
Access Requests workflow
Zluri’s Access Requests interface allows you to submit new application access requests and monitor their status.
Requesting Access to an Application
Employees can request application access through any of the following paths:
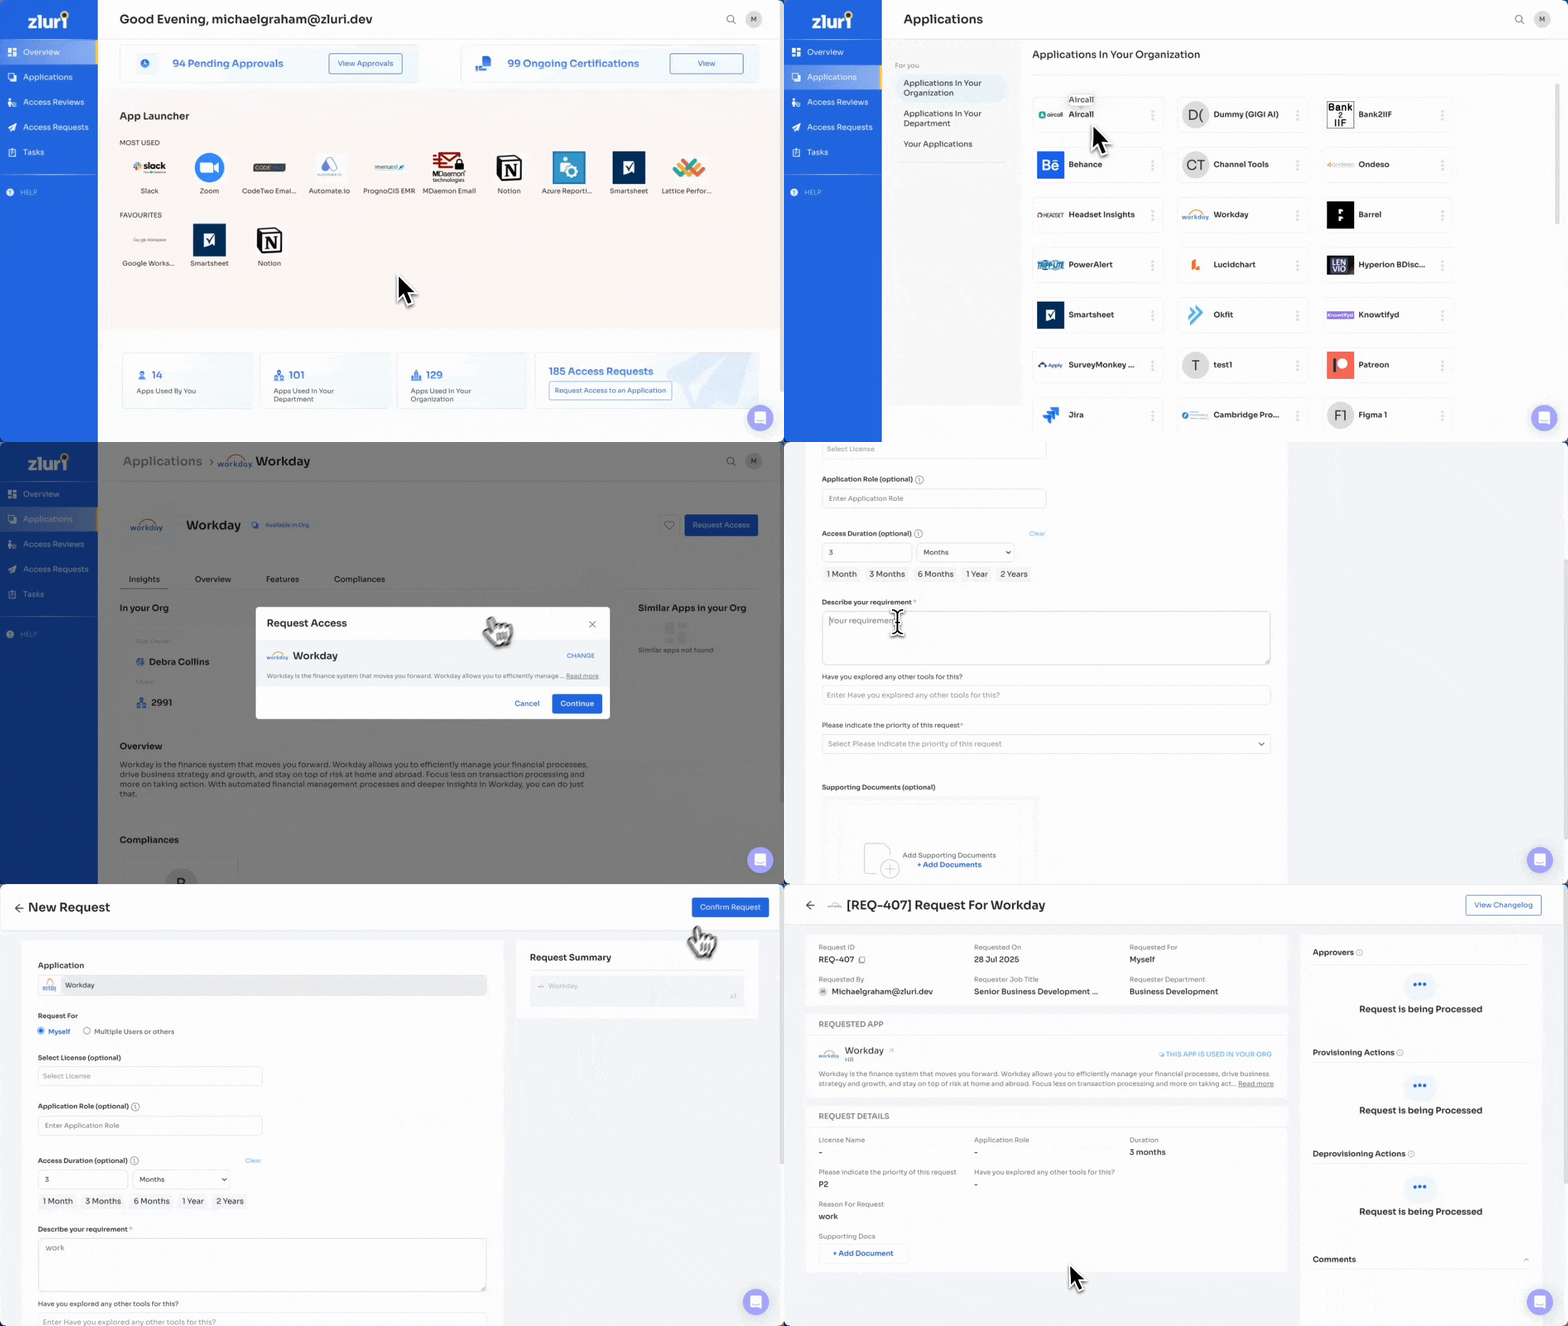
1. From the Applications section
Path: Applications → Select Application → Request Access
- Go to the Applications section.
- Click on the desired application.
- Click Request Access.
- If recommended alternatives exist, a prompt will appear. You can either:
-
Choose an alternative, or
-
Click Ignore and Continue to proceed.
-
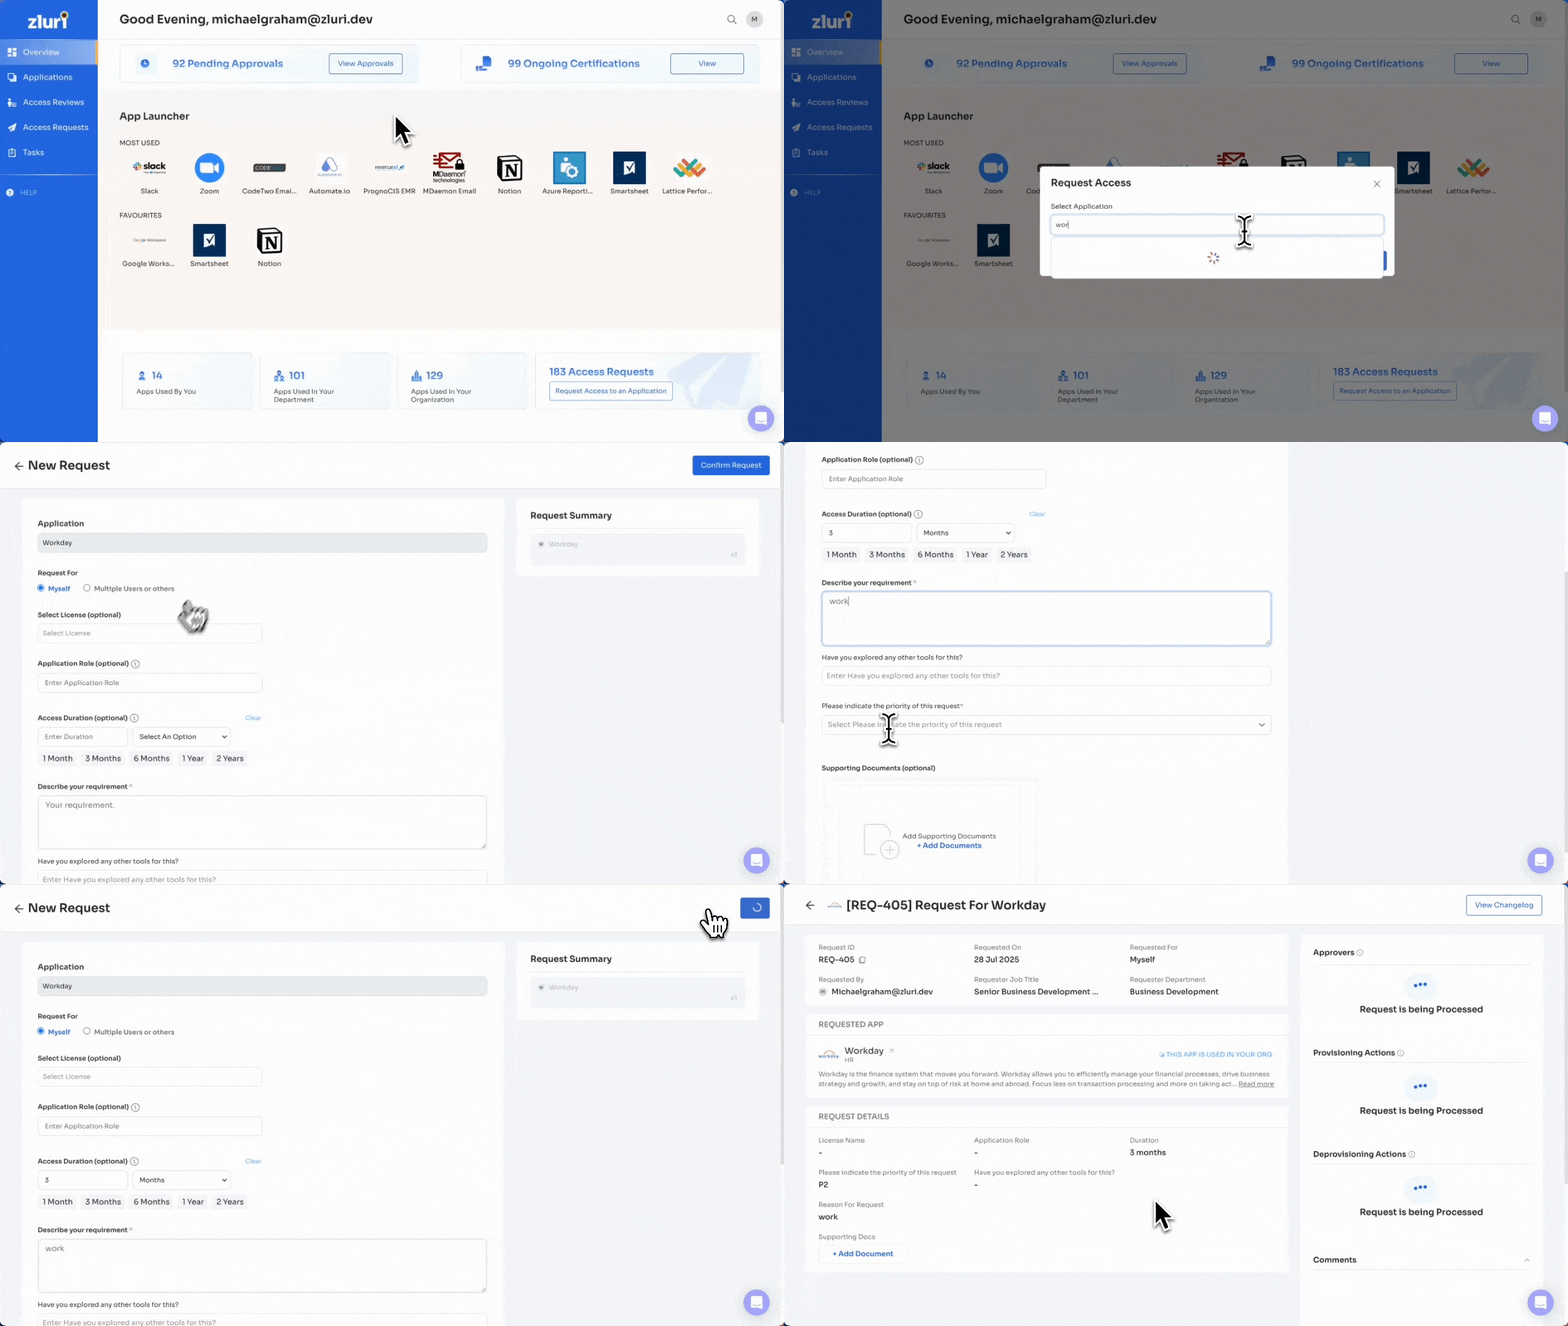
2. From the Overview section
Path: Overview → Request access to an application
- Navigate to the Overview section.
- Click Request access to an application.
- Search for and select the application.
- Fill out the request form.
- Submit the request.
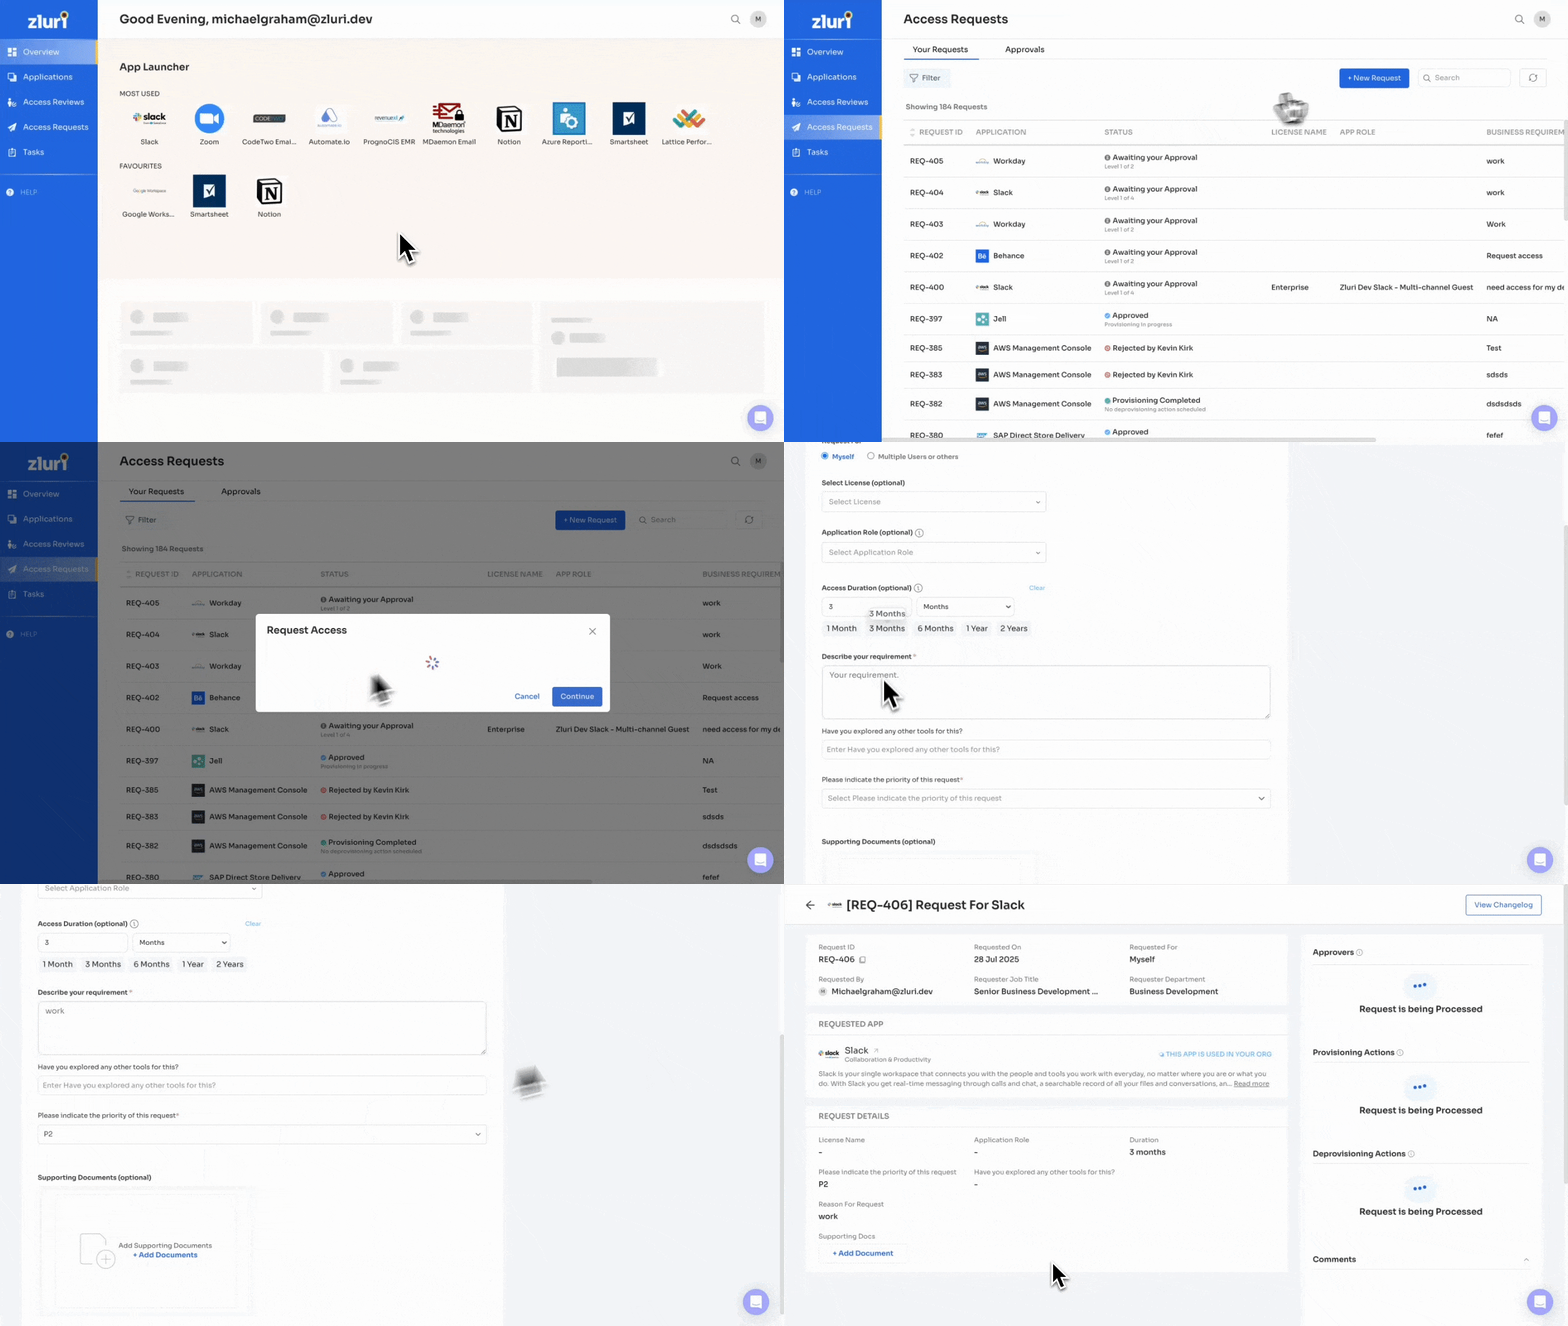
3. From the Access Requests section
Path: Access Requests → New Request → Fill Request Form
- Go to Access Requests from the left menu.
- Click New Request.
- Search for and select the application.
- Fill out the request form.
- Submit the request.
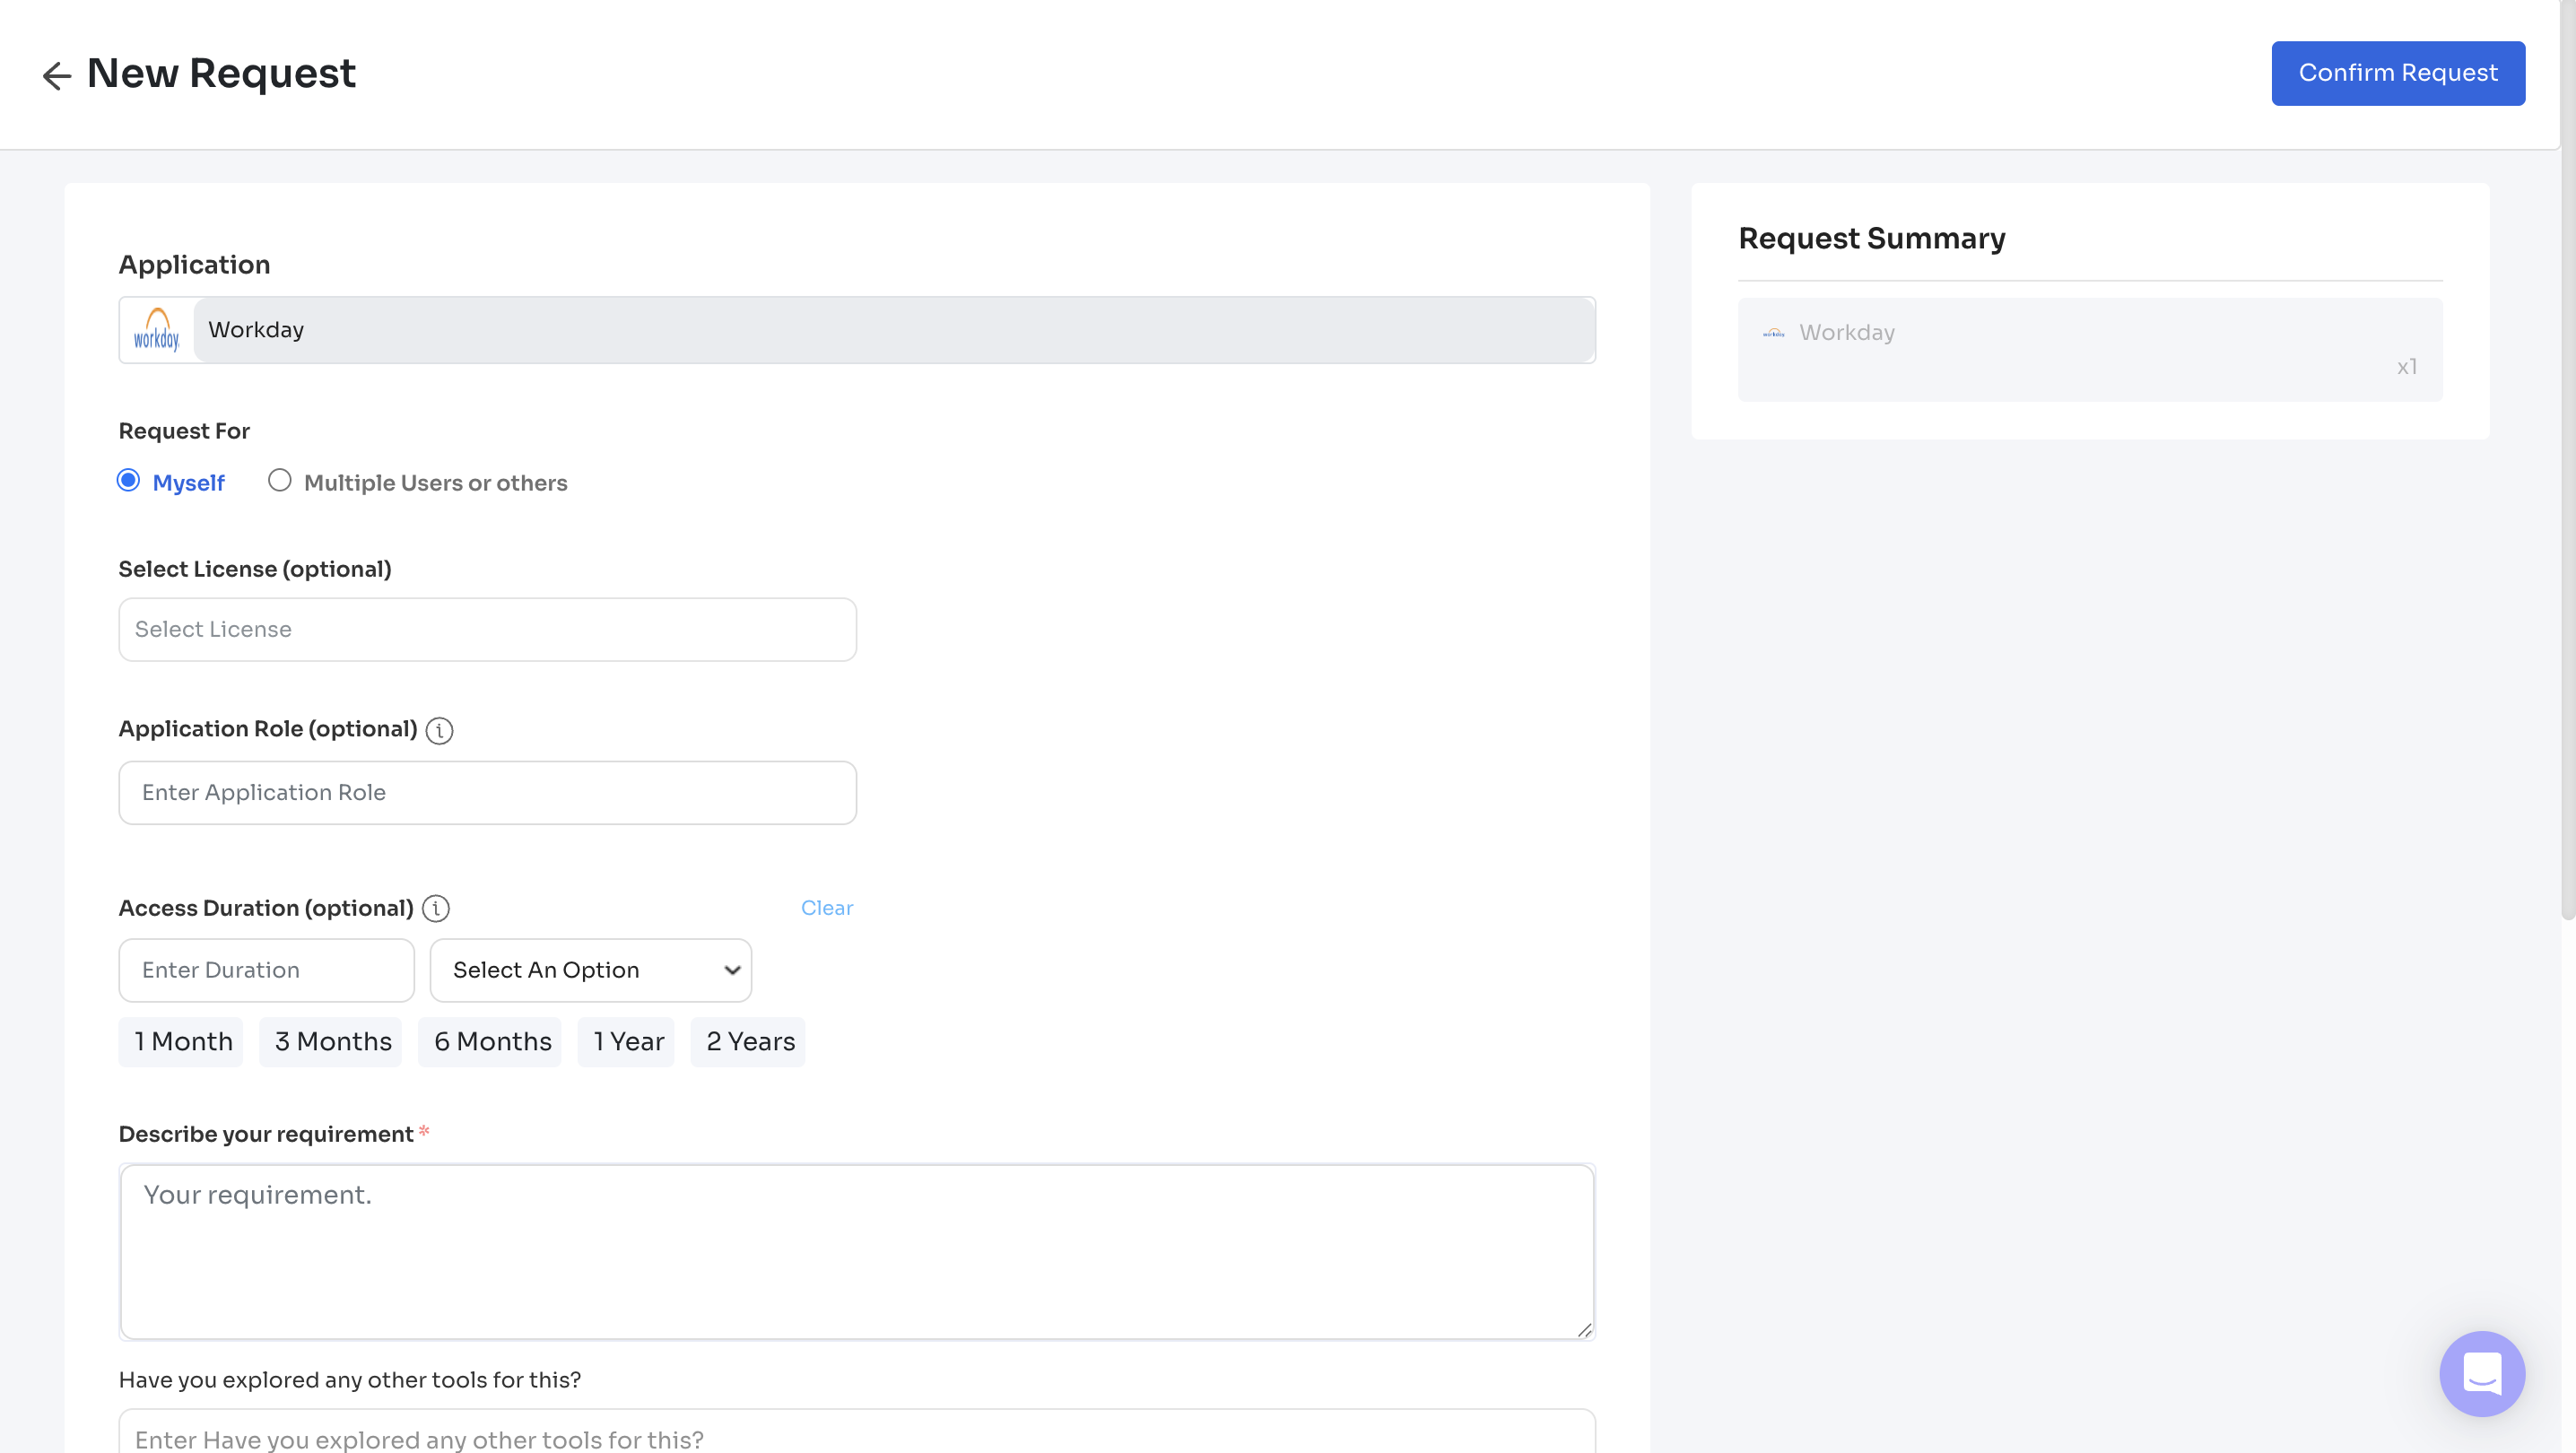
Access Request Form
The access request form allows users to submit application access requests. Available fields may vary based on workflow configurations set by your administrator.
Form Fields
- Request For:
- Myself: Request access for self.
- Multiple Users or Others: Submit on behalf of other users or teams.
- Select License (optional):
Specify the license type required, if applicable. - Application Role (optional):
Enter the role needed within the application (e.g., Admin, Viewer). - Access Duration (optional):
Define the requested access period. Use predefined values (1 Month, 3 Months, etc.) or enter a custom duration. - Describe Your Requirement (required):
State the business need or purpose for requesting access. - Have You Explored Any Other Tools? (optional):
Indicate if alternate tools were considered and why this app is preferred. - Priority (required):
Select the urgency of the request (e.g., Low, Medium, High). - Supporting Documents (optional):
Upload relevant files to justify or support the access request.
Once all required fields are filled, click Confirm Request to proceed.
Tracking Access Requests
To monitor the status of submitted requests:
- Go to the Access Requests tab in the left navigation.
- Click the Your Requests tab to view all access requests initiated by you.
Request Table Fields
Each request is listed with the following attributes:
- Request ID: Unique reference number
- Application: App for which access was requested
- Status: Current state of the request (e.g., Approved, Rejected, Awaiting Approval, Provisioning Completed, No Rules Matched, Request Cancelled, Request Withdrawn)
- License Name: Selected license (if applicable)
- App Role: Requested role within the application
- Business Requirement: Justification entered by the requester
- Requested On: Timestamp of when the request was submitted
- Subscription Duration: Requested access duration (if specified)
Additional Controls
- Use Filter to refine the list by request status, application, or date.
- Use Search to find specific requests by keyword or request ID.
- Click + New Request to initiate a new access request.
Requests are displayed in real-time and update as they move through the approval and provisioning process.
Withdraw Access Request
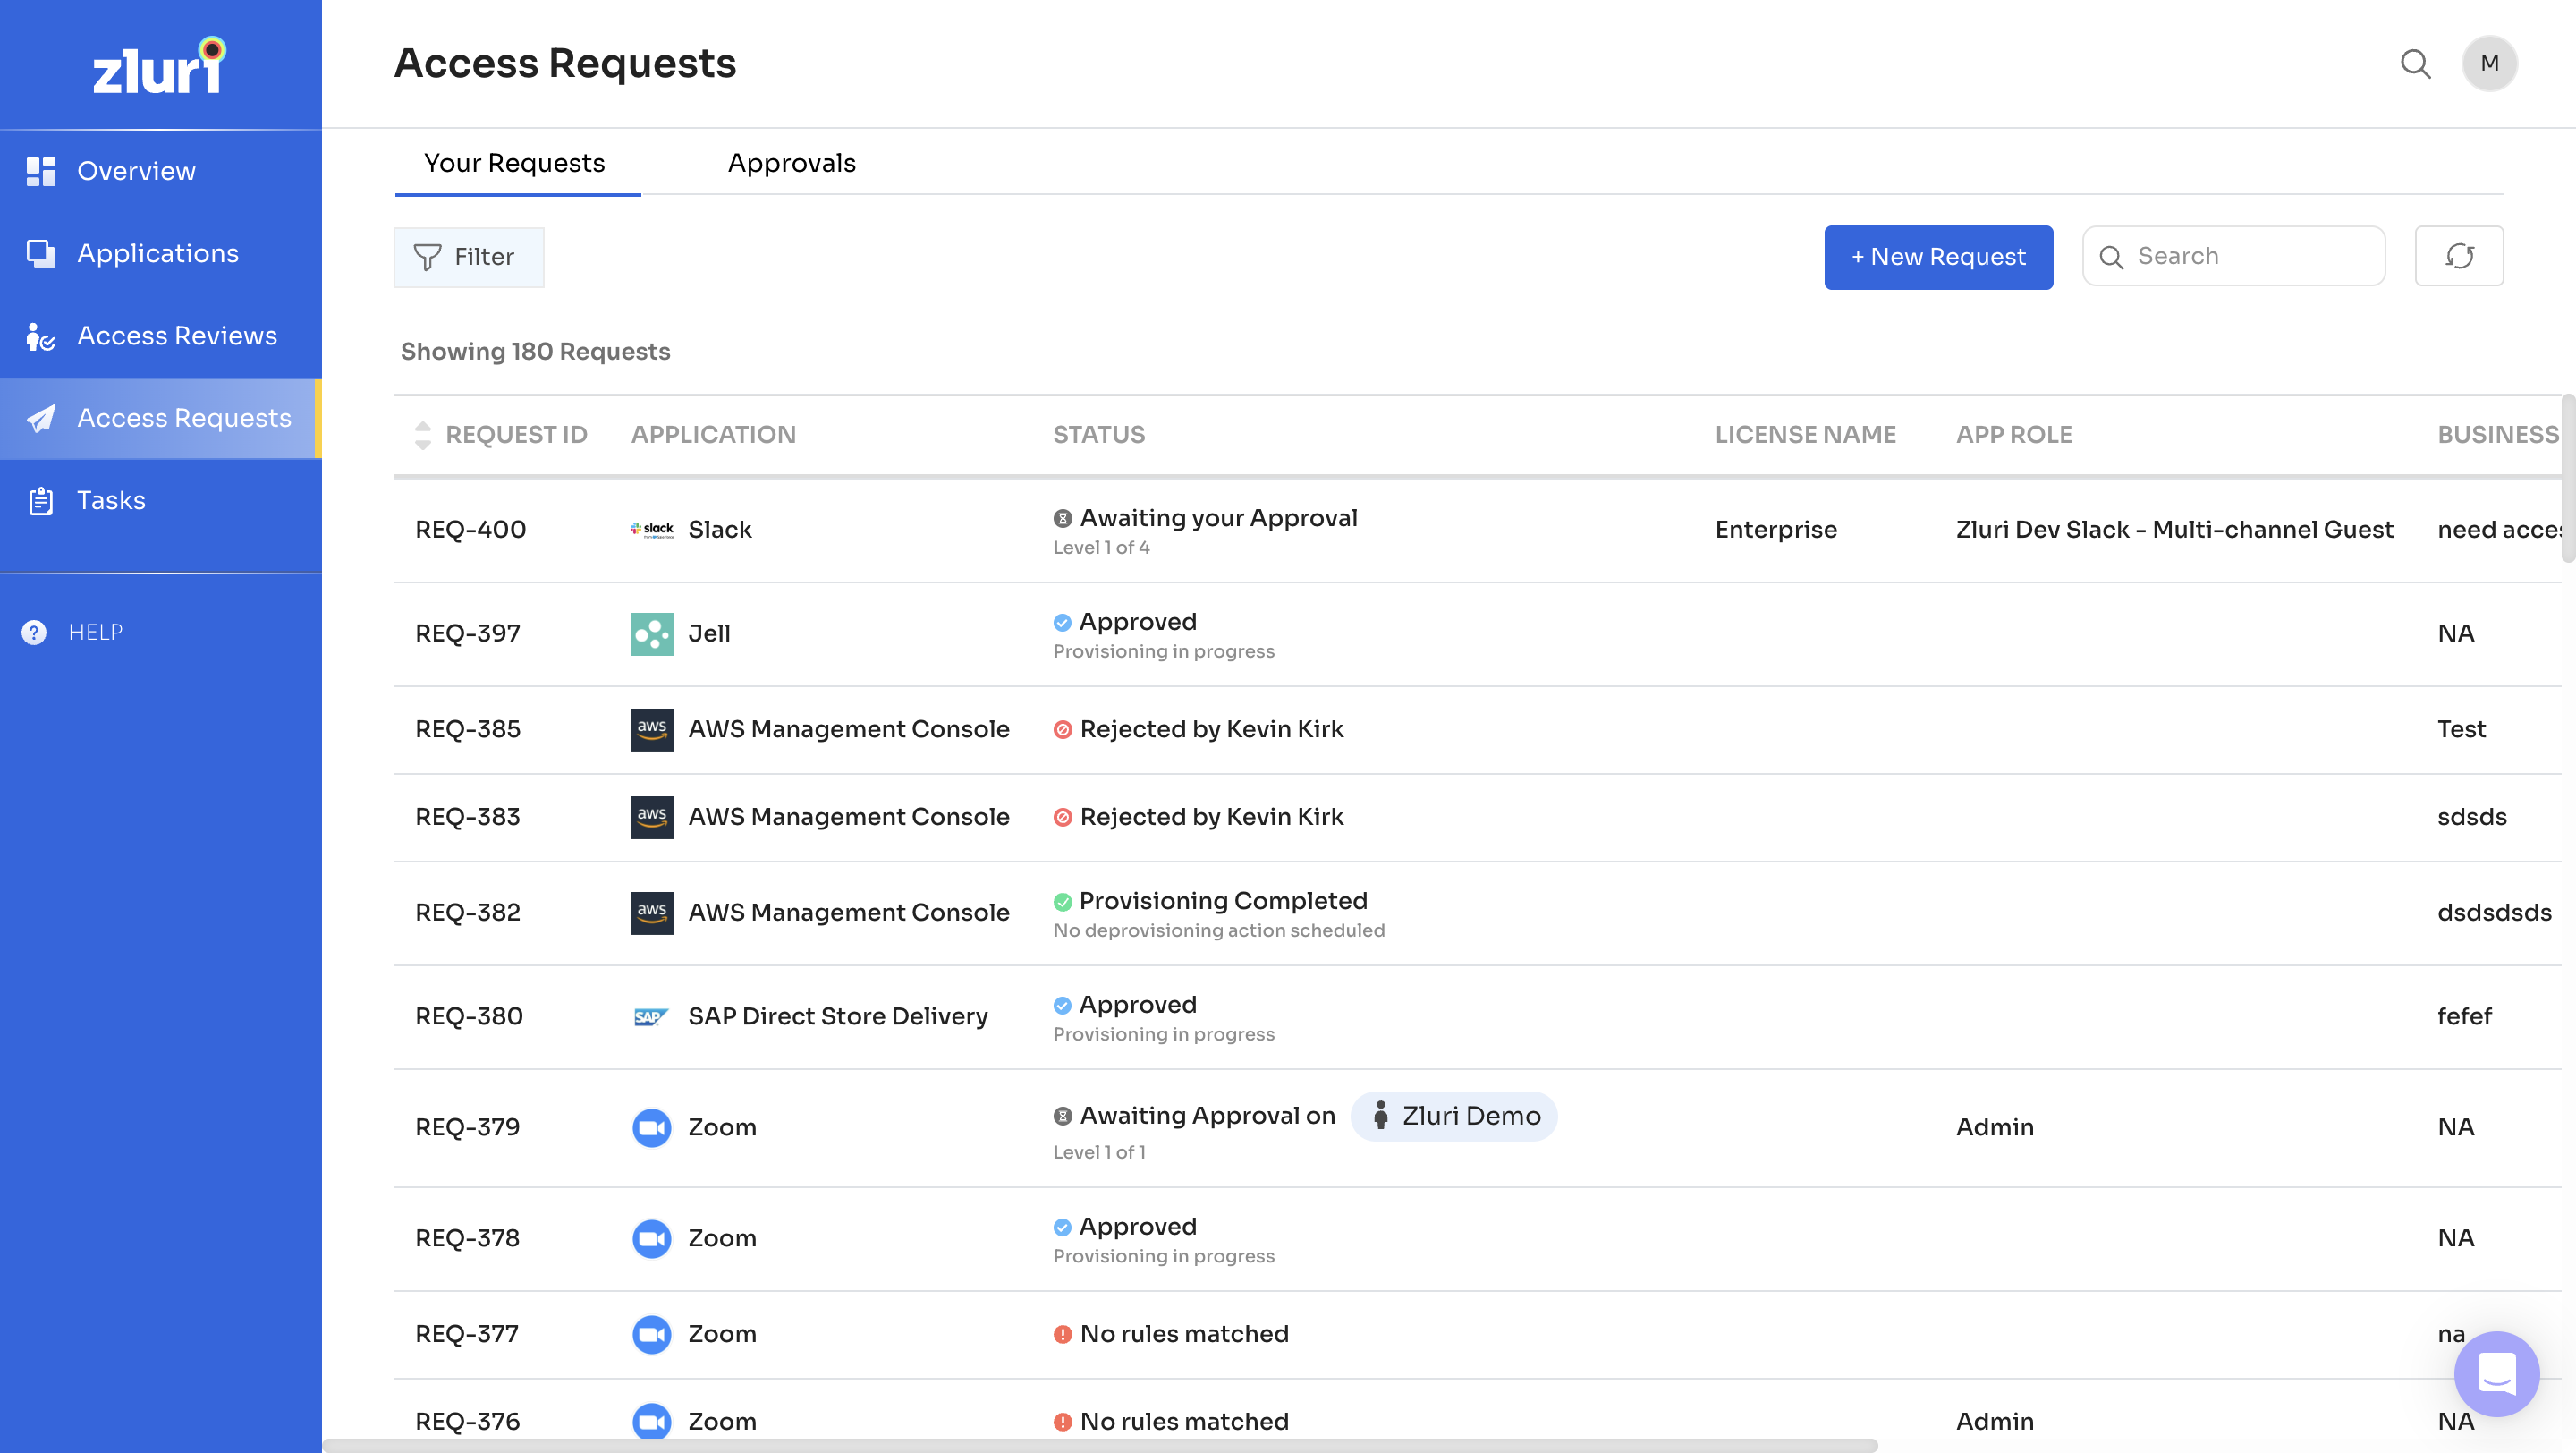
You can withdraw a request you no longer need, so approvers do not spend time reviewing something nobody wants. Withdraw a request when you found access another way, your manager redirected you, or you submitted it by mistake or against the wrong application.
Withdrawal is available while a request is still awaiting approval, including requests where some approvers have acted and others have not. Once every approver has approved, provisioning takes over and the request can no longer be withdrawn. If you no longer need access that has already been provisioned, contact your IT team to have it removed.
Cancelled Access Requests
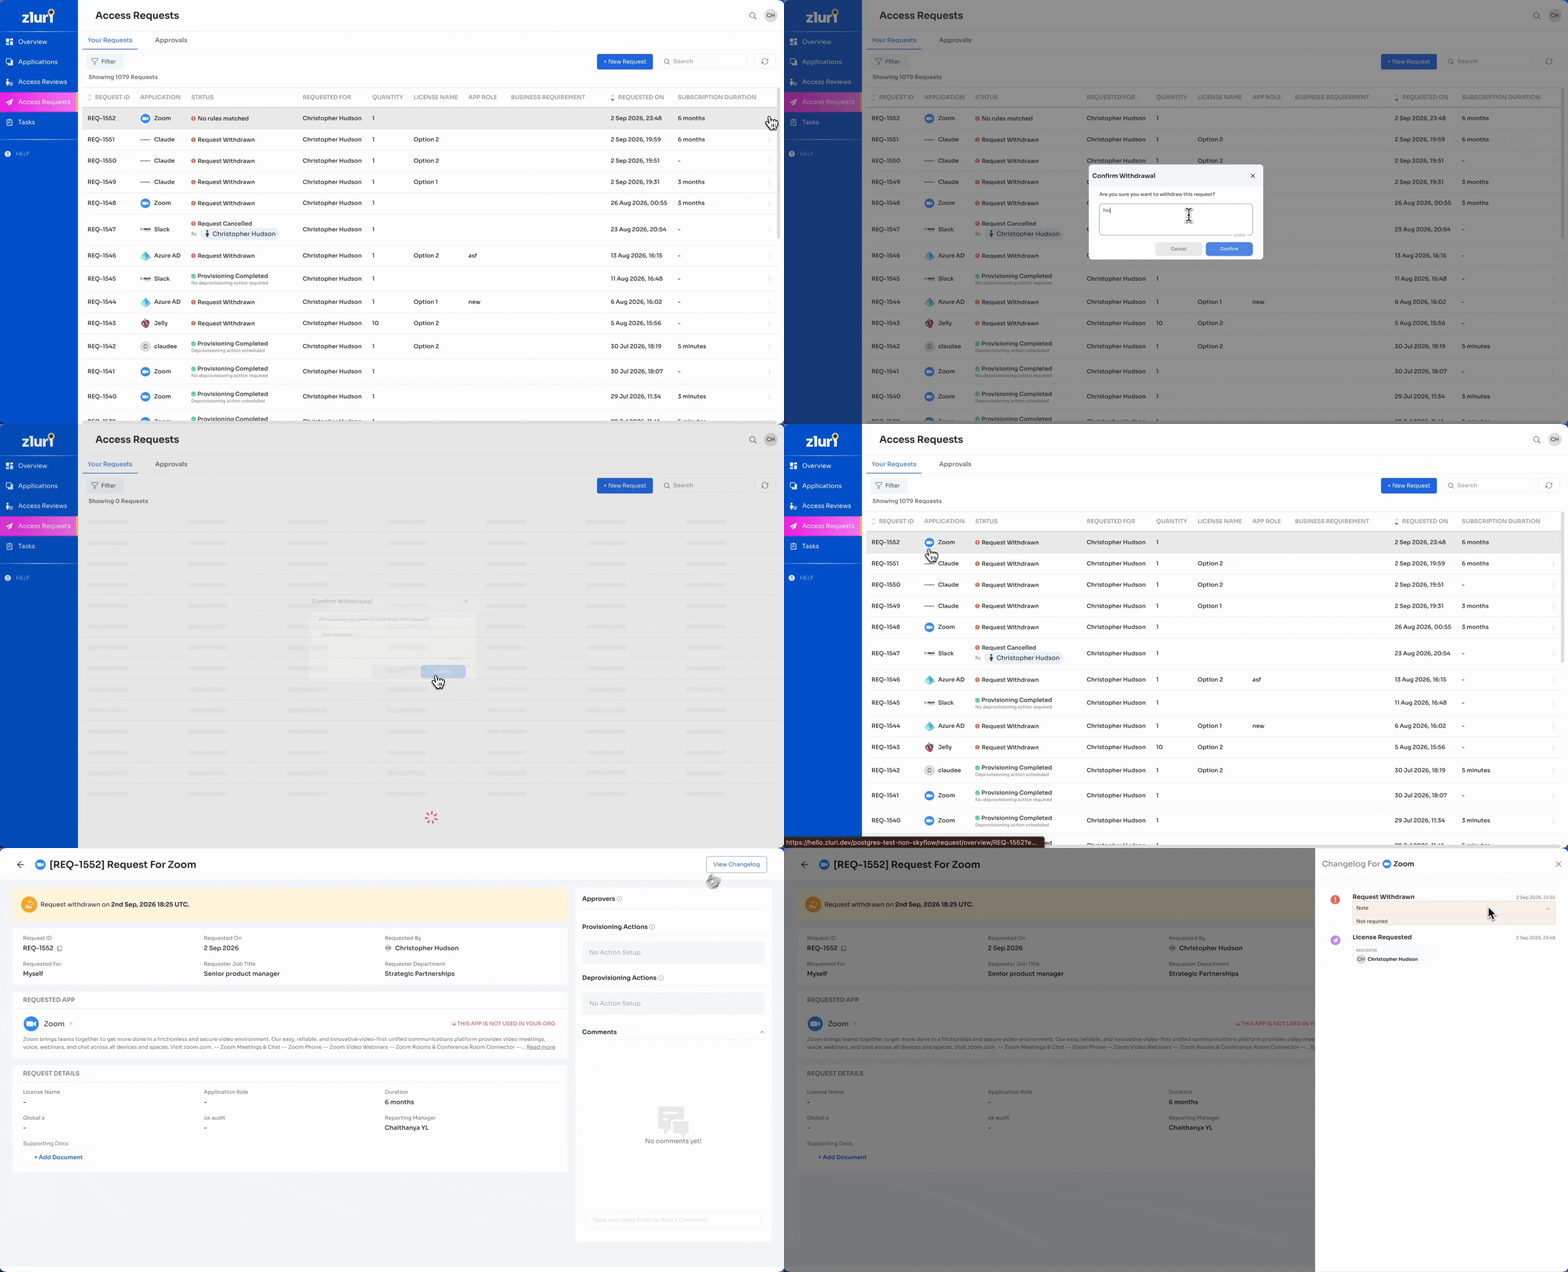
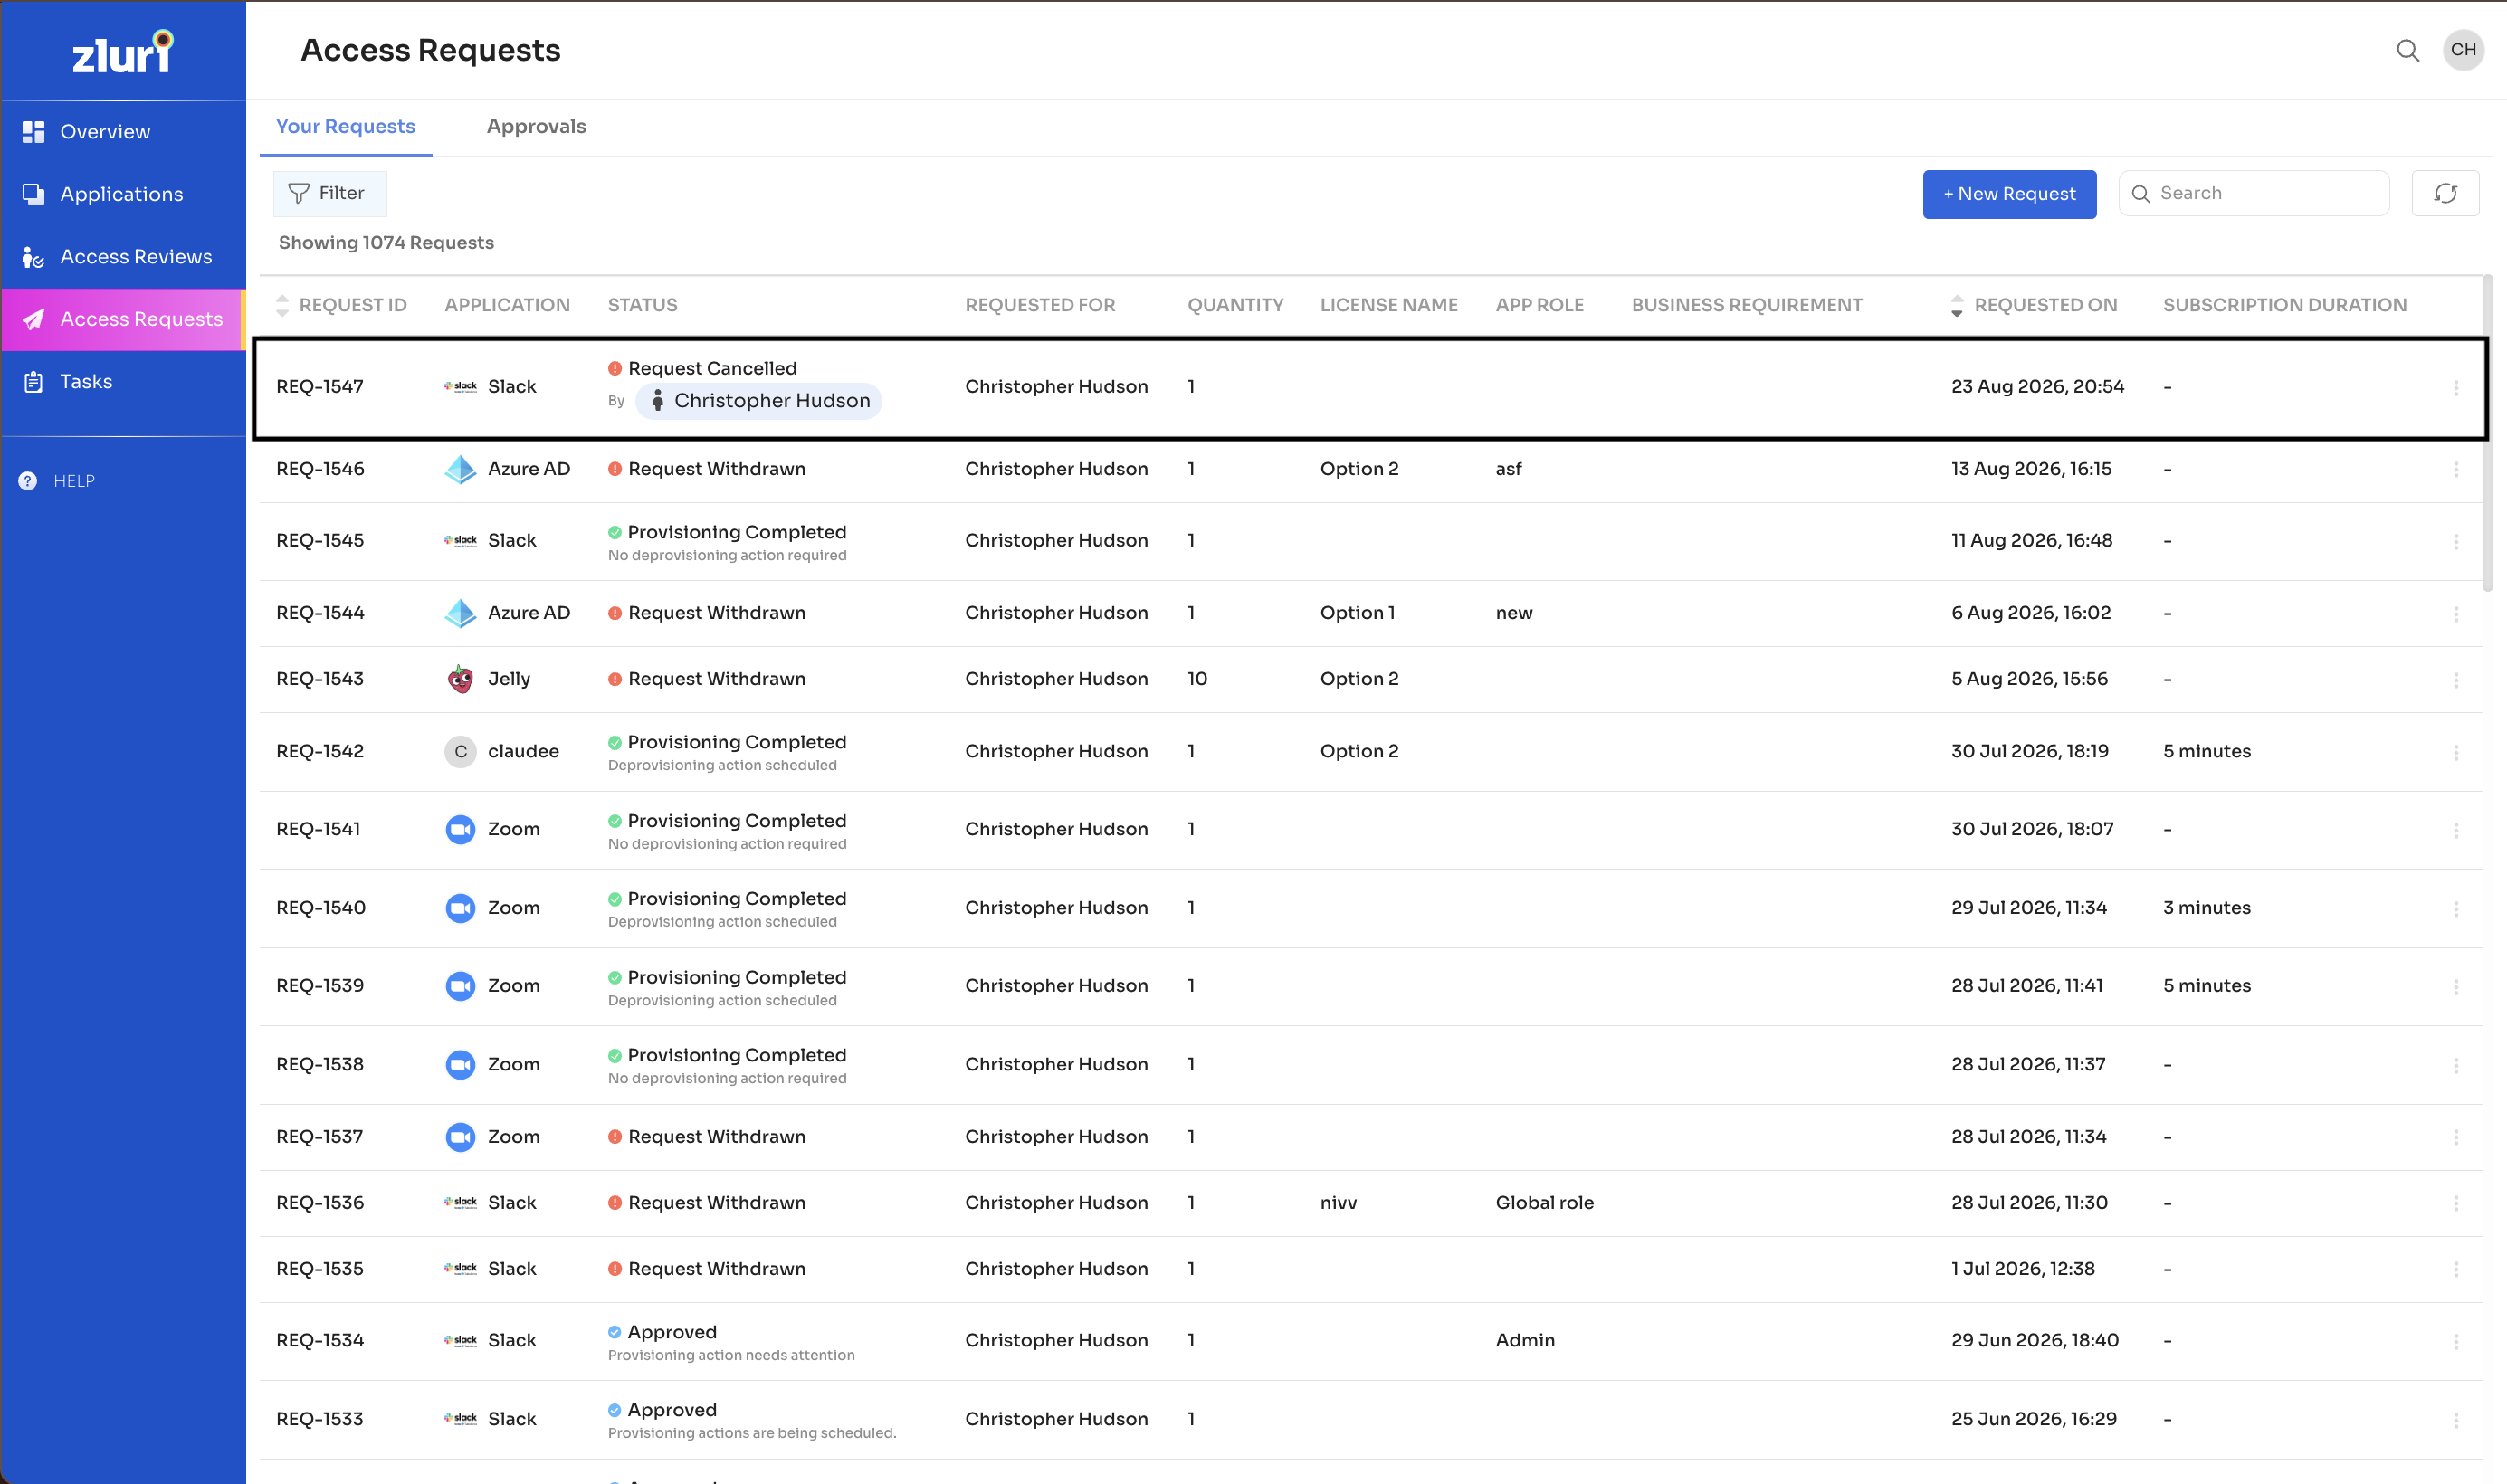
An admin can cancel a request that is still awaiting approval, for example, when the application has been decommissioned, the request duplicates another, or the person it was raised for has changed teams.
Zluri emails you naming the admin who cancelled the request, the application, the request details, and the reason where one was given.
Request Details
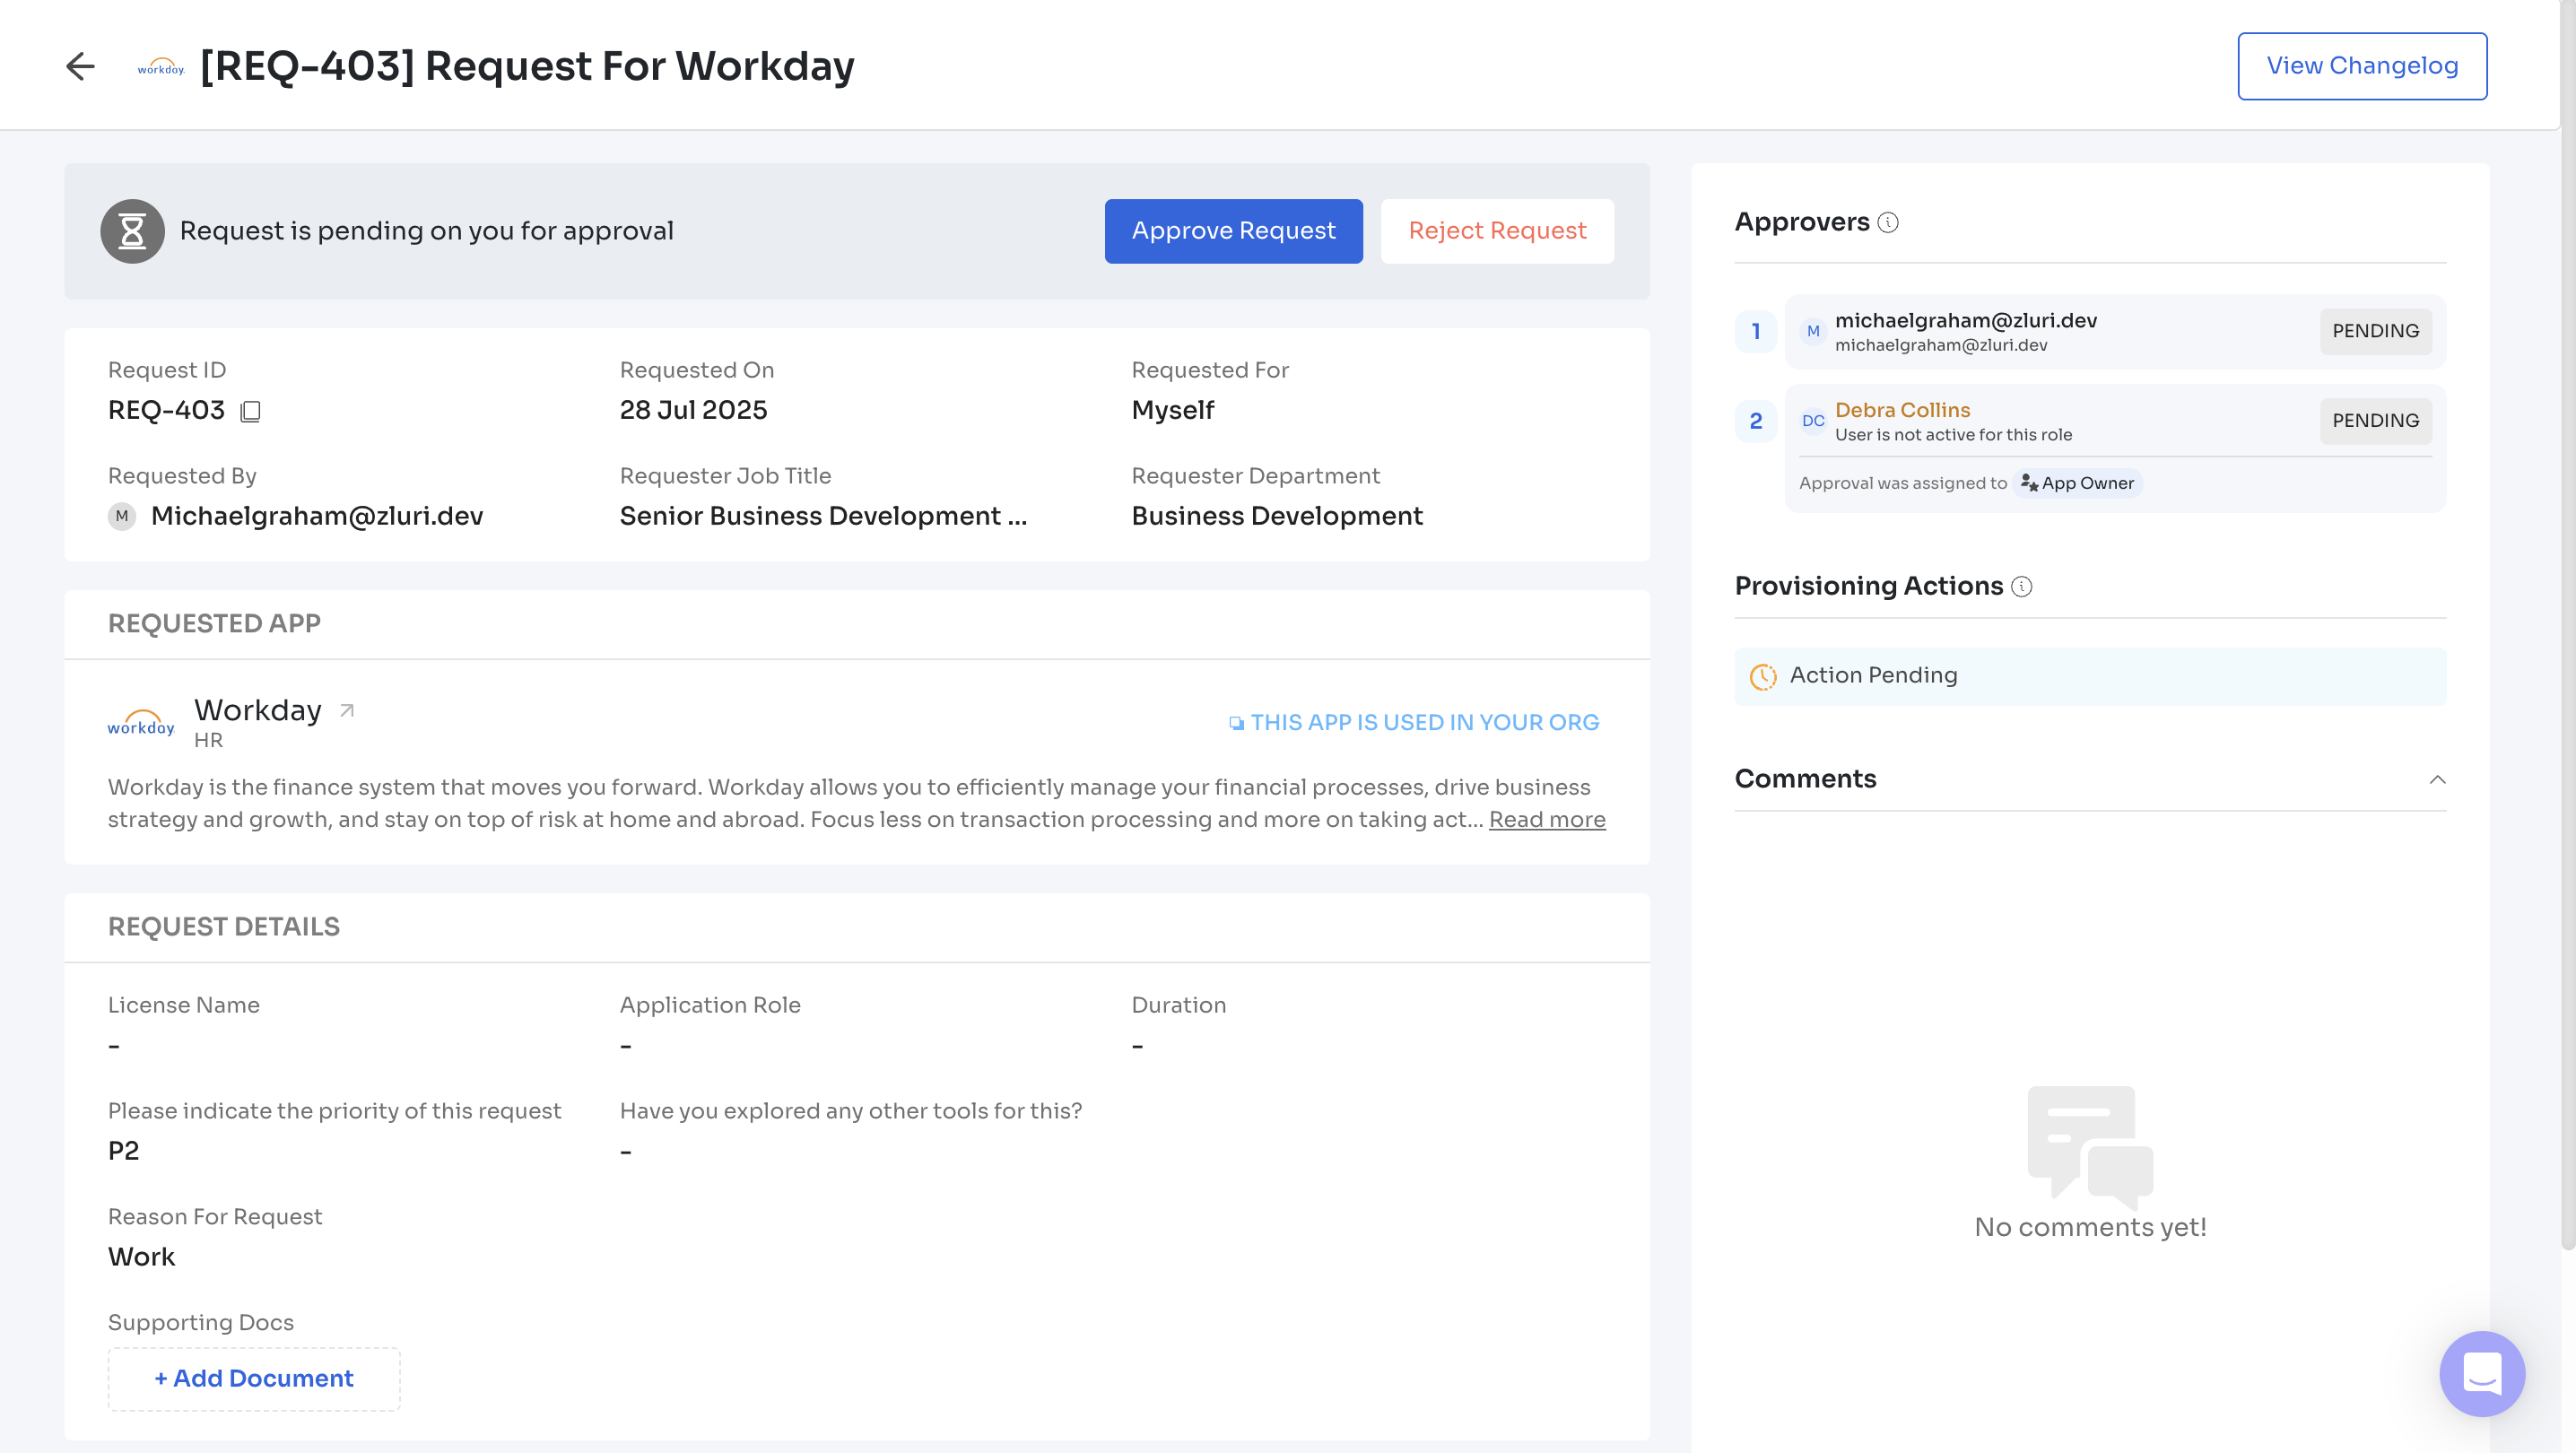
The Request Details page provides a comprehensive overview of an individual access request, including request metadata, approval workflow, provisioning actions, and user comments. A changelog is also available to audit request activity over time.
Request Metadata
Displays key information related to the request:
- Request ID: Unique identifier (e.g.,
REQ-403) - Requested On: Submission date of the request
- Requested For: Target user (usually the requester)
- Requested By: User who initiated the request
- Job Title and Department: Auto-filled from the requester's user profile
Requested App
Displays the application being requested:
- App Name and Category (e.g., Workday – HR)
- Usage Tag: If the app is already used within the organization, the label “This app is used in your org” is shown
- App Description: Brief summary of the application's purpose and capabilities
Request Inputs
Captures additional context for the request:
- License Name
- Application Role
- Duration
- Priority (e.g., P1, P2)
- Alternative Tools Explored (optional)
- Reason for Request
- Supporting Documents (optional attachments)
Approval Workflow
Lists approvers and their current status:
- Approver Order: Defines the sequence of approvals
- Status: Shows
Pending,Approved, orRejected
Provisioning Actions
Indicates the provisioning state:
Action Pending: Provisioning has not startedProvisioned: Access has been successfully grantedRejected: Access request was denied
Comments
Facilitates communication between approvers and requesters:
- Add clarifications or context
- Respond to approval comments
- Track conversation history
Both requesters and approvers are notified when a new comment is added, ensuring timely collaboration.
If no comments exist, the message “No comments yet” is shown.
View Changelog
Click the View Changelog button (top right of the request page) to view a complete history of the request, including:
- Status changes (e.g., moved from Pending to Approved)
- Approver decisions
- Provisioning outcomes
- Any edits or reassignments
The changelog supports auditing and traceability of access decisions for compliance and internal reviews.

Managing Approvers on a Pending Request
When a request is waiting on you for approval, you can change who approves it without contacting an admin. You can reassign the request to a different approver, or approve your stage and add another approver at the next level.
These actions are available only on a pending request, only to the approver the request is currently waiting on, and only if an admin has turned the capability on for your organization. Once you approve or reject a request, the actions are no longer available to you.
Path: Access Requests → Approvals → Select a pending request → More actions (three-dot menu)
To open the actions:
- Open a pending request that is waiting on you.
- Next to Approve Request and Reject Request, select the three-dot menu.
- Choose Reassign request or Approve & add new approver.
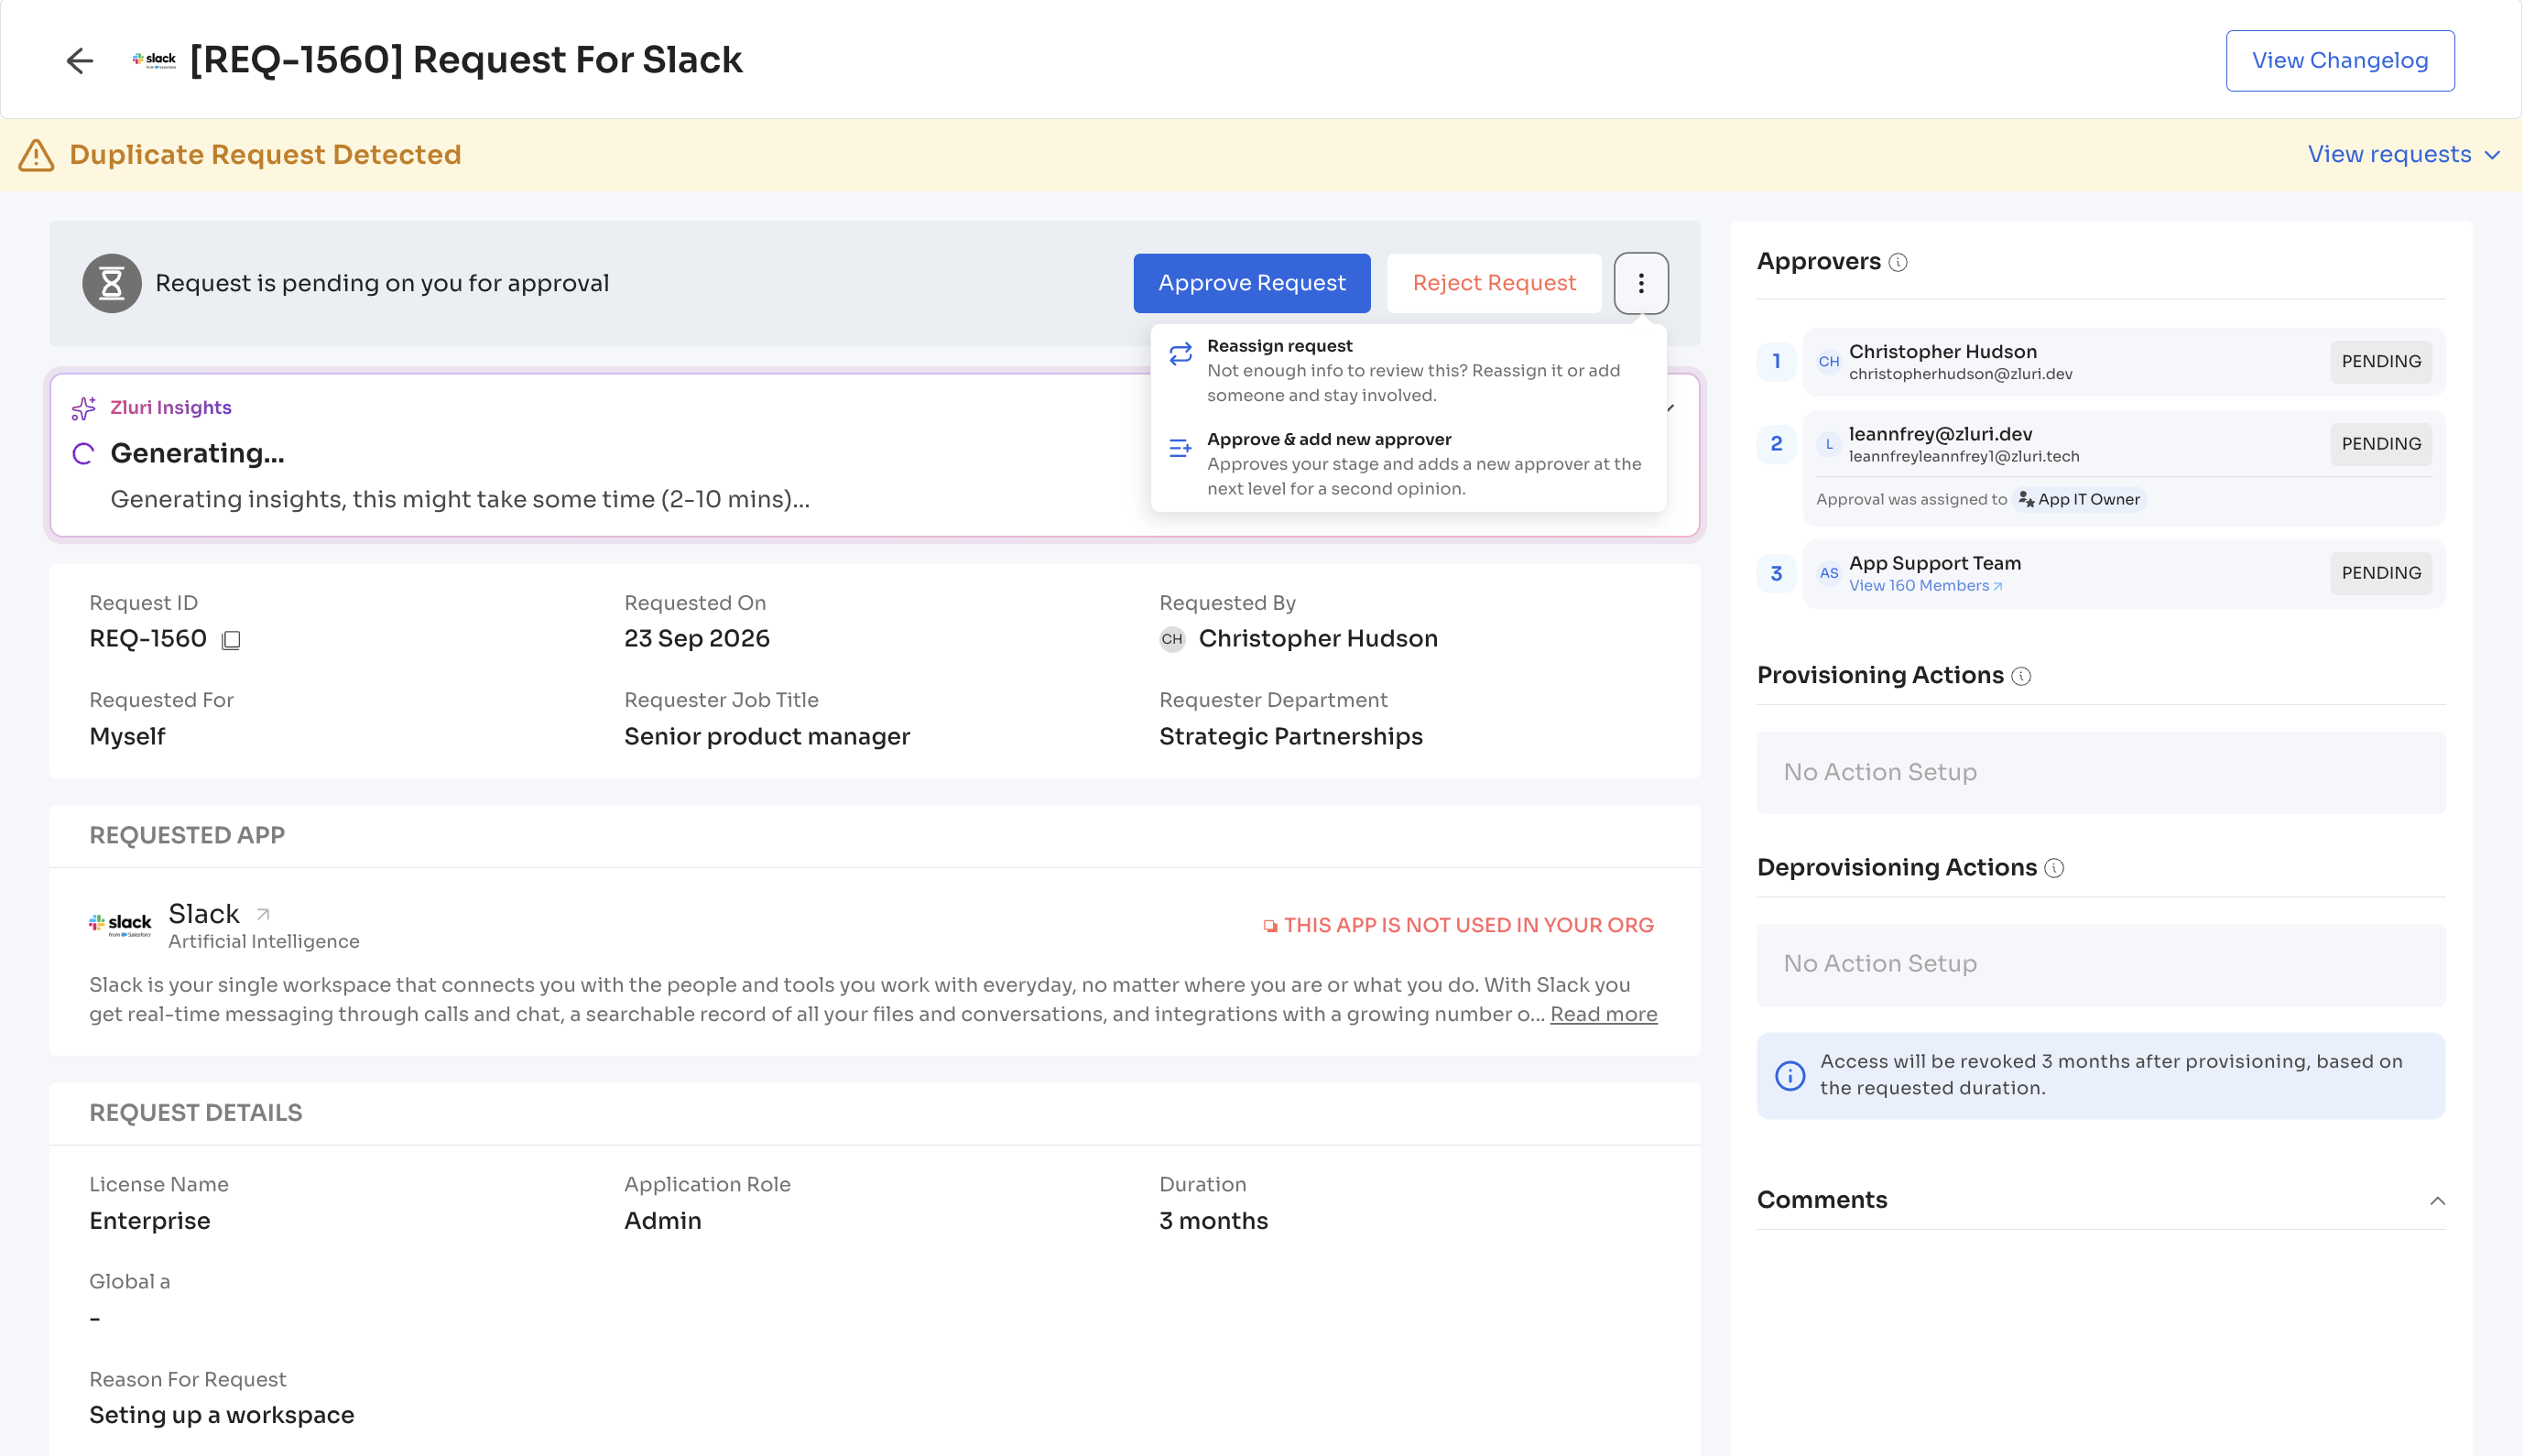
Reassign a Request
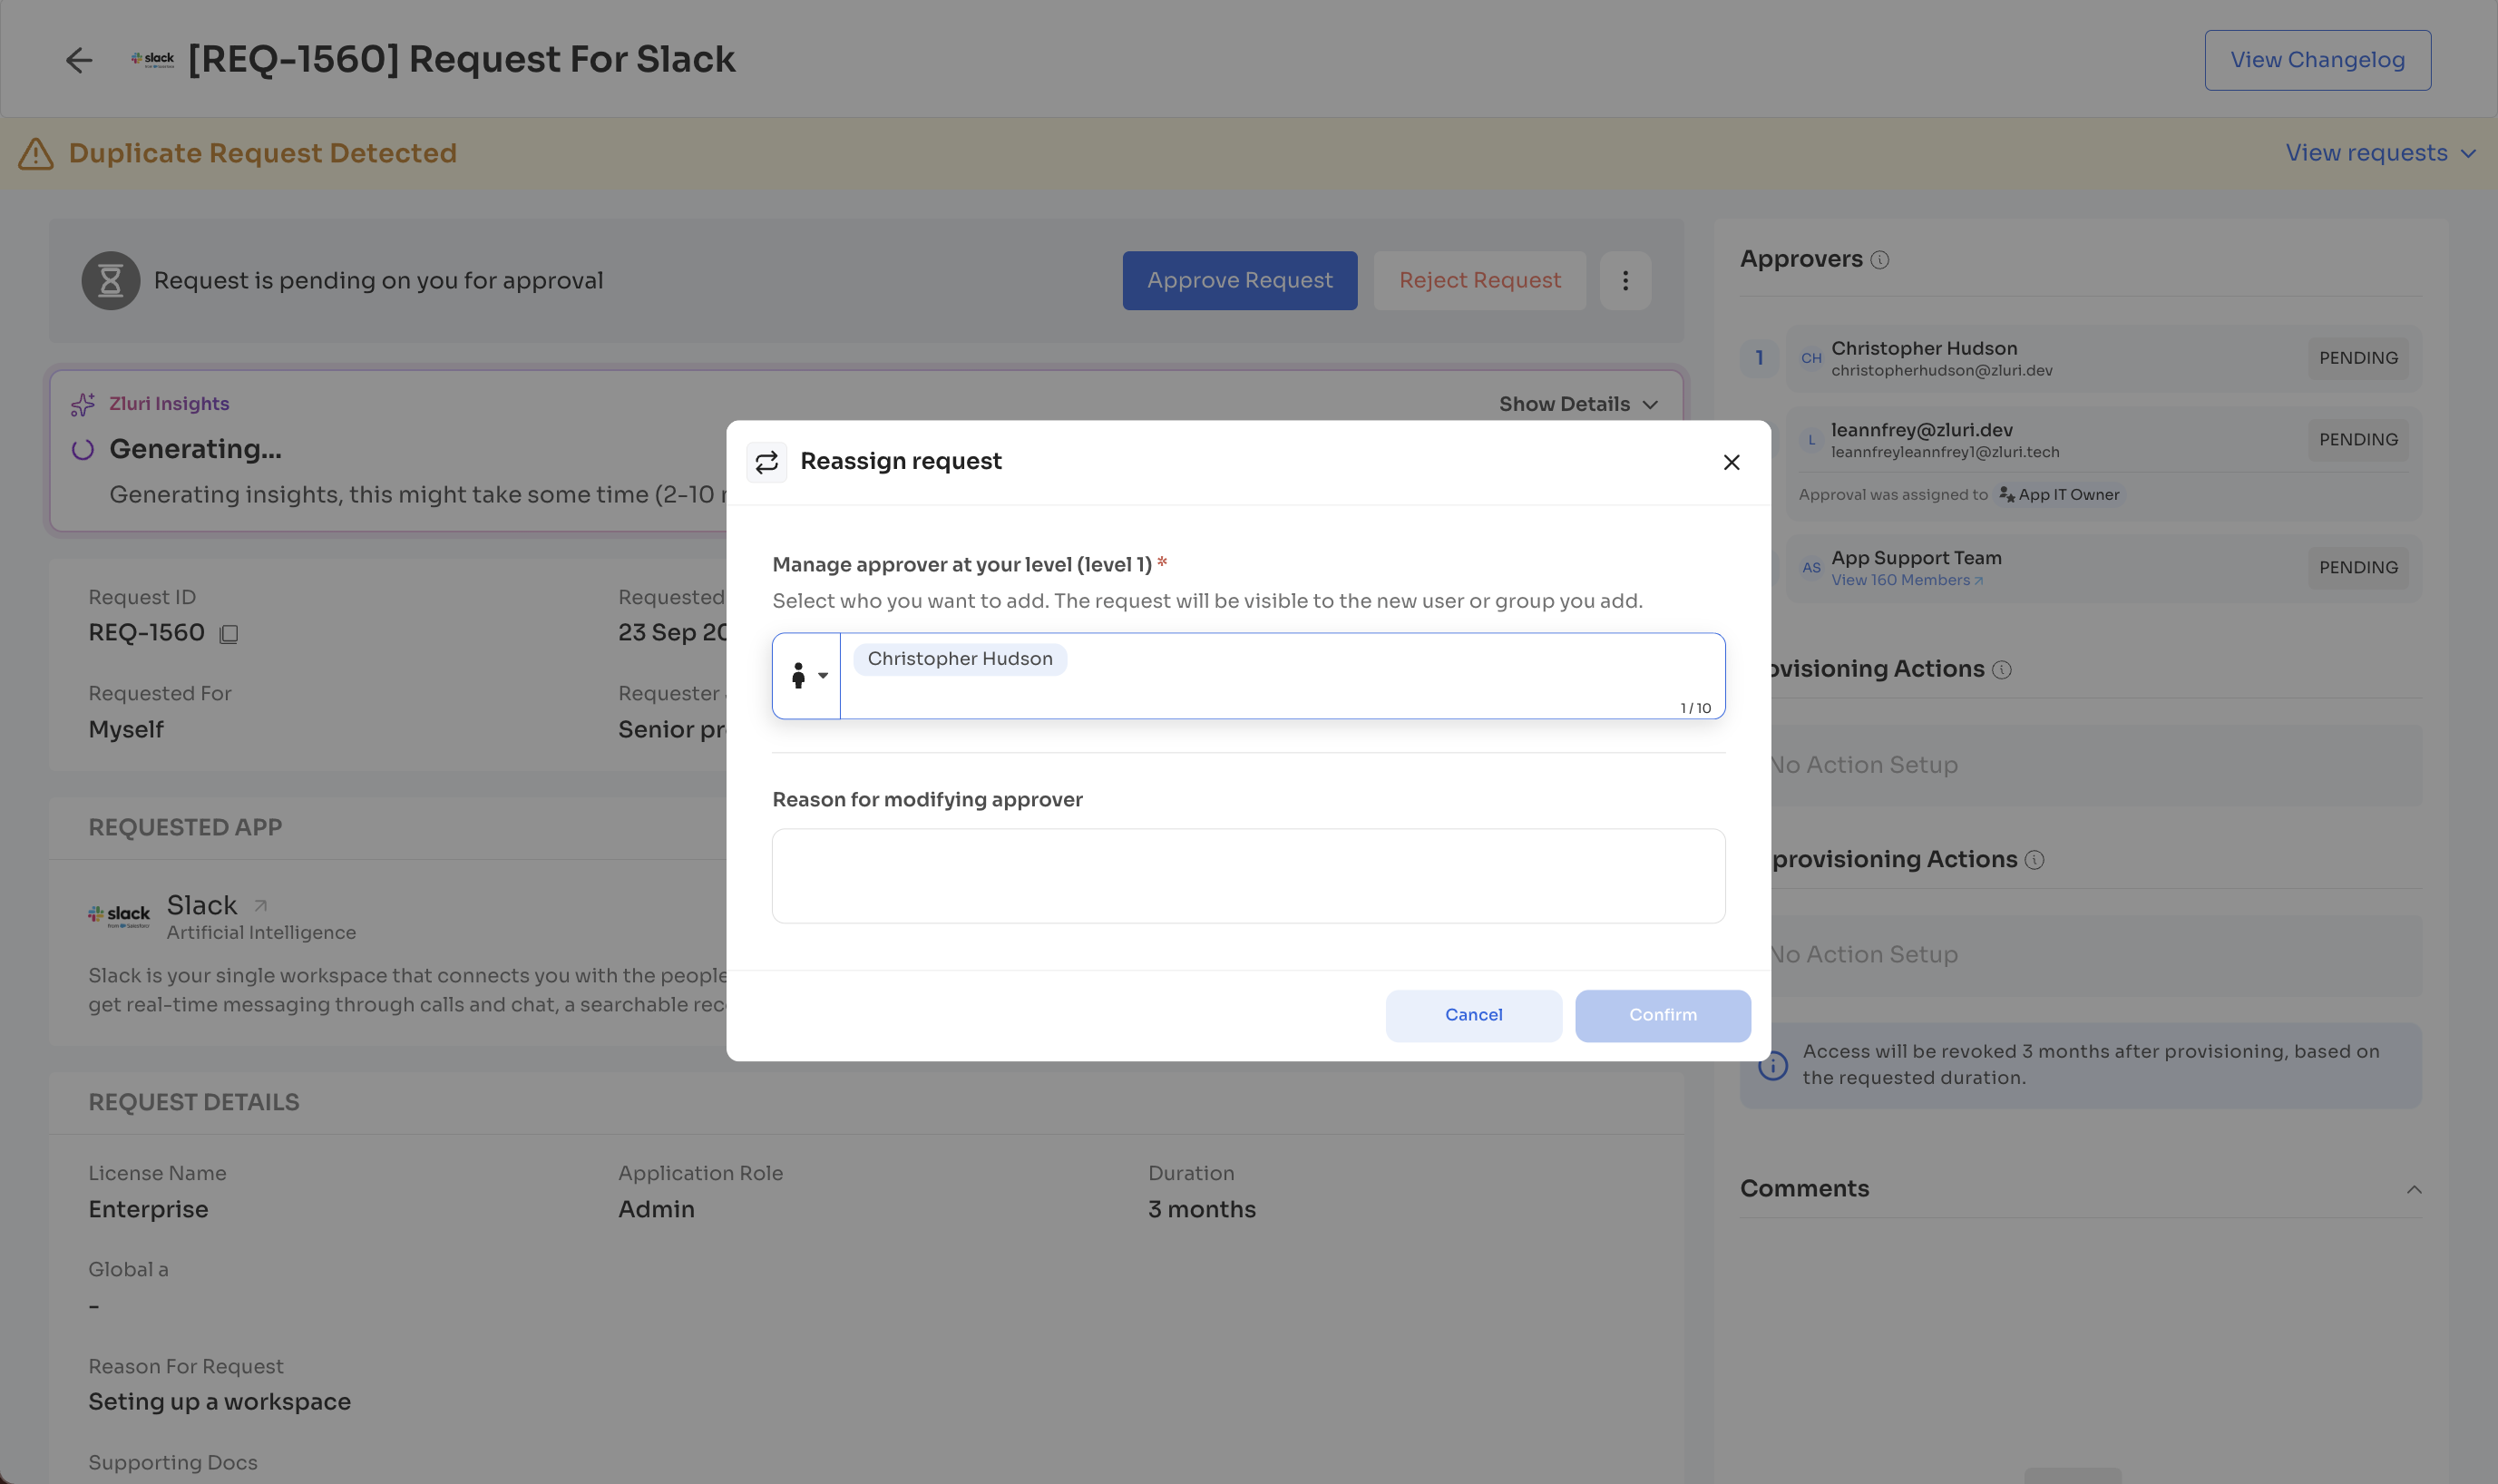
Reassigning lets you change who approves at your level. Use it to add new approvers or remove existing ones, including yourself.
- Select Reassign request from the three-dot menu.
- Under Manage approver at your level, select Add Approver.
- Choose an approver type: Assign to one or more users or Assign to a group.
- Select the users or the group you want to assign.
- Optionally, enter a Reason for modifying approver.
- Select Confirm.
The request moves to the user you assigned, and they are notified. A level can hold a single user, multiple users, or a group.
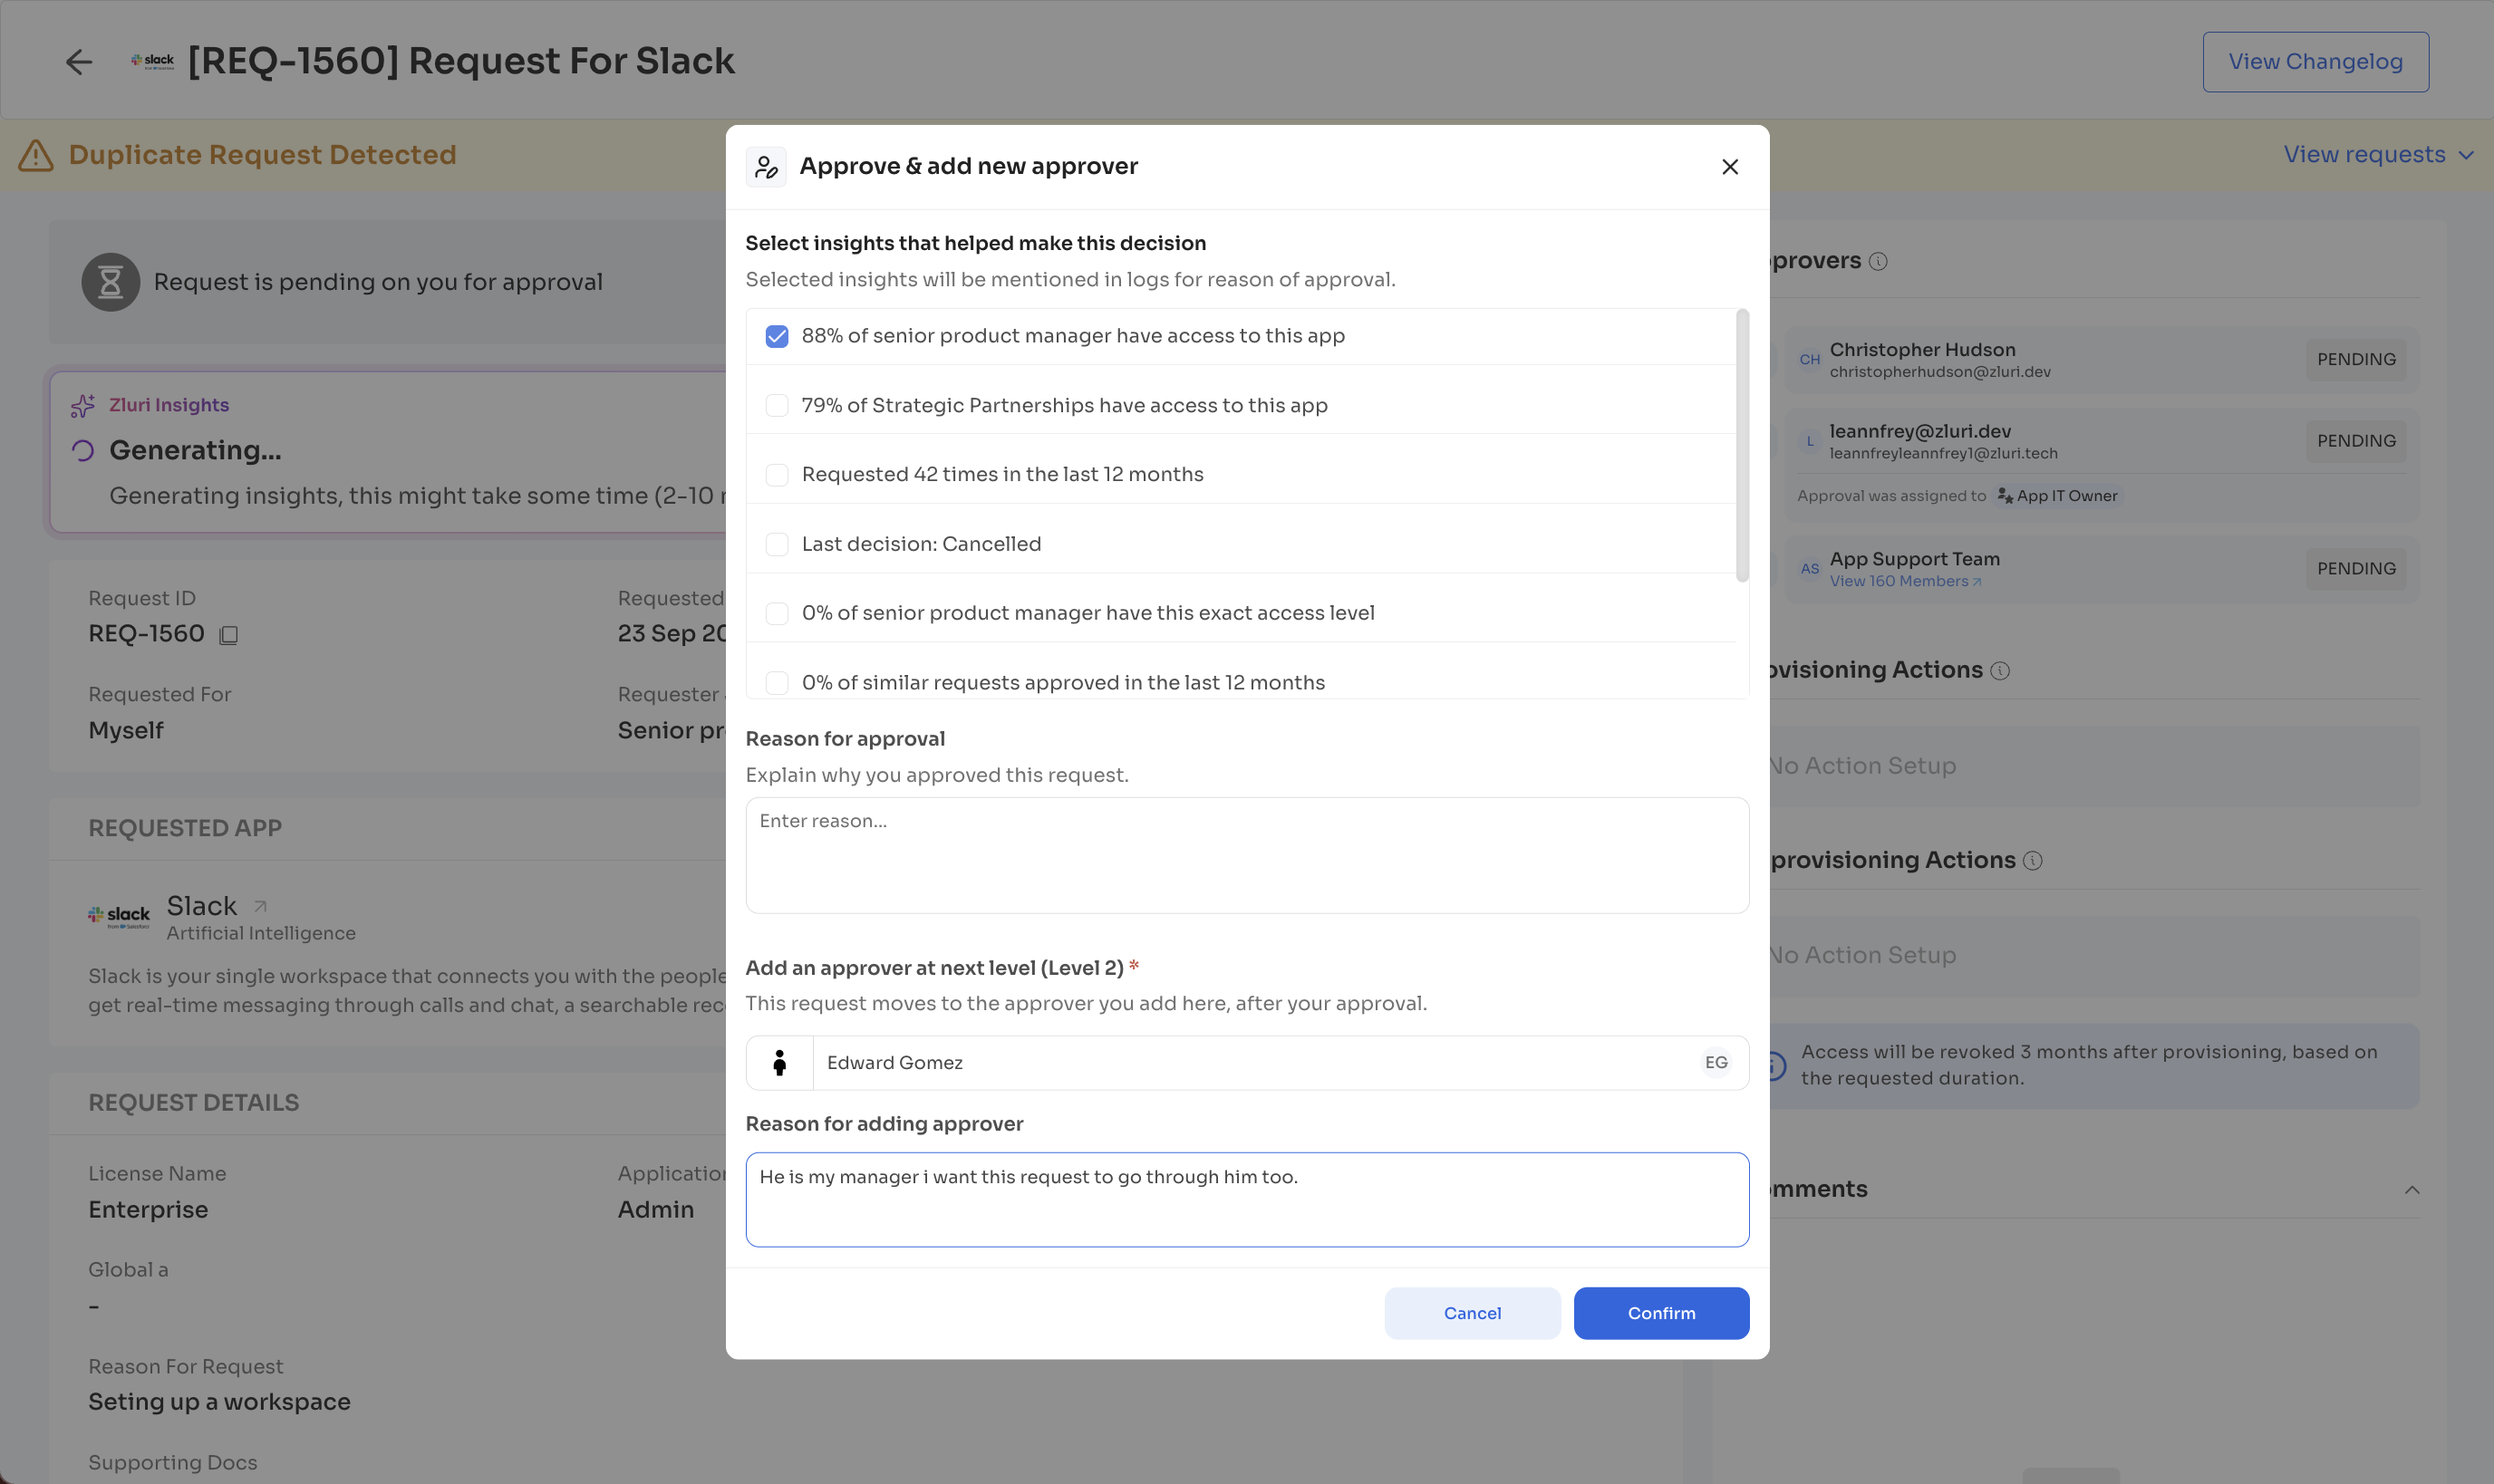
Approve and Add new Approver
You can use this action when you want to approve the request but also want to add another user to the request flow before access is granted. The new approver is added after your level in the access request flow.
- Select Approve & add new approver from the three-dot menu.
- Select an insight or enter a Reason for approval, justifing why you approved this request.
- Under Add an approver at next level, select Add Approver and choose a user, multiple users or a group.
- Optionally, enter a Reason for adding approver.
- Select Confirm.
Its marked as approved at your level and the request moves to the approver you added. Each approver can add one approver level right after their own.
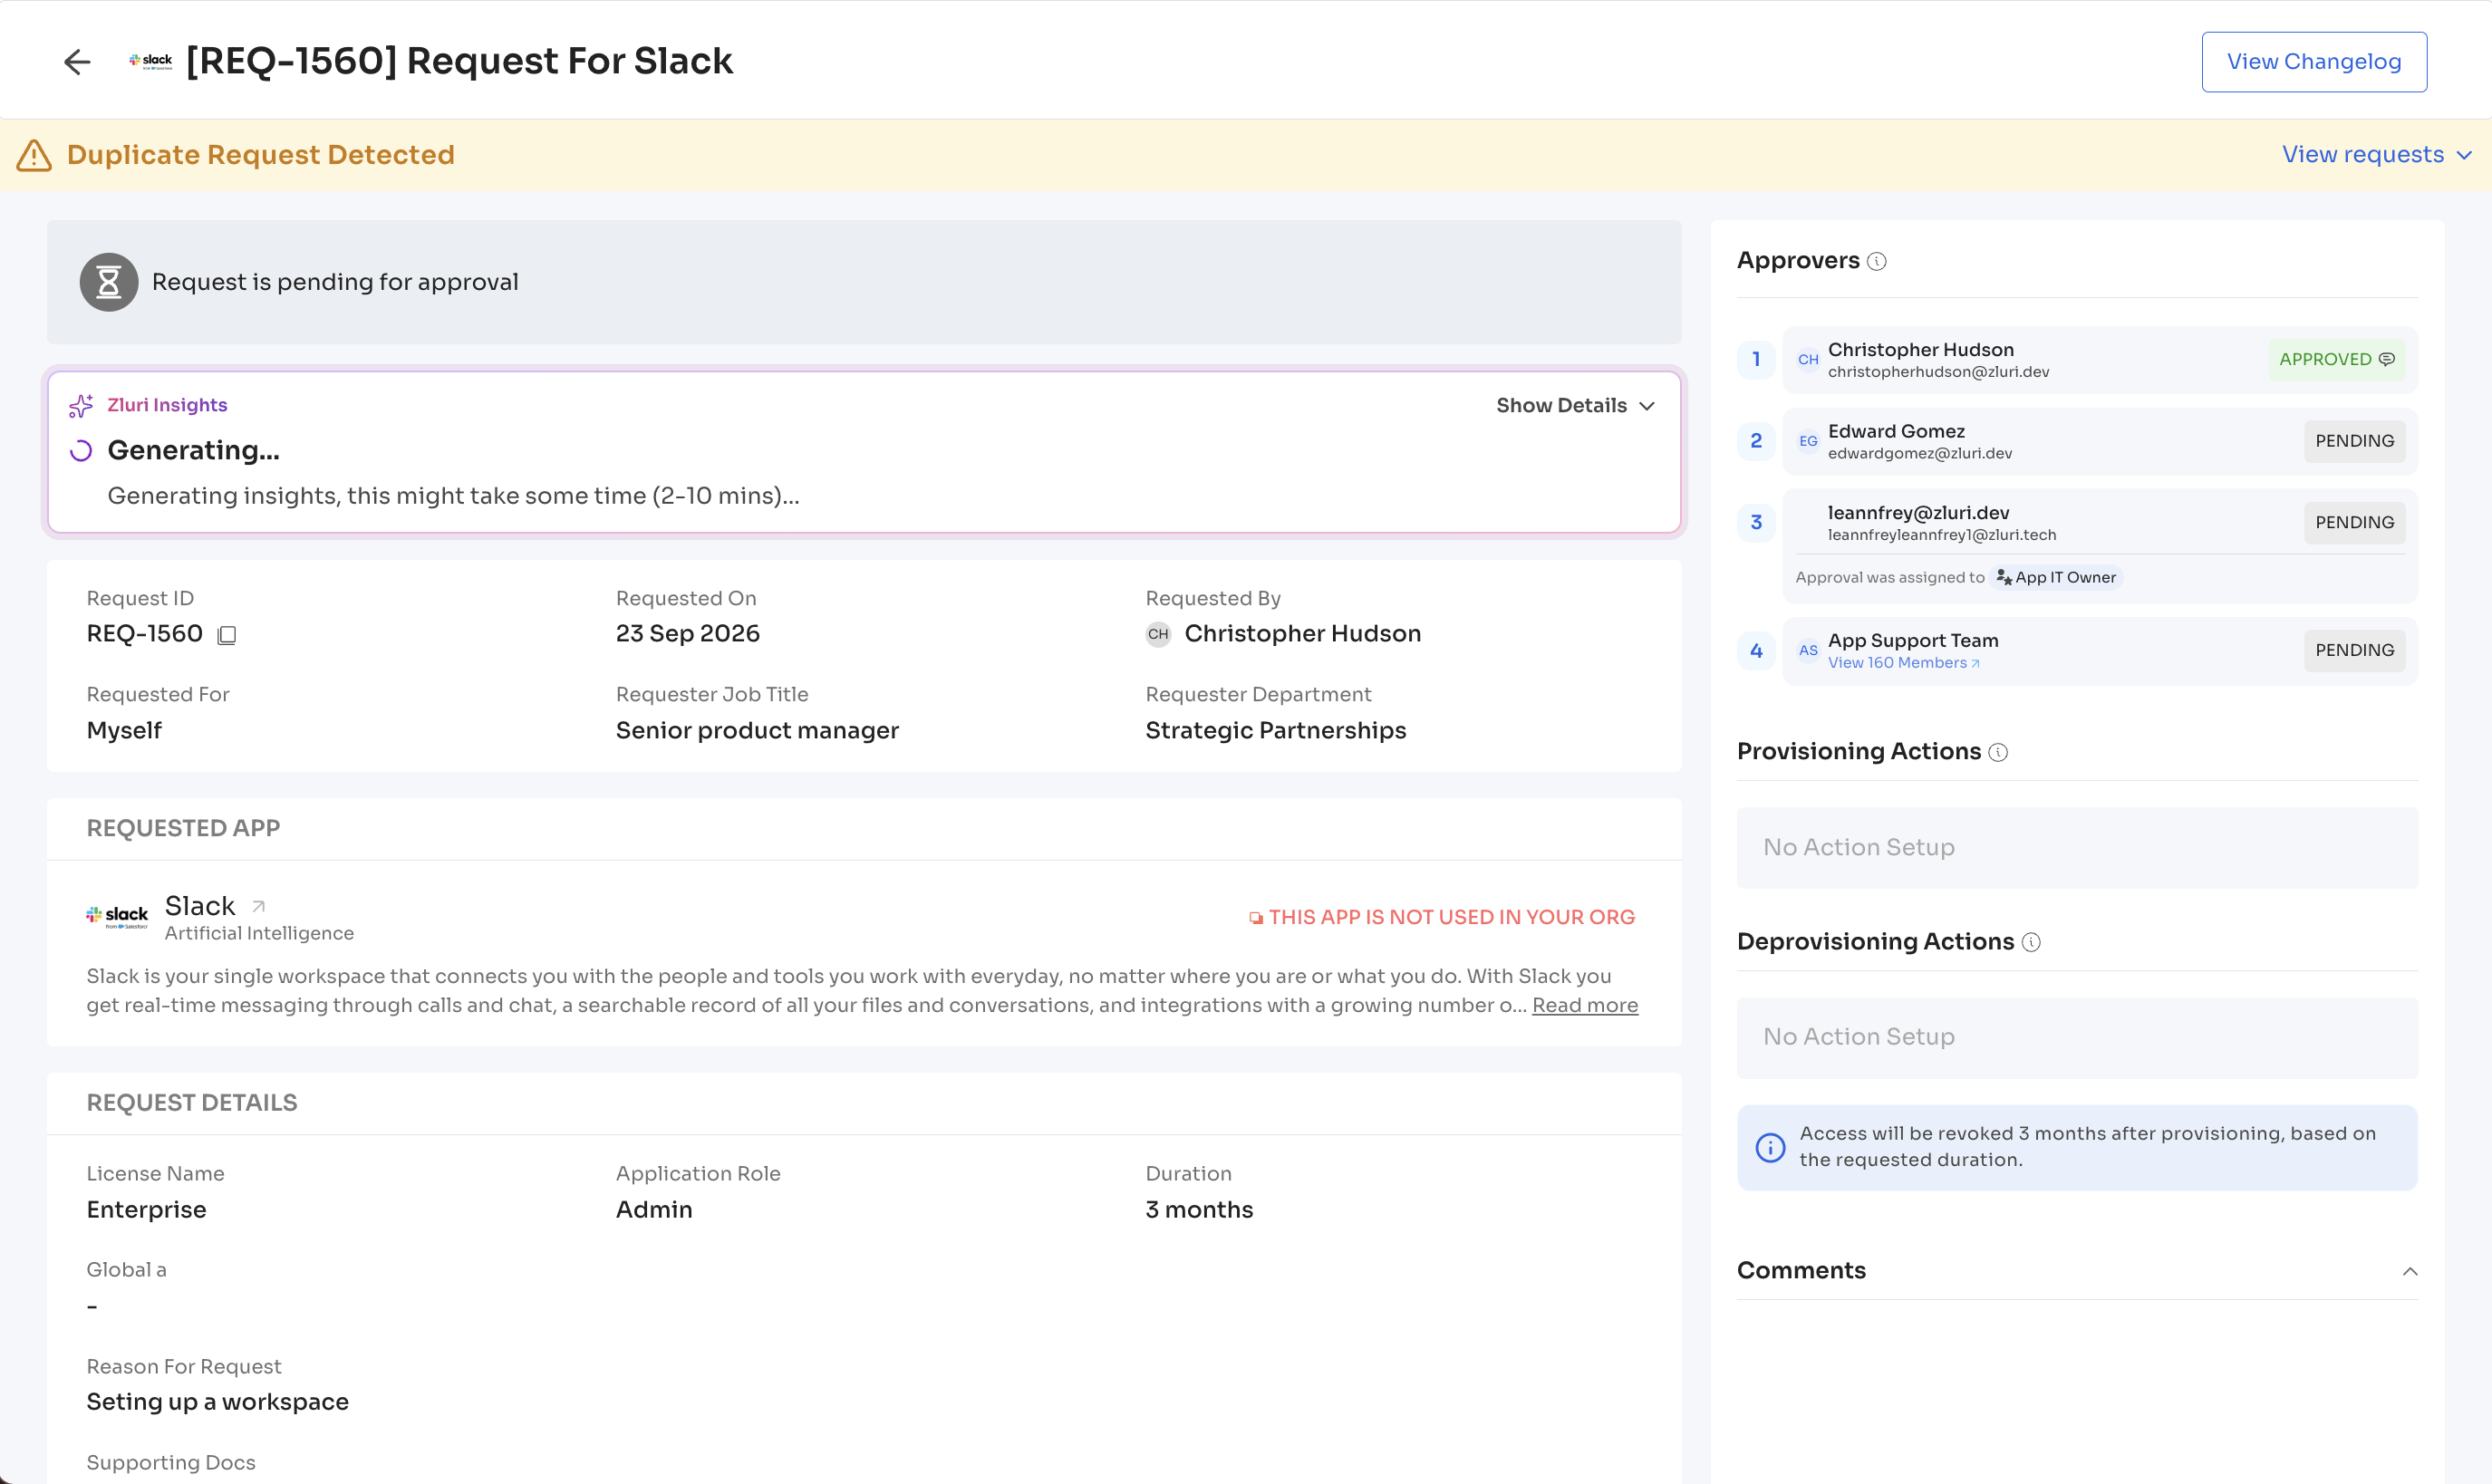
What Gets Recorded
Every reassignment and every added approver is recorded in the request's changelog and in Audit Logs, including who made the change, who it was assigned to, and when it was done.
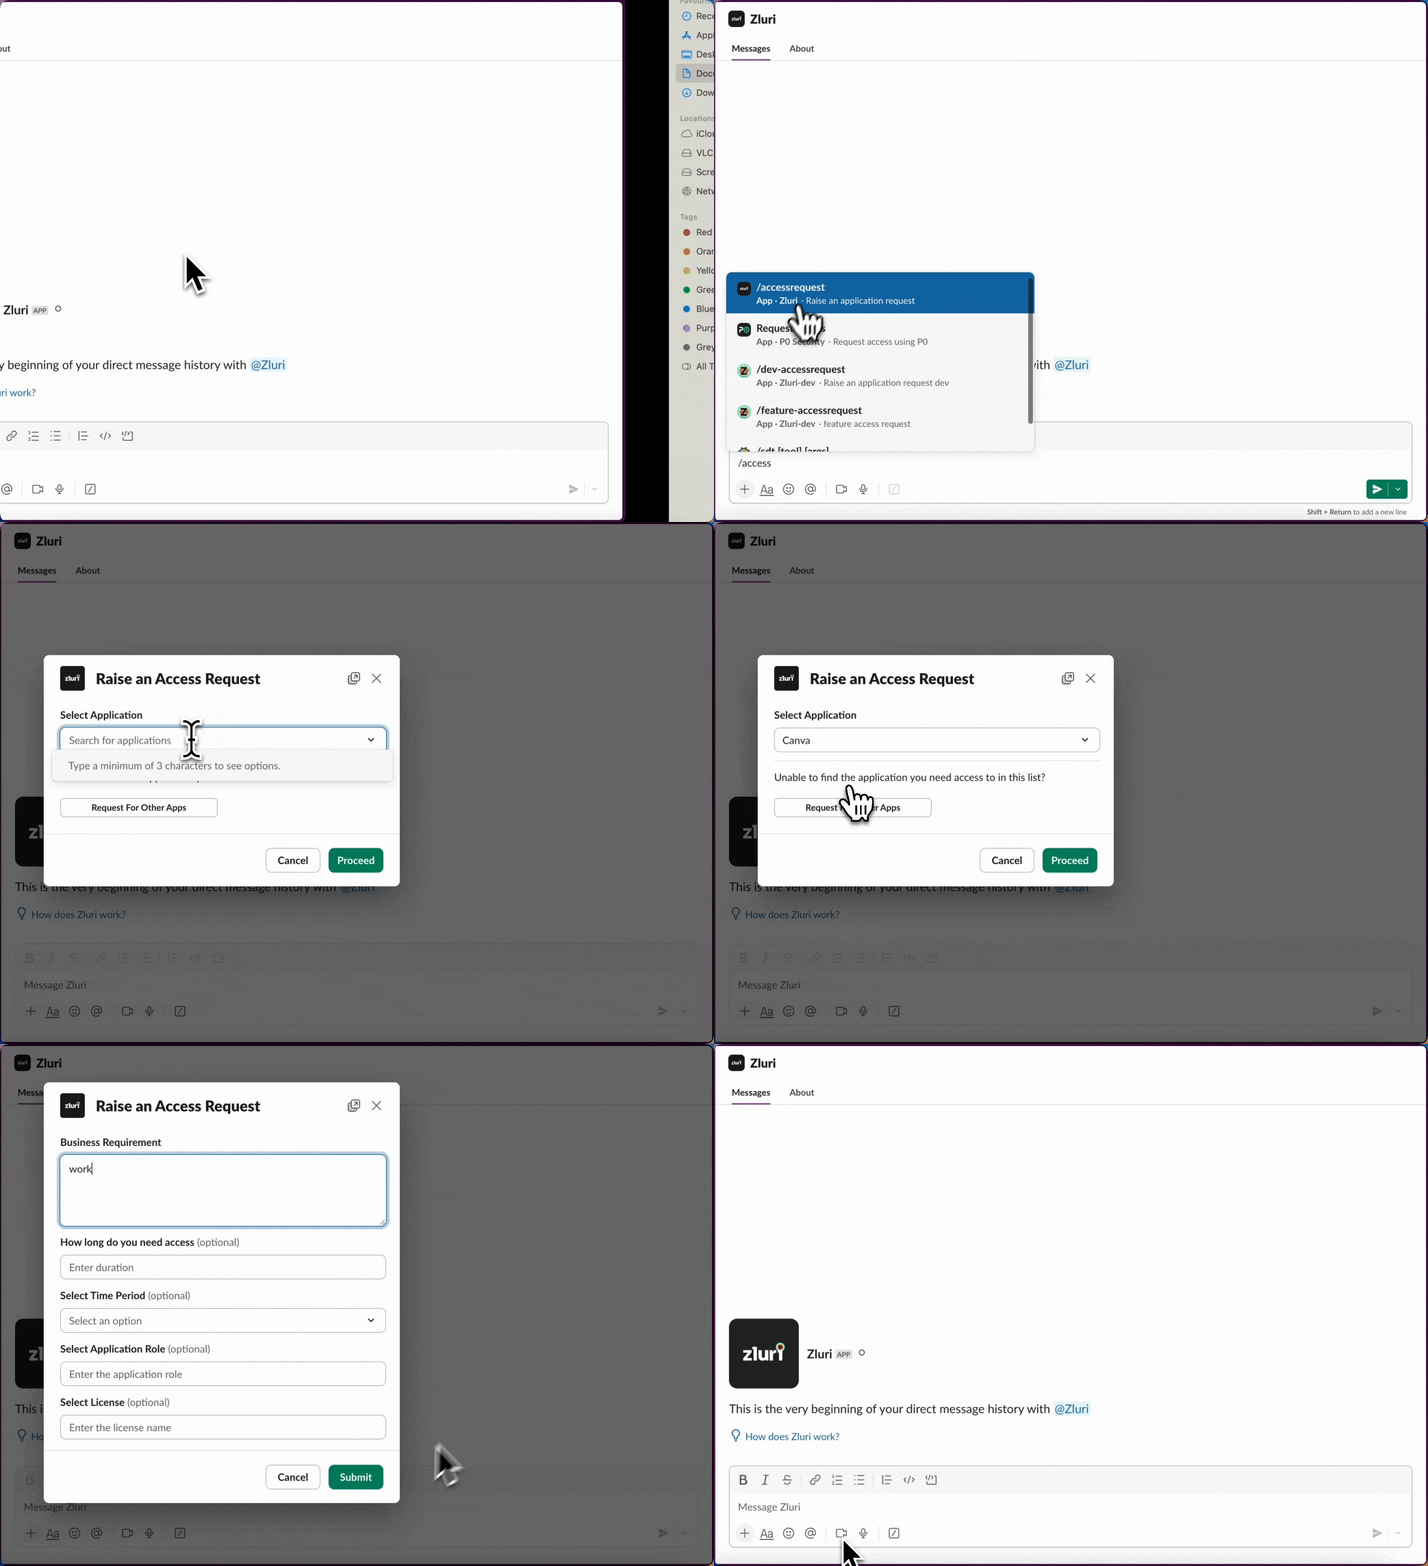
Requesting Access via Slack
If your organization has enabled Slack integration, you can request app access directly in Slack:
- Use
/accessrequestto open the form - Submit app details and justification
- Track approvals and receive status updates—all within Slack
The Slack-based flow follows the same request flow as the App Catalog.
Configure Slack Scopes
-
Go to Admin Control Center → Integrations → Communication → Slack.
-
Select Connect Slack.
-
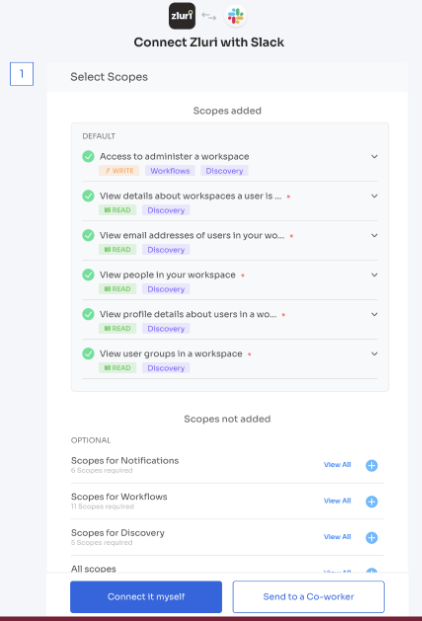
In the Select Scopes screen, enable the following scopes:
chat:write– allows Zluri to post messages in Slackusers:read– lets Zluri identify workspace userschannels:read– enables visibility for message deliveryteam:read– fetches workspace-level informationcommands– registers the/accessrequestcommand for employees
-
Authorize and complete the connection.
-
Once connected, verify the Slack workspace under Active Integrations.
Note: After the connection is active, employees can initiate requests using the
/accessrequestcommand and receive notifications in Slack.
Updated 22 days ago