User Management Overview
Oversee user information, application usage, and departmental assignments
This module consists of all user-based organizational data, including users marked for onboarding and offboarding. It provides a comprehensive set of views through which useful information can be viewed as well as providing the ability to export all user data externally through .csv format.
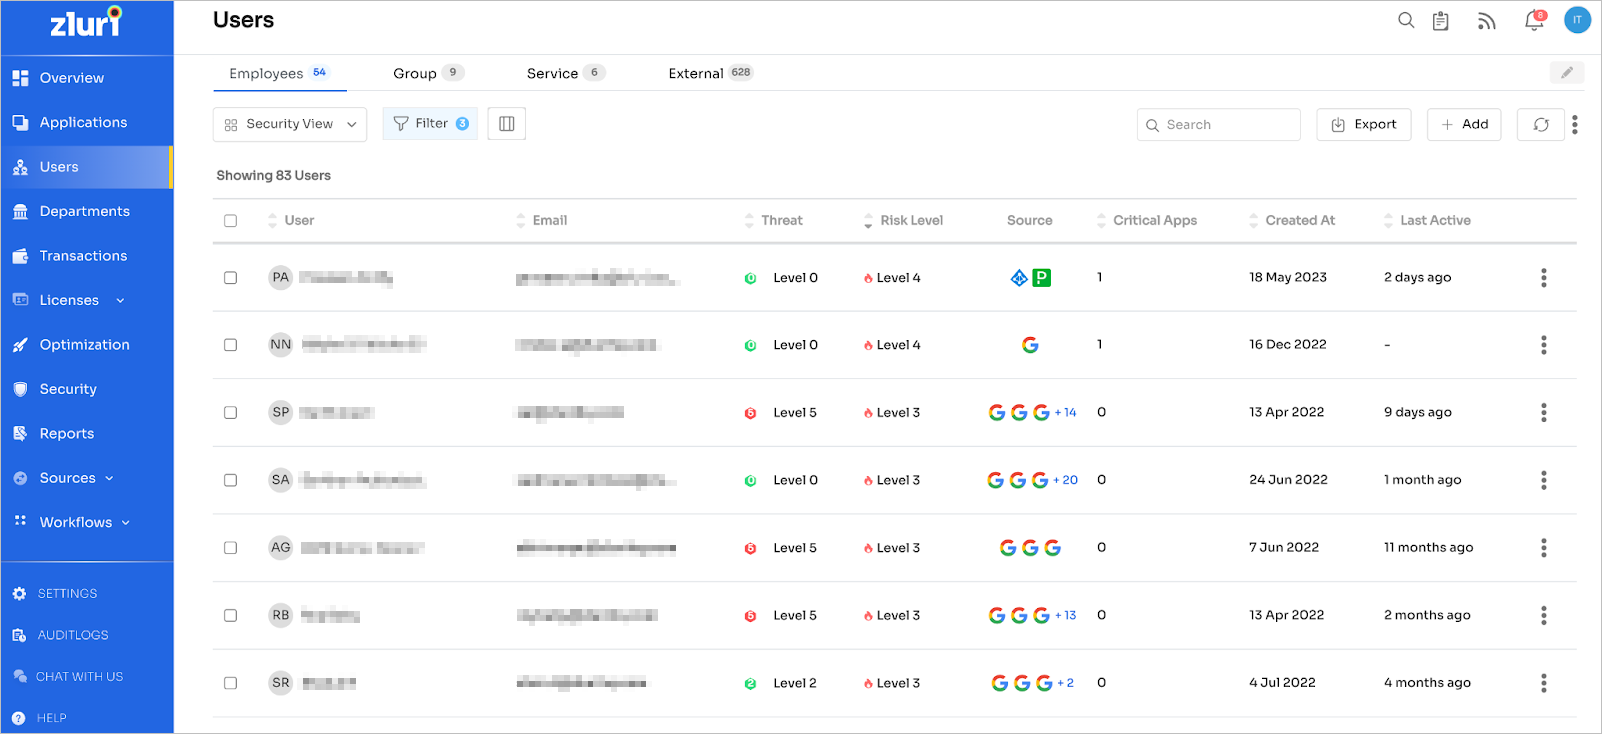
The user's page will list the users in your organization. Generally, this will be loaded from an SSO source like Google Workspace, but you can also manually add users. An employee record can contain their name, designation, department, email address, apps used, usage percentage, number of products, source, spend[YTD] & status( active/inactive).
You can add/remove columns by clicking on the Select Columns button near Filters by simply checking/unchecking the checkboxes highlighted below.
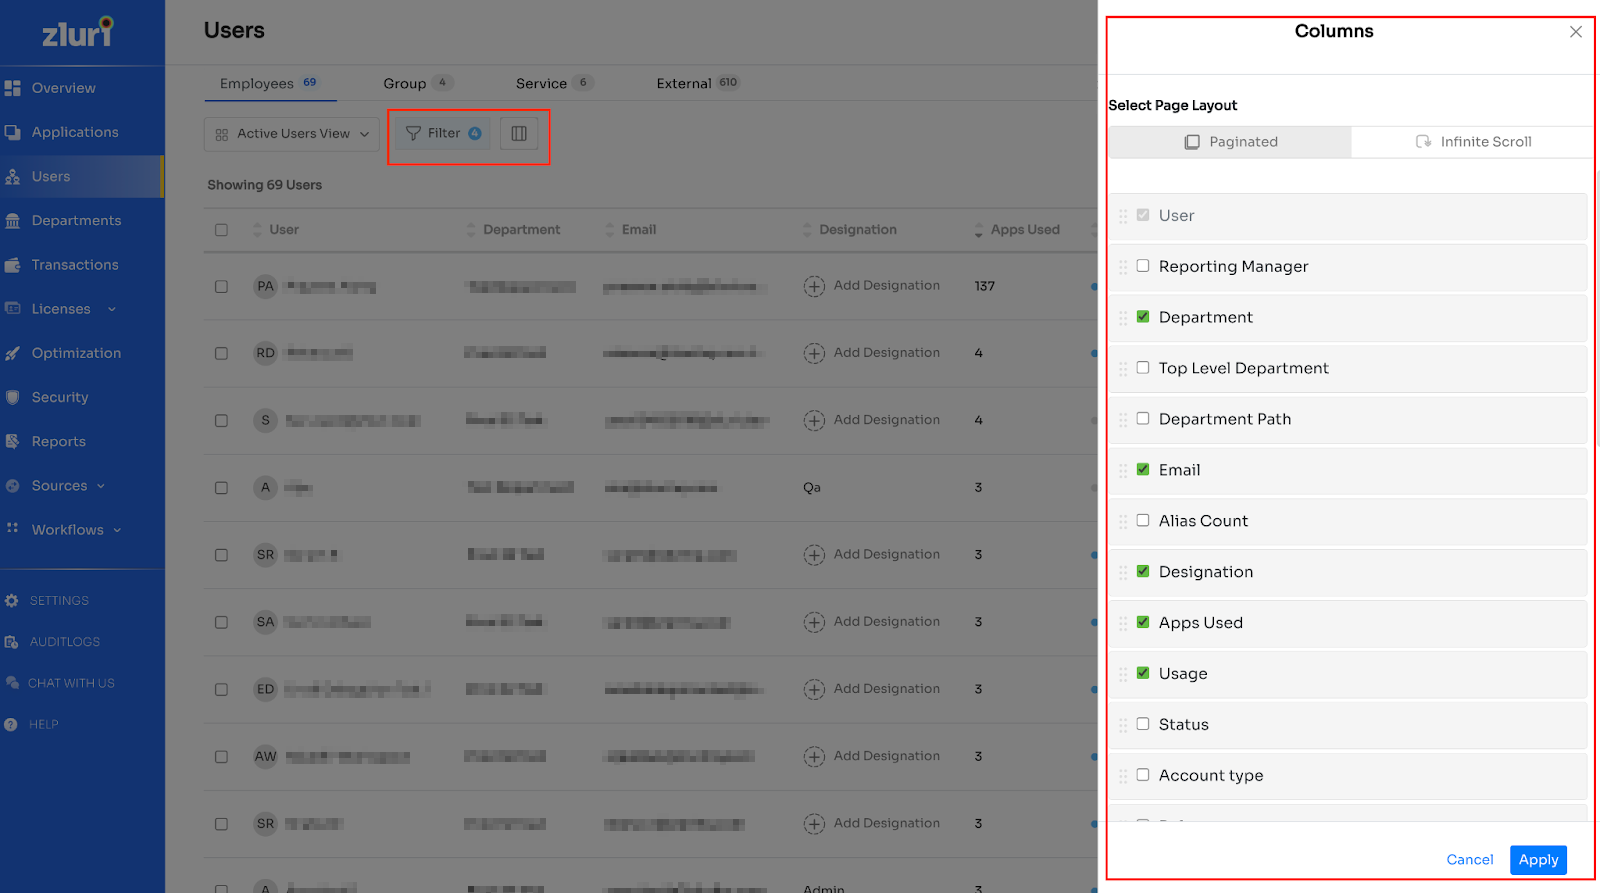
Similarly, you can click on Filters to filter the data you are interested in to view on the dashboard.
You can select multiple users by ticking the checkboxes next to the username. Once selected, “Send Prompt”, “Run a Playbook” and “Bulk Edit” options appear on the screen. Please refer to the snapshot below:
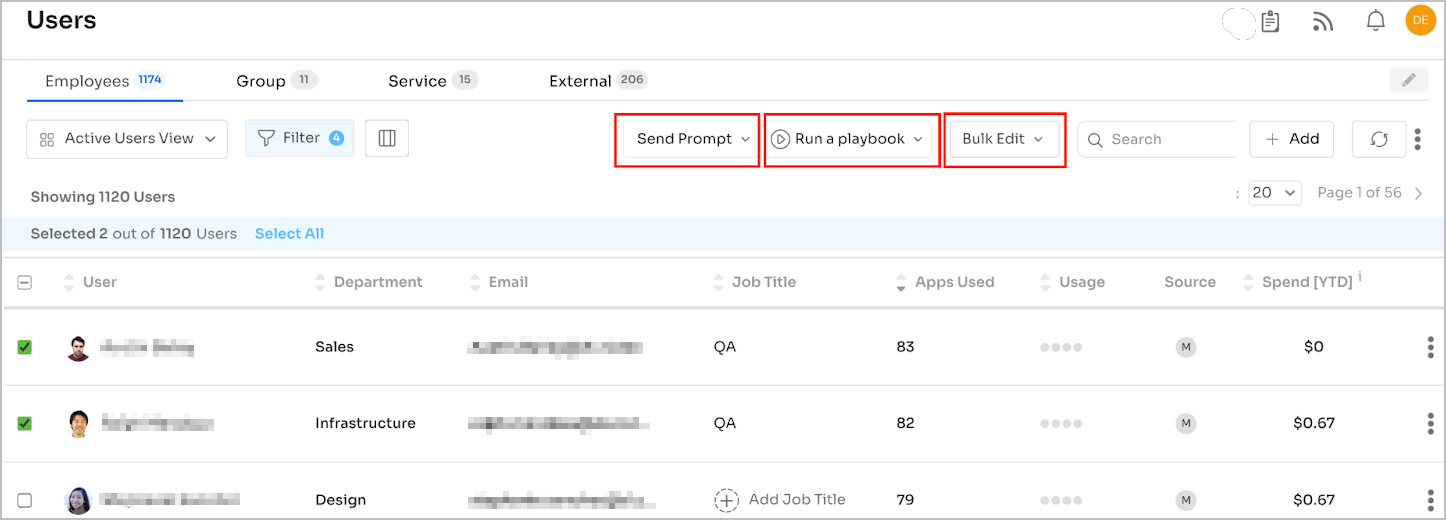
Once you click Send Prompt, a prompt can be sent to the user to install a Browser Agent or a Desktop Agent.
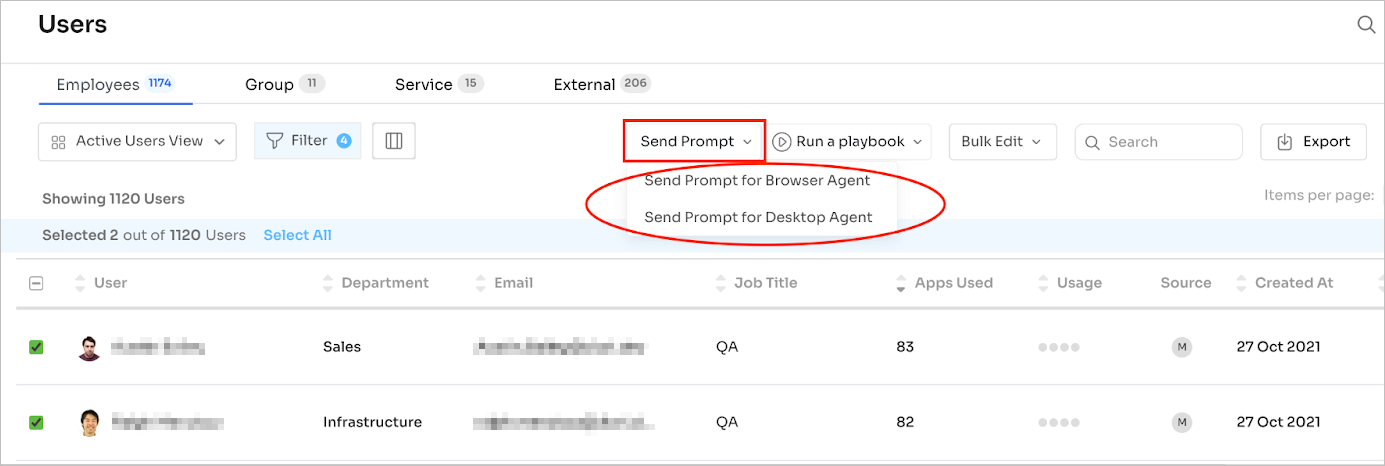
Once you click on Run a Playbook, you can either select an onboarding playbook or an offboarding playbook to run on the selected users.
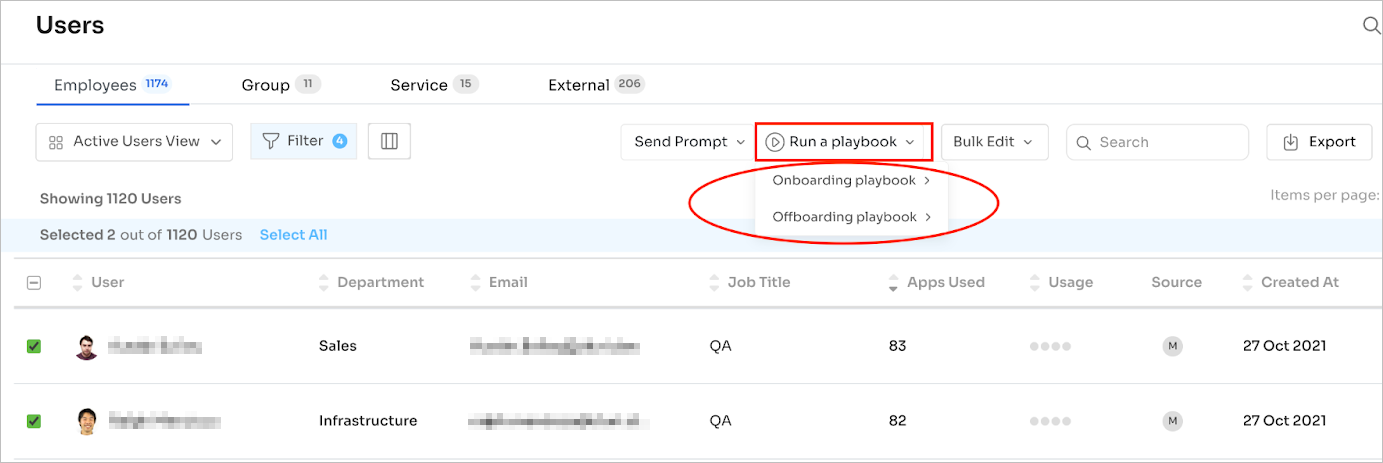
If you select the Onboarding playbook to run, you need to search for the playbook you have already created before for onboarding purposes in the Workflows section.

User Overview
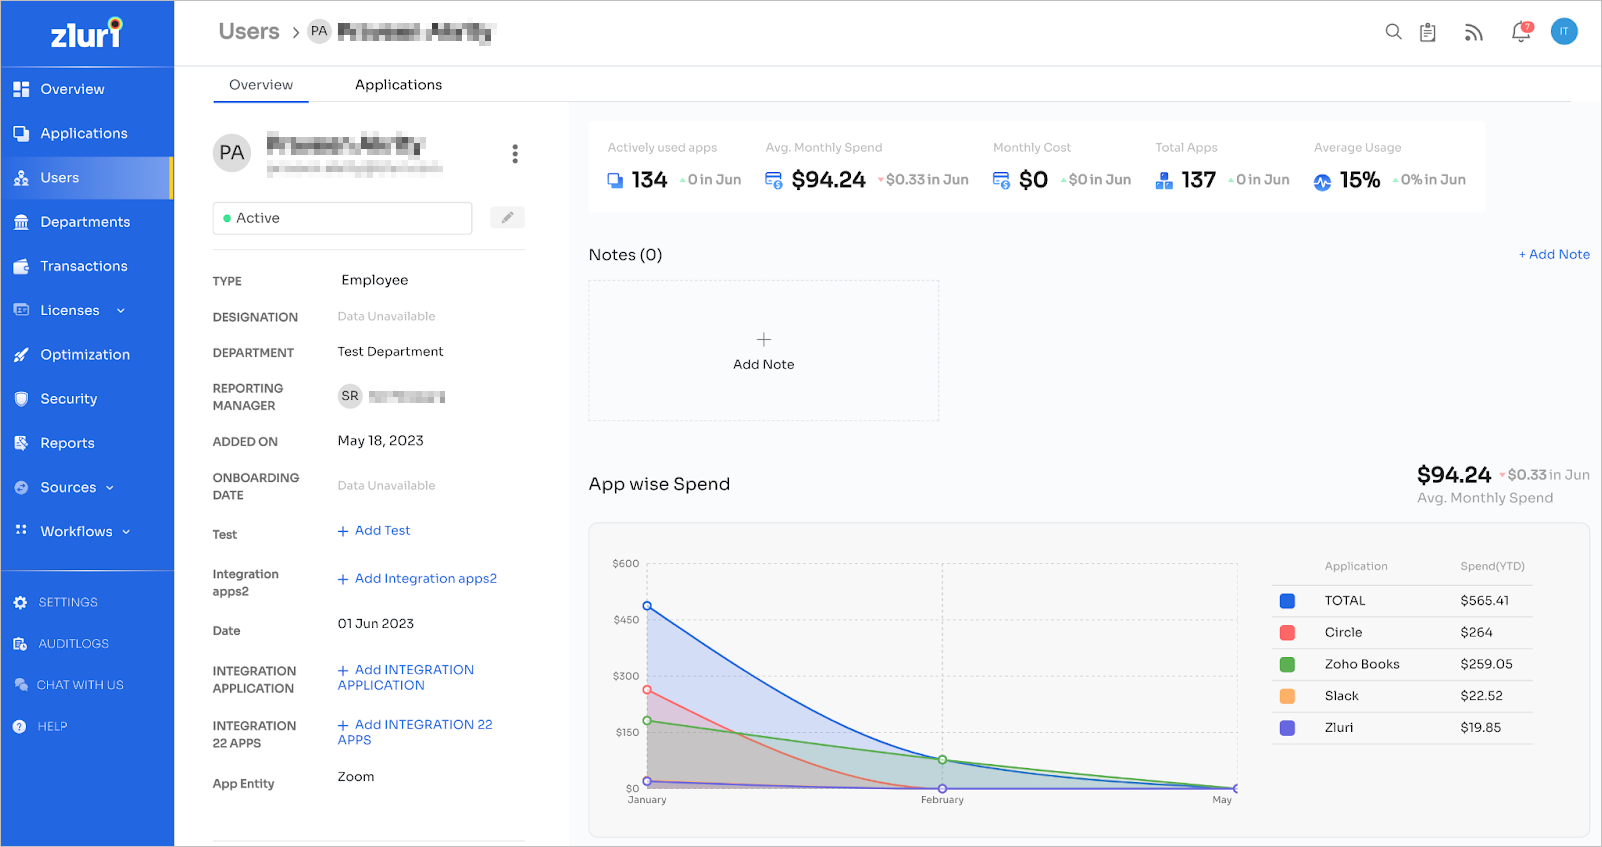
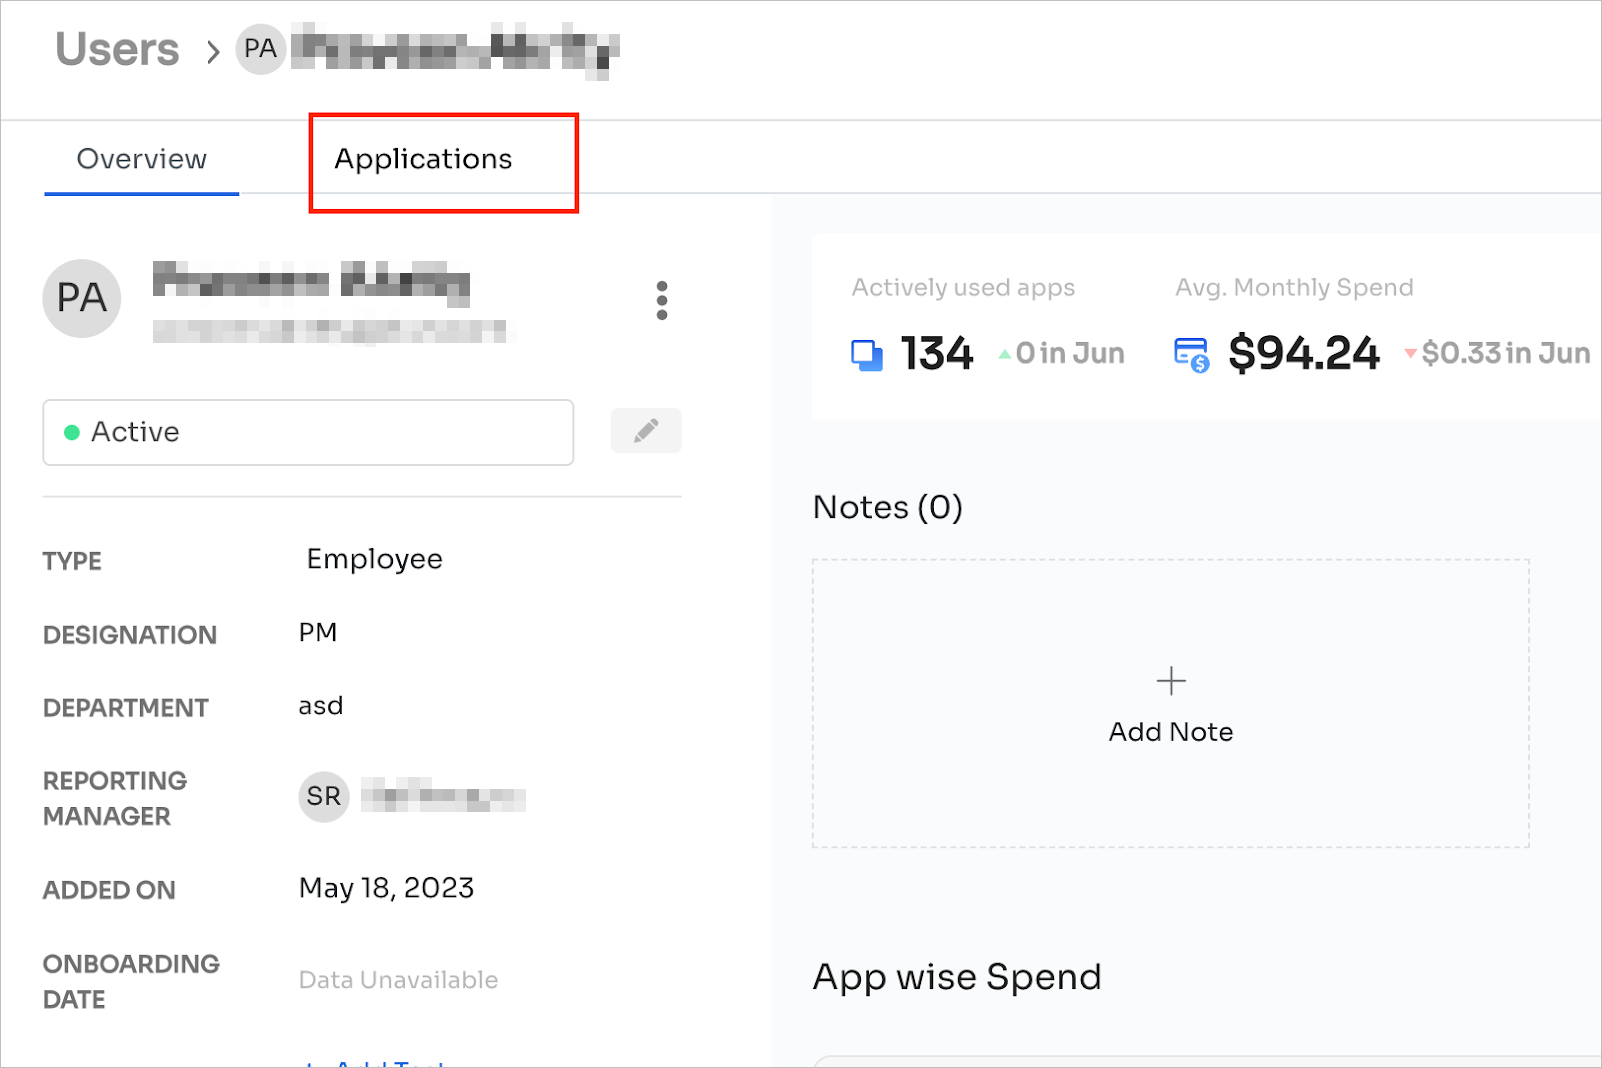
Clicking on a user will load their user page, which will display the following details.
-
Actively used apps: Total number of apps used in the current month & change in the number of apps used compared to the previous month as identified by the login data from the SSO source.
-
Average monthly spend: associated with the user for all the apps he has used in the current financial year & change in spend compared to the previous month.
-
Monthly cost: Cost is based on the contracts and contract term
-
Total apps: The user has used overall and the change in the number compared to the previous month.
-
Average usage as sourced from the SSO integration & change in usage percentage from the previous month.
-
Status (Active/Inactive)
-
Designation
-
Department
-
Added On: Date on which the user is added to Zluri
-
The Onboarding Date is the date for which the user is marked for onboarding
-
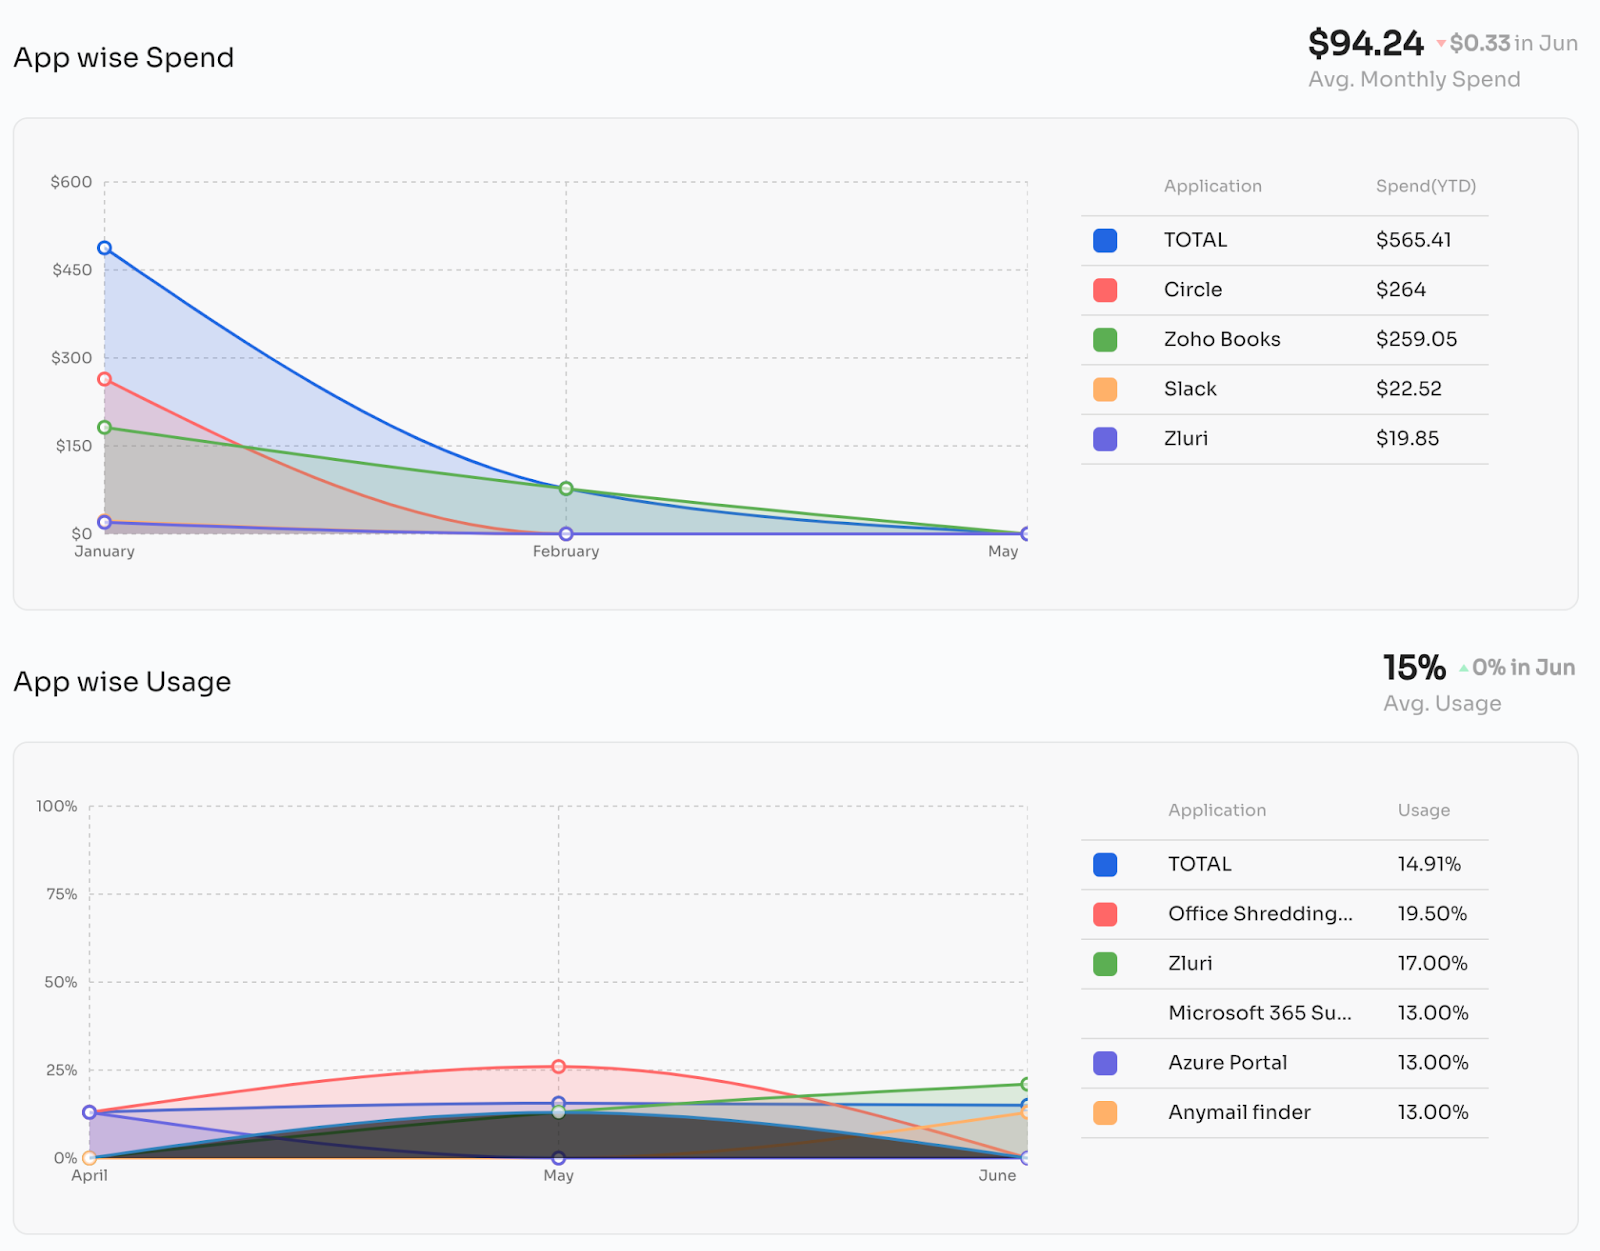
App-wise Spend: shows spends done on each application for the user and the average monthly spend for the user for all apps combined. Also, shows the value of total spends aggregated for all the apps for a user and app-wise spend value.
-
App-wise usage: shows usage for each application for the user and the average monthly usage of the user for all apps combined. It also shows the value of total usage percentage for all the apps for a user and app-wise usage percentage value.
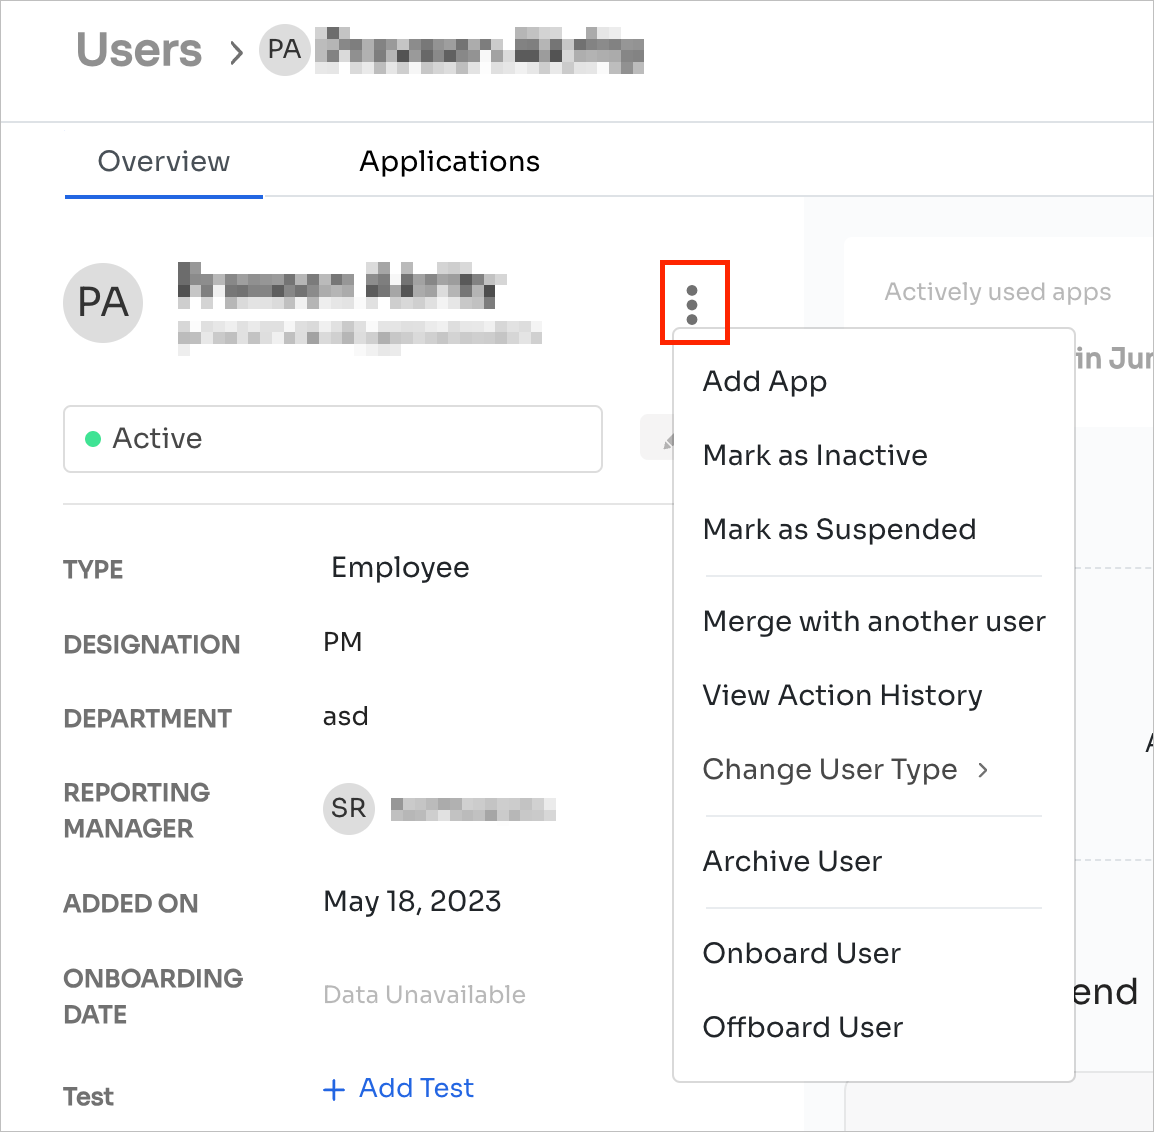
If the user clicks on the three dots next to the user name he will get a list of additional operations that can be performed on a user. Please refer to the below snapshot:
By clicking on the Application Tab on the Users Overview screen, the user will land on the Applications page.
User Applications
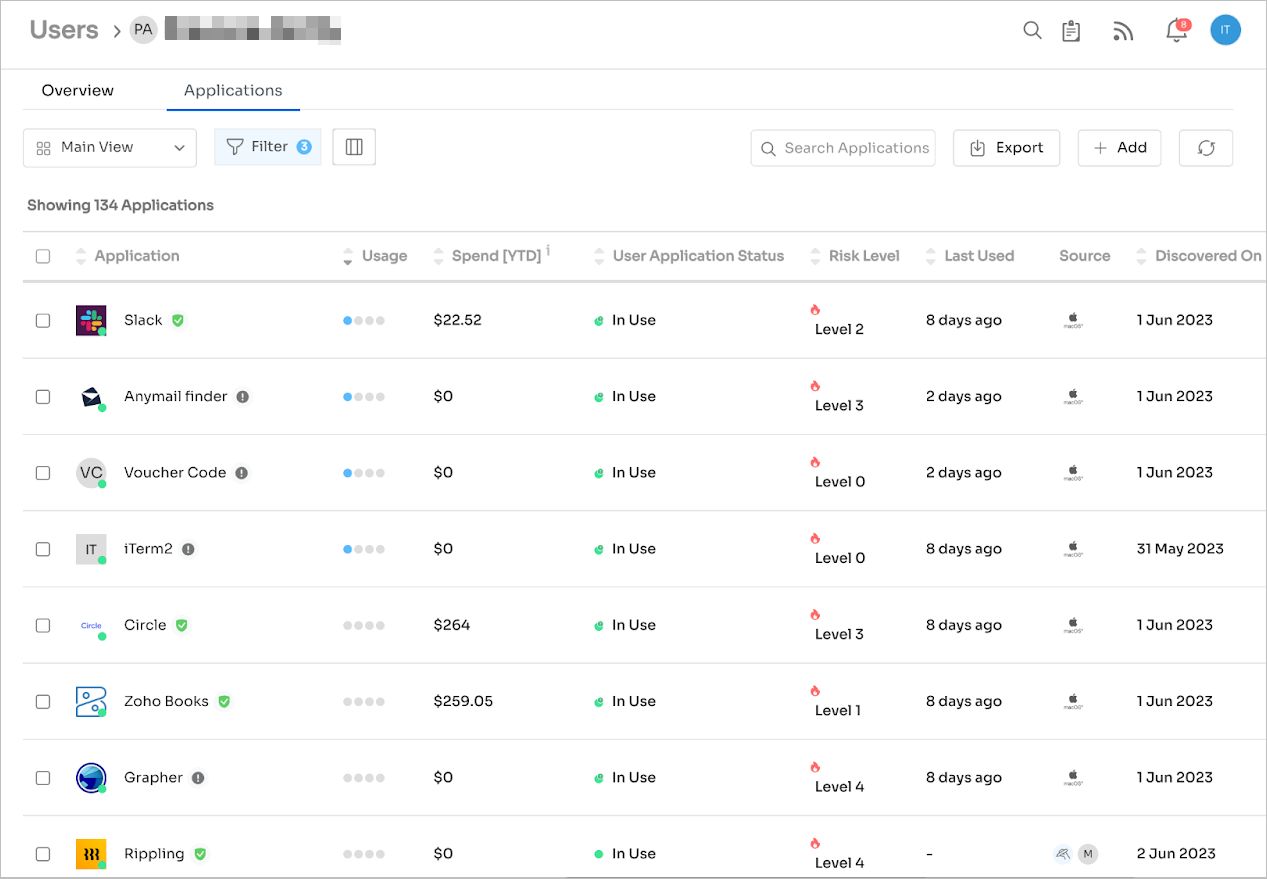
The Applications tab lists the applications used by the user, usage, spend[YTD], cost[YTD], license, user application status, risk level, the last used date as sourced from the SSO integration, the specified SSO source & status of the application.
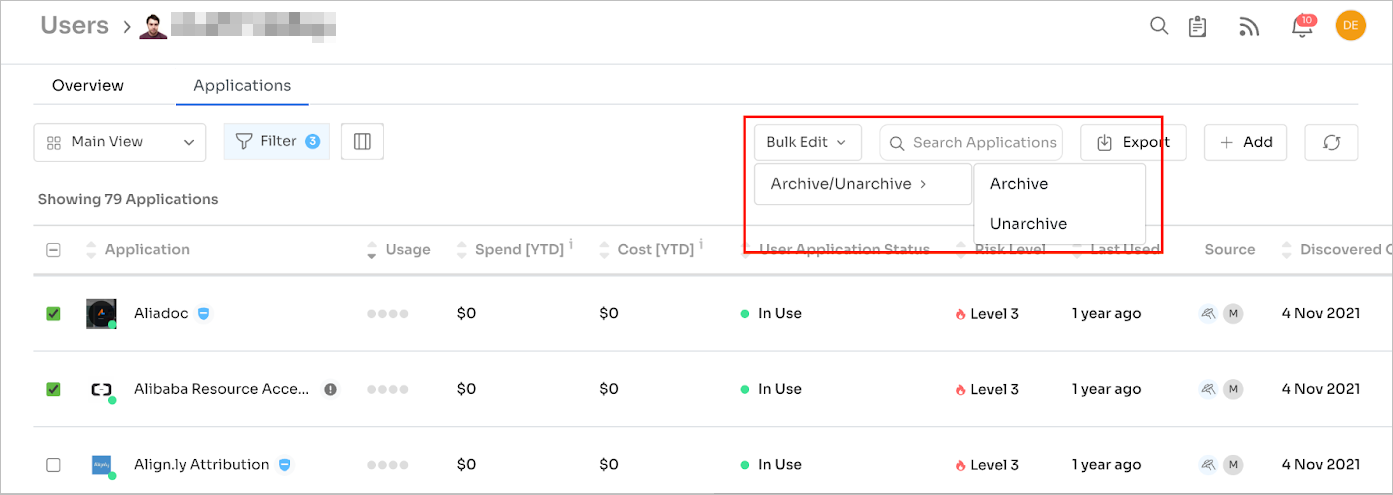
You can select multiple applications and do the Bulk Edit option. Once you click Bulk Edit, you can select the Archive or Unarchive option which will be applied to the selected applications for that user.
Add a New User
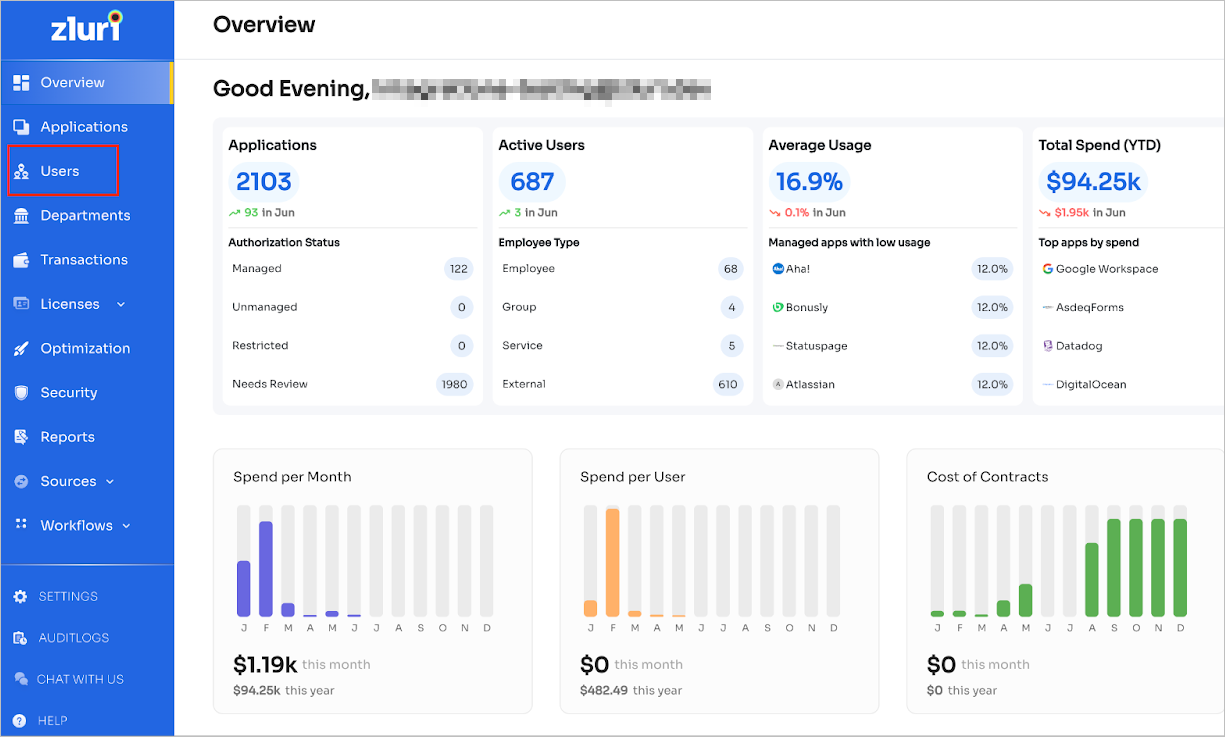
Go to Zluri's home page >> Click on USERS.
Click on “+Add Button” to add a new user.
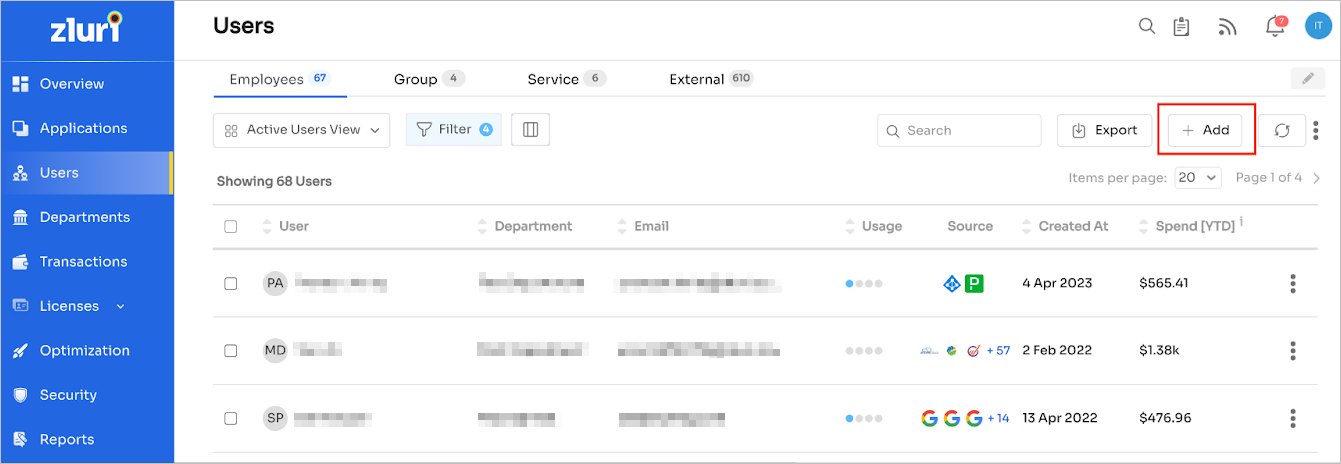

On the Add new user page. Enter the below mandate details.
- Add Username
- User's email address
- User's Designation
- User's status (Active/Inactive/Suspended)
- Add user to a specific department
Other fields that can be entered are(not mandatory):
-
Add Profile Image
-
Reporting Manager
-
Personal Email
-
Tick the checkbox “Mark for Onboarding” if needed
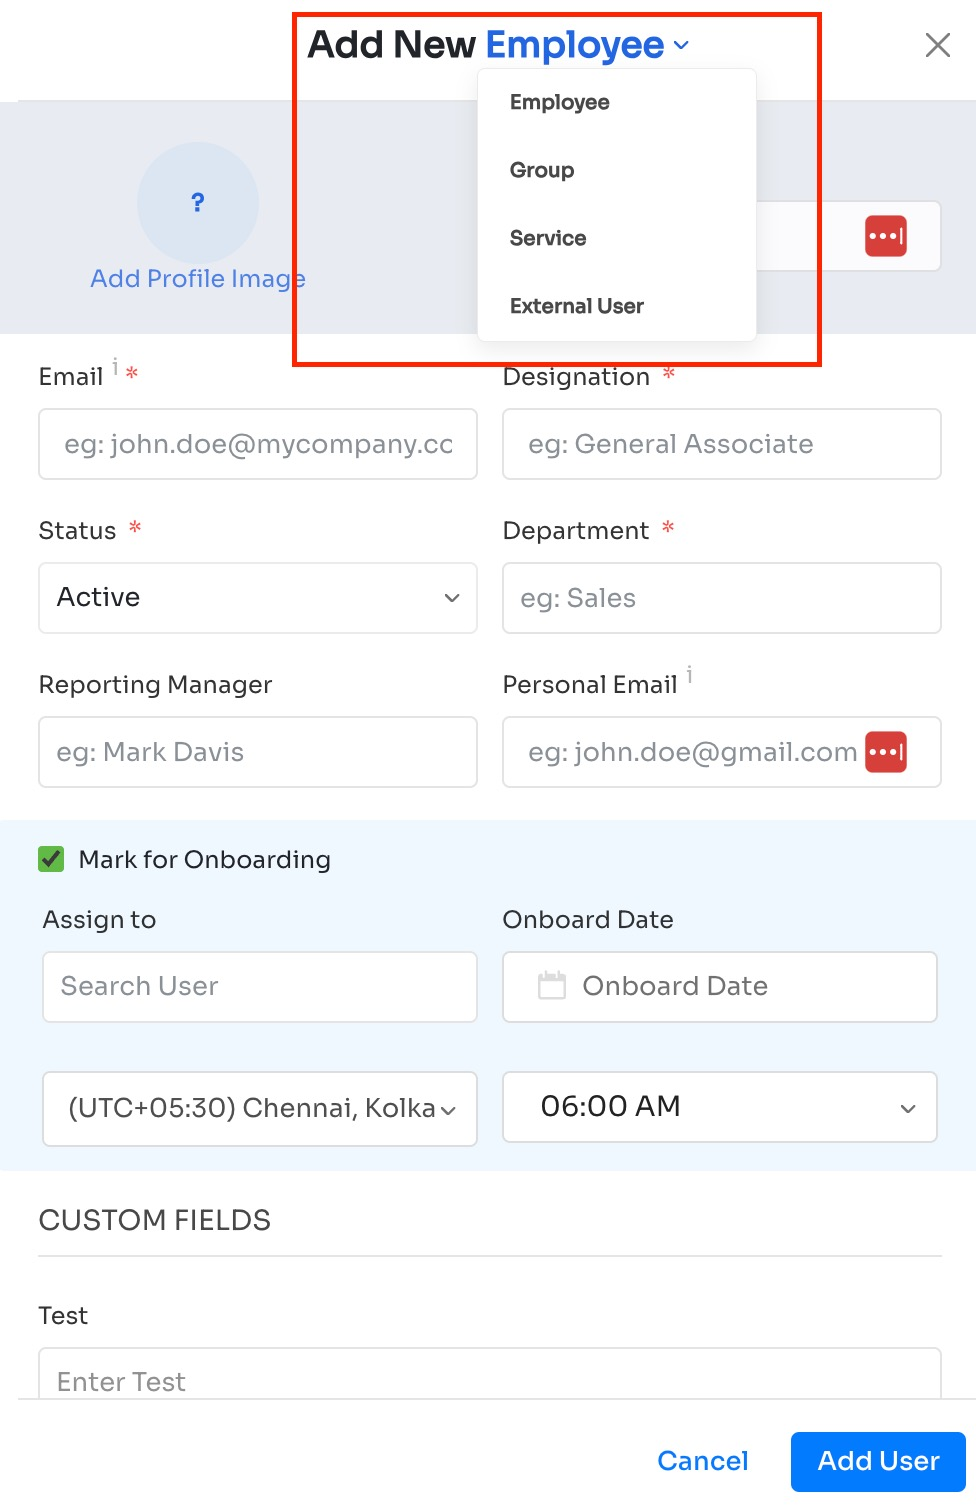
Click on the down arrow near Add New Employee on top. One can select one option from Employee, Group, Service, or External user. By default, the Employee option is selected.
Click on the Add User button on the bottom right.
Here you go, you have added the user successfully!
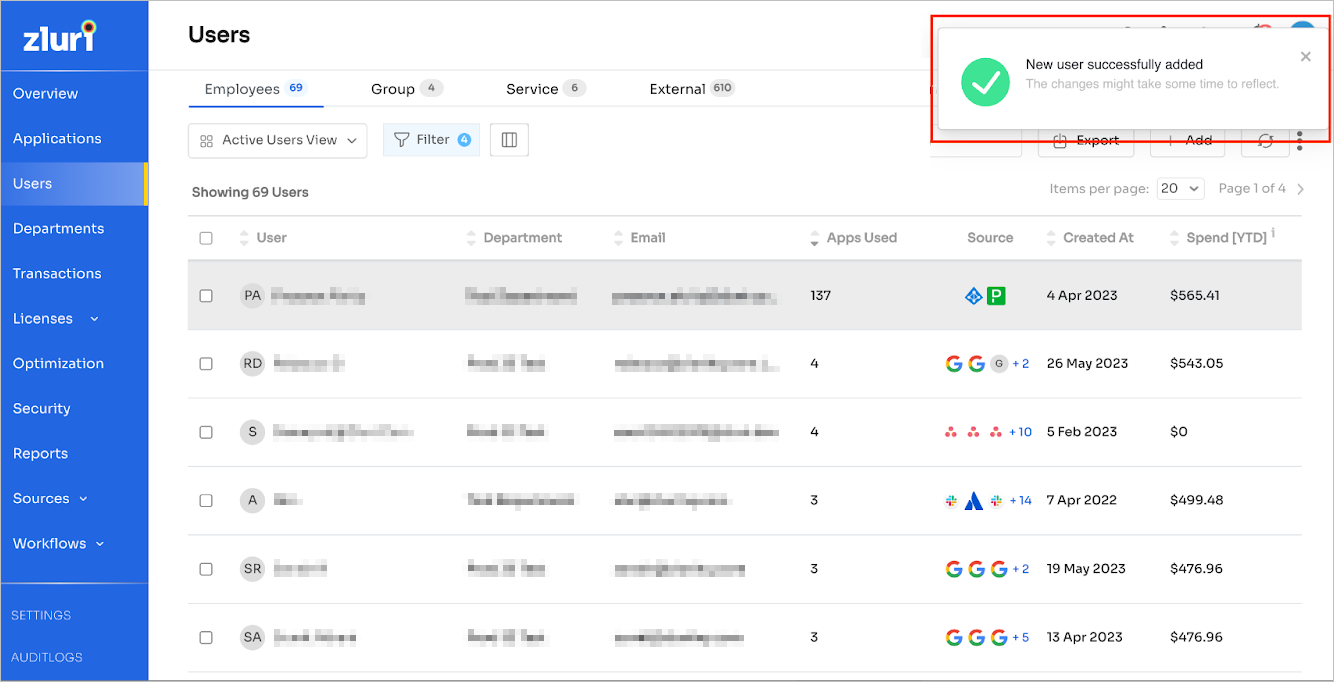
Editing user attributes
To edit the user attributes, you can do this on the user landing page or the individual employee page.
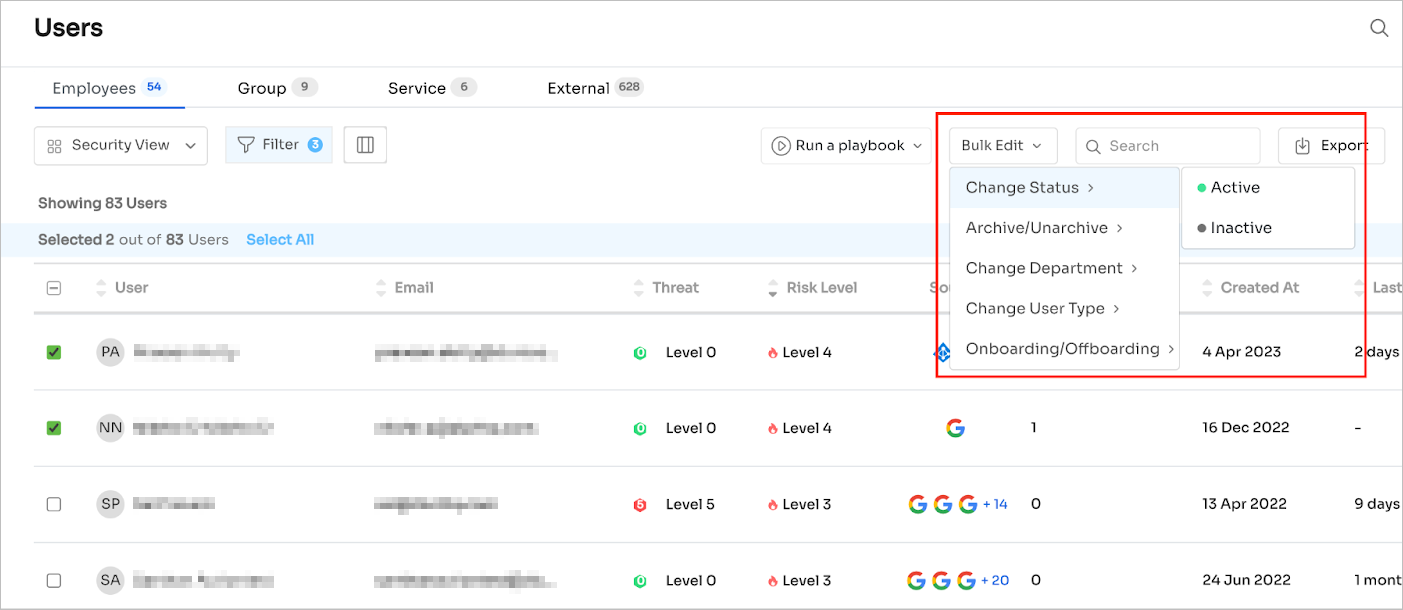
You can select users on the user landing page by ticking the checkboxes and Change the status of the user, Archive/Unarchive the user, Change Department of the user, Change User type, etc. This will change the attributes of all selected users.
For example, if a user wants to change an employee status to Active, he needs to click on Bulk Edit >> Change Status >> Active.
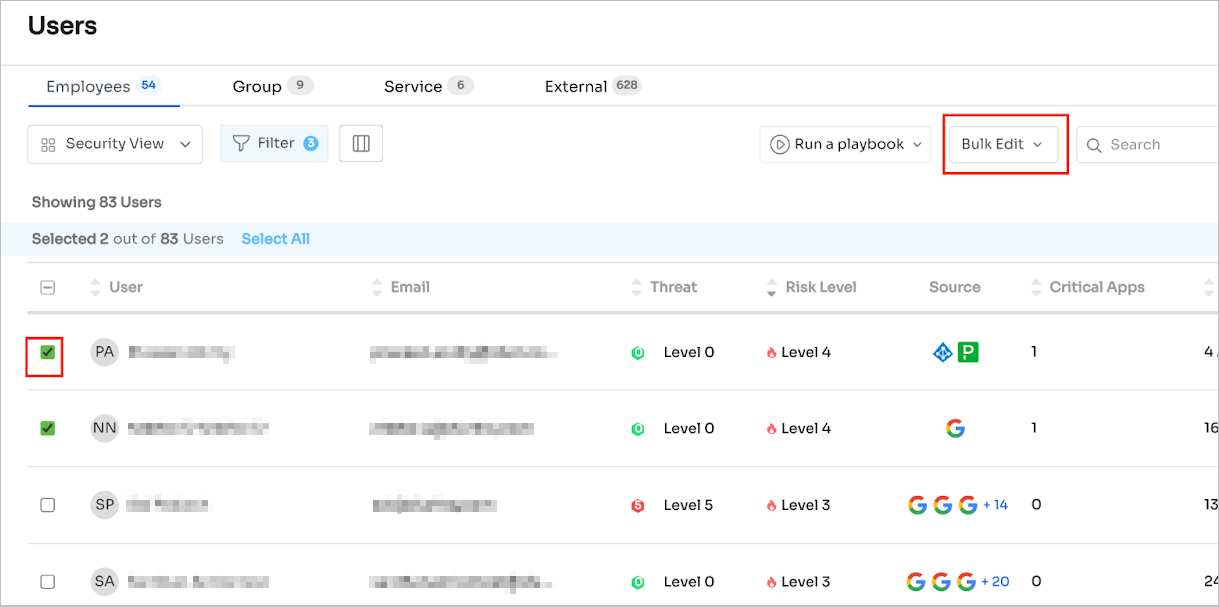
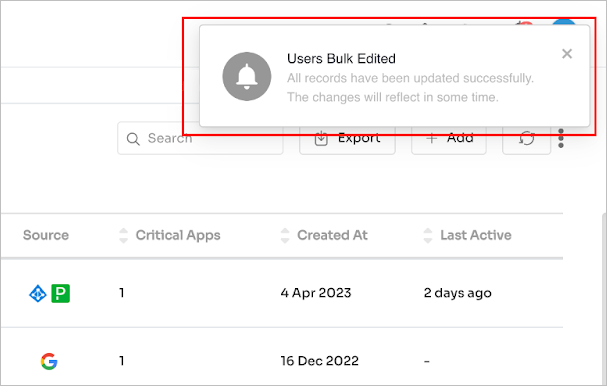
Once the details are saved, a pop-up will appear at the top right “Users Bulk Edited”.
You can also use the quick edit option to change the user designation by hovering your mouse cursor over the designation value.

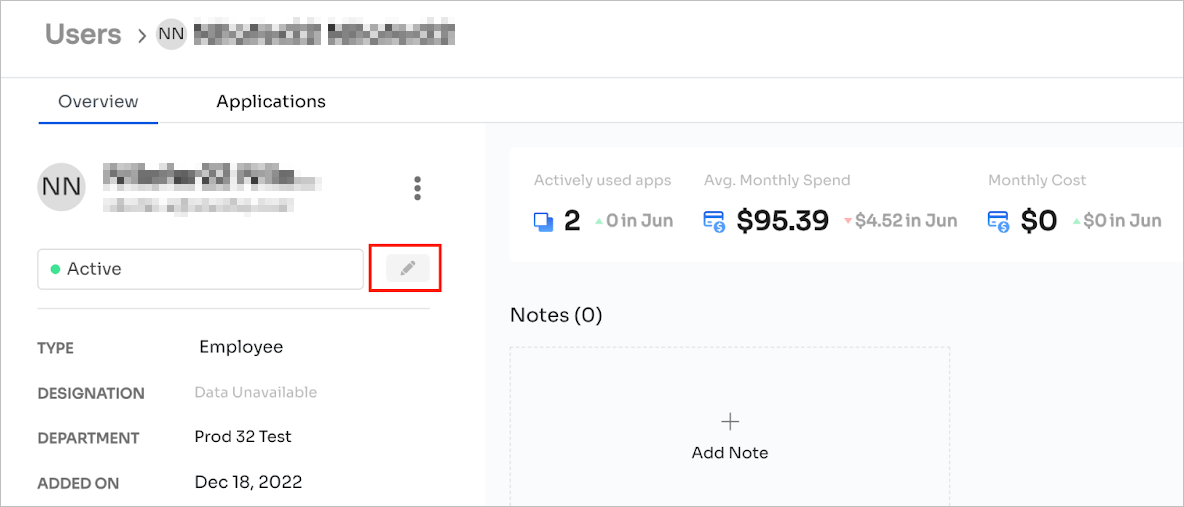
The user's designation and other attributes can also be changed on the individual user’s page. Click on the Edit button highlighted below:
Clicking ‘Edit’ will open a popup like the one below. Here you can make your changes & click ‘Edit user’.
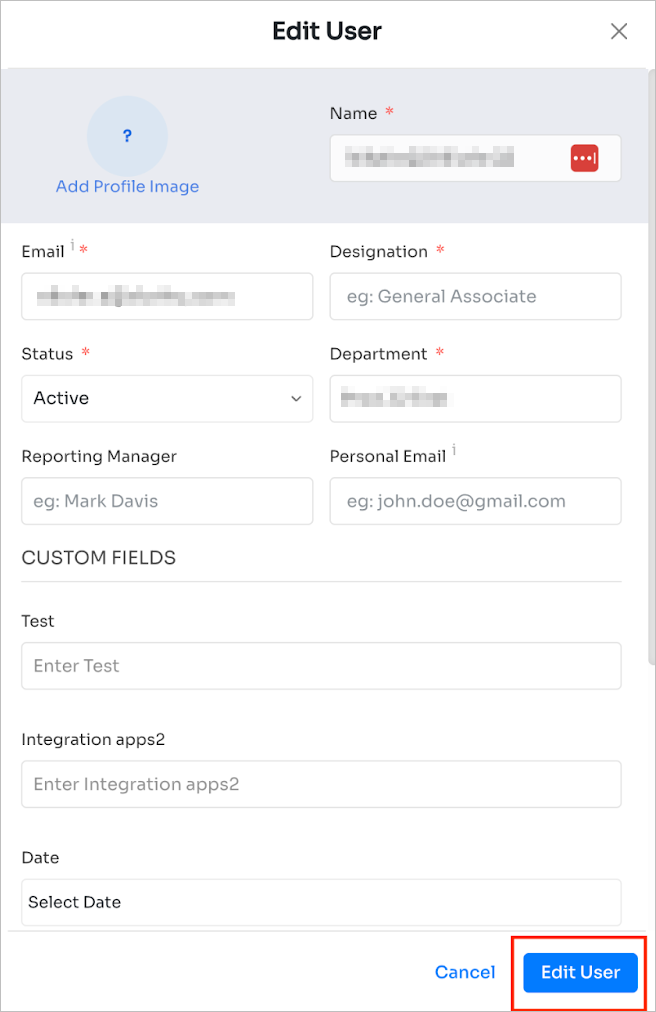
After entering the required details, the user can click on the Edit User button to update the details.
Bulk update data
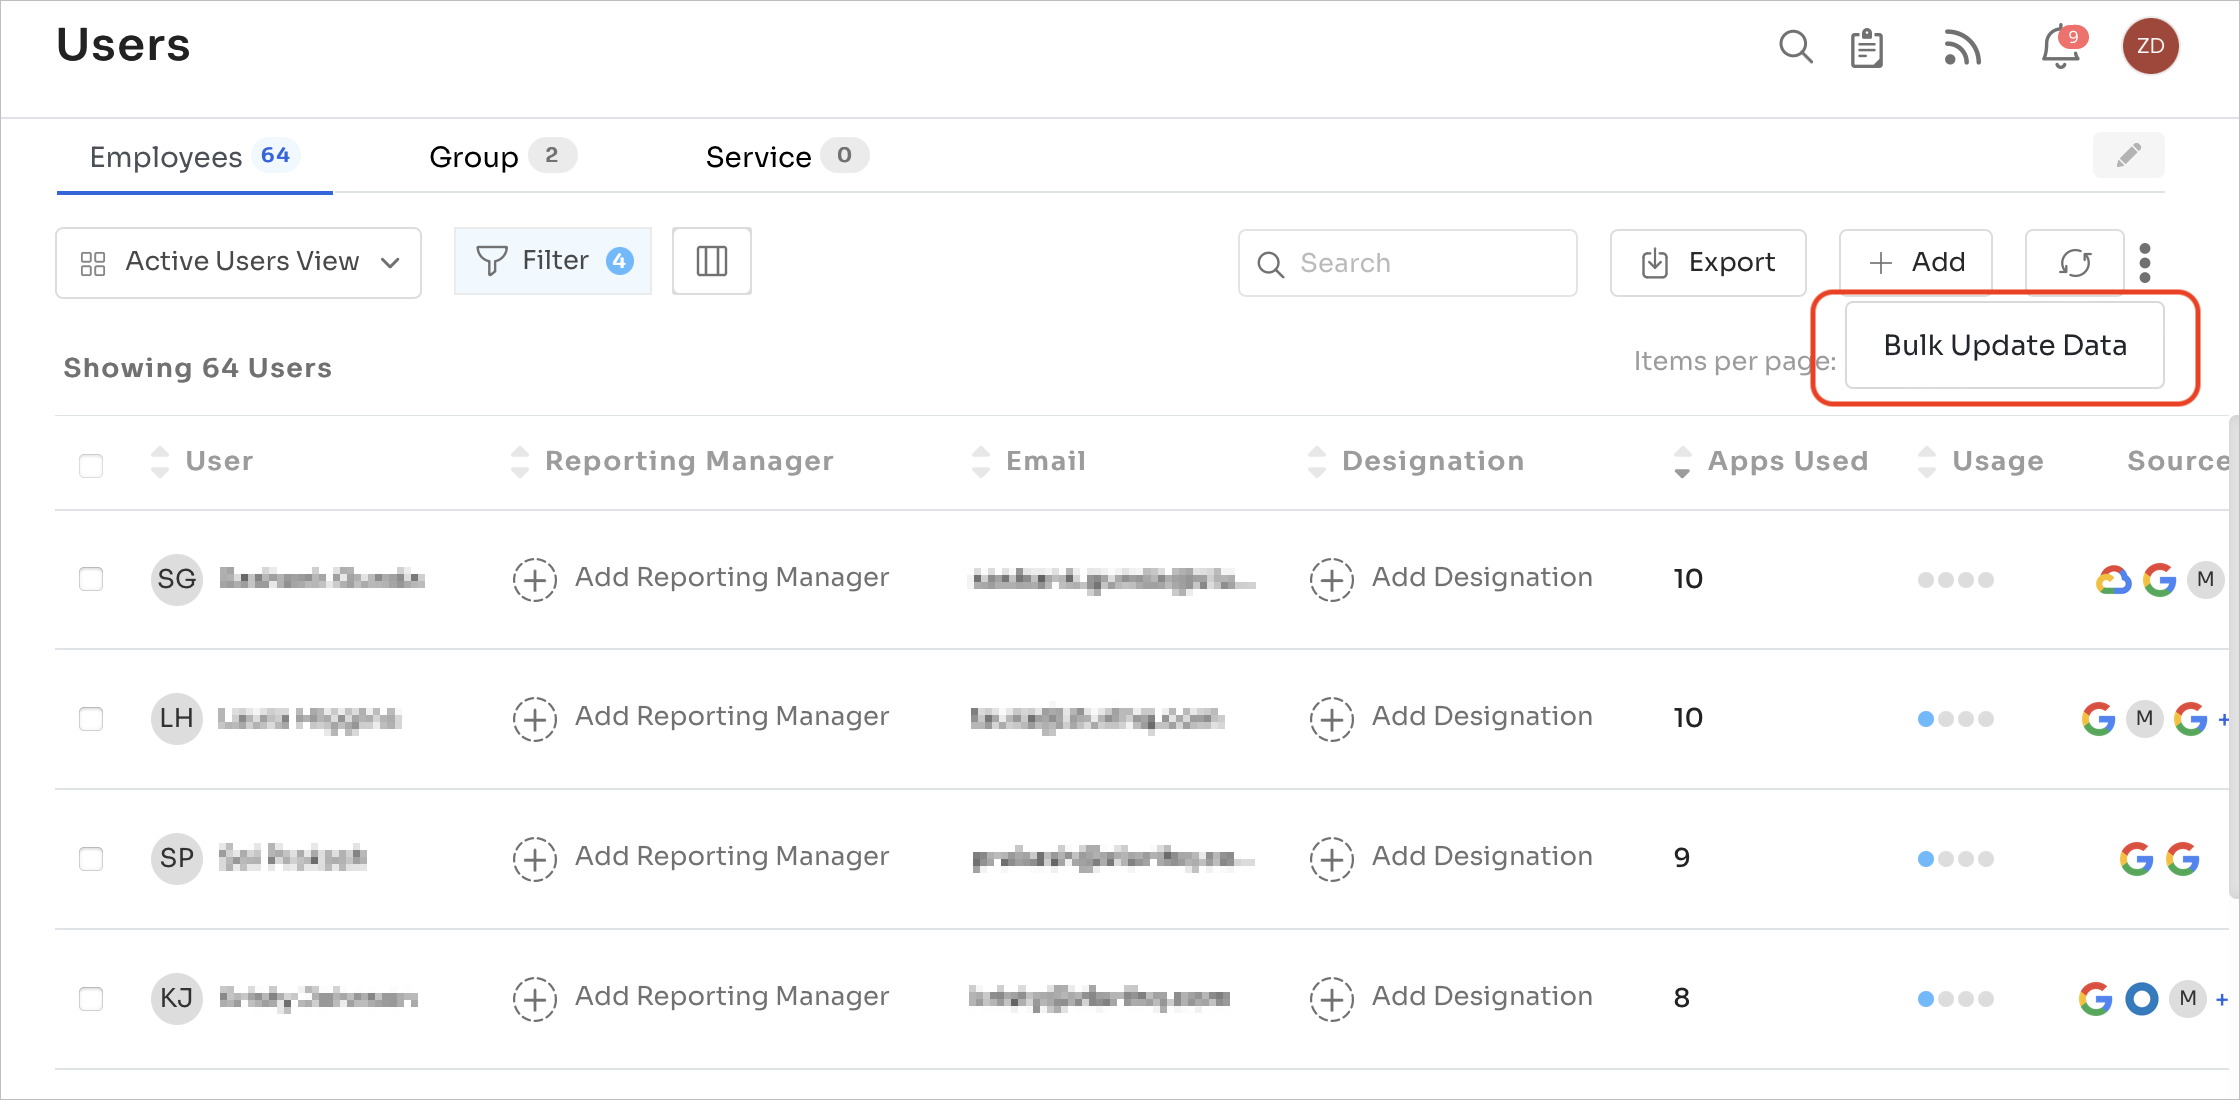
Zluri gives you the option to bulk update the metadata of each entity by directly uploading a CSV file. This article explains the step-by-step process of updating data in bulk.
To update data in bulk, click on the above menu on the right side of the page.
It will open a sidebar, as shown below.
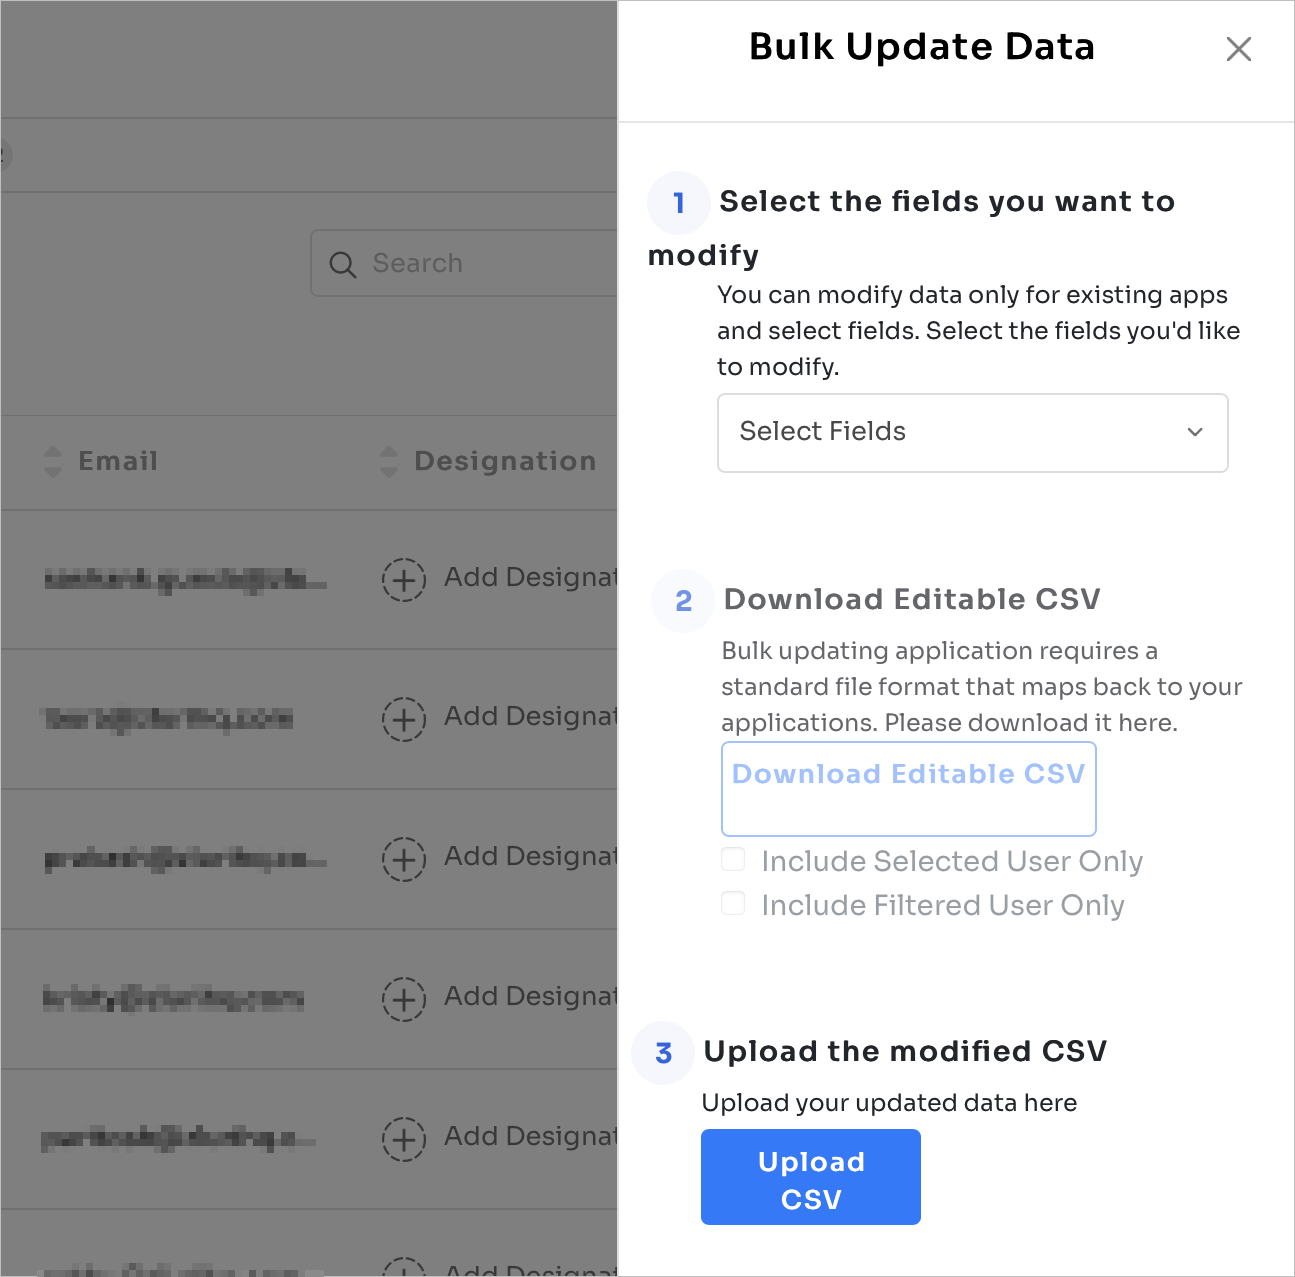
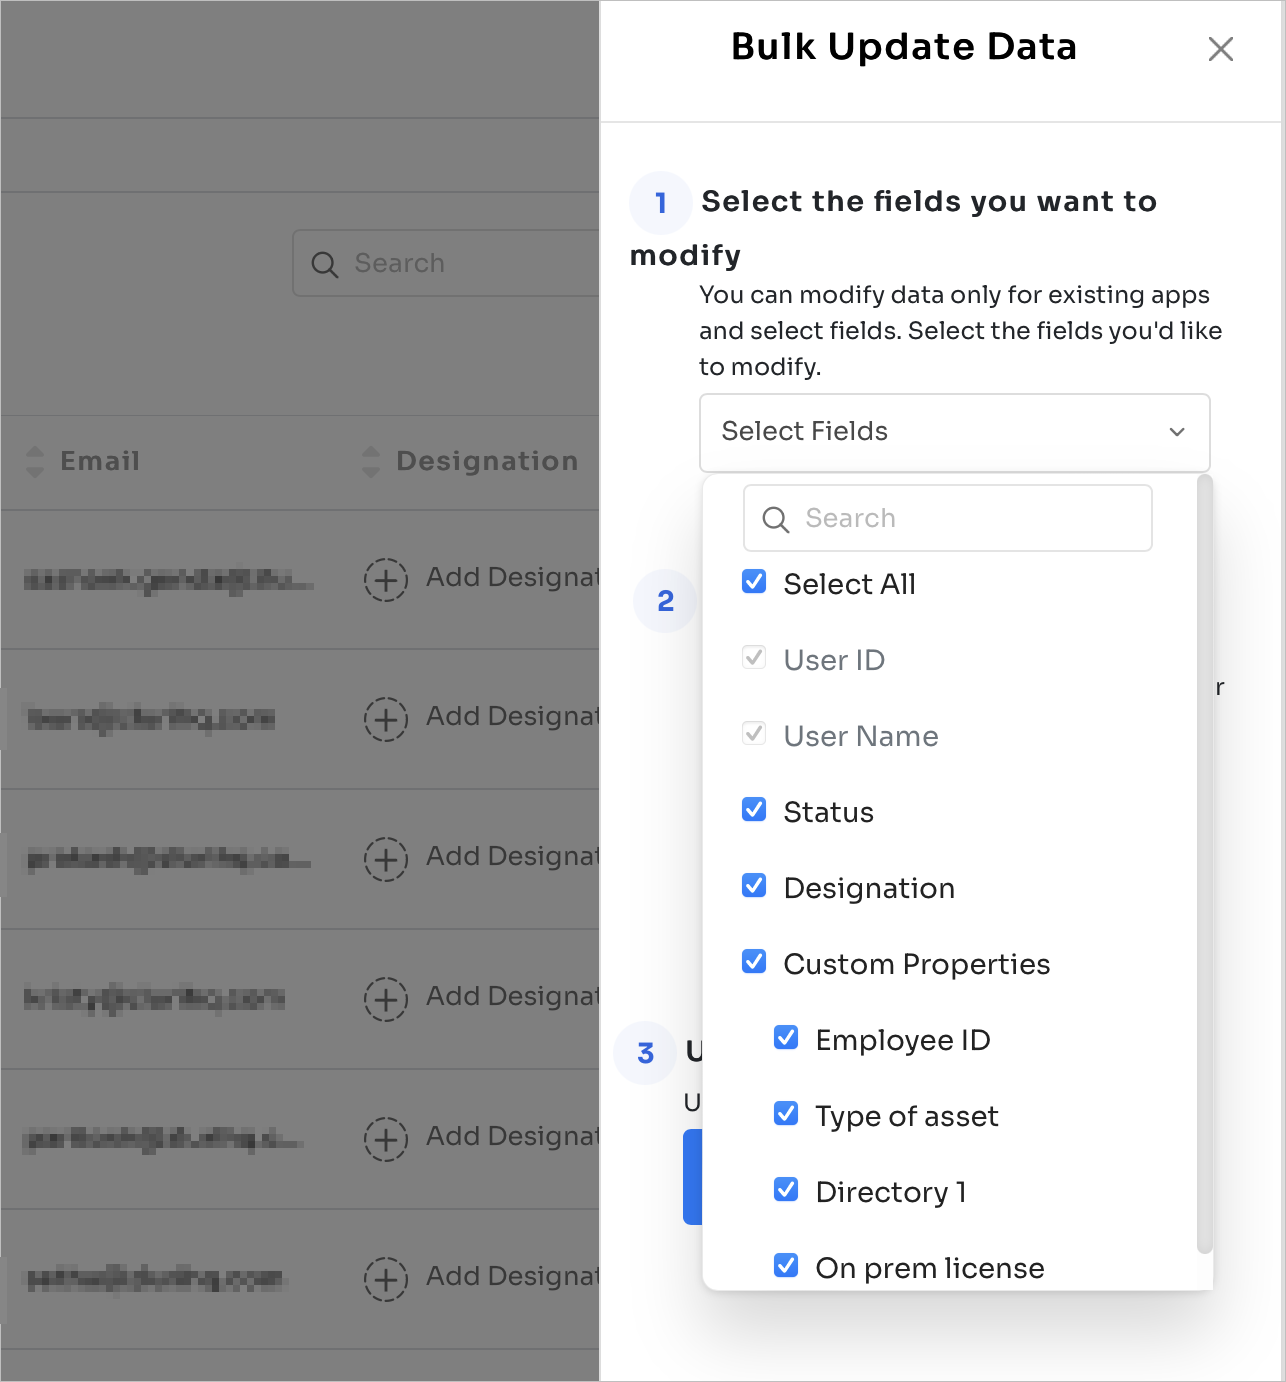
Select the fields you wish to update the data for.
Download the editable CSV.
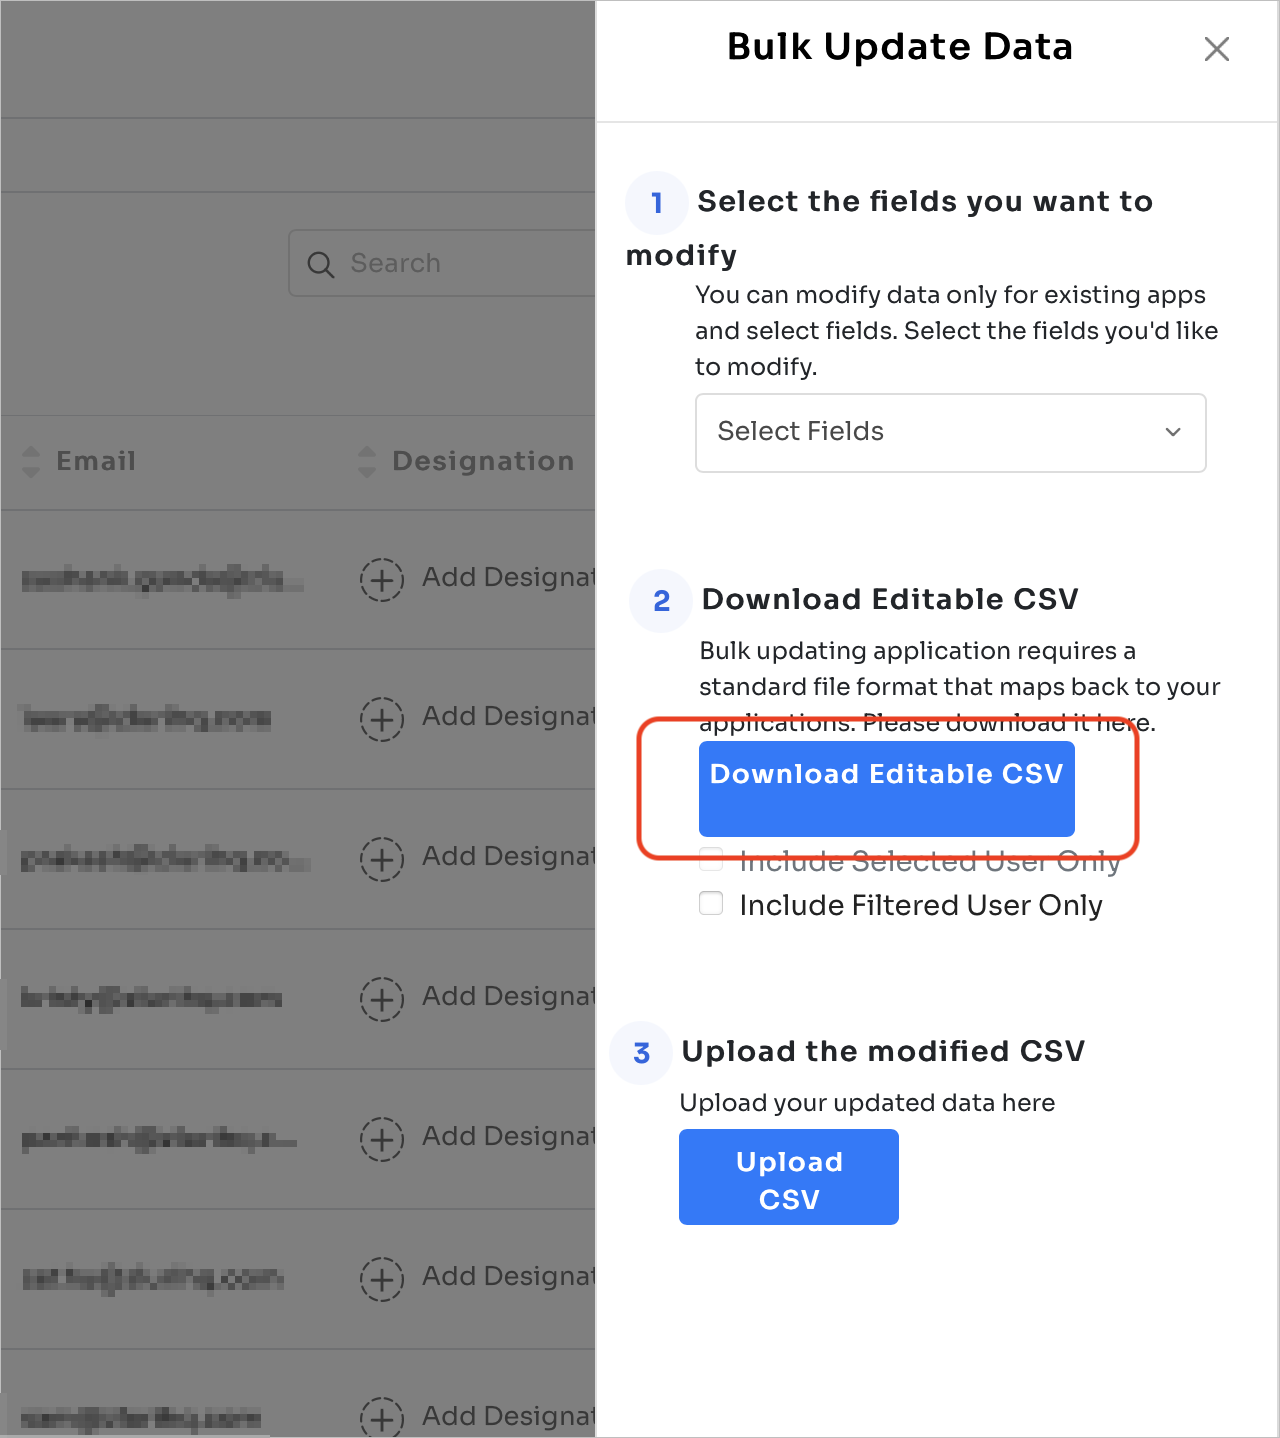
Update the file with new data. & Upload it. We will notify you by email when the upload is complete.
Similarly, you can update values for Users & Departments following the same process.
Please note that you can only update data of existing entities through bulk upload. You can not create new entities.
Updated 5 months ago
