Connect
Connect Calendly to Zluri
Prerequisites
- Owner or Admin privileges in Calendly
Integration steps
Generate personal access token in Calendly
-
Log in to Calendly.
-
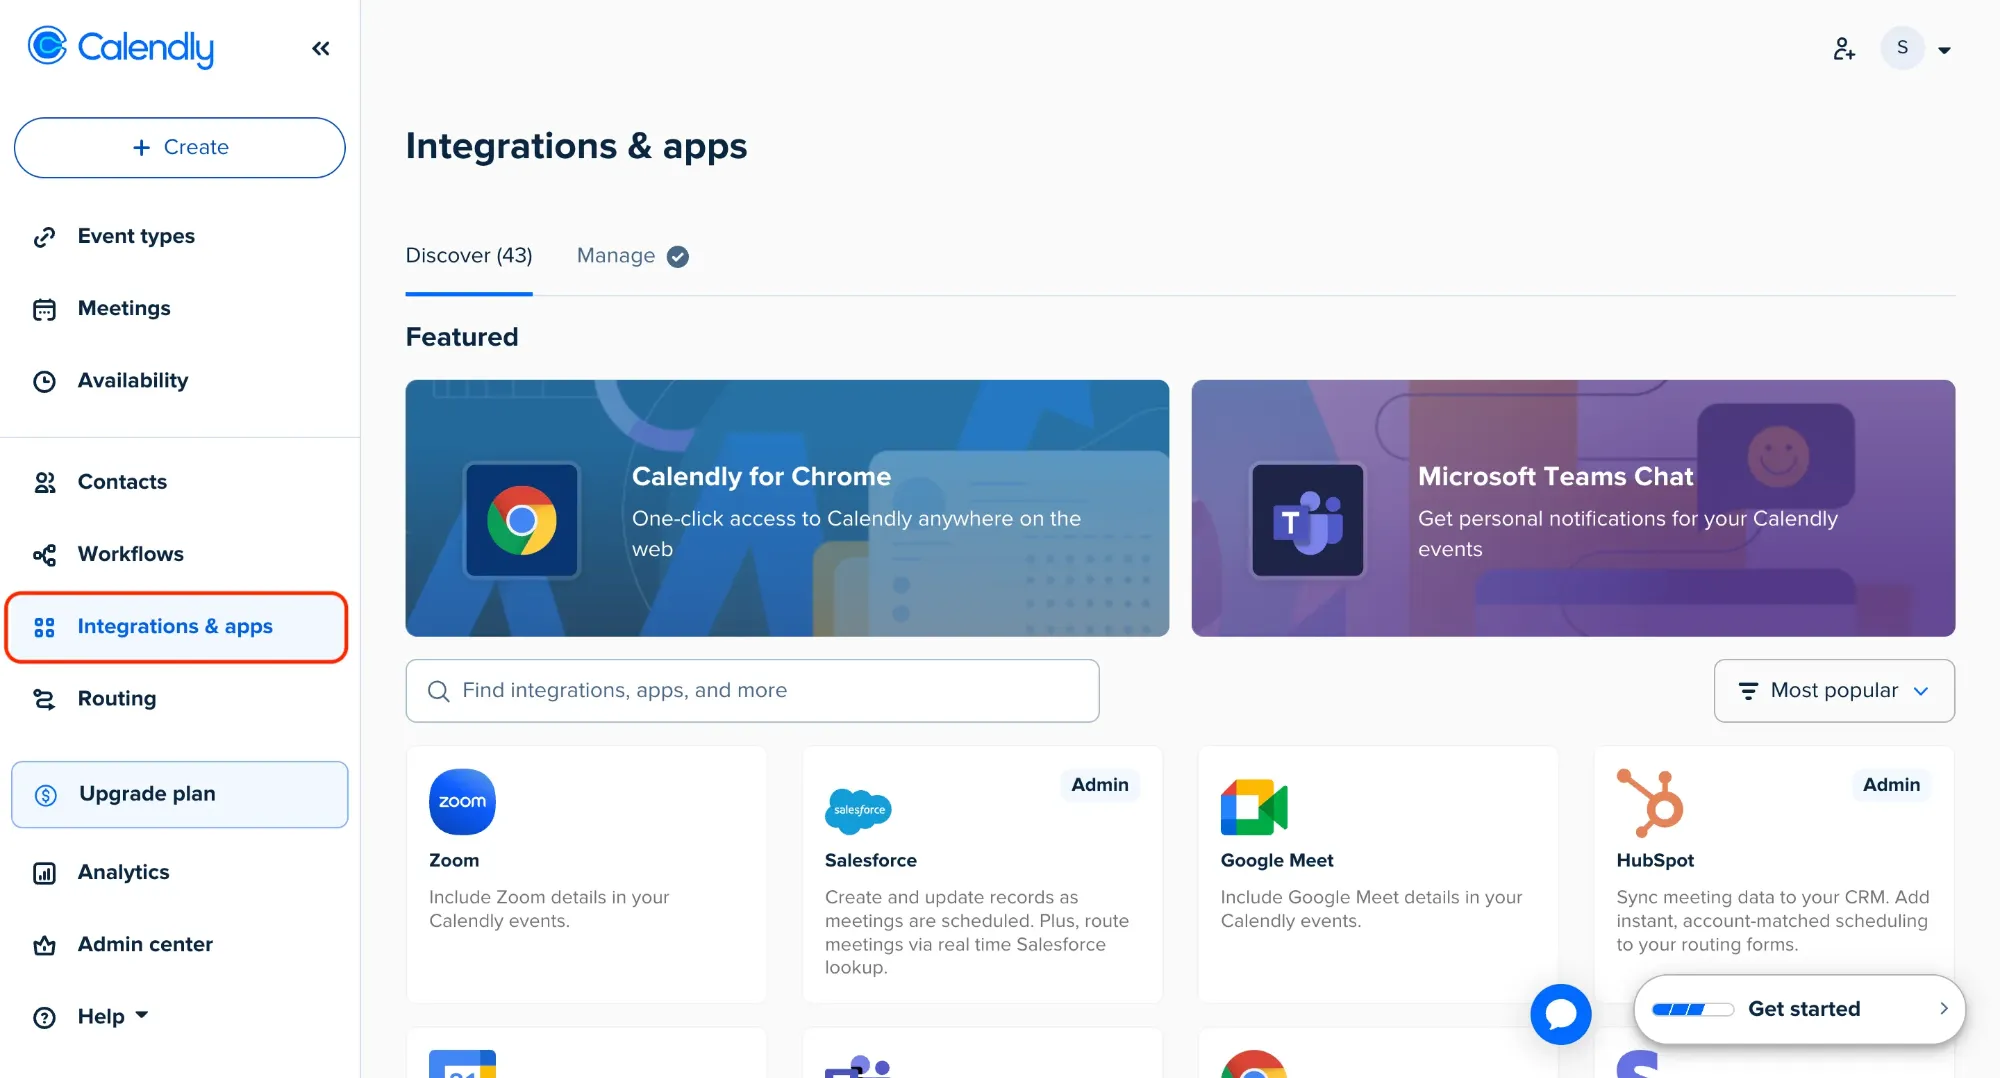
In the left sidebar, click Integration & apps.
-
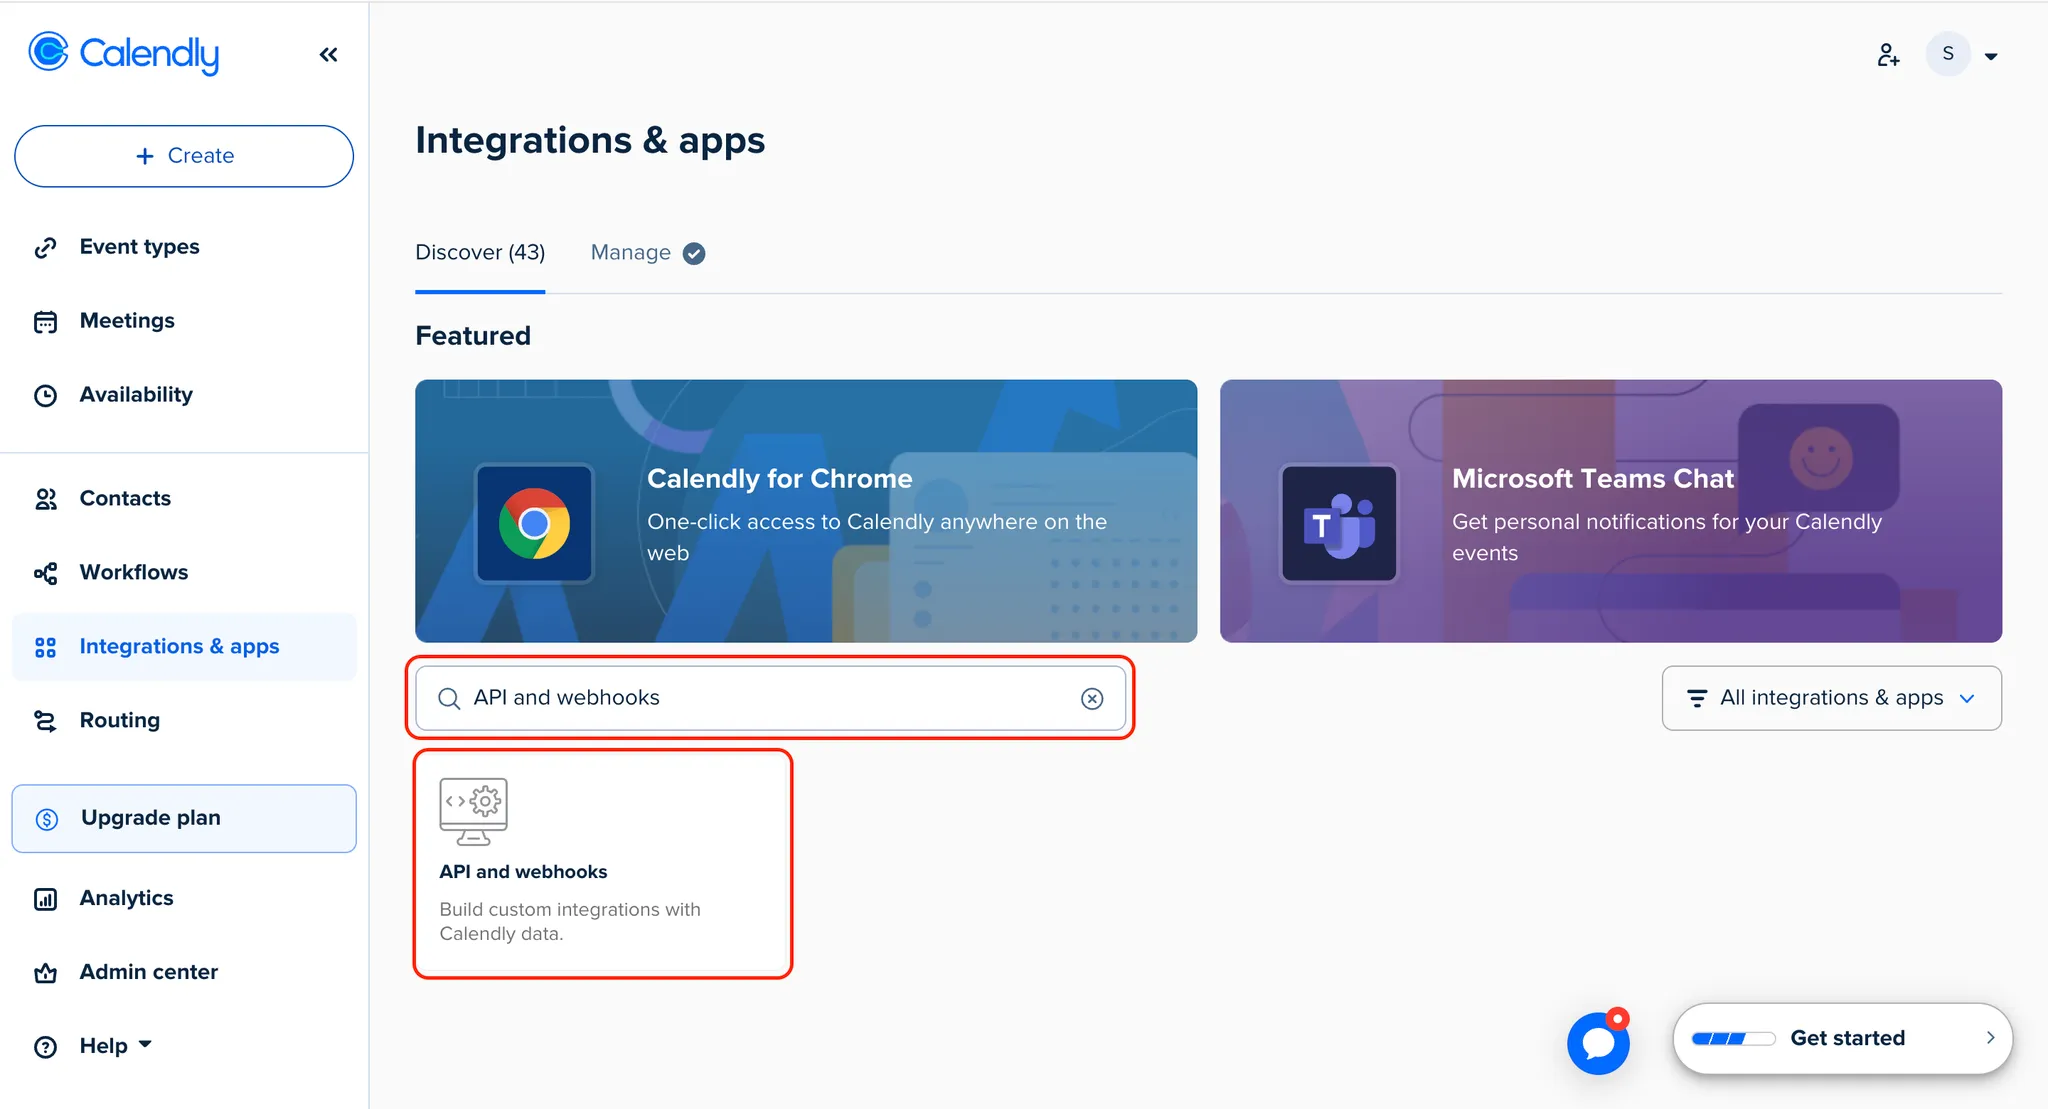
Search for and select API and webhooks.
-
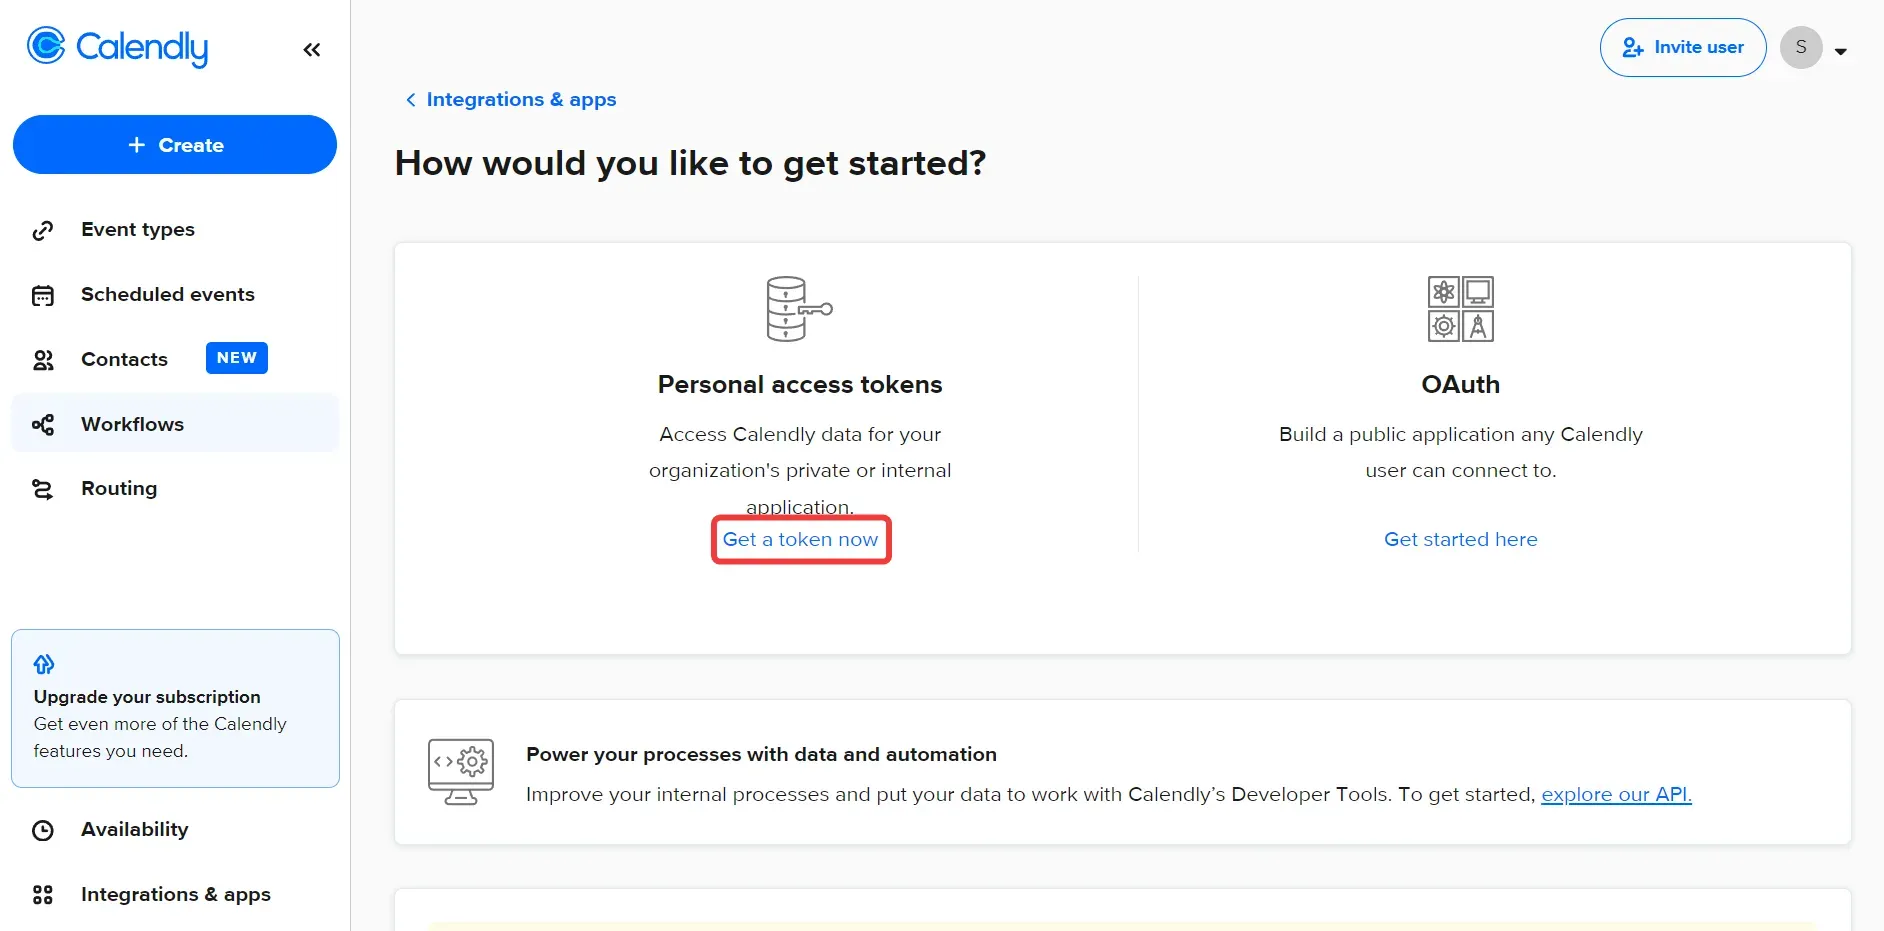
Under Personal access tokens, click Get a token now.
-
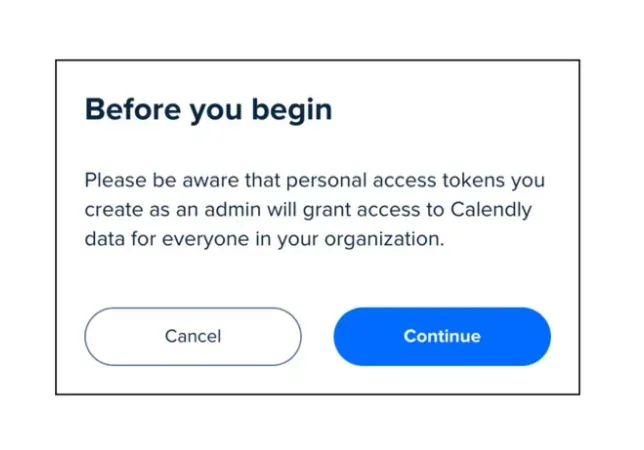
Click Continue on the warning.
-
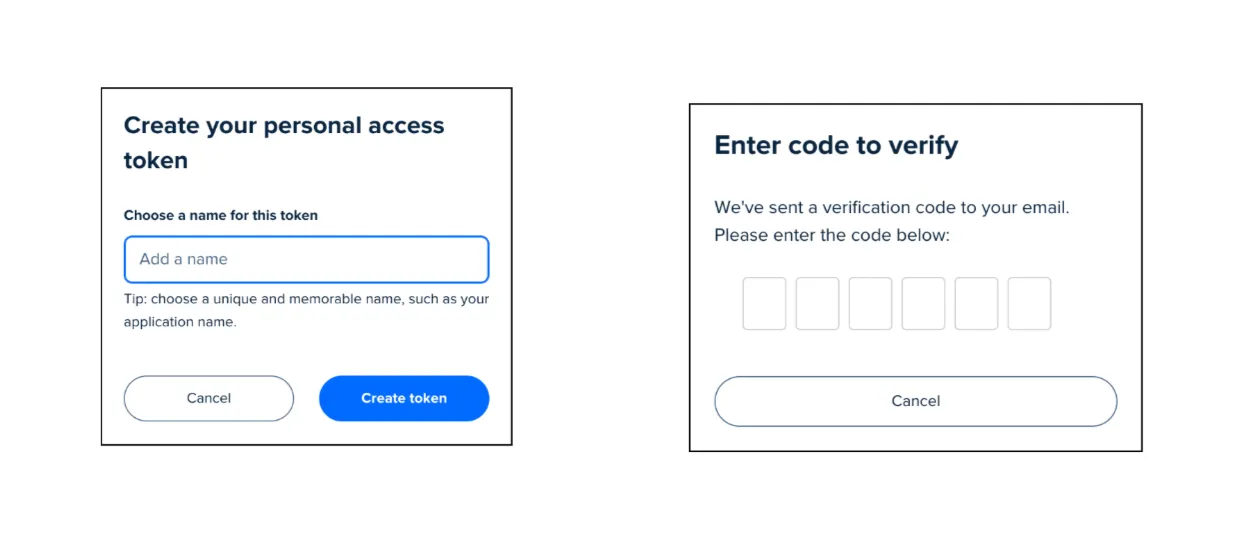
Choose a name for the token, click Create token, and enter the authentication code sent to the email address associated with Calendly.
-
You will now see a popup with the personal access token. Copy and securely save it.
Connect the Calendly instance in Zluri
-
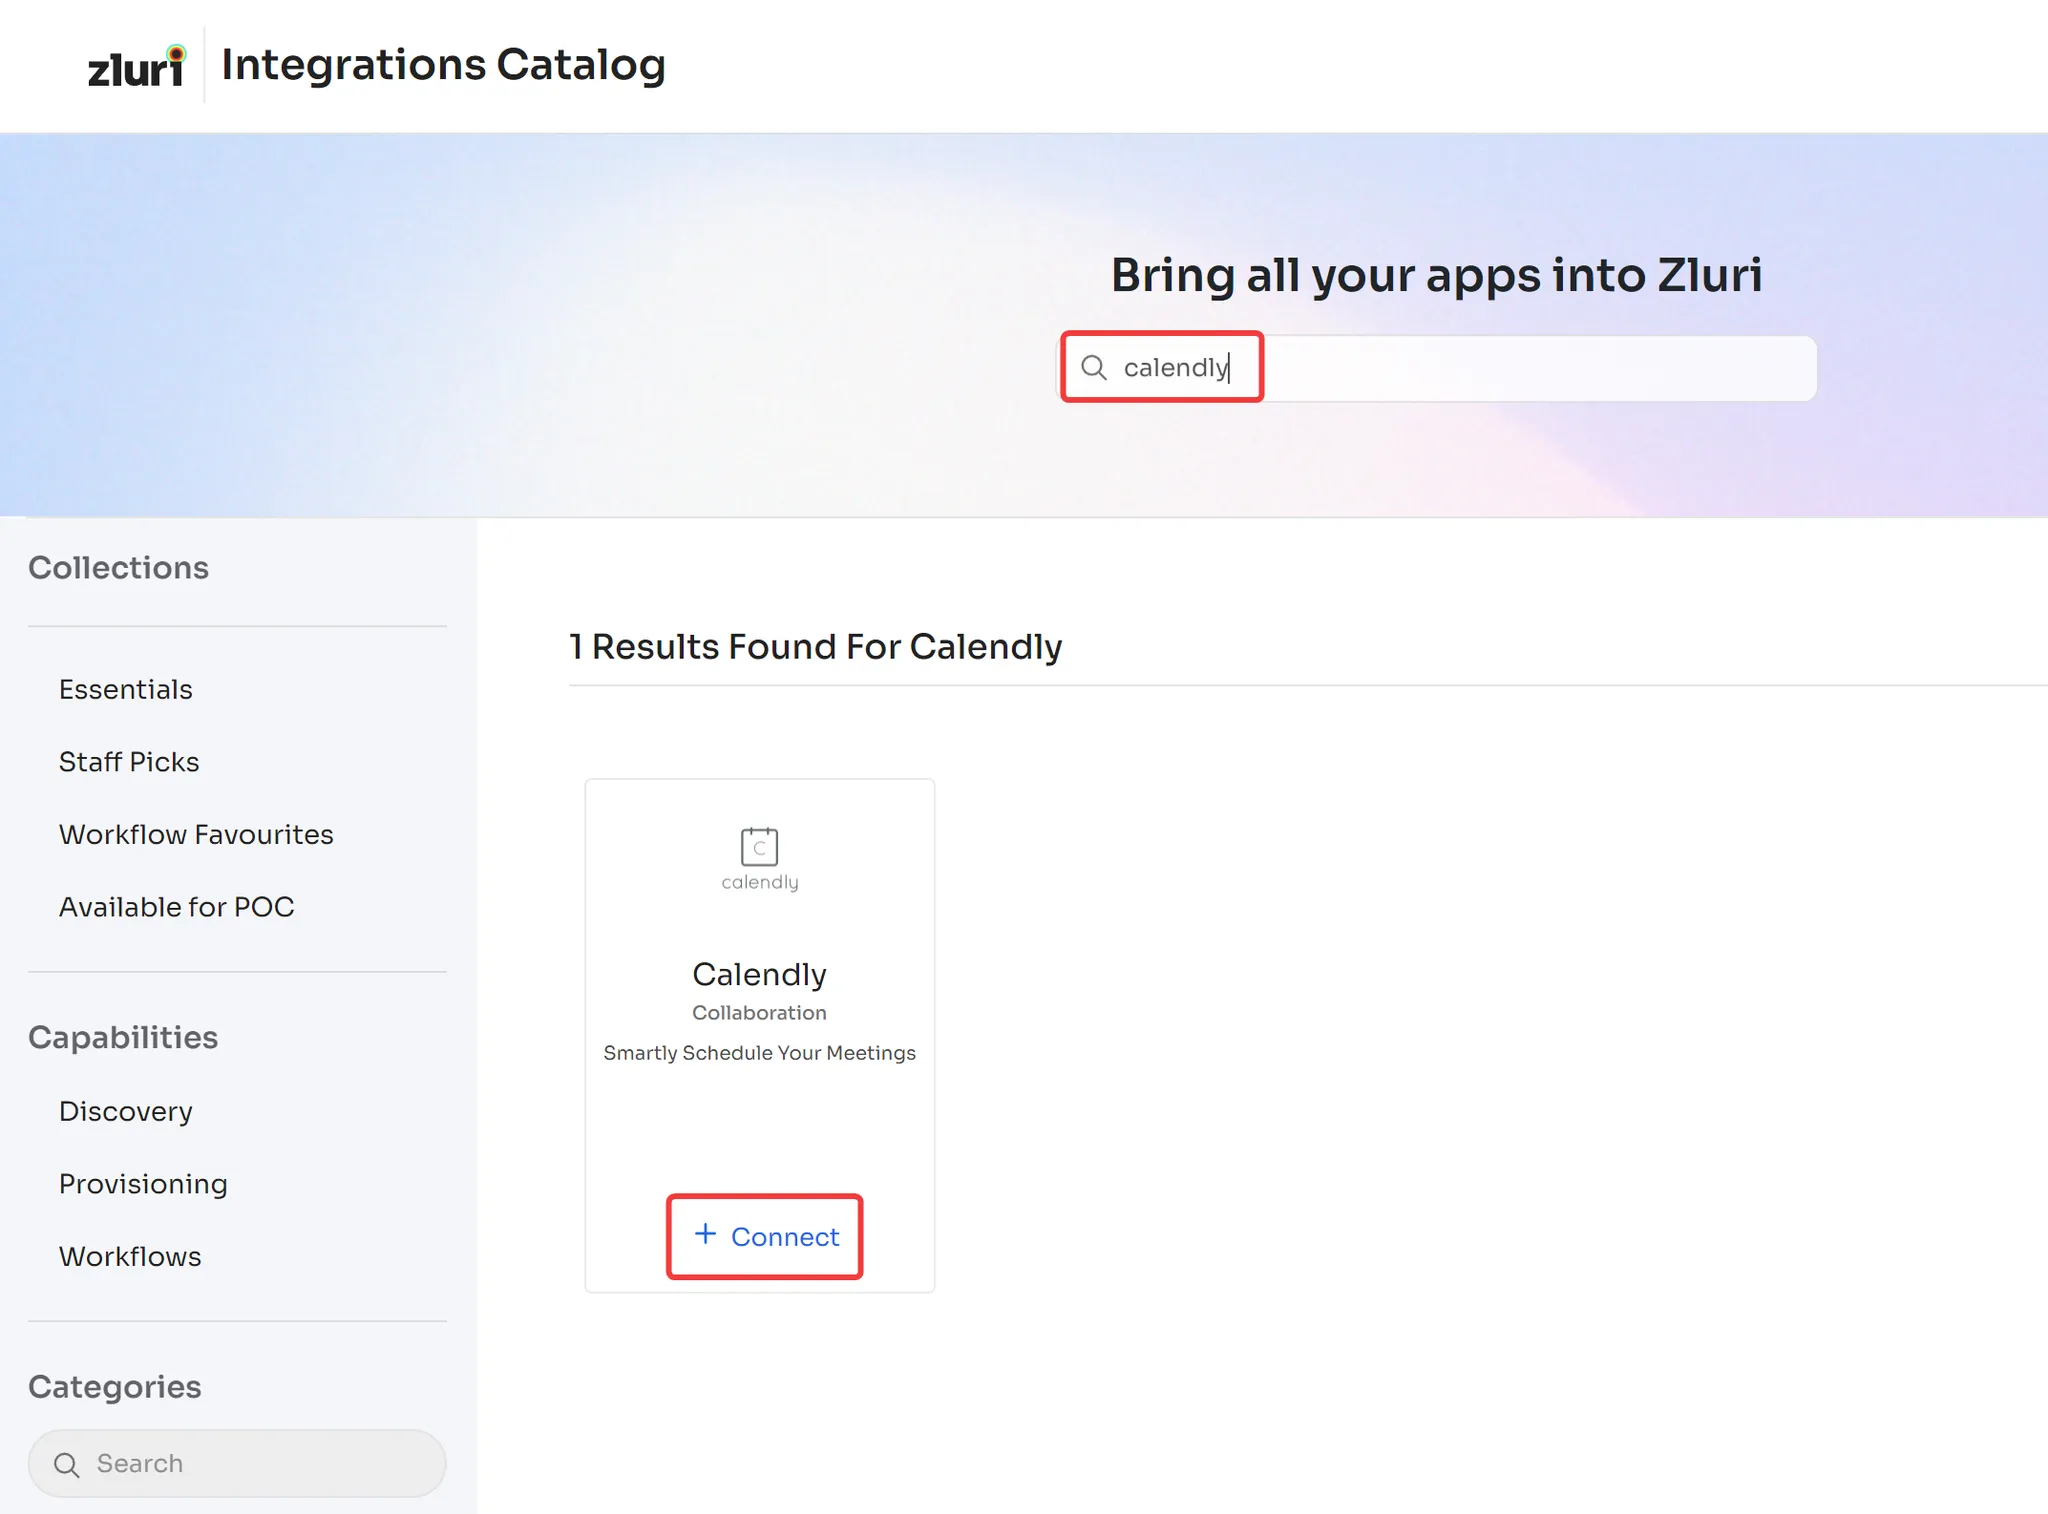
In Zluri, visit the Integrations Catalog. Search for and click ➕ Connect in the Calendly entry.
-
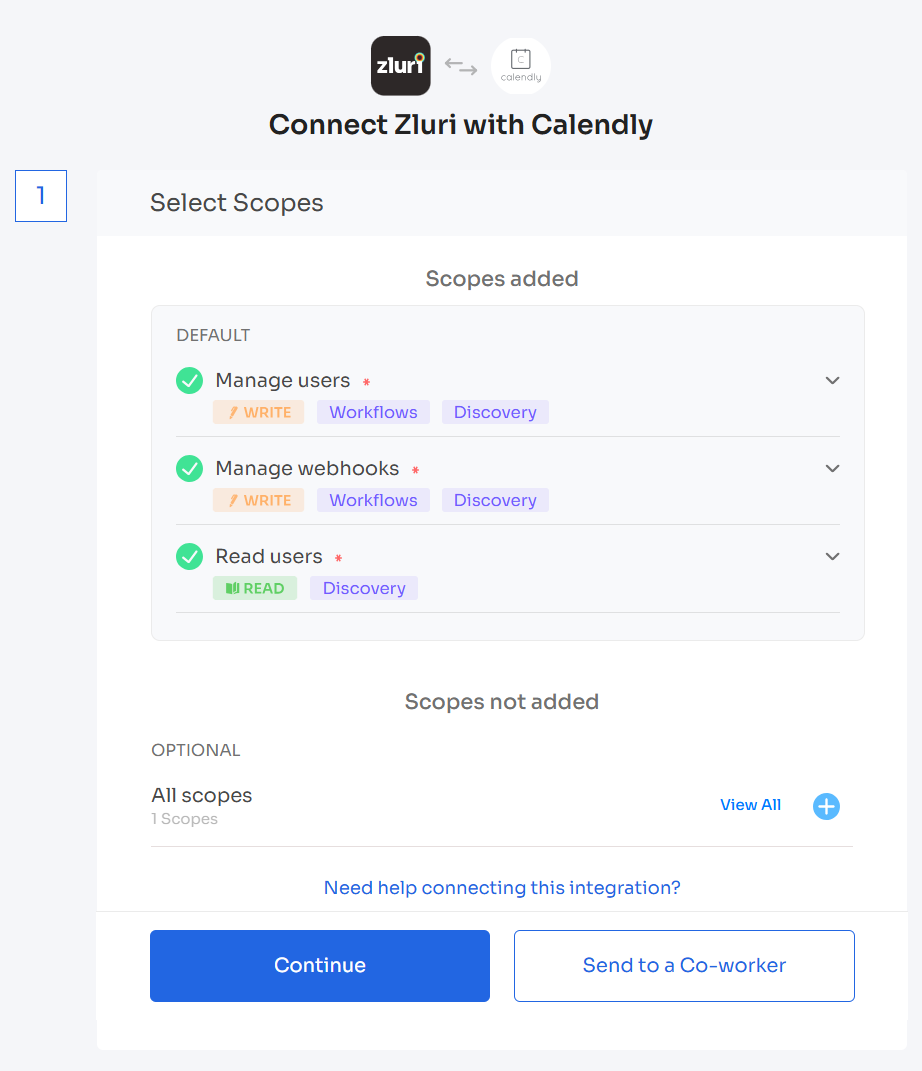
Review the scopes for the integration, and click Continue. You can click the down-arrow button towards the right of a scope to find out what it does.
-
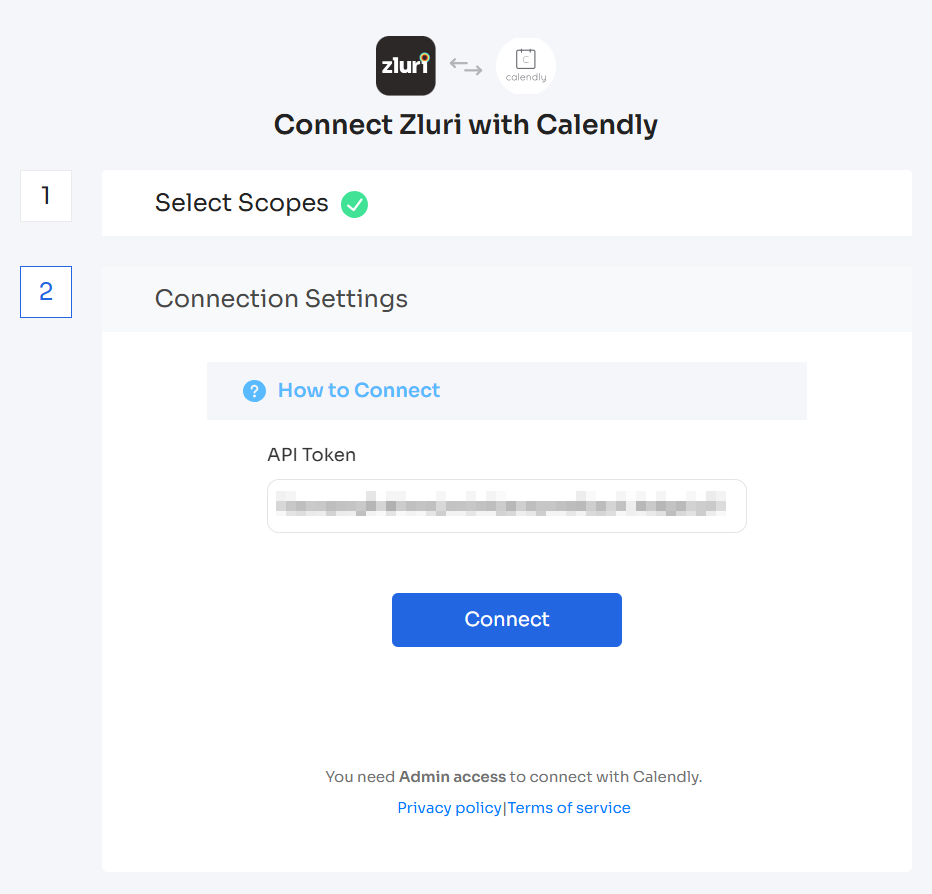
Paste the previously generated personal access token, then click Connect.
-
Click Connect, give the connection a name and description, and you’re ready to go!
Got questions? Feel free to submit a ticket or contact us directly at [email protected].
Updated 6 months ago
