Machine to Machine (Custom Admin Role)
Connect Okta (Machine to Machine) to Zluri using a custom admin role
Machine-to-Machine (M2M) communication in Okta is an authorization method that allows backend services, applications, and/or devices to communicate securely without user intervention.
This is primarily achieved through the Client Credentials Grant flow of OAuth 2.0.
Prerequisites
- Super Admin privileges in Okta
- Okta Developer Edition organization
Integration steps
Create a custom admin role
-
Log in to Okta with a Super Admin account.
-
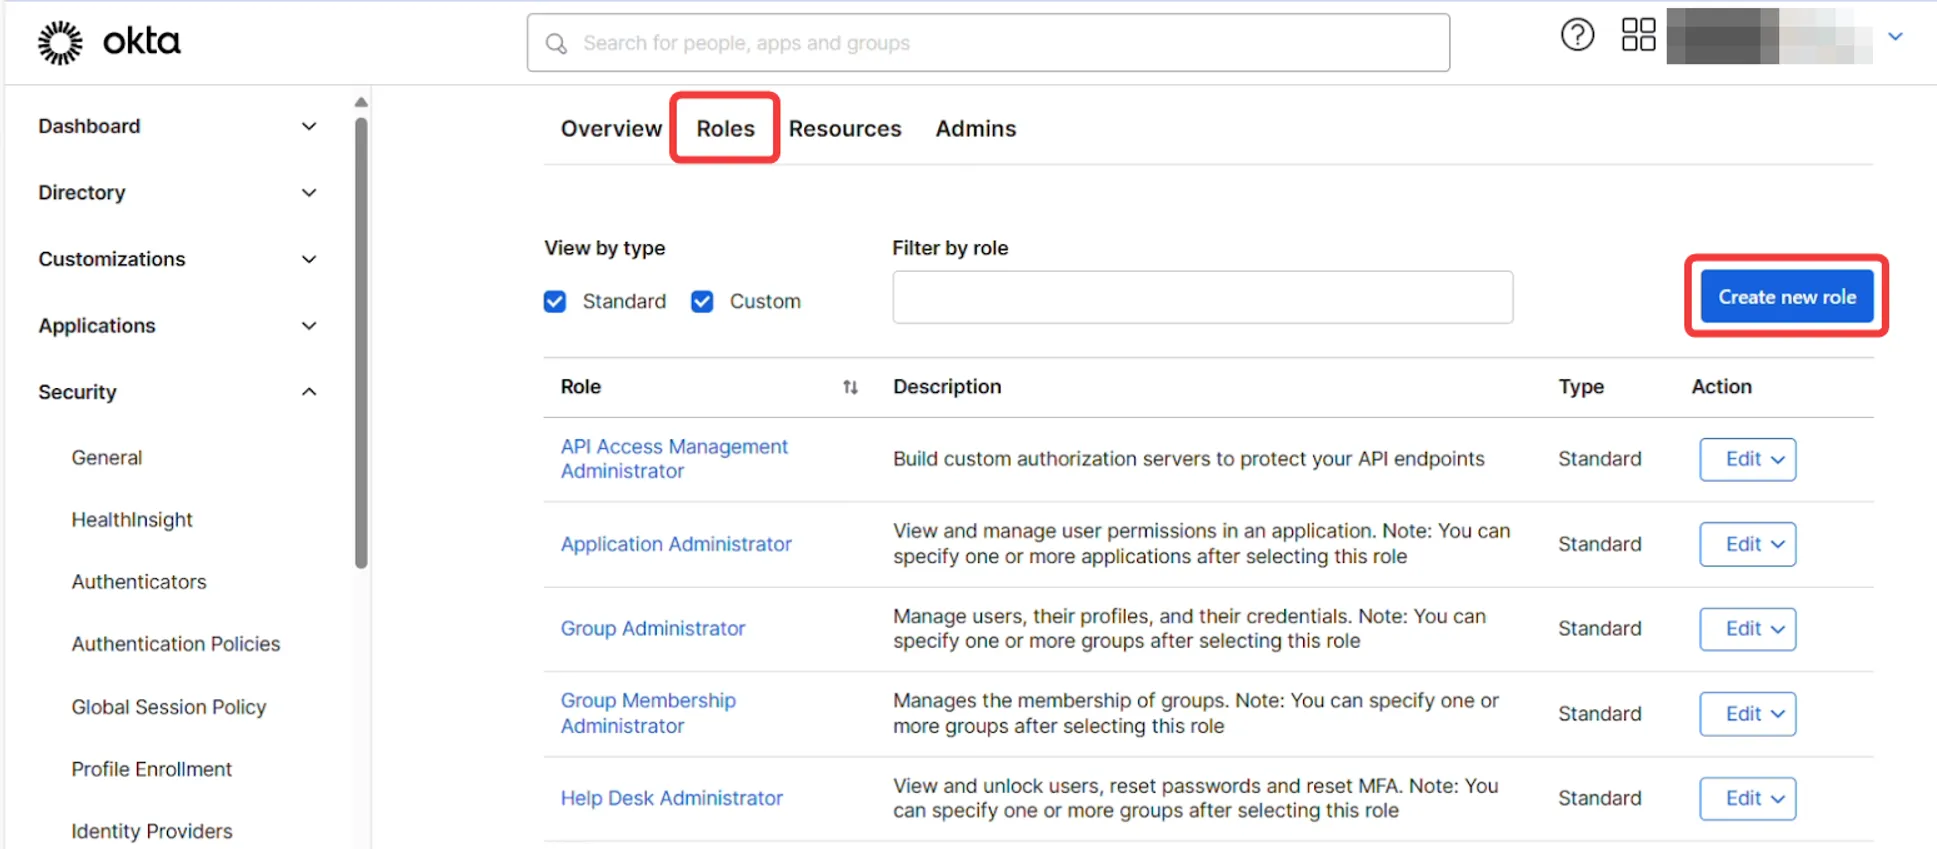
In the admin dashboard, navigate to Security → Administrators, then go to the Roles tab.
-
Click Create new role.
-
Name the role appropriately, considering its purpose or context.
-
Depending on your use case, enable one of the following sets of permissions:
Minimum required privileges
Maximum privileges
- *User**: View users and their details
- *Group**: View groups and their details
- *Identity and Access Management**: View roles, resources, and admin assignments
- *Application**: View application and their details
- *Customizations**: View customizations
- *User**:
- Edit users' lifecycle states
- View users and their details
- Edit users' profile attributes
- Edit users' application assignments
- Create users
- Edit users' group membership
- *Group**: Manage groups
- *Identity and Access Management**: View roles, resources, and admin assignments
- *Application**: Manage applications
- *Customizations**: View customizations
Generate a new resource set
-
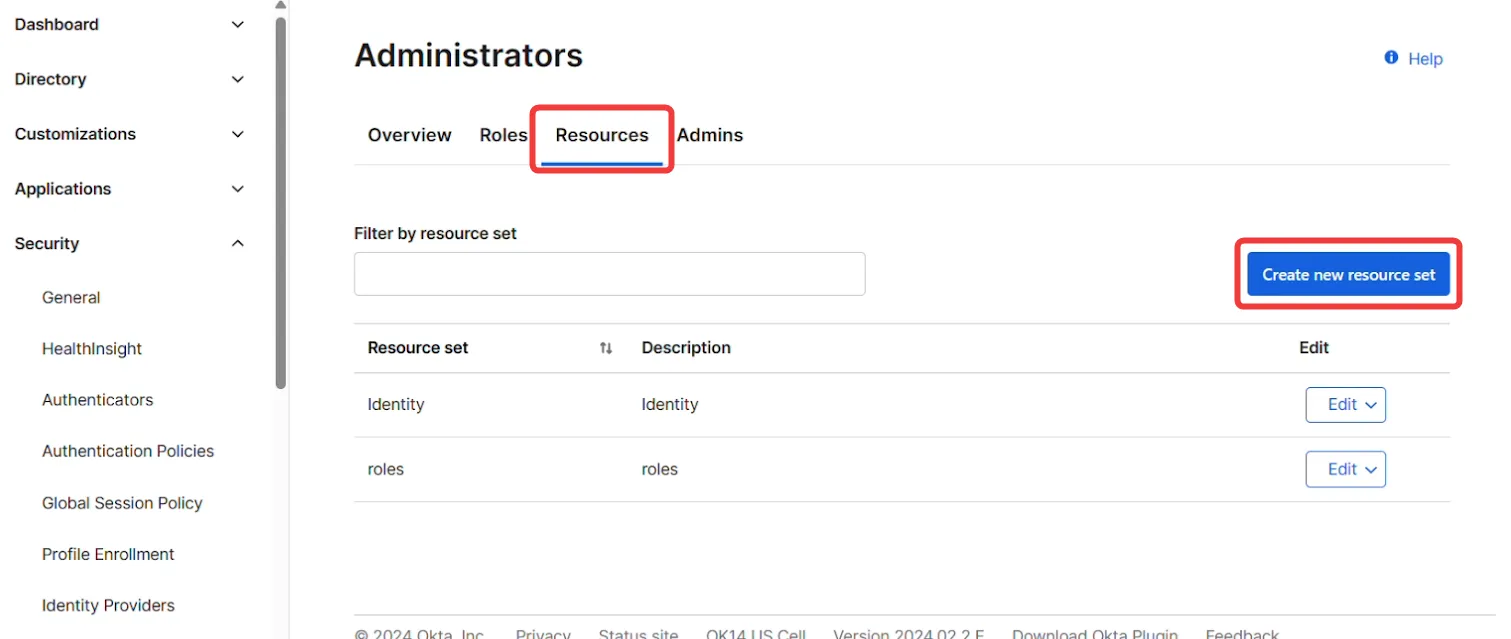
In the admin dashboard, navigate to Security → Administrators, then go to the Resources tab. Then, click Create new resource set.
-
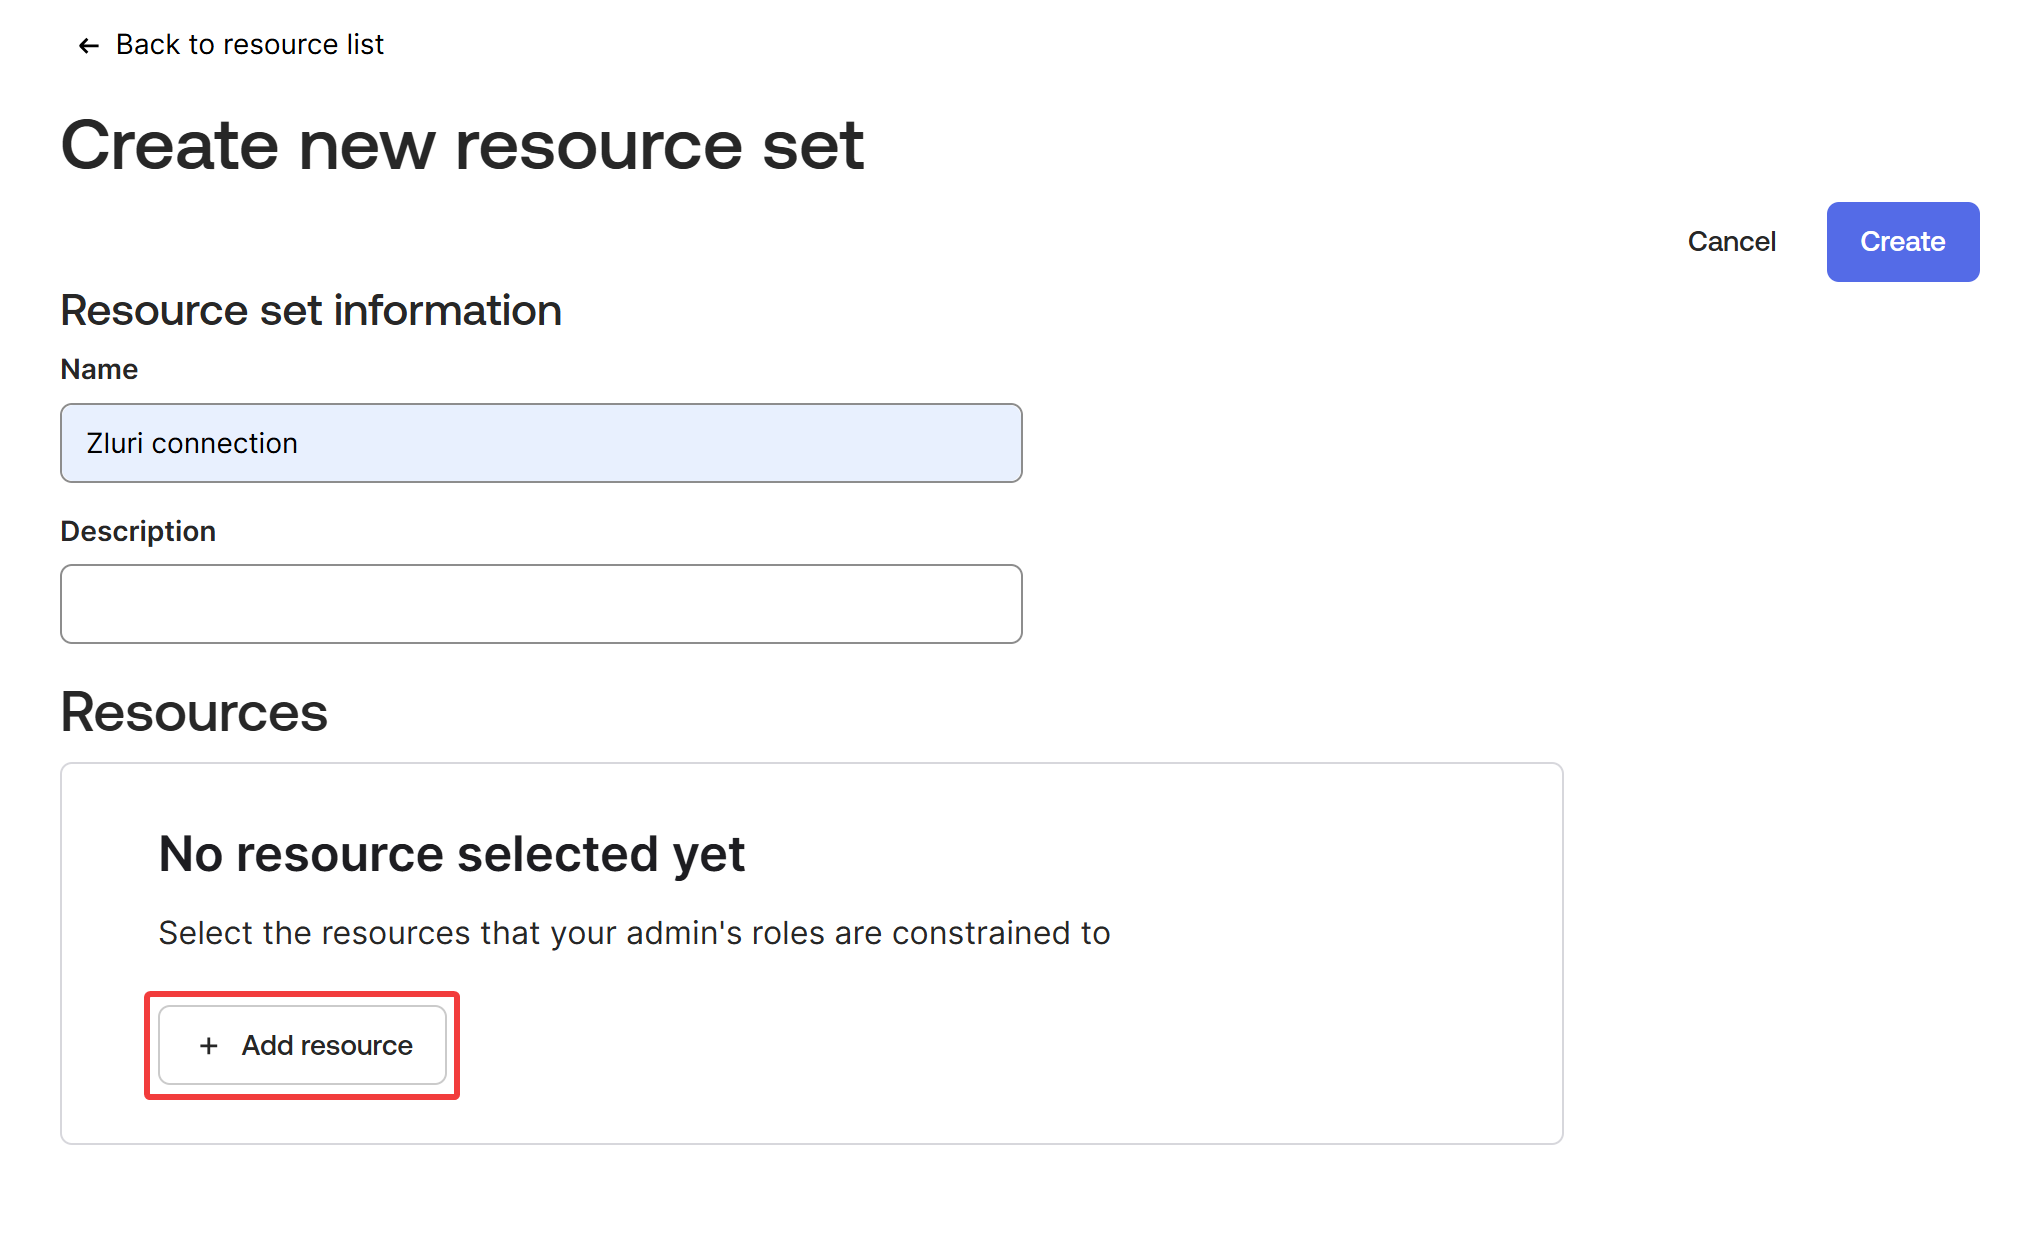
Enter a name for the resource set information and click ➕ Add resource.
-
On the Add Resource pop-up, select Groups → All groups, then click Save selection.
If you wish to do this for specific groups instead of all, click Select groups instead of All groups. See this section to learn more.
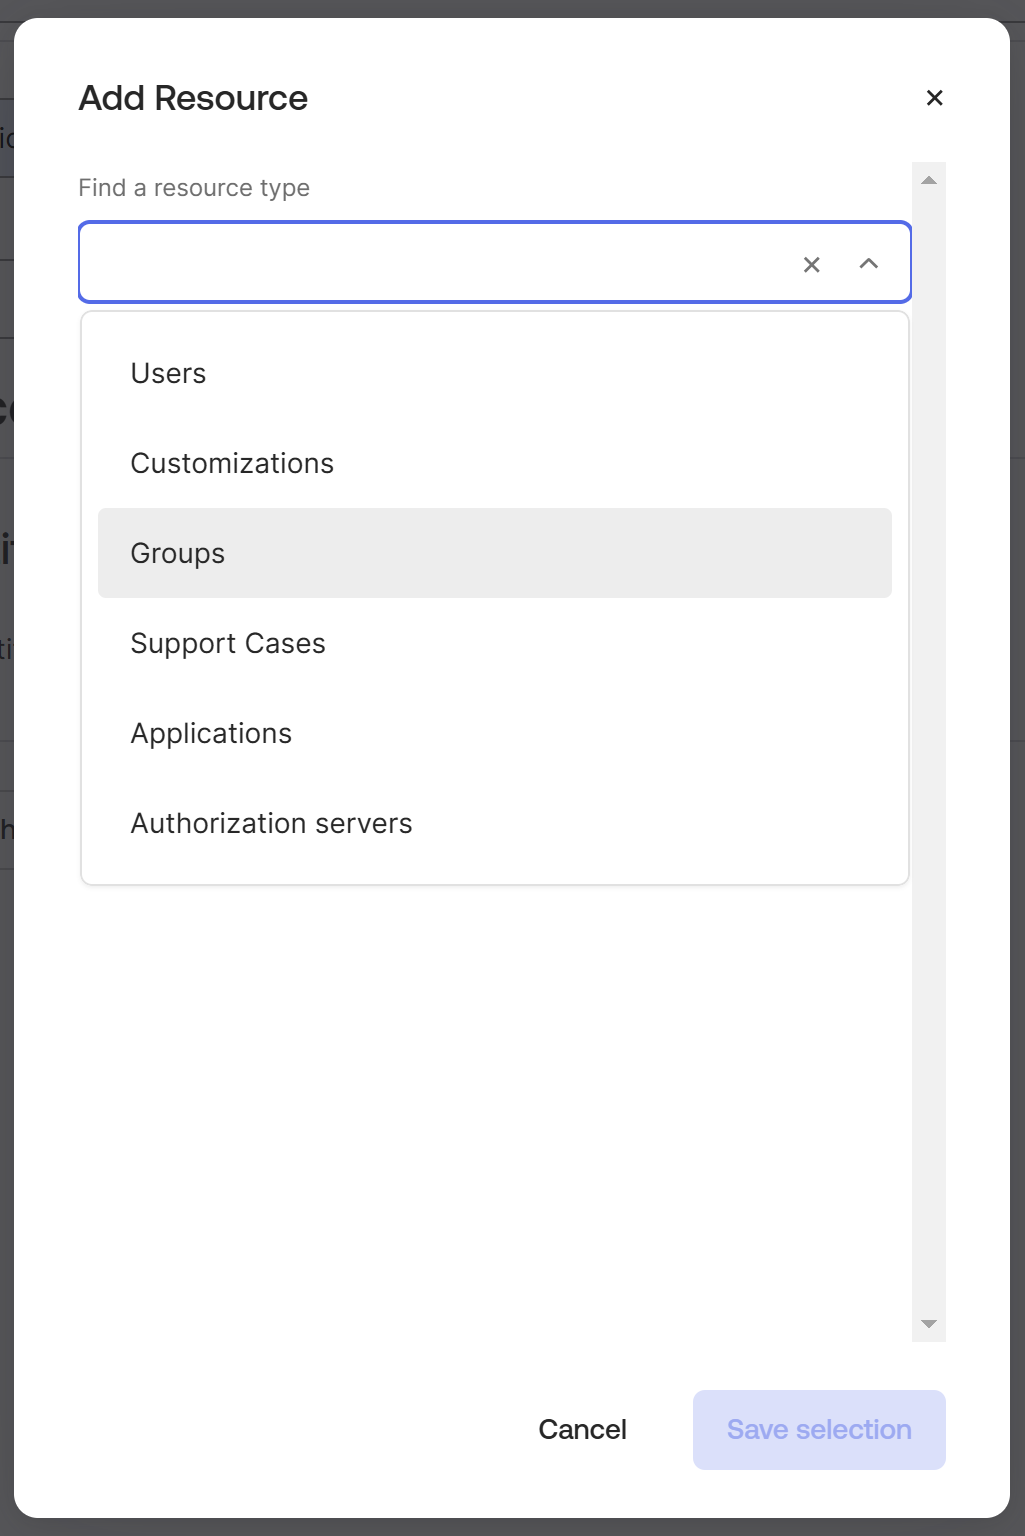
- Repeat the process for Users, Group , Applications, Identity and Access Management, and Customizations.
- Click Create to generate the new resource set.
(Optional) Grant access only to specific groups and/or users
If you don't wish to grant access to all groups, follow these steps:
- On the Add Resource pop-up, select Groups.
If you wish to do this for users instead of groups, select Users here
-
Click on Select groups, search for and select the group you wish to grant access to (
IT teamin this case). Click Save selection.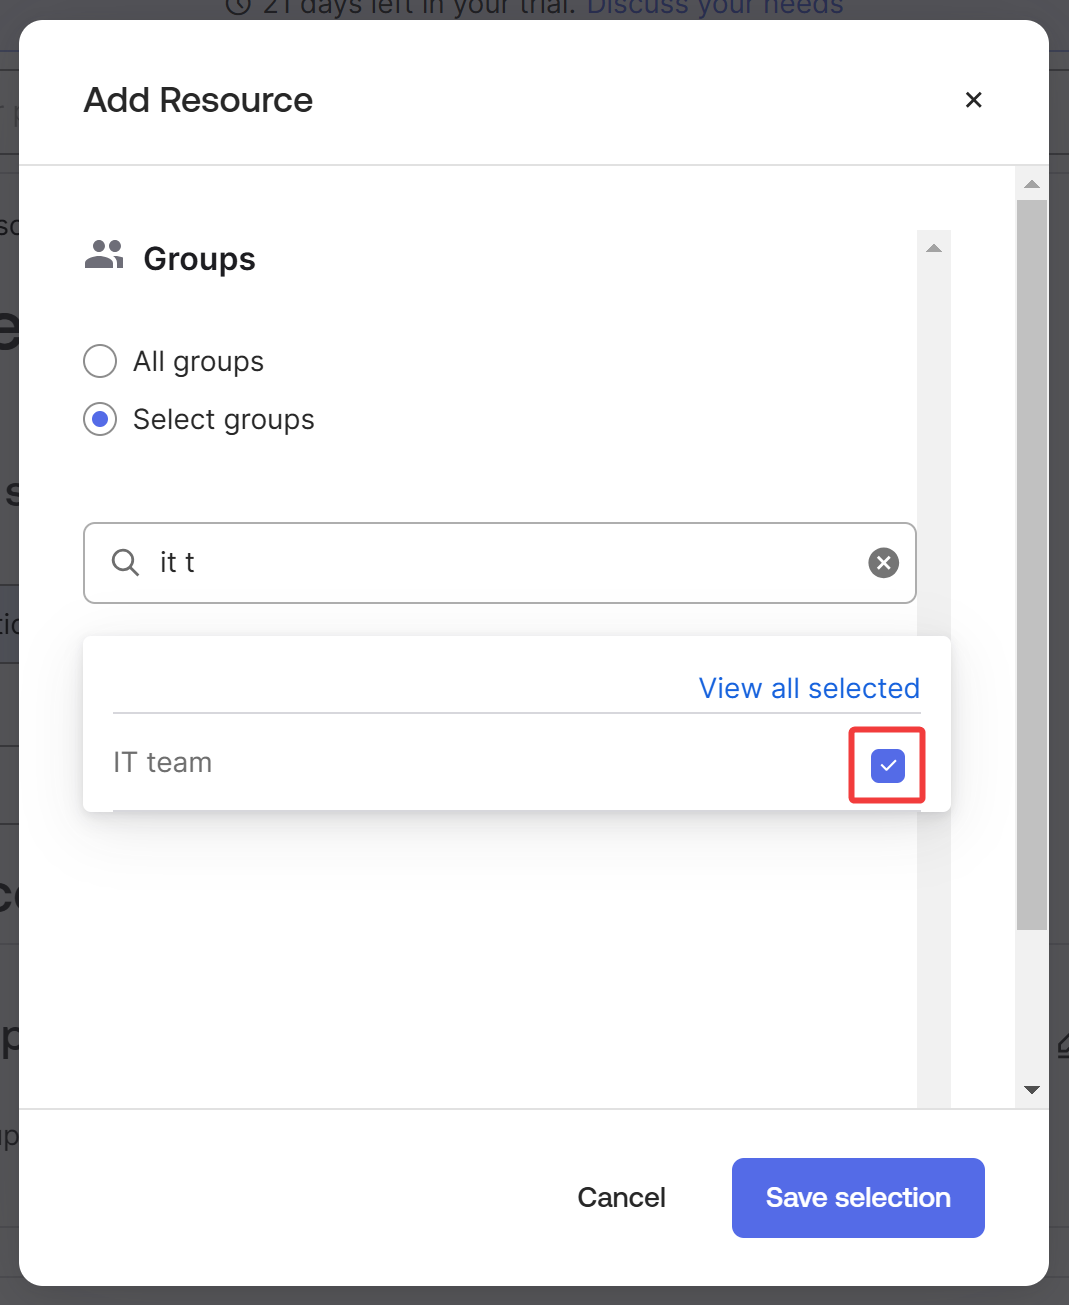
Create an Okta service app integration
-
Log in to Okta with a Super Admin account.
-
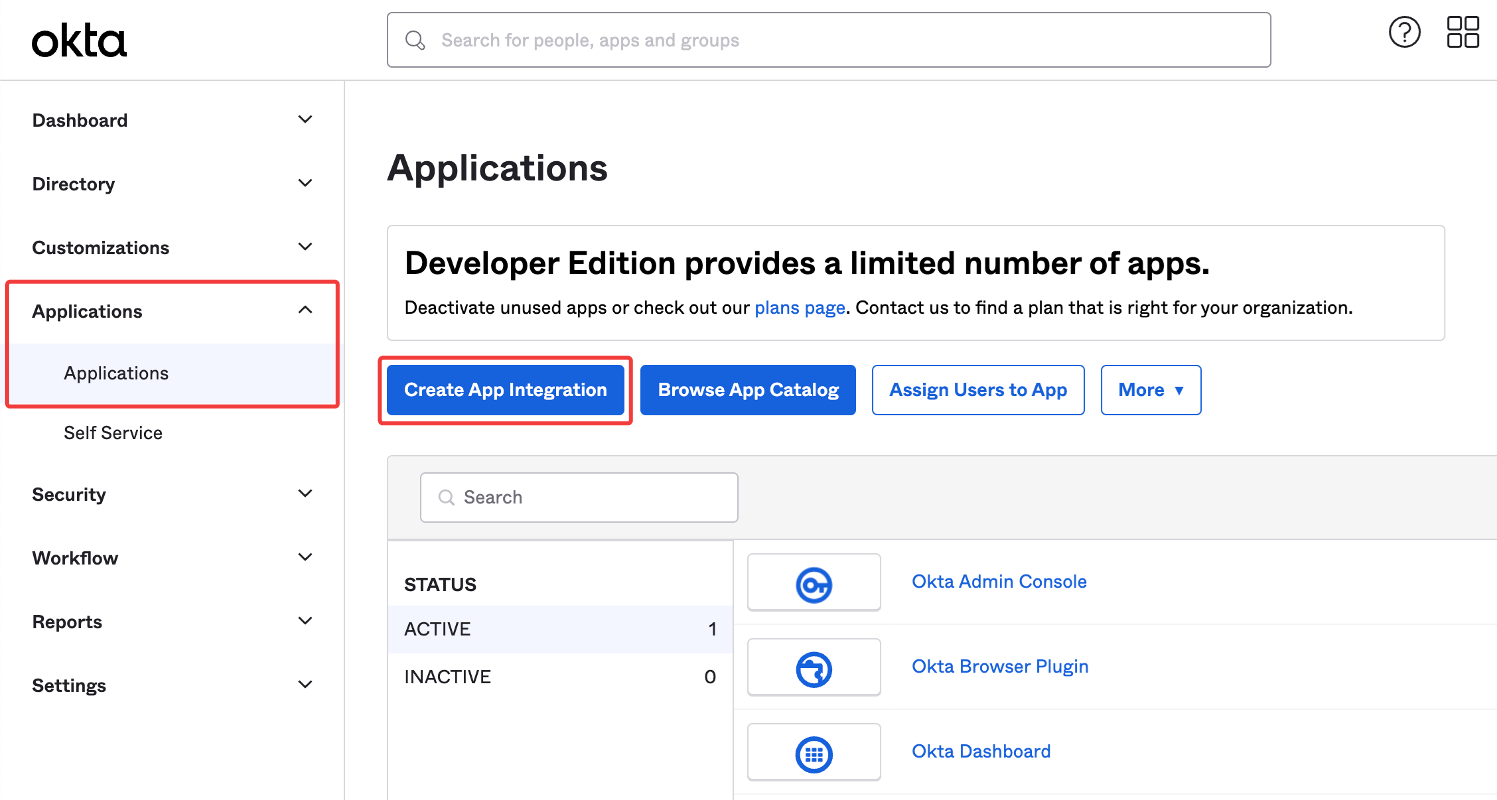
In the Admin Console, go to Applications → Applications, and then click Create App Integration.
-
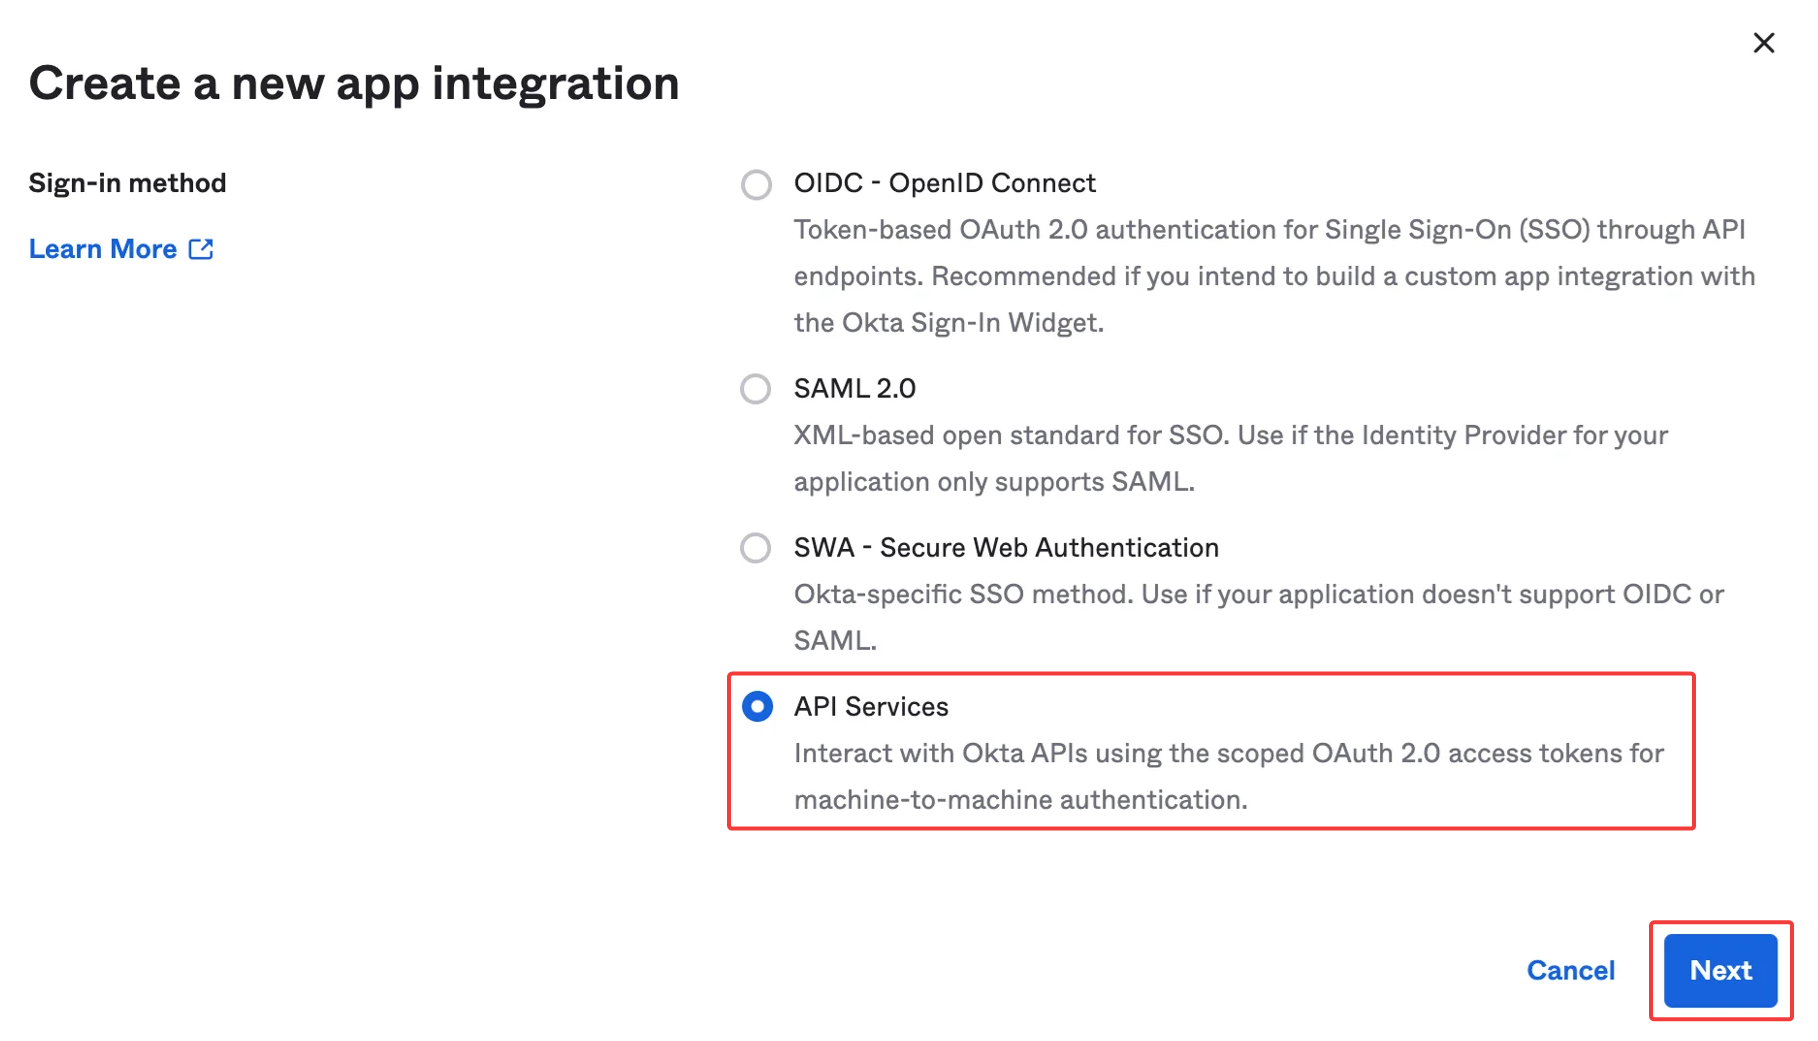
Under Sign-in method, select API Services, then click Next.
-
Enter a name for your app integration and click Save.
-
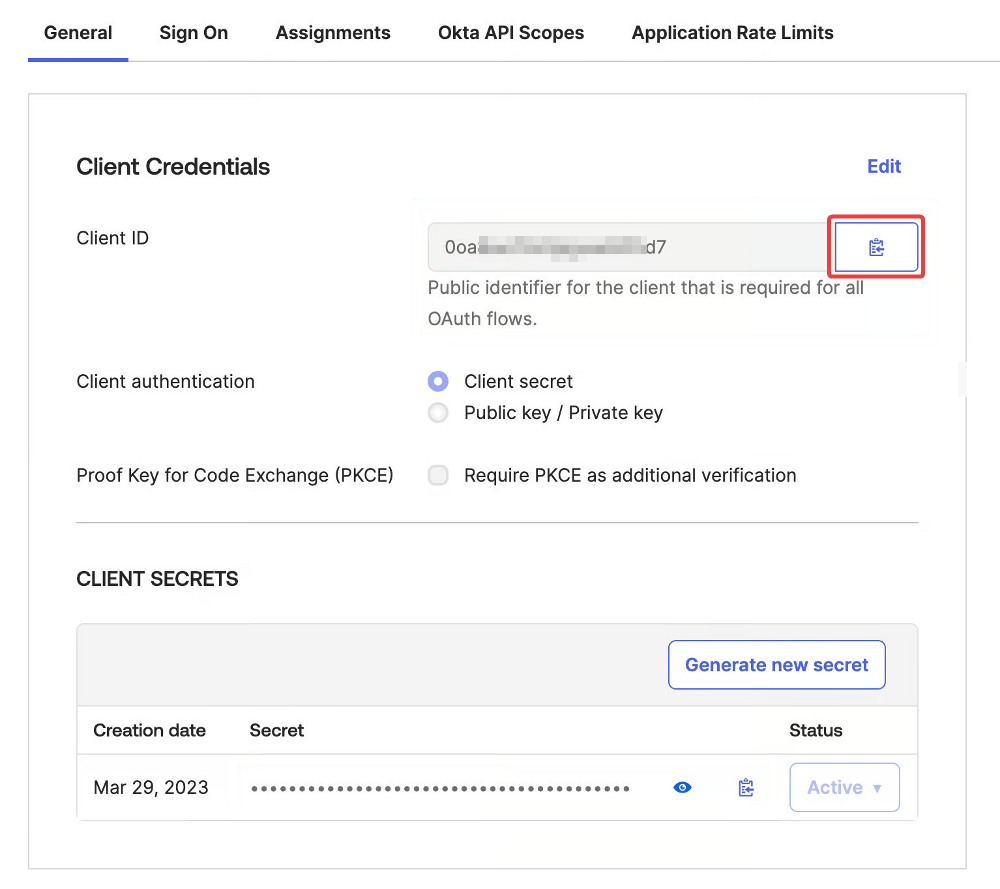
Copy the Client ID and store it securely. We'll use it in the final phase of the integration.
Generate a public and private key pair
-
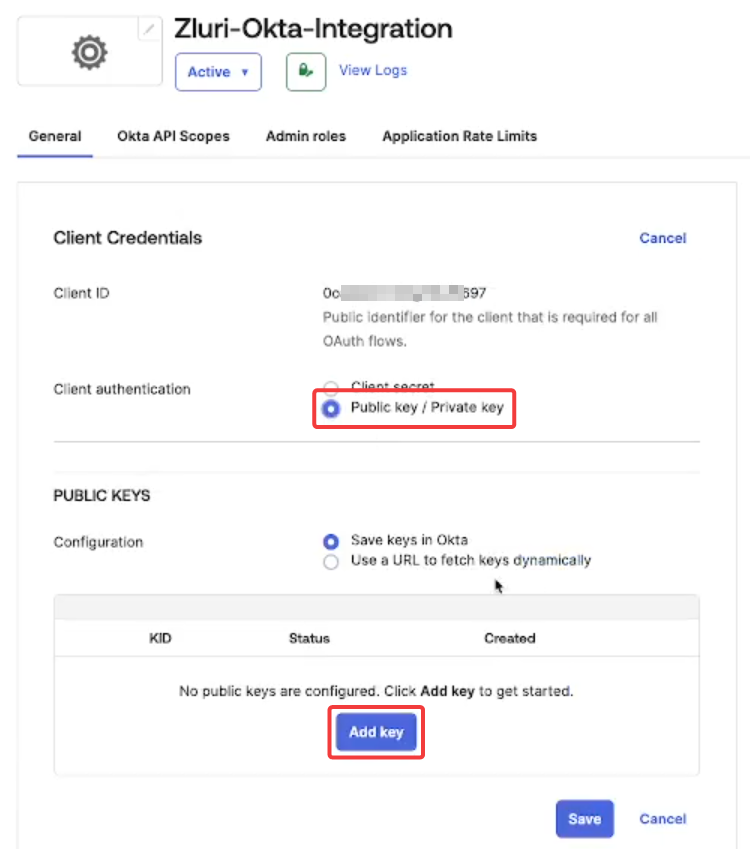
Under Client authentication, select Public key / Private key, then click Add key.
-
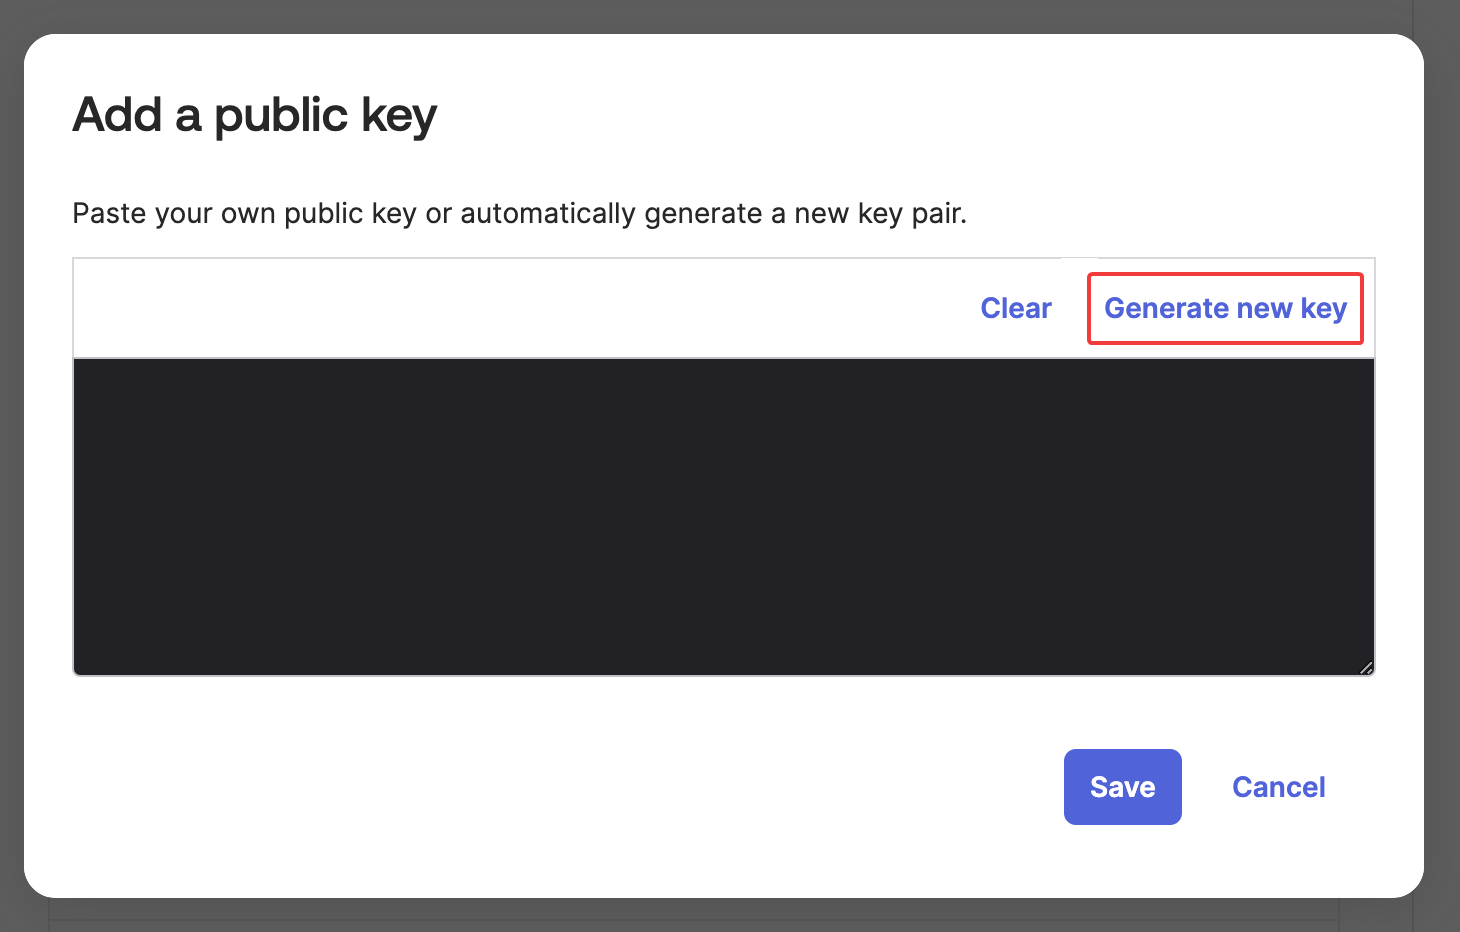
Click Generate new key.
-
Copy and securely save the values of **
e,kid,**and **n**without the quotes (") and commas at the end. -
Under the Private key section, click on PEM, then Copy to clipboard and securely save the key. Click Done.

-
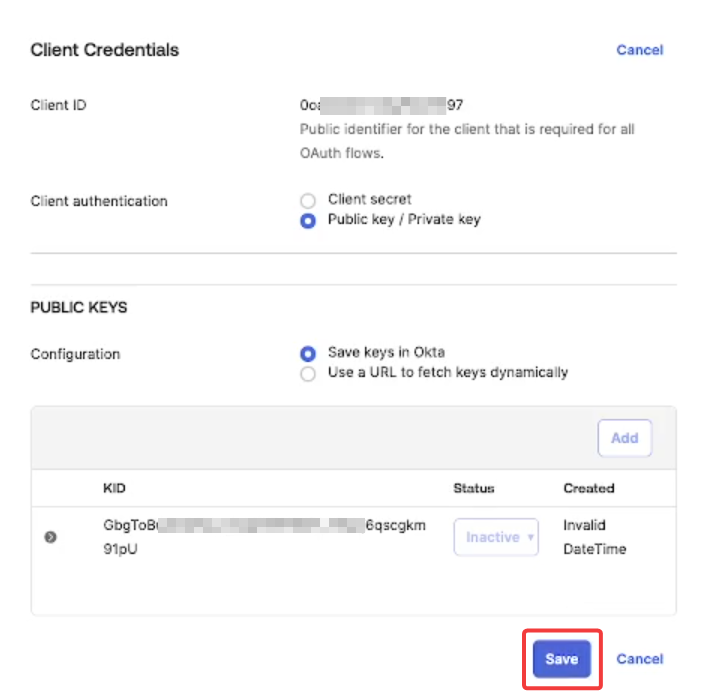
Click Save.
-
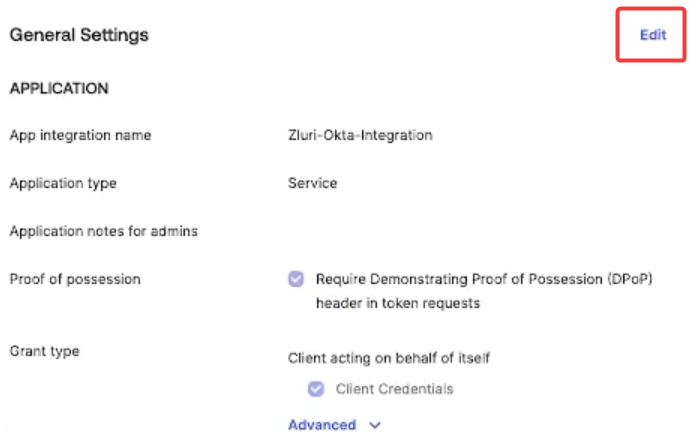
Click Edit under General Settings.
Grant scopes and privileges
-
In the Okta API Scopes tab, grant the following scopes:
okta.users.readokta.groups.readokta.apps.readokta.logs.readokta.roles.readokta.domains.read\
Optional scopes for WorkflowsIf you wish to use Workflows with Okta, grant the following scopes in addition to the ones above:
-
okta.apps.manage -
okta.groups.manage -
okta.linkedObjects.manage -
okta.linkedObjects.read -
okta.orgs.manage -
okta.roles.manage -
okta.schemas.read -
okta.userTypes.manage -
okta.userTypes.read -
okta.users.manage
-
-
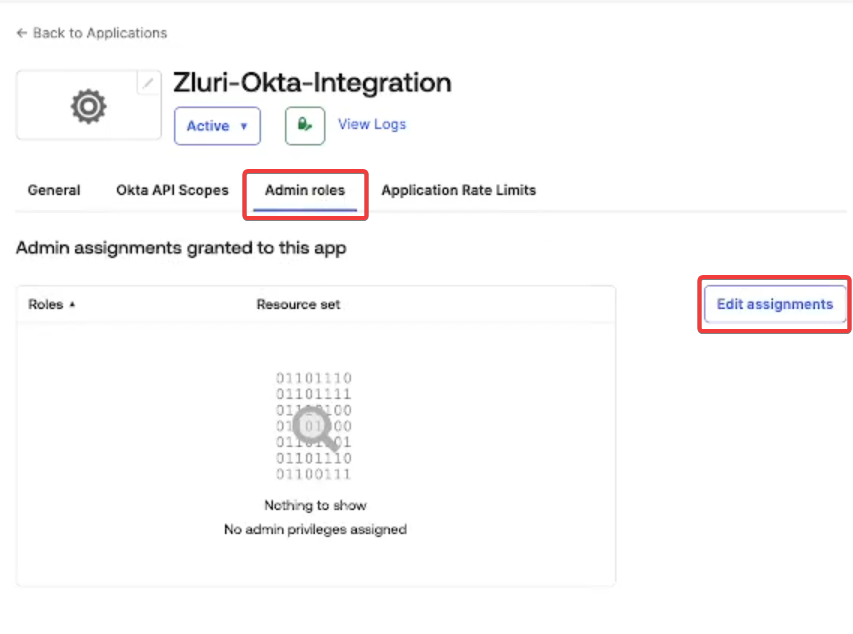
Under the Admin roles tab, click Edit assignments.
-
Add the following roles and click Save changes:
-
Custom Rolecreated in Step 1. -
Report Administrator
-
Connect the Okta M2M instance in Zluri
-
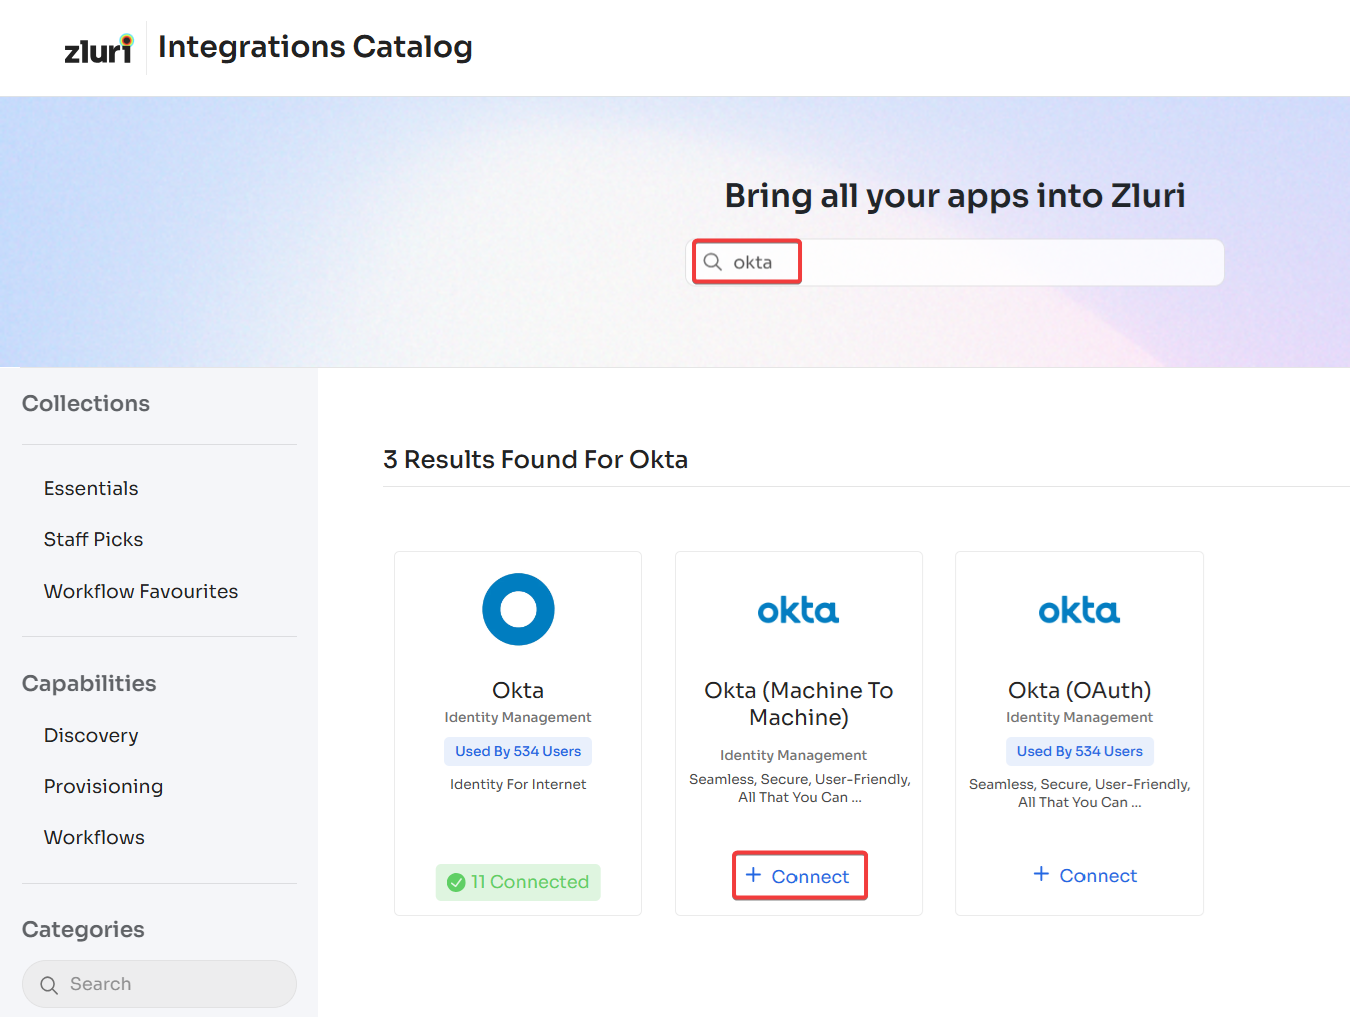
Open the Integrations Catalog, search for “okta”, and click ➕ Connect under Okta (Machine to Machine).
-
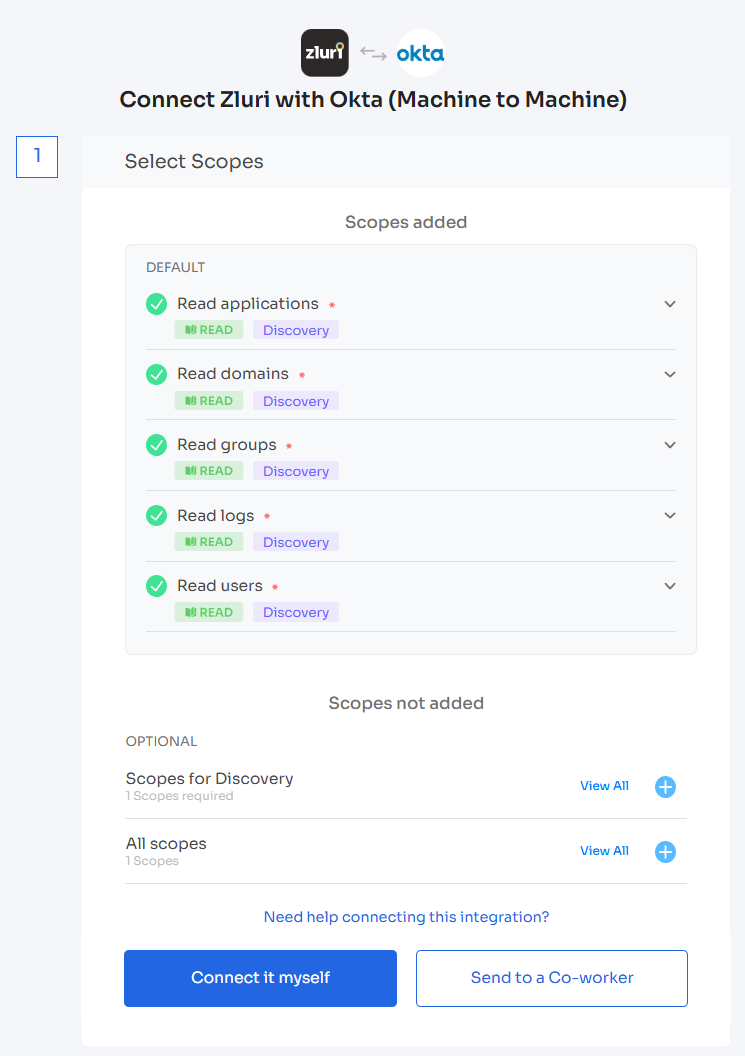
Choose the scopes for the integration, and click Connect it myself. You can click the down-arrow button towards the right of a scope to find out what it does.
-
Fill out the other fields as follows:
-
Client ID: obtained from step 5 of the Create an Okta service app integration section
-
Private key: obtained from step 4 in the Generate a public and private key pair section.
-
Base URL: if you access Okta using
https://mycorp.okta.com, enter it here. If you aren't sure, consult this doc to find your Okta base URL. -
The values of
kid,n, anderespectively from step 3 in Generate a public and private key pair section.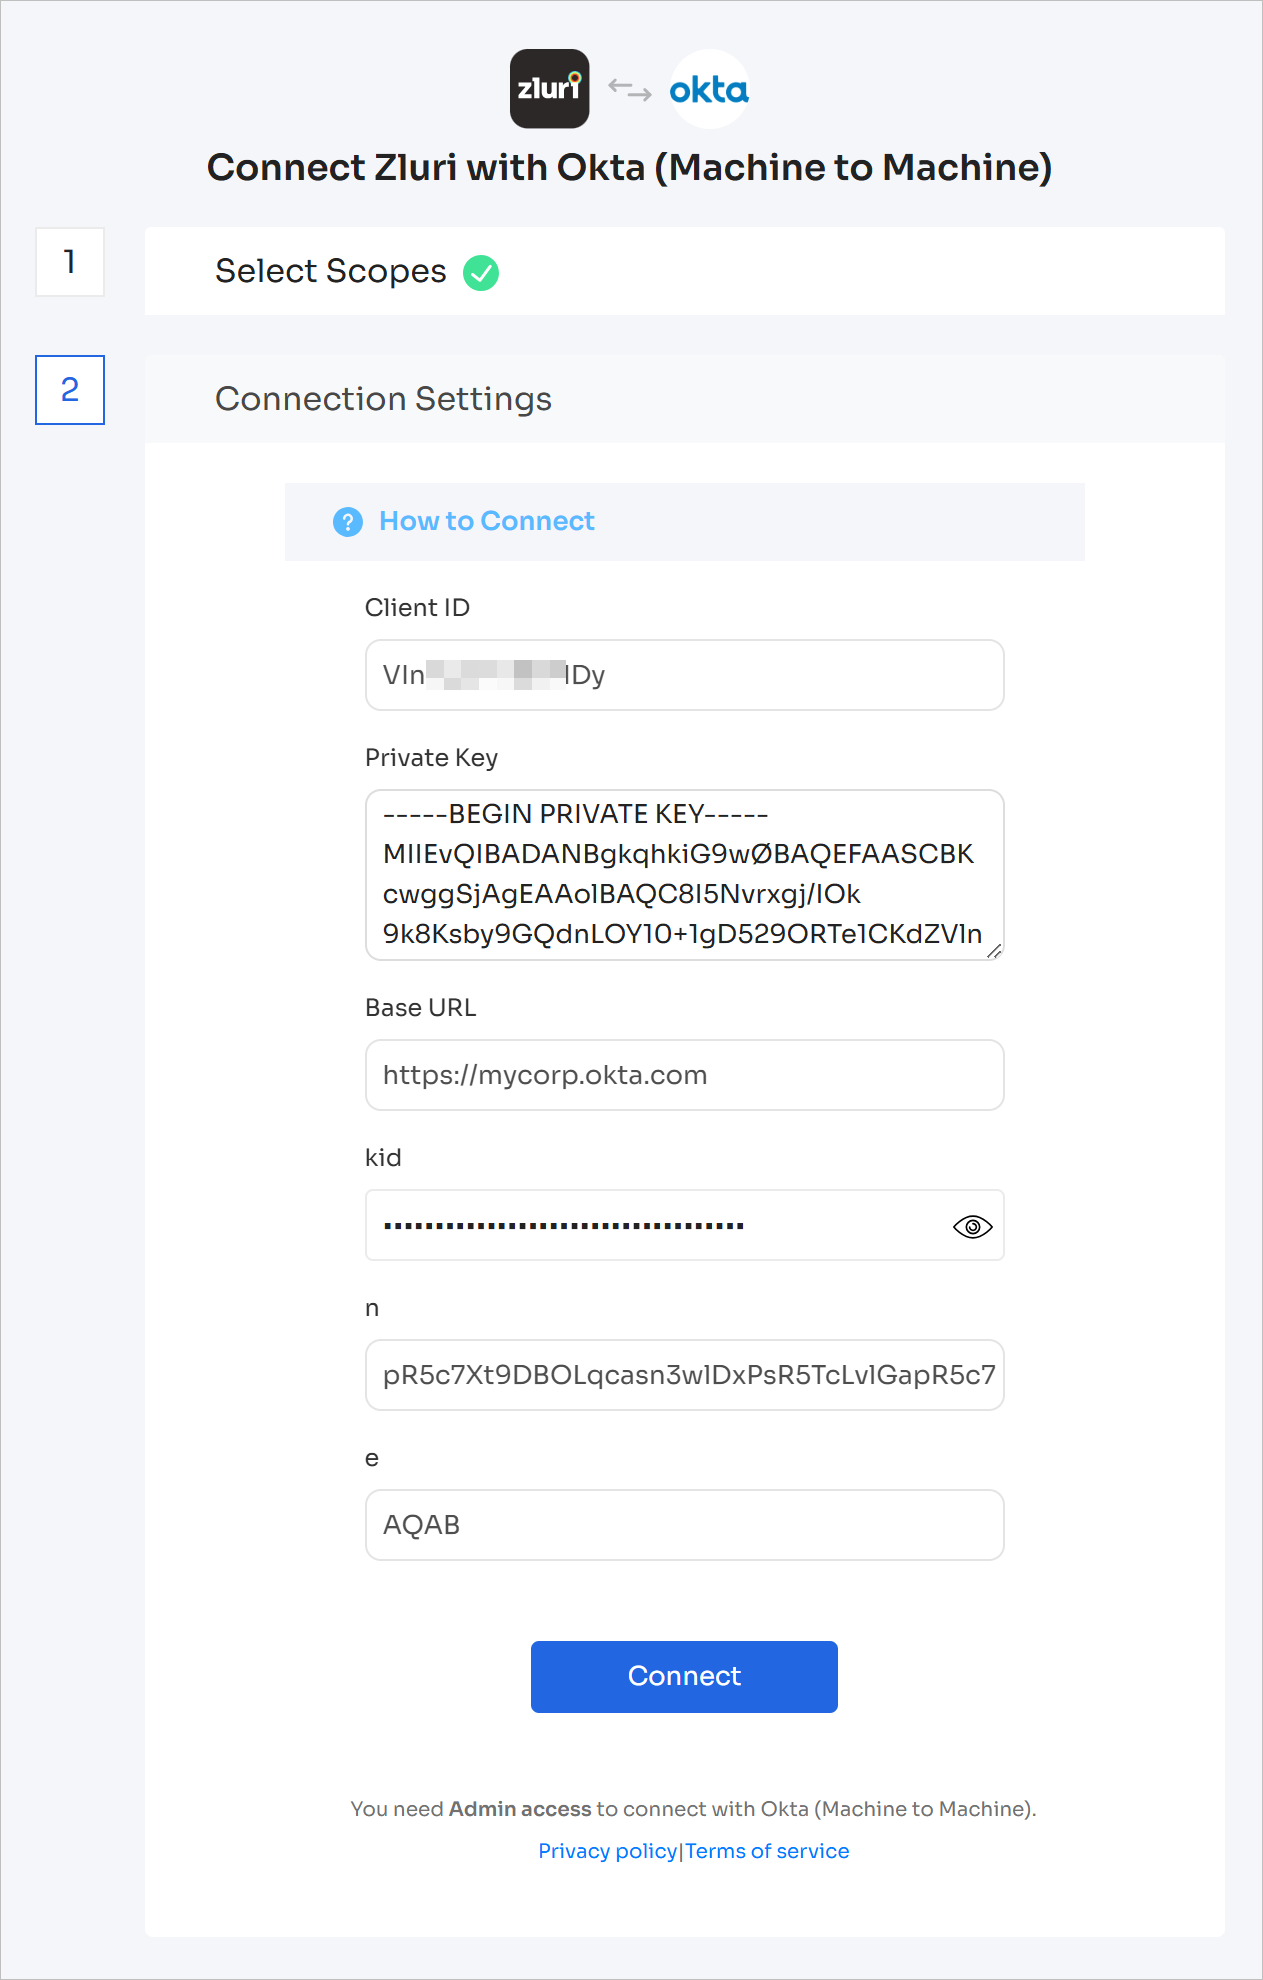
-
-
Give the connection a name and description, and you’re ready to go!
Got questions? Feel free to submit a ticket or contact us directly at [email protected].
Updated 6 months ago
