Using a Custom Admin Role
Connect Okta to Zluri using a custom admin role
If you wish to delegate Zluriʼs Okta integration to a user or group without Super Admin credentials, you can assign them a custom admin role. This method requires more manual configuration, but gives greater control over the Zluri features you wish to use.
Prerequisites
- Super Administrator privileges in Okta (only required for creating the custom role)
Integration steps
Create a custom admin role
-
Log in to Okta with a Super Administrator account.
-
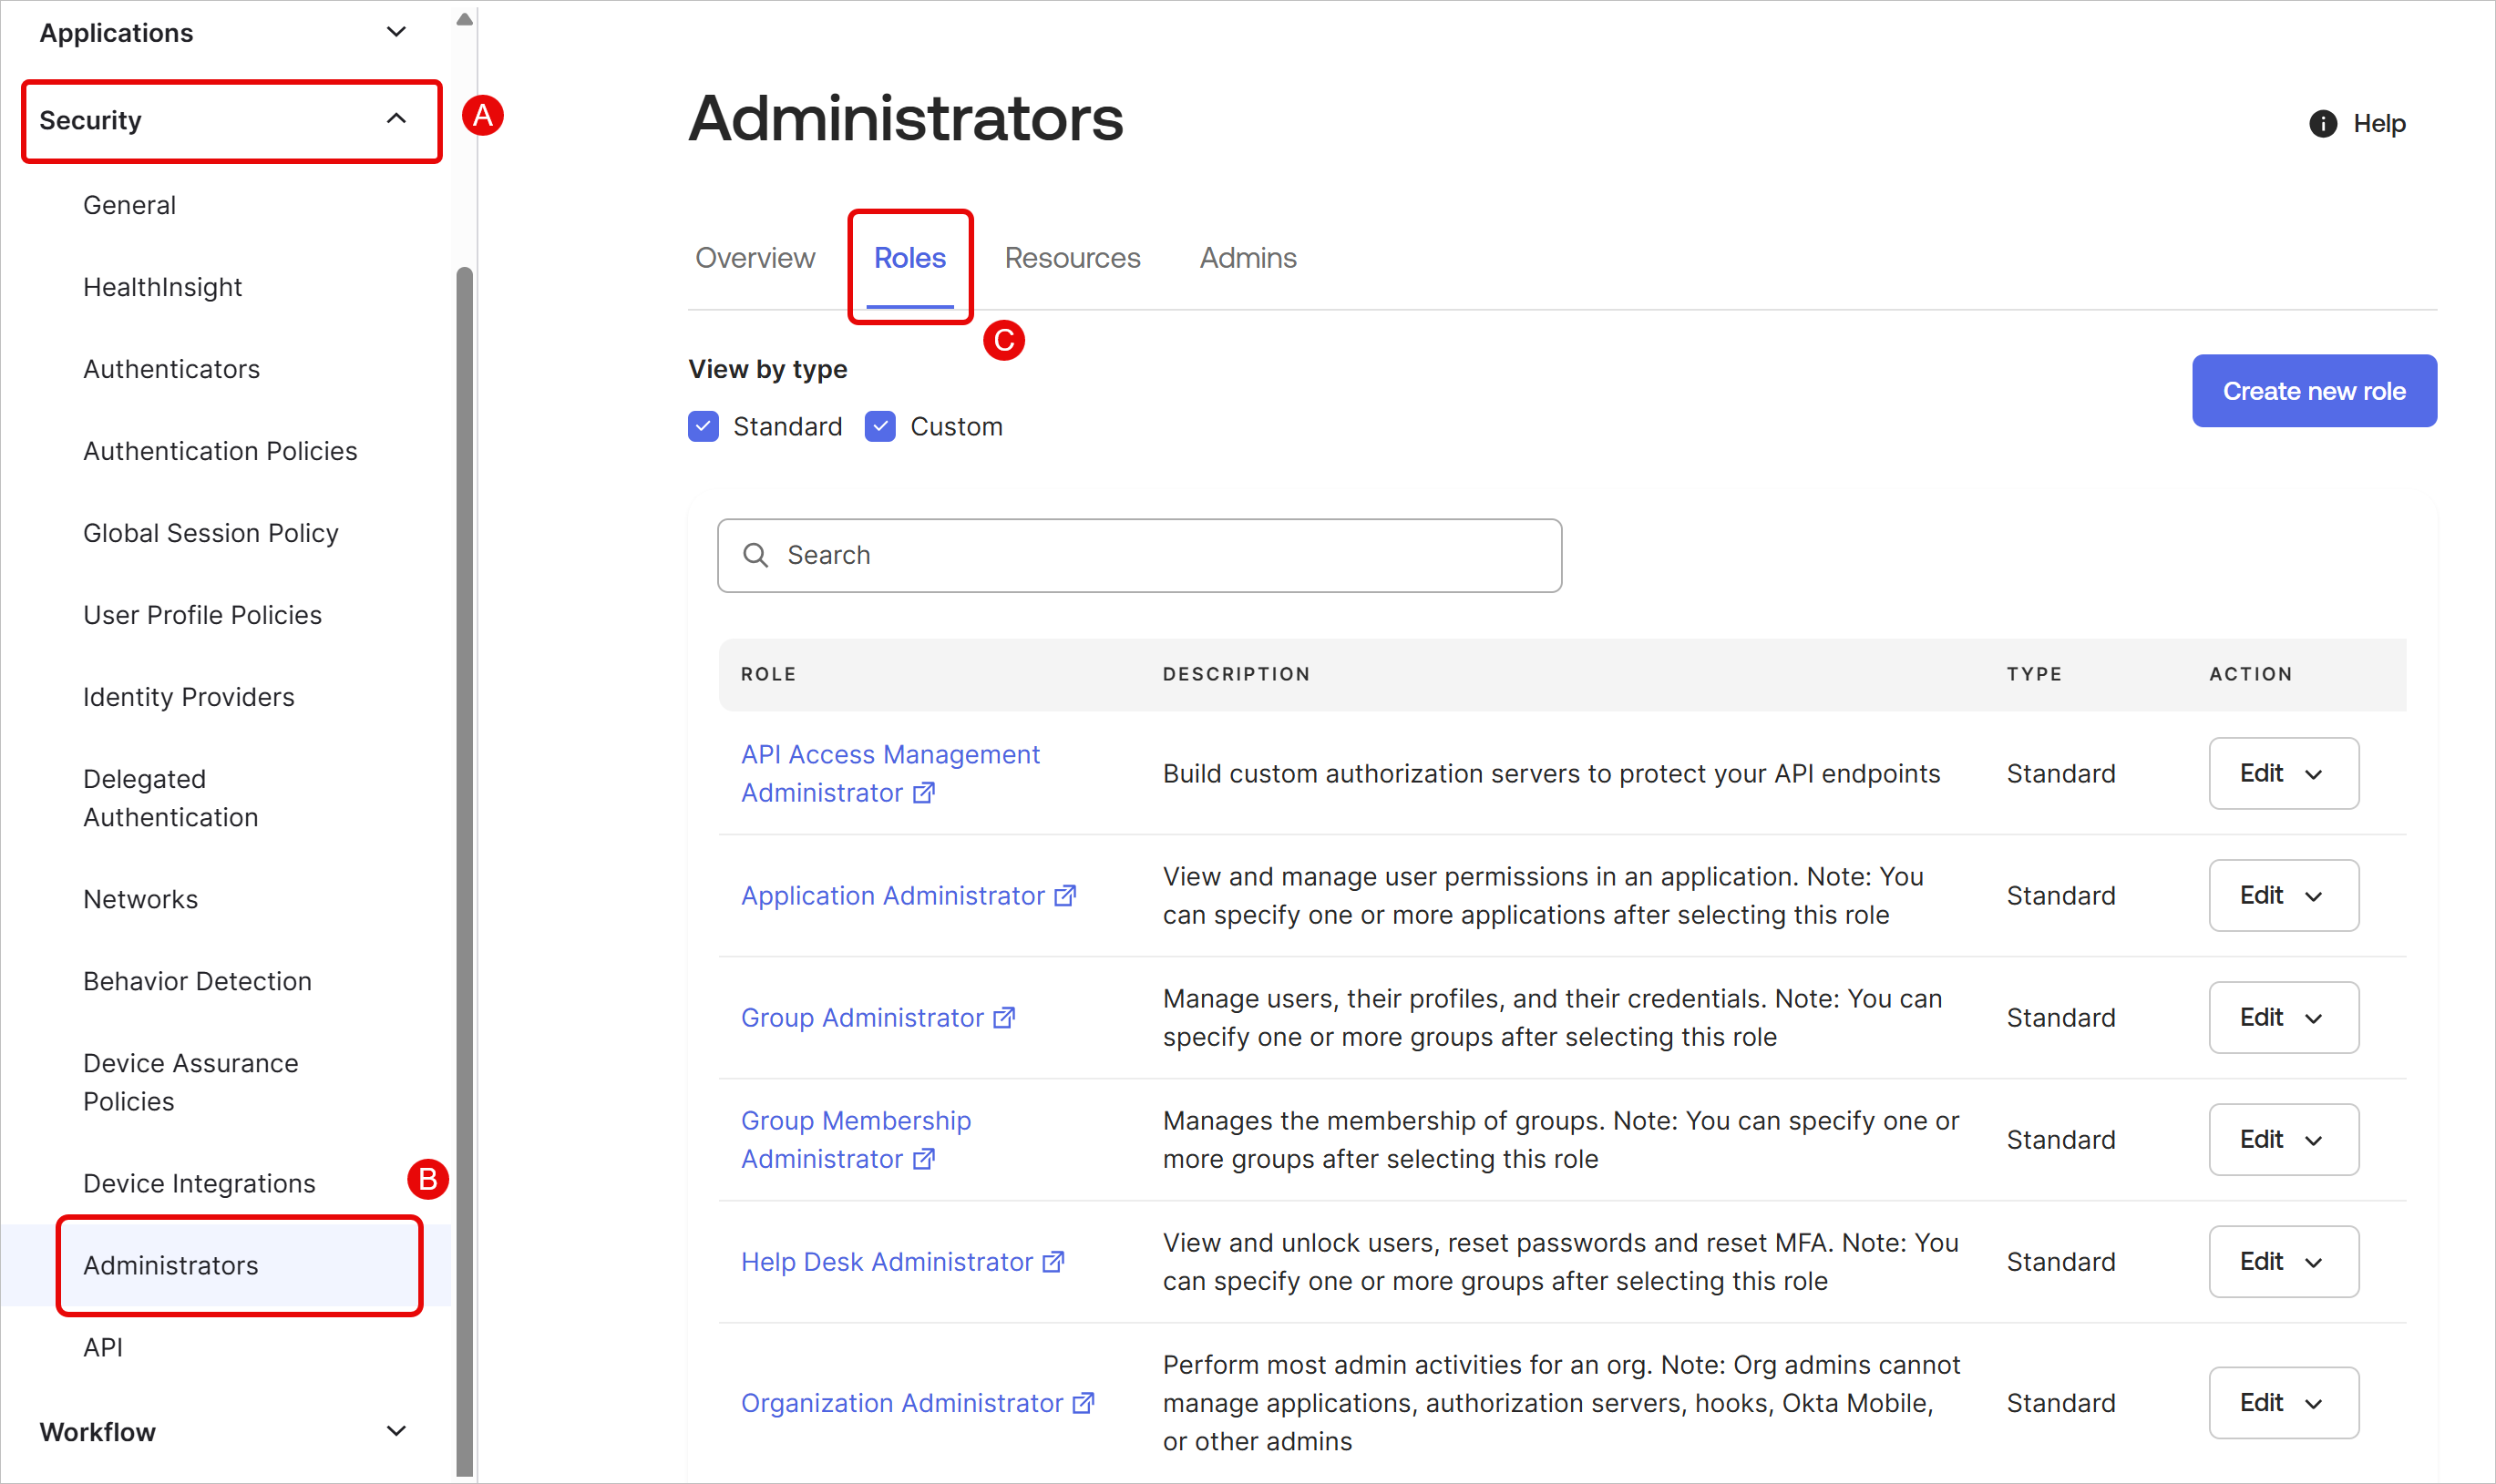
In the admin dashboard, navigate to Security → Administrators → Roles.
-
Click Create new role.
-
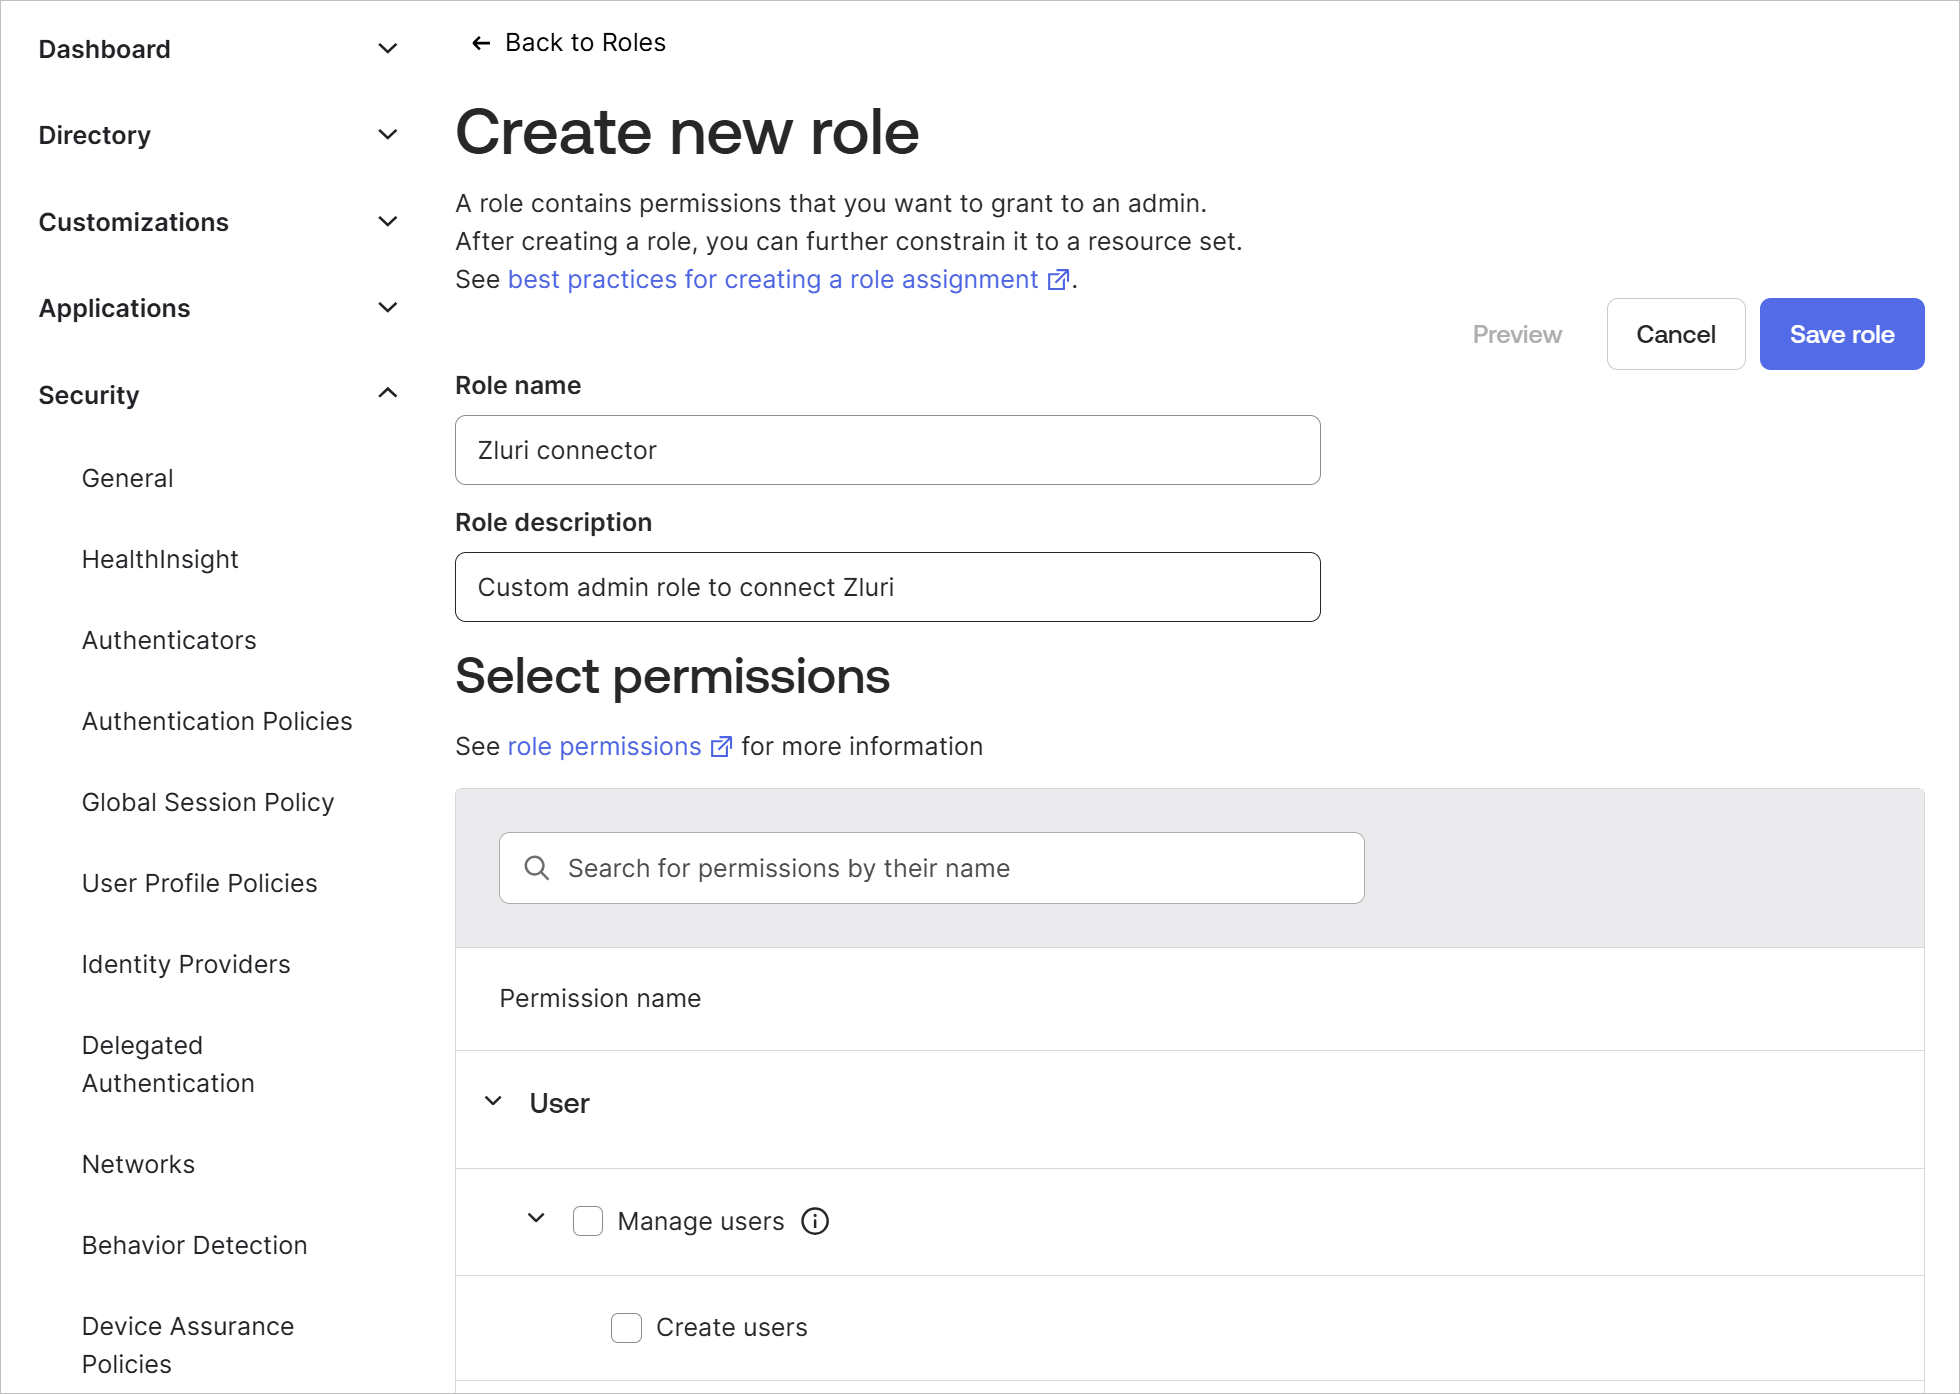
Give the new role a name and description.
-
Depending on your use case, enable one of the following sets of permissions:
Minimum required privileges Maximum privileges - *User**: Manage users including all sub permissions
- *Group**: Mange groups including all sub permissions
- *Identity and Access Management**: View roles, resources, and admin assignments
- *Application**: View application and their details
- *Directories**: View application directory integration
- *Customizations**: View customizations
- *User**:
- Manage users including all sub permissions
- Create users
- Edit users' profile attributes
- Edit users' lifecycle states
- View users and their details
- Edit users' group membership
- Edit users' application assignments
- *Group**: Manage groups including all sub permissions
- *Identity and Access Management**: View roles, resources, and admin assignments
- *Application**: Manage applications
- *Directories**: Manage application directory integration
- *Customizations**: View customizations
-
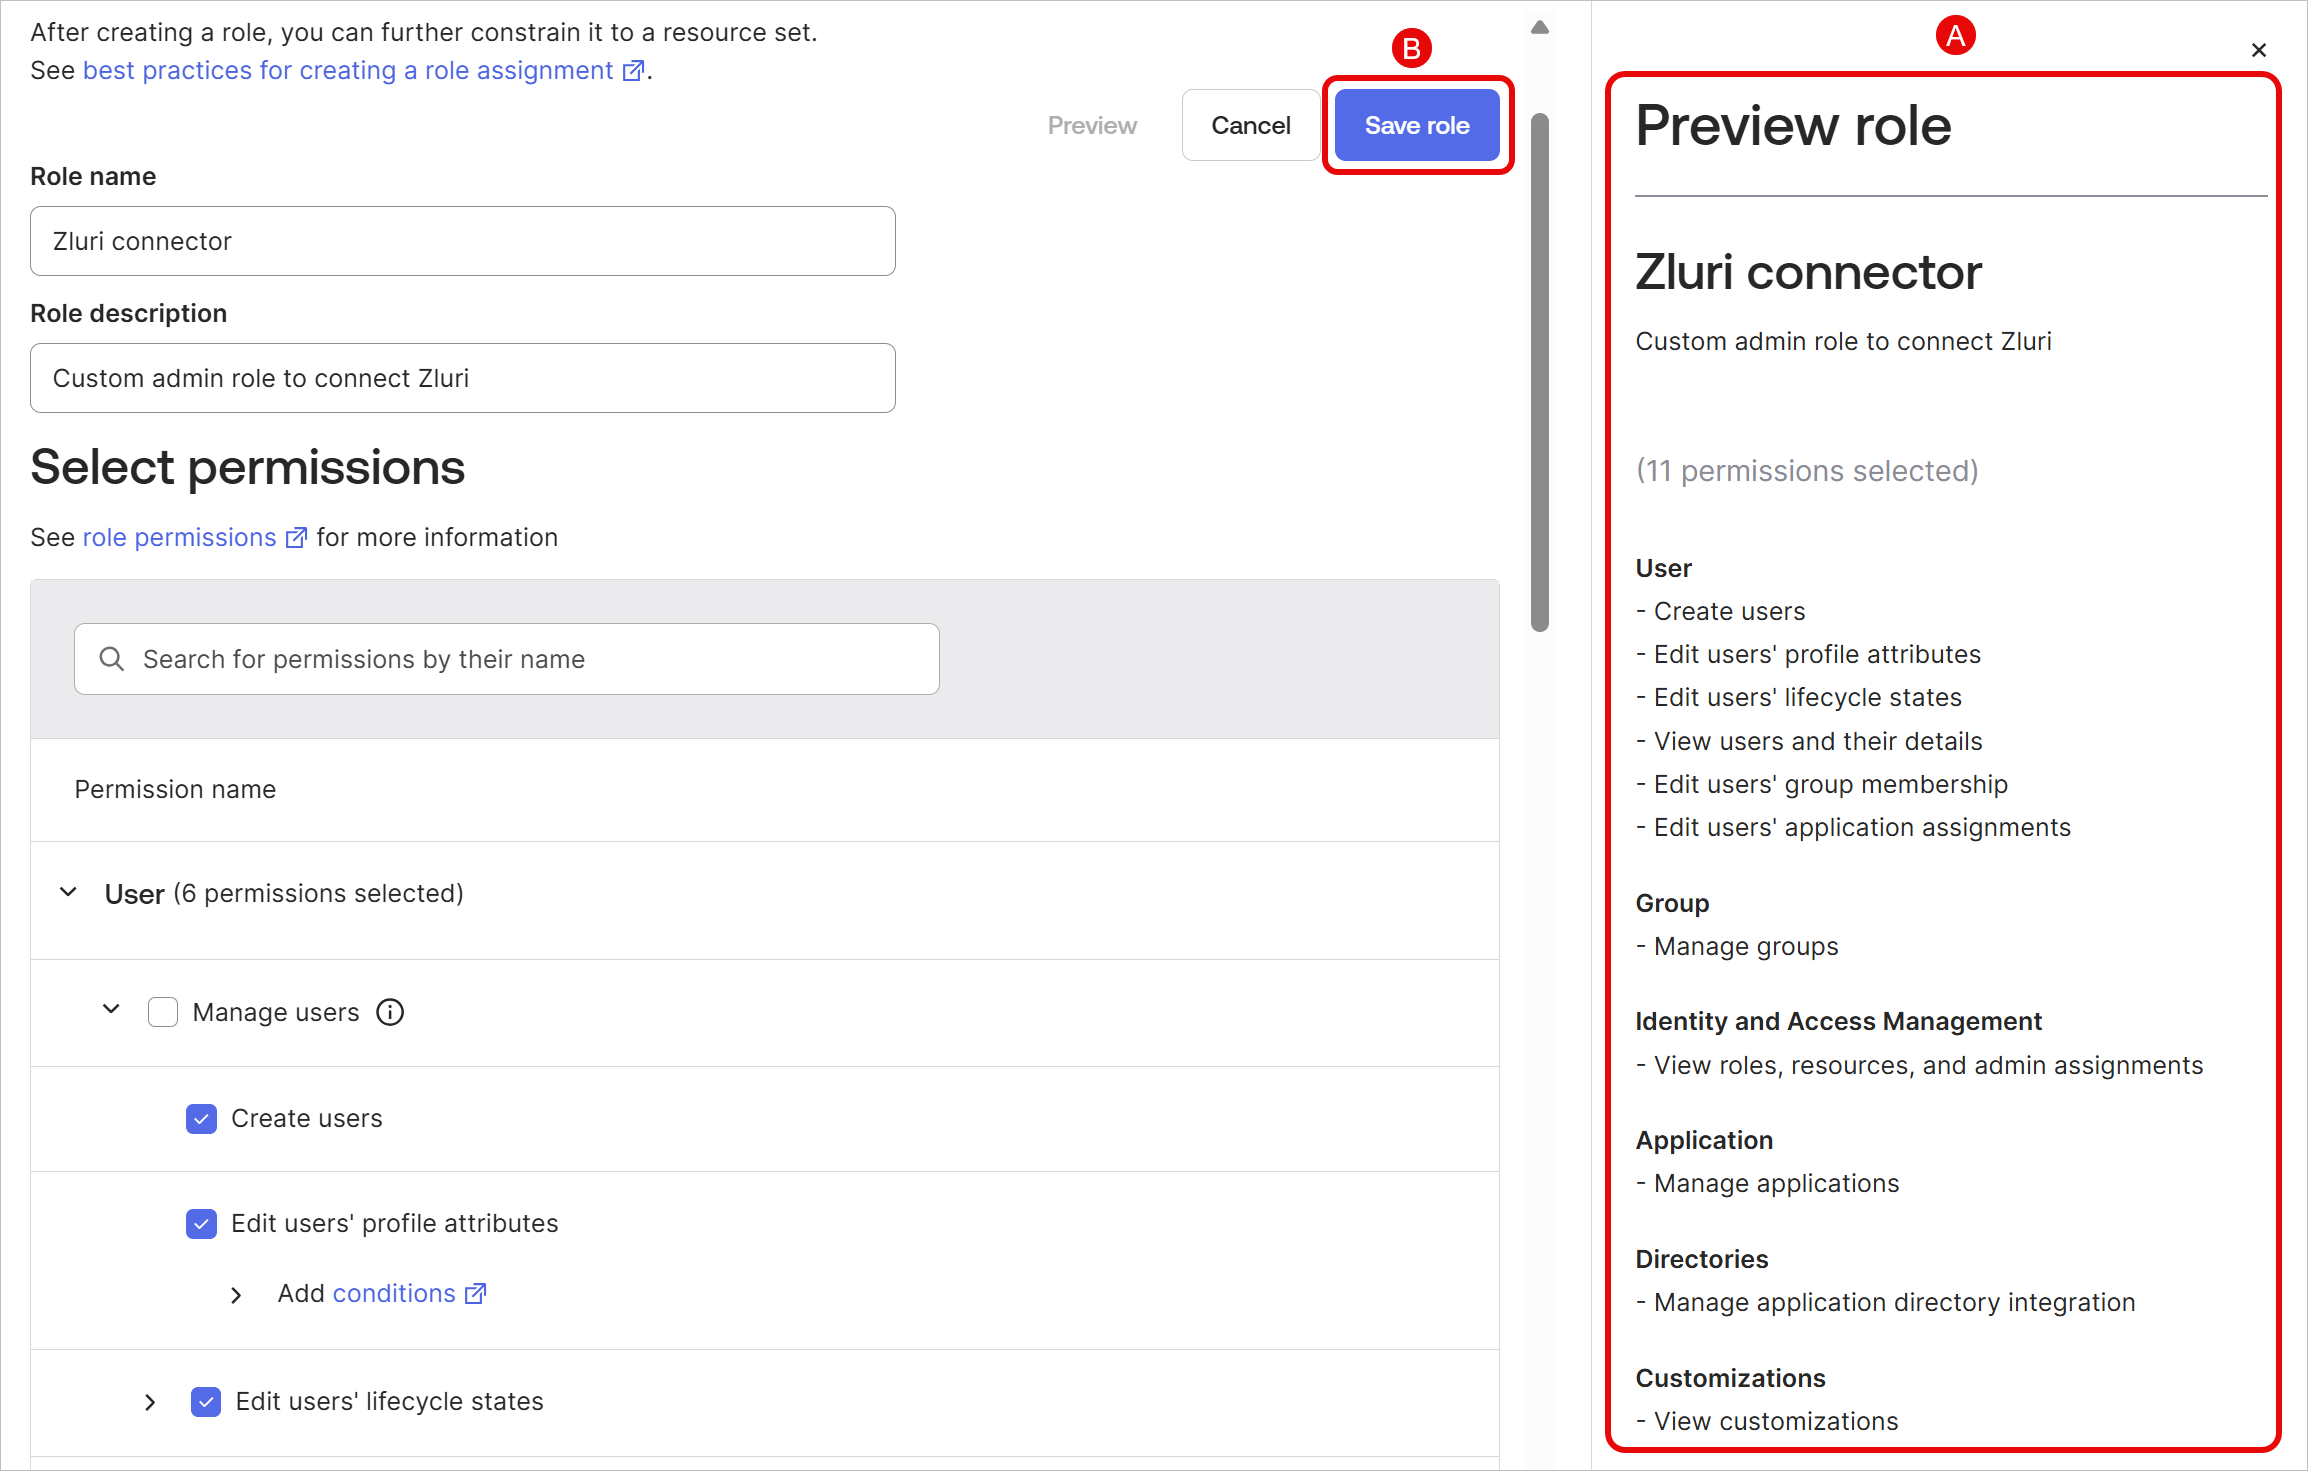
Review the permissions in the Preview role section on the right, then click Save role.
Generate a new resource set
-
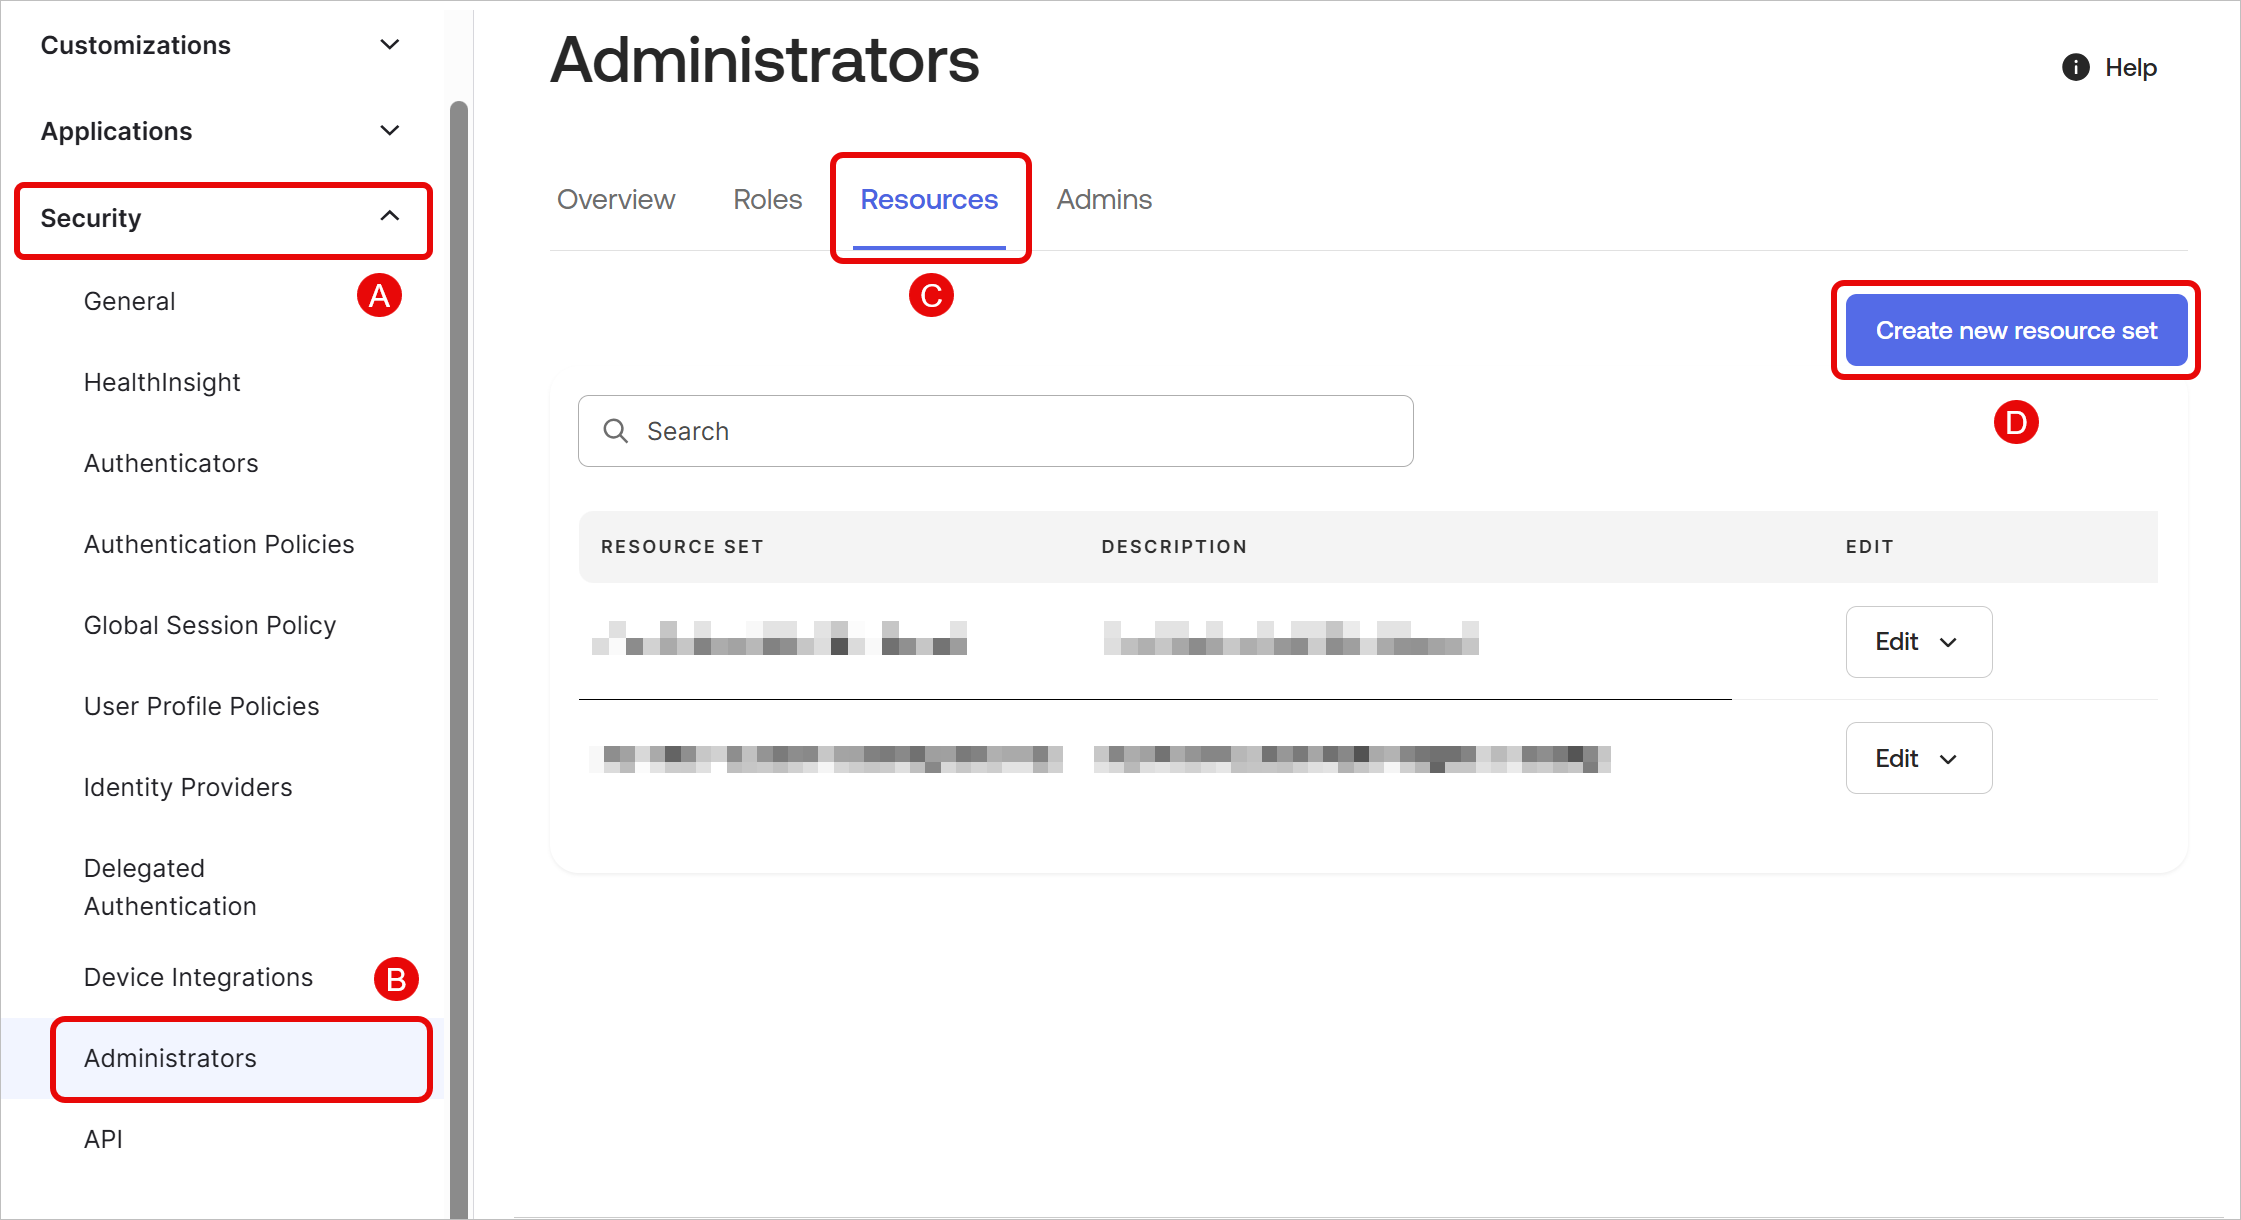
In the admin dashboard, navigate to Security → Administrators → Resources. Click Create new resource set.
-
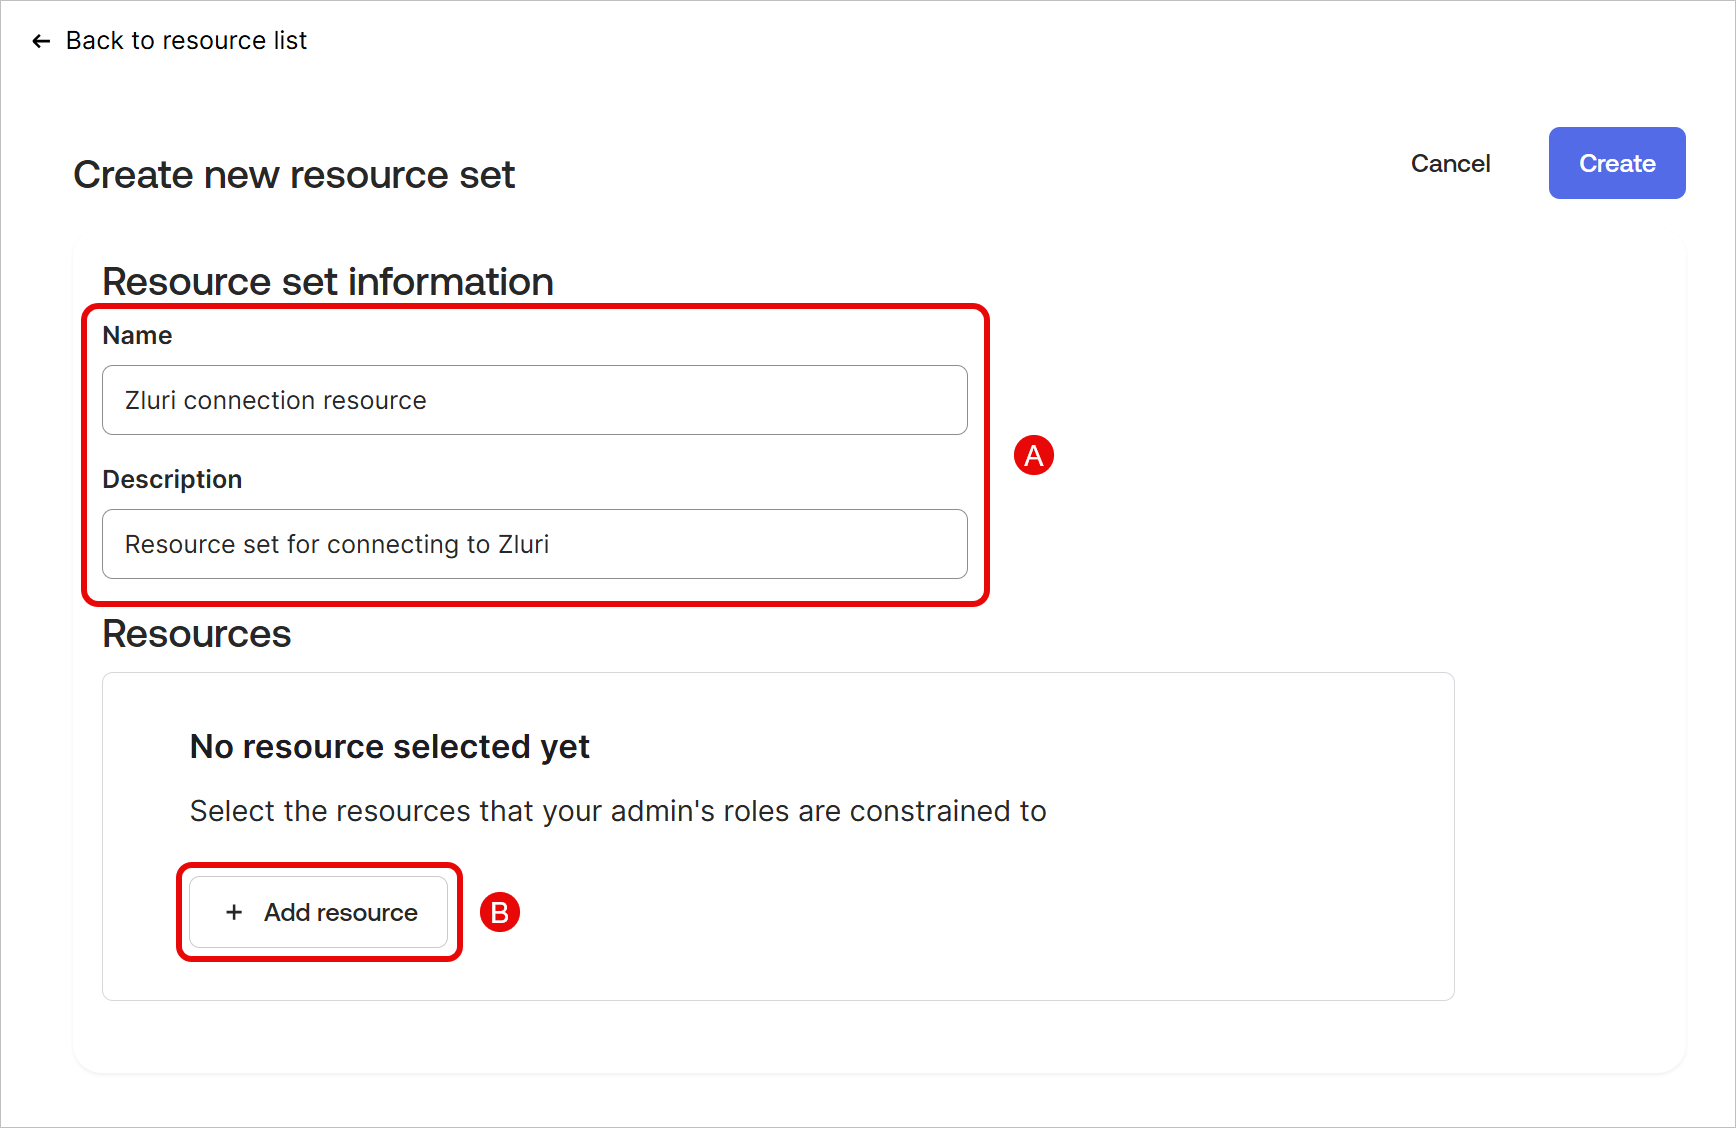
Give the resource set a name and description, and click + Add resource.
-
Add the following resources:
- Users
- Groups
- Applications
- Customizations
- Identity and Access Management
-
Click Create to generate the new resource set.
Assign the new role set to a user
-
In the Admin Dashboard, navigate to Directory → People.

-
Select the account you wish to use for connecting to Zluri, or create a new one.
If the existing user thatʼs being assigned this custom role already has another administrative role (e.g., Super Admin or Org Admin) assigned to them, then the API token that is generated in later steps will have the most privileged permissions rather than the permissions defined in the custom role.
-
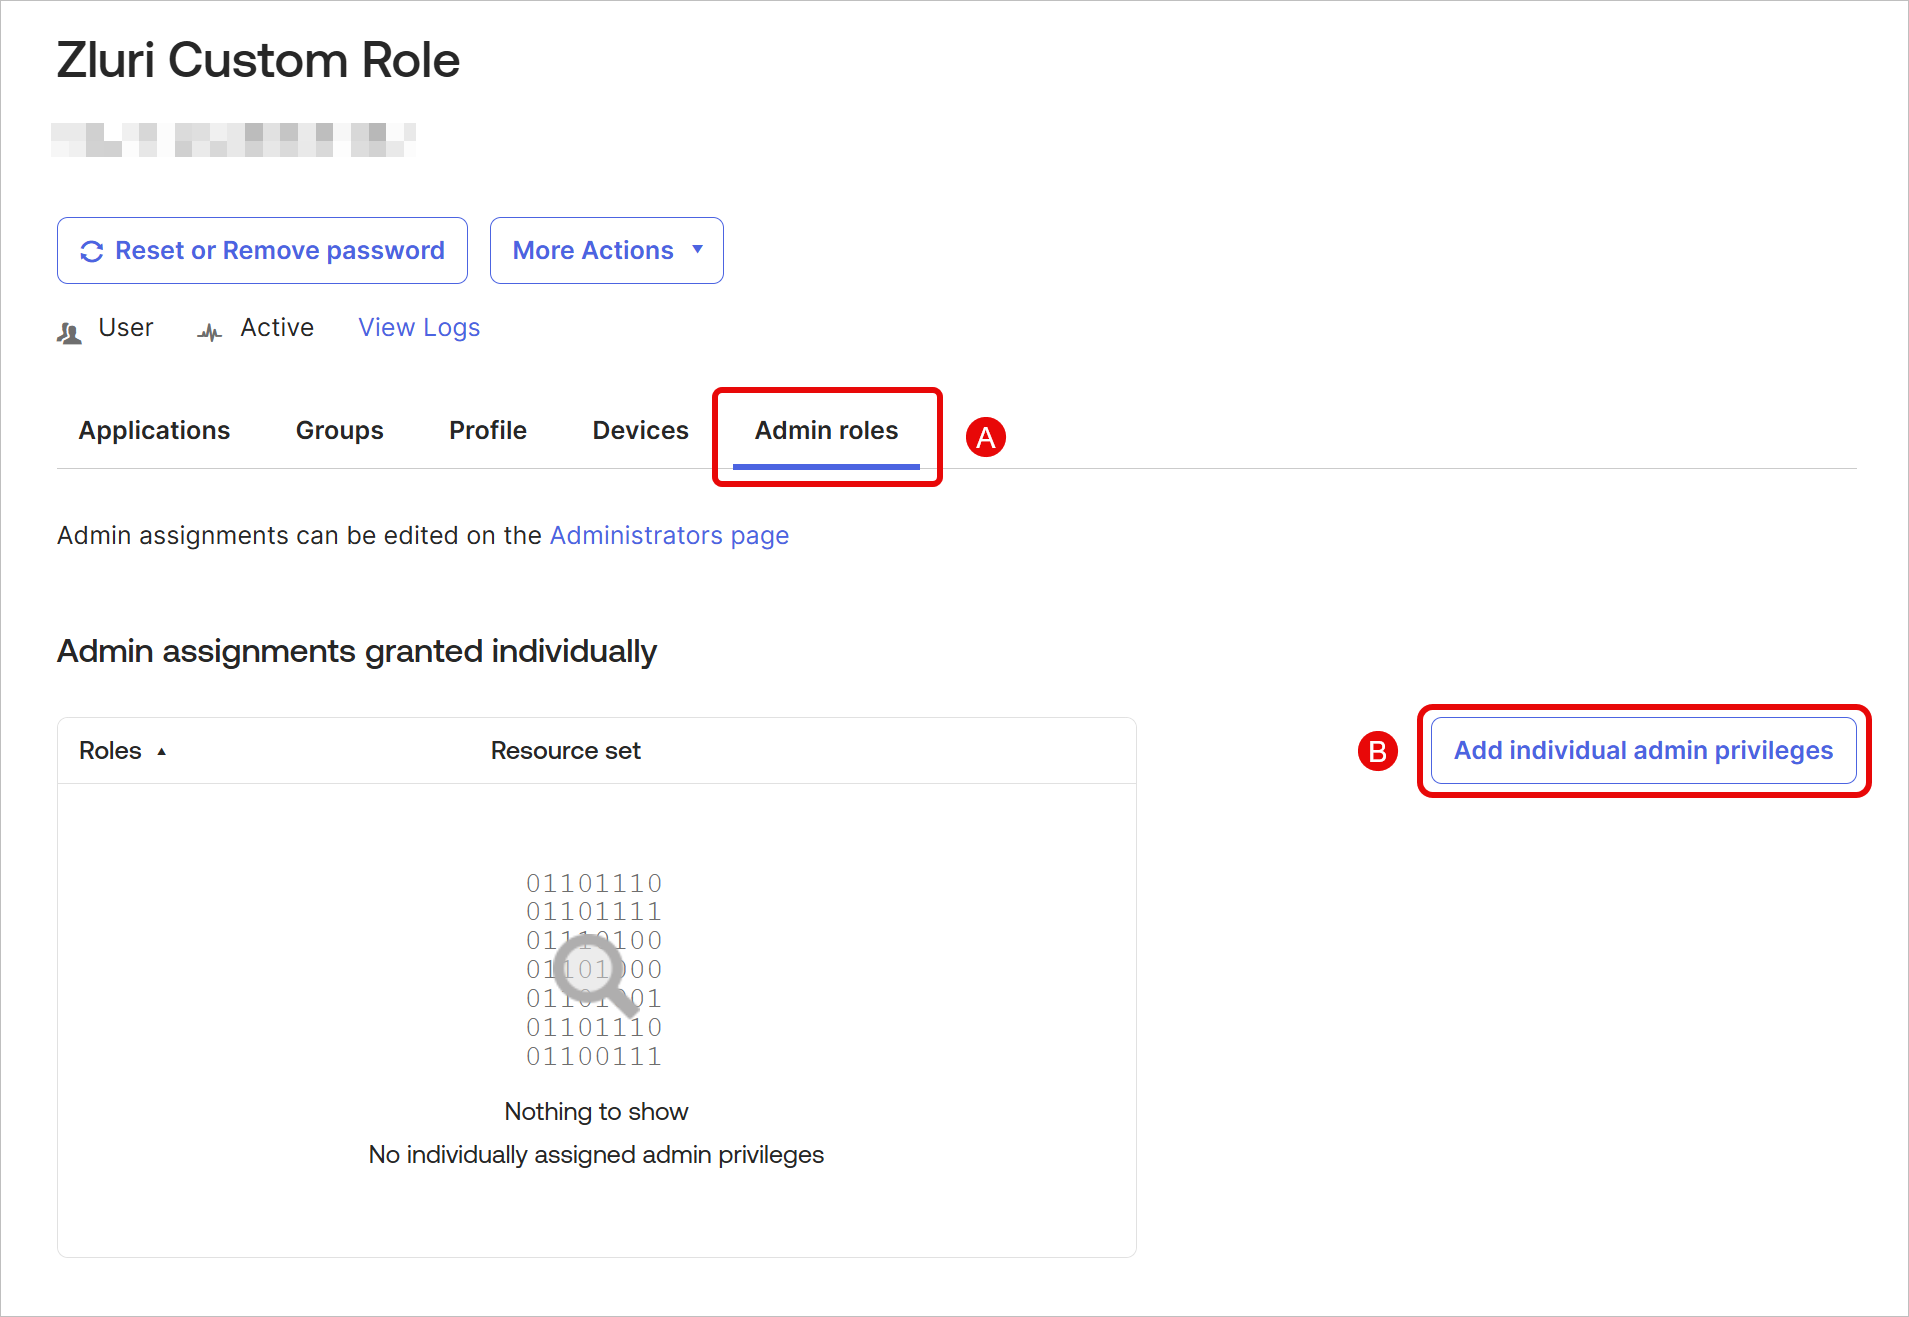
Go to the Admin Roles tab and click Edit individual assignments.
Add a new assignment for the custom role
-
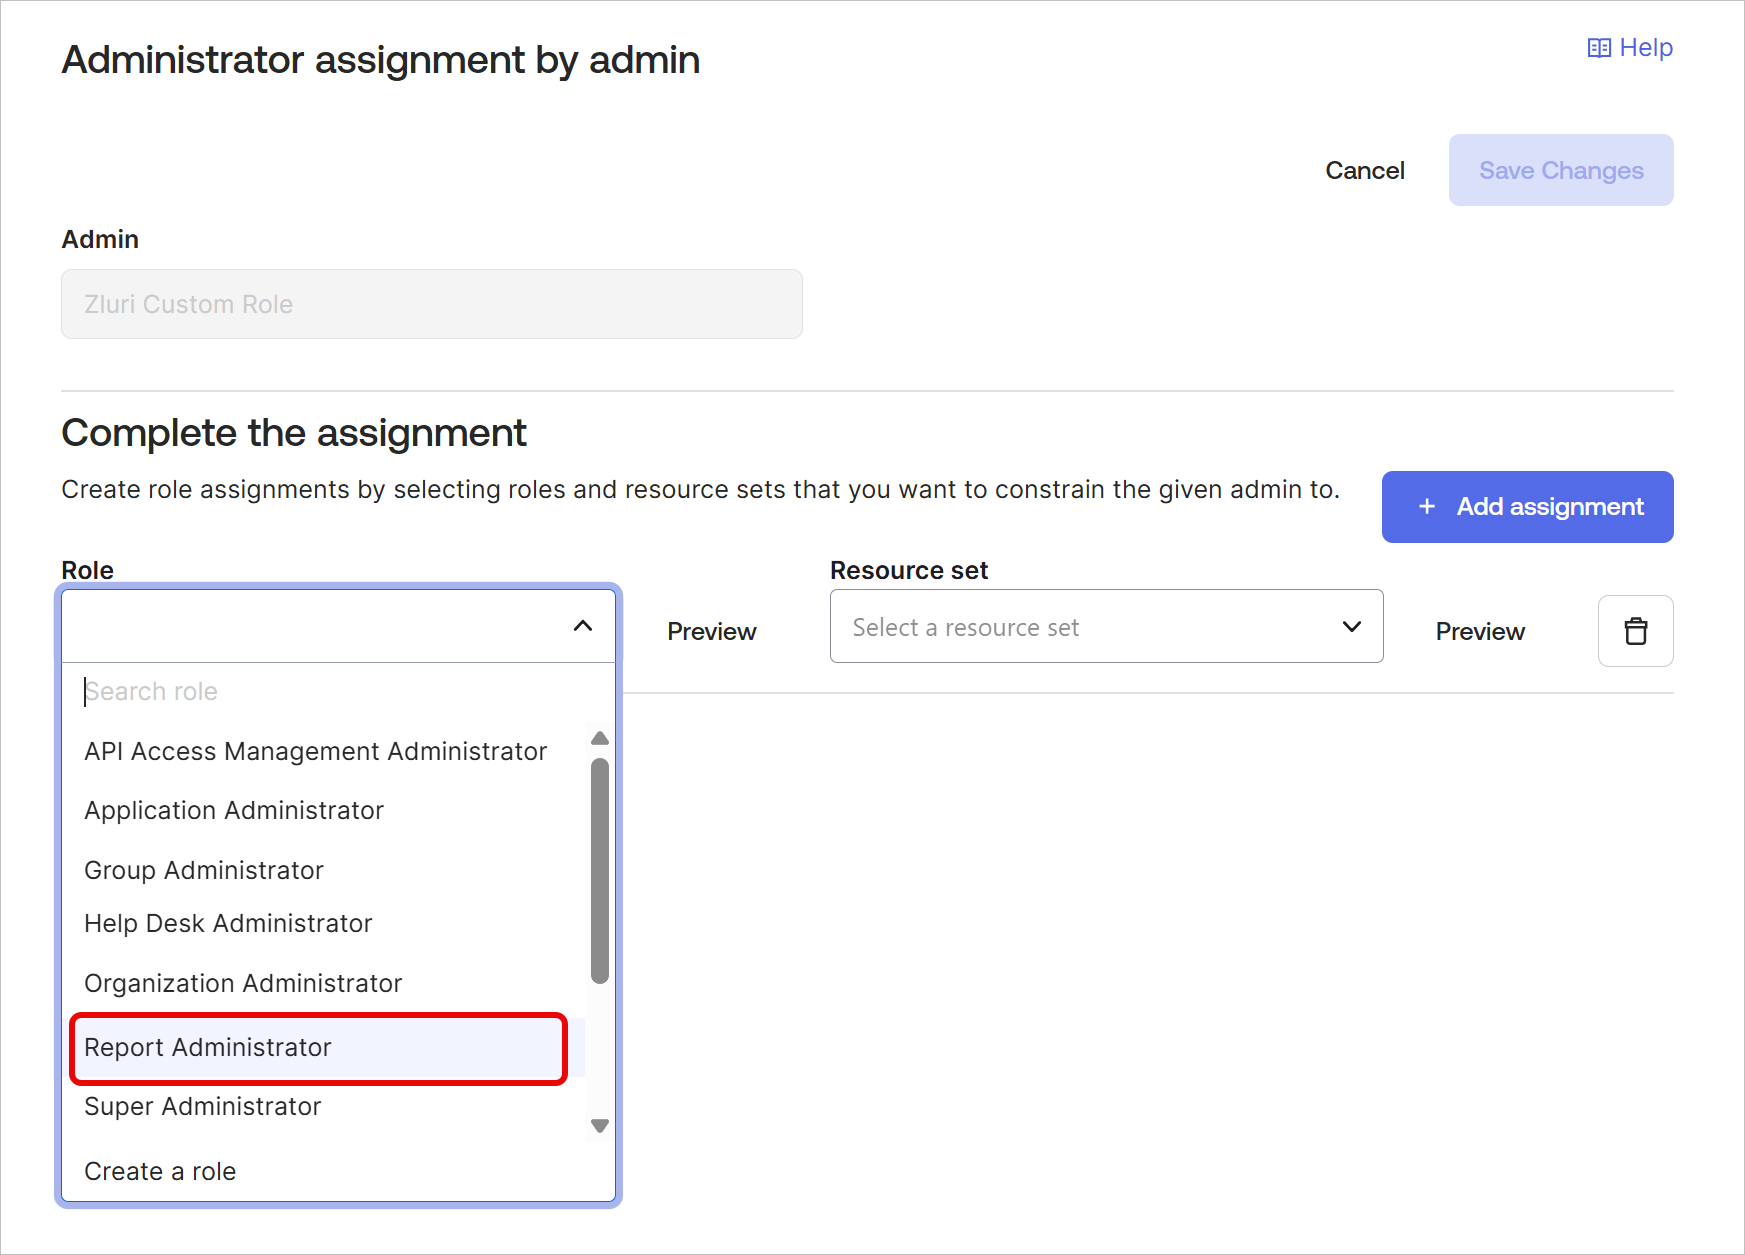
In the Role dropdown, select Report Administrator. This is required for enabling Zluri's mandatory Read logs scope.
-
Click + Add assignment and select the previously created Role and Resource set combo (
Zluri connectorandZluri connection resourcerespectively in our case)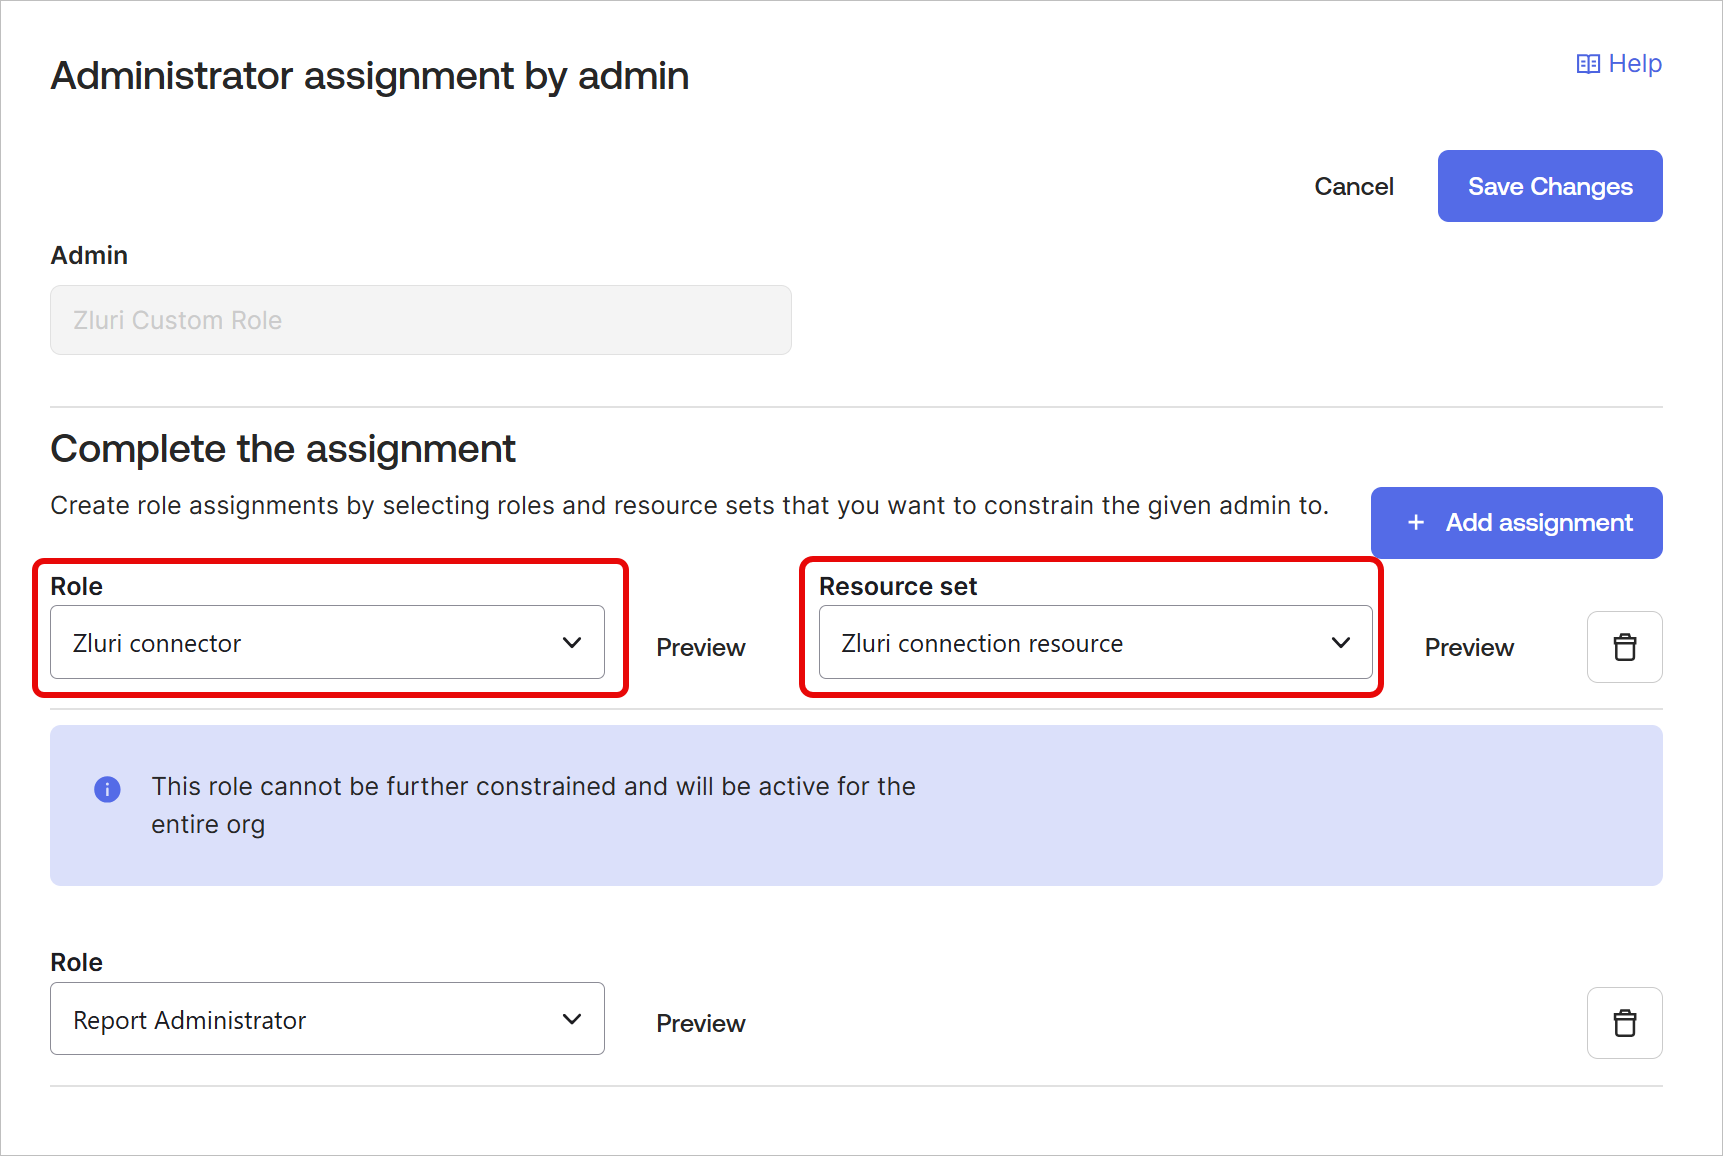
-
Click Save Changes.
Create an Okta API token
- Log in as the user created for connecting to Zluri.
This step is essential as the API token will inherit the permissions of the user creating the token.
-
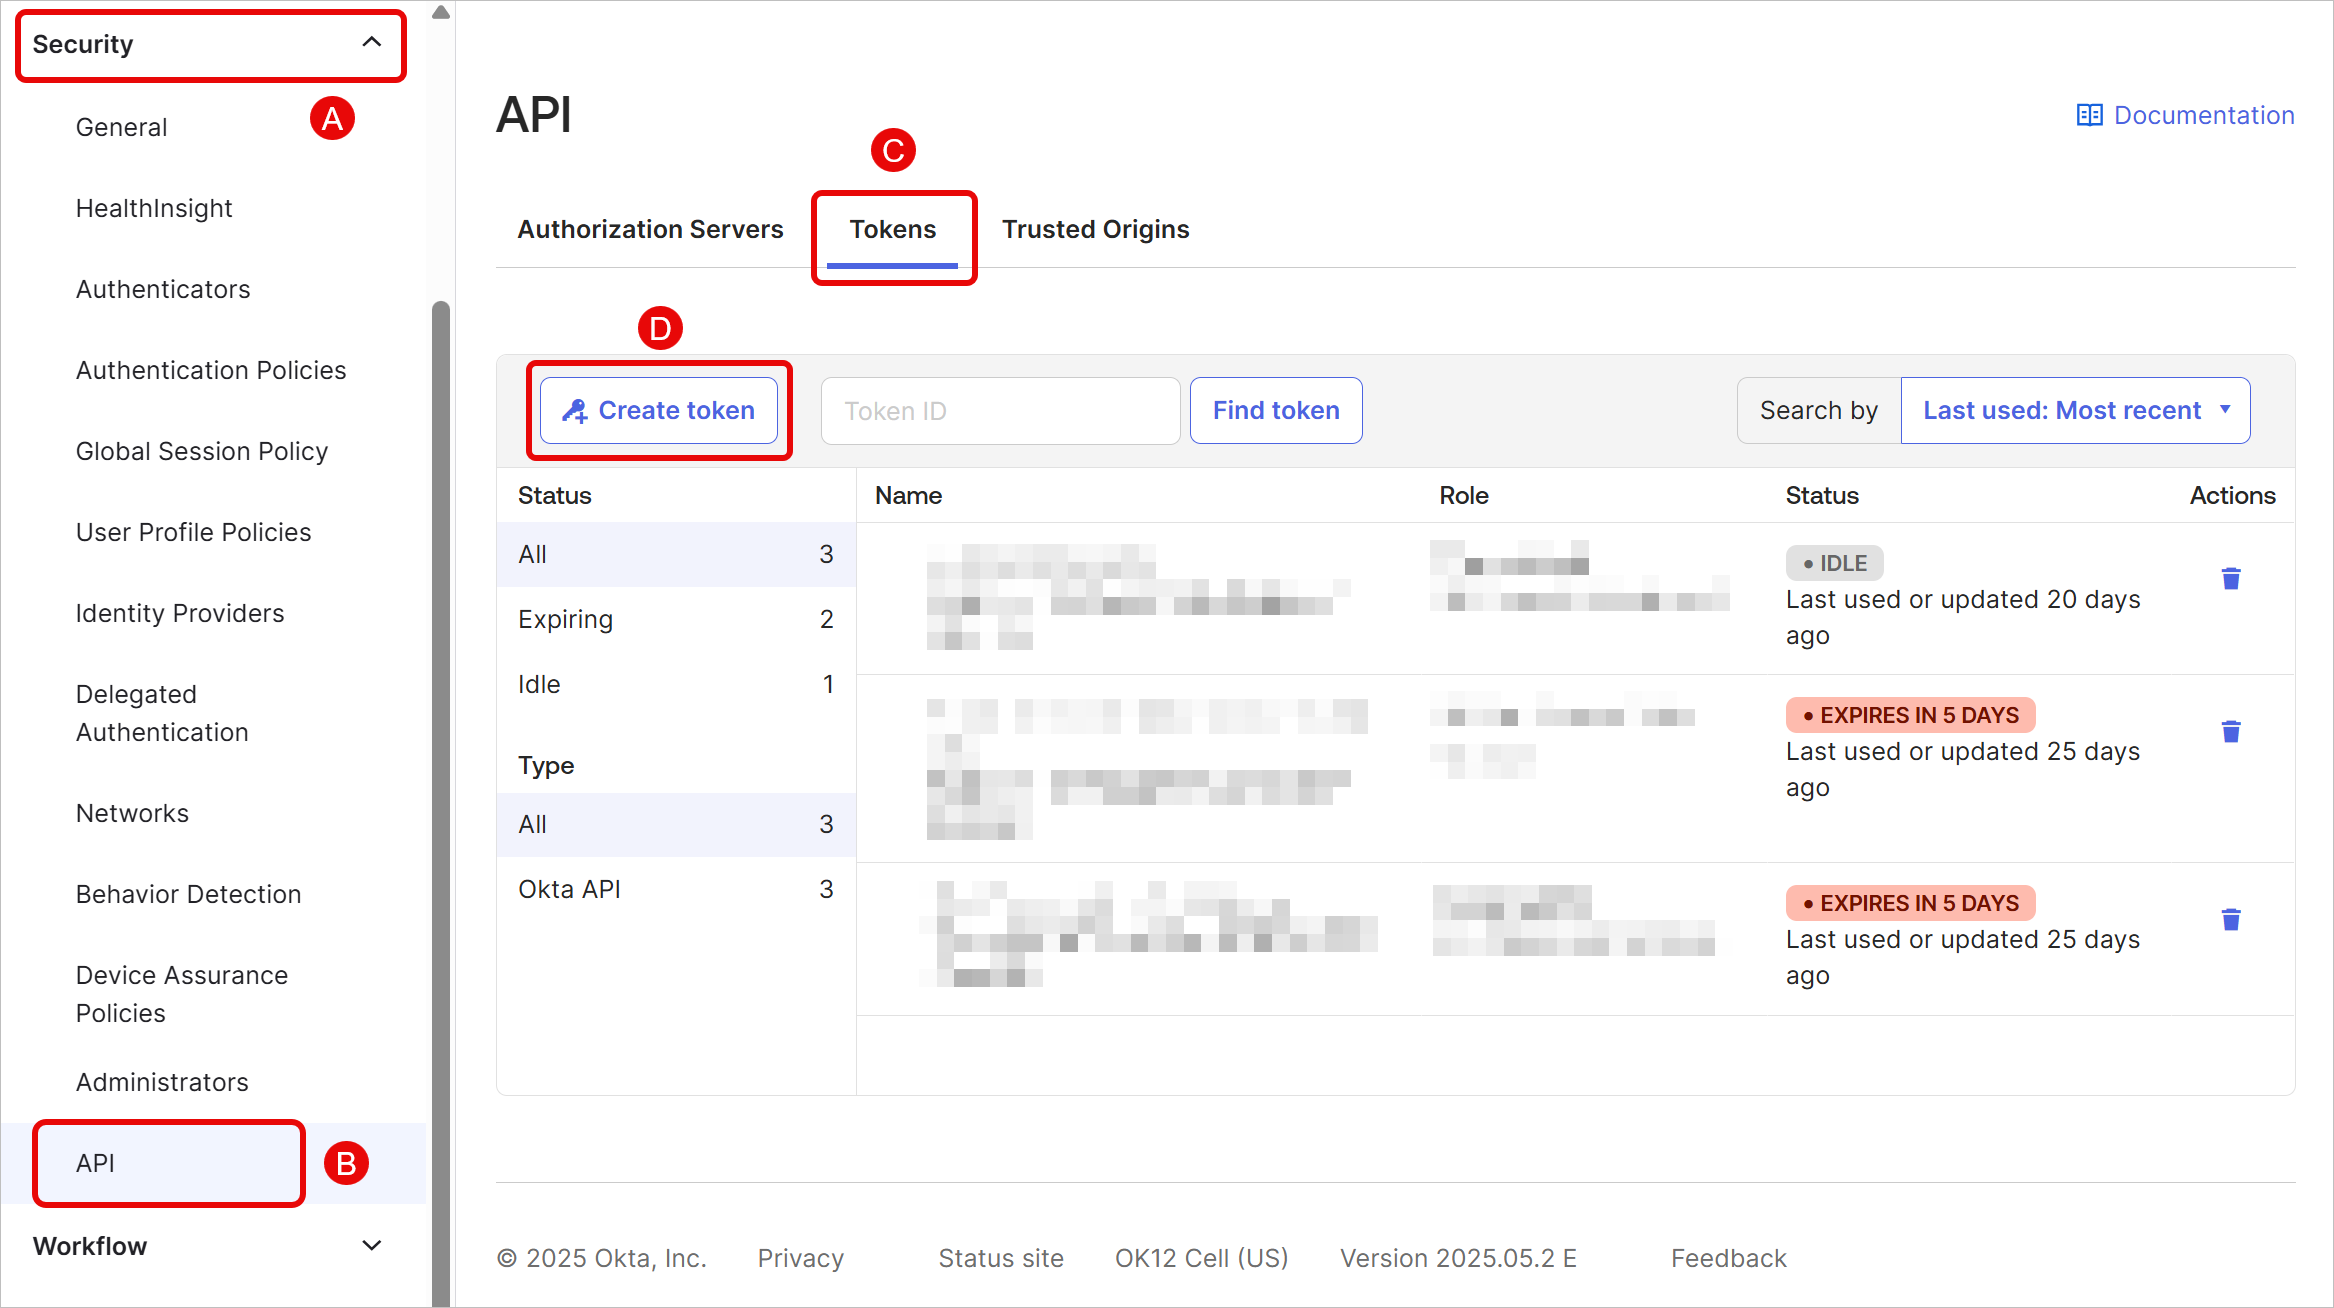
Navigate to Security → API → Tokens. Click Create token.
-
Give the token a name and select where the API calls must originate from. If unsure, select Any IP here. Click Create token.

-
Copy and securely save this token.
Connect the Okta instance in Zluri
-
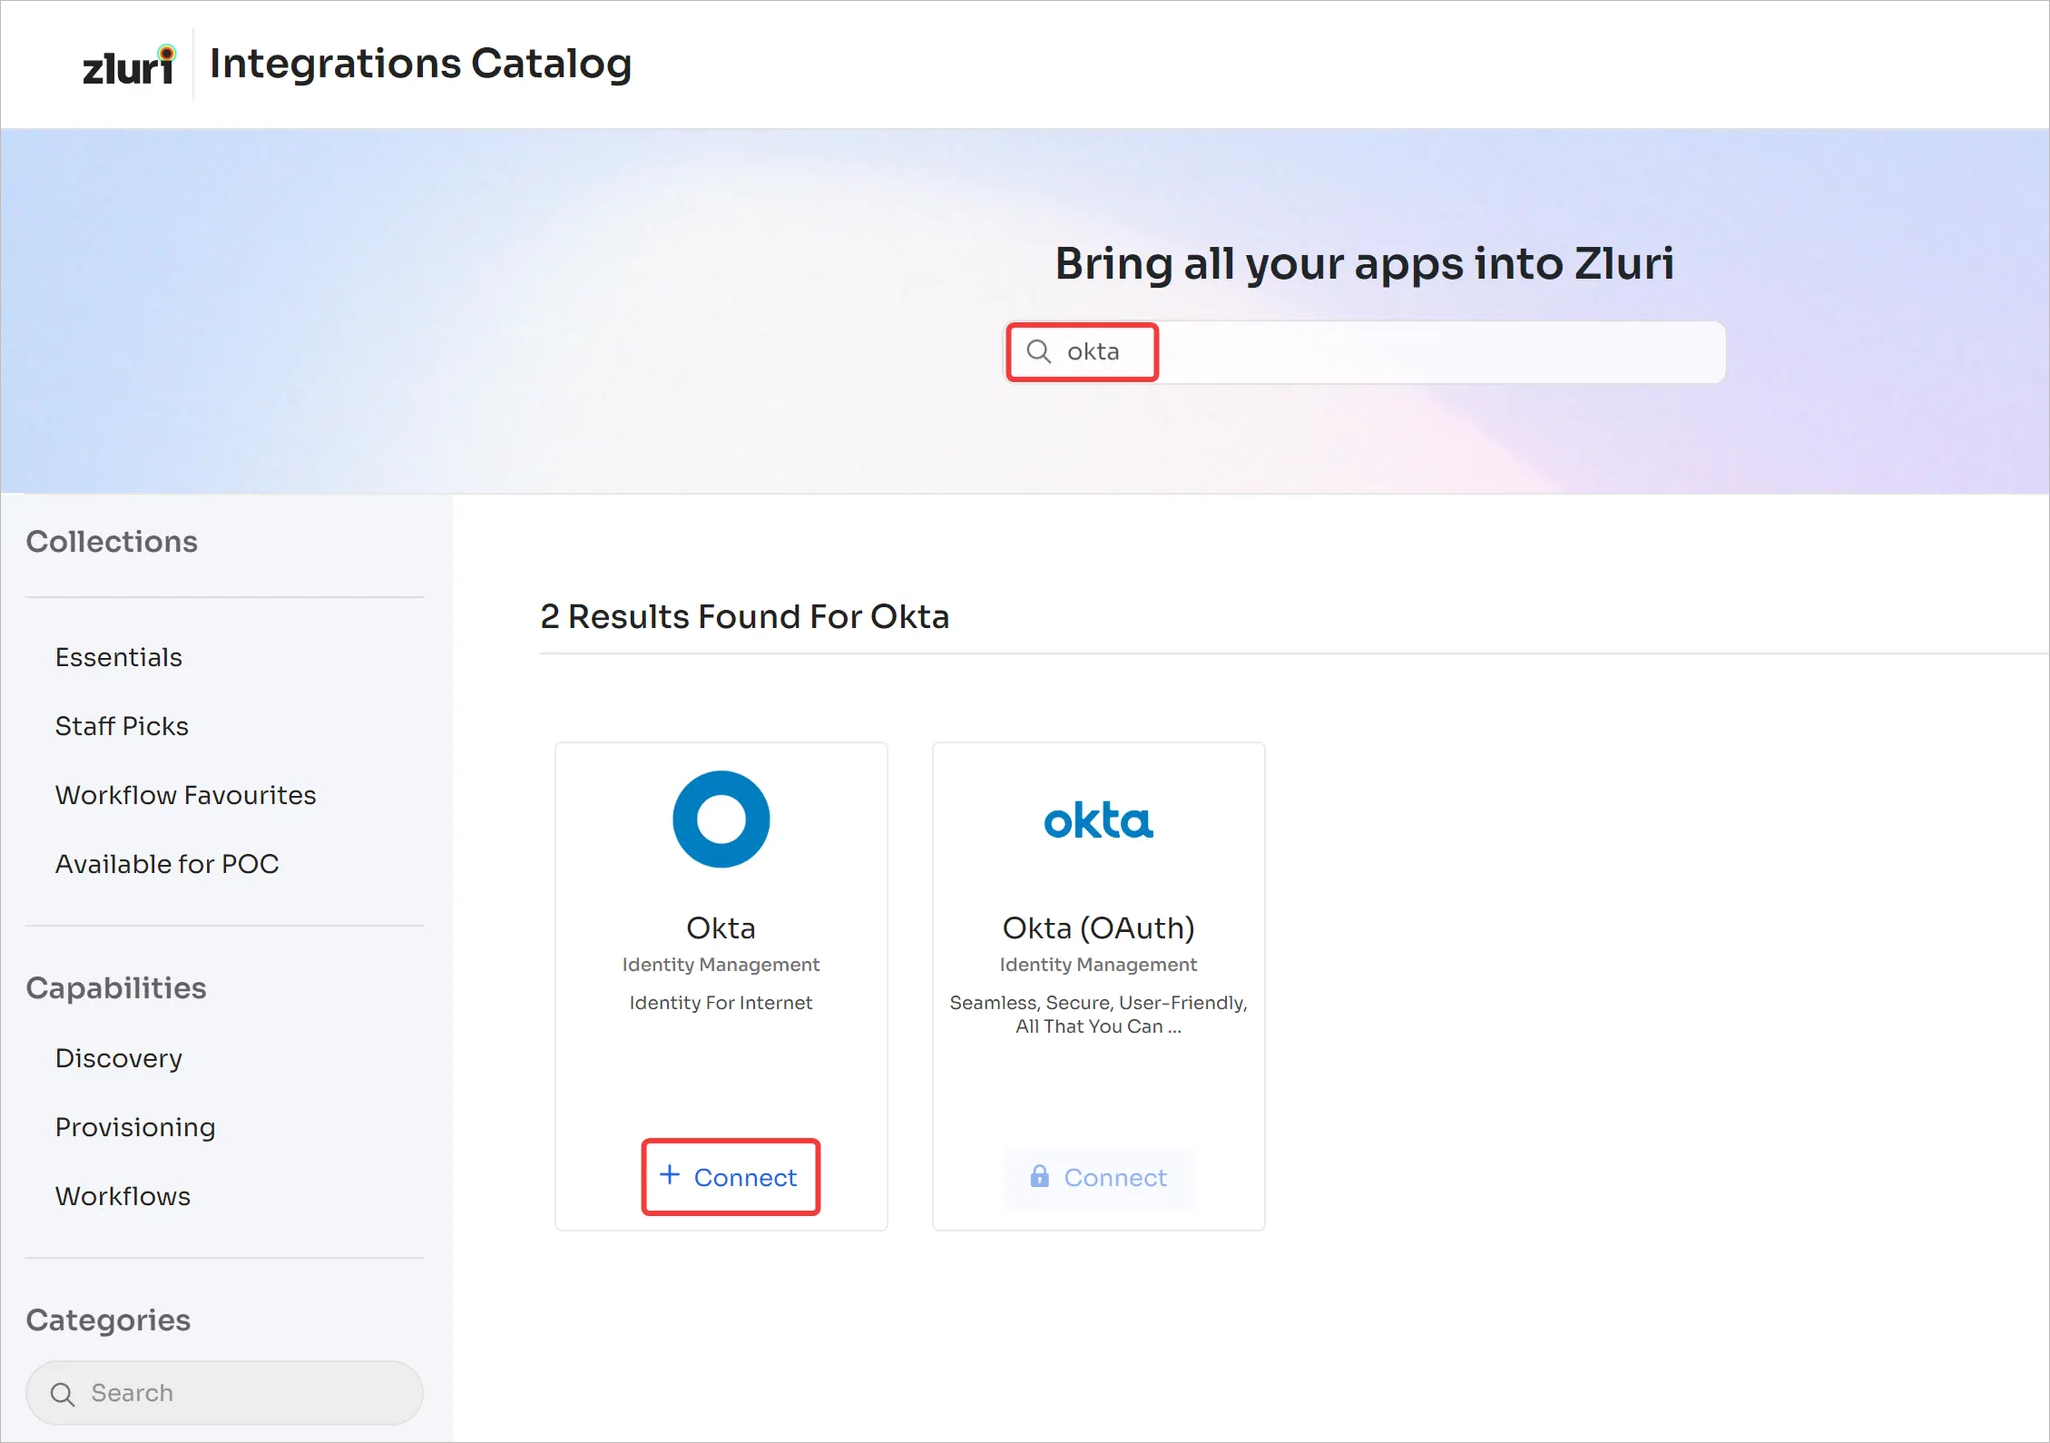
Open the Integrations Catalog, search for "okta", and click ➕ Connect.
-
Choose the scopes for the integration, and click Continue. You can click the down-arrow button to the right of a scope to find out what it does.
Make sure the scopes you choose correspond to the permissions that you enabled for the custom admin.

-
Enter the previously generated API key and your Okta organization URL here. For example, if you access Okta using
https://umbrellacorp.okta.com, enter it here. Make sure there is no trailing slash (/) after.com
-
Click Connect, give the connection a name and description, and you're ready to go!
Got questions? Feel free to submit a ticket or contact us directly at [email protected].