Azure AD SAML
Configure Azure AD SAML in Zluri
To enable clients to log in to Zluri through Azure AD, you'll need to set up SAML.
Configuration steps
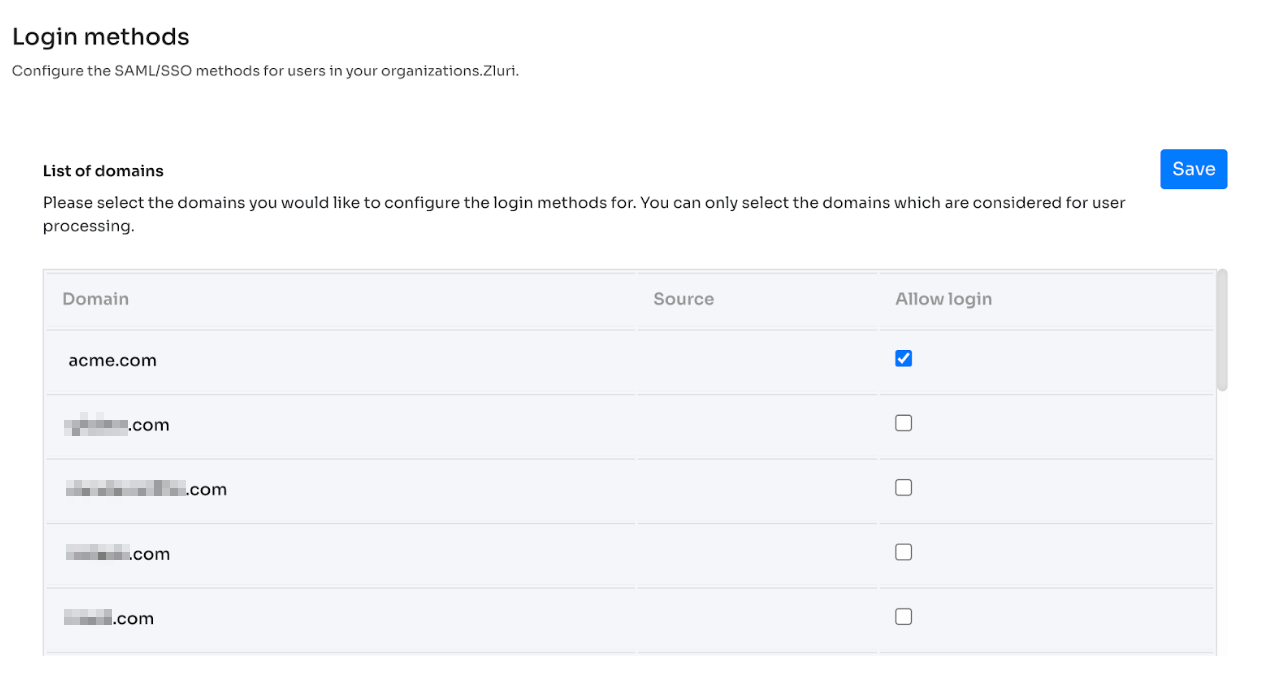
Select domains allowed for SSO in Zluri
In Zluri, navigate to Settings → SSO and select the domains allowed for SSO login. Click Save when done.
If your domain is not listed, you can add it from Settings → Directory Management.
Obtain ACS URL and Entity ID
-
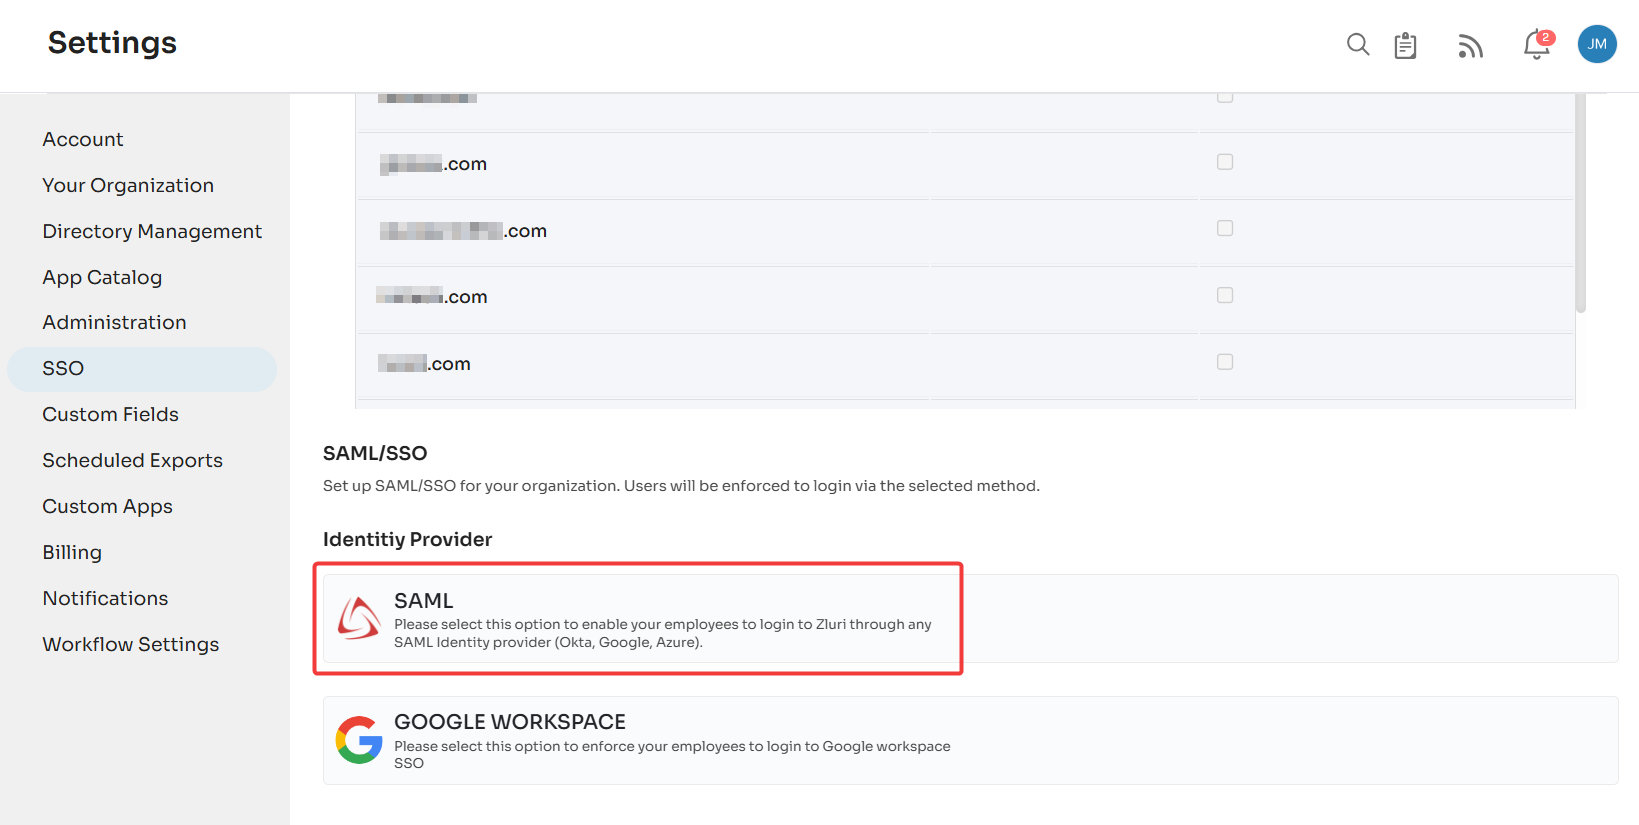
Navigate to Zluri's SSO Settings, scroll down, and click SAML.
-
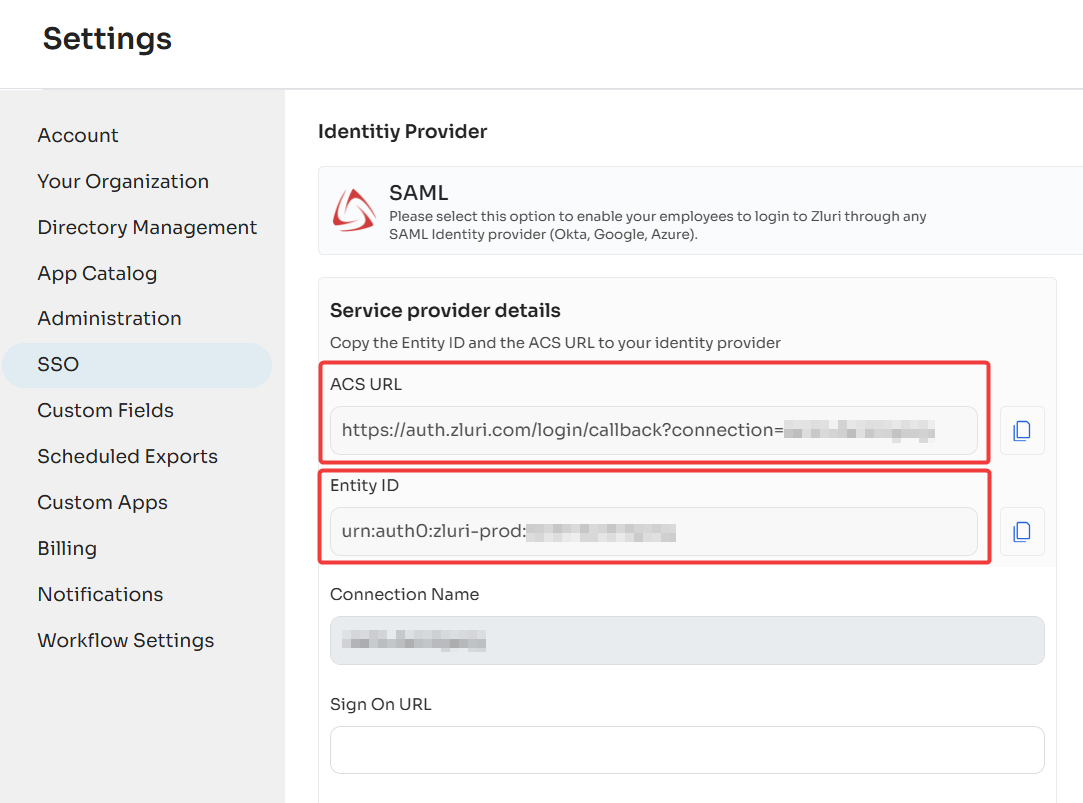
Note down the ACS URL and Entity ID. These will be needed in the next steps.
Configure SAML in Azure AD
-
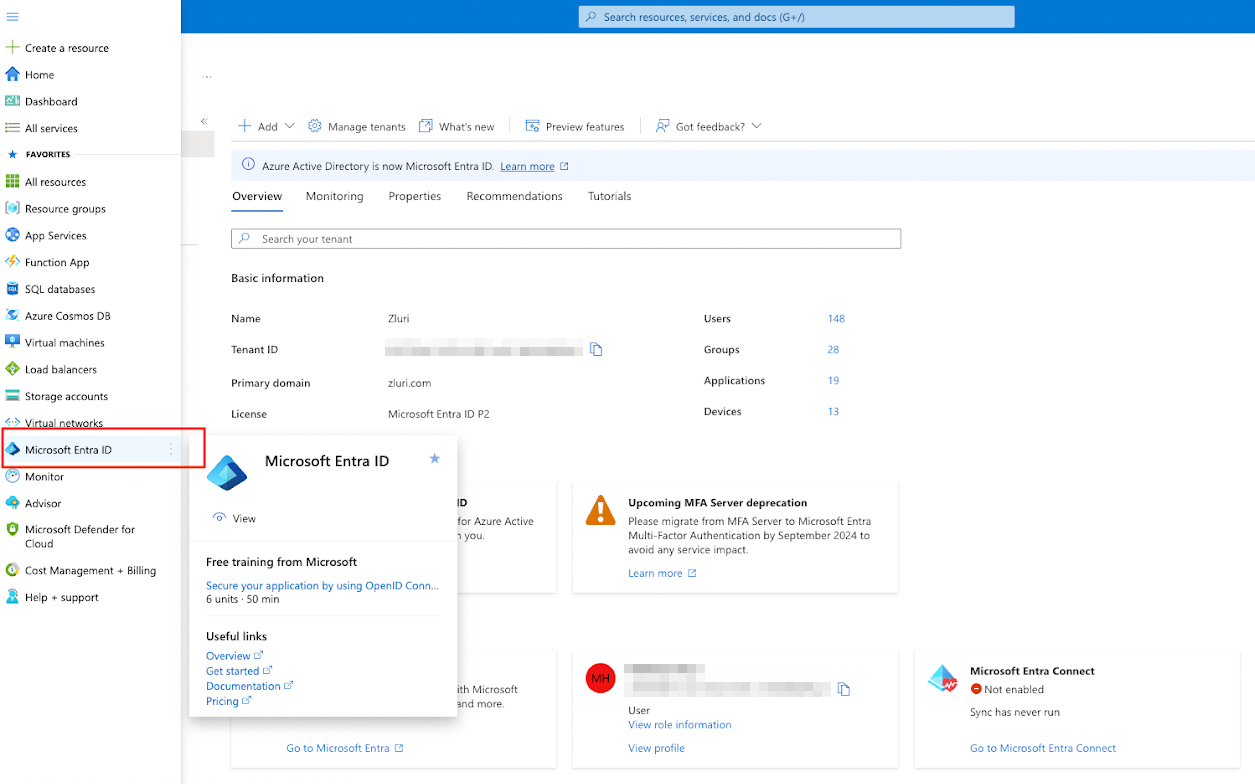
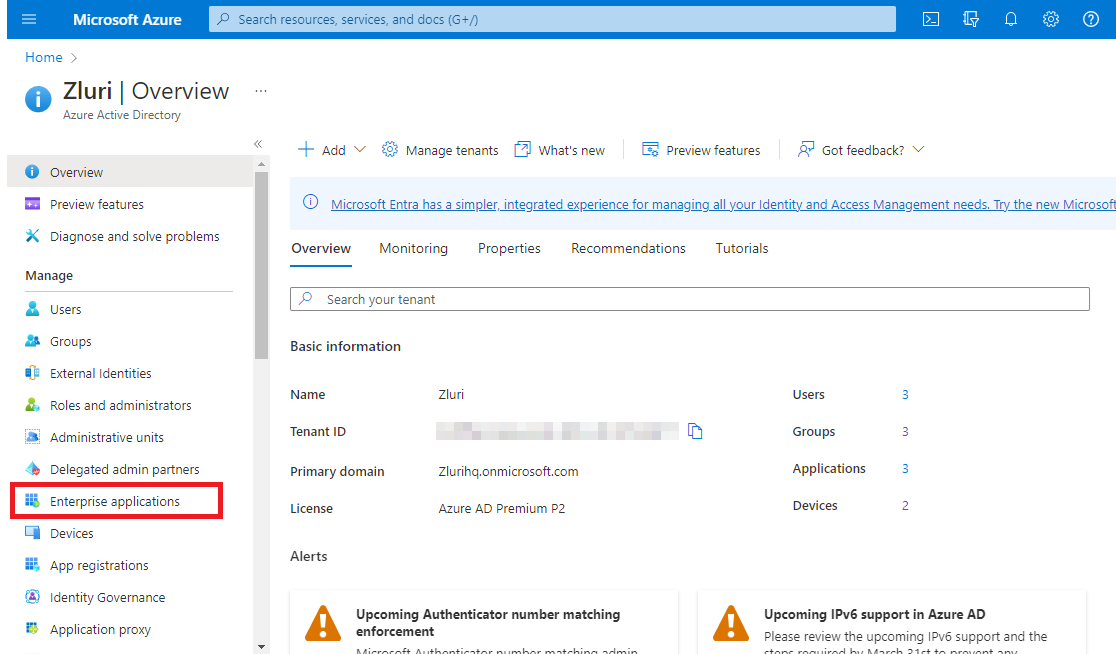
Log in to Azure AD and select Microsoft Entra ID in the left sidebar.
-
Select Enterprise applications.
-
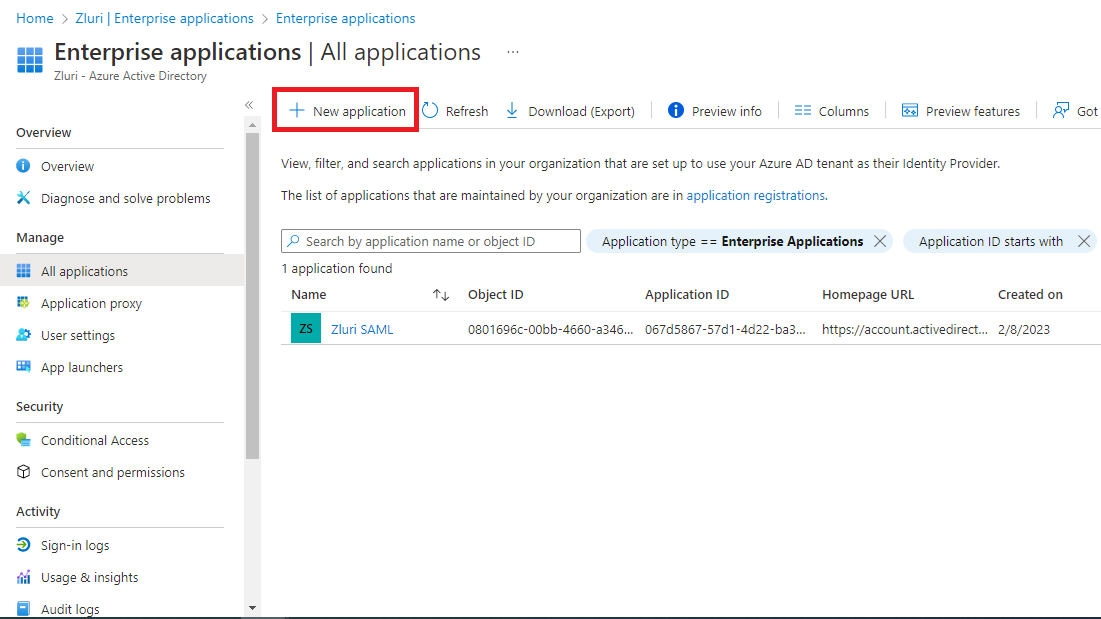
Click ➕ New application.
-
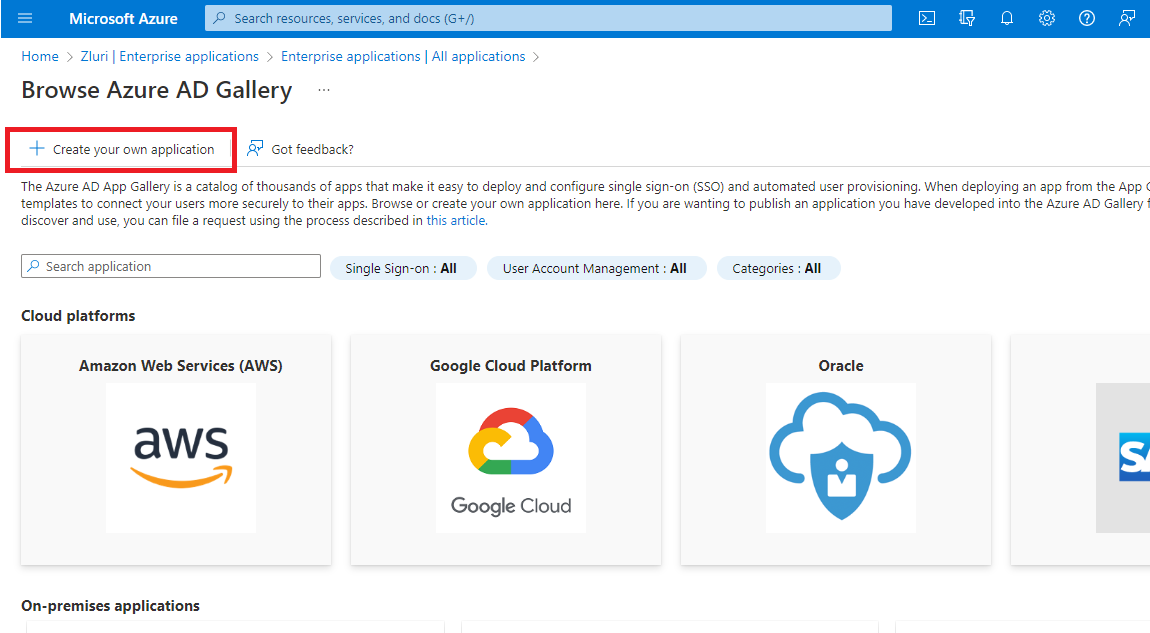
Select ➕ Create your own application.
-
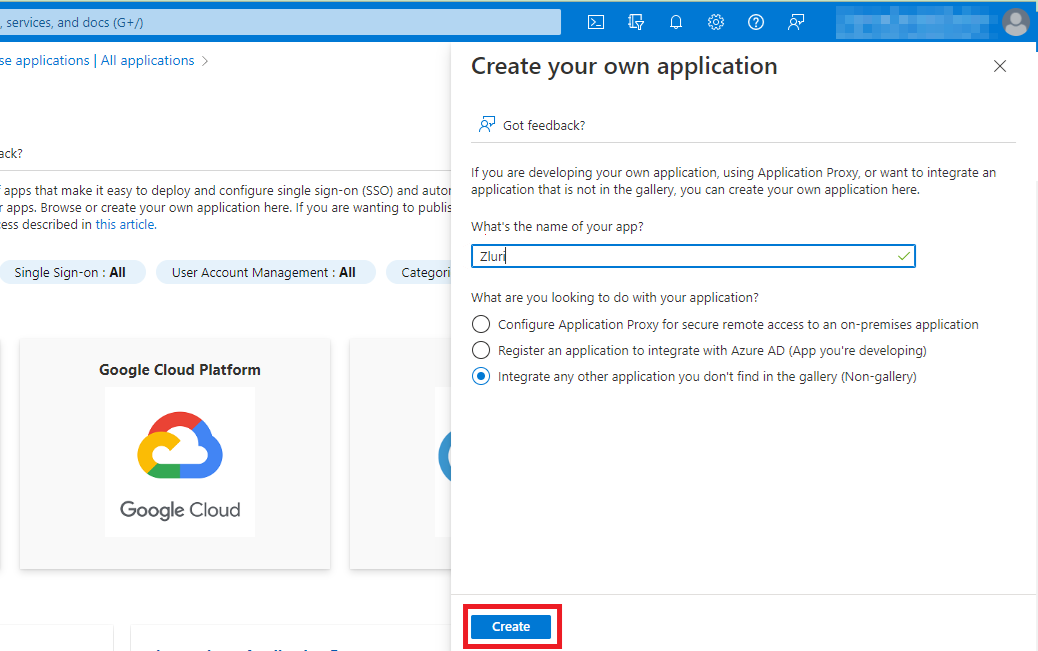
Give the application a name, select Integrate any other application you don't find in the gallery, and click Create.
-
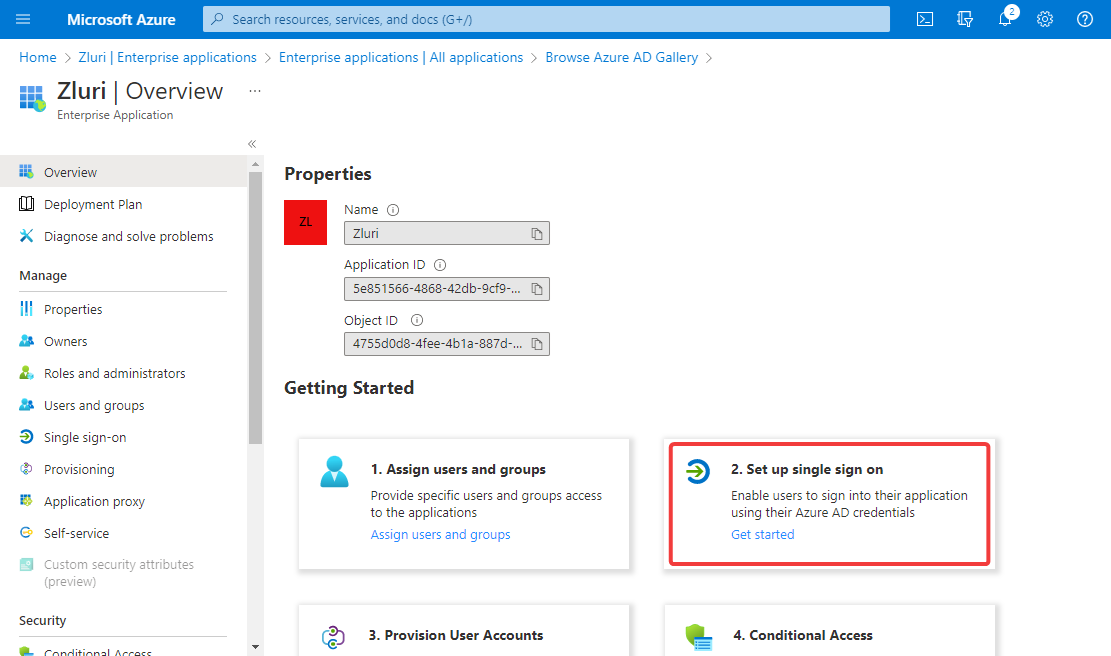
Under Getting Started, select Set up single sign on.
-
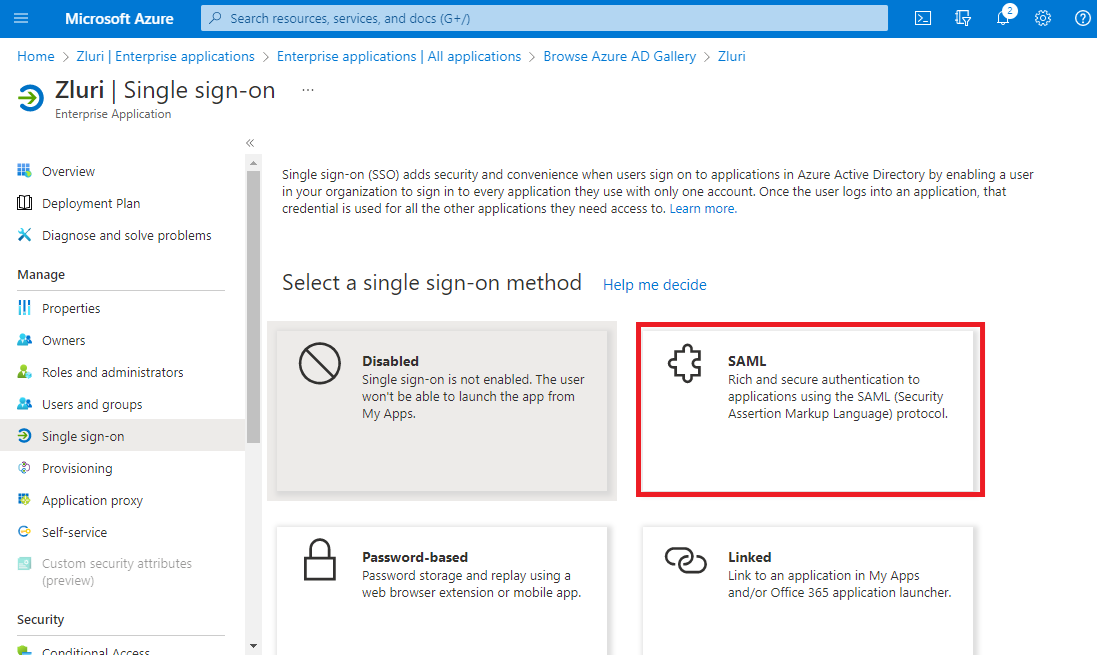
Select SAML.
-
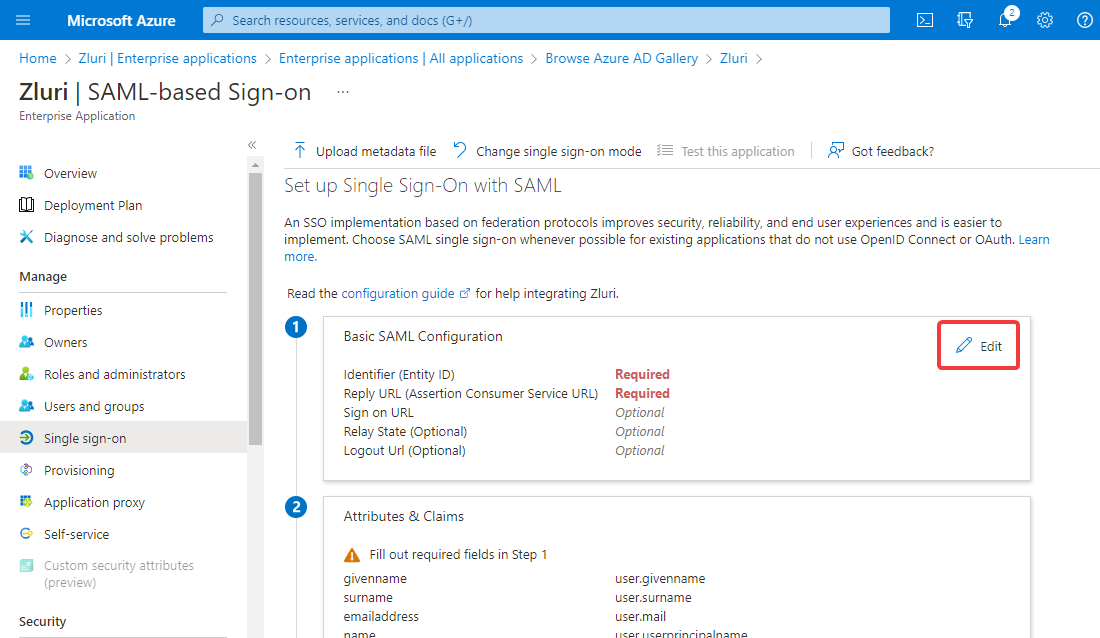
Click ✏️ Edit.
-
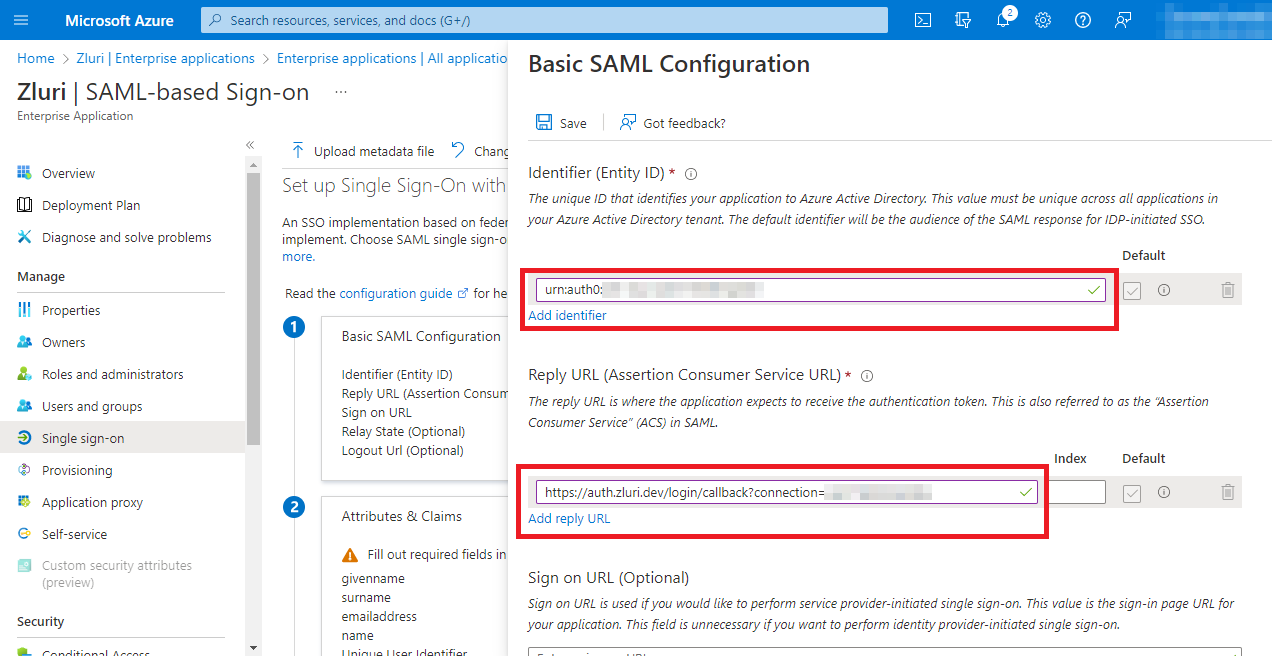
Refer to the Entity ID & ACS URL obtained earlier from the Zluri dashboard and enter them under Identifier (Entity ID) and Reply URL (Assertion Consumer Service URL) respectively.
-
Under Attributes & Claims, click ✏️ Edit.
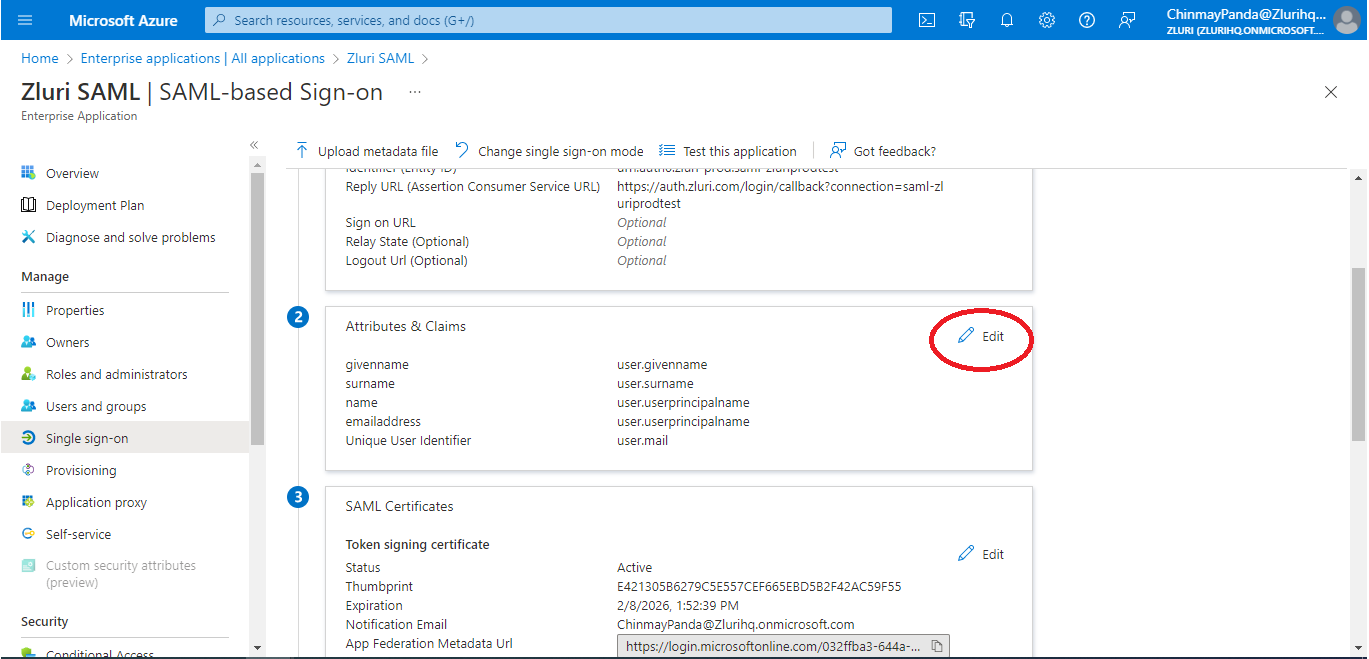
11. Fill out the required fields:
- givenname = user.givenname
- surname = user.surname
- name = user.userprincipalname
- emailaddress = user.userprincipalname
- Unique User identifier =user.mail
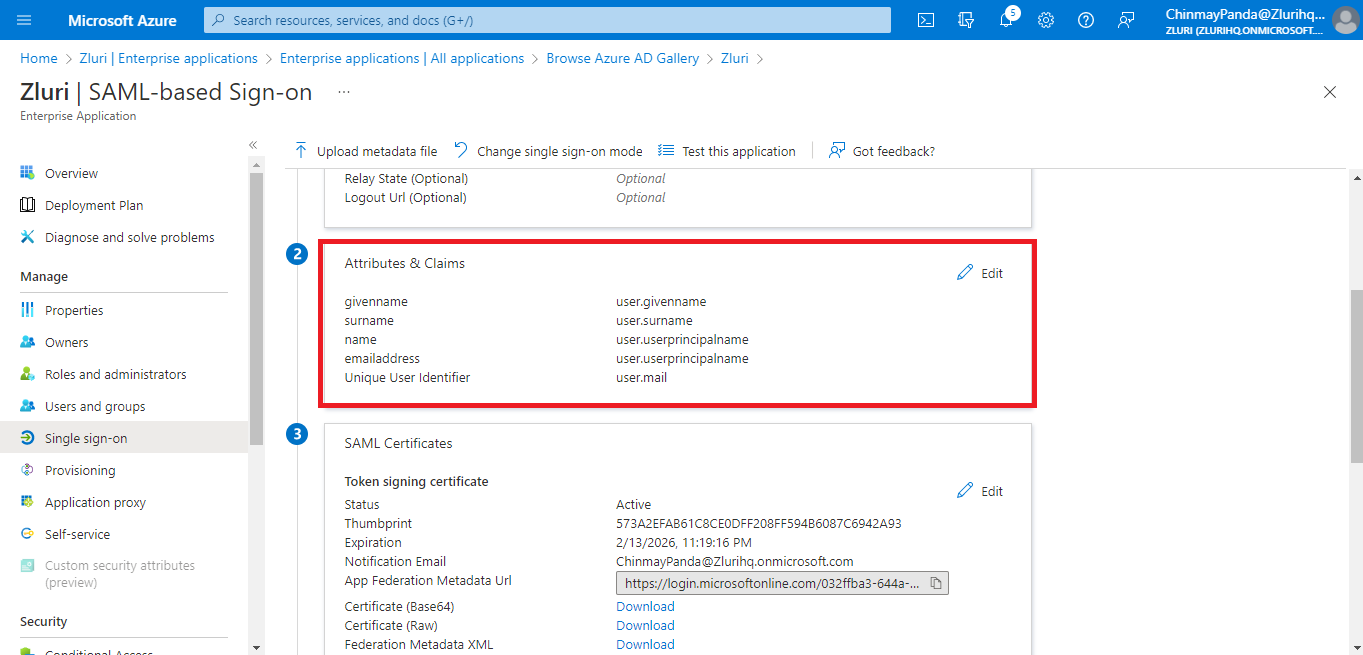
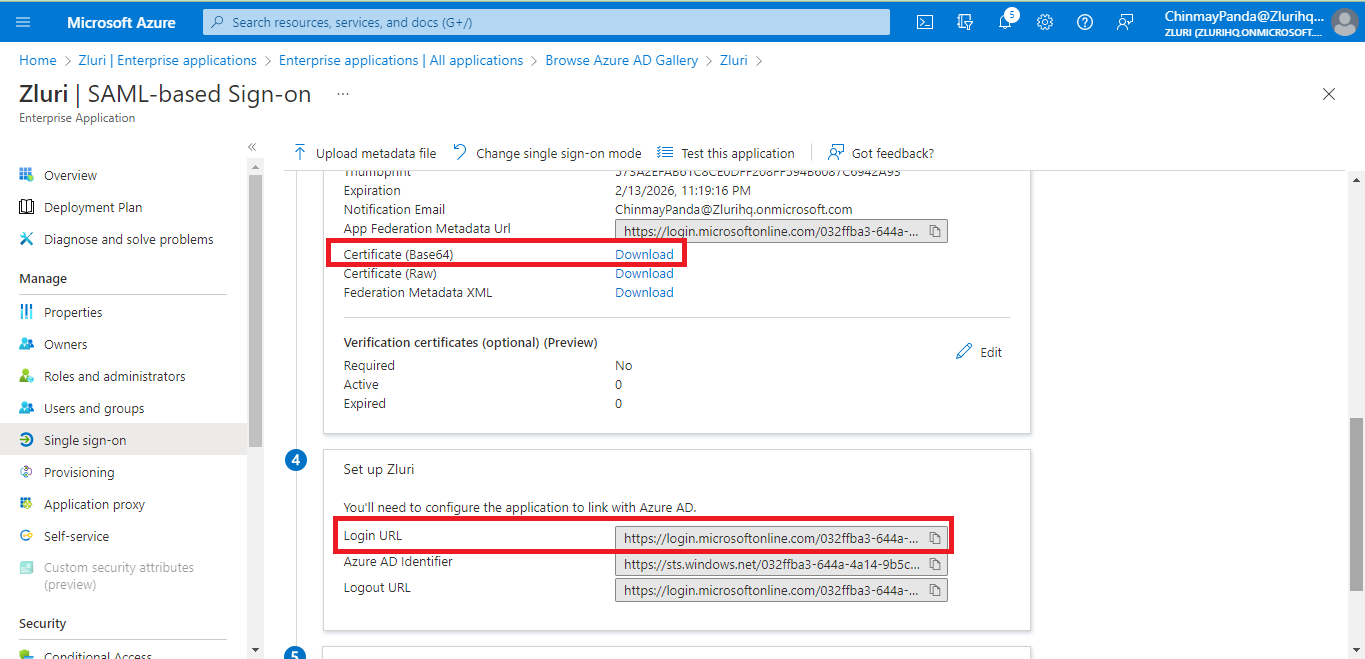
12. Download the Certificate (Base 64) and copy the Login URL.
13. The last step is to add user and user groups to the Zluri application. 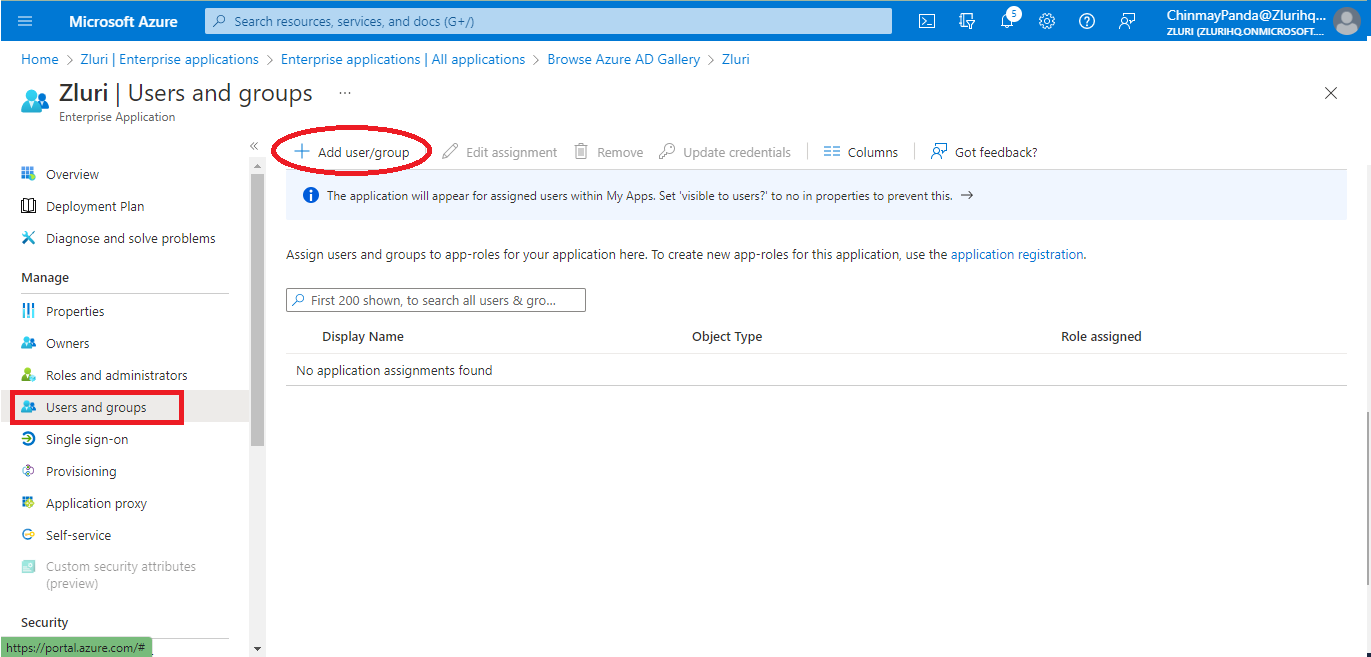
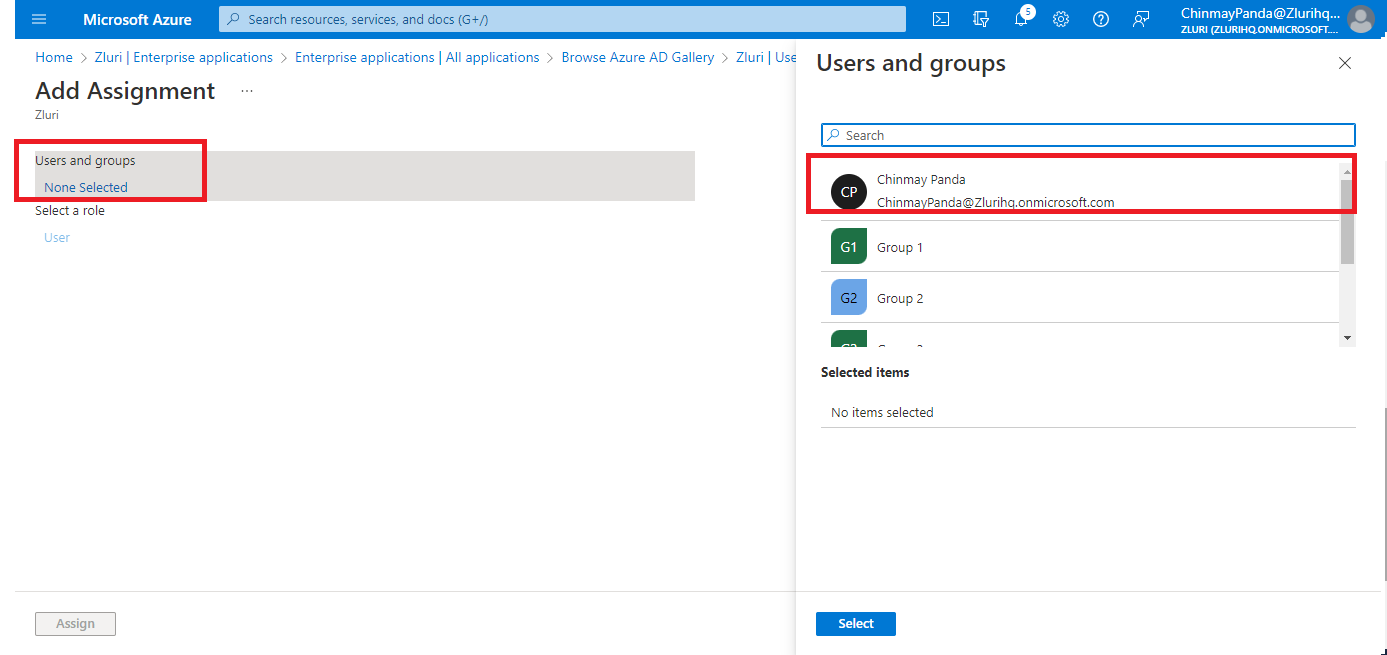
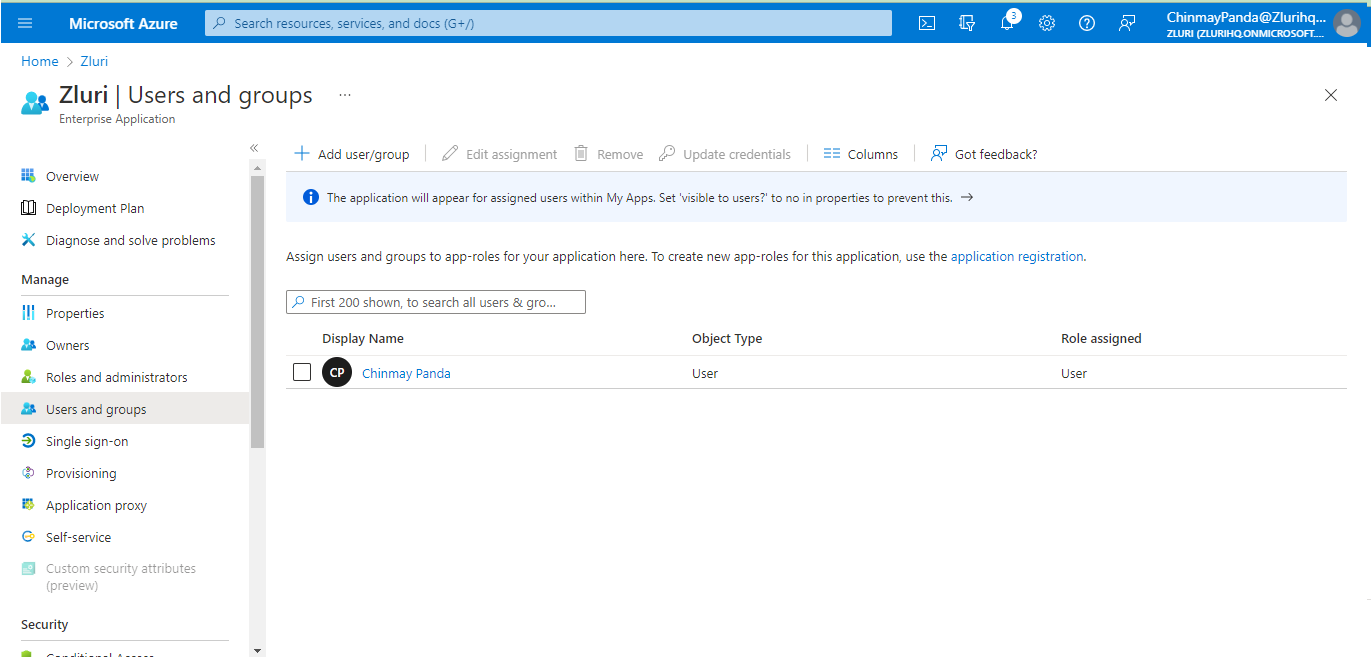
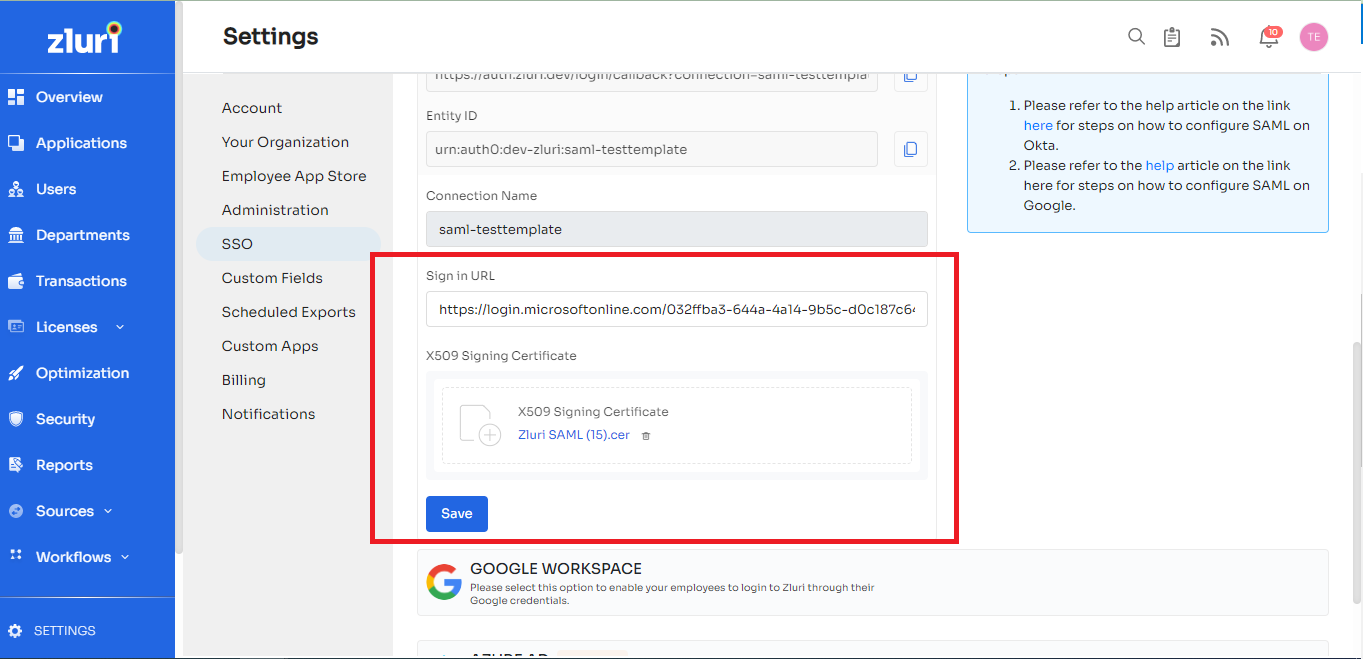
Then click 'Test connection' to try logging in with your AzureAD credentials. If you can log in successfully, then it works. Next time any user of your organization tries to log in they will be redirected to the AzureAD login page.
If you have already configured SAML, please check this link to understand How you can rotate SAML Certificate in Zluri?
Editing an existing SAML setup
Rotate SAML certificates
X.509 certificates have a defined lifetime (e.g., in Google Workspace, it has a validity of 5 years). You should rotate a certificate if it's about to expire or if it becomes compromised.
If a certificate expires before you rotate it, your users won’t be able to use SSO to sign in to any SAML applications that use that certificate until you replace it with a new certificate.
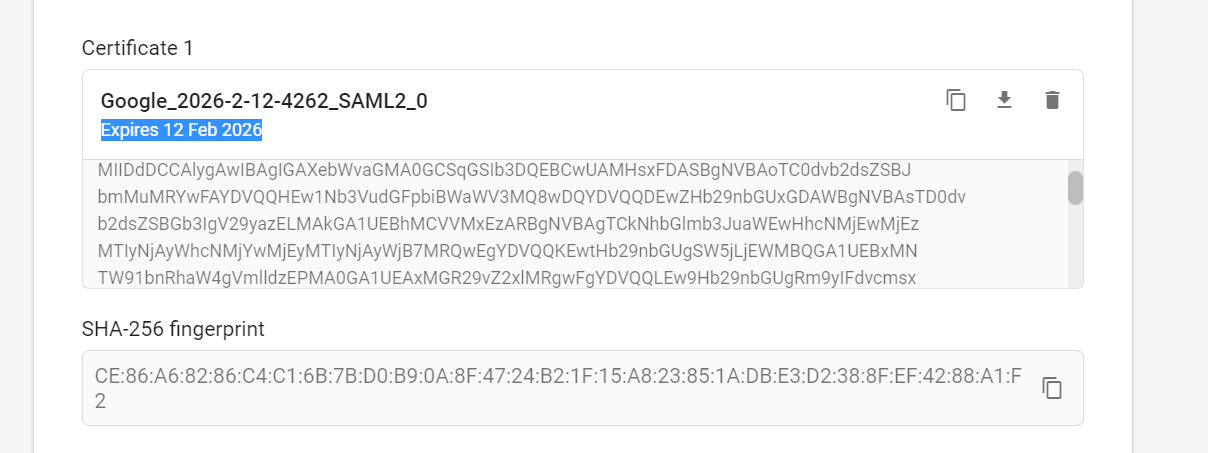
To rotate the certificate:
-
Open the SAML app in your SSO, navigate to the certificate page, and recreate it.
-
Once you get the new certificate, please upload it to the Zluri platform.
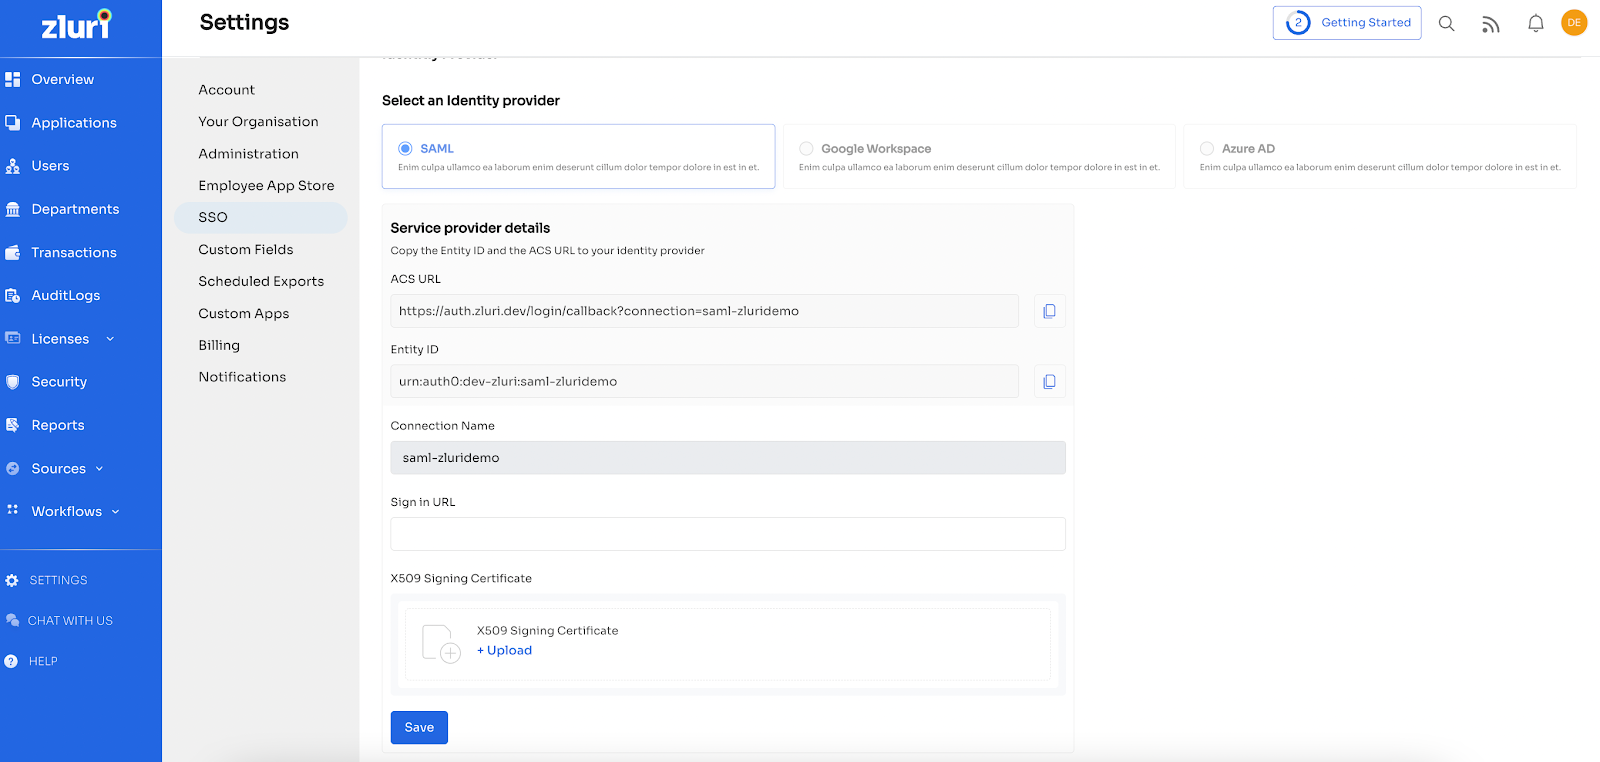
Save the connection, and you can continue to use the SAML connection as configured.
Add/remove SAML domains
To add or remove SAML domains, go to SSO Settings, select/deselect the domains that you want to configure for SAML, then click Save.
Updated 6 months ago
