Google SSO
This article explains how configure Google SSO in Zluri
How to configure Google SSO for Zluri?
Two steps are to be followed to create a Google SSO connection.
Configure Google Identity Provider in Zluri app.
Register OAuth 2.0 app with google.
Step 1: Configure Google Identity Provider in Zluri app.
Login to the Zluri dashboard
Go to settings
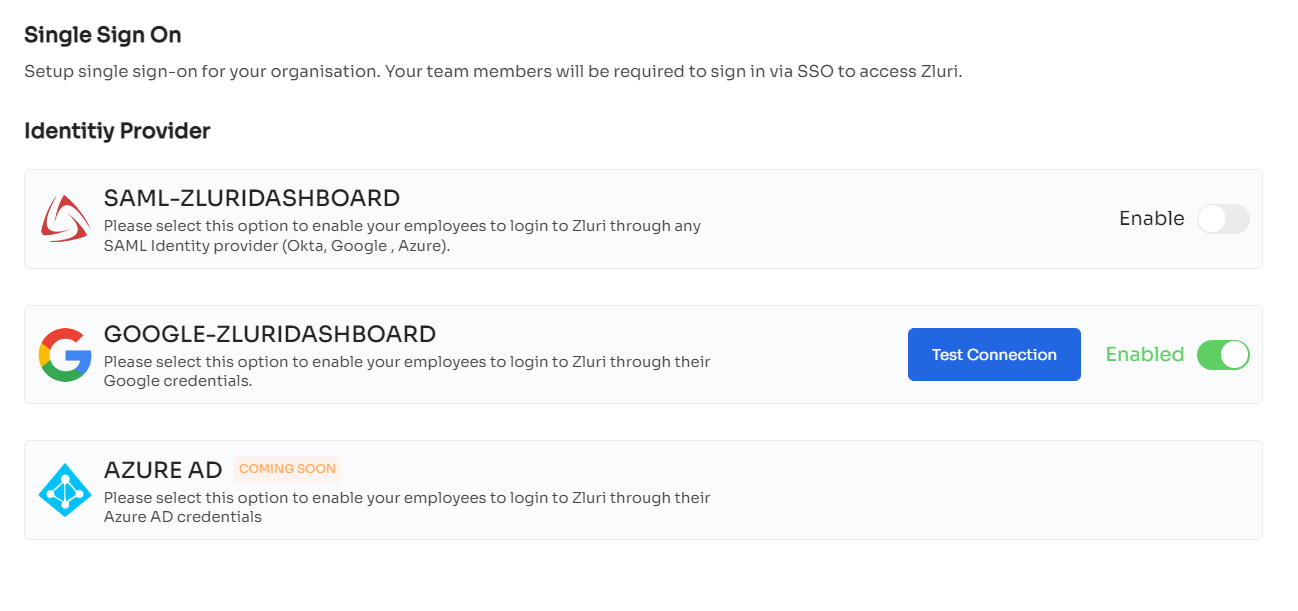
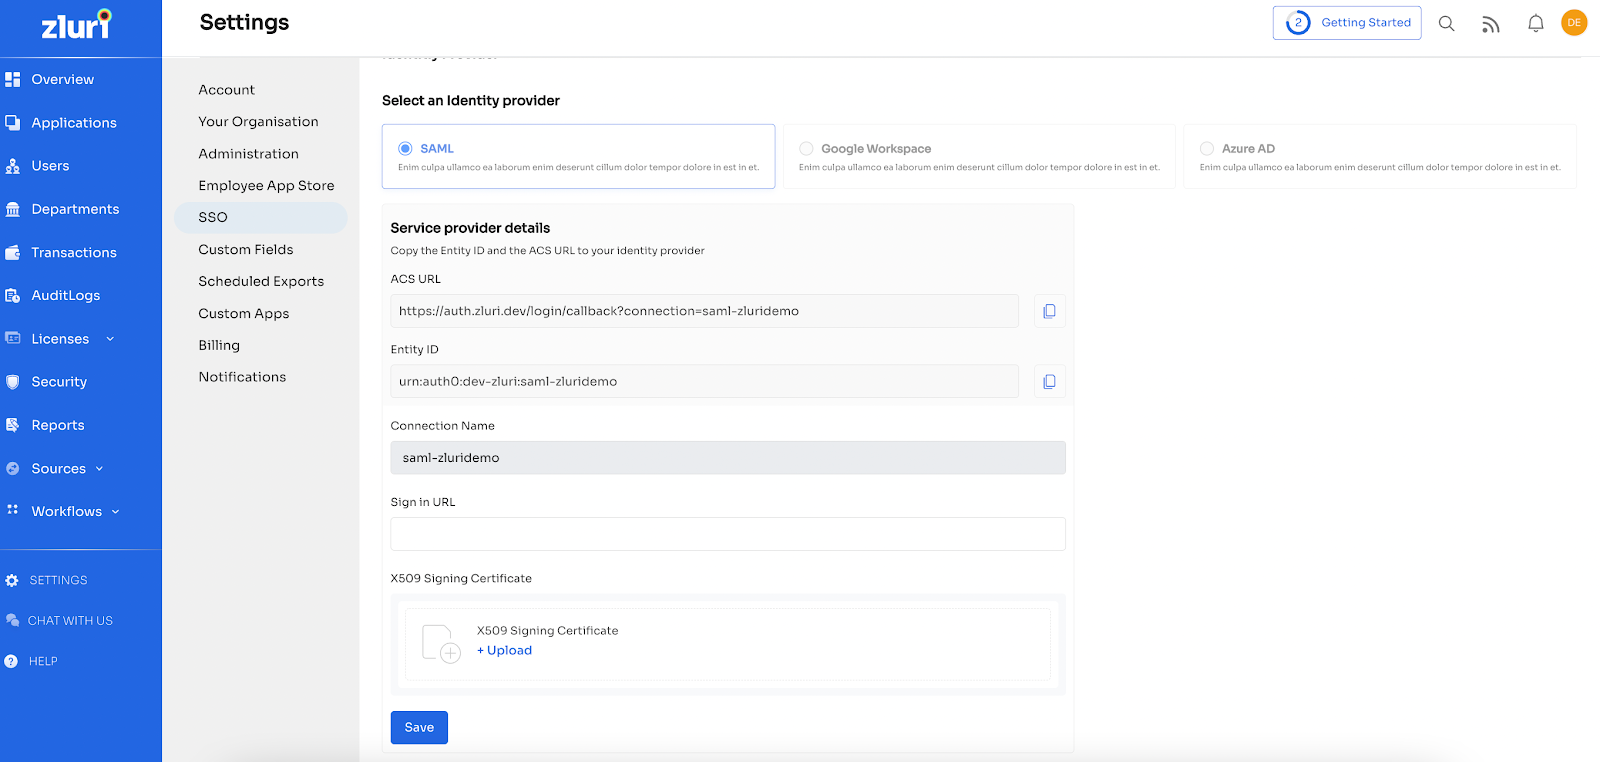
Select SSO from the left sidebar
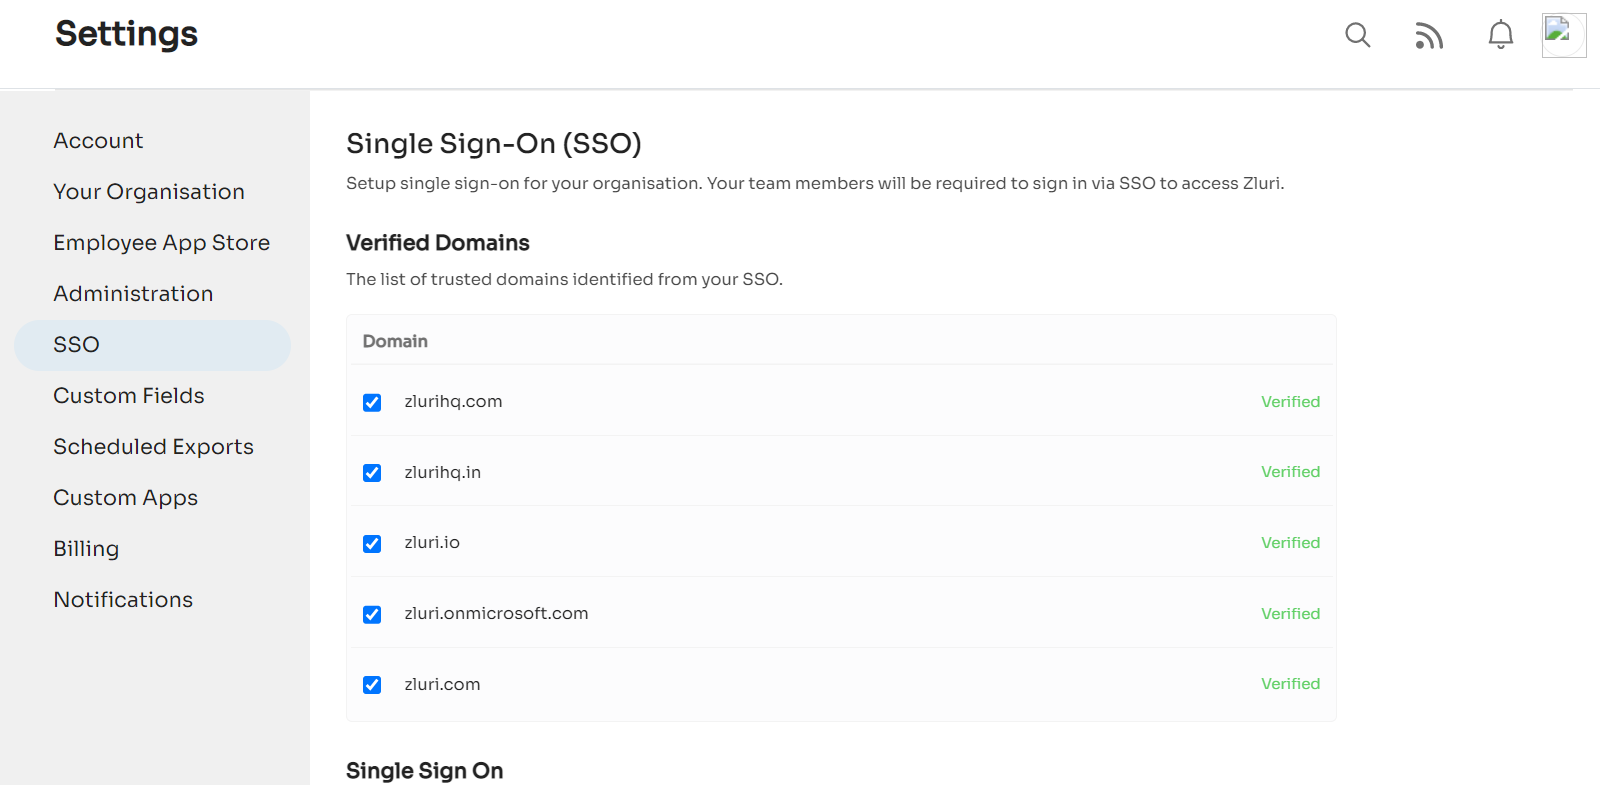
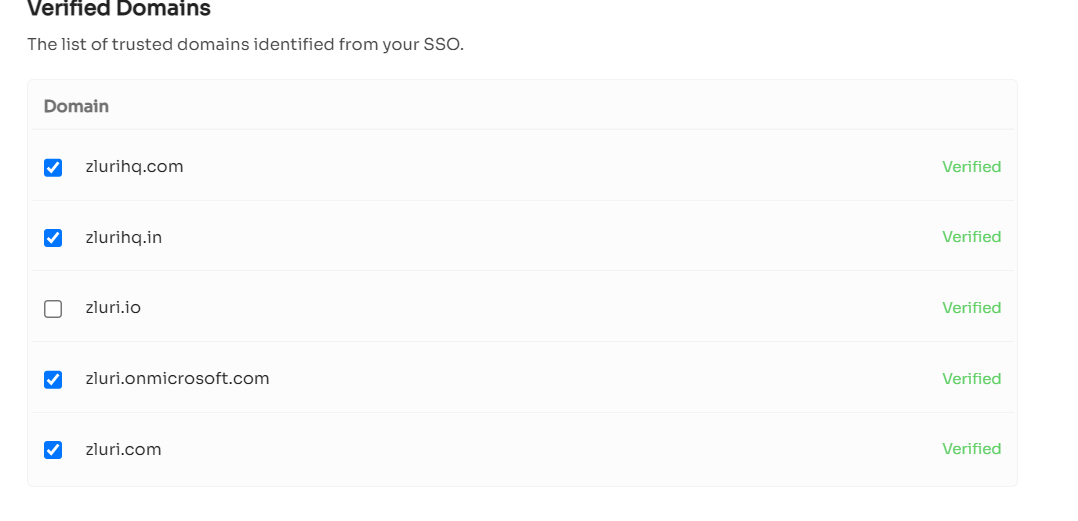
Check the list of verified domains. The Google SSO will only be enabled for users belonging to these domains. If the domains are not listed please contact the support team to get these populated in your account.
Scroll down to Identity provider and search for Google Workspace.
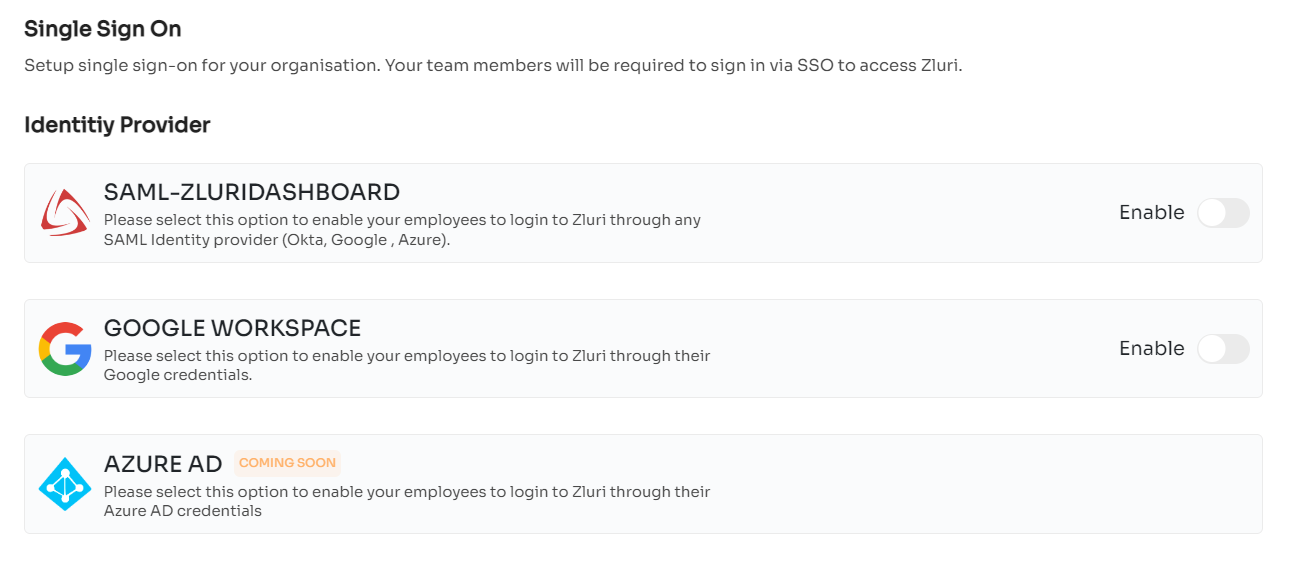
Click on 'Google Workspace'.
Form to configure the Google Workspace Identity Provider opens up
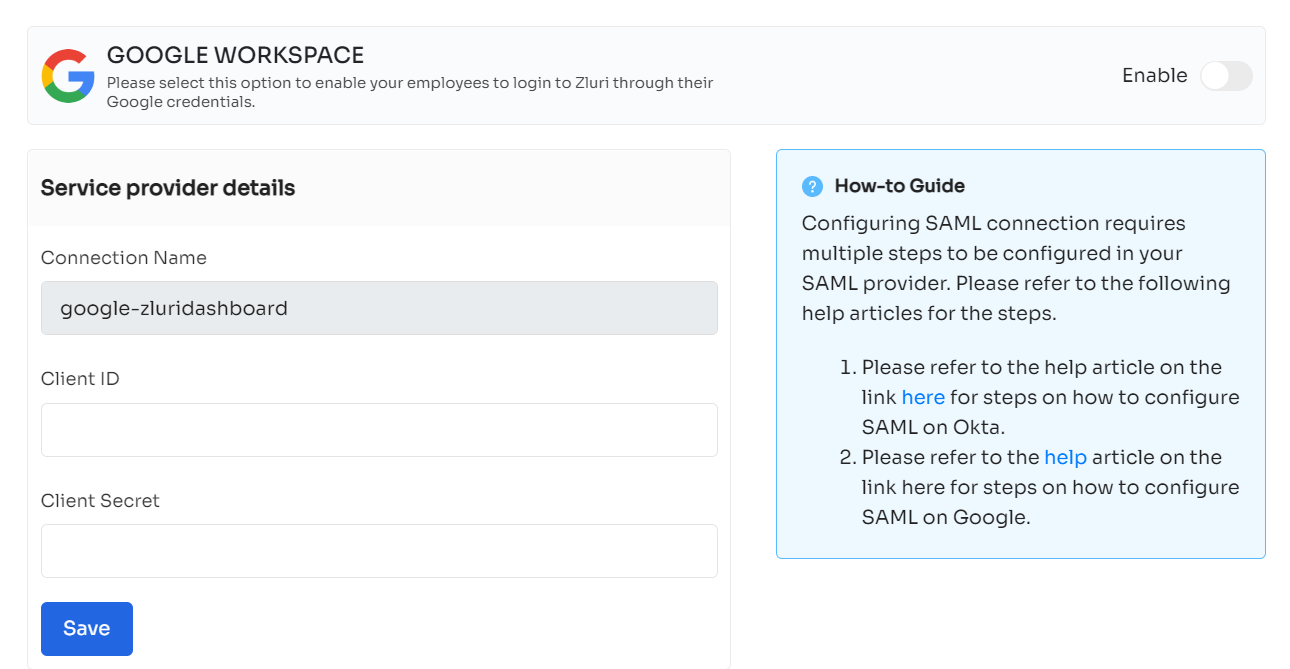
Enter Client id and Client Secret and save it (Please refer step 2 to get client id and client secret)
Post save, click enable to enforce users to login through SAML.
If something goes wrong disable the connection and check if OAuth app is correctly registered with Google or please contact us at [email protected]
Step 2: Get the client id & secret from Google Cloud Console
(https://support.google.com/googleapi/answer/6158849)
To use OAuth 2.0 in your application, you need an OAuth 2.0 client ID, which your application uses when requesting an OAuth 2.0 access token.
To create an OAuth 2.0 client ID in the console:
Go to the API Console.
From the projects list, select a project or create a new one.
If the APIs & services page isn't already open, open the console left side menu and select APIs & services.
On the left, click Credentials.
Click New Credentials, then select OAuth client ID.
Note: If you're unsure whether OAuth 2.0 is appropriate for your project, select Help me choose and follow the instructions to pick the right credentials.
Select the appropriate application type for your project and enter any additional information required. Application types are described in more detail in the following sections.
Application type - web application
Authorised JavaScript origins - https://auth.zluri.com
Authorised redirect URIs - https://auth.zluri.com/login/callback
If this is your first time creating a client ID, you can also configure your consent screen by clicking Consent Screen. (The following procedure explains how to set up the Consent screen.) You won't be prompted to configure the consent screen after you do it the first time.
Click Create client ID
It will display both the Client ID & Secret. Copy those and enter those as mentioned in point 8 of step 1.
Editing an existing SAML setup
Rotate SAML certificates
X.509 certificates have a defined lifetime (e.g., in Google Workspace, it has a validity of 5 years). You should rotate a certificate if it's about to expire or if it becomes compromised.
If a certificate expires before you rotate it, your users won’t be able to use SSO to sign in to any SAML applications that use that certificate until you replace it with a new certificate.
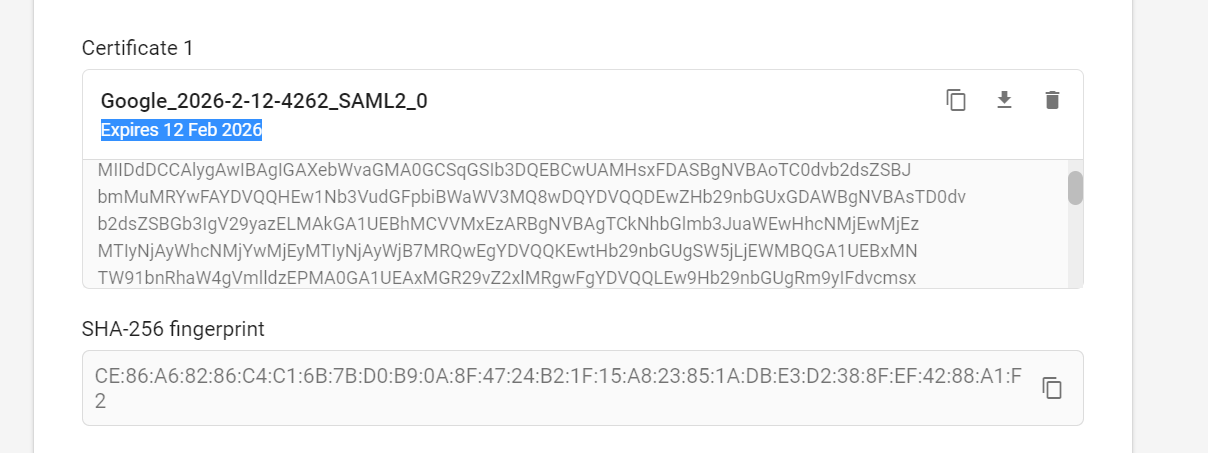
To rotate the certificate:
-
Open the SAML app in your SSO, navigate to the certificate page, and recreate it.
-
Once you get the new certificate, please upload it to the Zluri platform.
Save the connection, and you can continue to use the SAML connection as configured.
Add/remove SAML domains
To add or remove SAML domains, go to SSO Settings, select/deselect the domains that you want to configure for SAML, then click Save.
Updated 10 months ago