Contracts
Contract management overview
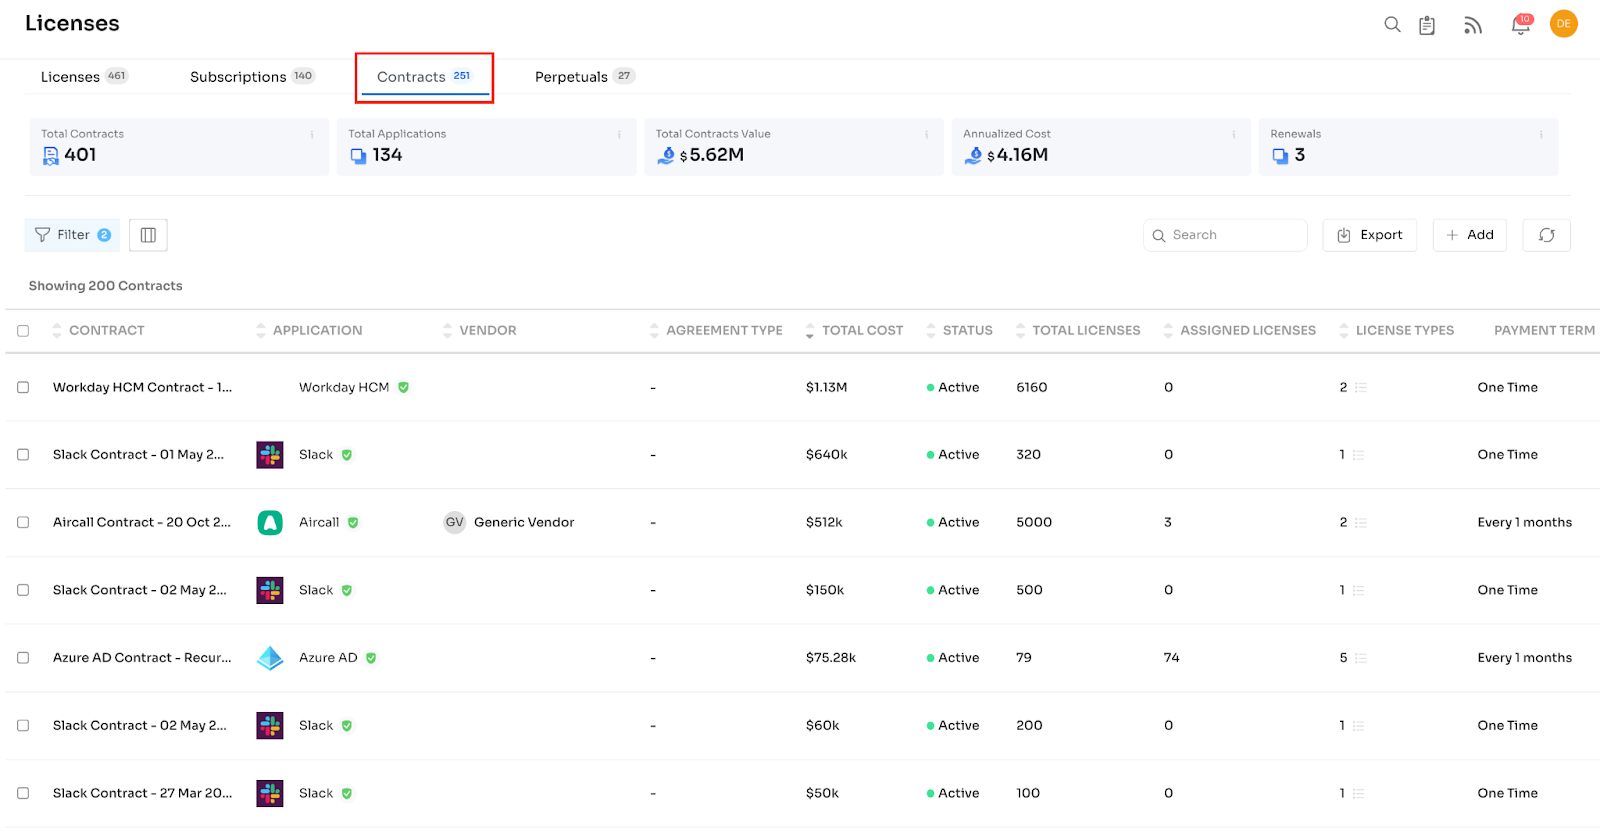
In the Contracts tab, below mentioned columns are present:
Contract, Application, Vendor, Agreement Type, Total Cost, Status, Total Licenses, Assigned Licenses, License Types, Payment Term, Auto-Renewal, Start Date, End Date, Term Length, Annual Spend, Renewal/Cancel By Date, Payment Method, No. of Documents.
- Agreement Type can be Master, SOW, Service, or True Up.
- The Payment Terms can be One Time, Every month, Every three months, etc.
- The Auto-Renewal can be OFF/ON. Term Length is the duration of the contract.
- The Annual spend is the annualised amount spent in the contract for various applications/licenses.
- No. of documents is the document related to the contract.
A Contract has fixed start and end dates.
Add a New Contract
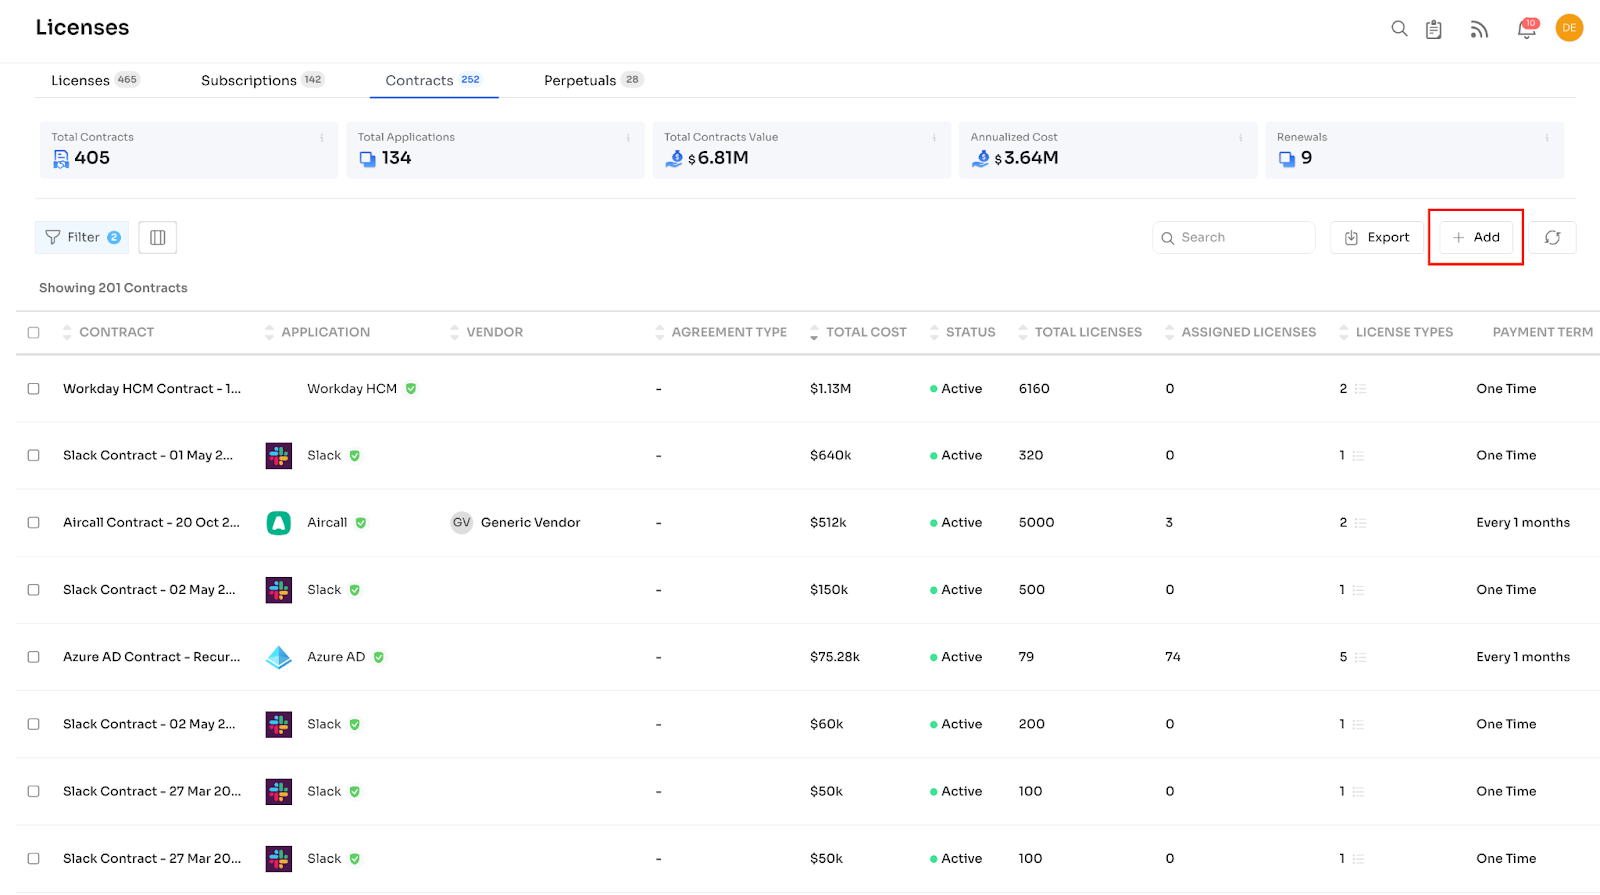
To add a new contract, the customer must click the “+Add” button, as shown below:
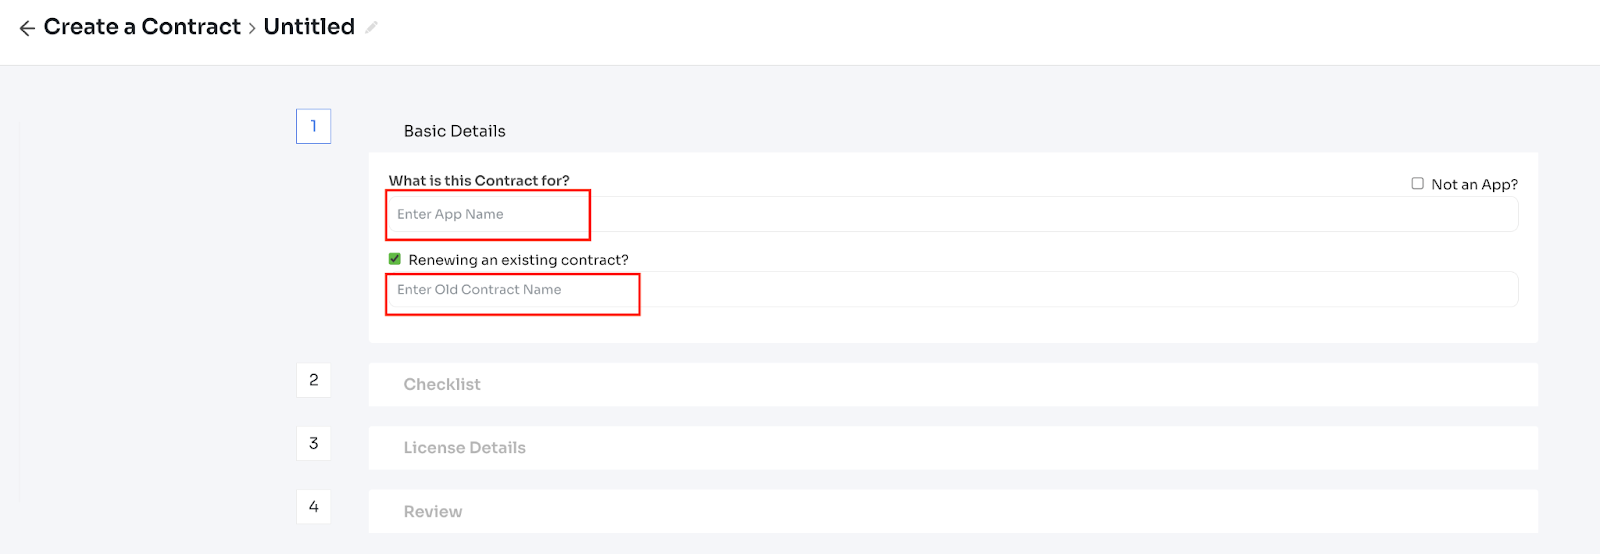
On the first screen, the customer needs to enter the application name. He also has the option to renew the existing contract if he selects the “Renew and existing contract” checkbox. He can enter the old contract name:
If the customer is creating a new contract, they need to enter the application first and proceed to fill other details:
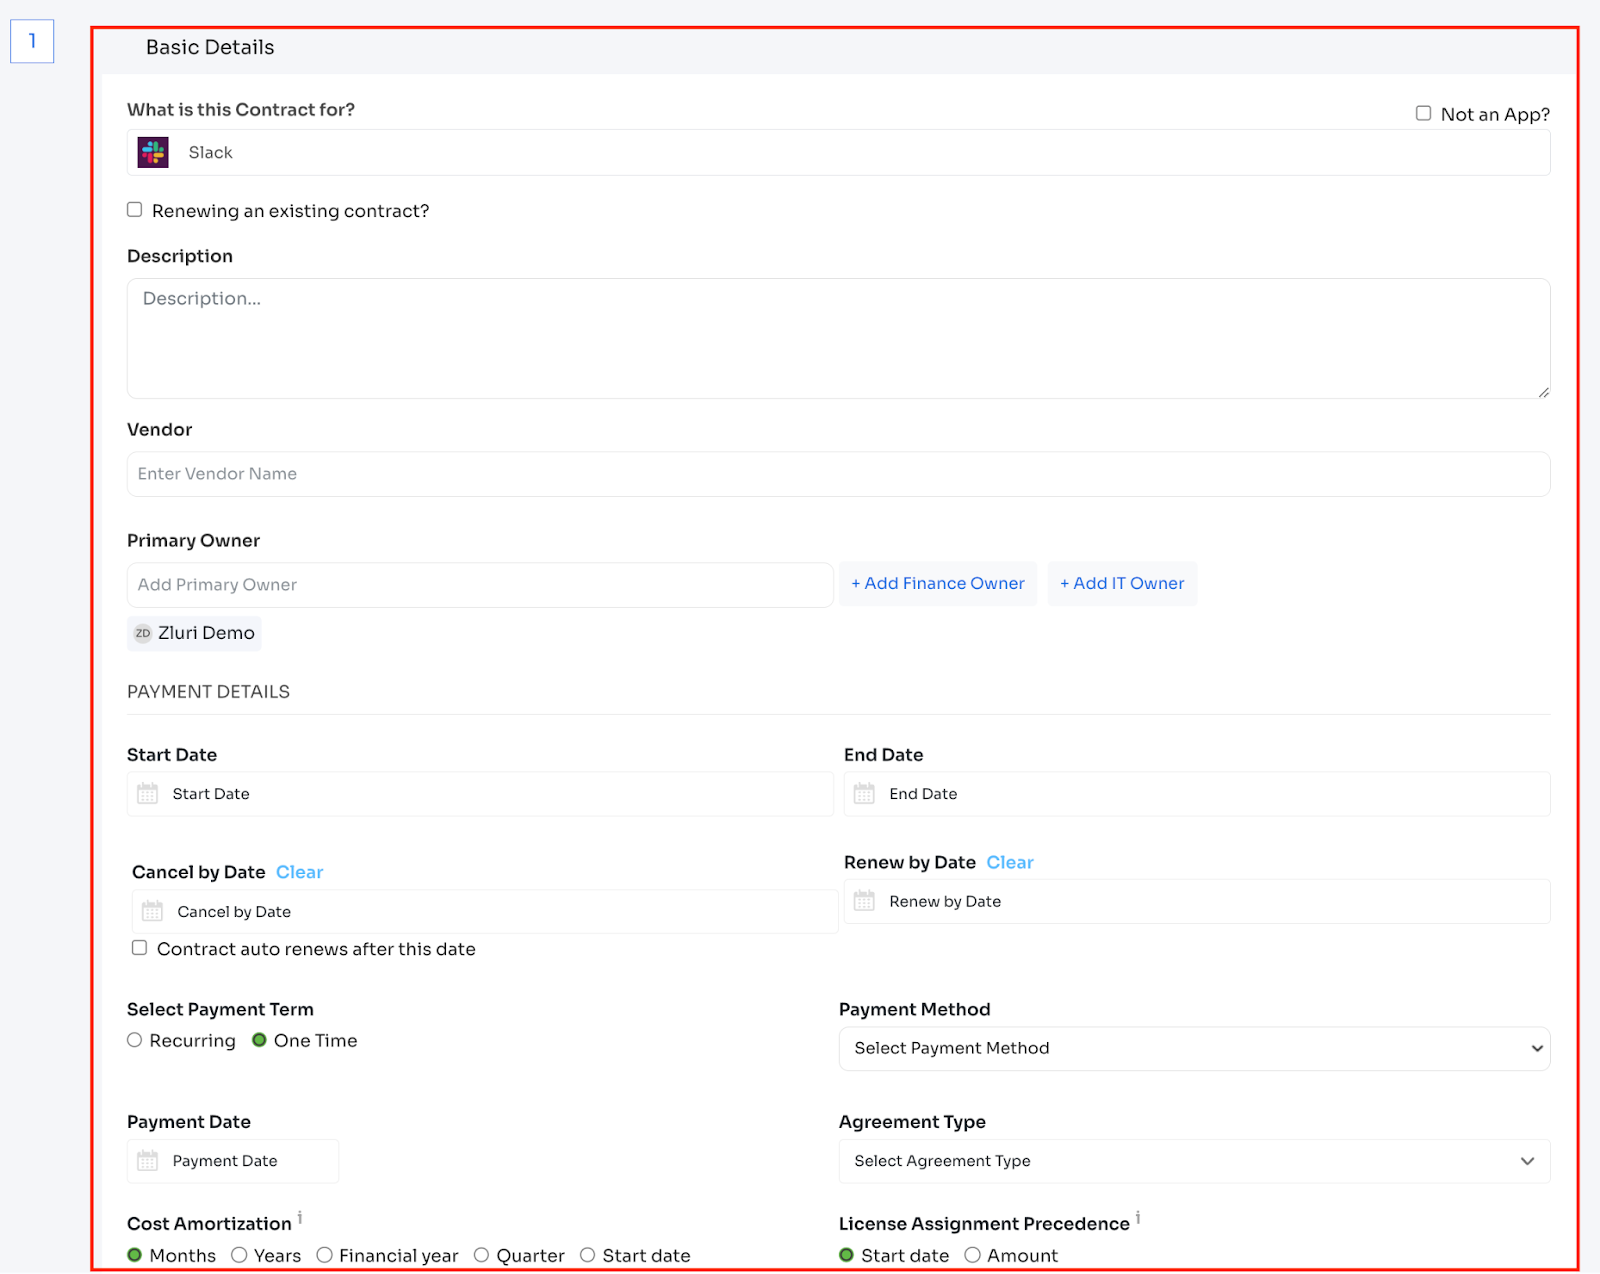
Basic details:
- Contract name - Required
- Application - Required
- Select by searching an application or select ‘not an app.’
- Vendor - Required
- Primary Owner - Required
- Select from the dropdown list of all users in the organisation
- Finance owner - Optional
- IT Owner - Optional
- Contract start date - Required
- Contract end date - Required
- Agreement Type can be Master, SOW, Service, or Turn Up.
- Master agreement - The first agreement comprises the agreement's terms and conditions.
- Service - the services and payments that are offered between both parties.
- SOW - Statement of work - comprises goals, deliverables, projects etc.
- True ups - additional services/licenses procured in future after the first agreement.
- Cost Amortisation can be set for Months, Years, Quarters, FY, and Start Date.
- Important: Adding renewal/cancel by date will add the contract to the renewal calendar & contract owner/IT admin can set alerts to remind them about upcoming renewals.
After entering Basic Details, next, the customer needs to fill out the Checklist. Here the customer can upload a copy of the contract and enable the relevant options on the right side, whichever is applicable:
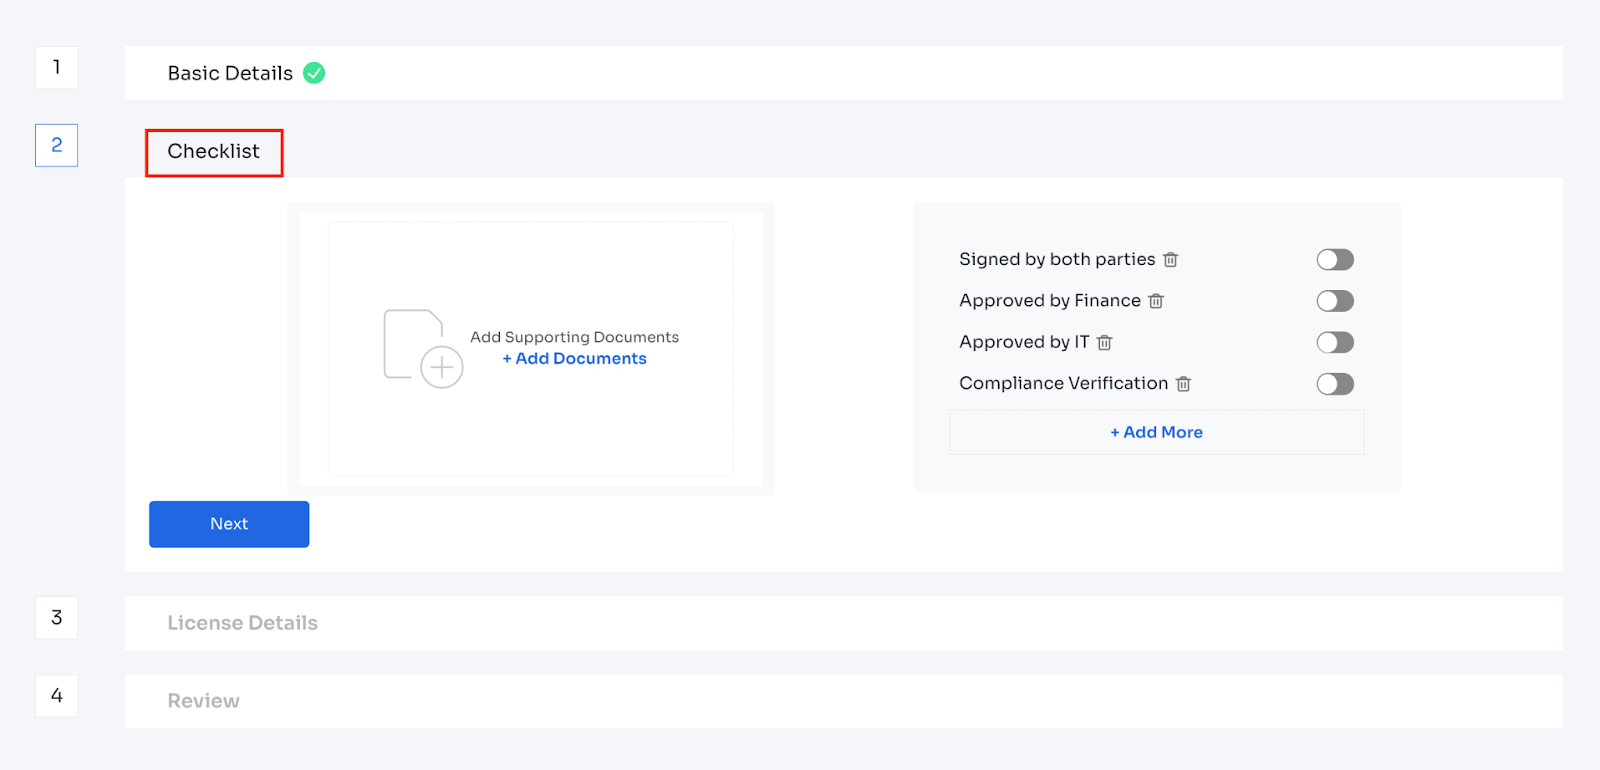

Important: You can add/delete the type of document you want from the document checklist.
After filling in the details, he can click on Next to enter License Details:
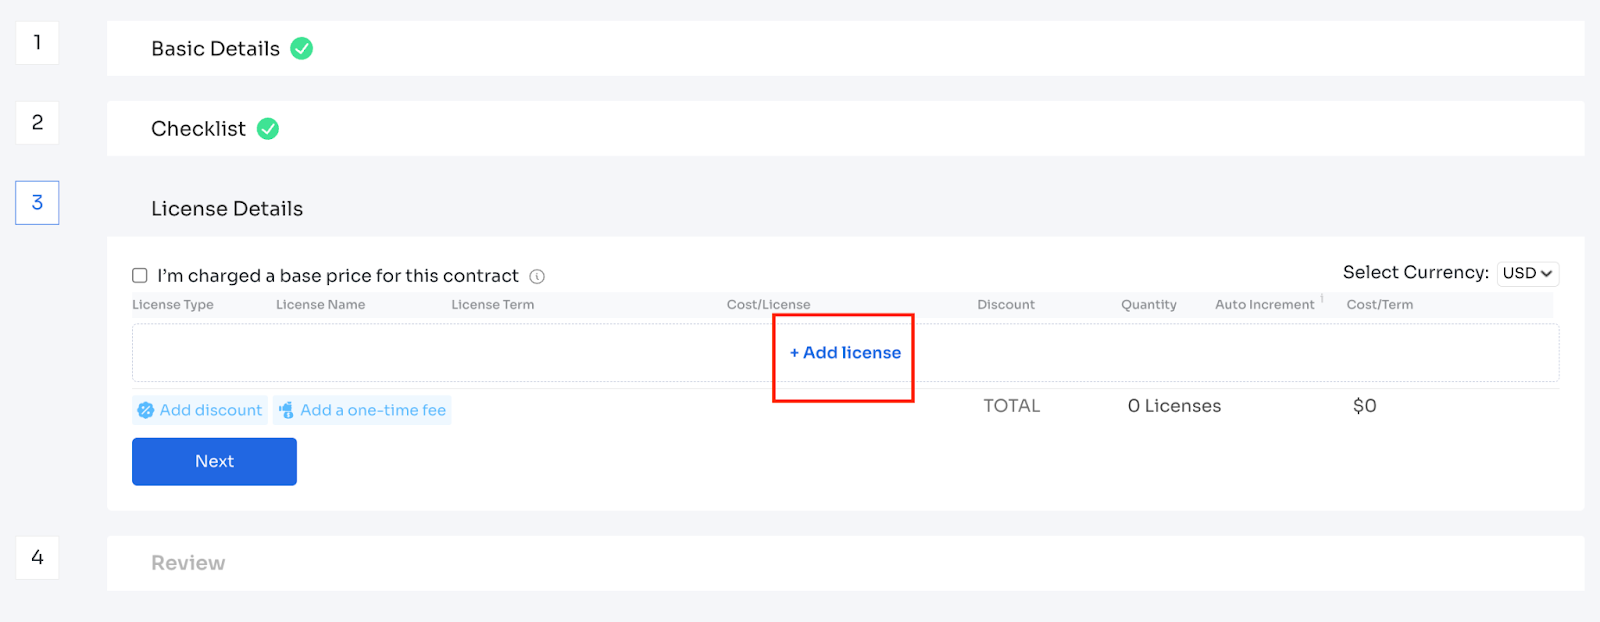
The customer can fill in the base price, discount and setup fees if applicable:
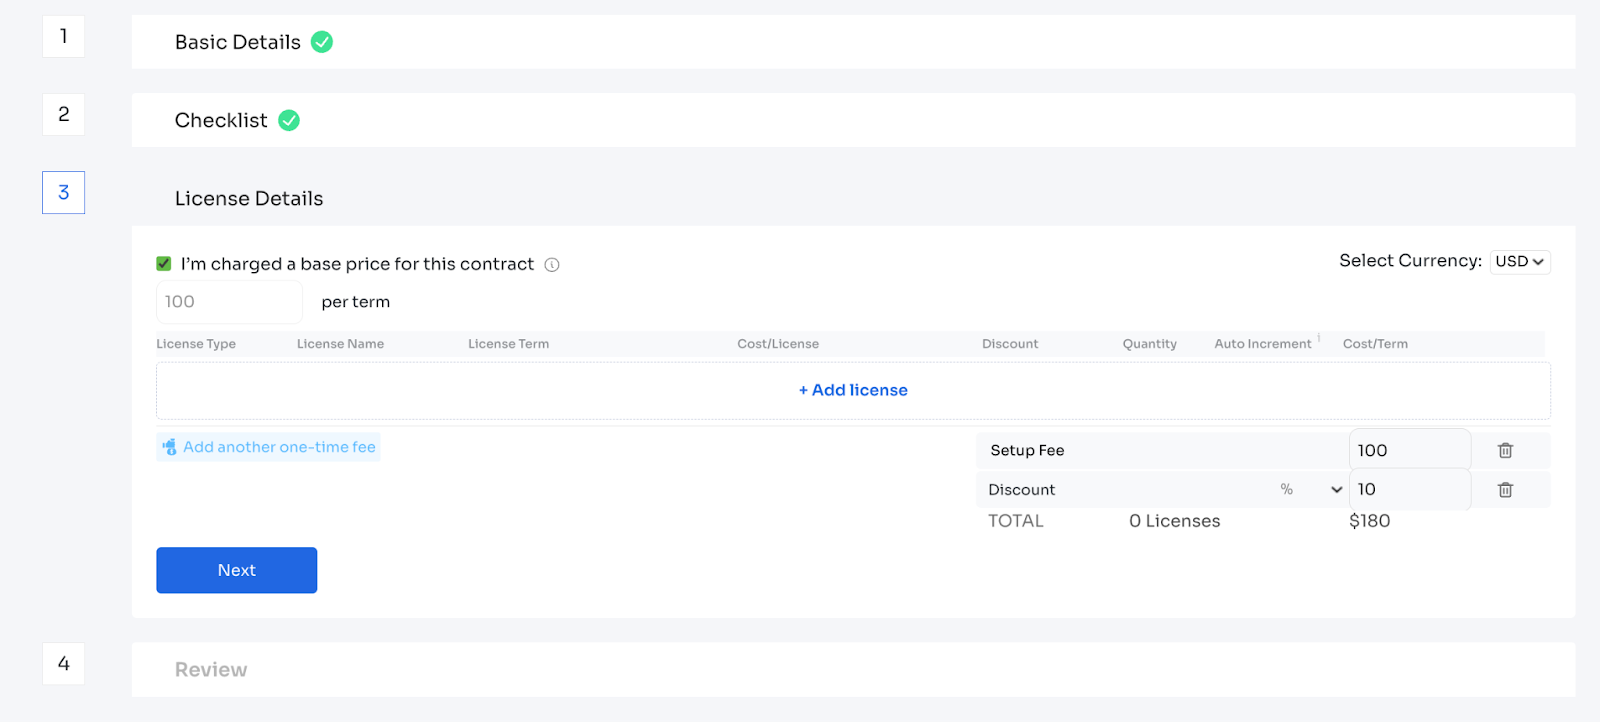
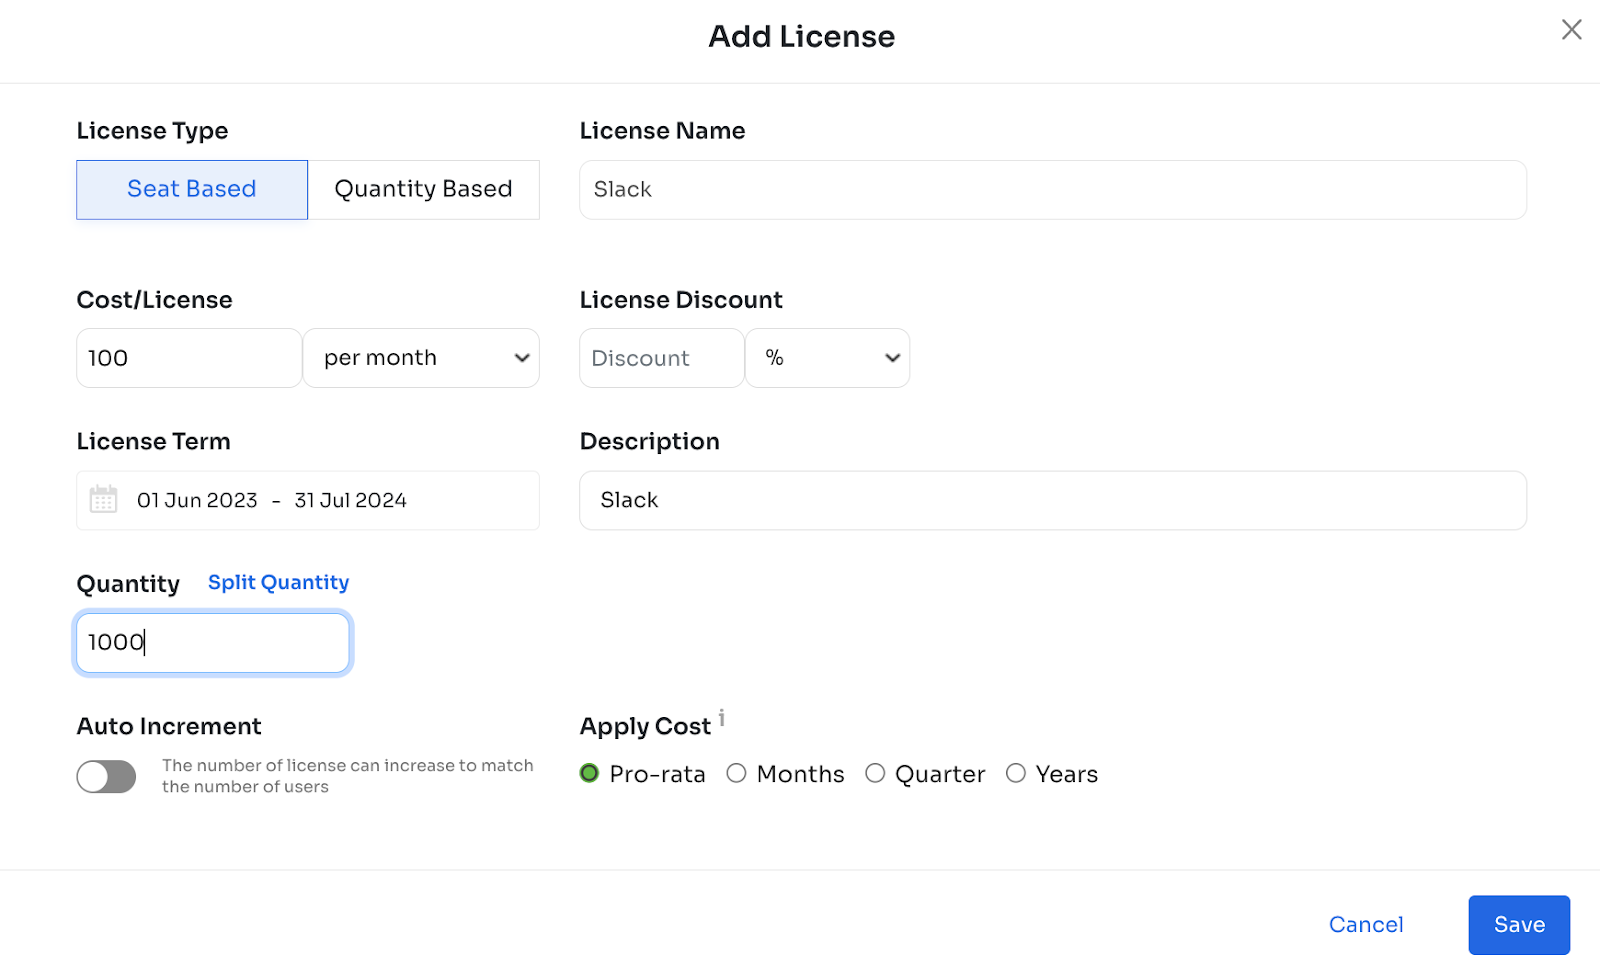
Once the customer clicks on “+ Add license”, the below screen will appear:
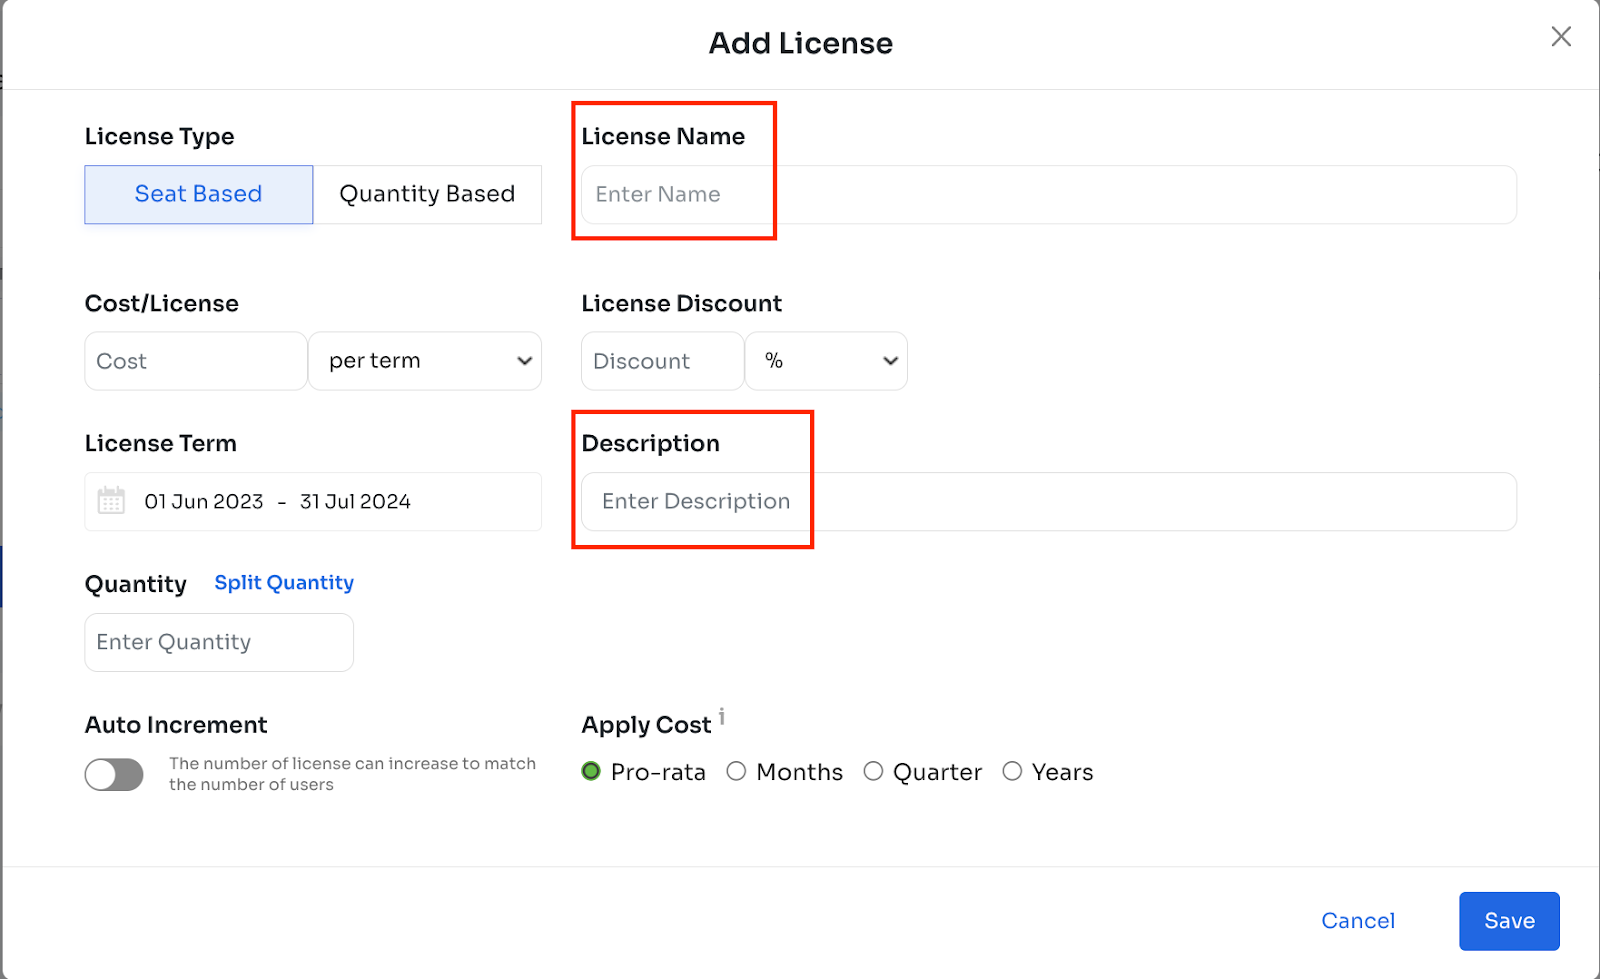
- License Name and Description are mandatory fields.
- Cost/License can be filled in per term/license term/month/quarter/year.
- The total number of licenses can be filled in Quantity.
- Quantity can be split across multiple license types, too, if needed.
- The Auto Increment option can be enabled to match the number of licenses to the number of users.
- Cost can be applied on a pro-rata or Months/Quarters/Years basis. Details below:
Individual license Term
The new license module allows users to add duration for specific line items. This can be done by clicking the ‘Add’ button (+ symbol) and choosing the license duration.
To solve the aforementioned problem, we can now add 2 line items with the same name for different durations and different quantities.
Earlier, the user would have to create two different line items with different names to accommodate two license with just different quantities and costs.
Cost Calculation Settings:
- Pro-rata: cost is calculated only for the duration for which the additional quantity is added
- Months: irrespective of the number of days used in a month, the cost is calculated for the entire month
- Quarters: irrespective of the number of days used in a quarter, the cost is calculated for the entire quarter
- Years: irrespective of the number of days used in a year, the cost is calculated for the entire year
Auto-Increment/Auto adjust
The auto-increment previously just changed the quantity without recording the date of the increase in quantity. Now, we are creating a new group is created from the date when the license was detected.
If auto-increment is ‘On’ for a contract, and Zluri detects more licenses through the API, It will automatically create a group with an extra number of licenses starting from the current date.
If auto adjust is ‘On’ for a subscription, the license quantity will increase or decrease based on the number of licenses detected from the API to match the total number of licenses always.
Keeping auto-increment/auto-adjust off will not capture the fluctuations in the licenses. However, users can manually adjust the quantity of licenses.
The customer can click on the Save button after filling in the details; the customer has the option to review the details entered, add a new license and go to the next step by clicking on the “Next button”:
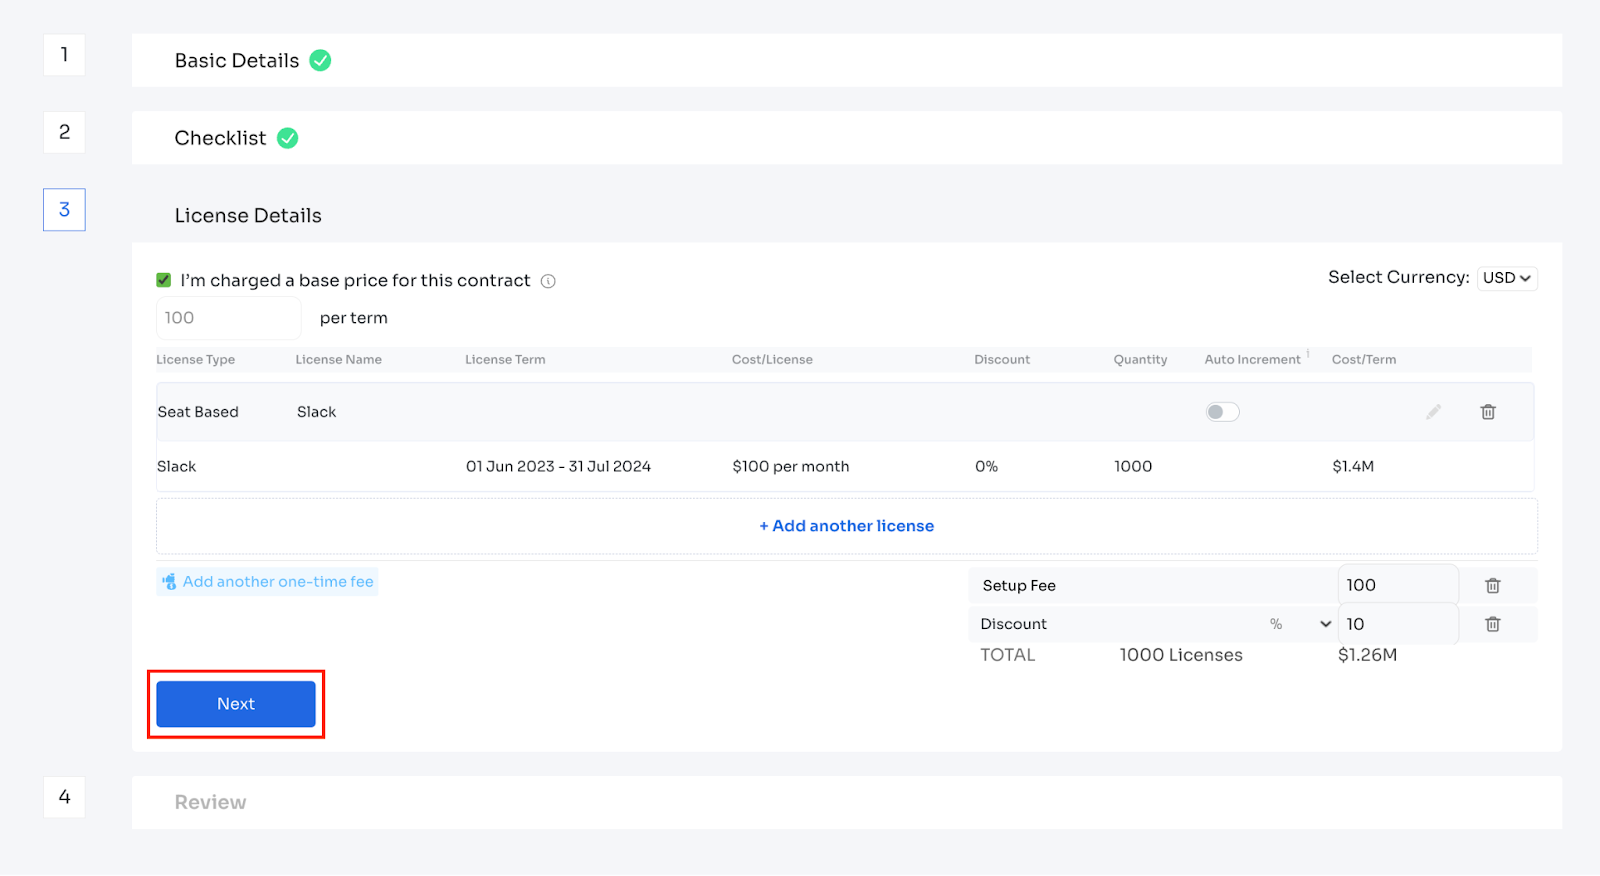
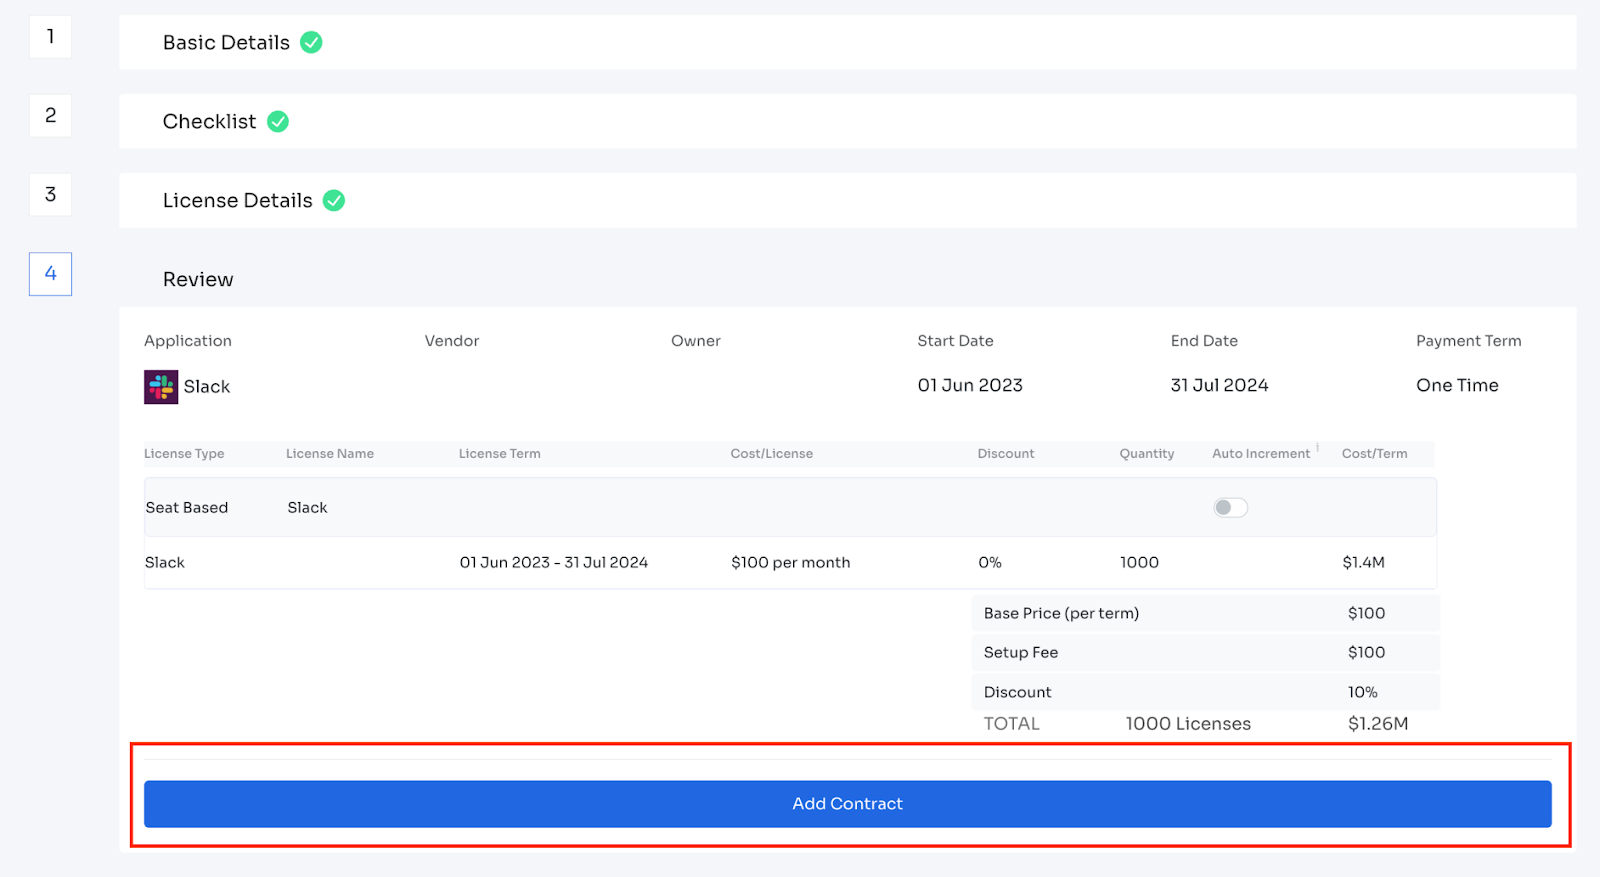
The customer can add the contract here if everything looks fine:
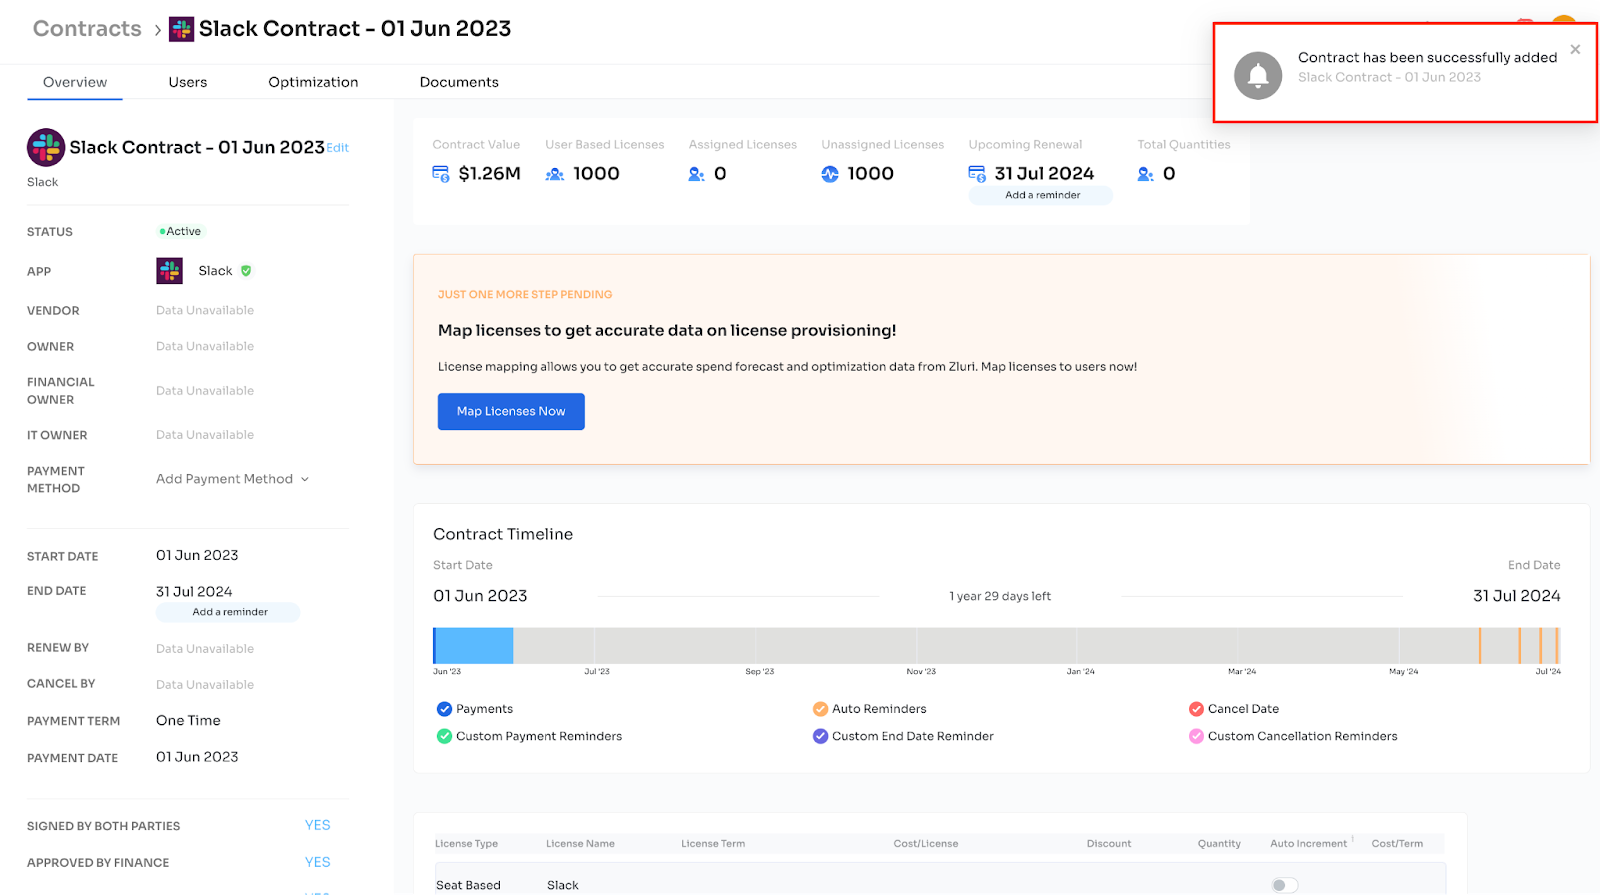
The newly added contract will look like this, and a pop-up will appear on the left side of the screen confirming the same:
Edit a Contract
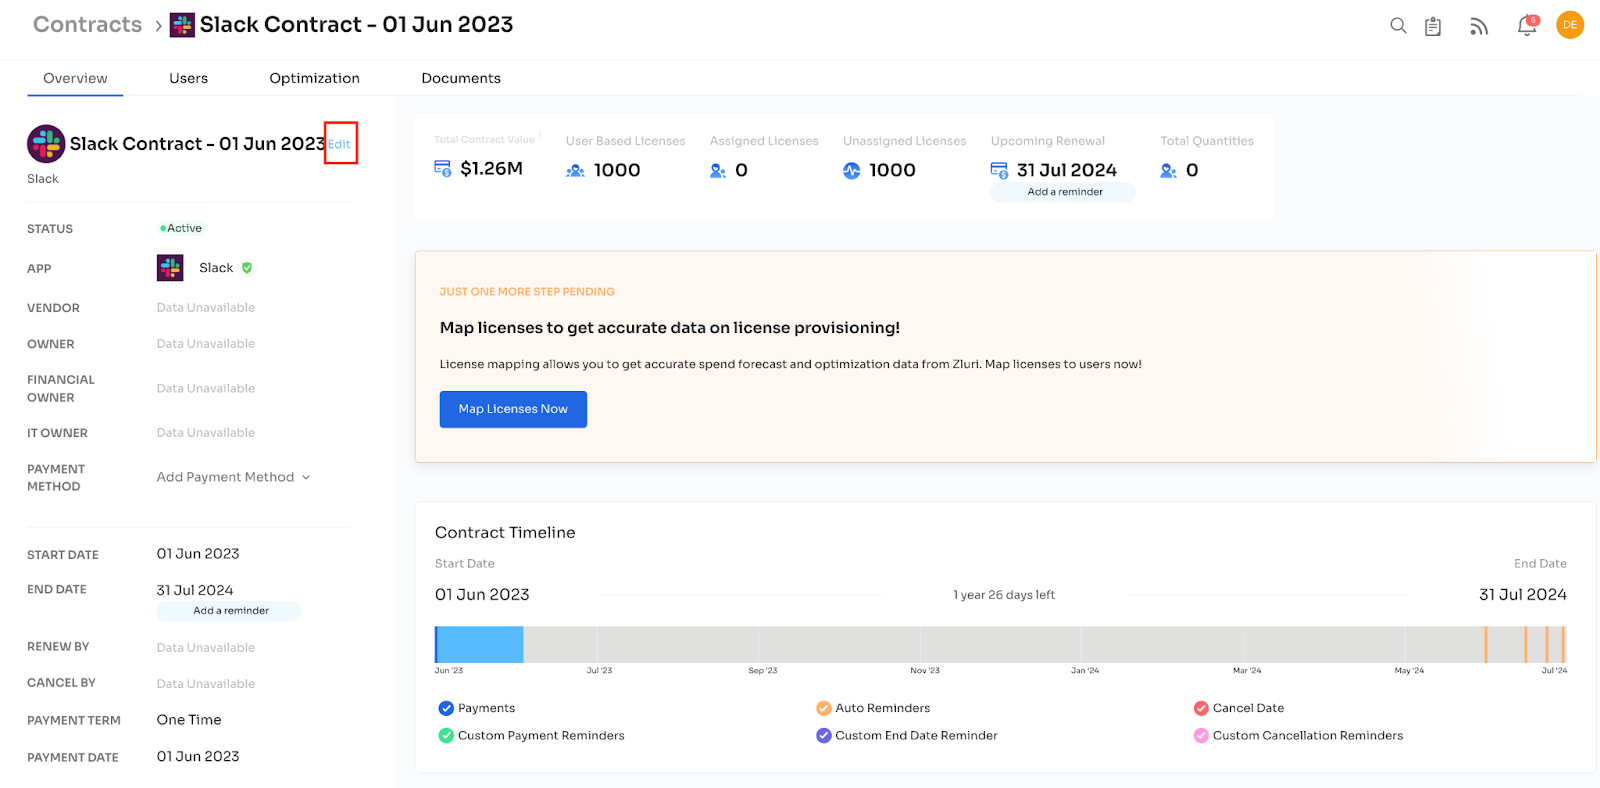
You can edit a contract by clicking on the ‘Edit’ button beside the contract name on the individual contract page. It will open a new page where you can edit the contract details.
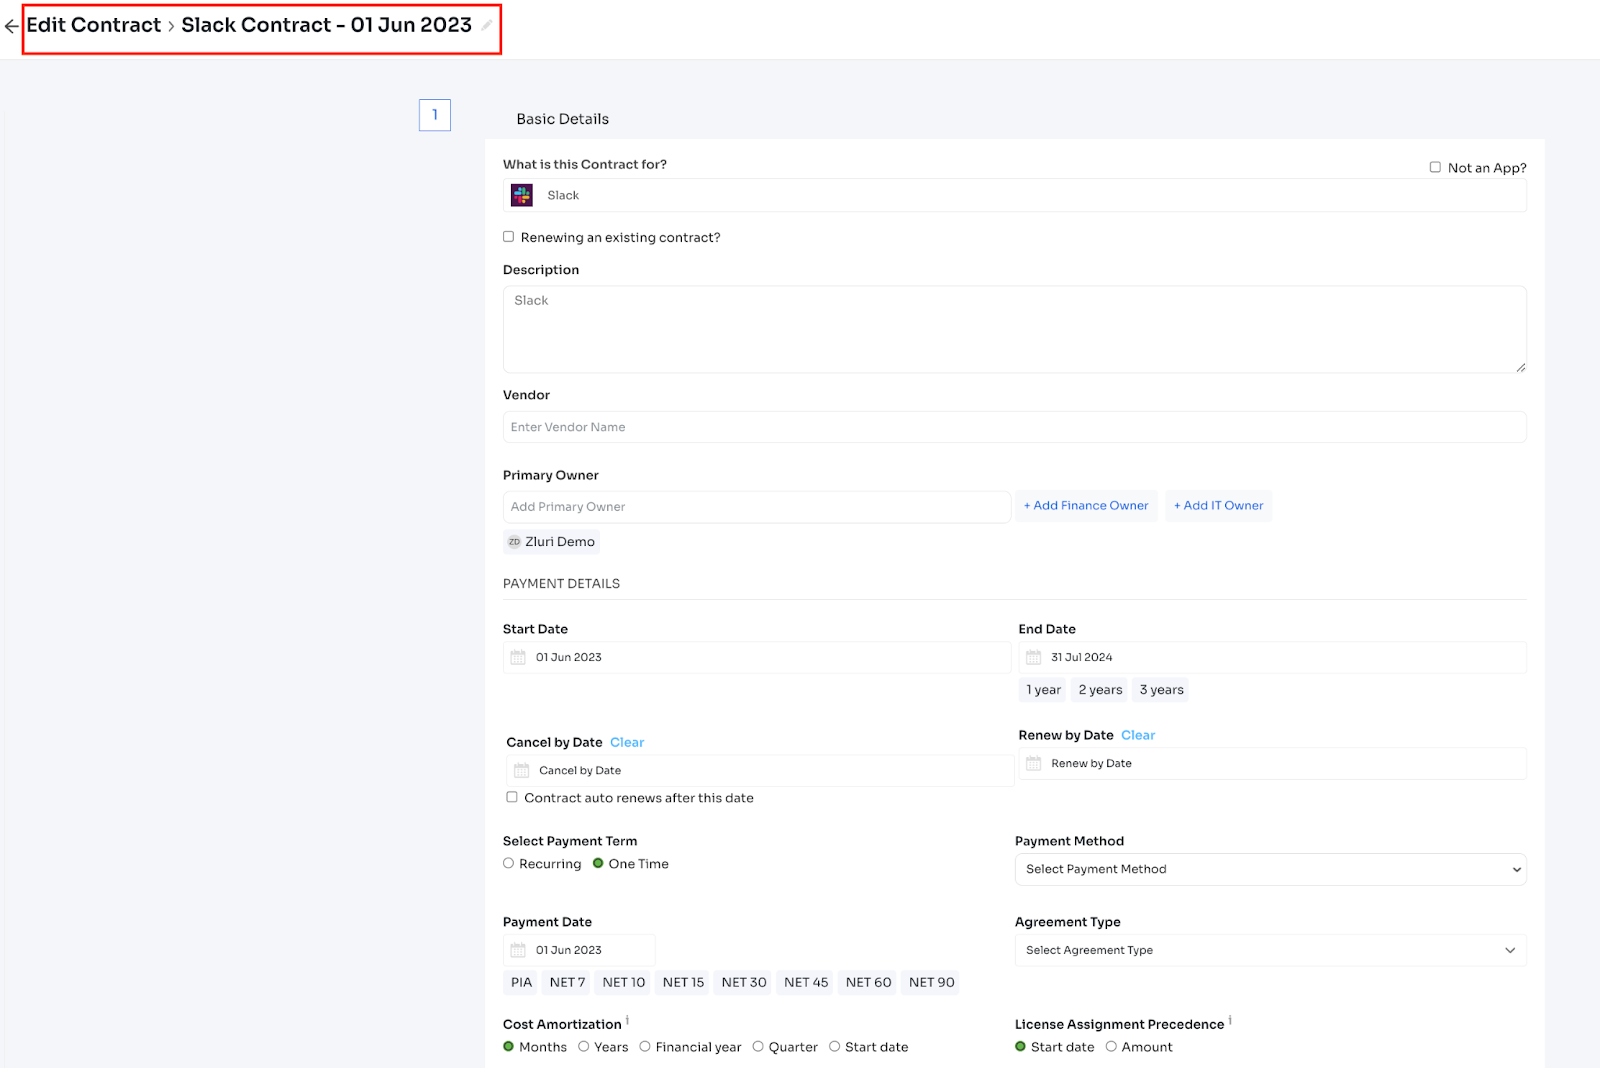
Here the customer can edit the basic details of the contract like Application name, Start Date, Payment Method, etc.
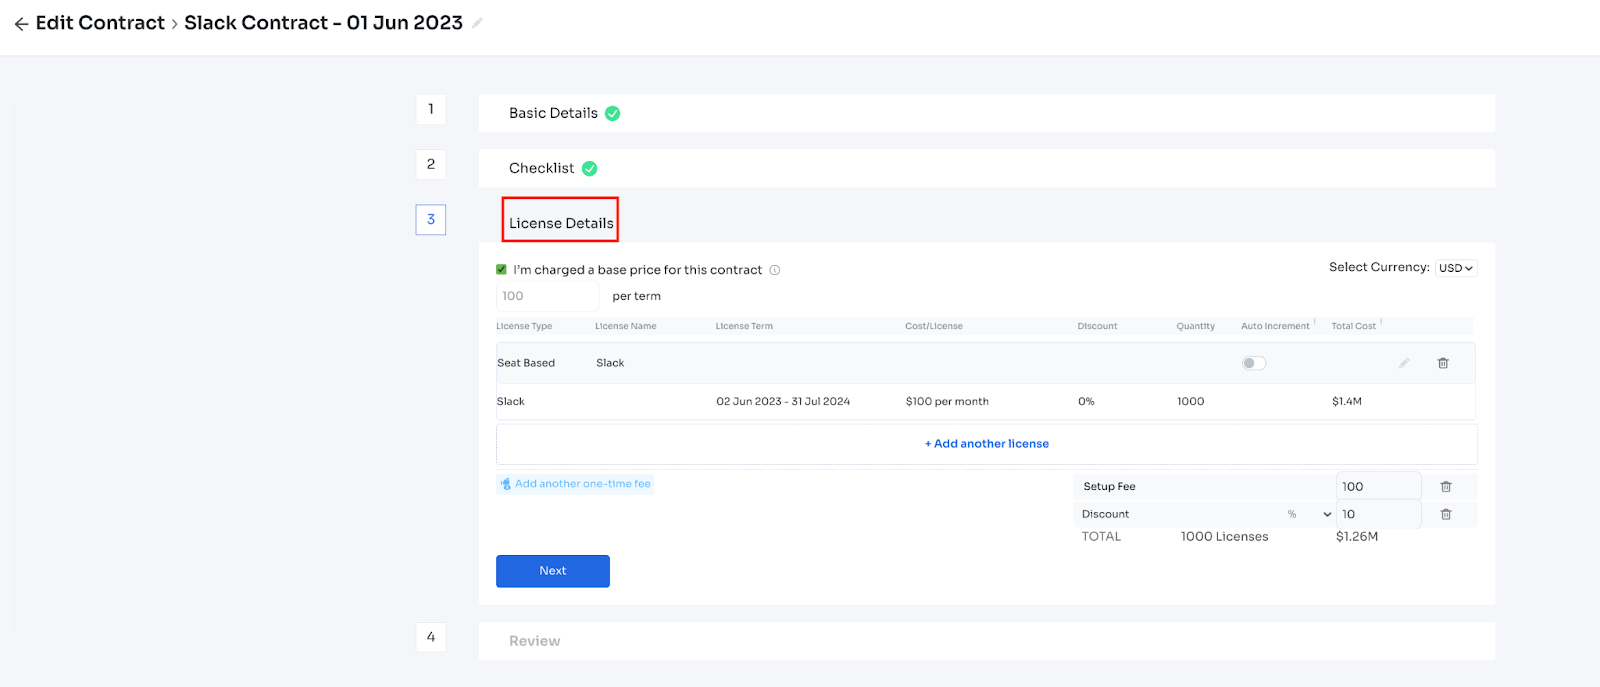
Similarly, on License details, the customer can add/modify/delete the license-related details:
Timelines: Contract timelines help you keep track of renewals and important touch points with your vendor, including the start date, end date, renewal date notifications and more.
Updated 5 months ago
