NetSuite (SOAP)
NetSuite (Legacy) Integration
NetSuite (SOAP) integration works on NetSuite SOAP APIs through token-based authentication. It is able to fetch all VendorBill details but does not fetch Journal Entries. But it gives us all the details about Vendor Bills. If you maintain all your transactions in Vendor Bills, you can connect this integration. Also, if you wish us to filter data based on any specific vendor code or account code, then you should connect to the NetSuite (SOAP) integration.
Zluri also supports a Rest API-based integration to NetSuite. Please visit this link for more details.
Step 1: Enable Token-Based Authentication
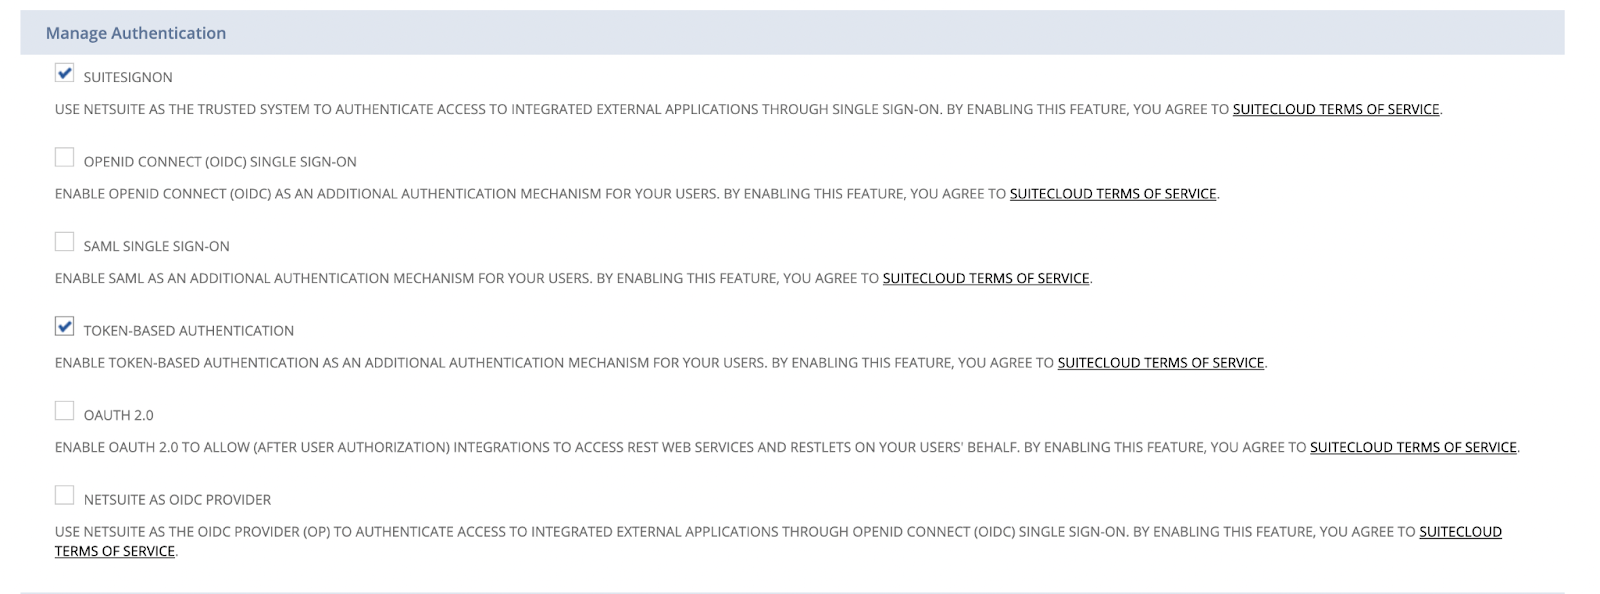
- Go to your NetSuite Setup > Company > Enable Features > Suite Cloud > Manage Authentication
- Enable Token-Based Authentication

Step 2: Create an integration
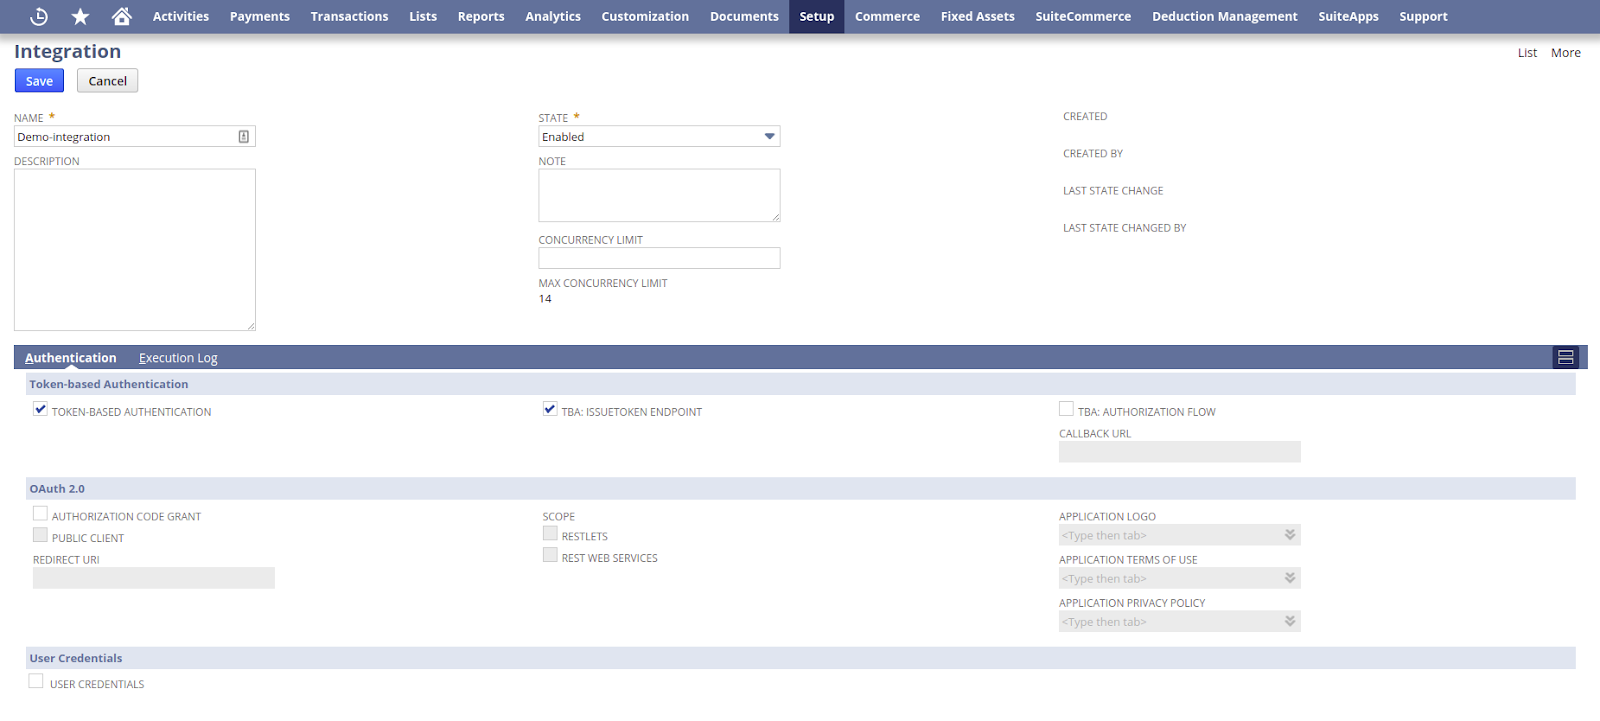
- Go to menu Setup > Integrations > Manage Integrations
- Tap the New button
- Set the name to "Zluri Integration". Please make sure to tick the Token-Based Authentication option, uncheck the "TBA: AUTHORIZATION FLOW" and "AUTHORIZATION CODE GRANT" options, and check the "TBA: ISSUETOKEN ENDPOINT" option.
- Click Save.
- At the bottom, you will find the consumer key and consumer secret
Please take note that Consumer Key and Consumer Secret values_are displayed only once, so please make sure you copy them before going to another page. You can anytime edit and save the integration again to get the new consumer key and secret._

Step 3: Create a role
- Go to Setup > Users/Roles > Manage Roles > New
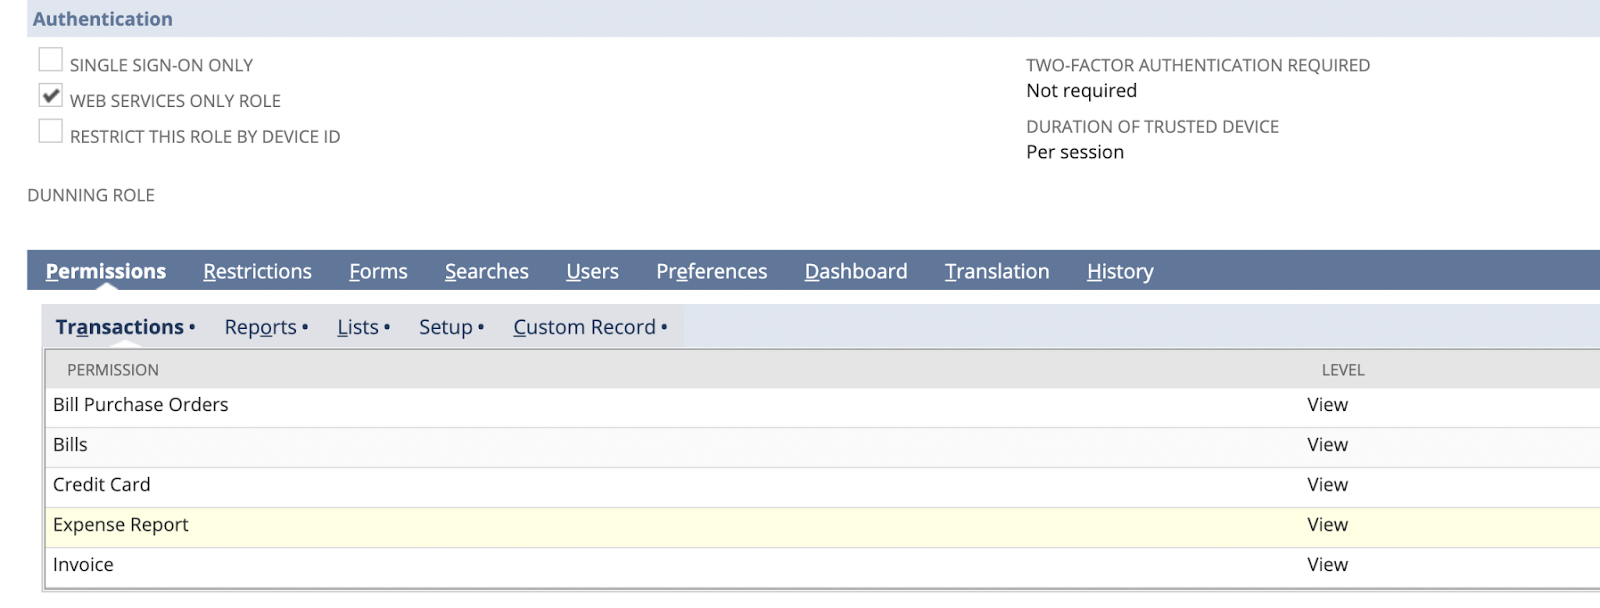
- Create a role and assign necessary permissions for Zluri integration
- Make sure you selectAll under Subsidiary Restrictions > ACCESSIBLE SUBSIDIARIES
- You can name the role aszluri-integration-role
3.1: Assign permissions to the role
1. At the bottom, click on Lists and add the following permissions:
- Employees
- Employee Record
- Vendors
- Documents and Files (required to get vendors)
- Departments

4. Click on Transactions and add the following permissions:
- Expense report
- Bill Purchase Orders
- Bills
- Credit Card
- Invoice
- Purchase order
Please select 'Web Services Only Role'.

5. Click Setup and add the following permissions:
- SOAP Web Services
- User Access Tokens

Step 4: Assign role to user
- Go to Setup, Users, and Manage Users. Edit an existing user record (The user which you want to use for authentication).
- Click on the “Access” subtab.
- If the “Give Access” checkbox isn't checked, check the checkbox.
- Under Roles, select the role created above.
- Click “Save”.
Step 5: Create a token
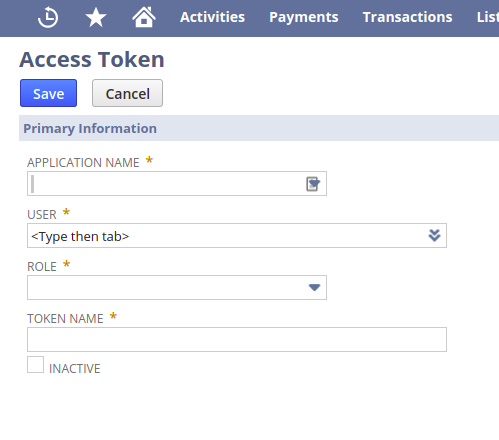
1. Go to setup>Users/Roles>Access Tokens>New.
2. Select the Integration record, User, and Role created or referenced in the previous steps.
3. Select Click Save
4. At the bottom, you will find the Token ID and Token secret.

Step 6: Get the Account ID and Soap service URL
- Go to setup > company > company information
- Search for ACCOUNT ID
- Under Company URLs, search for SUITETALK (SOAP AND REST WEB SERVICES)
Please note the following information to use for connecting Zluri with NetSuite.
- Soap service URL (e.g.https://xyz.suitetalk.api.netsuite.com)
- Account ID
- Consumer key
- Consumer secret
- Token ID
- Token Secret
Updated 6 months ago
