Subscriptions
Subscription management in Zluri
Subscriptions are a flexible category of licensing supported on Zluri. Subscriptions can be charged monthly, quarterly or yearly, depending on the agreement with the vendor.
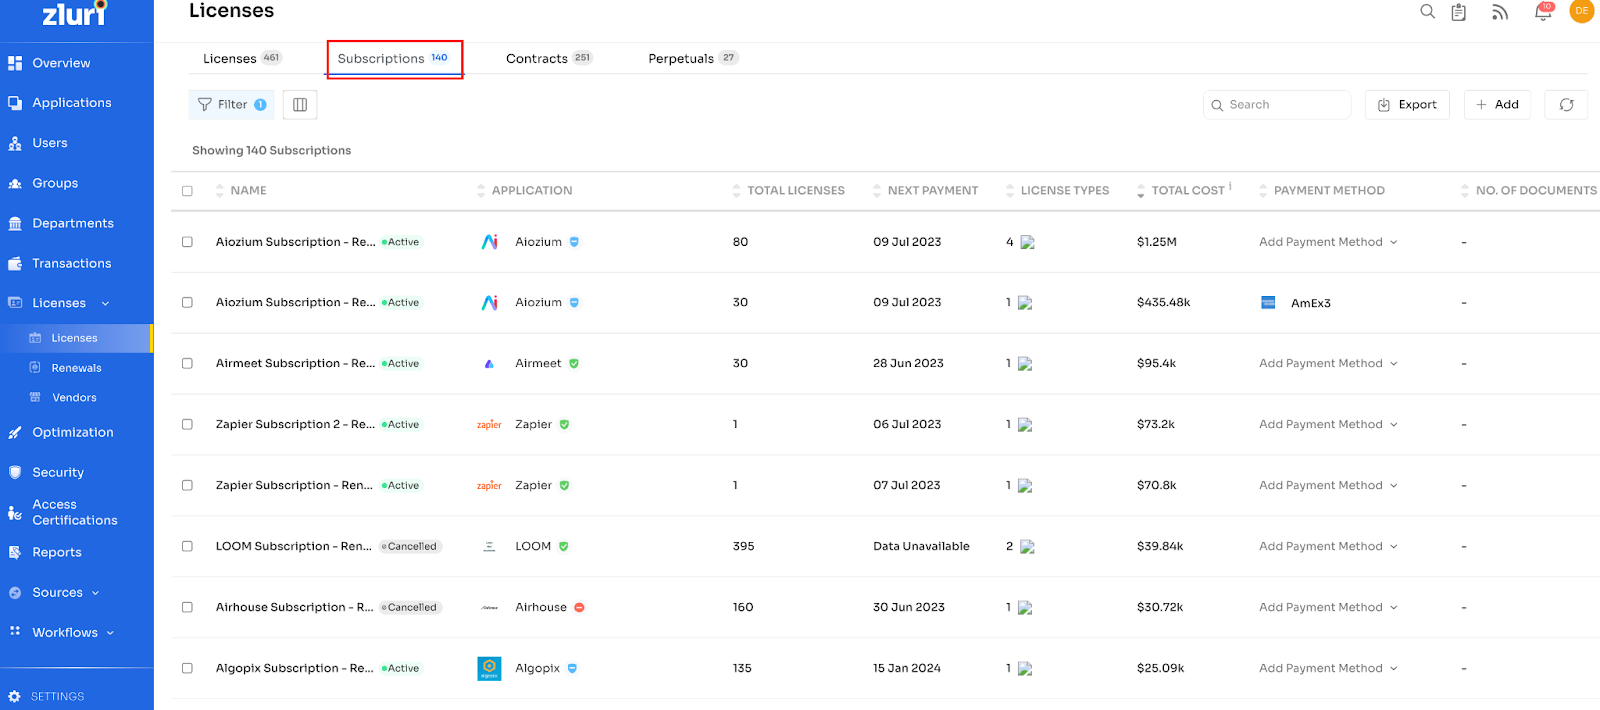
In the Subscriptions tab, below mentioned columns are present:
Subscription name, Application name, Total Licenses, Next payment, License Types, Total Cost, Payment Method, and No. Of Documents.
Subscription Name - It is the name of the subscription which can be active or cancelled, as shown in the screenshot.
If the customer hovers over License Types, a small window appears that shows different types of licenses and the quantity of each license type.

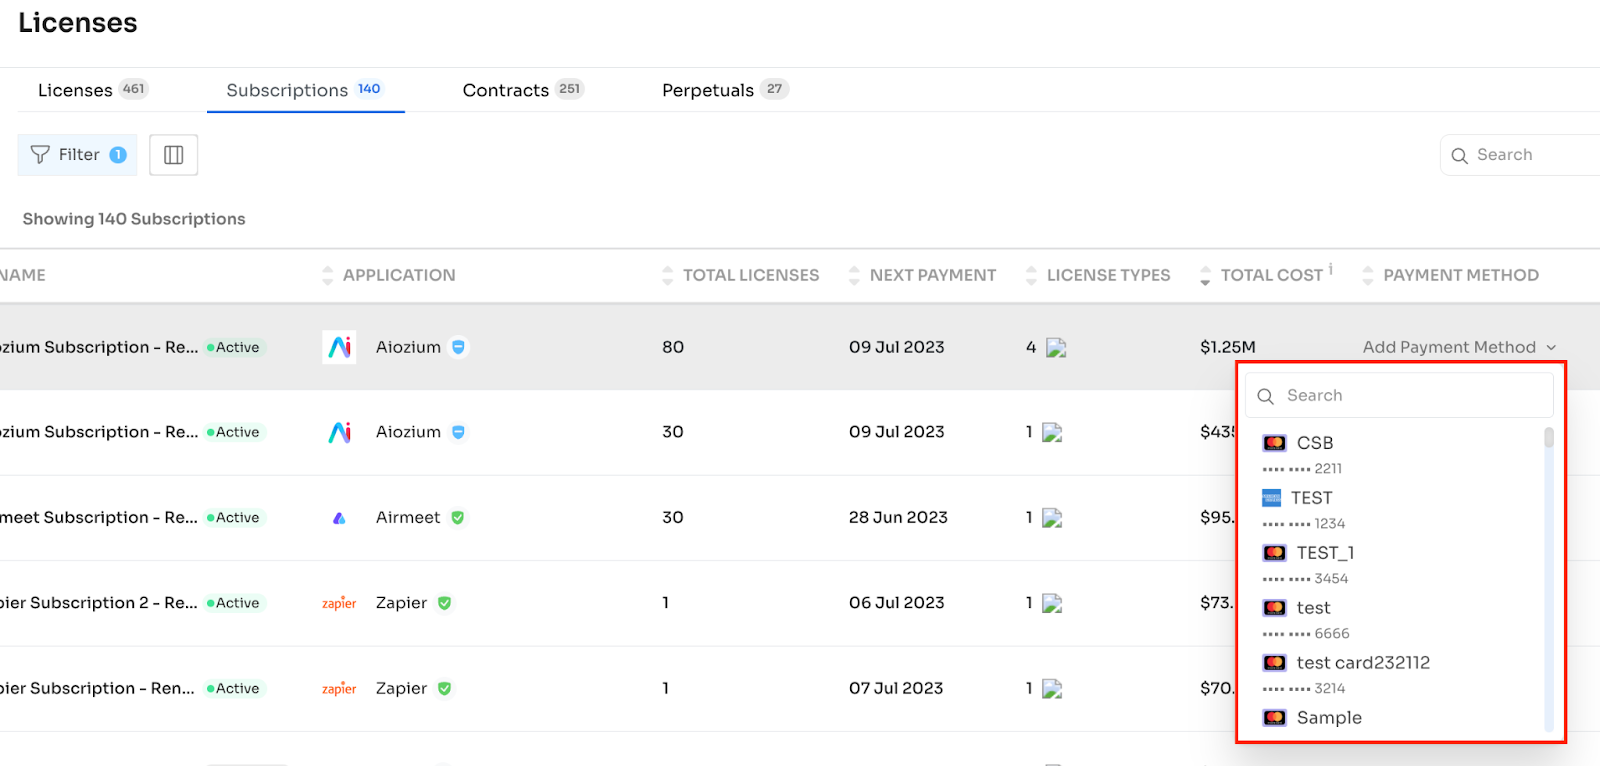
The payment method of any subscription can be changed by clicking on Add Payment Method for any subscription and selecting the required payment method.
Add a New Subscription
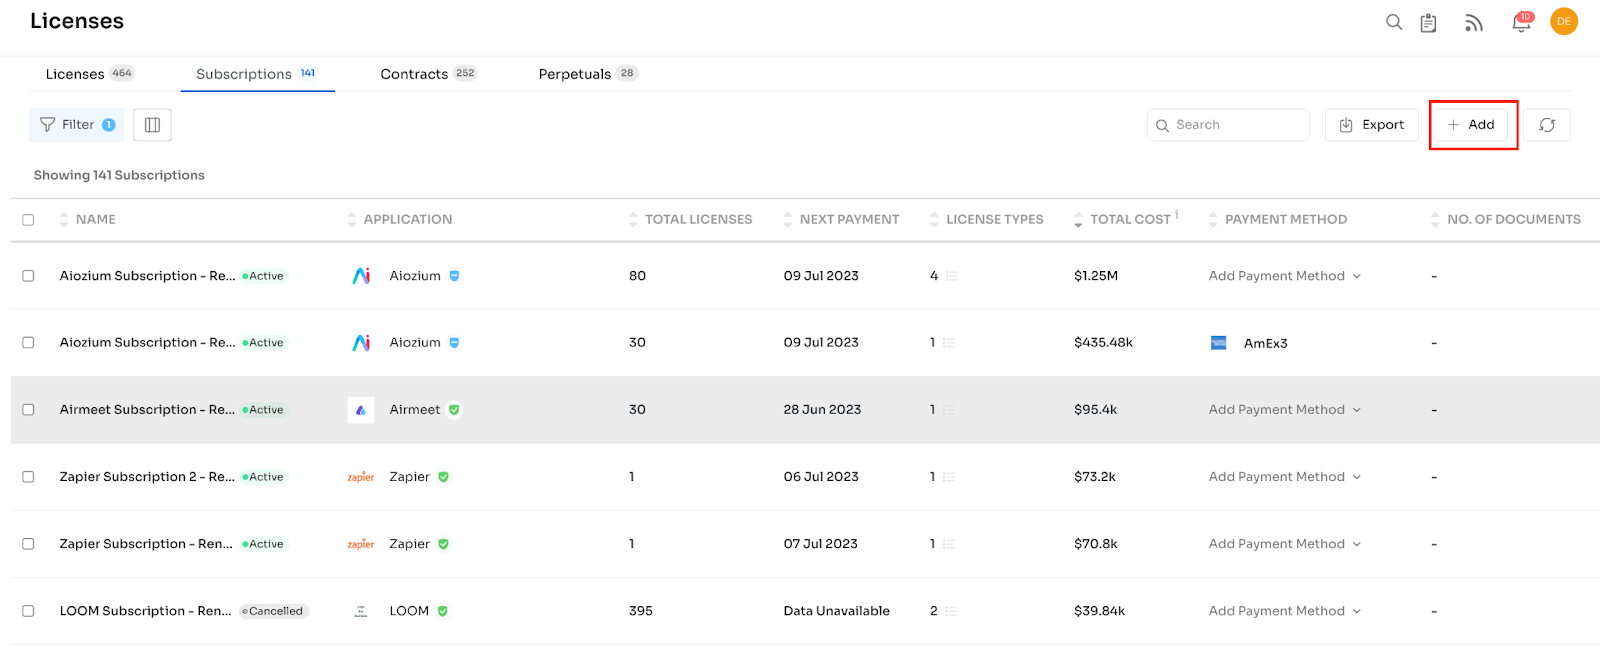
To add a new subscription, the customer must click the “+Add” button, as shown below:
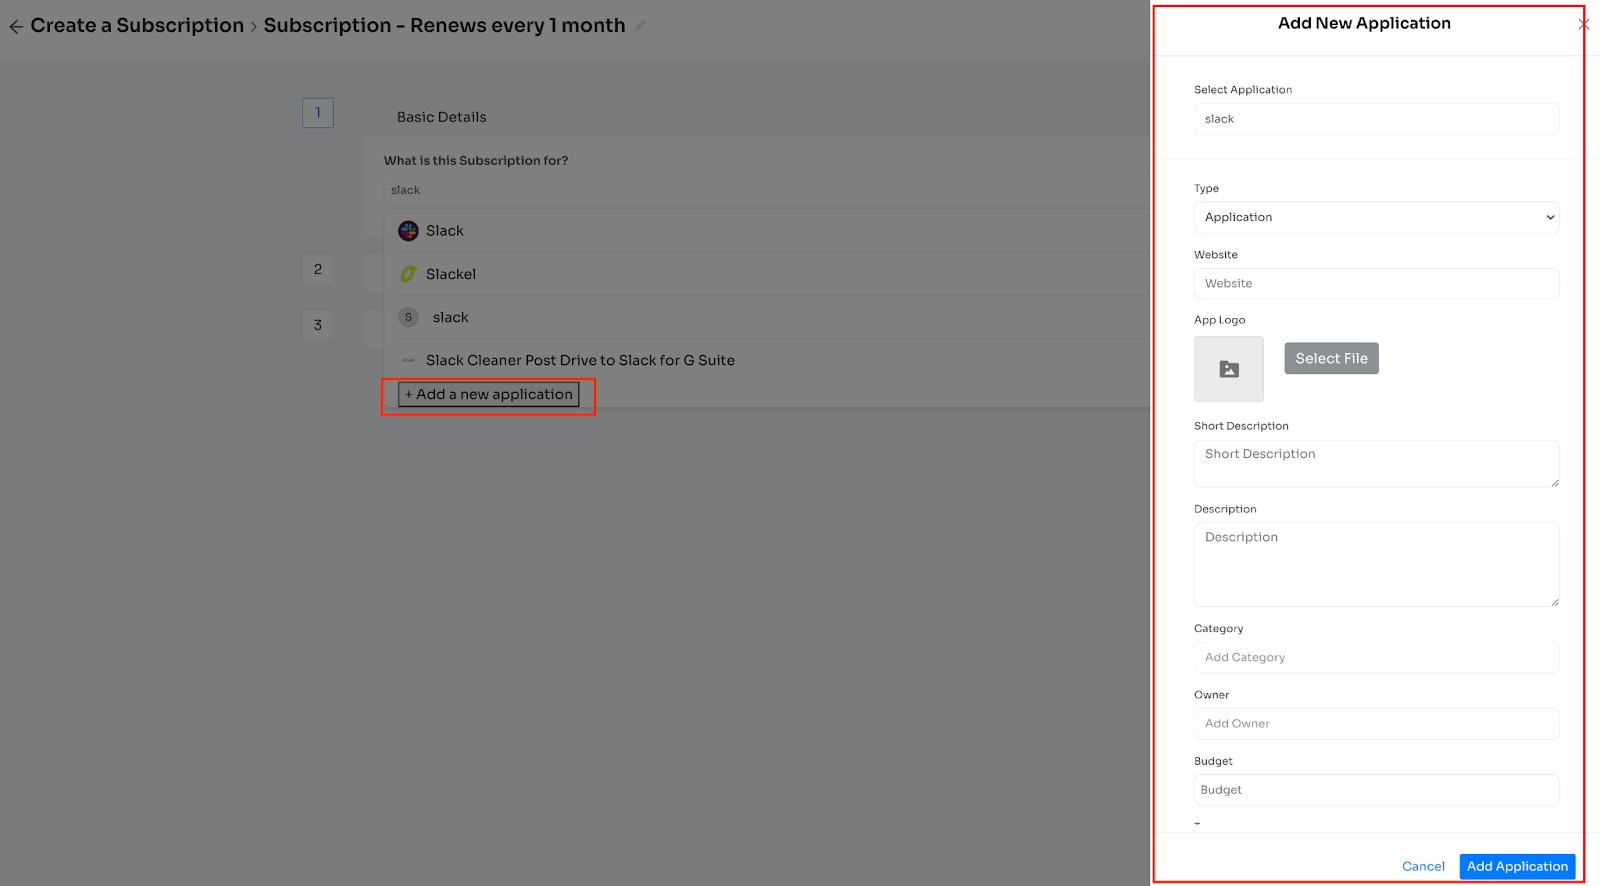
Enter the application name and select the appropriate option from the list if available.

If it is a new application, select “+Add a new Application”. It will open up a new window on the right-hand side. The details can be filled in here and saved.
If the customer selects the “Not an app?” option, the textbox for entering the application name will be greyed out, and the customer can enter the following relevant information:
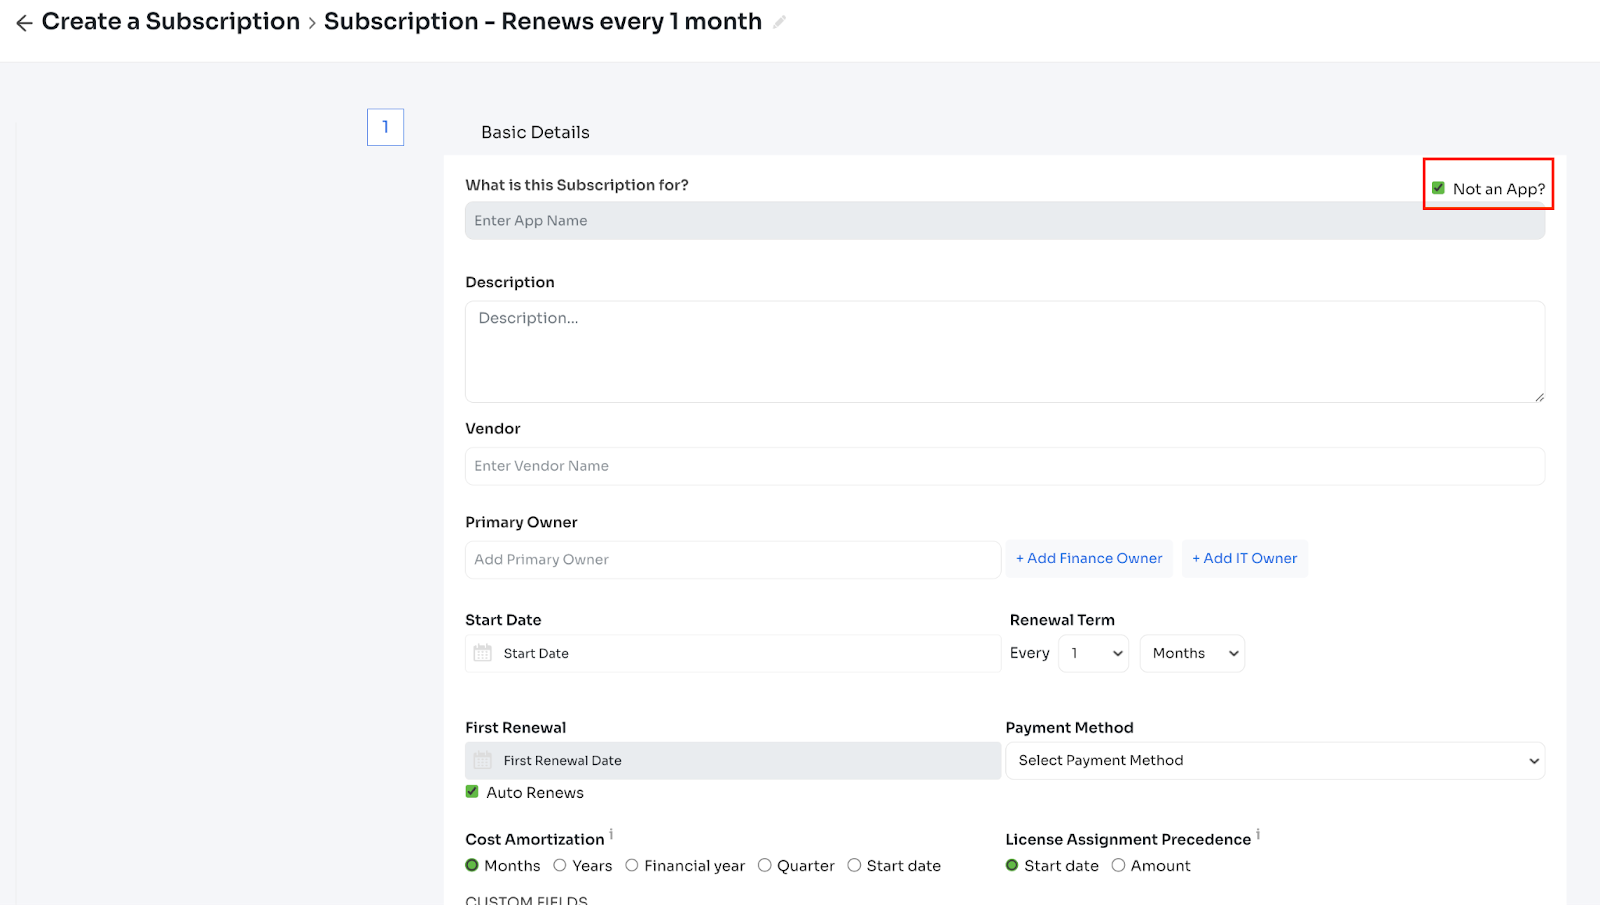
If the application name is entered, the below Basic Details must be entered to proceed to the next step:
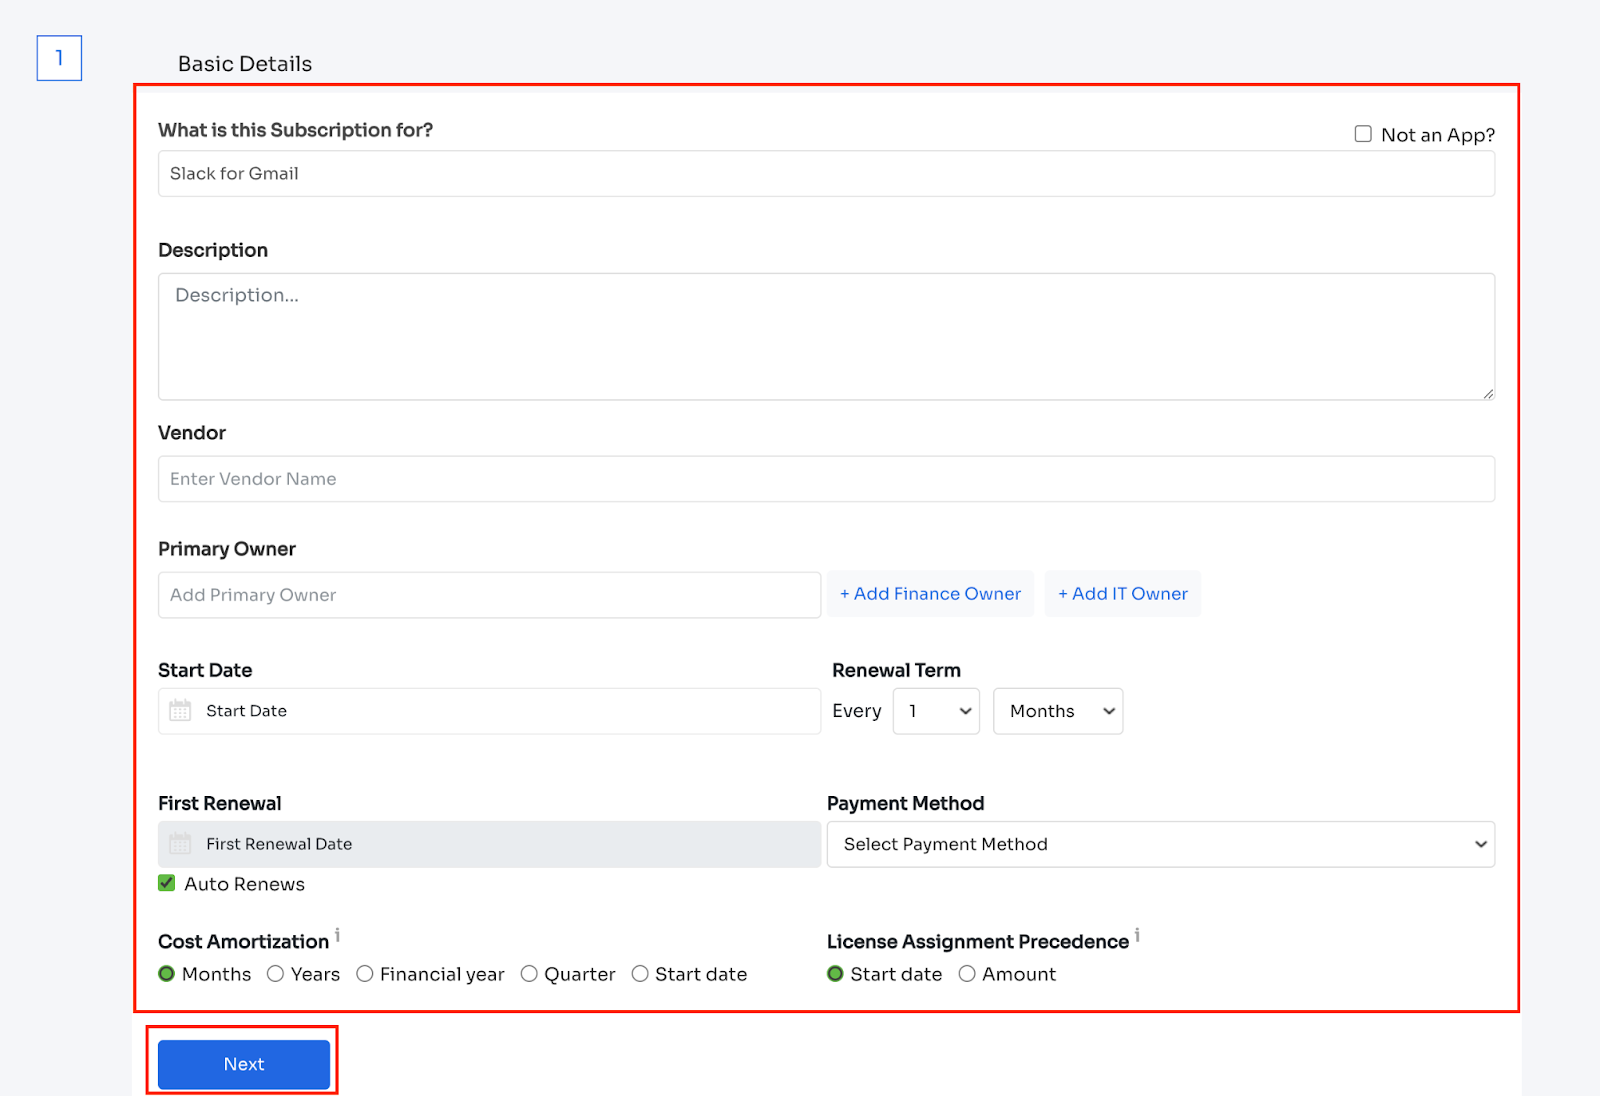
Basic Details:
- Subscription name - Required
- Application - Required
- Select by searching an application or select ‘not an app.’
- Vendor - Required
- Primary Owner - Required
- Select from the dropdown list of all users in the organisation
- Finance owner - Optional
- IT Owner - Optional
- Start date - Required
The auto-Renews checkbox can be selected if one wants a subscription to be auto-renewed before the expiry date.
Cost Amortisation - The duration over which the entire cost of the contract is distributed depending on the user's choice. Details below:
Cost Amortisation Settings:
The duration over which the entire cost of the contract is distributed depends on the user's choice.
- Monthly: the cost of the contract is distributed over all the months of the contract.
- Yearly: the cost of the contract is attributed just to the starting month of the contract.
- Financial Year: the cost of the contract is attributed just to the starting month of the financial year
- Payment Term: depending on the option chosen, if the payment term is recurring, then the cost is attributed depending on the frequency chosen
- Quarter: the cost is attributed once every quarter
- Start Date: the start date of the contract
License Assignment Precedence - In case multiple entities are active at the same time, then the license Assignment Precedence comes into the picture (under the basic details)

- Start Date: the license with an earlier start date is assigned.
- Amount: the license with a lesser amount is assigned.
After entering the Basic Details, the next step is to enter the License Details:
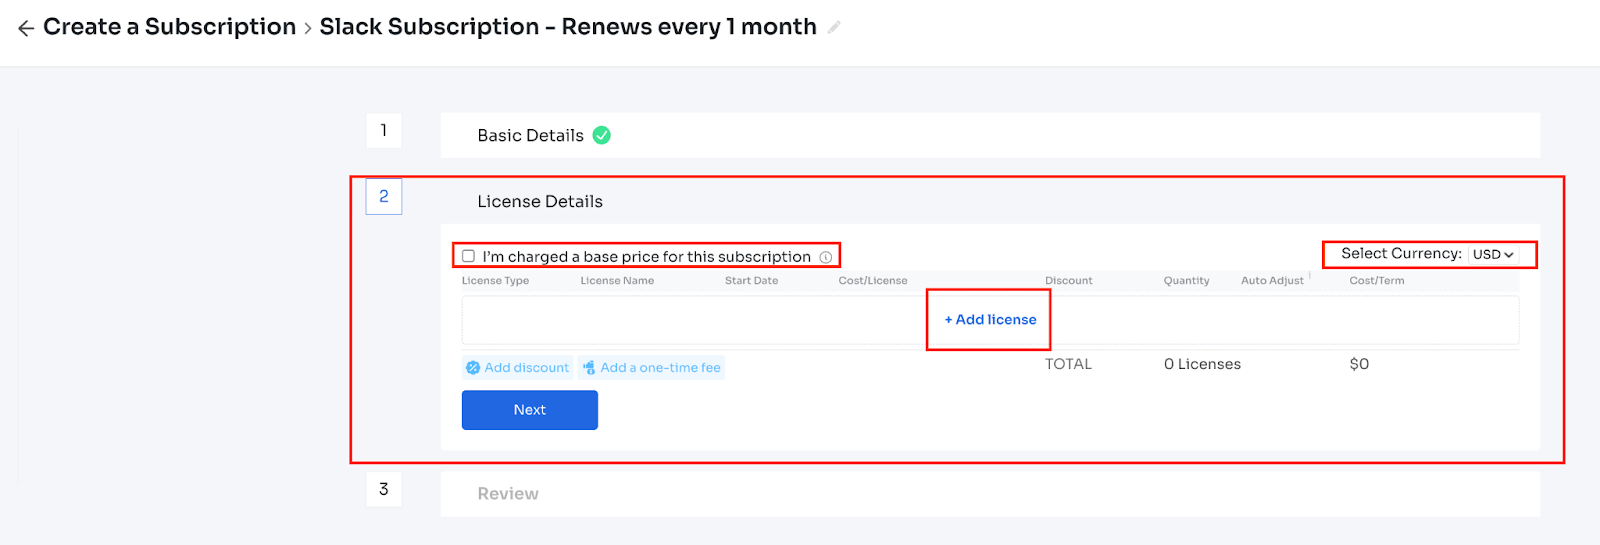
If the customer has paid a base price for the subscription, the checkbox “I am charged a base price for this subscription” should be selected.
The currency can be set from the Select Currency option.
If setup fees or discounts are available, both can be added here before adding a license.

Now, the customer needs to add license information by clicking on the “+ Add license” button:
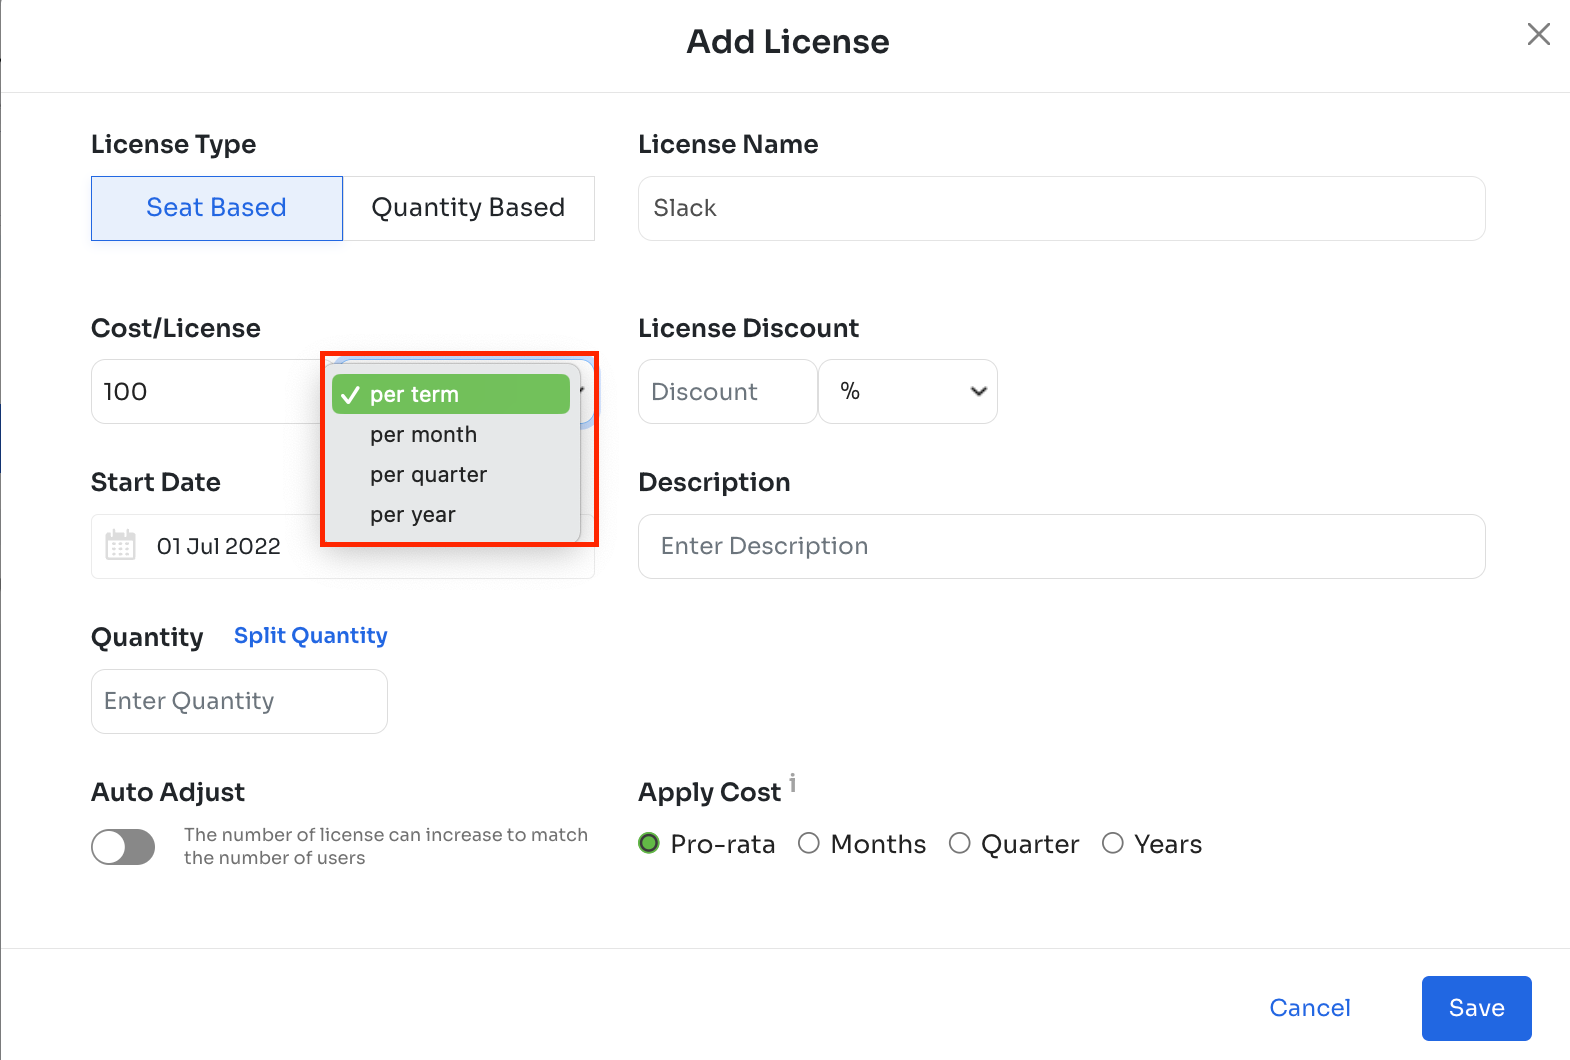
- License type - Seat Based/Quantity Based
- License Name - Required
- Cost/license- Required
- Quantity- Required
- Auto adjust - You can enable it if the license can be auto-adjusted to match the growing number of users.
- Discount - Optional
- License term - Optional
- Cost per term - Auto calculated
- Set up fee - Optional
- Discount - Optional
- The quantity of licenses can be split across multiple types of licenses.
- Apply Cost - option allows the customer to choose cost on a pro-rata basis or per month/quarter/year basis.
Finally, after entering all the details, the Save button gives the option to save the details. The screen will look like this:
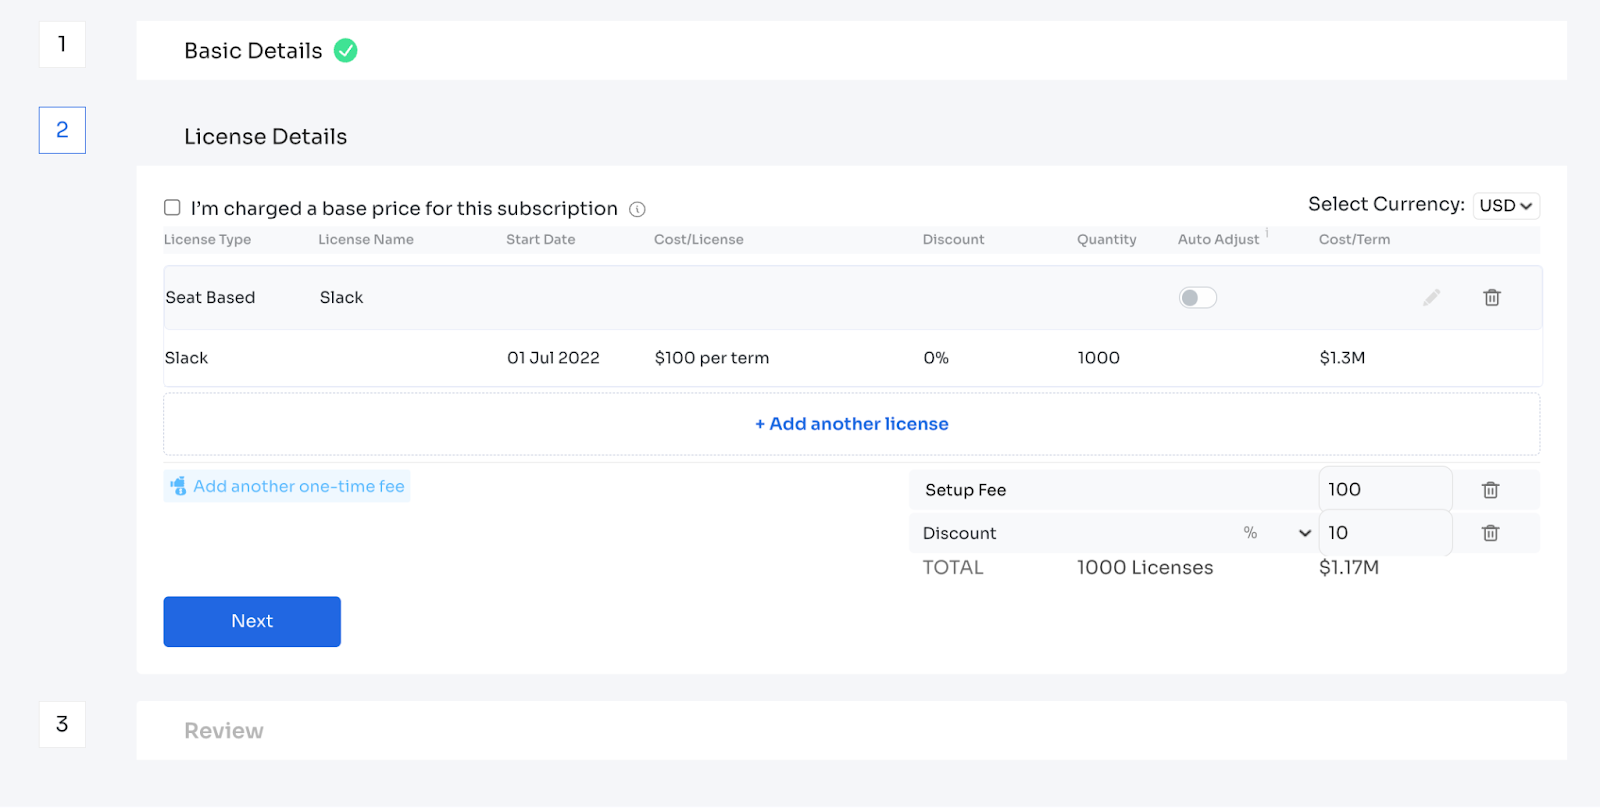
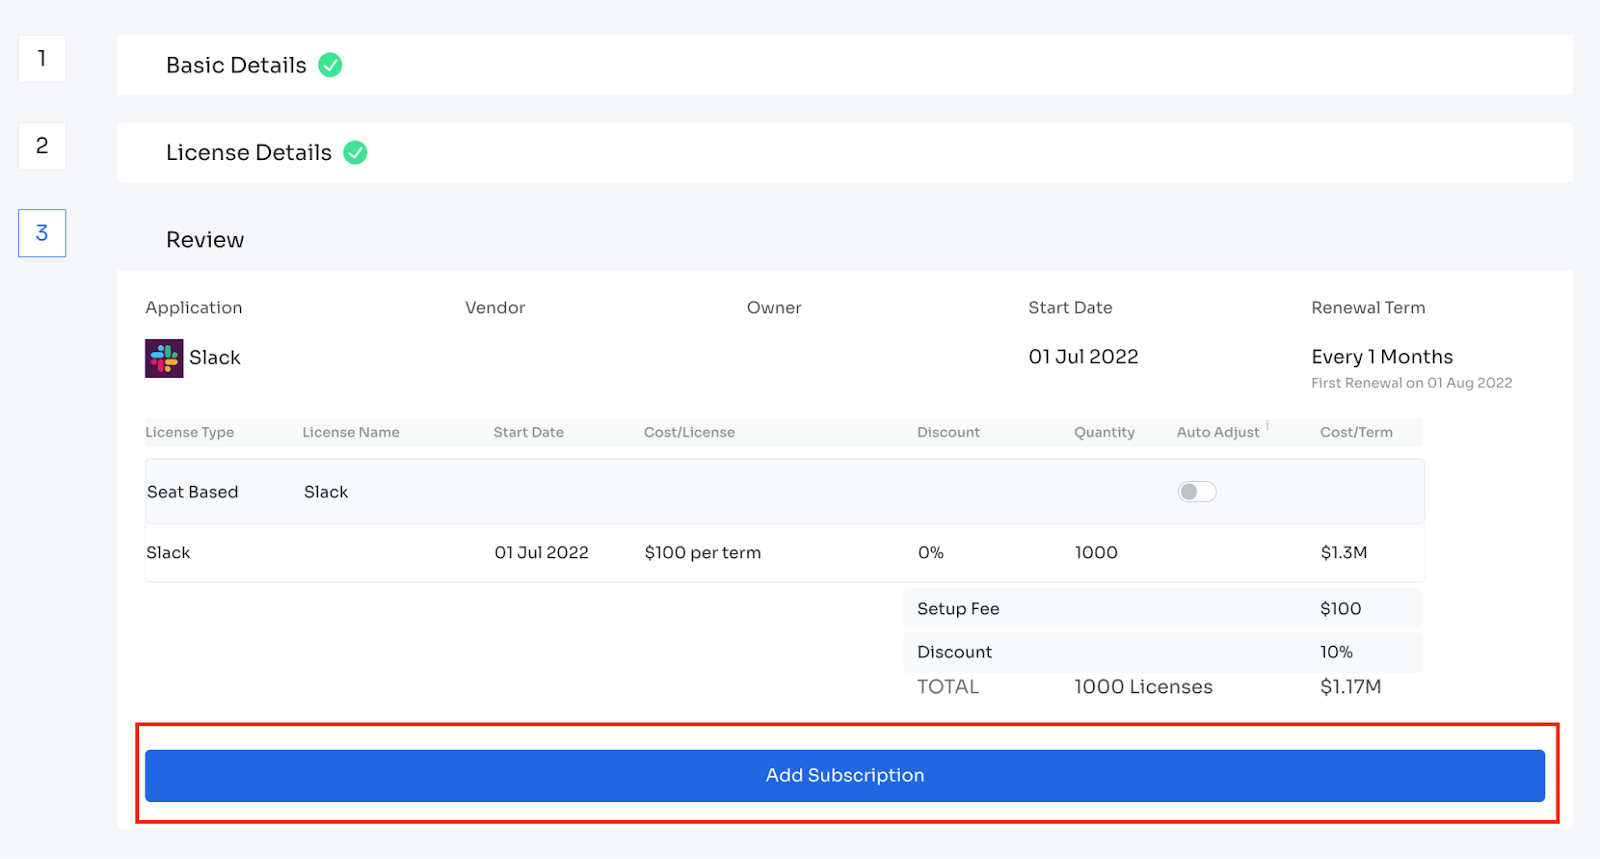
Click on the Next button to review the details and Add the new Subscription:
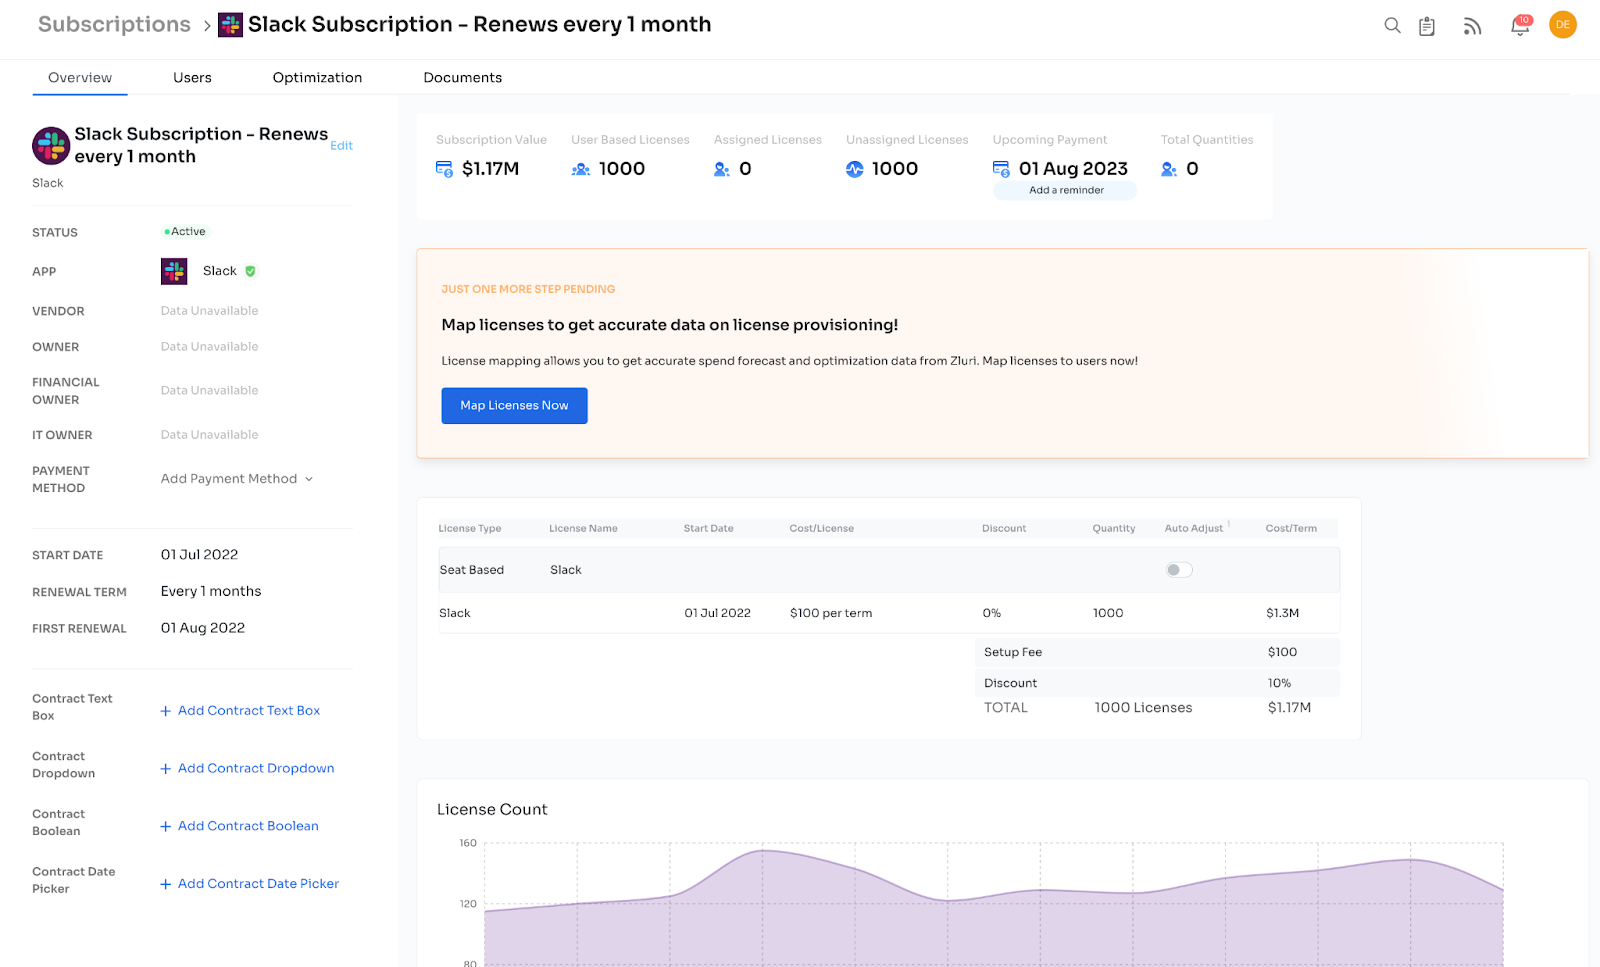
The newly added subscription will be displayed like this:
Edit a Subscription
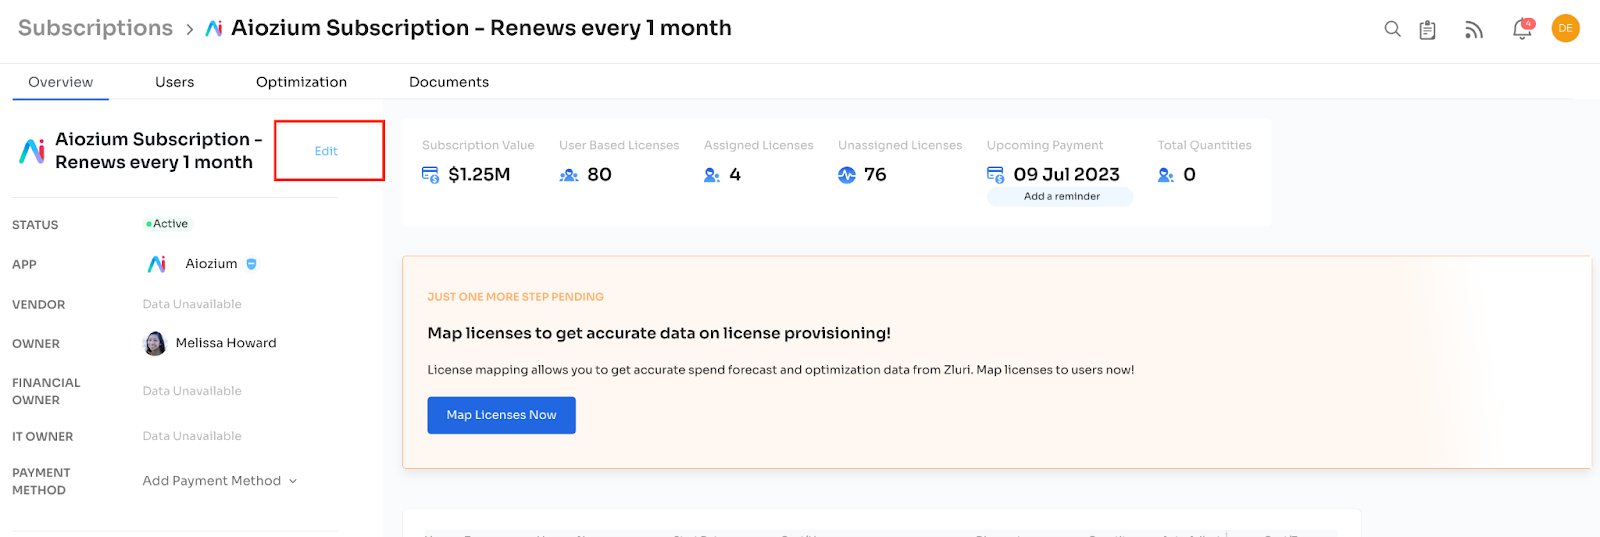
You can edit a subscription by clicking the ‘Edit’ button beside the subscription name on the individual subscription page. It will open a new page where you can edit the subscription details.
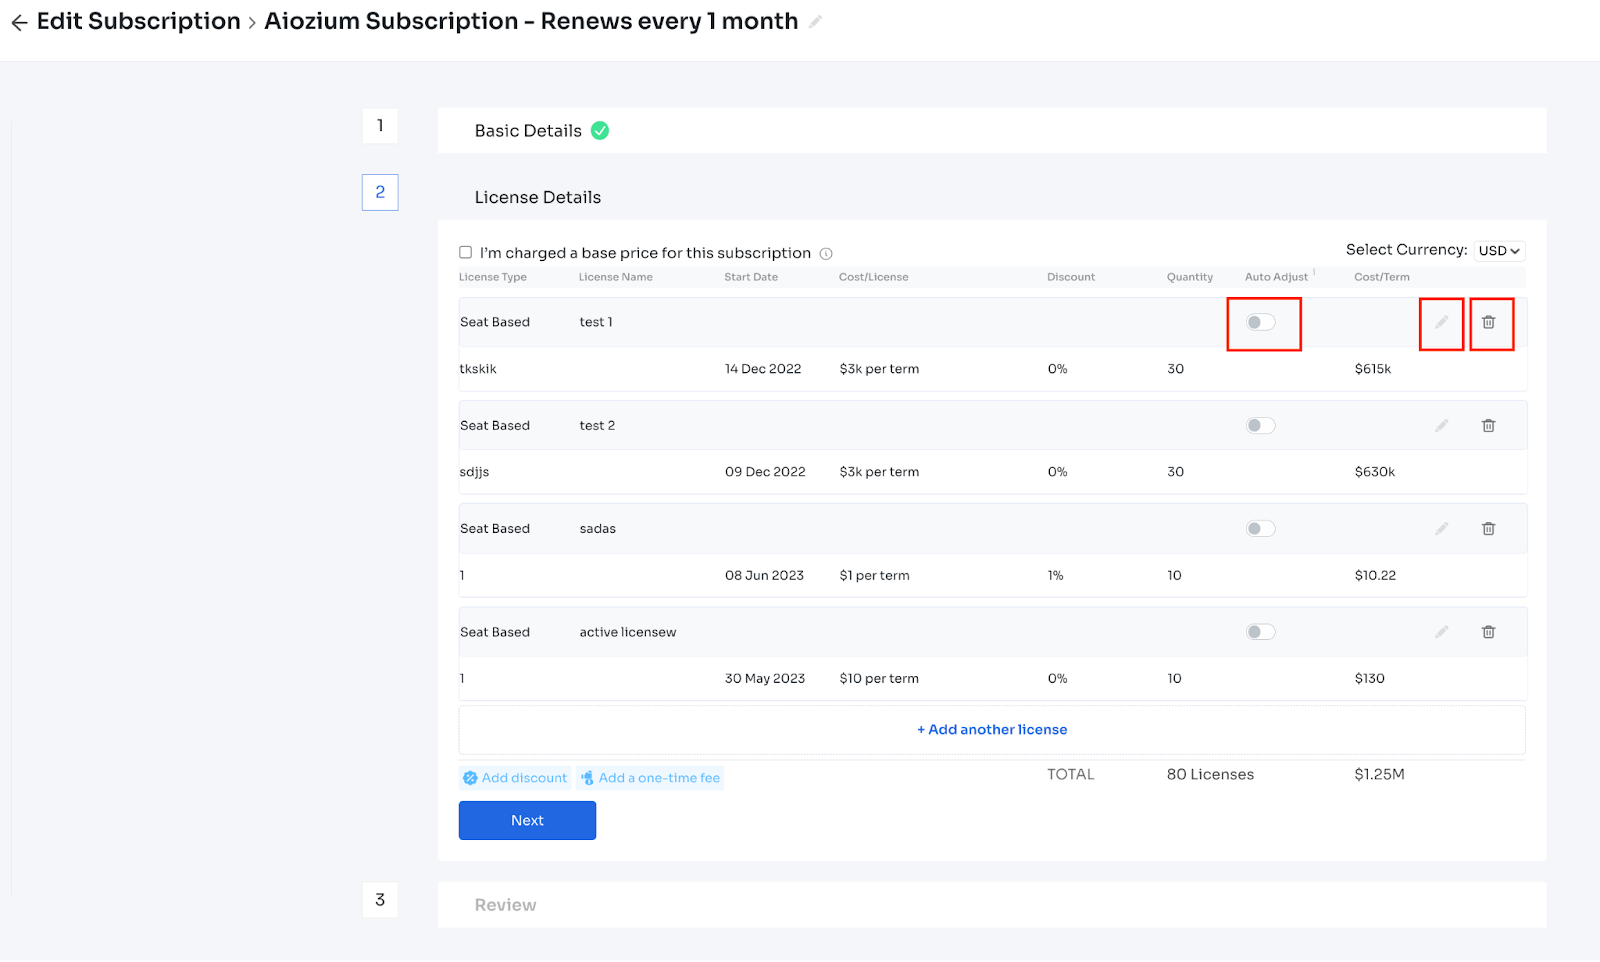
The customer can edit and delete the licenses from the above-highlighted buttons. If the edit button is clicked, the below screen will appear:
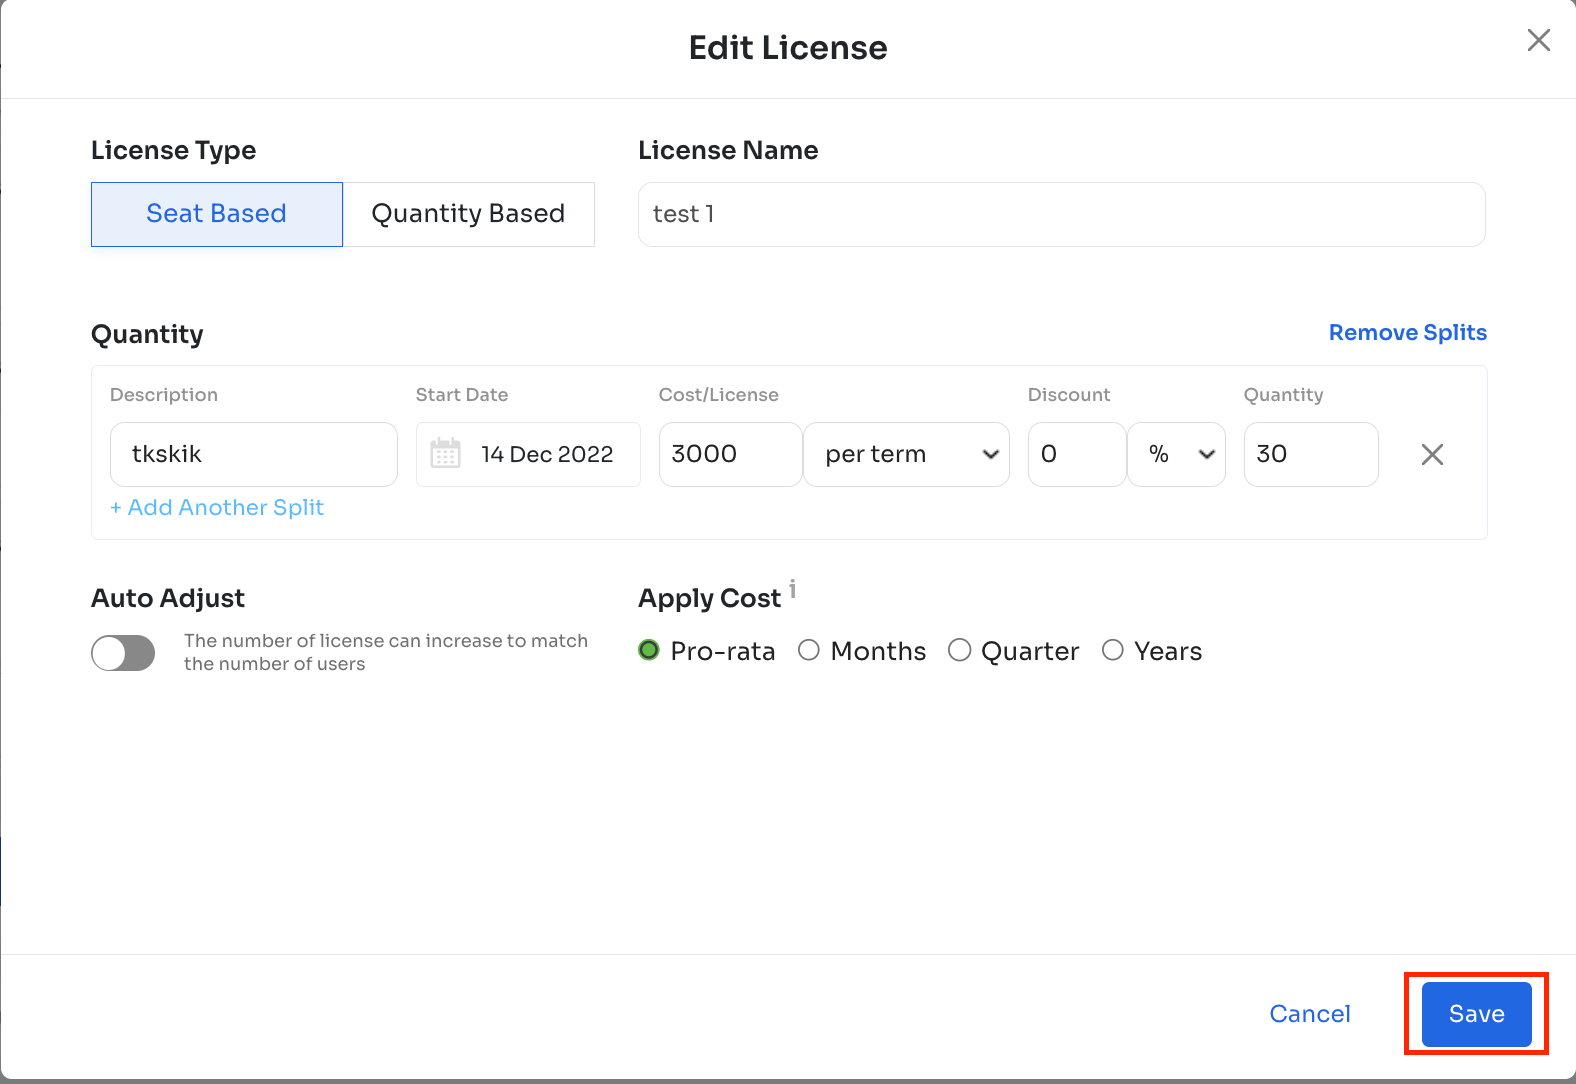
Here, the editing of the license can be done and saved.
Auto adjust
If auto-adjust is ‘On’ for a subscription, the license quantity will increase or decrease based on the number of licenses detected from the API to match the total number of licenses always.
Keeping auto-increment/auto-adjust off will not capture the fluctuations in the licenses. However, users can manually adjust the number of licenses.
Updated 6 months ago
