Connect
Connect Atlassian Admin to Zluri
Prerequisites
- Administrator privileges in Atlassian Admin
- Atlassian Admin Free, Standard, Premium, or Enterprise subscription
- A verified domain with claimed users
- This is required for Zluri to fetch and manage user accounts from your Atlassian organization.
- Follow this guide to verify your domain and claim users:
Verify a domain to manage accounts →
Integration steps
Create an Atlassian Admin API key
-
Log in to Atlassian Admin. Select your organization if you have more than one.
-
Navigate to Settings → API keys.
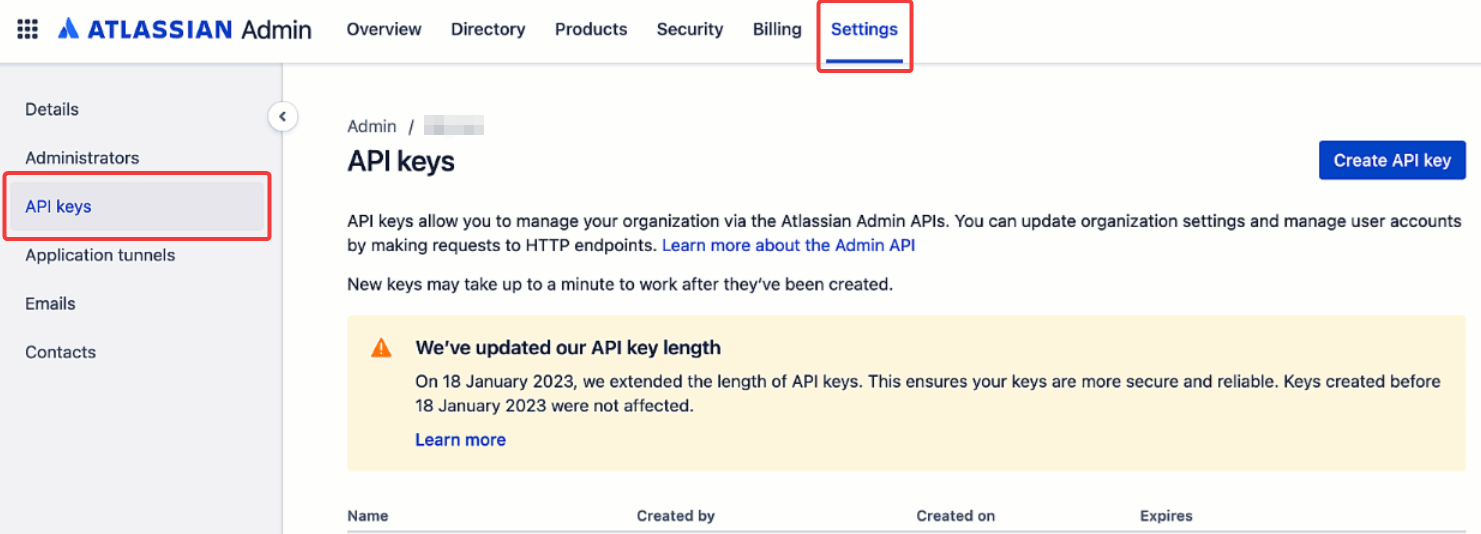
-
Click Create API key in the top-right corner.
-
Choose API key without scopes and click Next.
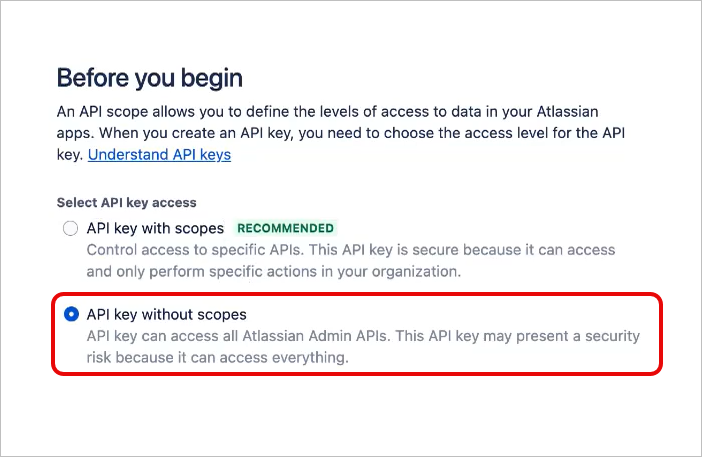
NoteTo connect Atlassian Admin to Zluri, use an Admin API key without scopes. Scoped API keys do not work for Organization and Organization Member APIs due to an Atlassian limitation. The integration will support scoped keys only if Atlassian adds admin privileges to them.
- Give the key a descriptive name and select an expiration date. We recommend setting the expiration date to the maximum possible duration (one year).
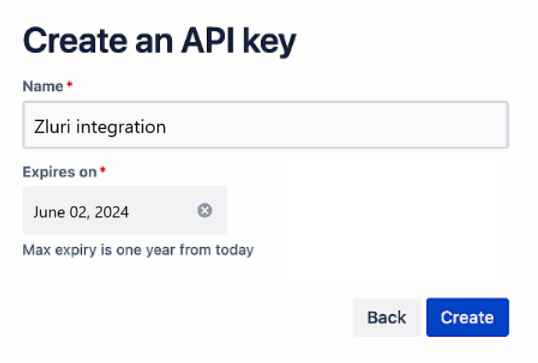
- Click Create. Copy and securely save the newly generated API key.
Note:Although Atlassian now allows selecting specific scopes (like
readorwrite), using scoped API keys may lead to authentication errors such as “User is not part of the organization.”To ensure successful integration, we recommend generating the key by choosing API key without scopes.
(Optional) Generate a SCIM API key
Follow these steps if you wish to use the user provisioning and deprovisioning features of Zluri. Otherwise, move to the Connect the Atlassian Admin instance in Zluri section below.
-
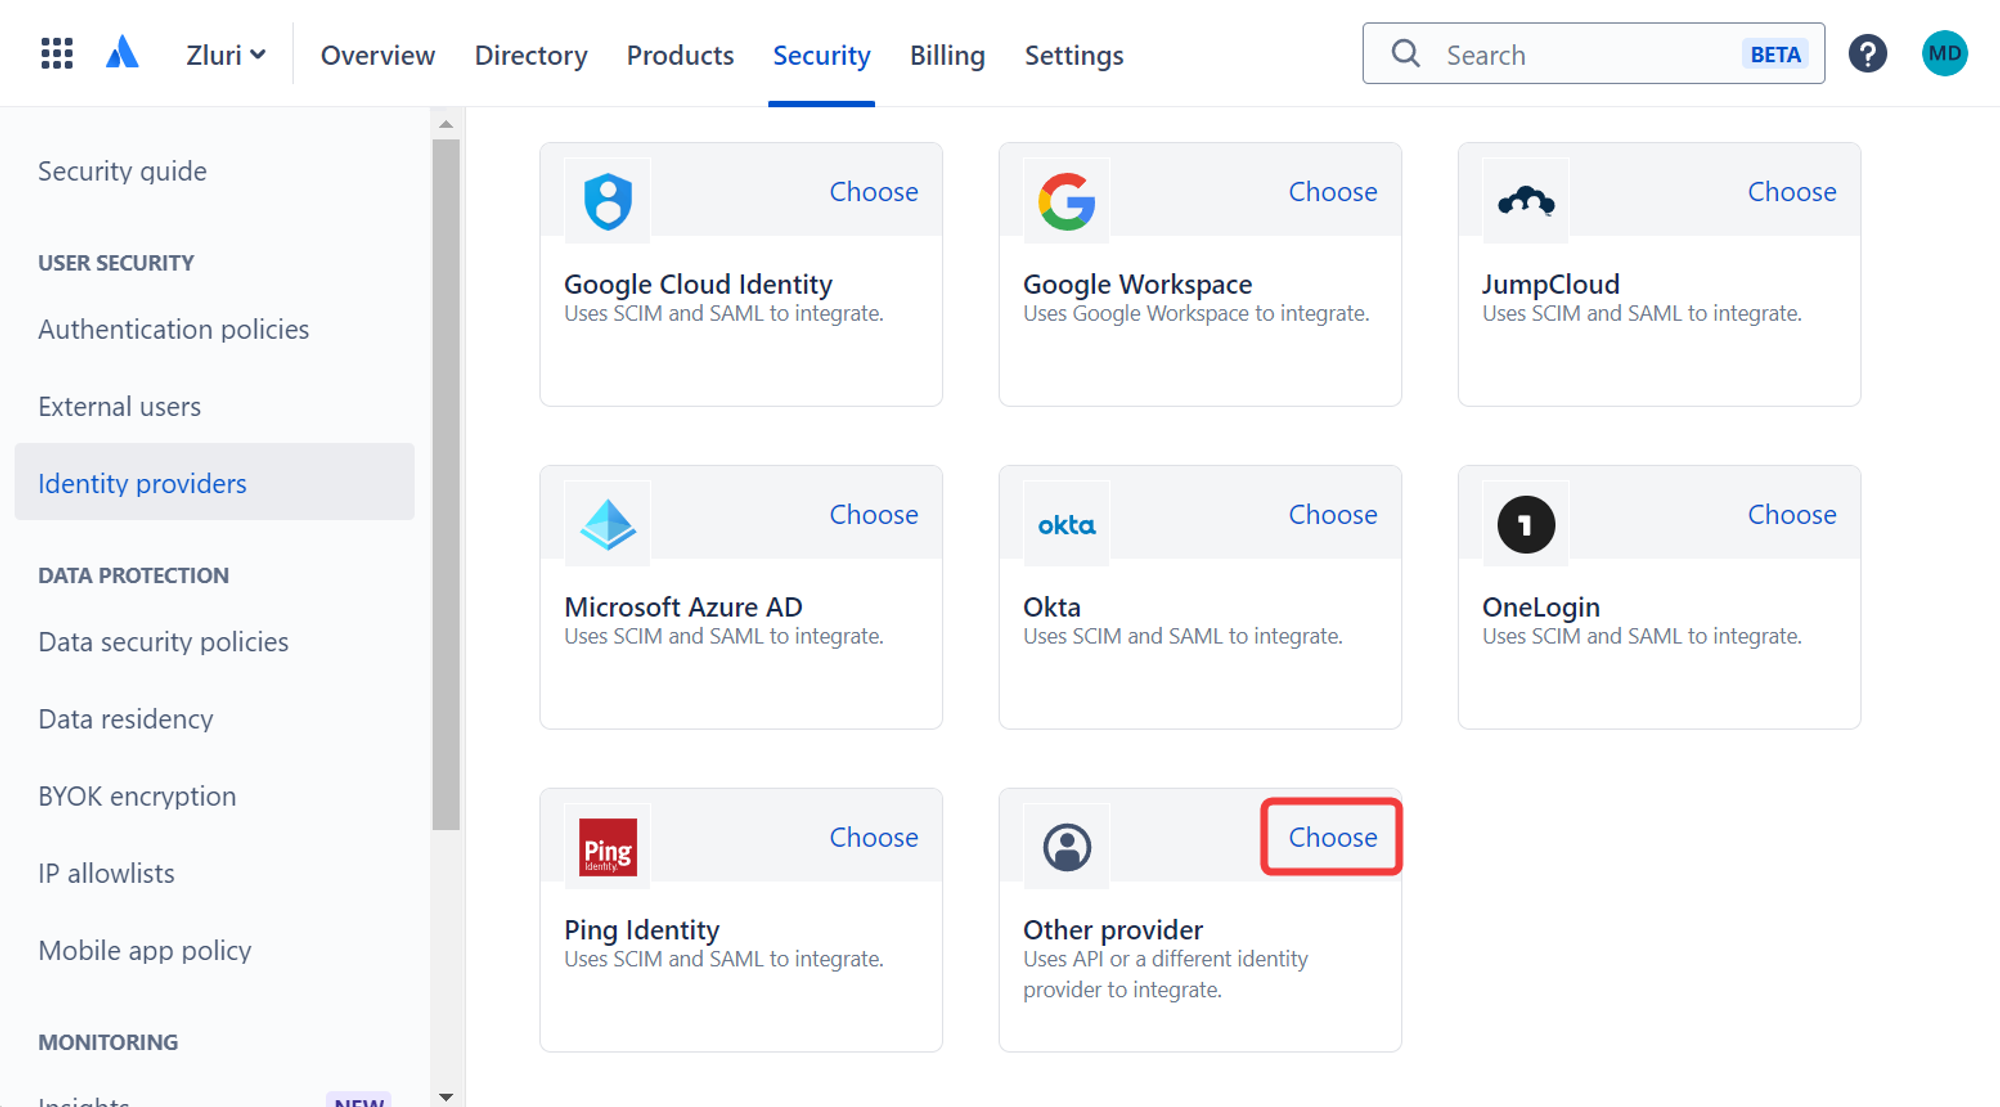
Go to the Admin panel, select your organization name, and navigate to Security → Identity providers.
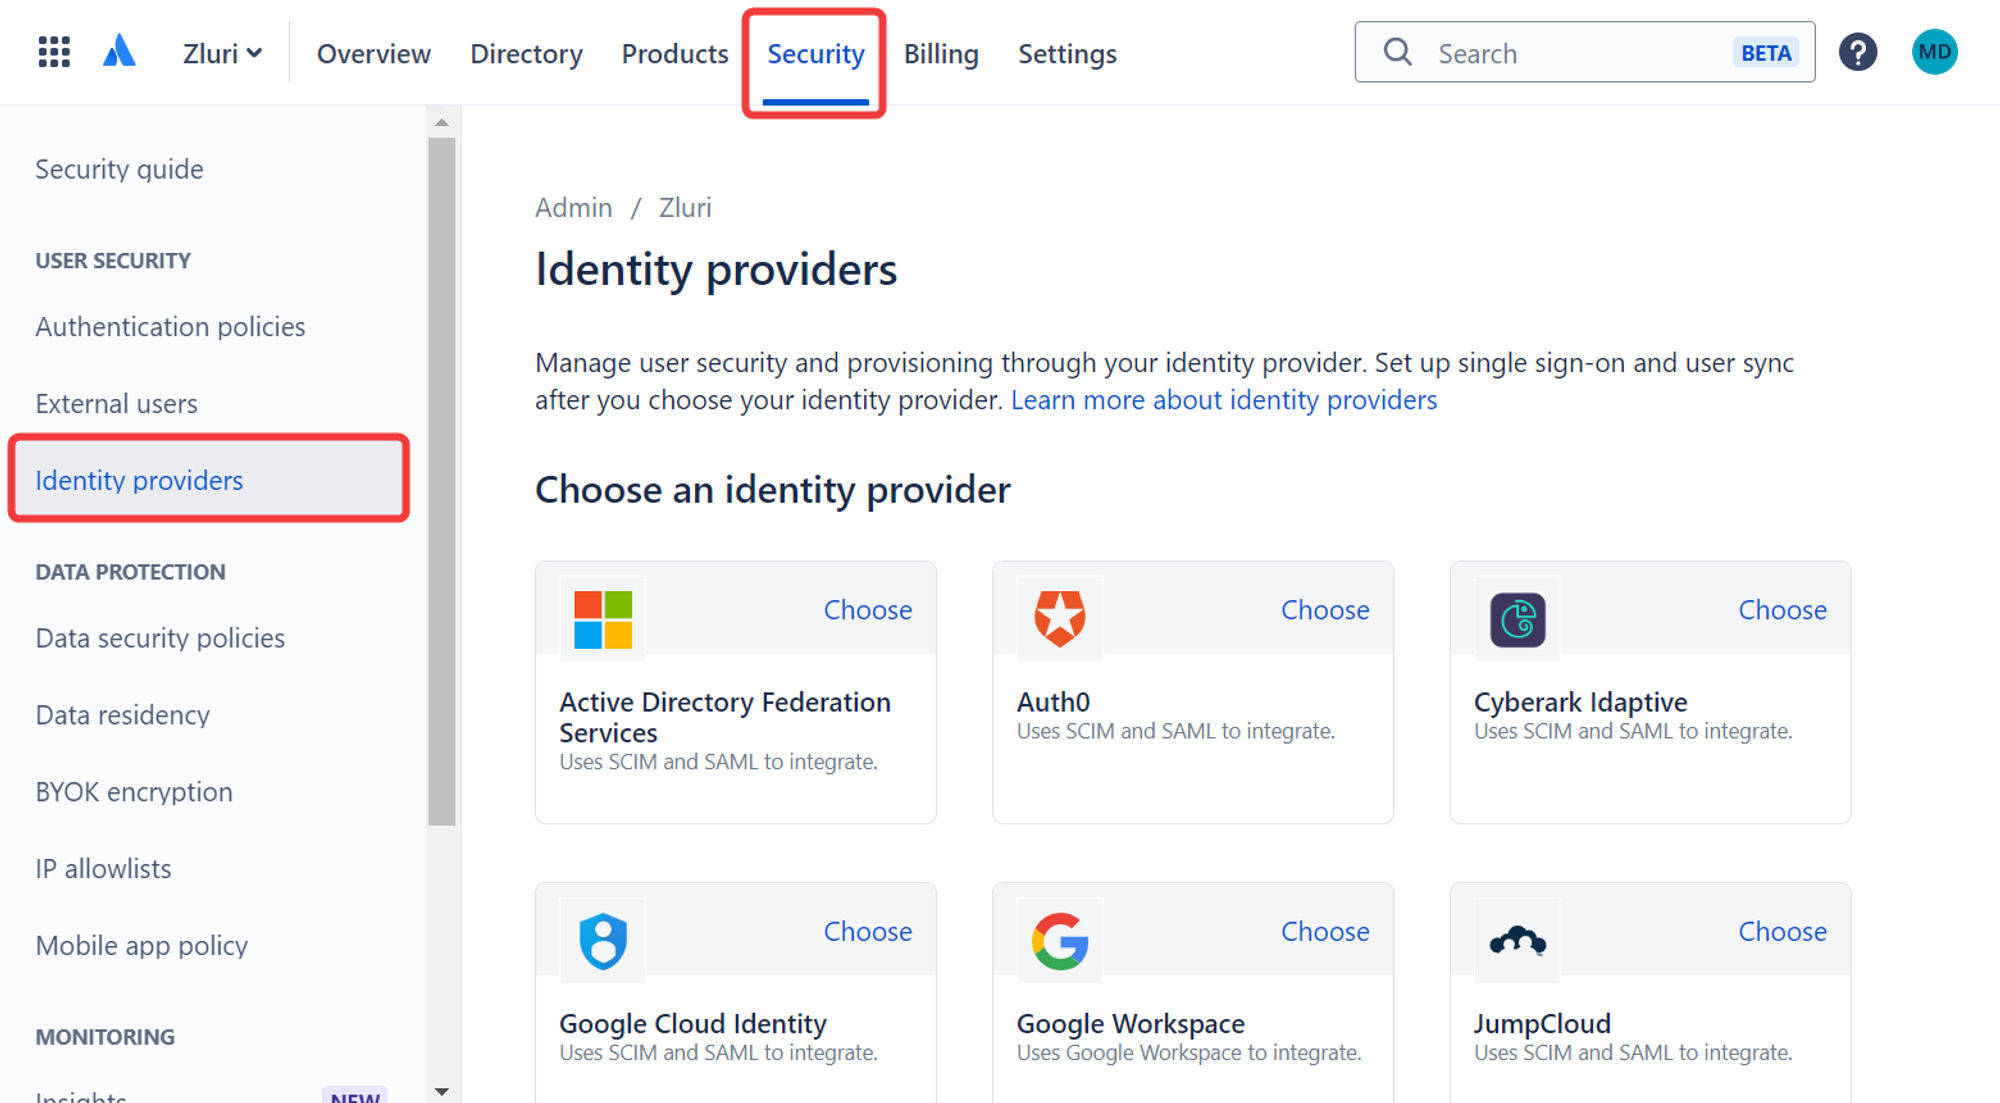
-
Scroll down till you see Other provider, then click Choose.
-
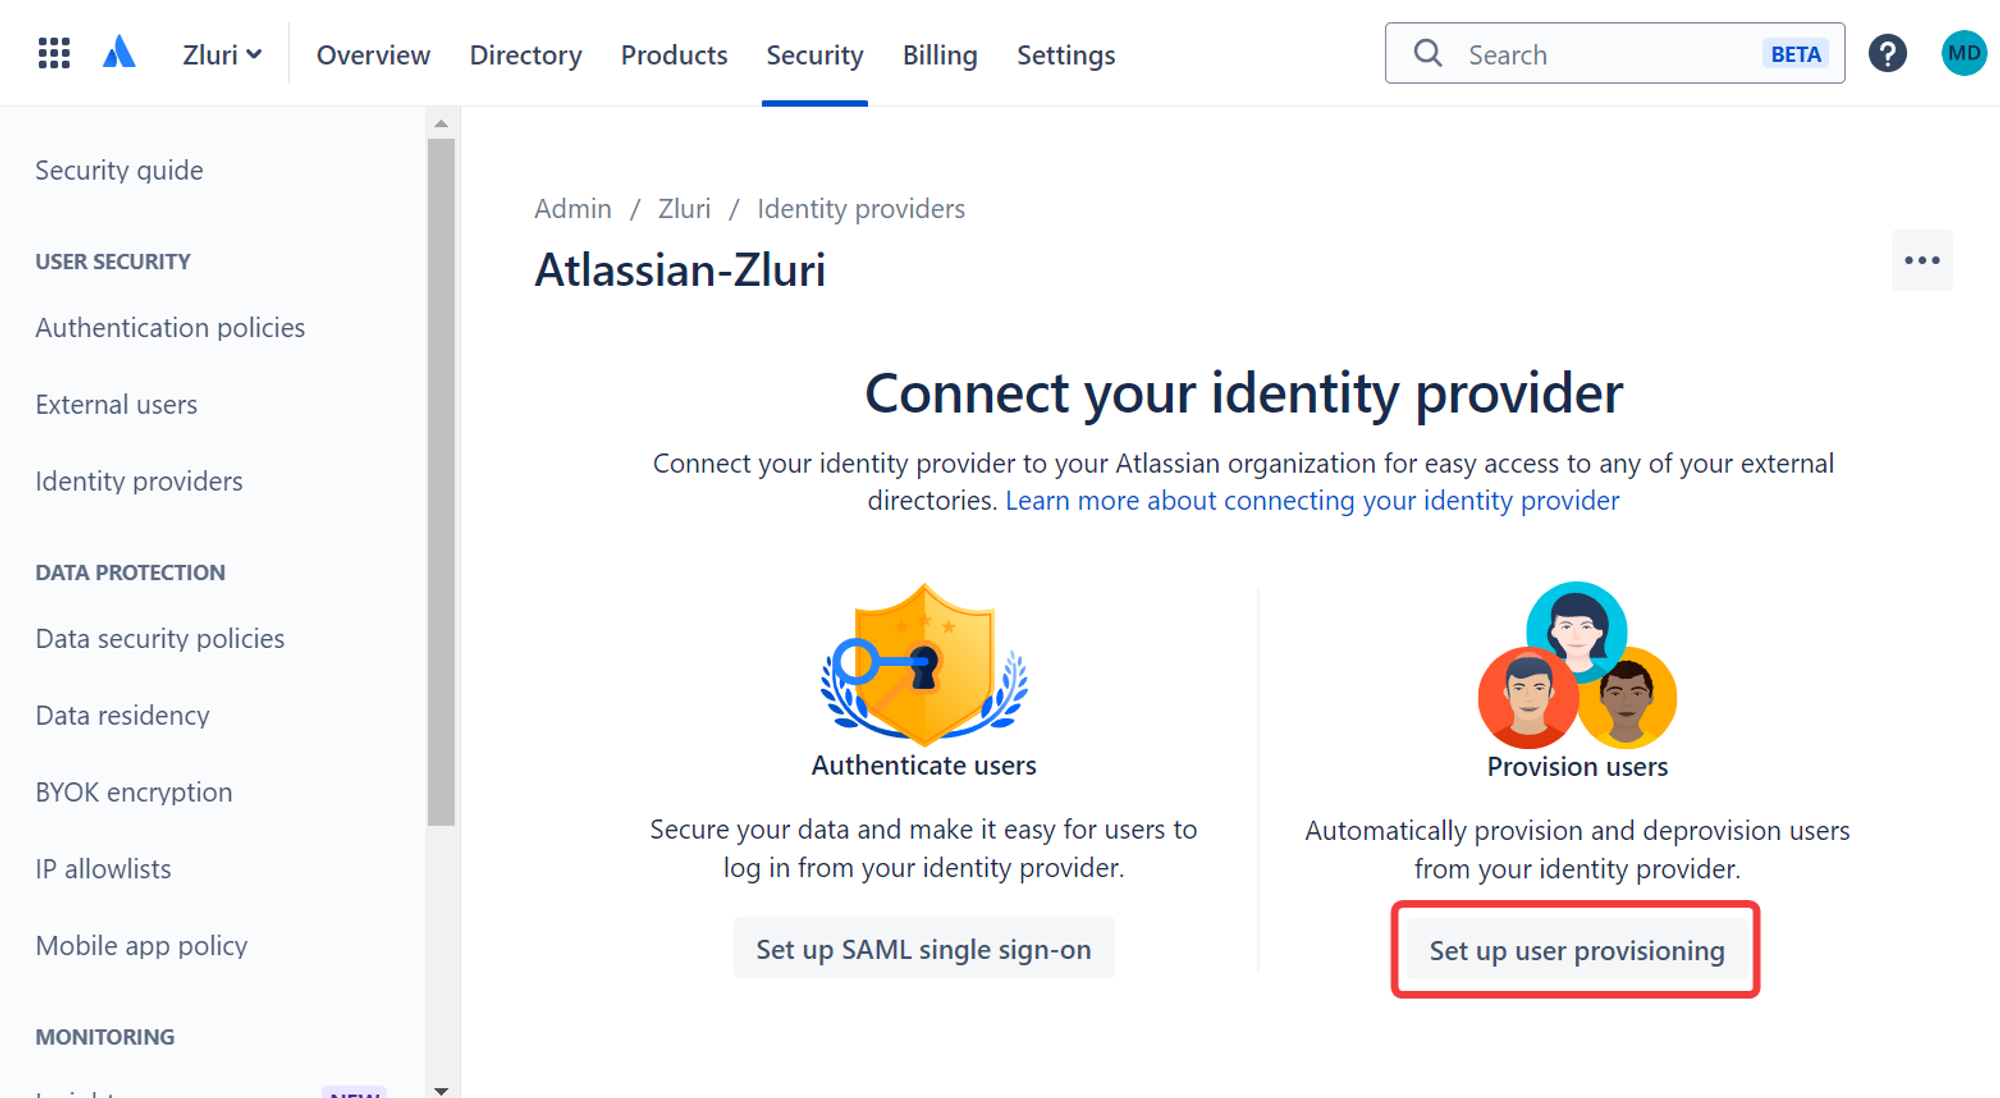
Choose a directory name and click Add. On the next screen, pick Set up user provisioning.
-
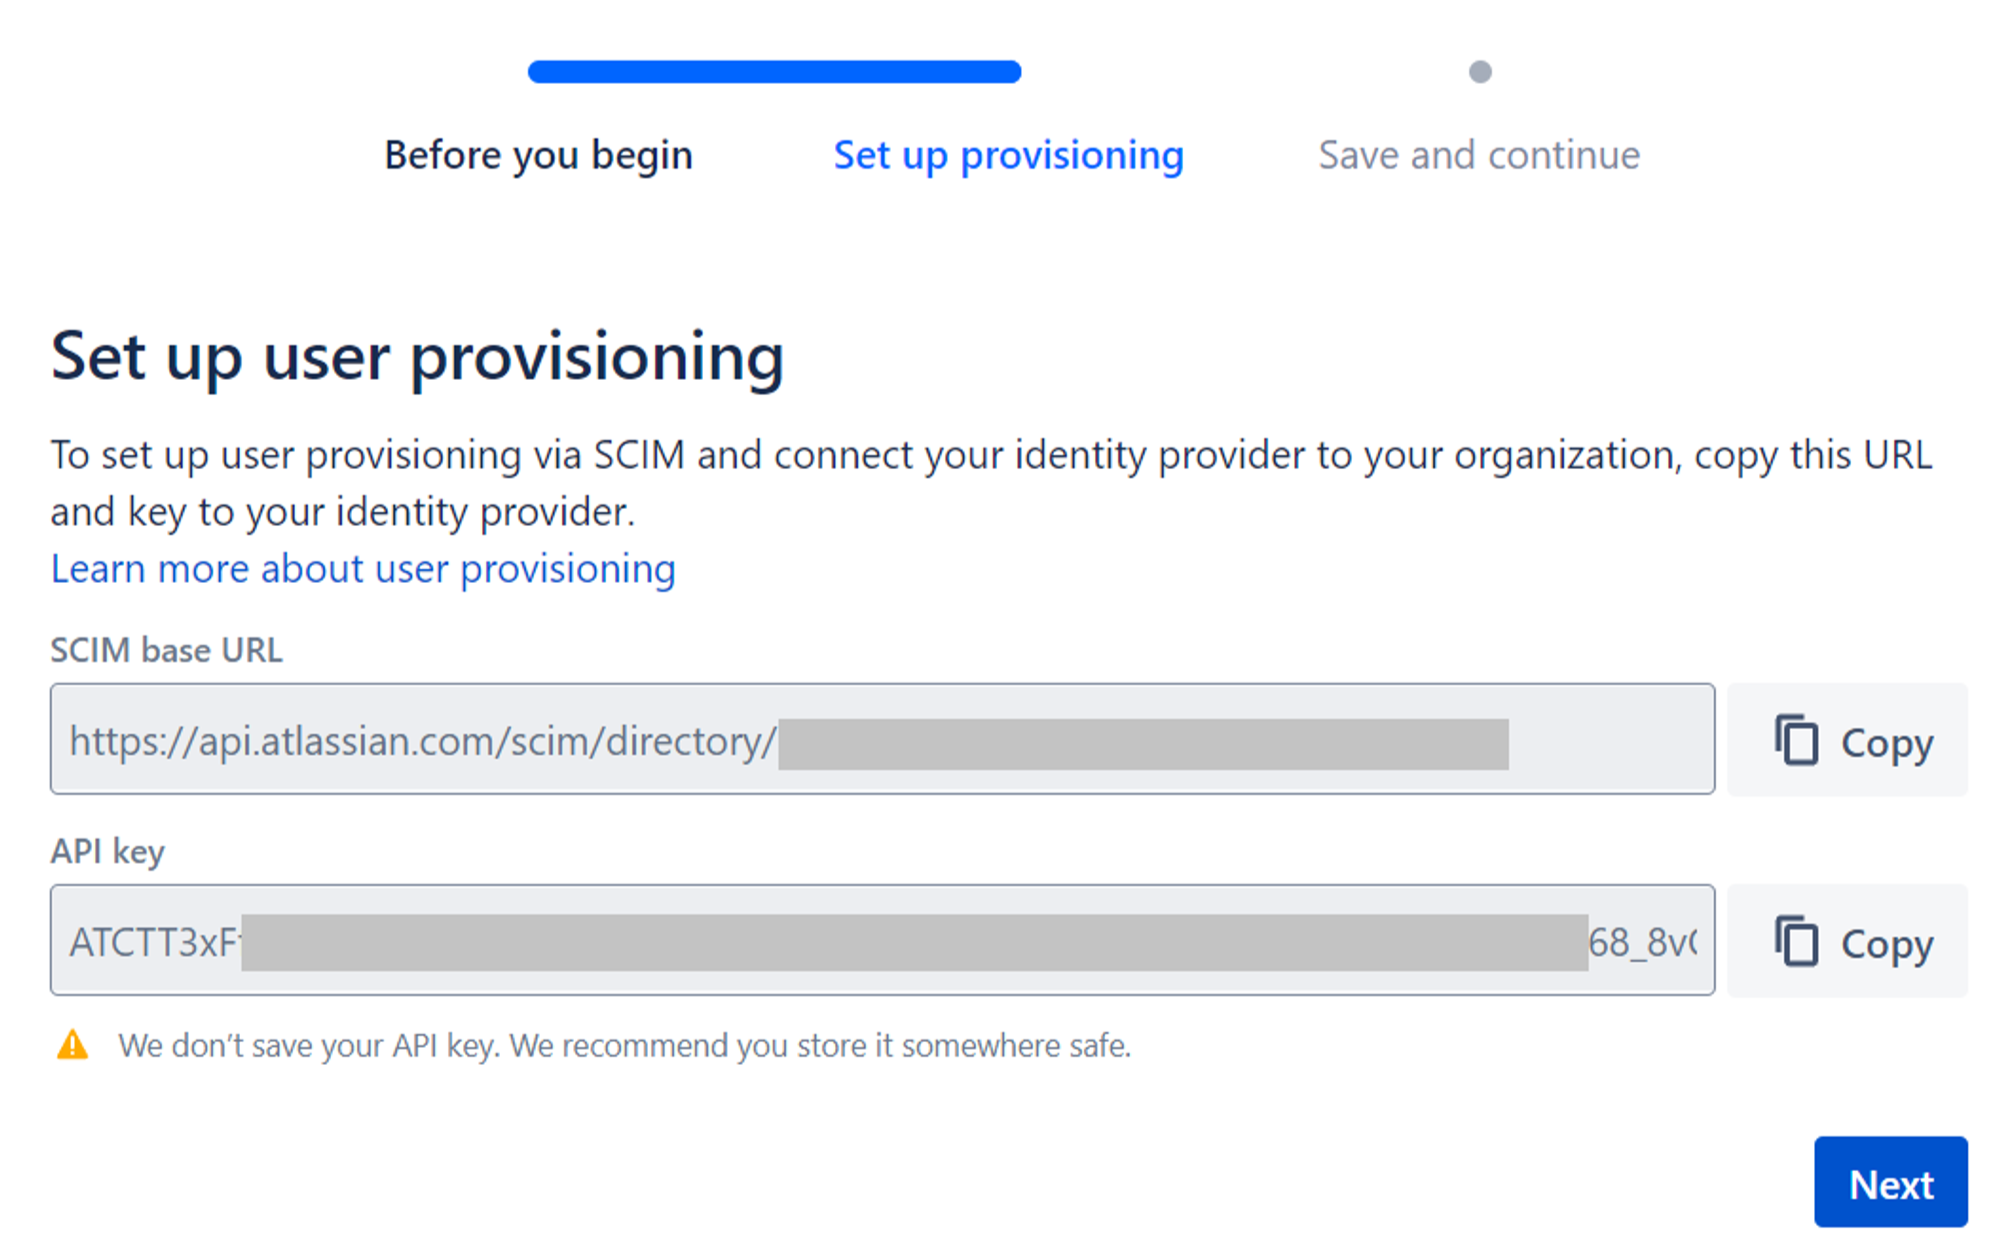
Copy and store the generated SCIM base URL and API key, then click Next.
The “API key” generated in the Create an Atlassian Admin API key section is NOT the same as the API key generated here. For the sake of clarity, we will refer to the latter as “SCIM API key” instead.
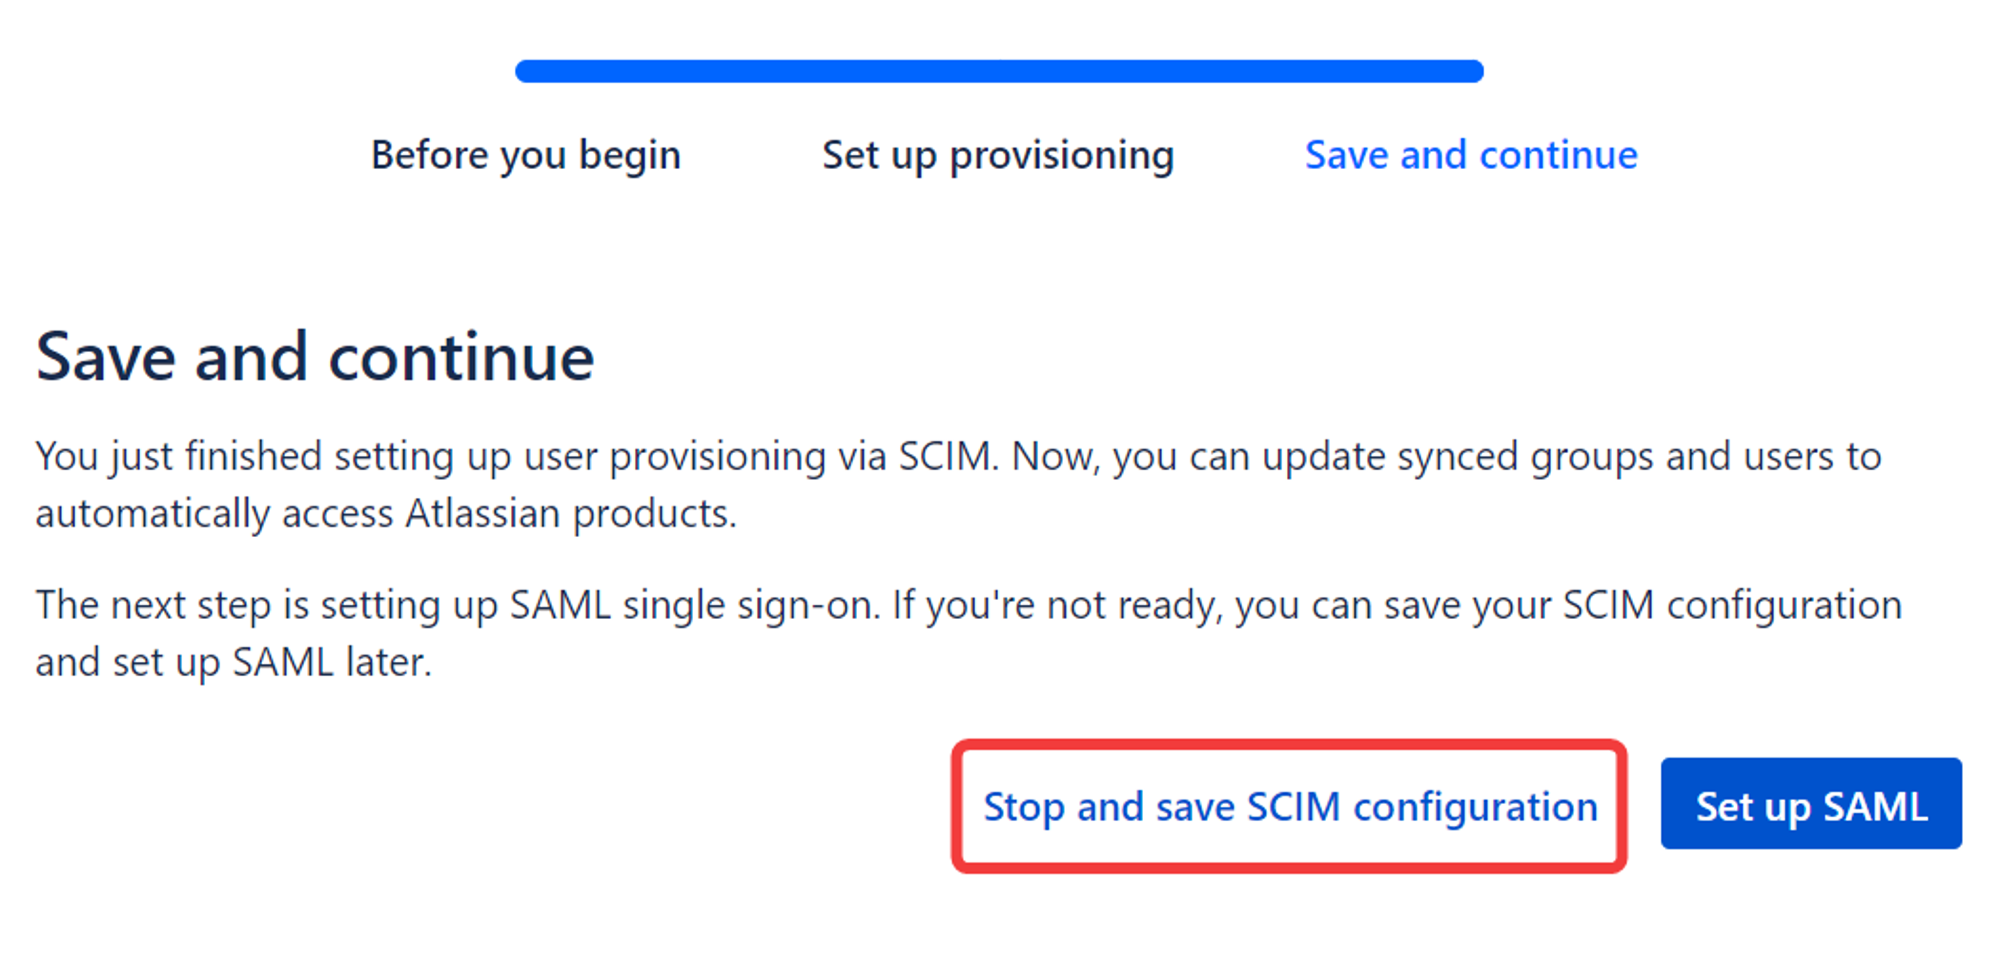
- Finally, click on Stop and save SCIM configuration.
Connect the Atlassian Admin instance in Zluri
-
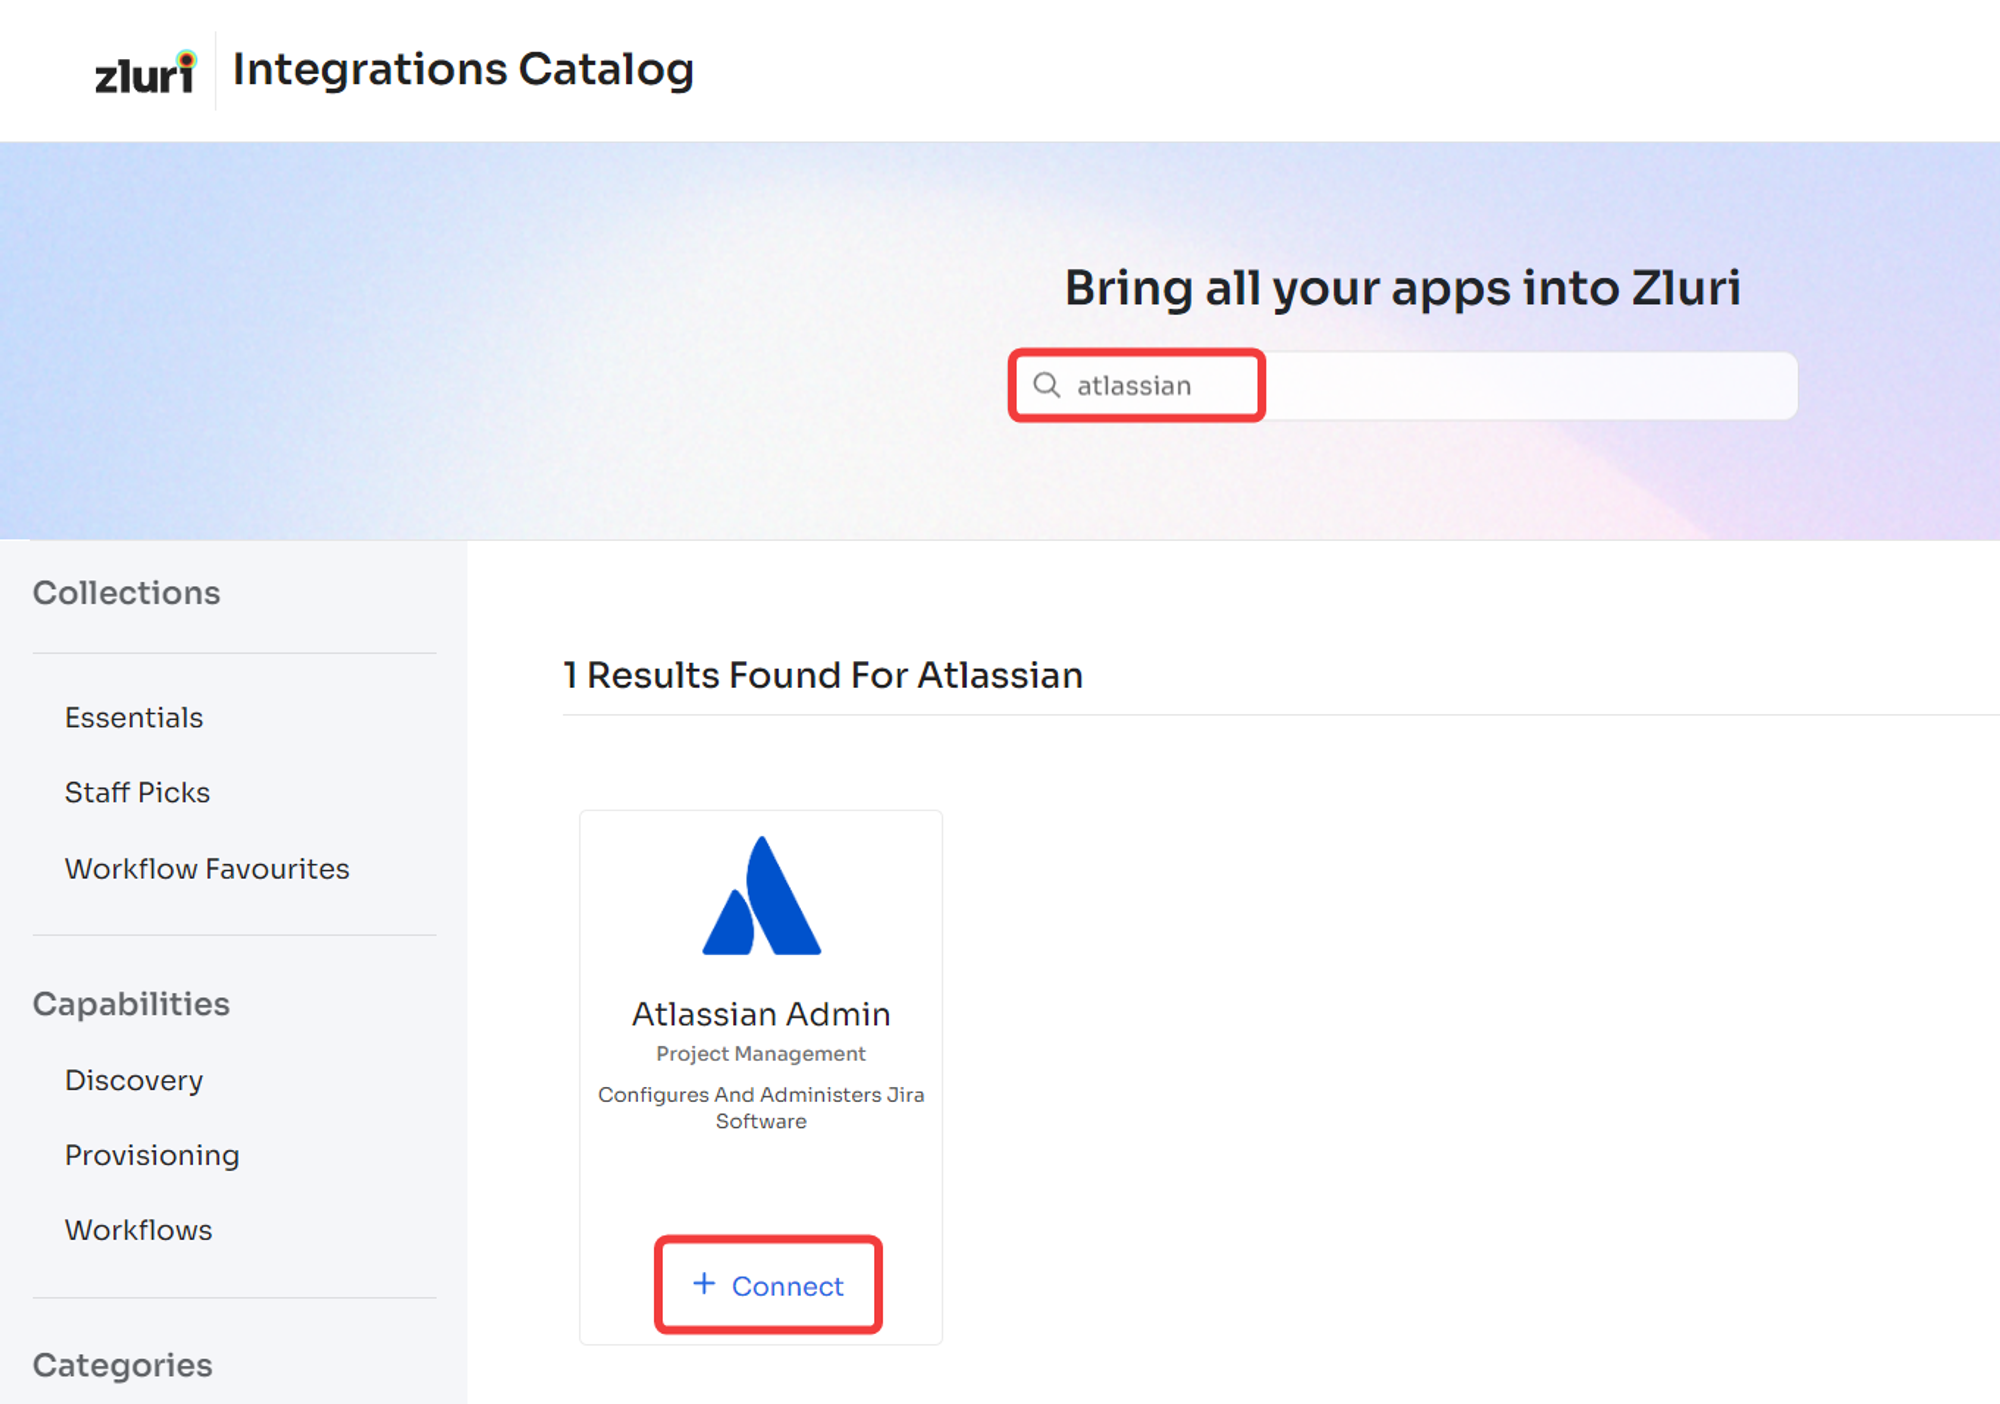
Open the Integrations Catalog, search for “atlassian”, and click ➕ Connect.
-
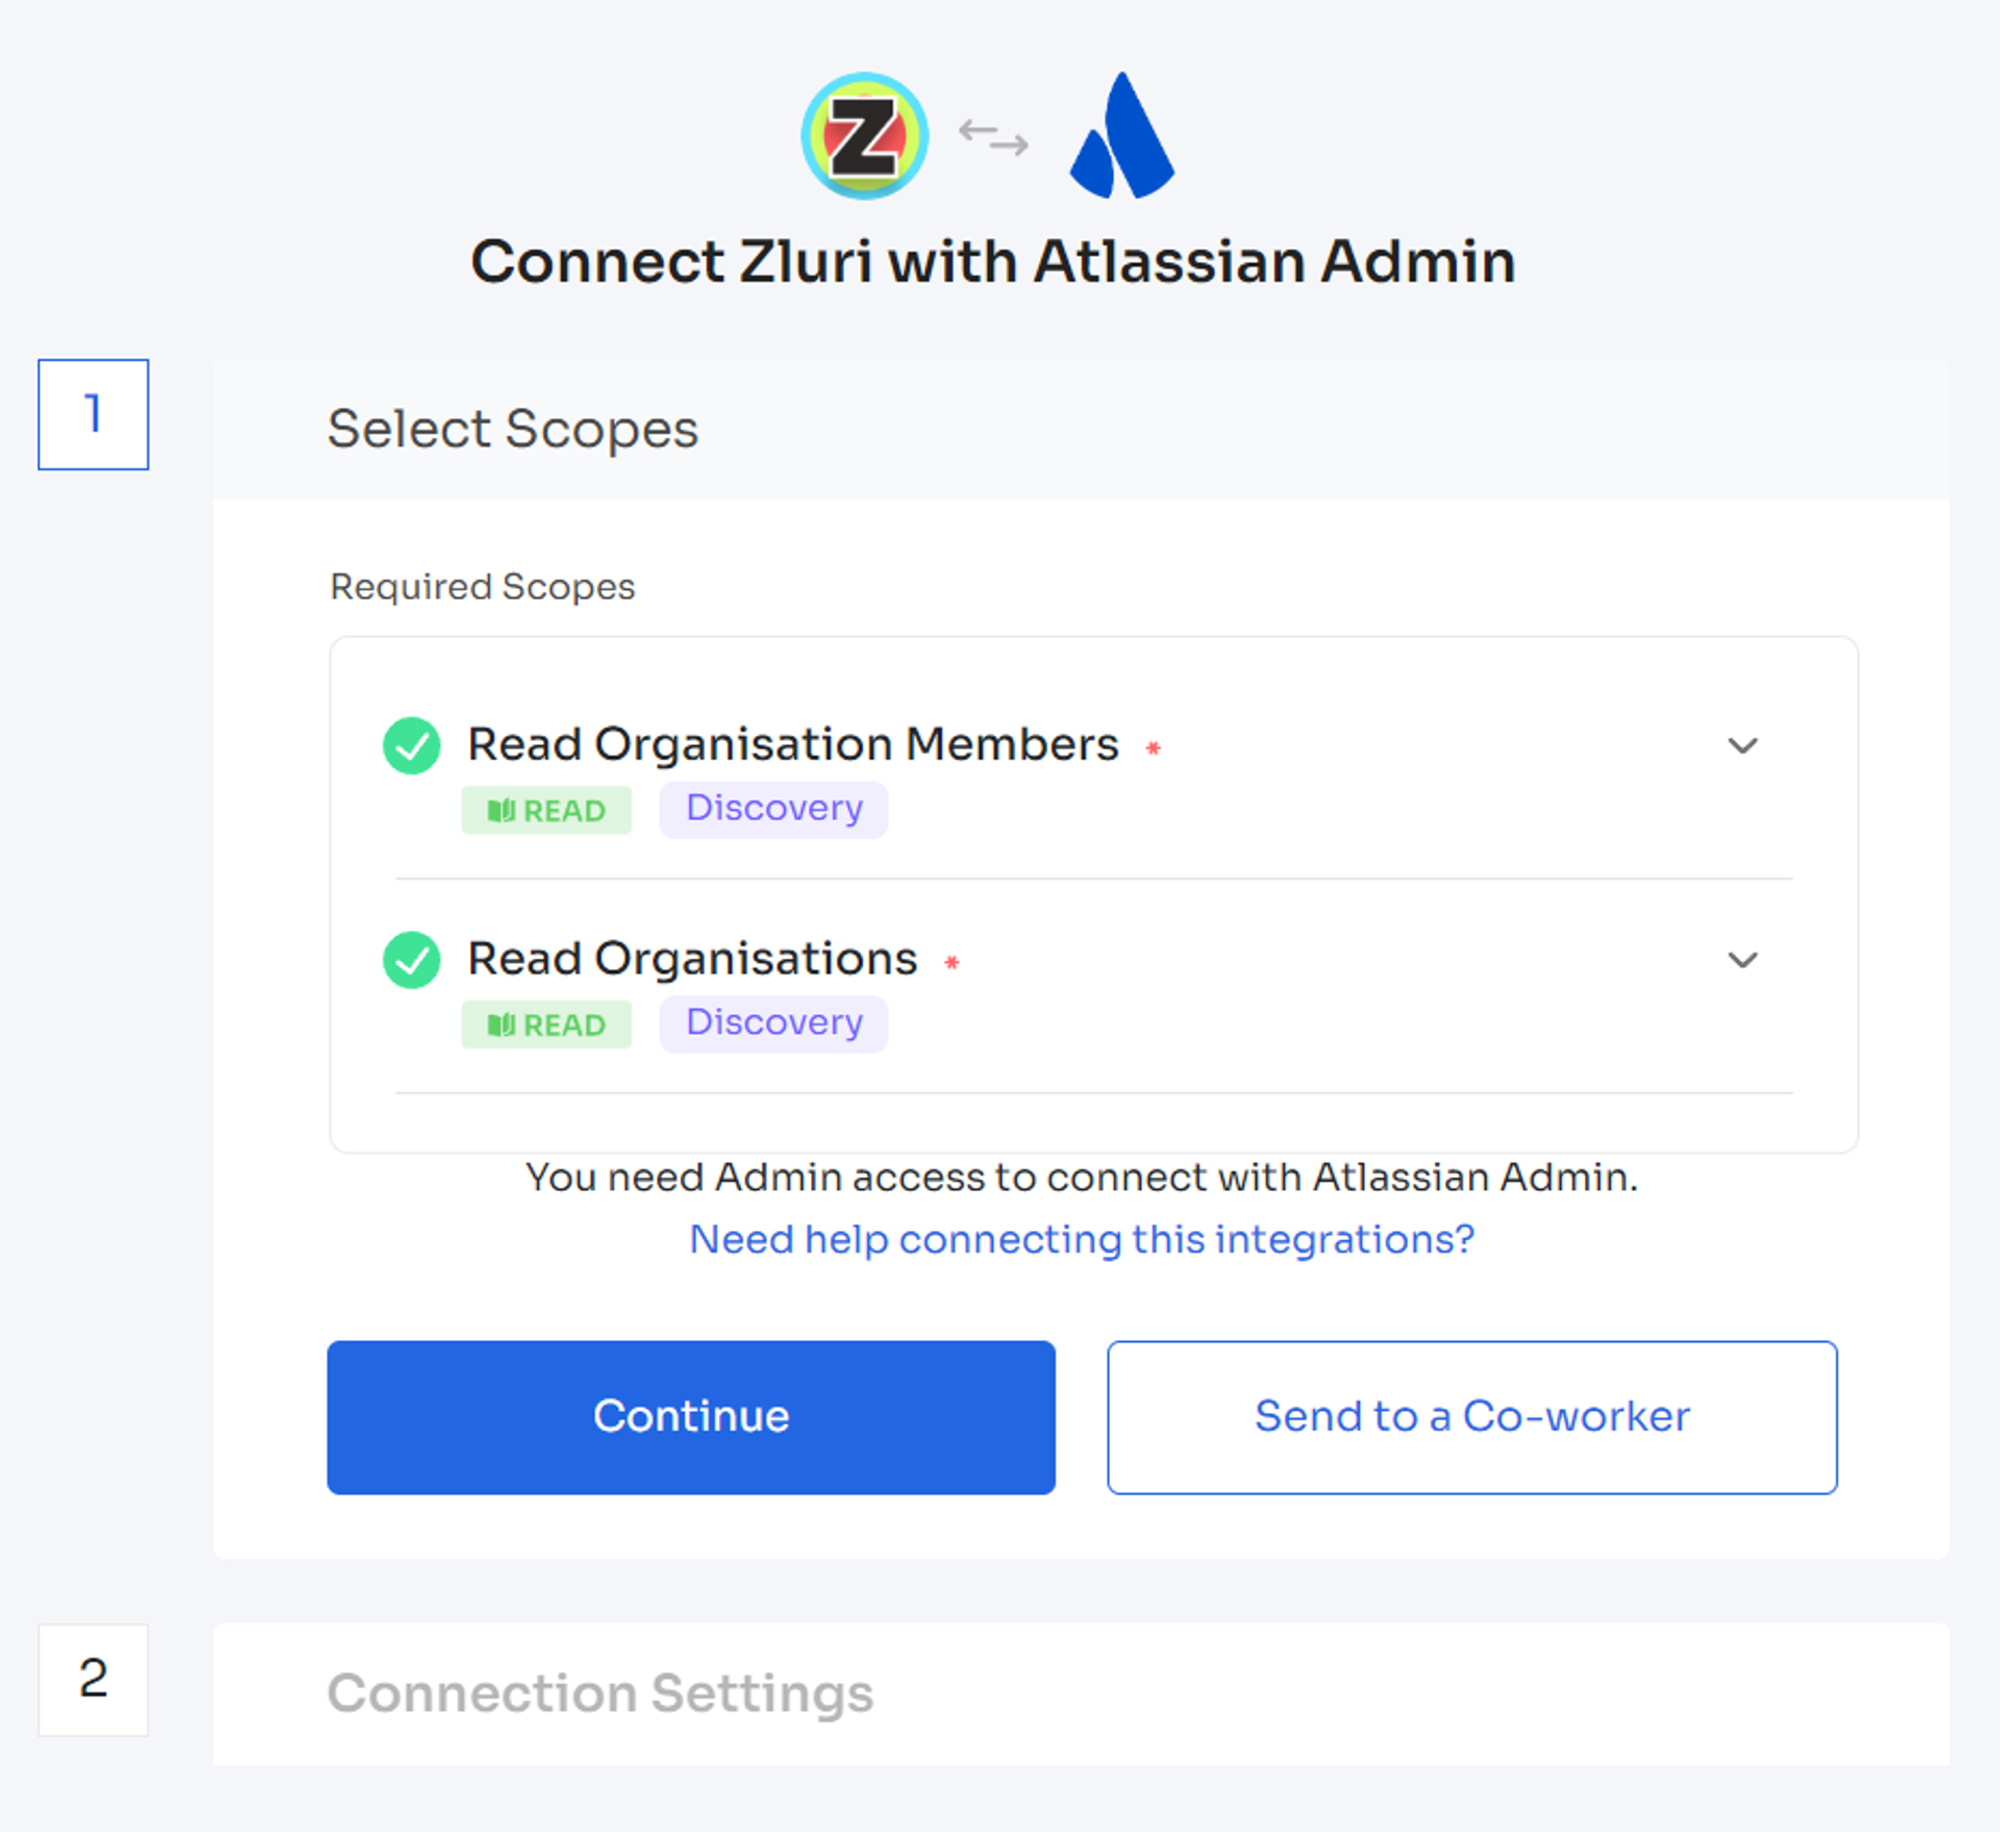
Click Continue here. You can click the down-arrow button towards the right of a scope to find out what it does.
-
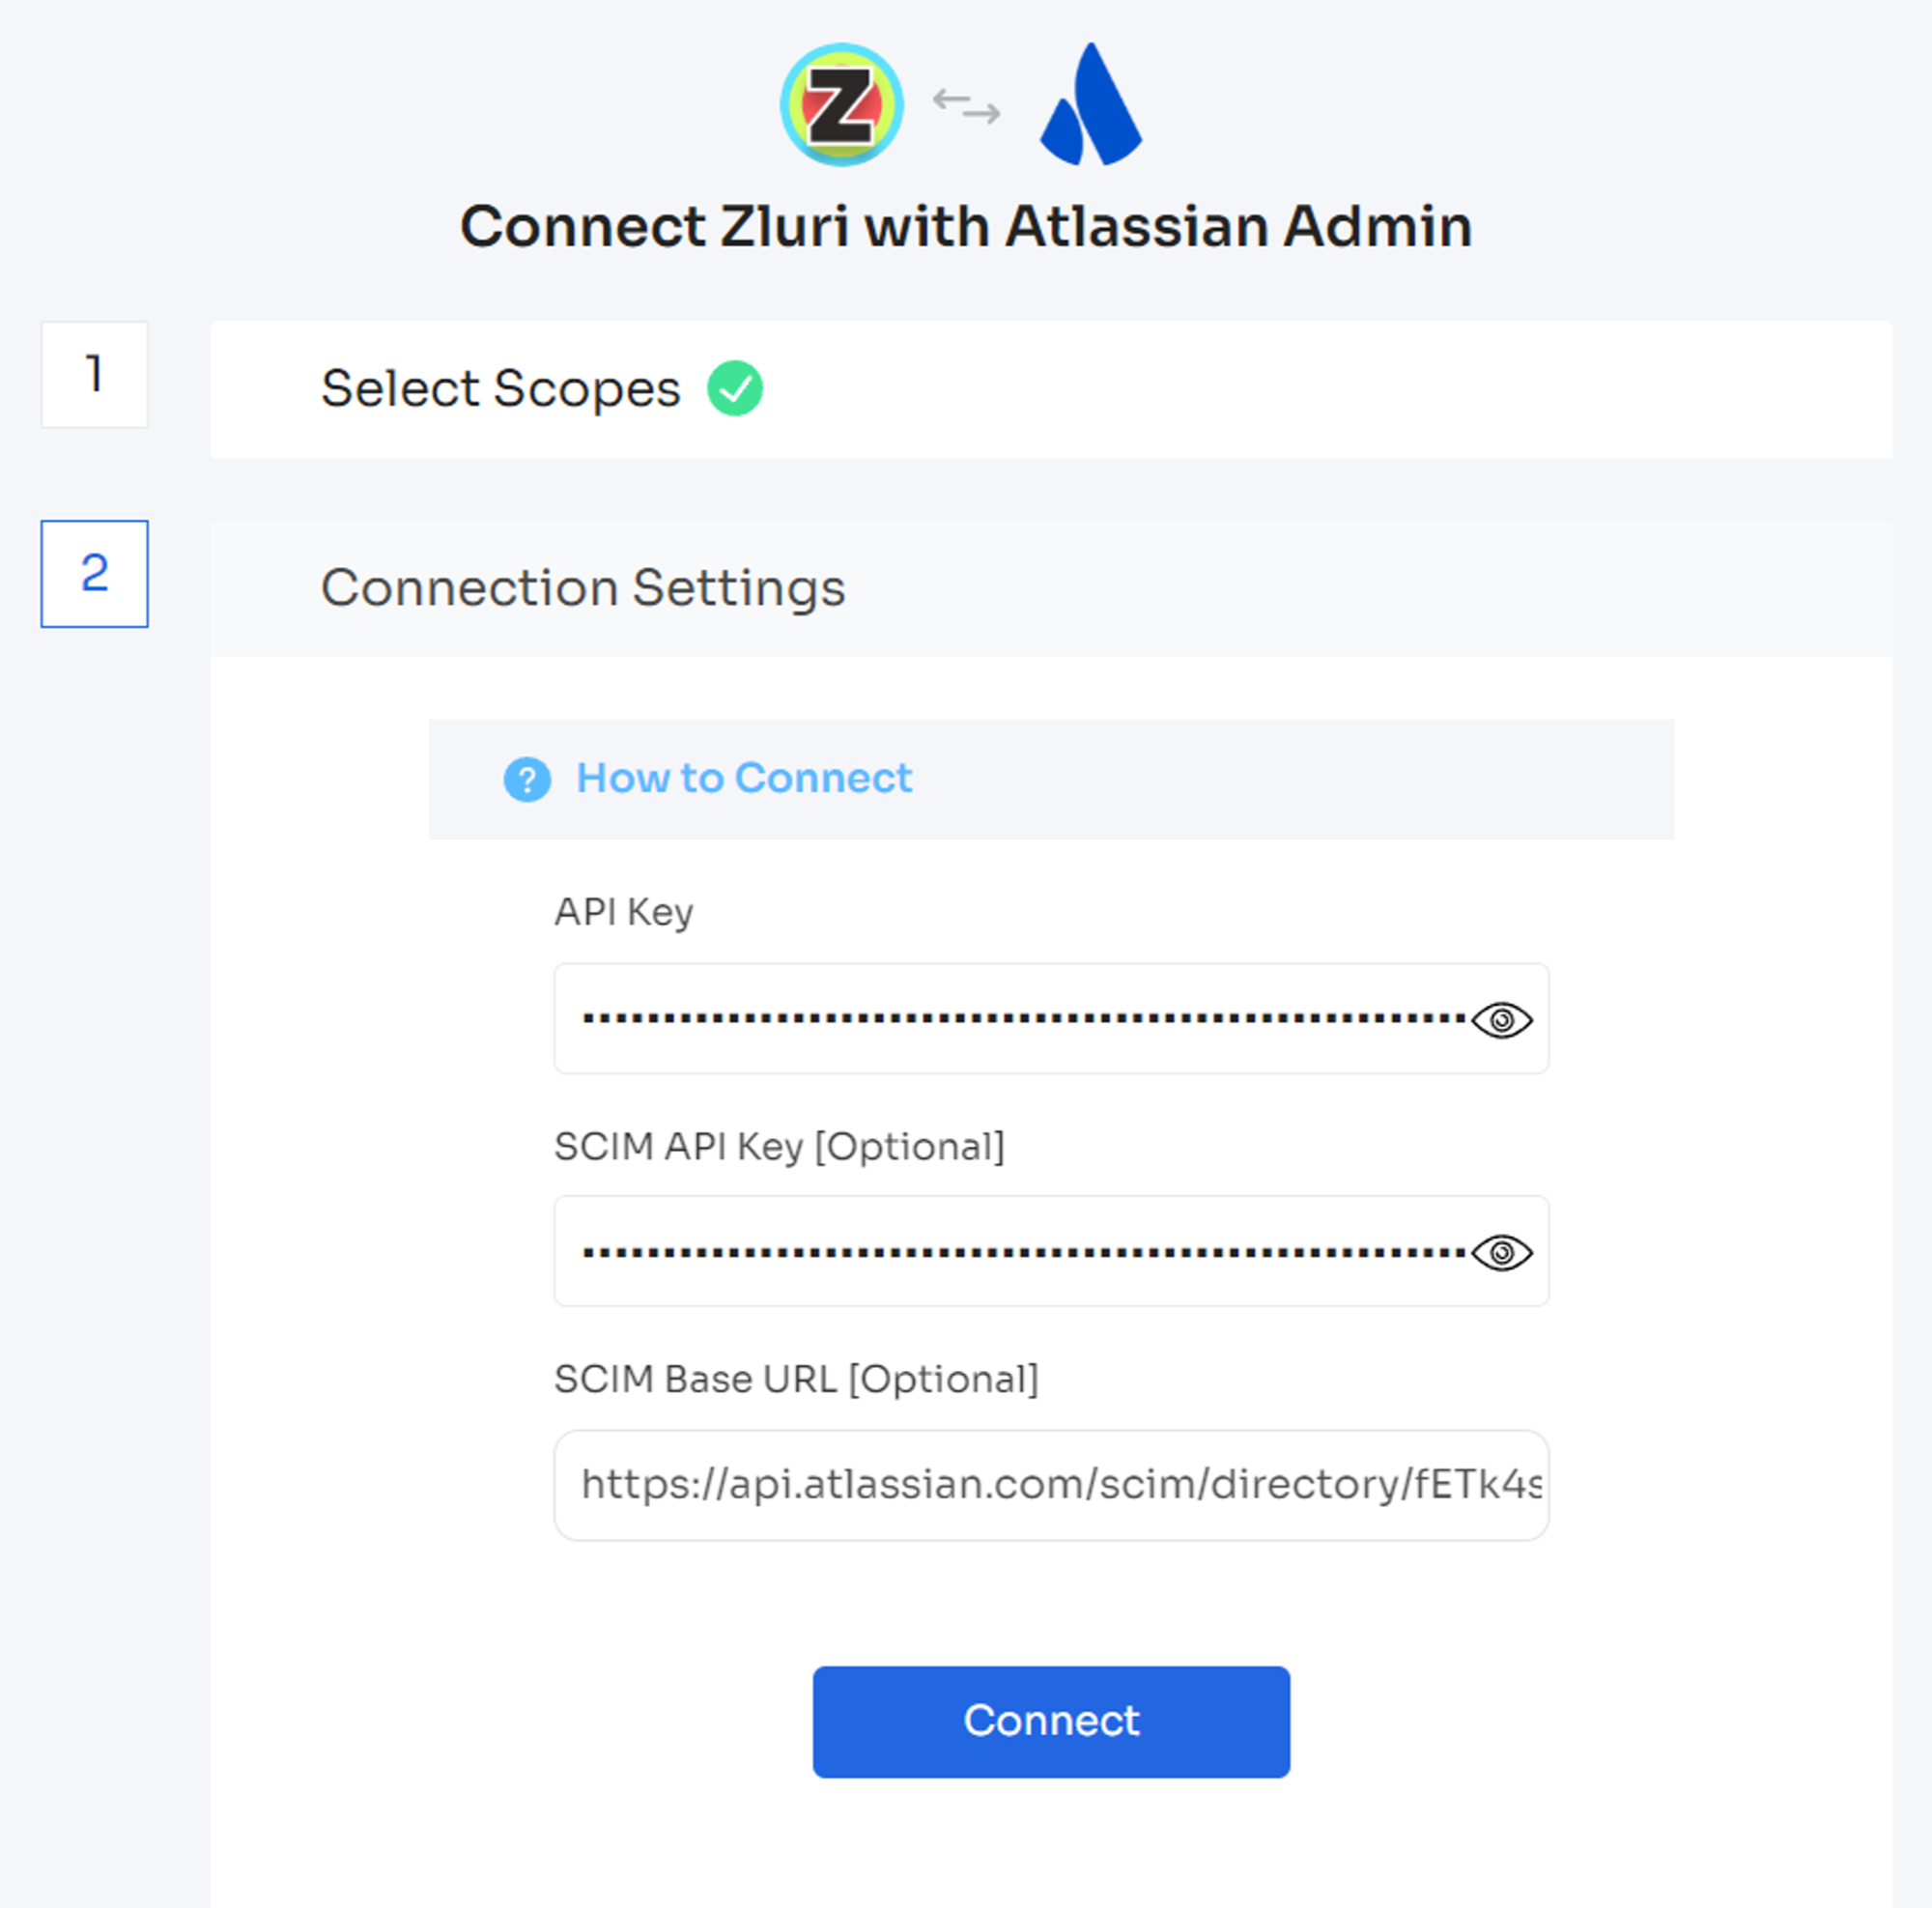
Enter the previously generated API key and (optionally) SCIM API key and SCIM base URL here.
-
Click Connect, give the connection a name and description, and you’re ready to go!
Got questions? Feel free to submit a ticket or contact us directly at [email protected].
Updated 10 months ago