Tasks Dashboard_outdated
Learn about Zluri's task dashboard capabilities
Use the Tasks dashboard to view, manage, and track tasks assigned to you or your groups. You can take actions on tasks, add comments, and share task links with team members. This guide shows you how to navigate the interface and customize your task management workflow.
Access the dashboard by clicking on Tasks in the left sidebar or through this link.
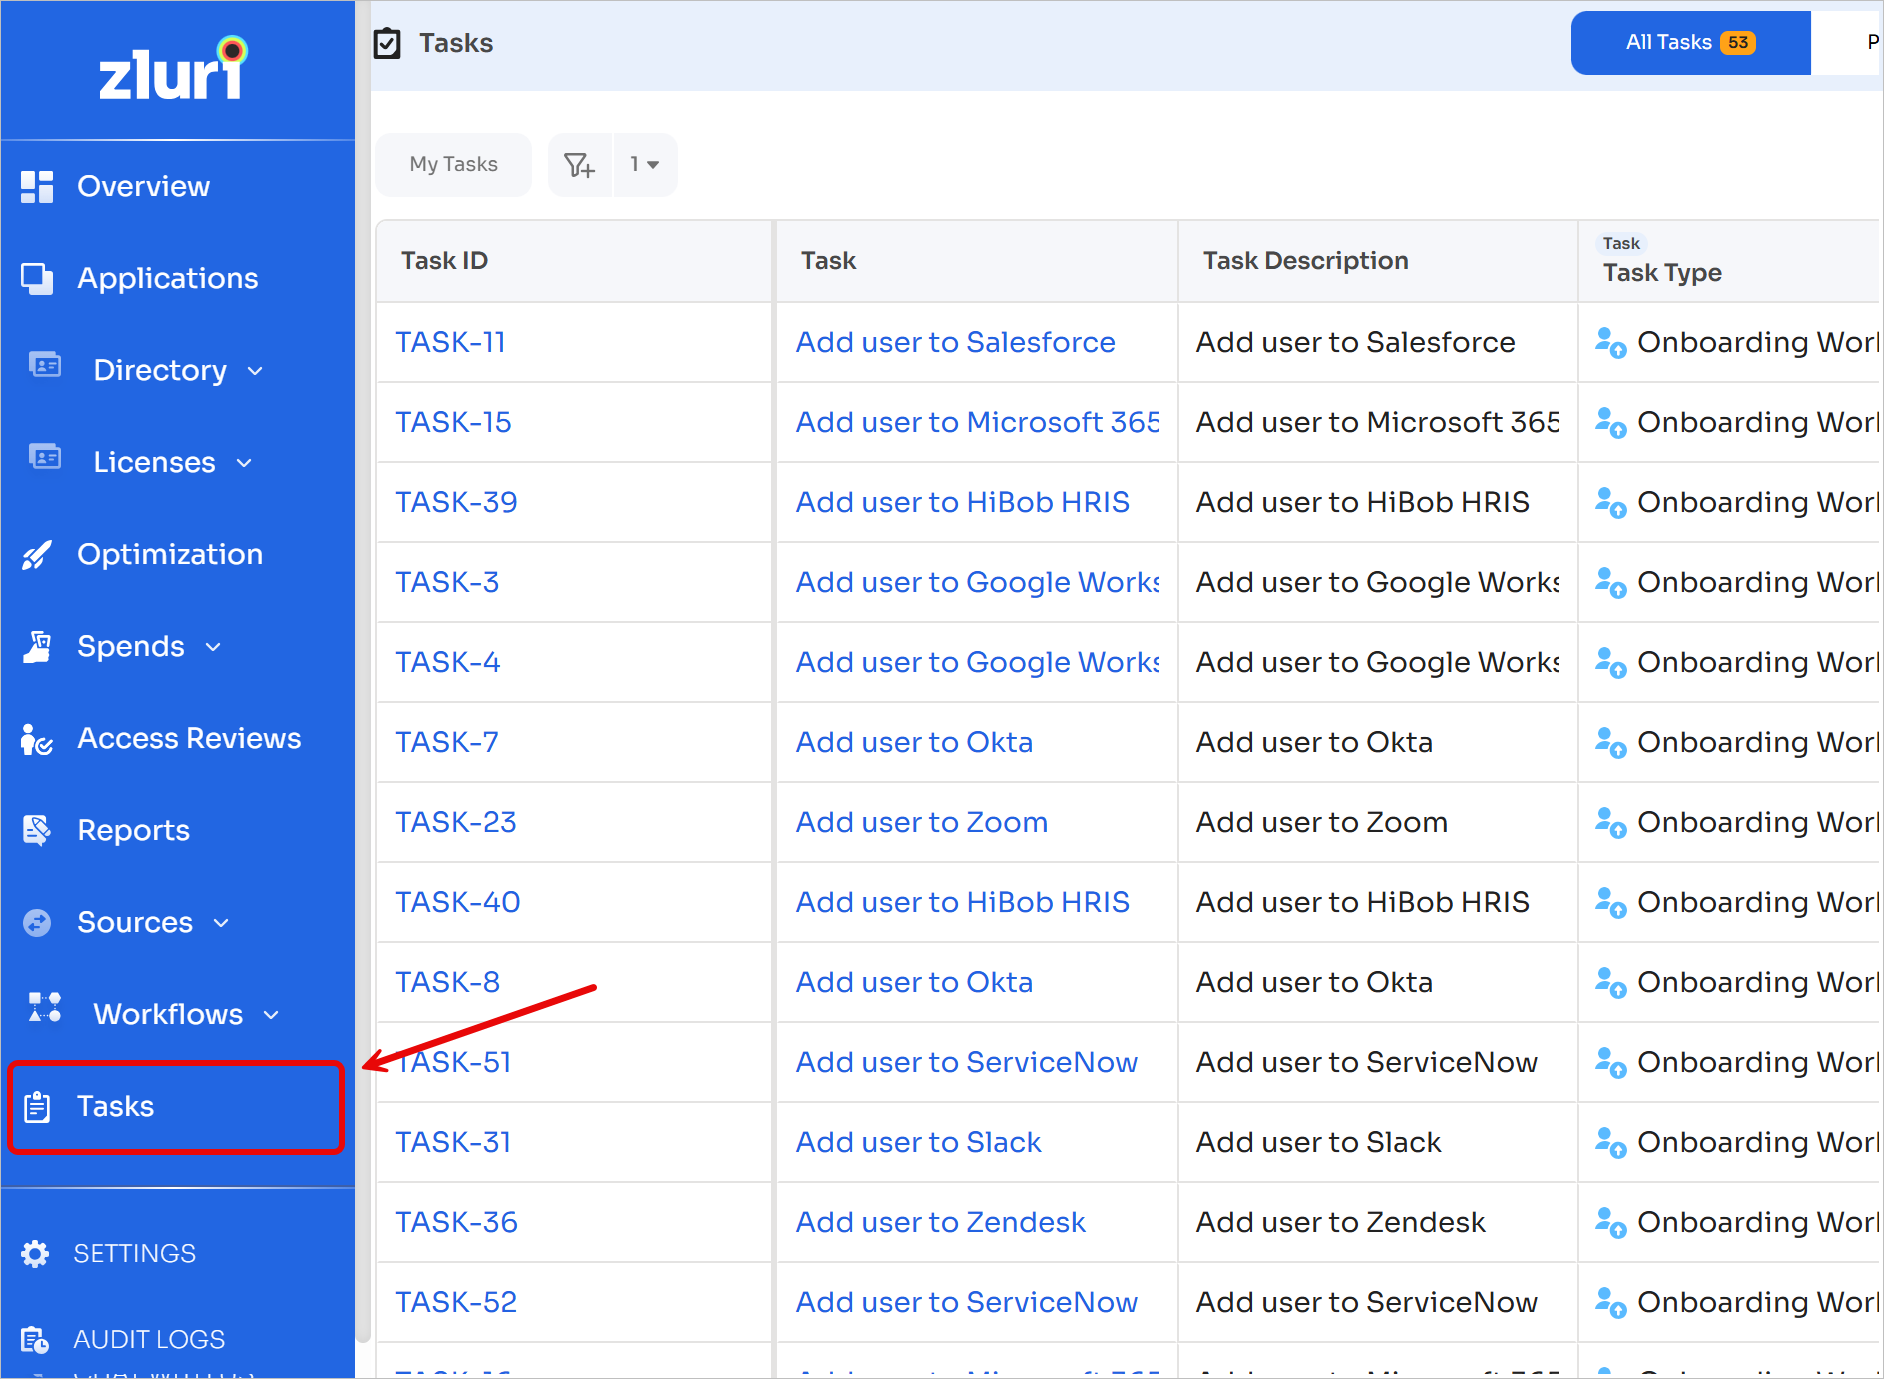
Understanding the Task dashboard interface
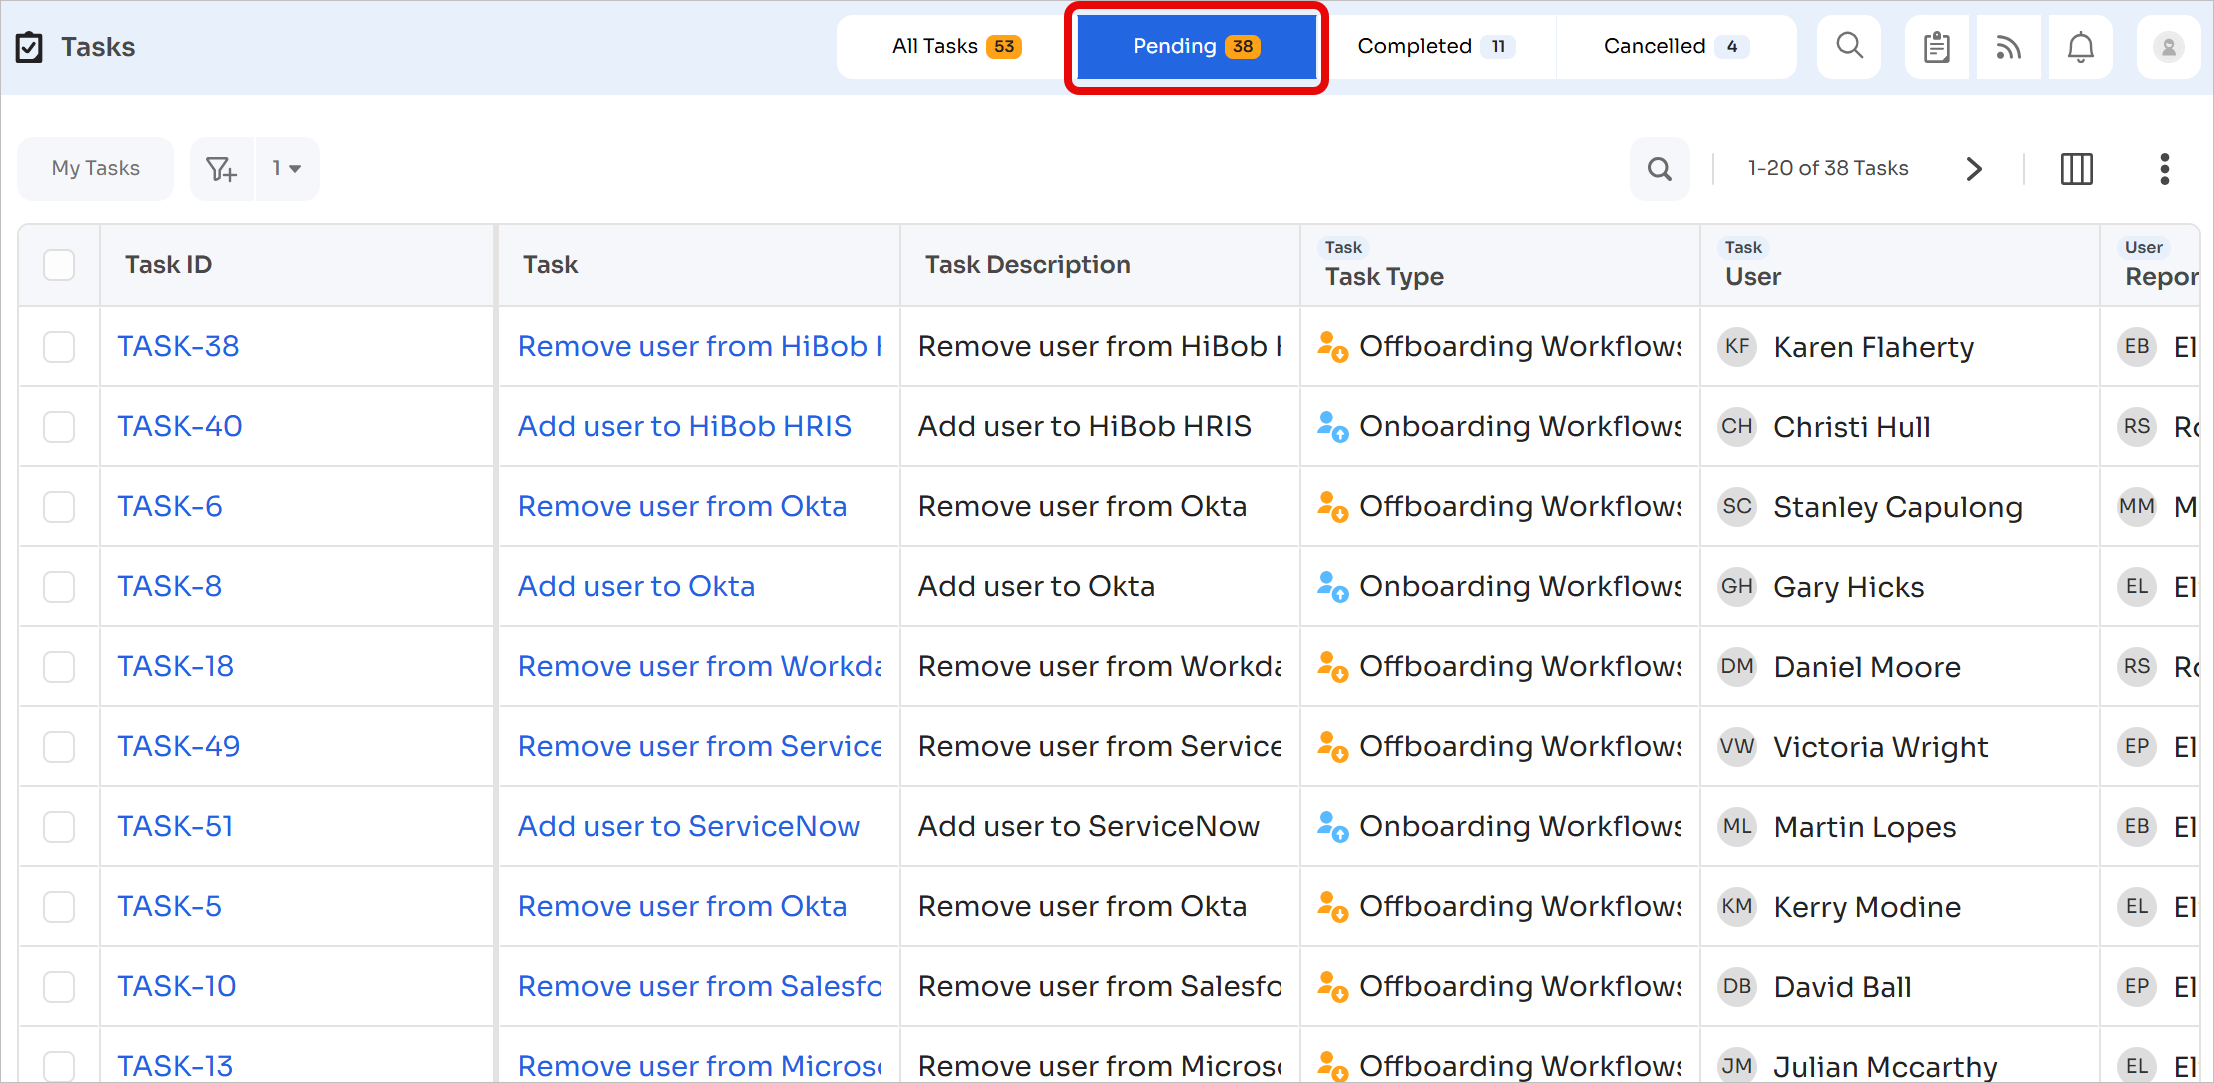
This is what the Task dashboard looks by default, depending on your screen width:
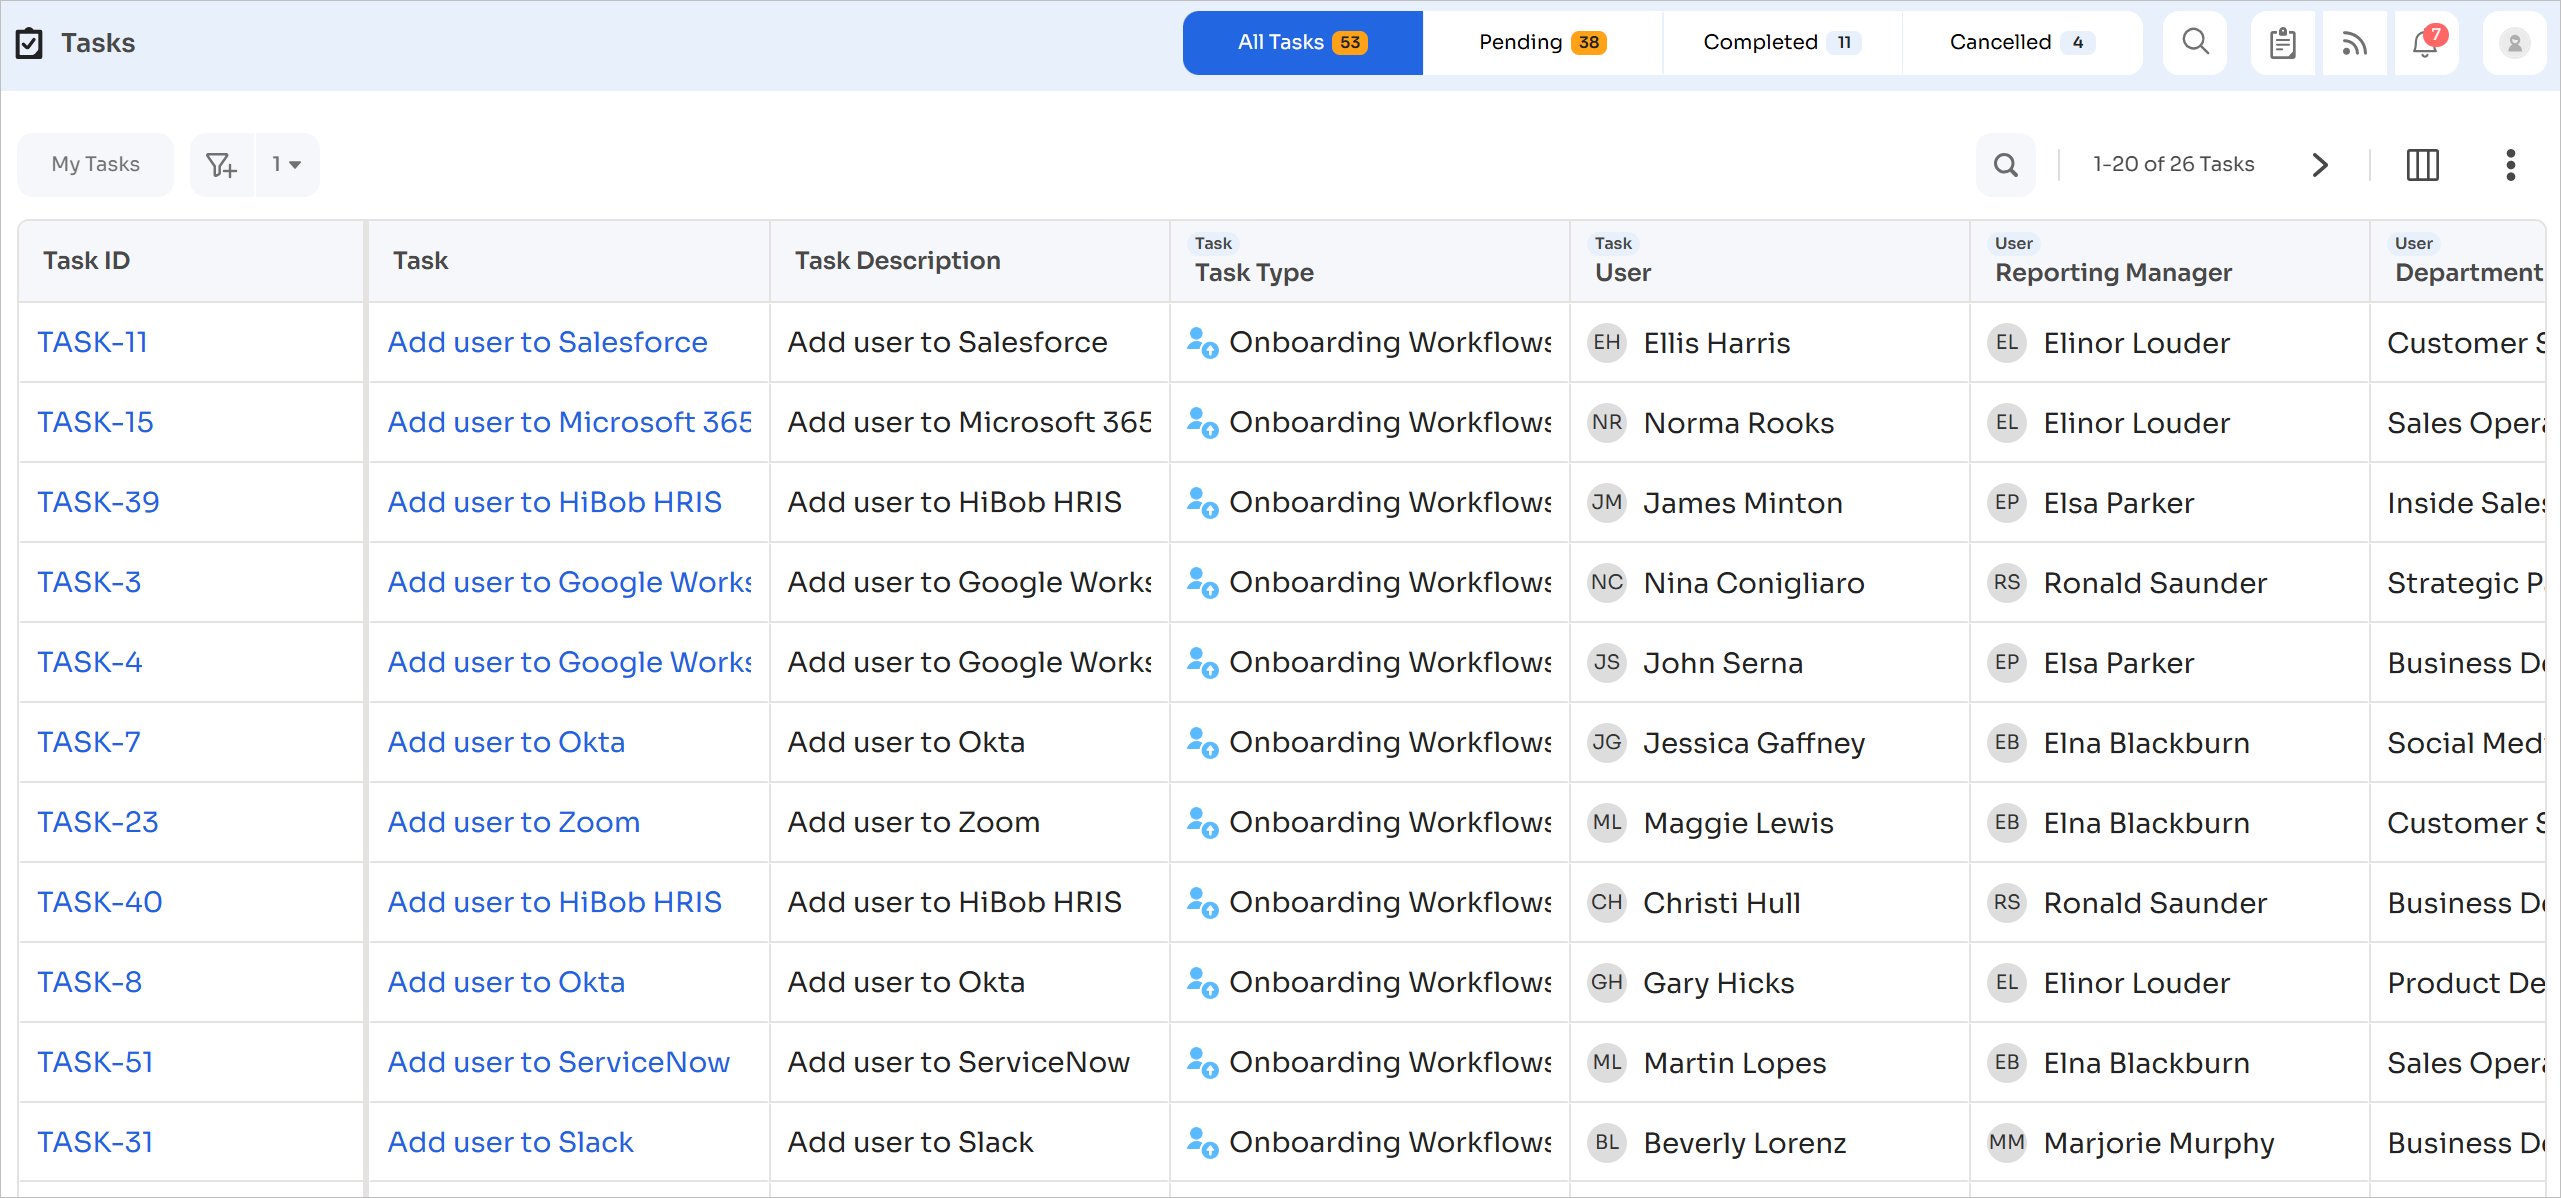
Scroll horizontally to reveal more columns:
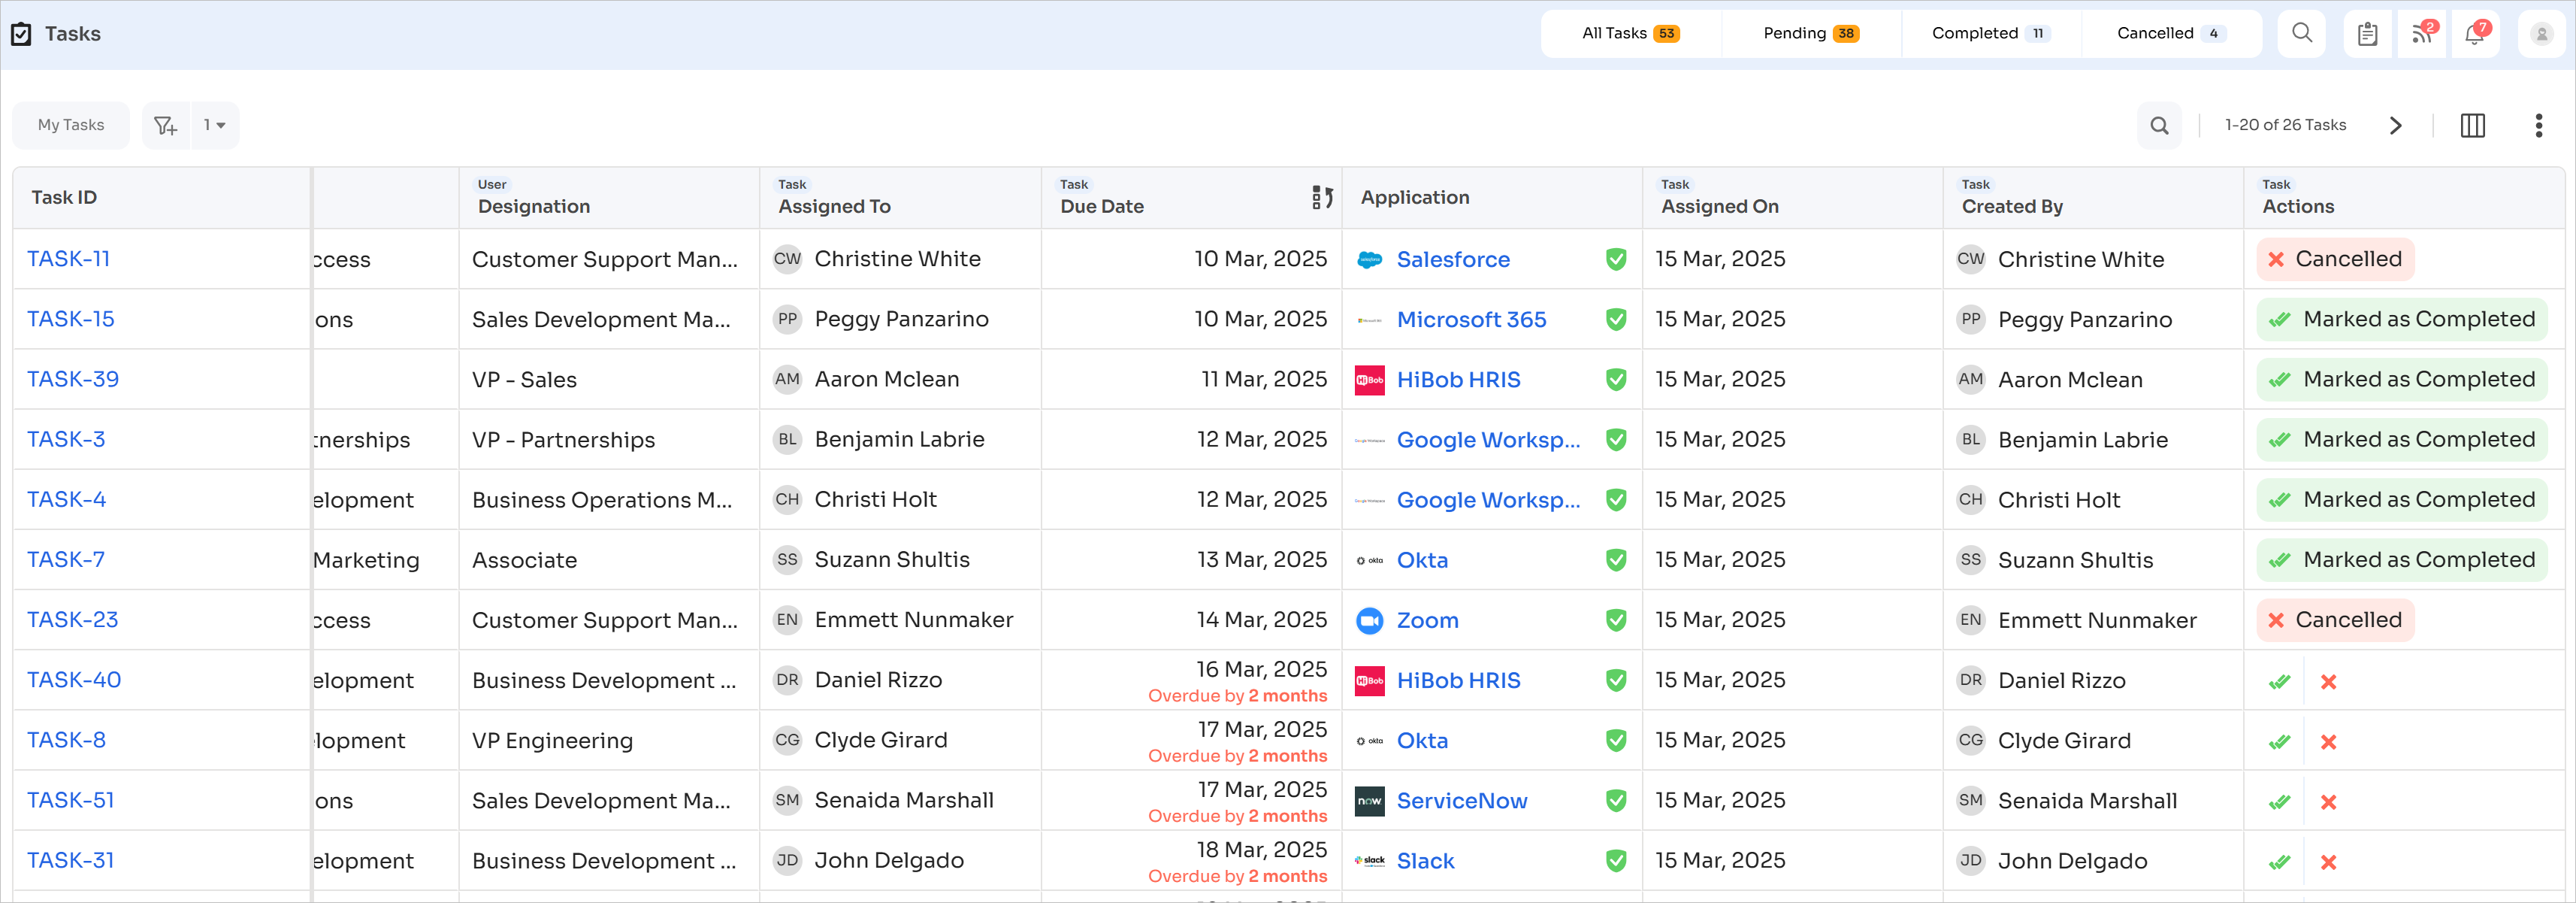
Tasks list columns
Here is the complete list of columns:
If you have set up custom fields for applications, they won't be visible in the column list by default. You can select which columns to show and in which order by modifying them.
Default columns
- Application
- Action Taken By
- Actions
- Assigned On
- Assigned To
- Comments
- Created By
- Department
- Designation
- Due Date
- Reporting Manager
- Task
- Task Completed On
- Task Description
- Task ID
- Task Type
- User
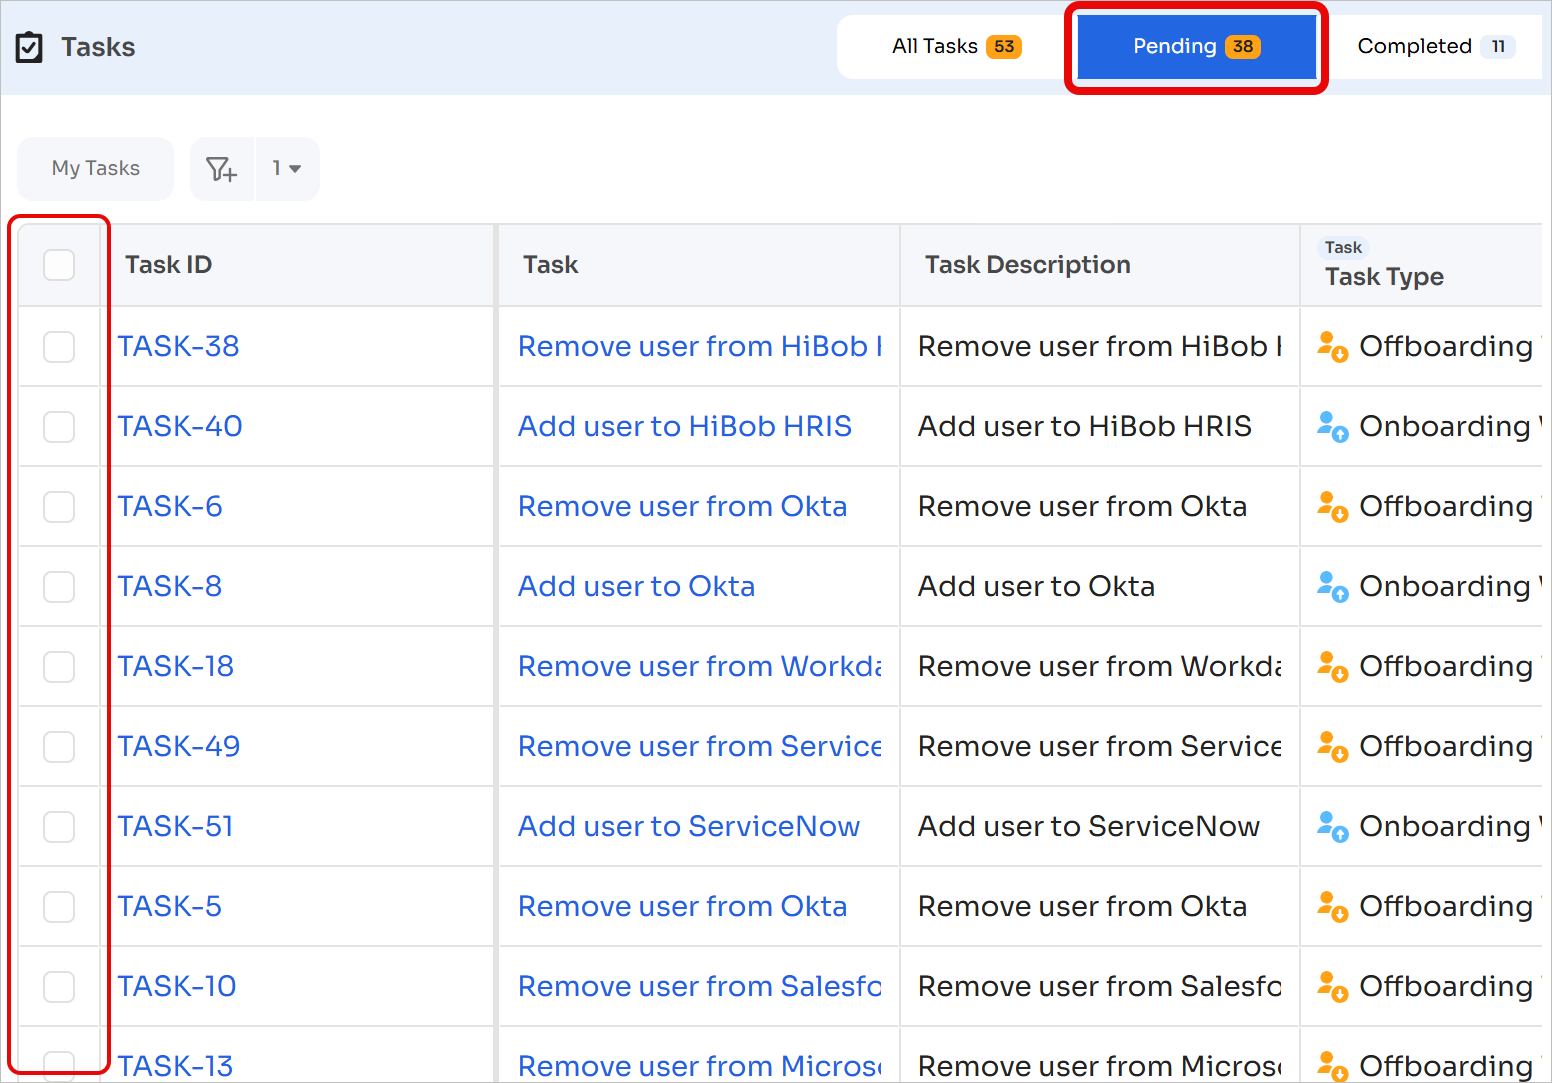
Pending tasks view only: Select multiple tasks
The Pending tasks tab offers an additional column for checkboxes that lets you take decisions on tasks in bulk.
Other UI elements
Here is a list of other task-related UI elements and what they do:
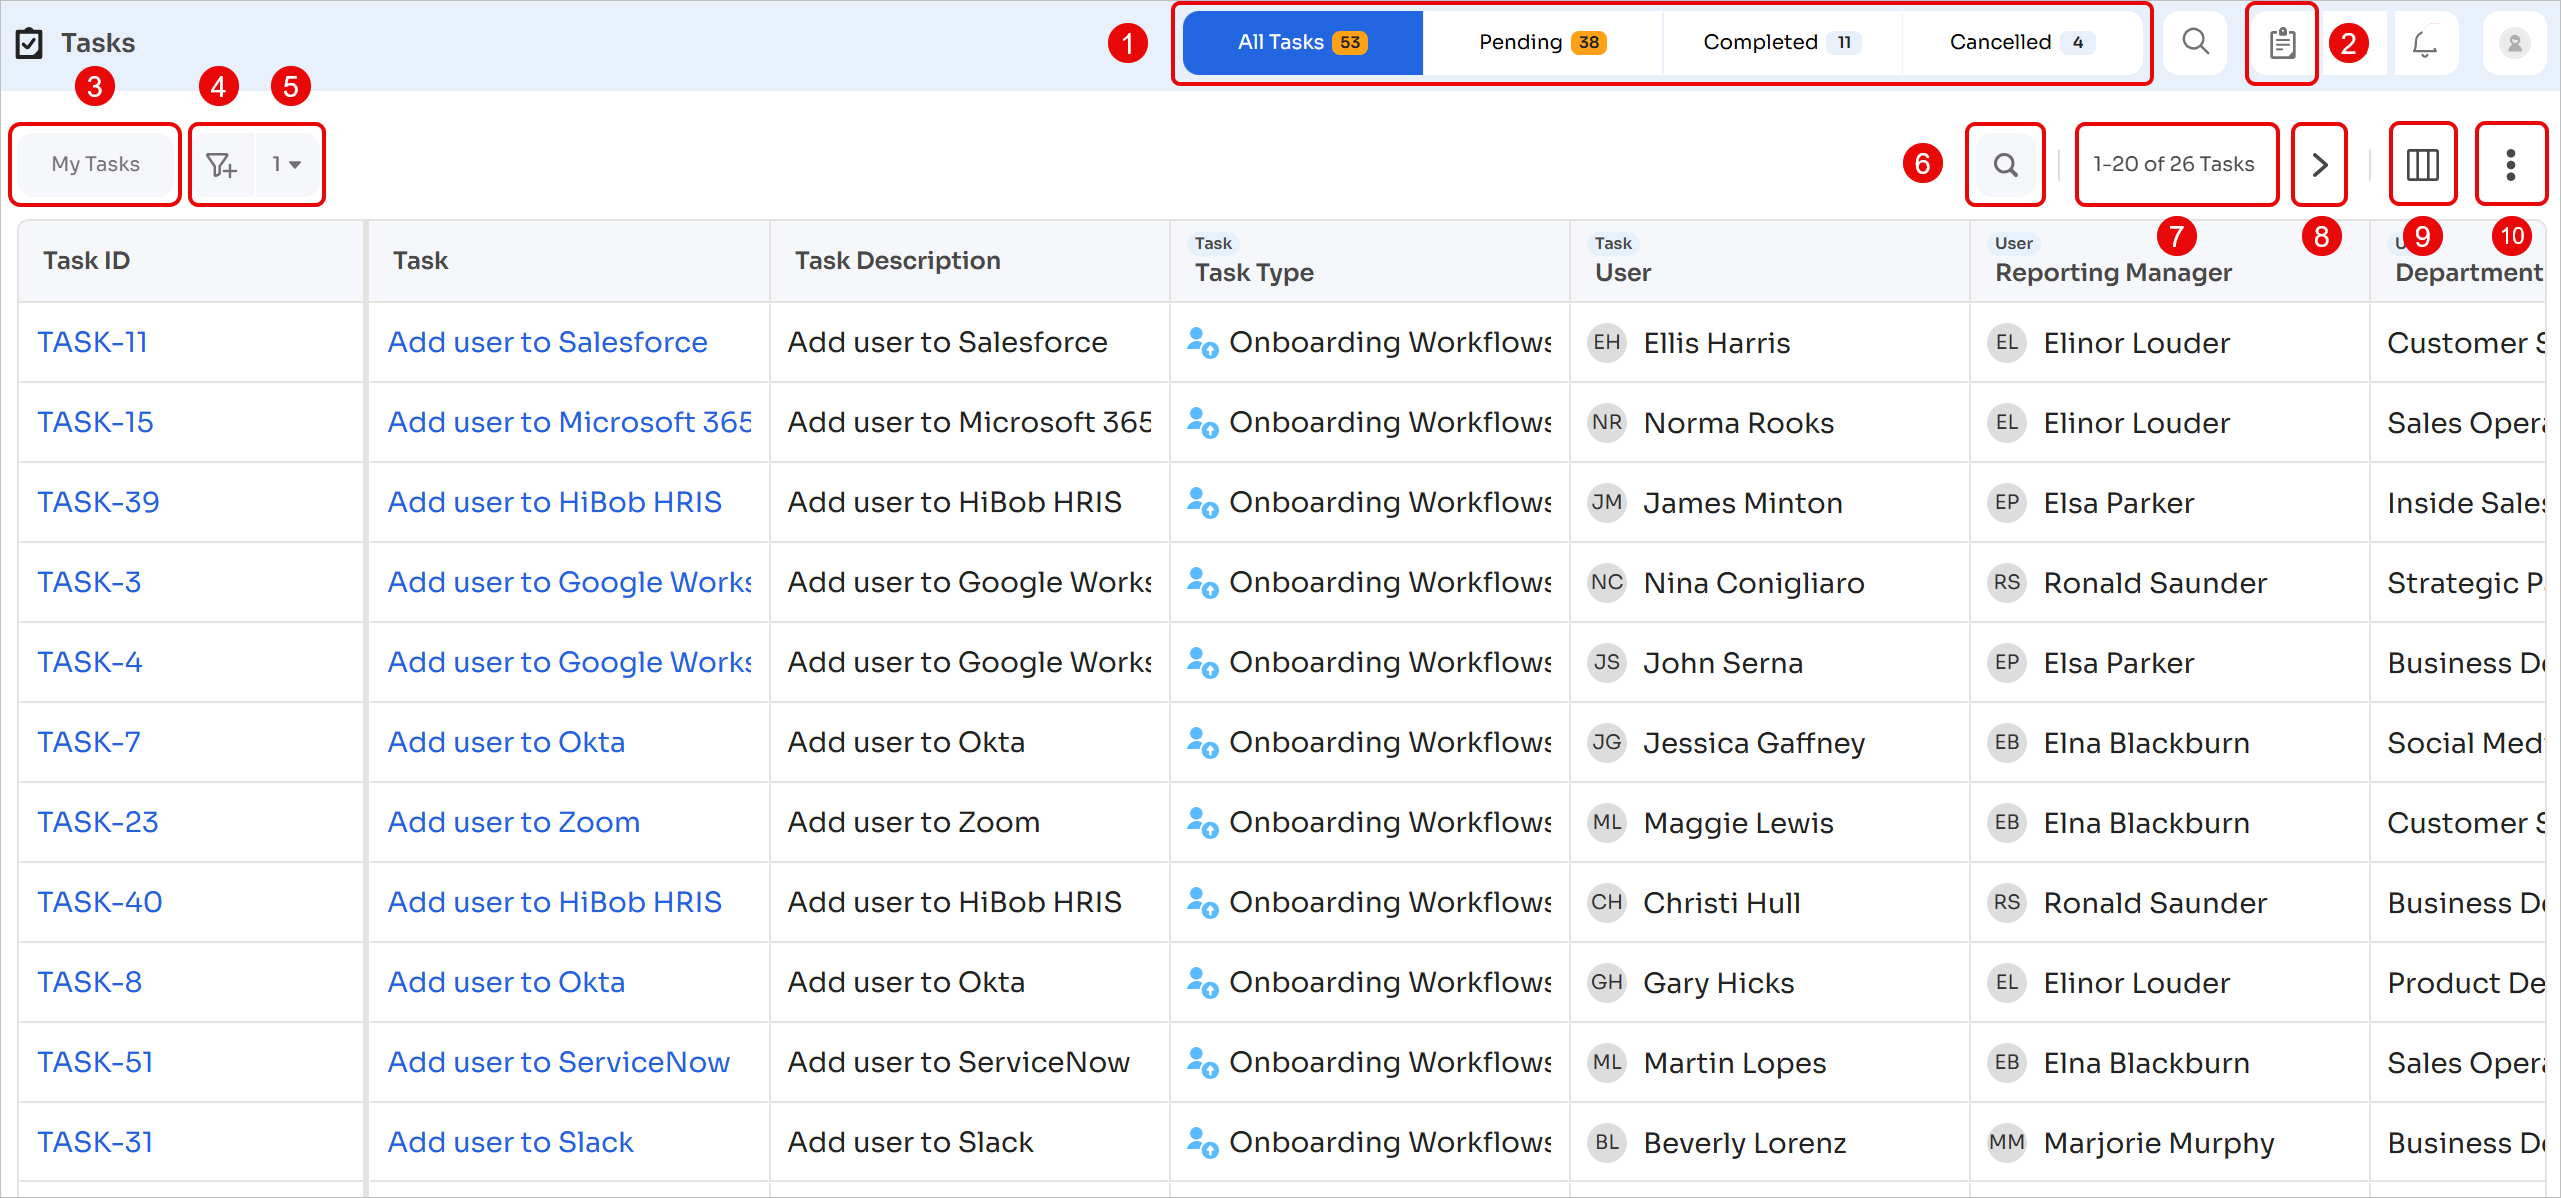
- Task type switcher: Chose between All, Pending, Complete, and Cancelled tasks
- My Tasks list: See a list of tasks assigned to you and take quick actions
- My Tasks: Quick filter to display only your tasks
- Configure Filters: Advanced filtering options
- View Active Filters: List of all currently applied filters
- Search Tasks: Find tasks by name or task ID
- Pagination Configuration: Configure how many tasks to display per page or enable infinite scrolling
- Next Page / Previous Page: Navigate between pages
- Modify Columns: Configure which columns to display and their order
- More Actions menu: Refresh view, change density (Compact v/s Comfortable), or export table data
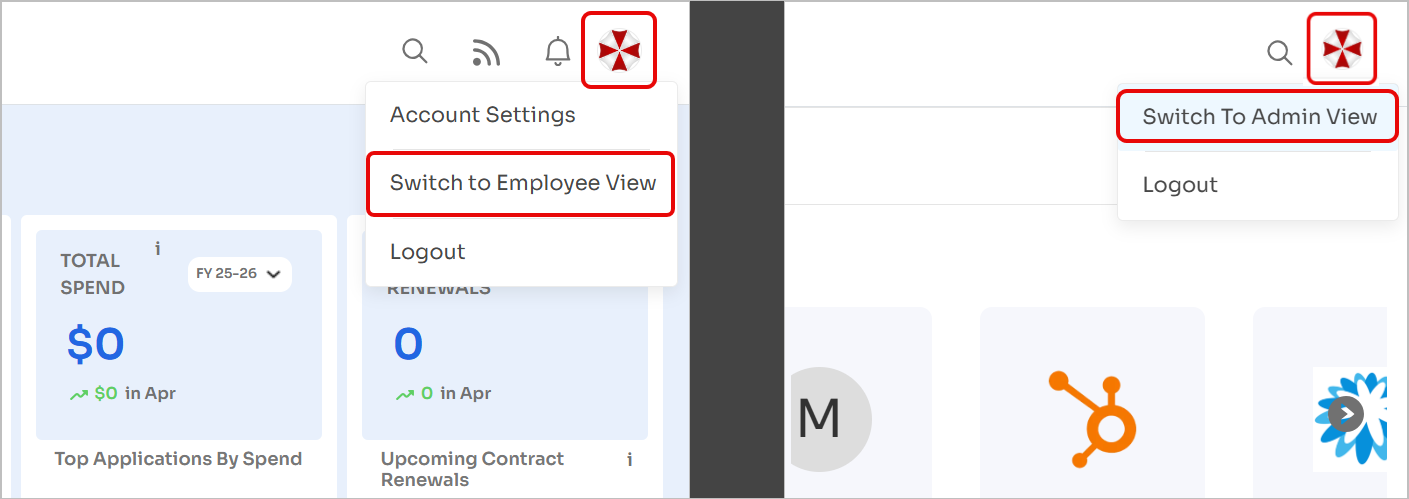
View types
There are two types of views: Employee view and Admin view. You can switch between them by clicking on your profile picture in the top-right corner and selecting Switch to Employee View or Switch to Admin View.
Employee view
As an employee, you can:
-
See all tasks assigned to you (both directly and via groups)
-
View task details by clicking on any task
-
Mark the action as Approved / Completed / Cancelled
-
View and/or add comments
-
Once someone has taken an action on the task, you can see the type of action (approved or cancelled) and who took it
Admin view
The following user roles in Zluri can access the Admin view:
- Owner
- Admin
- Super User
- Integration Admin
- IT Admin
- Viewer
- IT Viewer
As an admin, you can do everything that a regular user can do, plus:
- View all tasks in the Tasks dashboard, including those assigned to other individuals and to groups you aren't a part of.
- Read and write comments in all tasks.
The Viewer and IT Viewer roles can only view the tasks and comments of other individuals and groups that they aren't a part of. They cannot take actions or write comments in them.
-
Filter tasks using the My Tasks quick filter to see:
- Tasks assigned directly to you
- Tasks assigned to groups you belong to
Taking actions
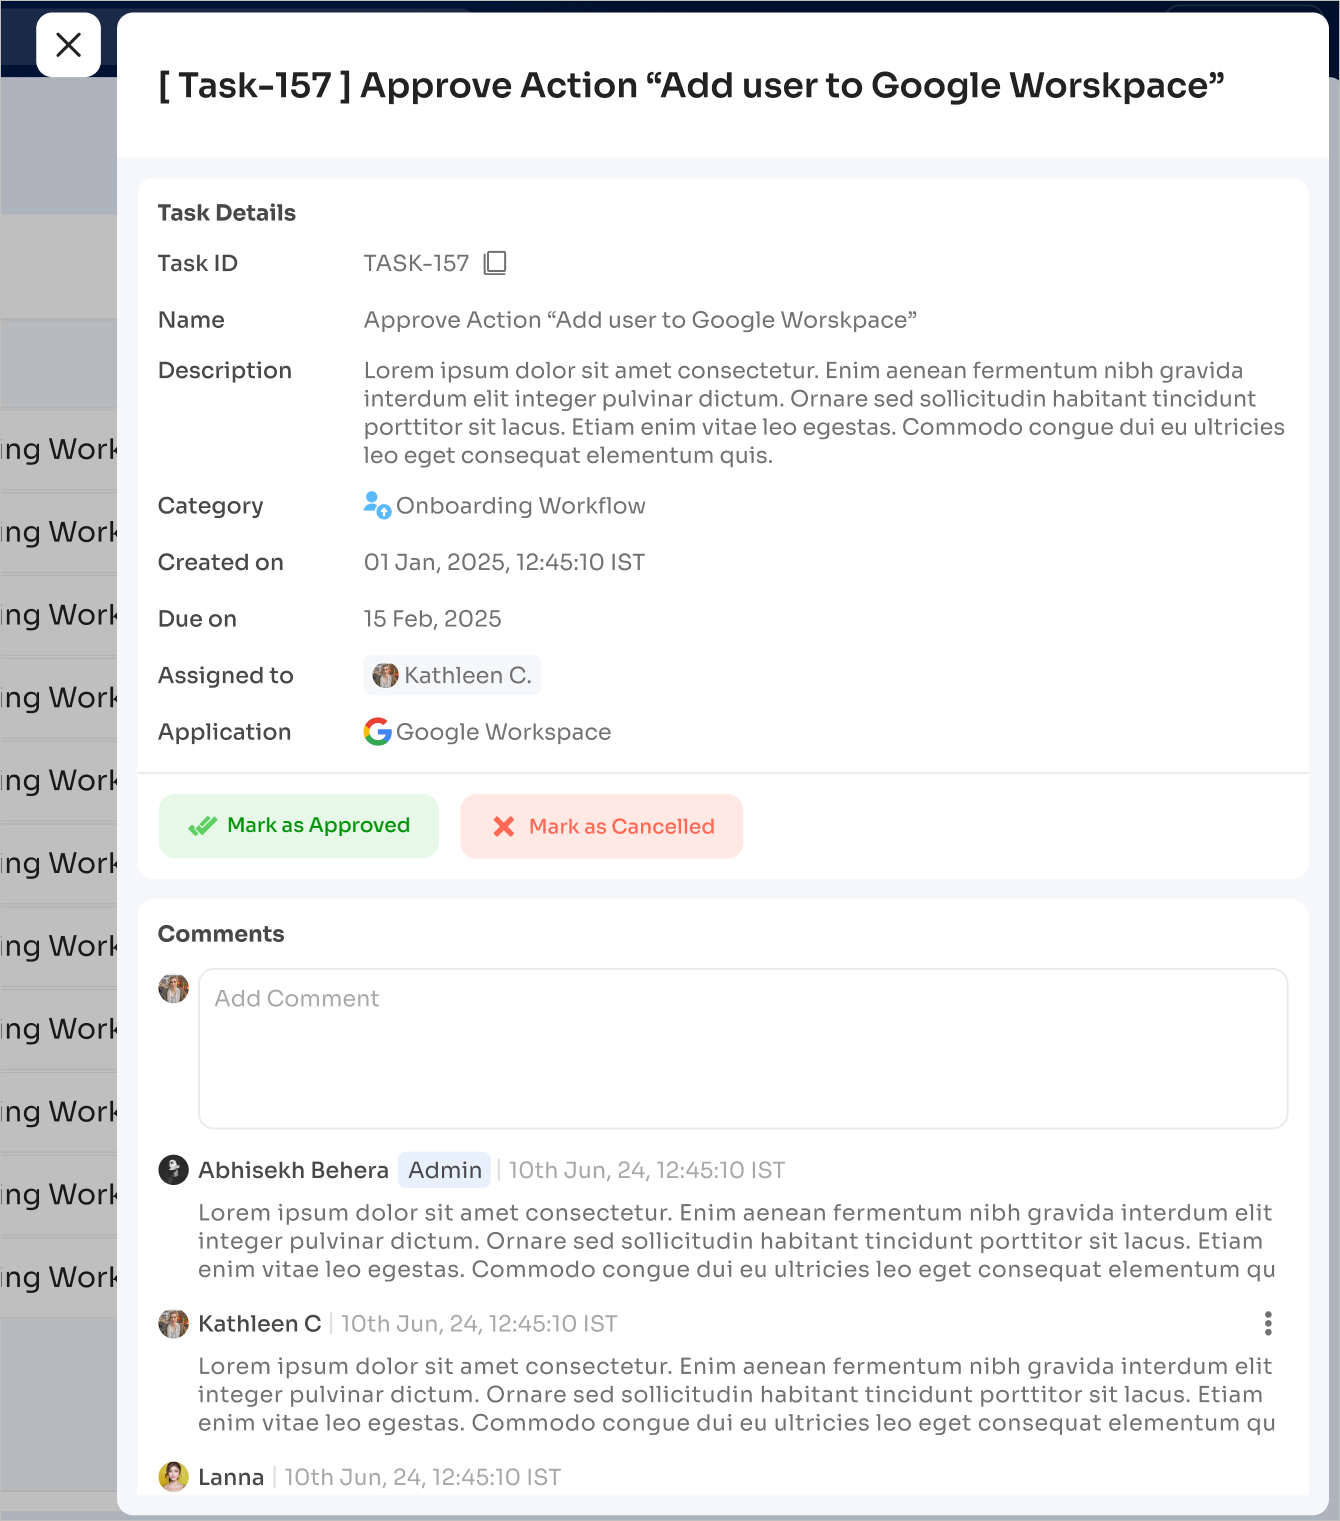
Approve or cancel individual tasks and add comments
- View task details by clicking on any task.
- Here, you can (A): Mark the action as Approved / Cancelled, or (B): View and/or add comments.
For approvers, the text is Mark as Approved. For task assignees, the text will read Mark as Complete instead
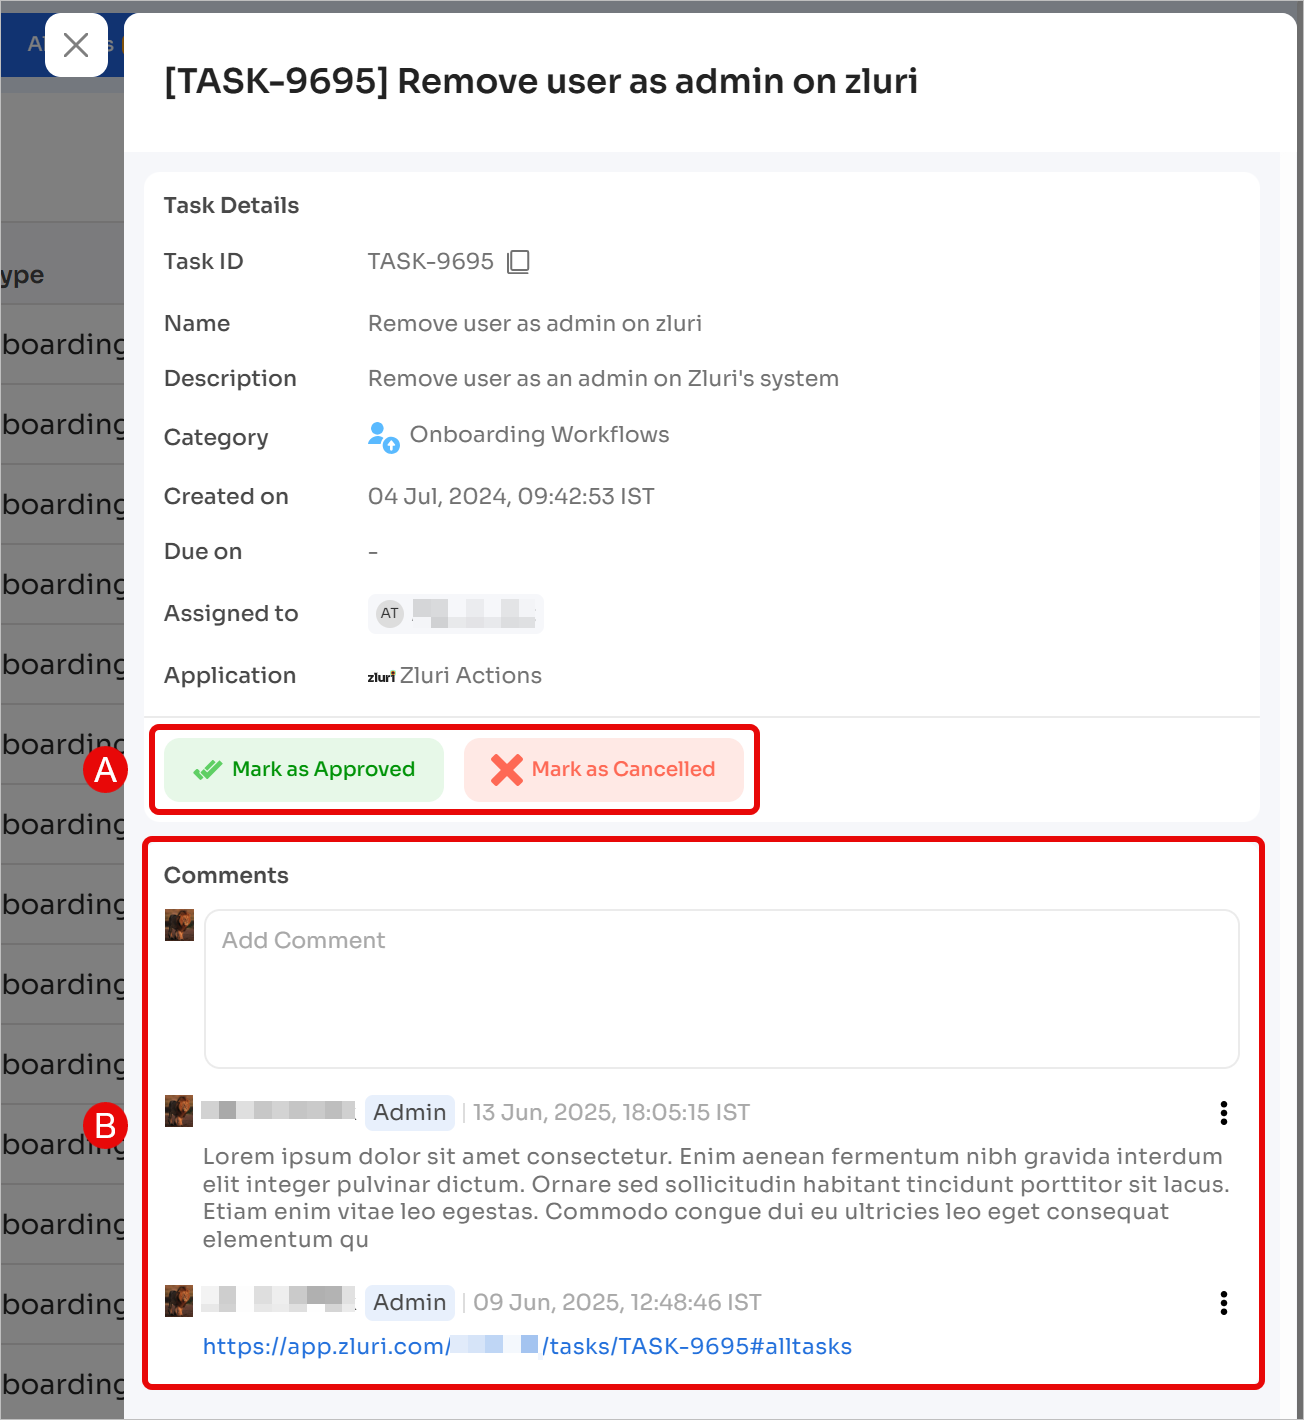
- Once someone has taken an action on the task, you can see the type of action (completed or cancelled) and who took it.
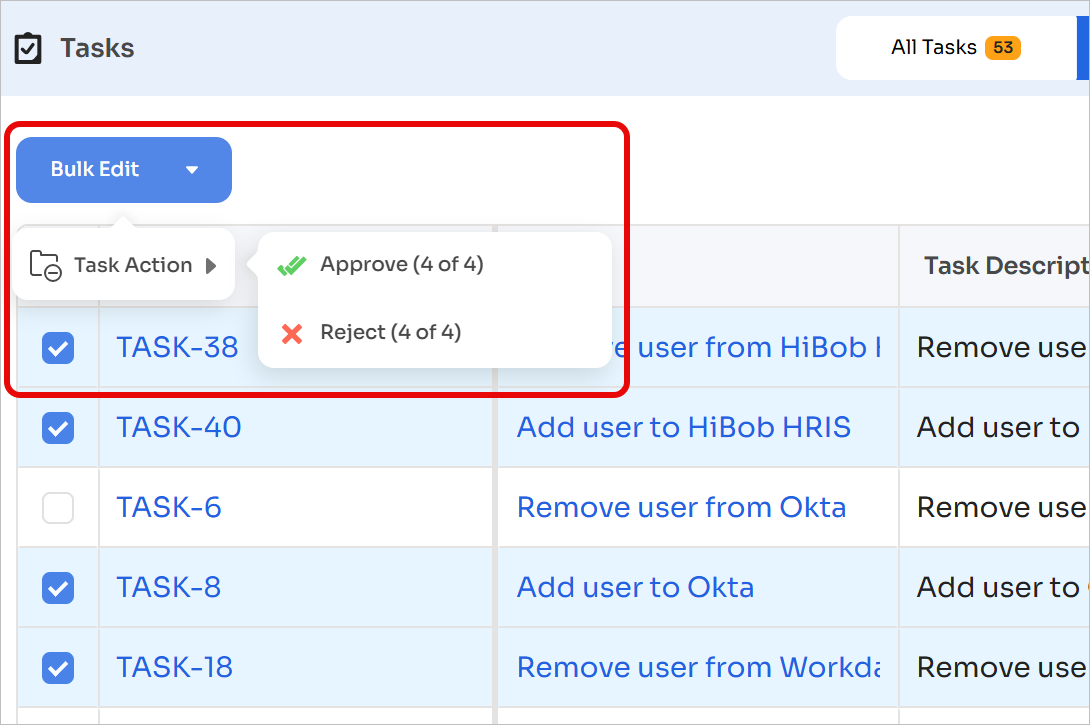
Approve or cancel tasks in bulk
-
Select the Pending tasks tab
-
Use the checkboxes to select multiple tasks

-
Click Bulk Edit → Task Action, then select Approve or Reject
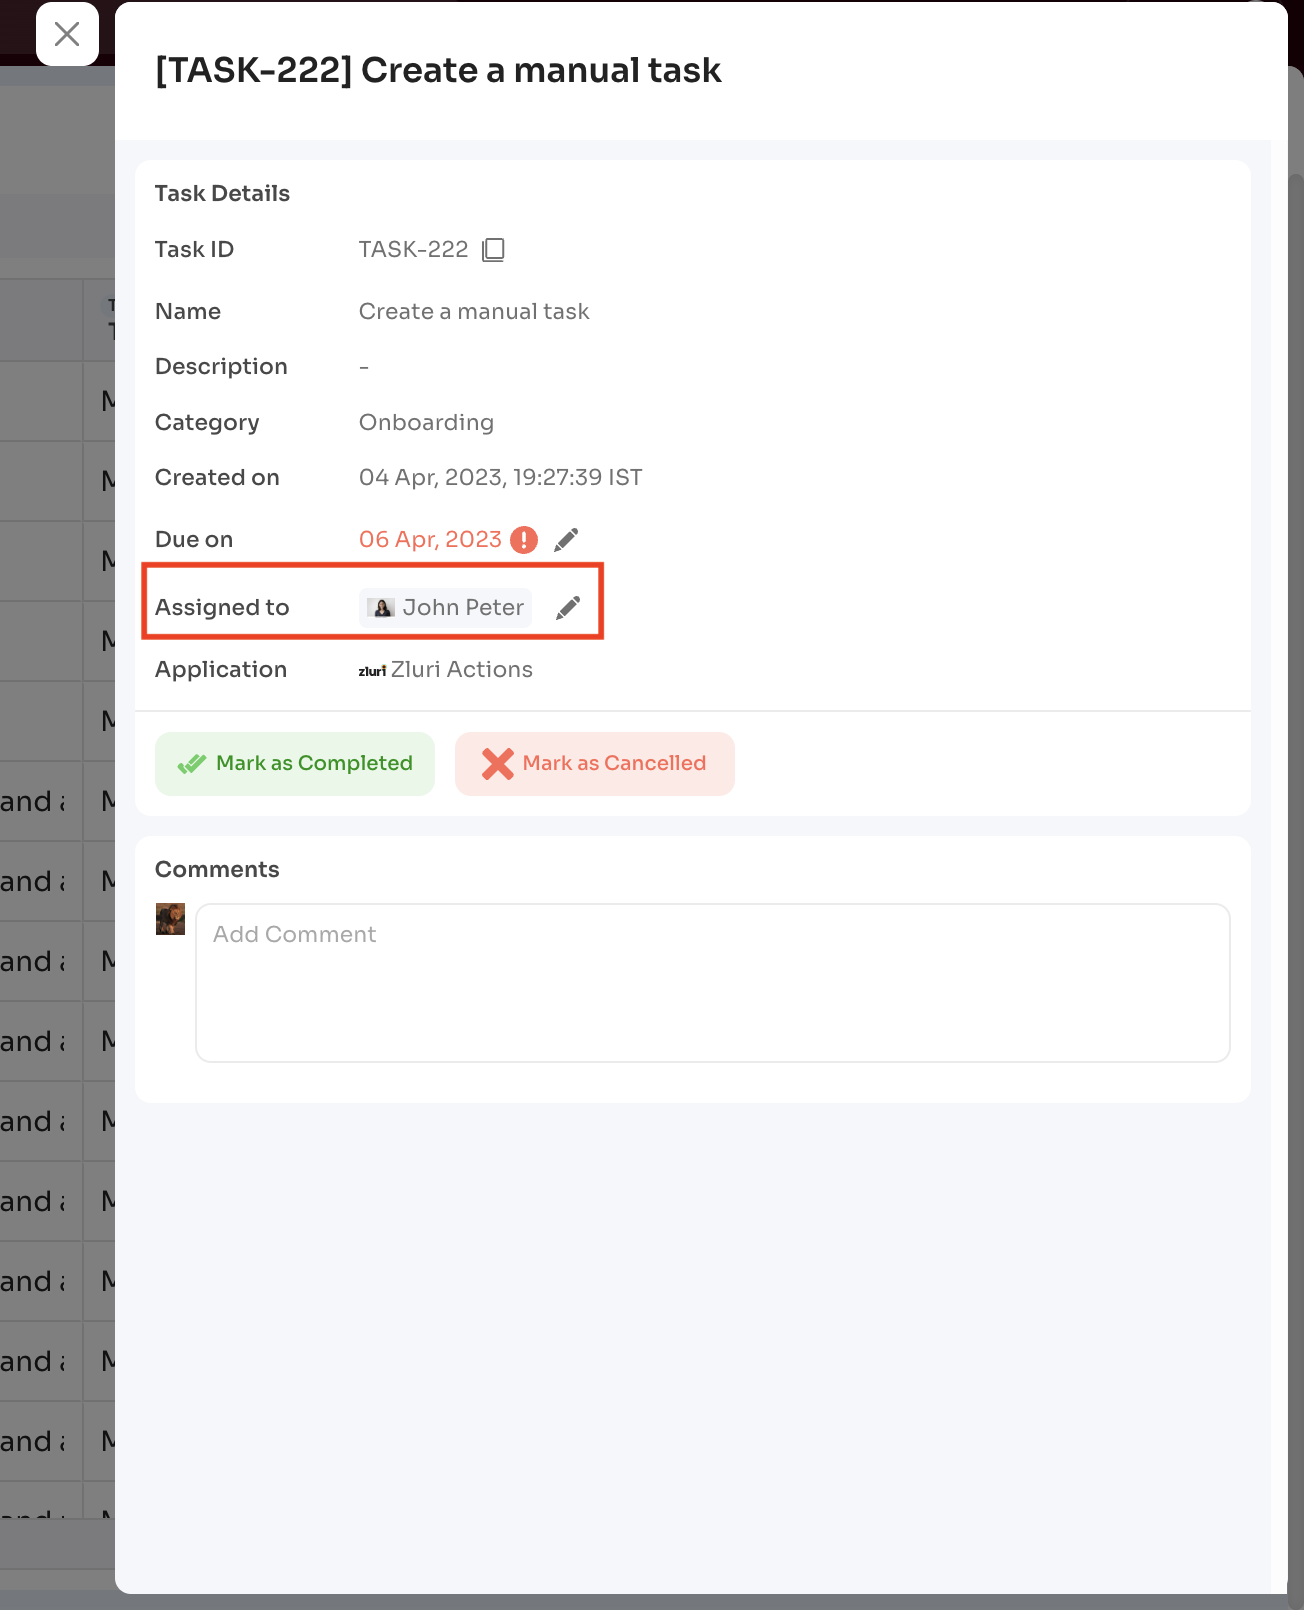
Reassign a Task (Assigned To)
Admins and task owners can reassign manual tasks from both the dashboard and task details view.
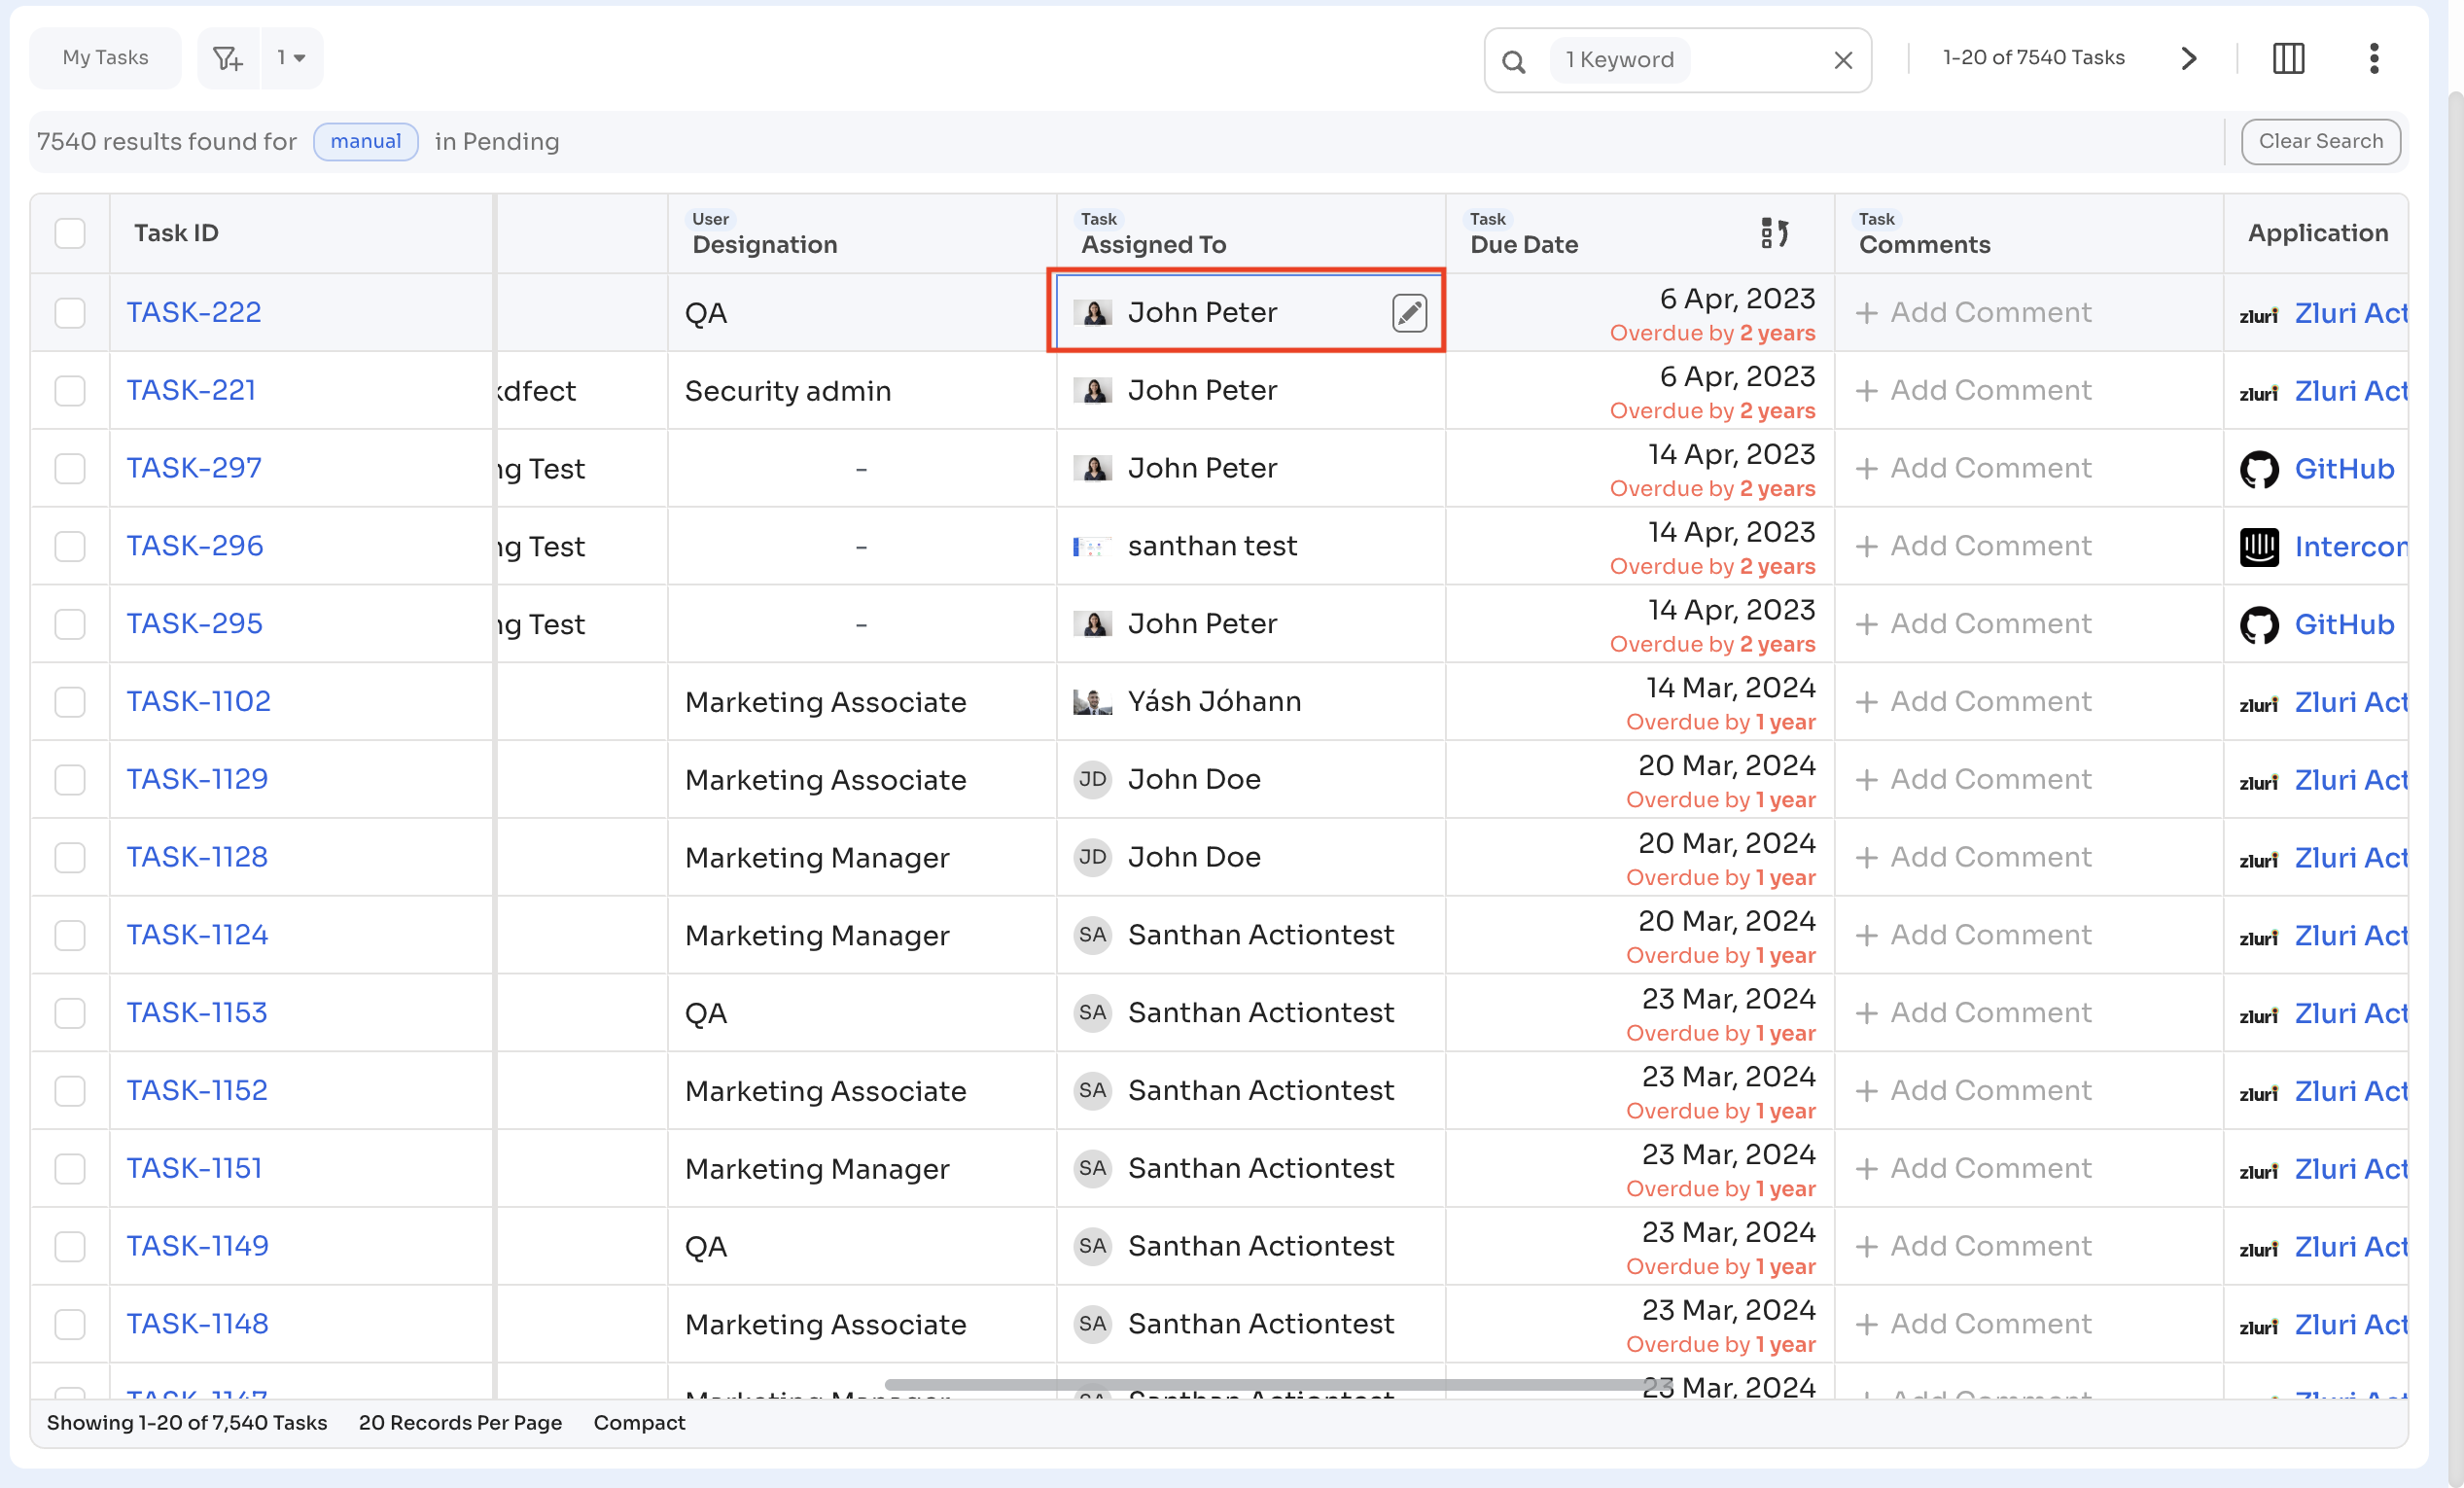
From the Task Dashboard
-
Go to
Admin View → Tasks -
Click the edit icon in the Assigned To column
-
-
Select a new user or role → Save
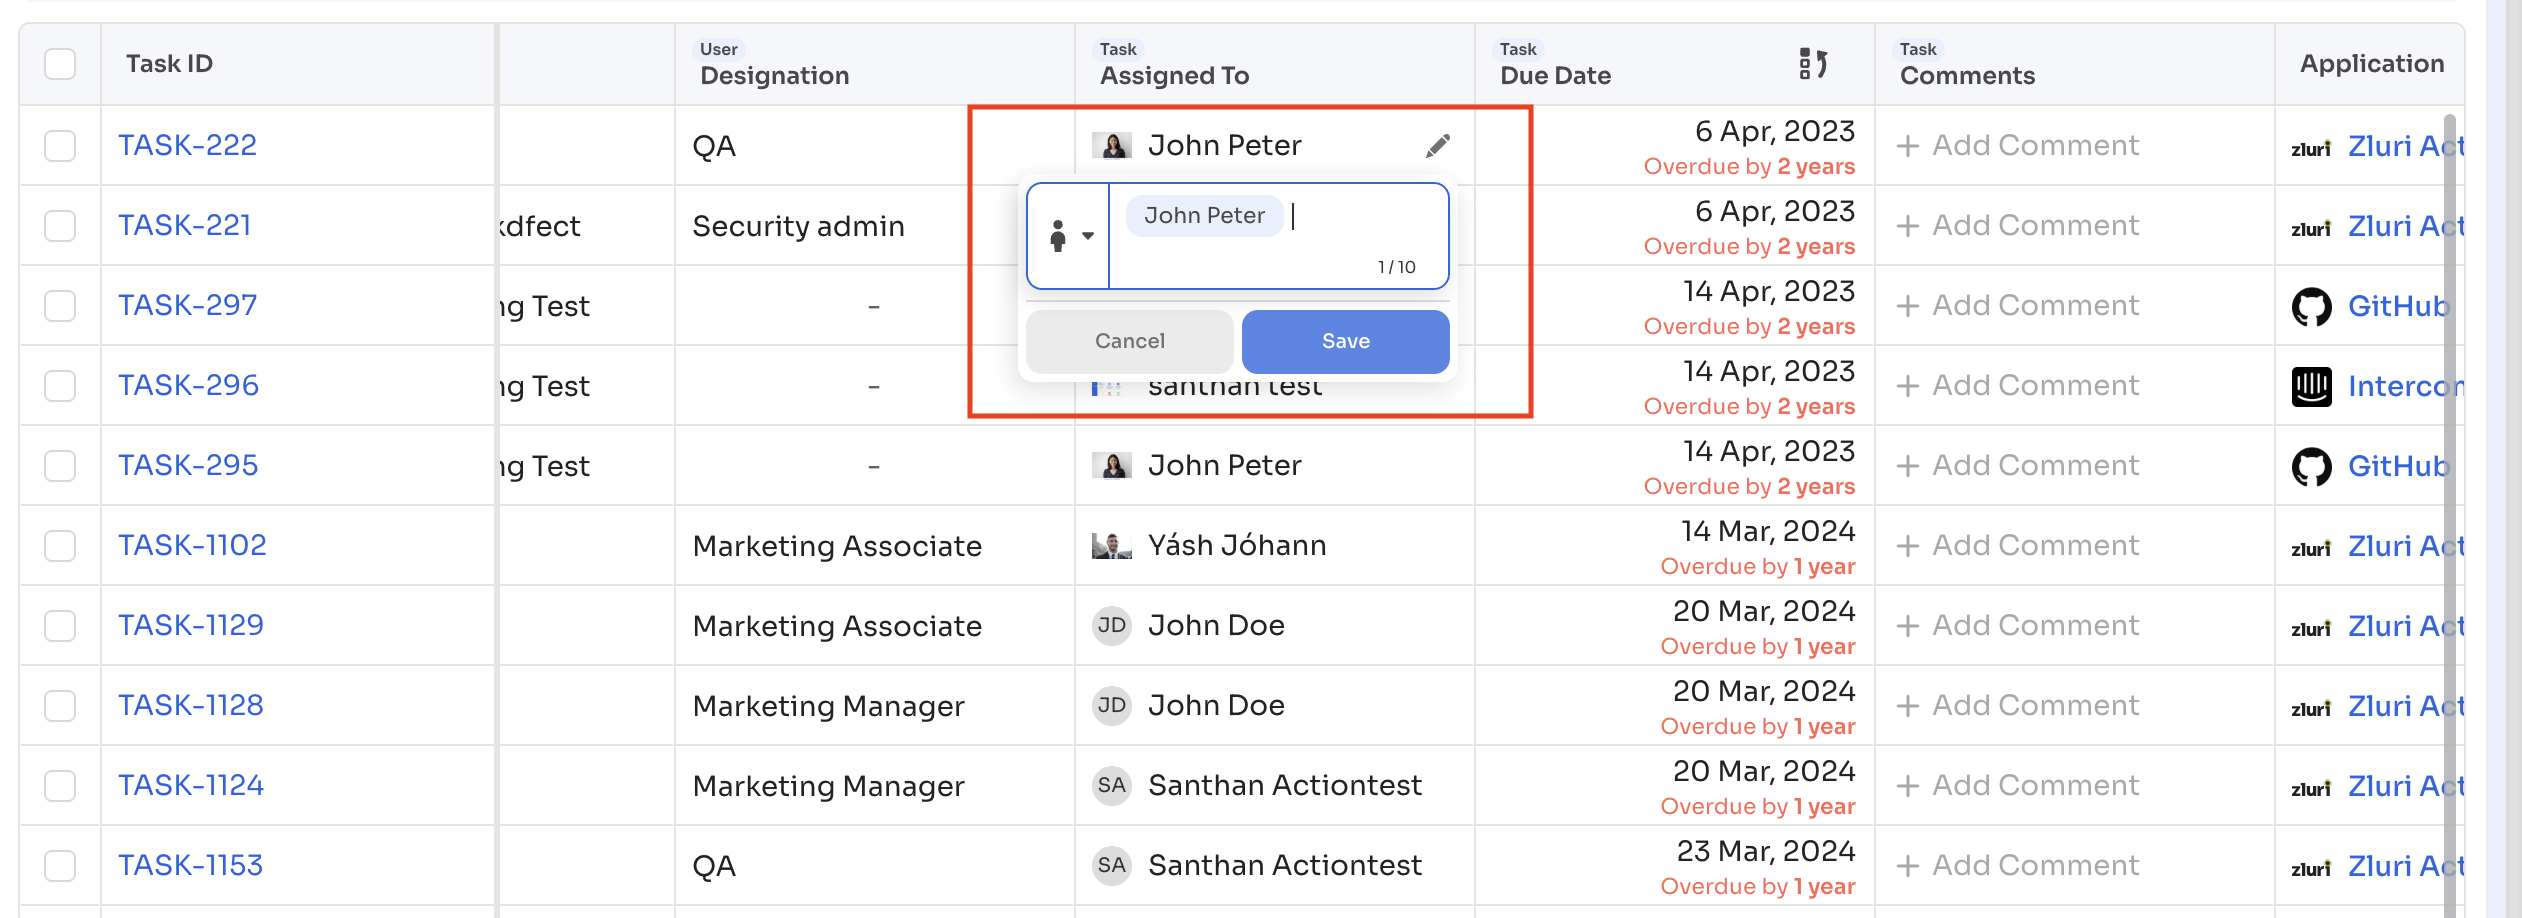
From the Task Details Page
-
Open the task by clicking on it
-
Under Assigned To, click edit
-
Choose a new assignee → Save
Notes
- Jira-created tasks can only be reassigned to one user or one role (groups/multi-user not supported)
- Notifications are automatically sent to the new assignee
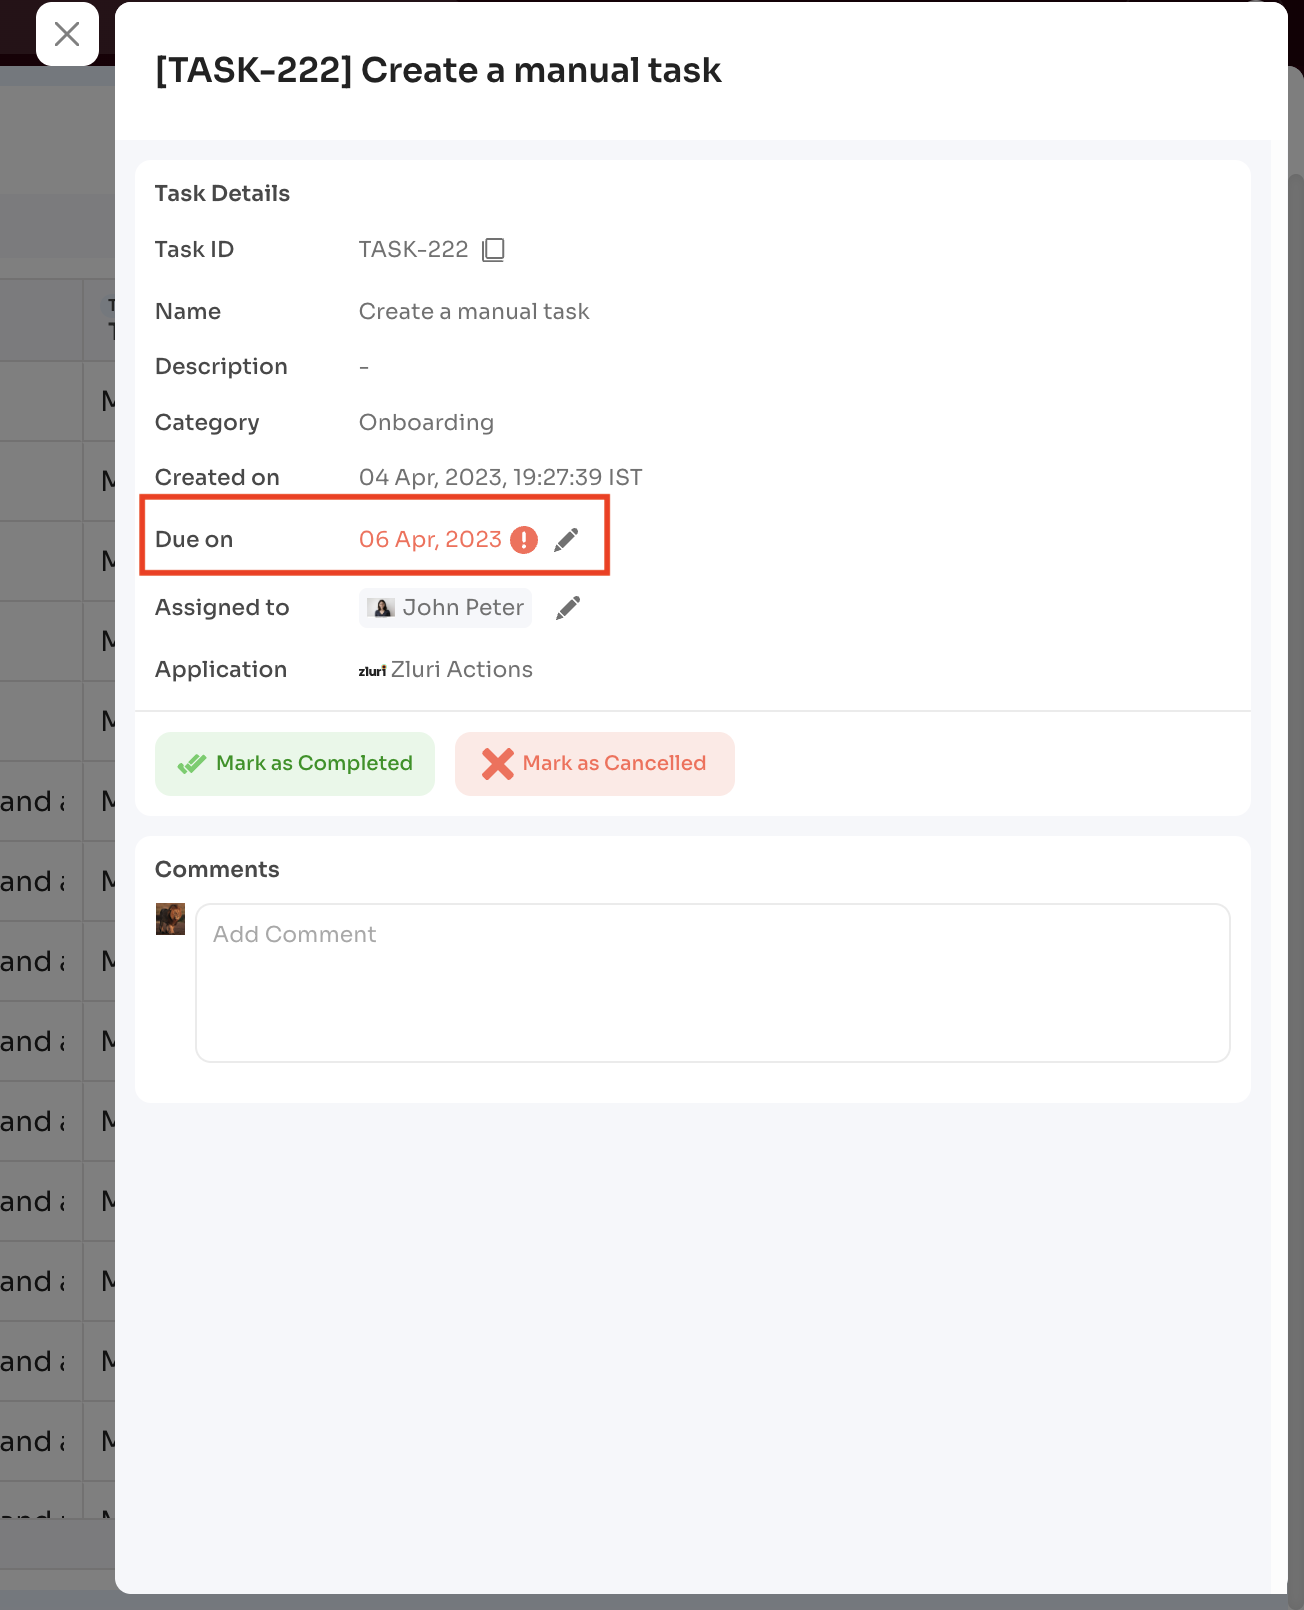
Update a Task’s Due Date
Admins and task owners can update task due dates from both views.
From the Task Dashboard
-
Go to
Admin View → Tasks -
Click the edit icon in the Due Date column

-
Pick a new date → Apply

From the Task Details Page
-
Open the task by clicking on it
-
Under Due Date, click edit
-
Select a new date → Save
Notes
- Notifications include both old and new due dates
- All changes are tracked in the task changelog
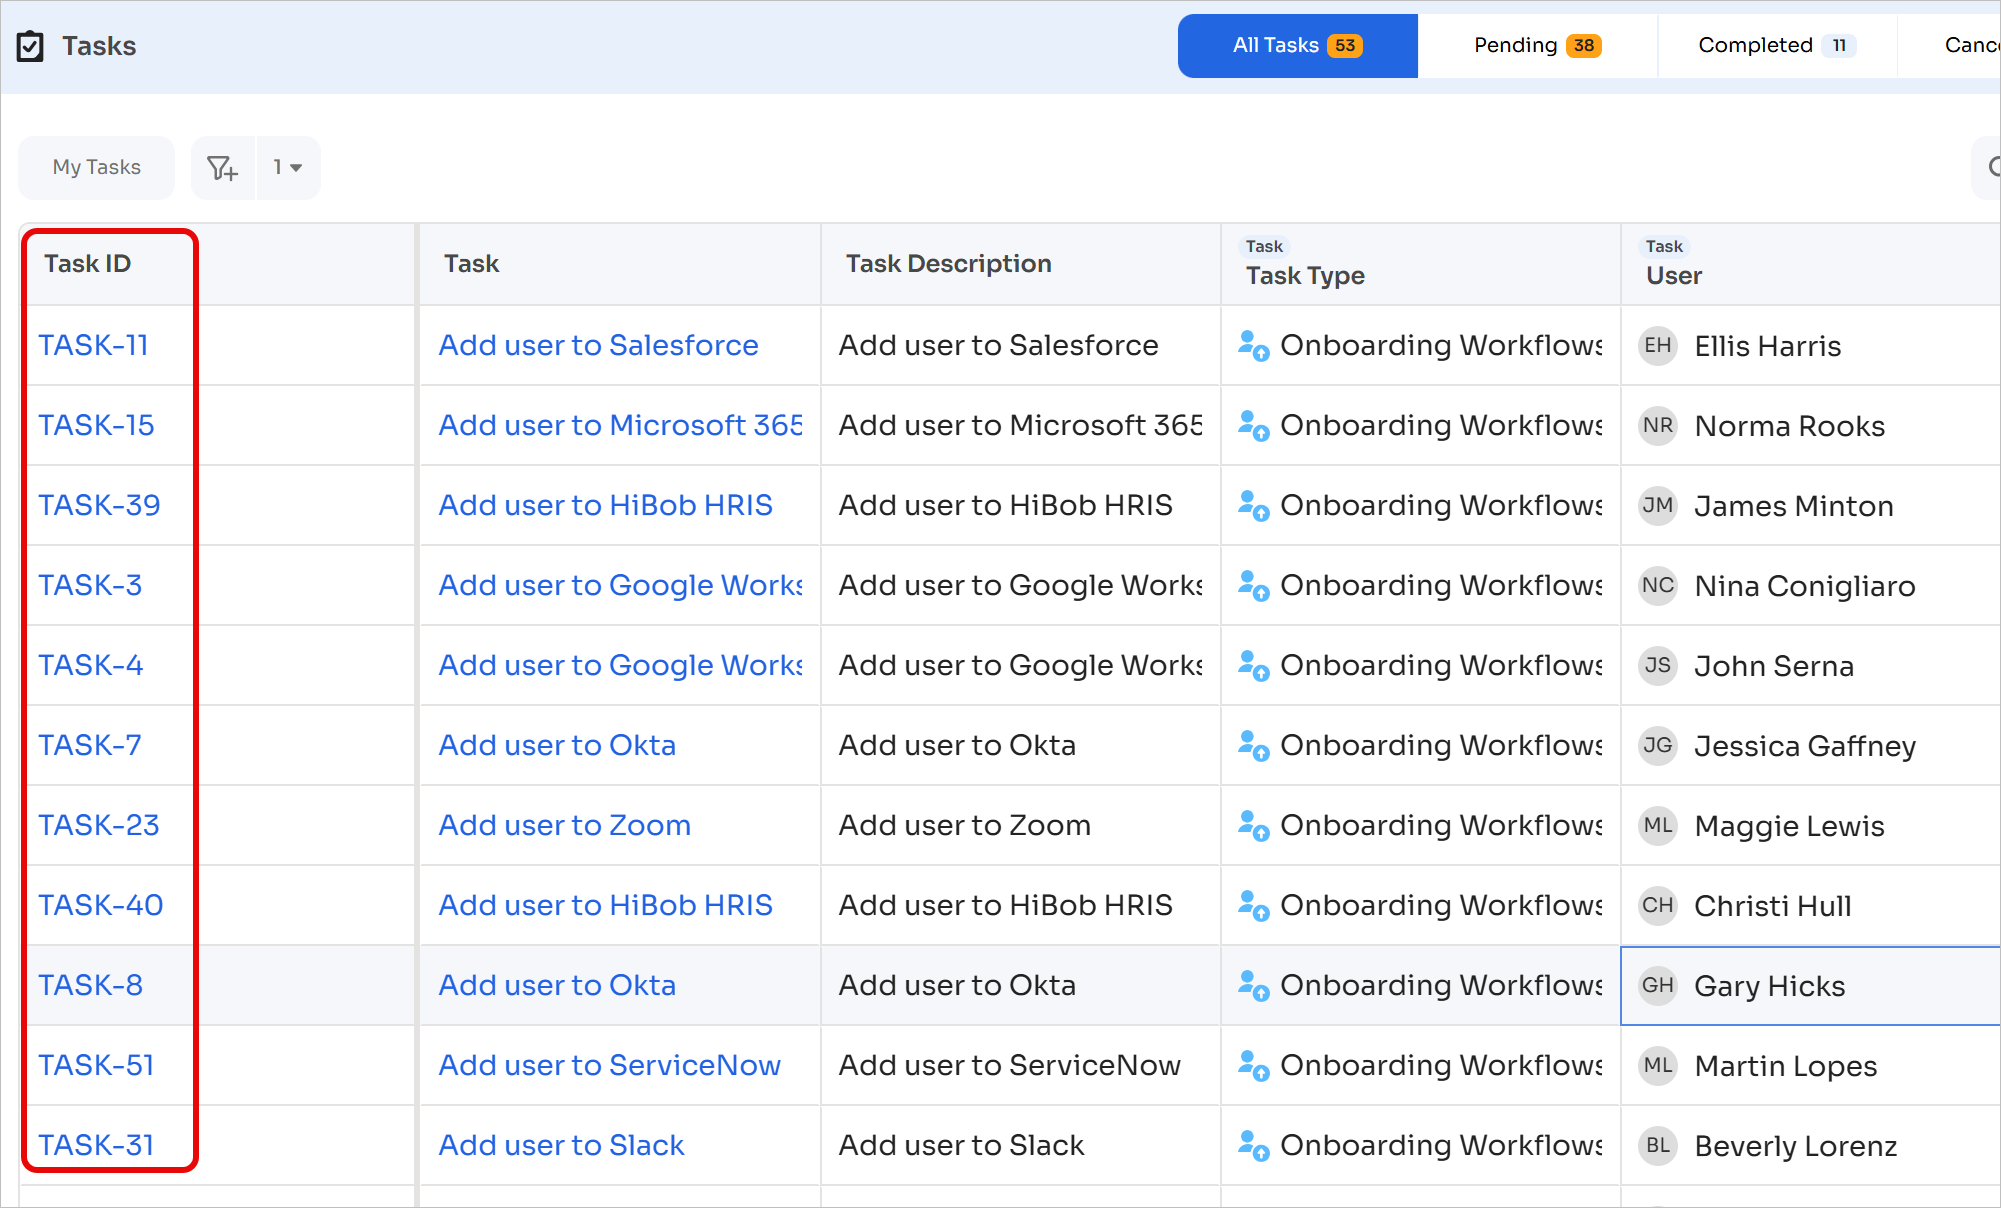
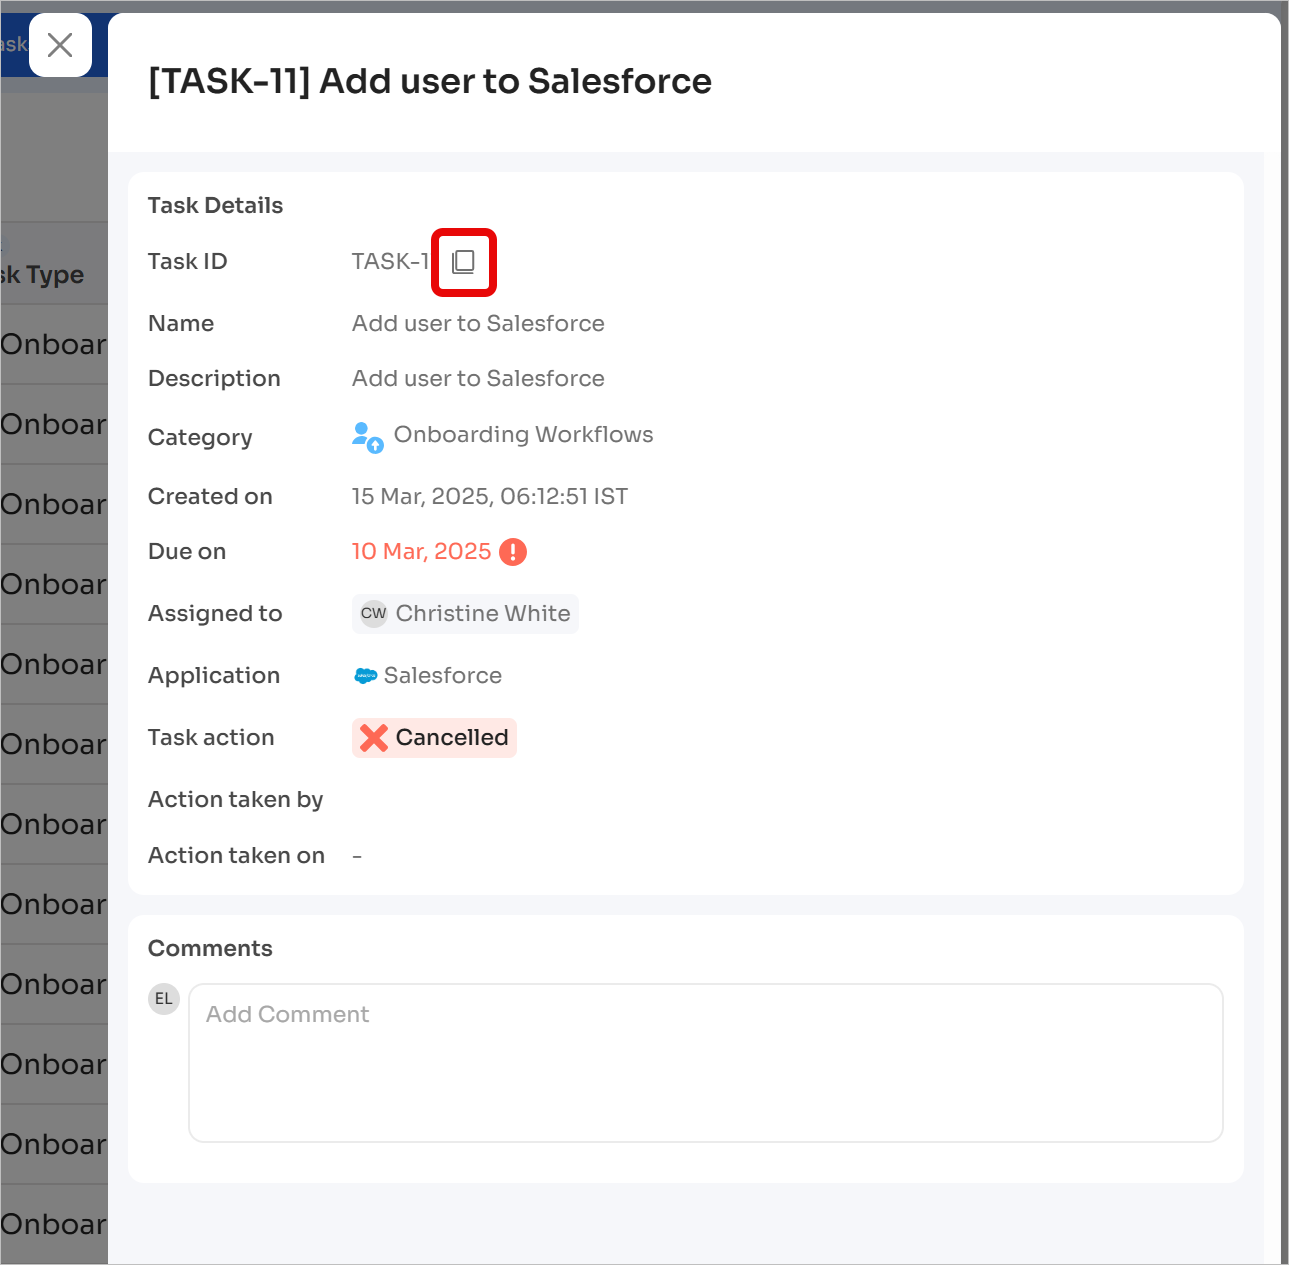
Task ID
Each task has an associated task ID, e.g., TASK-2341 and a task link. These links enable easy task sharing and collaboration across teams, for example, sharing tasks with reporting managers for visibility or escalation. You can also search for tasks using this ID.
Task IDs offer the following advantages:
System-wide integration
Task IDs appear consistently across multiple locations:
- Tasks dashboard table view
- Individual task detail panels
- Workflow run logs and execution tracking
- Employee dashboards
- Email notifications sent to assignees
- Slack notifications
Data integrity
Task IDs maintain consistency throughout their lifecycle:
- Task IDs never change once assigned, even if you reassign the task
- Deleted task IDs are never reused, maintaining historical uniqueness
- This ensures reliable tracking and prevents confusion in audit trails
Access control considerations
With access to a task link, even team members who wouldn't otherwise have access to a task will be able to view and comment (but not take actions) on it. Please be mindful when sharing a task ID link in Slack channels or multi-recipient emails.
Generating task ID links
To create a task link that you can share with team members:
-
Click on a task in the list (task 11 in this case)
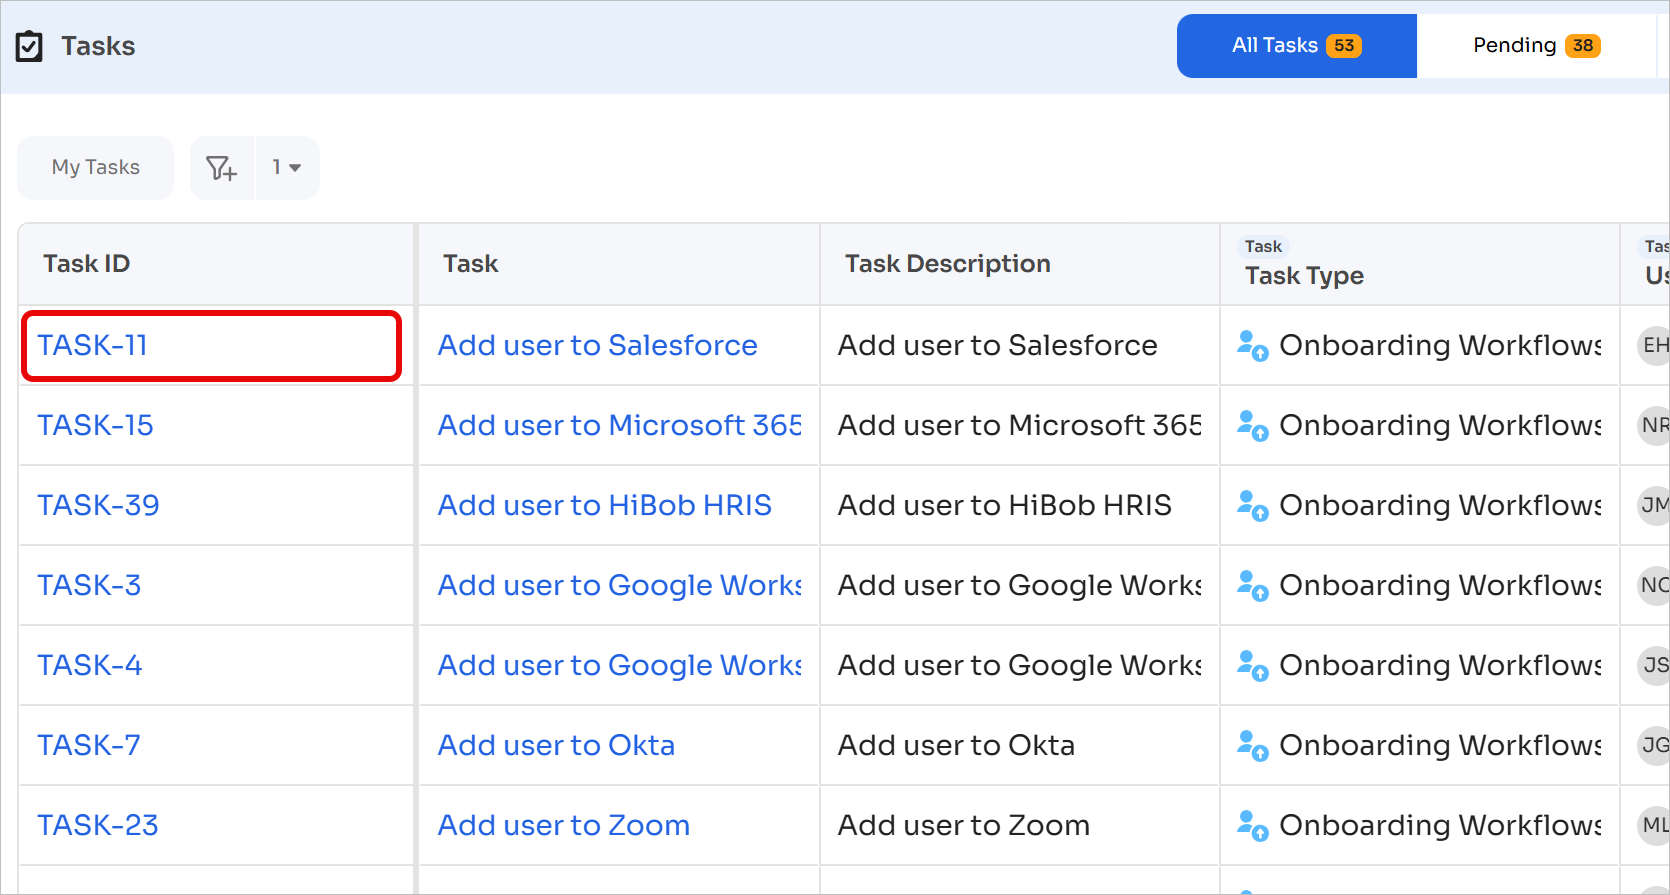
-
Click the Copy Task Link icon
Filtering options
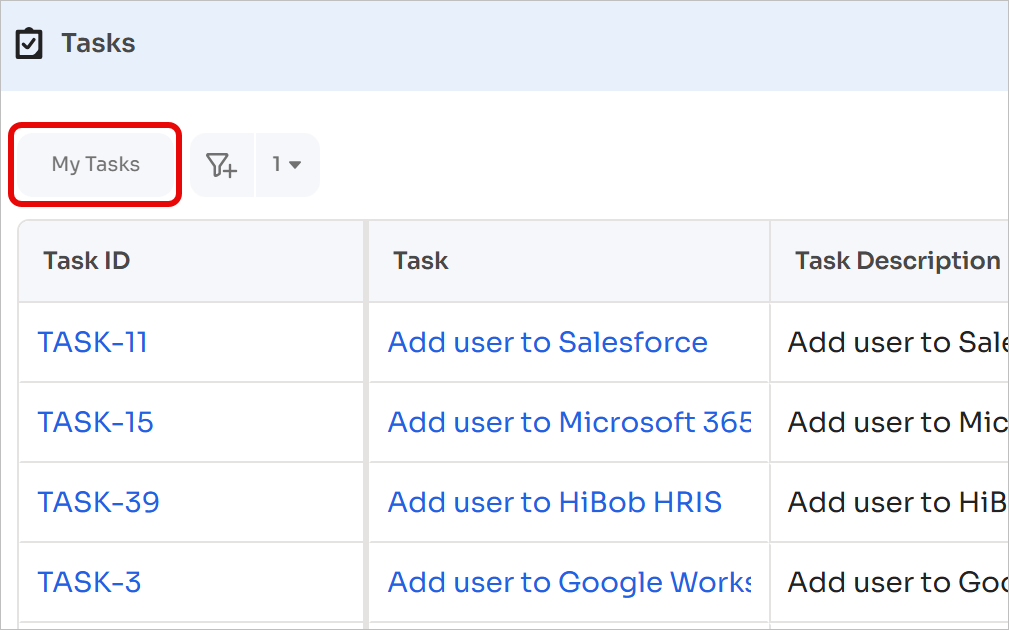
My Tasks filter
Quick filter to only show tasks assigned to you. Enable or disable it by clicking the My Tasks button.
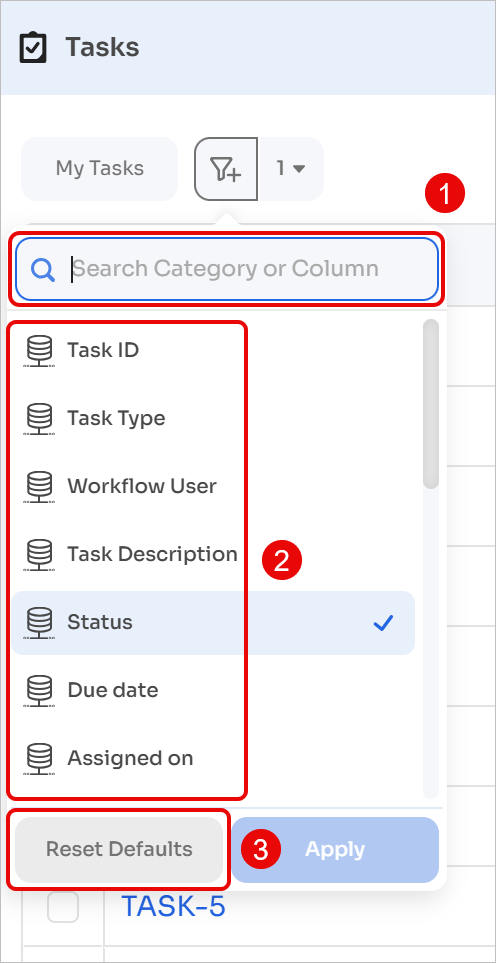
Advanced filtering options
Click the Configure Filters icon to reveal advanced filtering options.
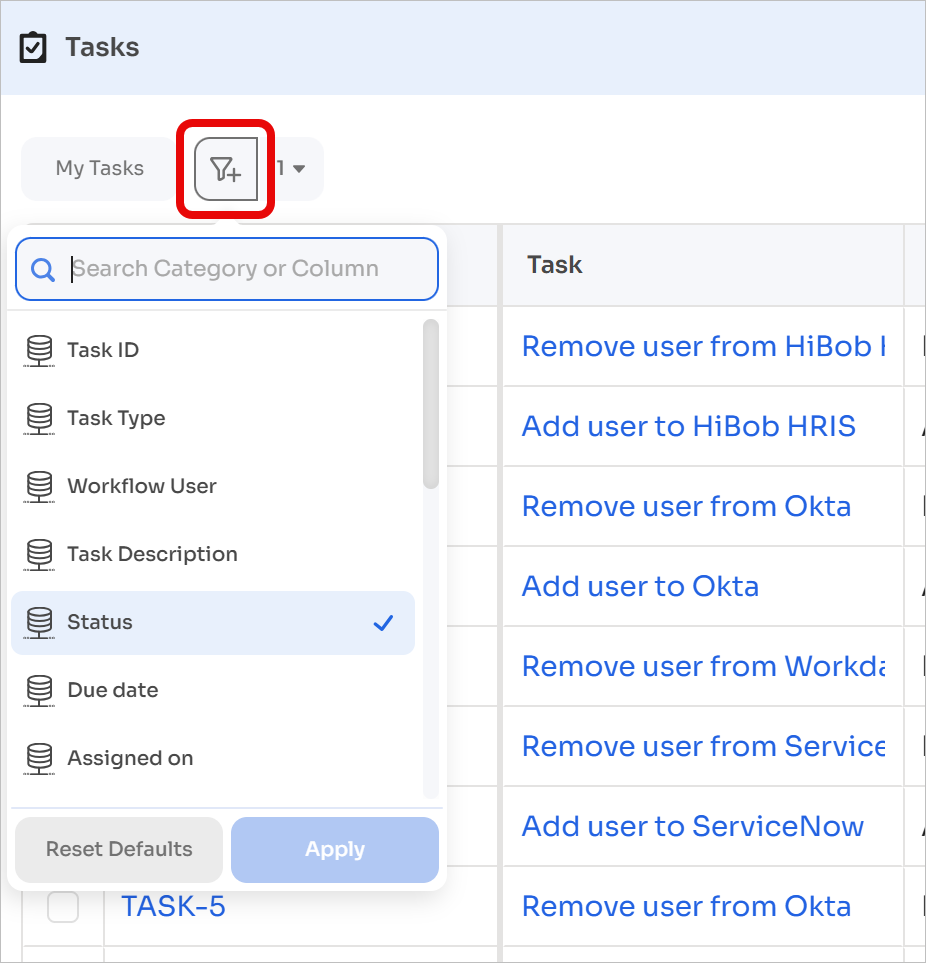
This popup offers the following options:
- Search by category or column
- Filter tasks based on all categories / column
- Reset currently active filters
Customizing the interface
Pagination and infinite scrolling
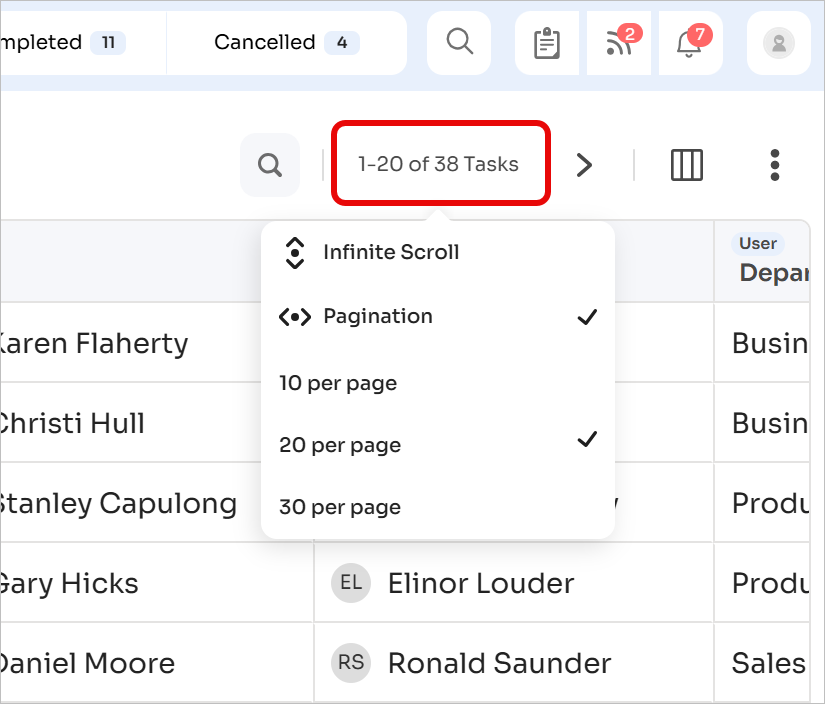
Click the Pagination Configuration button in the top-right corner to choose between Infinite Scroll and Pagination. Within pagination, you can select between 10, 20, or 30 tasks per page.
Modify columns
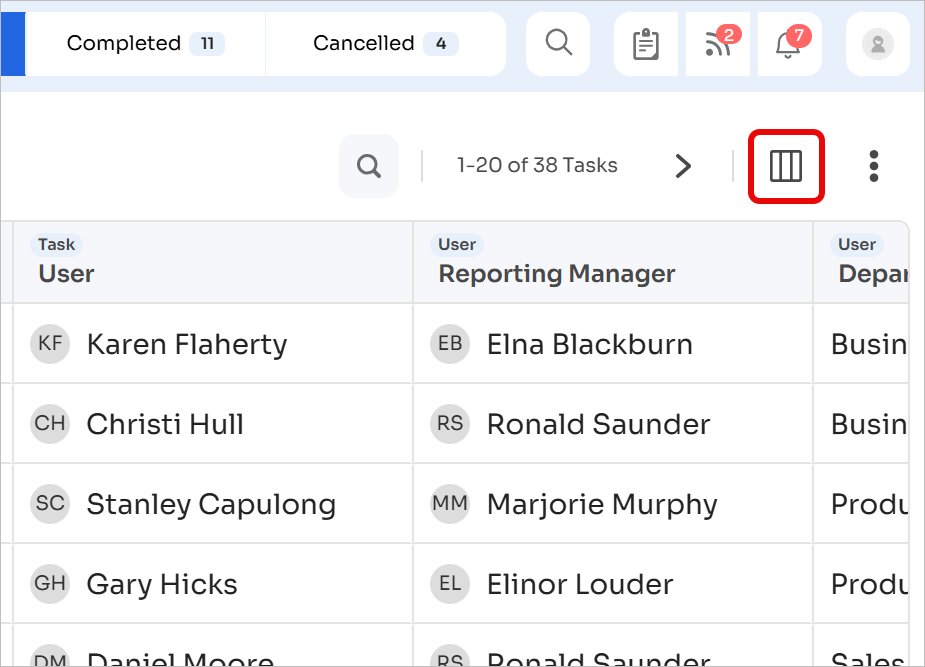
To select the columns to display and in which order, click the Modify Columns icon in the top-right corner.
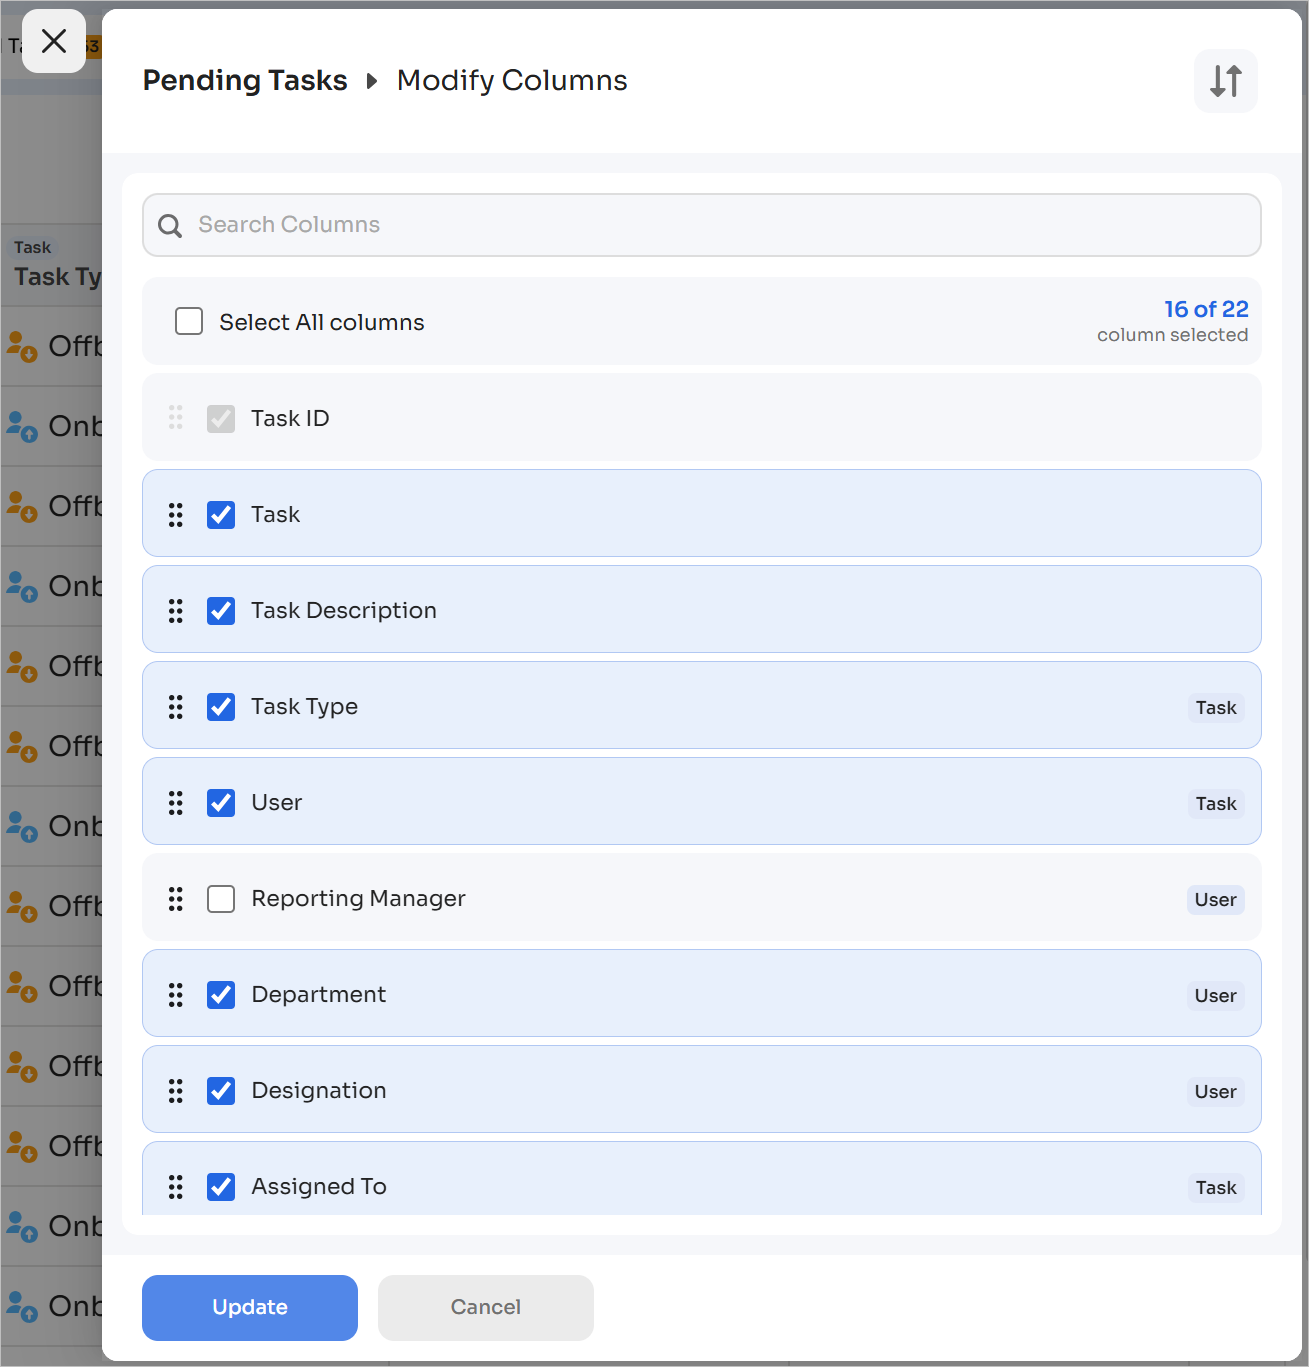
Select the columns you wish to see on the main page, or click and drag the drag handle to the left of each entry to reorder them. Click Update once done.
The Task ID column cannot be removed or reordered.
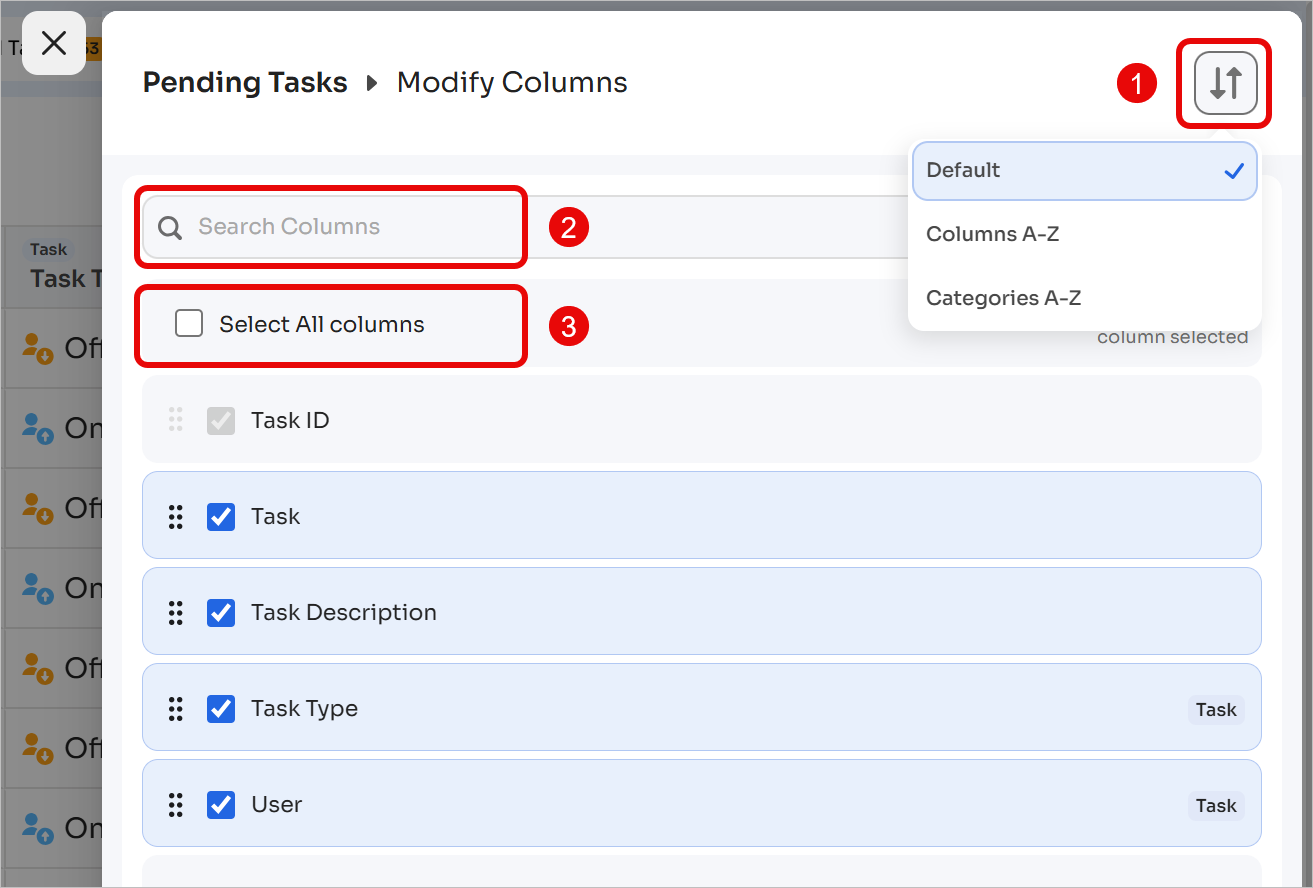
Additionally, there are options to:
-
Reset column order to the default settings, or sort them alphabetically
-
Search columns by name
-
Select or deselect all columns
Change display density
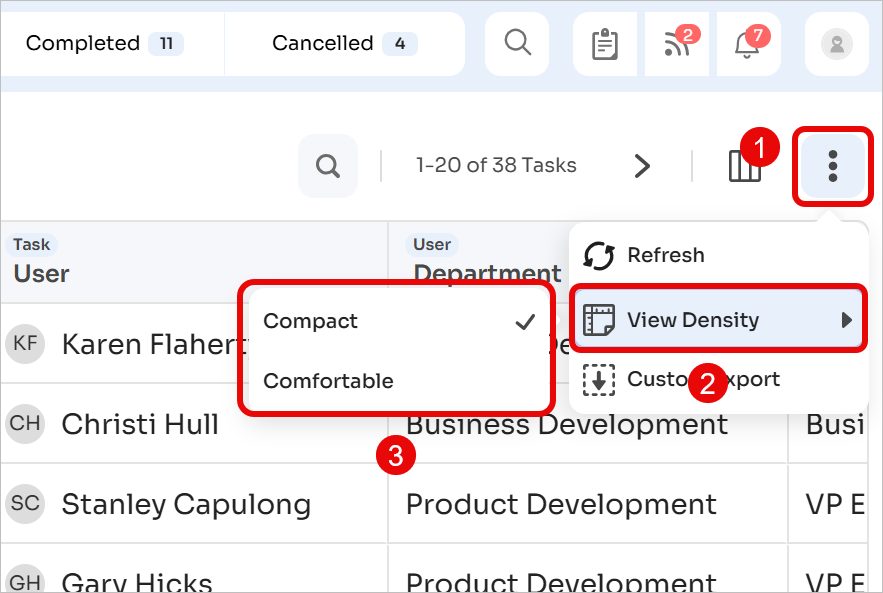
Click the 3-dot menu in the top-right corner. Hover over the View Density entry and choose between Compact and Comfortable.
Custom export
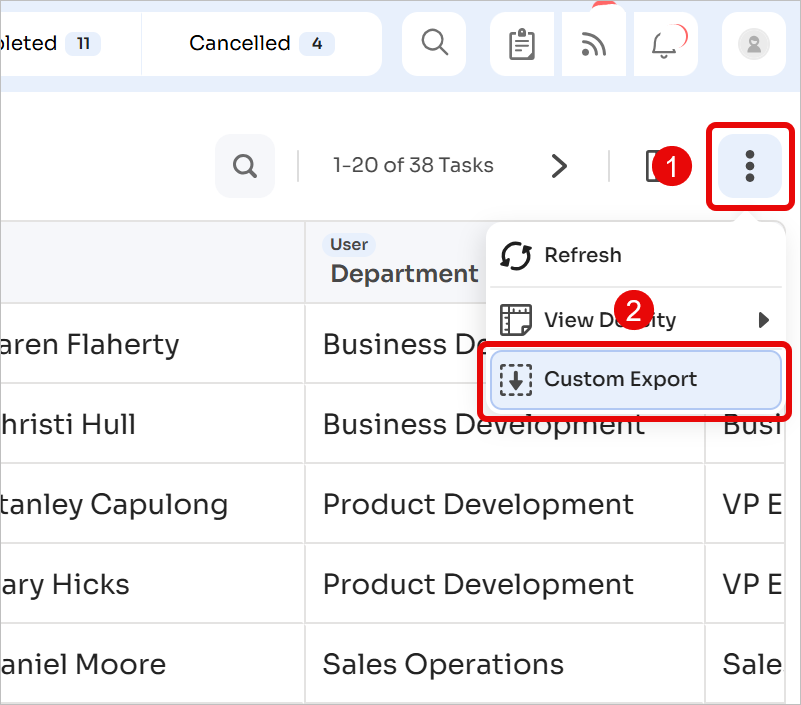
You can export the table as a CSV (regular or Excel-formatted). To do this, click the 3-dot menu in the top-right corner and select Custom Export.
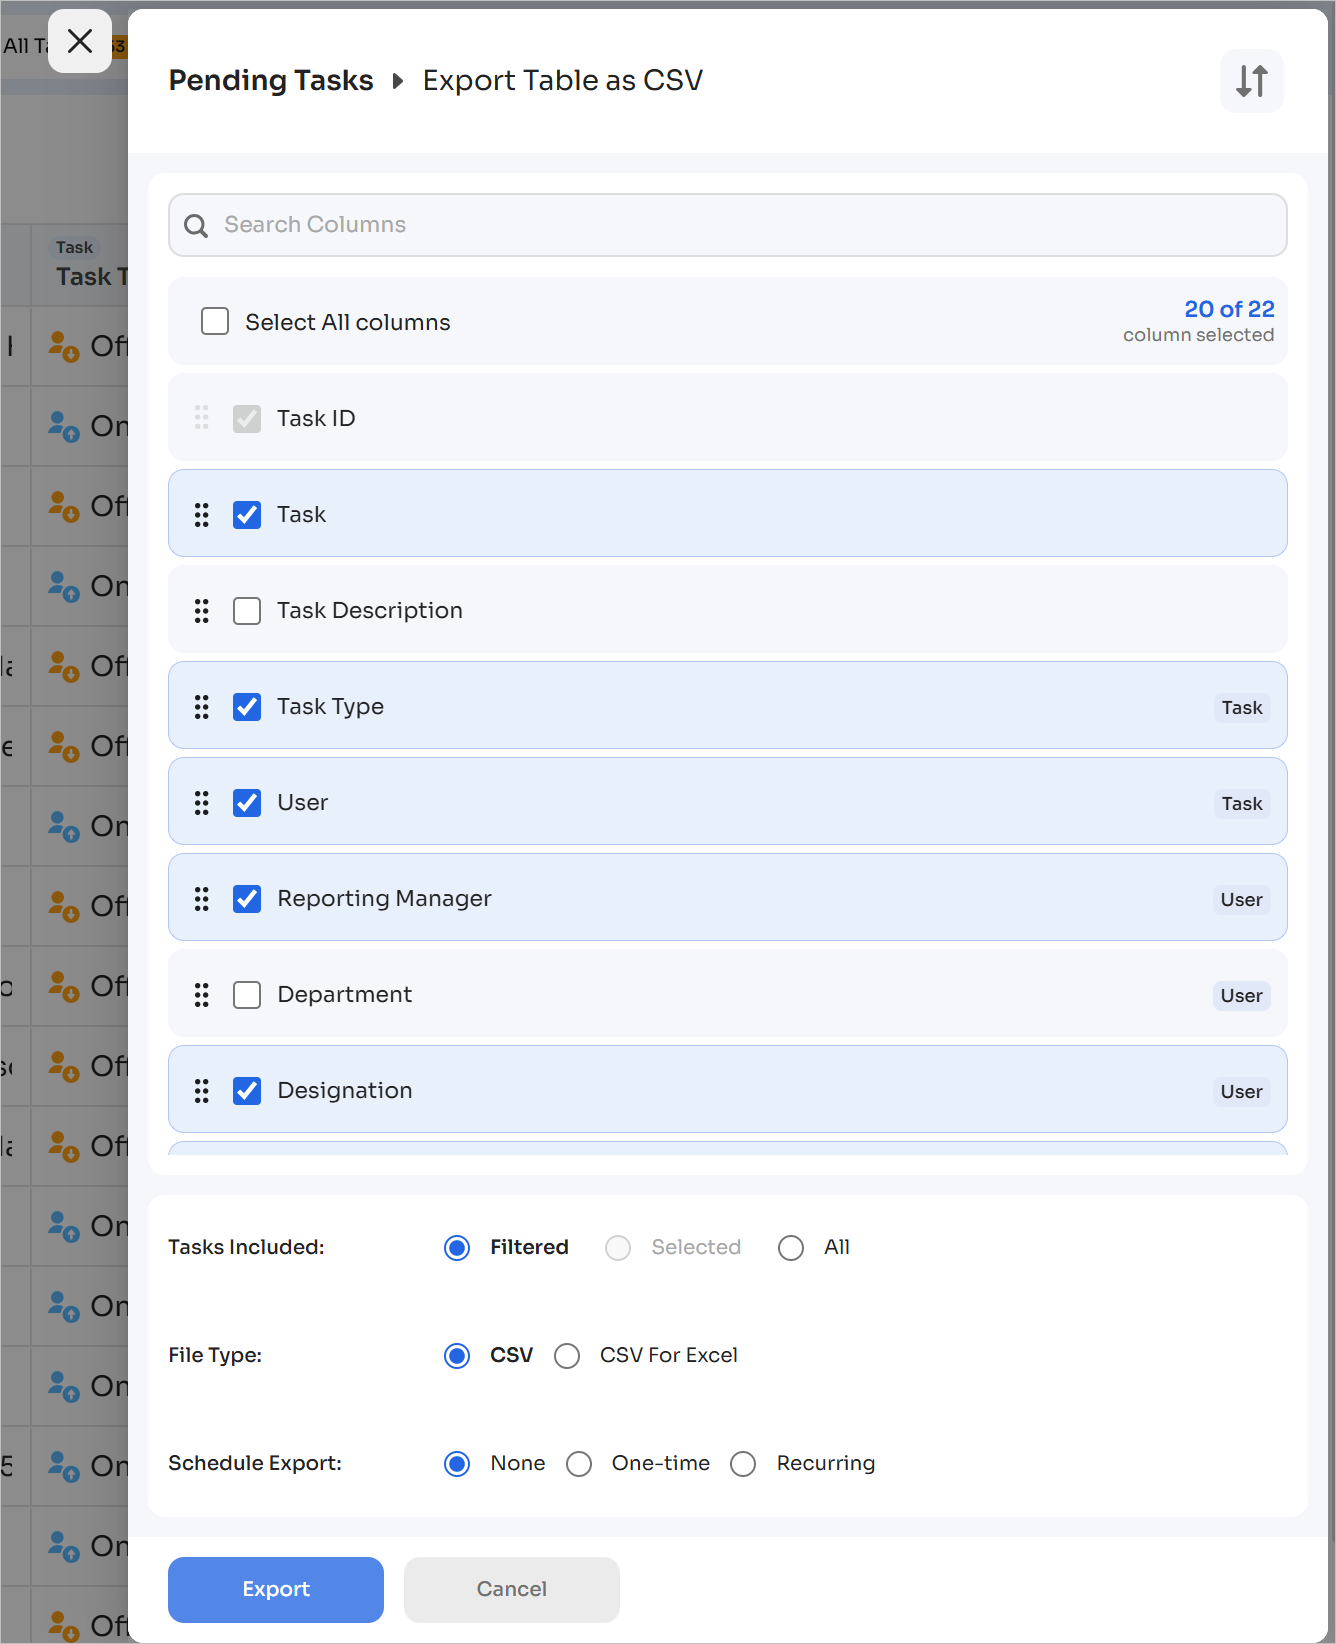
Select the tasks to include, the file type (regular CSV or Excel-formatted CSV), and optionally set a schedule. Click Export once done.
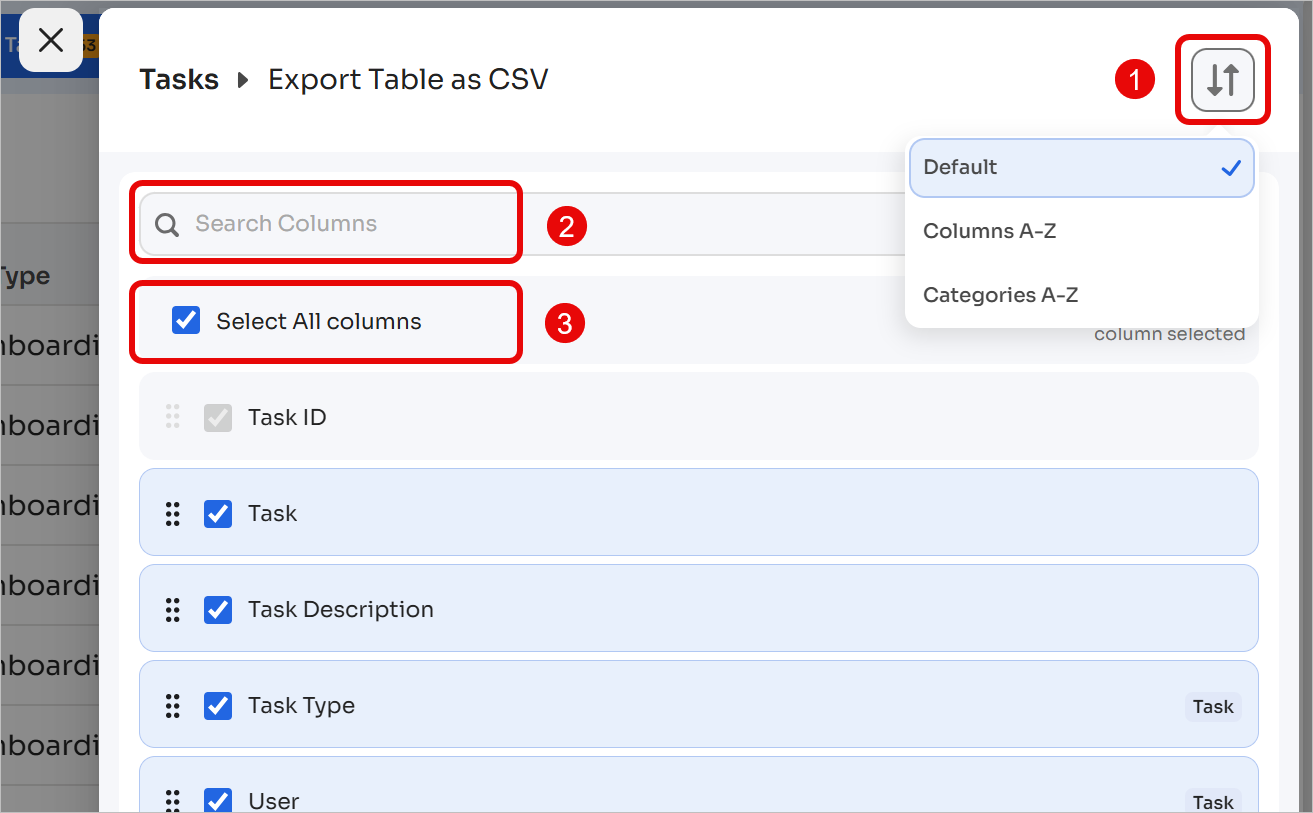
As with modifying columns, you can:
-
Reset column order to the default settings, or sort them alphabetically
-
Search columns by name
-
Select or deselect all columns
Got questions? Feel free to submit a ticket or contact us directly at [email protected].
Updated 17 days ago