Connect
Connect Netsuite to Zluri
NetSuite Integration
NetSuite integration fetches data from NetSuite (Rest) APIs. It fetches VendorBills, Journal Entries & Invoices. It gives the Memo, Date, and Transaction amounts. If you wish Zluri to fetch Journal Entries and Invoices you should connect to this integration.
To connect with NetSuite, you will need Admin-level permissions.
Integration steps
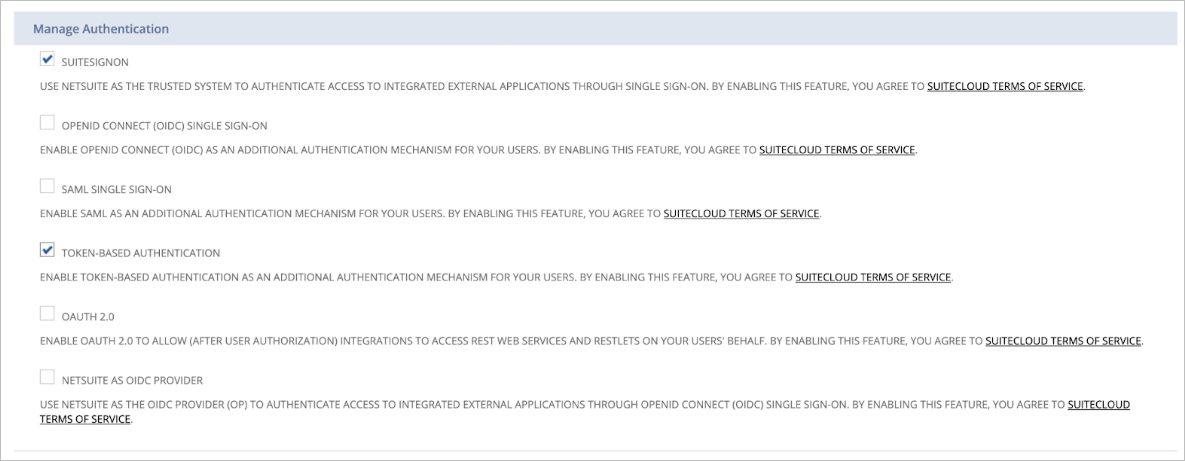
Enable Token-Based Authentication
-
Visit Setup > Company > Enable Features > Suite Cloud > Manage Authentication
-
Enable Suite Sign On & Token-Based Authentication.
-
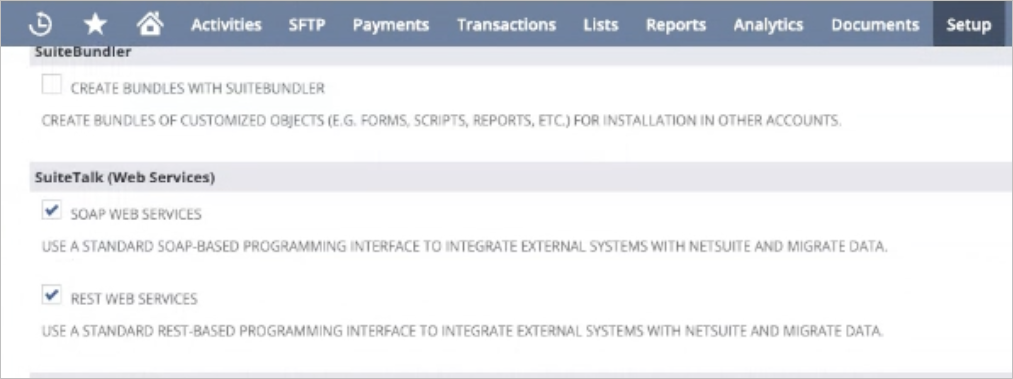
Visit SuiteTalk (Web Services)
- Enable Rest Web Services
- Enable SOAP Web Services
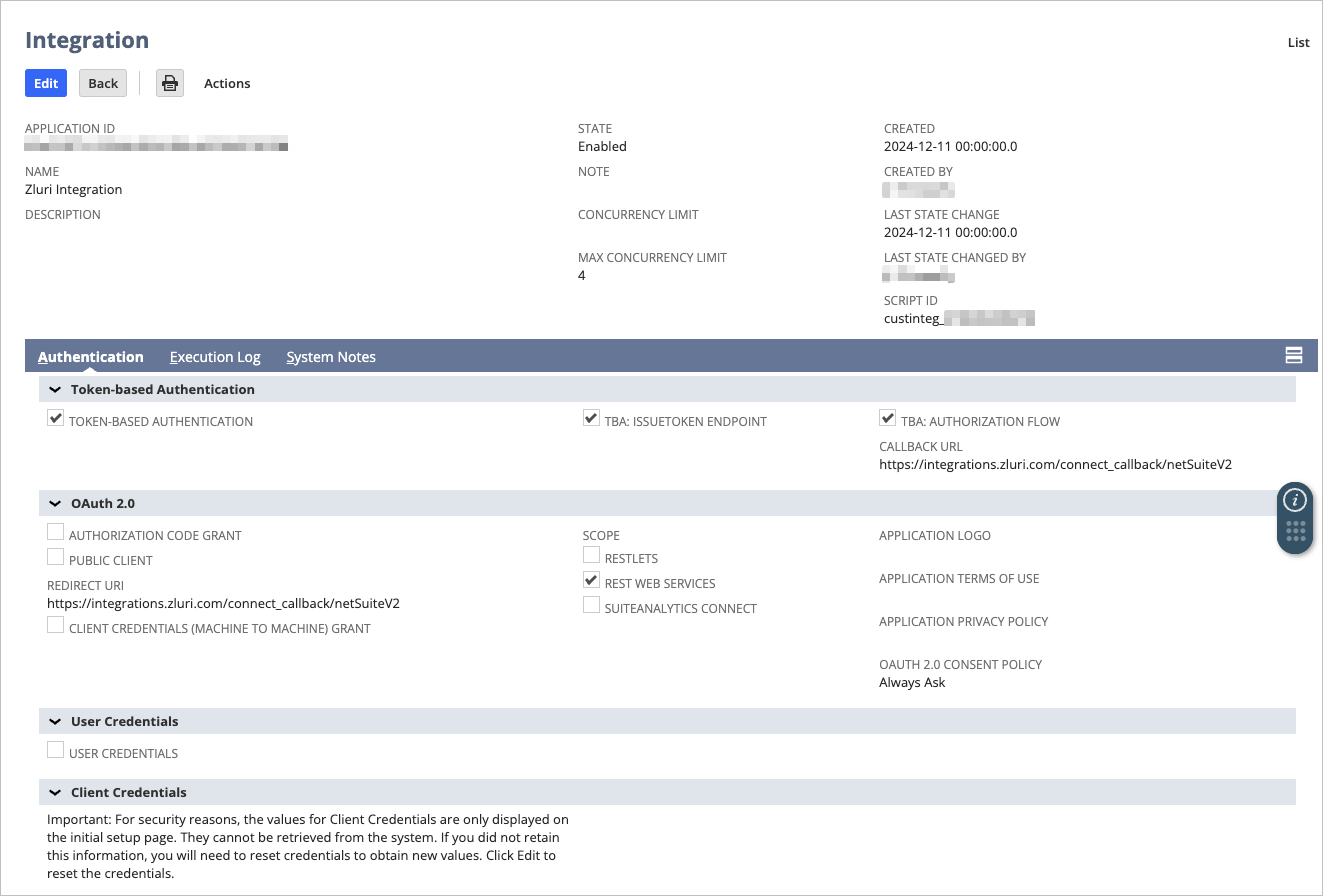
Create an Integration
-
Go to Setup > Integrations > Manage Integrations
-
Click the New button
-
Set the name to "Zluri Integration"
-
Make sure to check the following boxes:
- TOKEN-BASED AUTHENTICATION
- TBA: ISSUETOKEN ENDPOINT
- TBA: AUTHORIZATION FLOW
- REST WEB SERVICES
-
Set the Callback and Redirect URL as:
https://integrations.zluri.com/connect_callback/netSuiteV2 -
Click Save
-
At the bottom, you will find the Consumer Key and Consumer Secret
Please note that Consumer Key and Consumer Secret values are displayed only once. Make sure you copy them before proceeding.
If you’ve lost or forgotten them, go to Setup > Integrations > Manage Integrations, edit and save the integration again to regenerate them.
Create a Role
- Go to Setup > Users/Roles > Manage Roles > New
- Create a role and assign necessary permissions for Zluri integration
- Make sure you select All under Subsidiary Restrictions > ACCESSIBLE SUBSIDIARIES
- Name the role:
zluri-integration-role
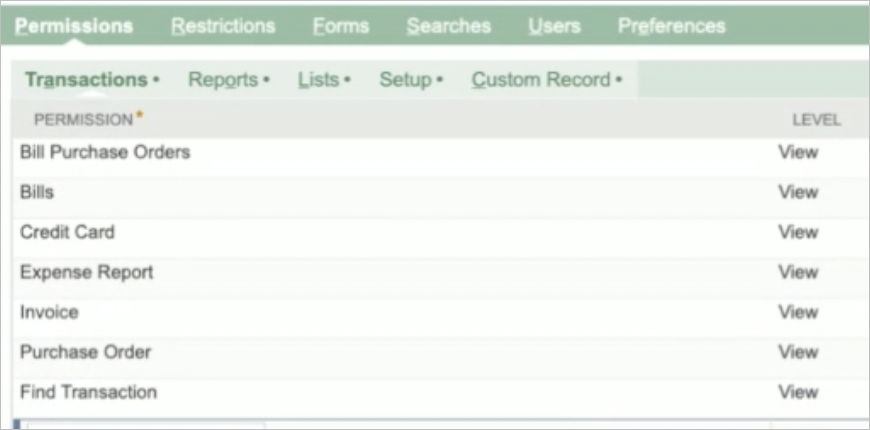
Assign permissions to the role
-
Under Transactions, add:
Transaction-level scopes are required only when the Read Transactions scope is enabled.
If you select Read Employees and Departments alone, you can skip all transaction-related permissions.- Expense report
- Bill Purchase Orders
- Bills
- Credit Card
- Invoice
- Purchase order
- Make Journal Entry
- Find Transaction
-
Check the Web Services Only Role option

-
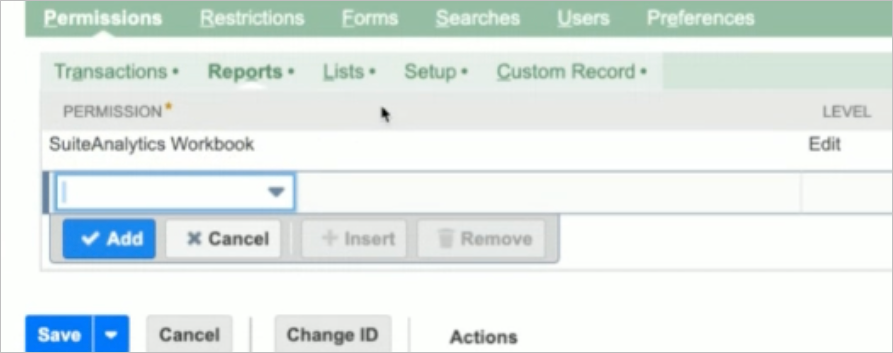
Under Reports, add:
- SuiteAnalytics Workbook (edit)
-
Under Lists, add:
- Employees
- Employee Record
- Departments
- Vendors
- Documents and Files (required to get vendors)
**Vendors + Documents and Files** are required only when the **Read Transactions** scope is enabled. If you select **Read Employees and Departments** alone, you can skip adding the two.
-
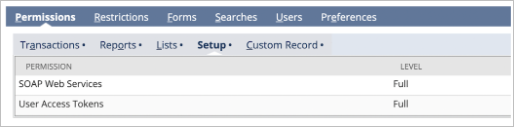
Under Setup, add:
- SOAP Web Services
- User Access Tokens
- Rest Web Services
Assign Role to User
- Go to Setup > Users > Manage Users. Edit the user you want to use for authentication.
- Click on the Access subtab.
- If Give Access is unchecked, check the box.
- Under Roles, assign the role created above.
- Click Save
Create Token
Follow these steps to generate a new Access Token in NetSuite.
Steps
-
From your NetSuite homepage, go to:
Setup > Users/Roles > Access Tokens > New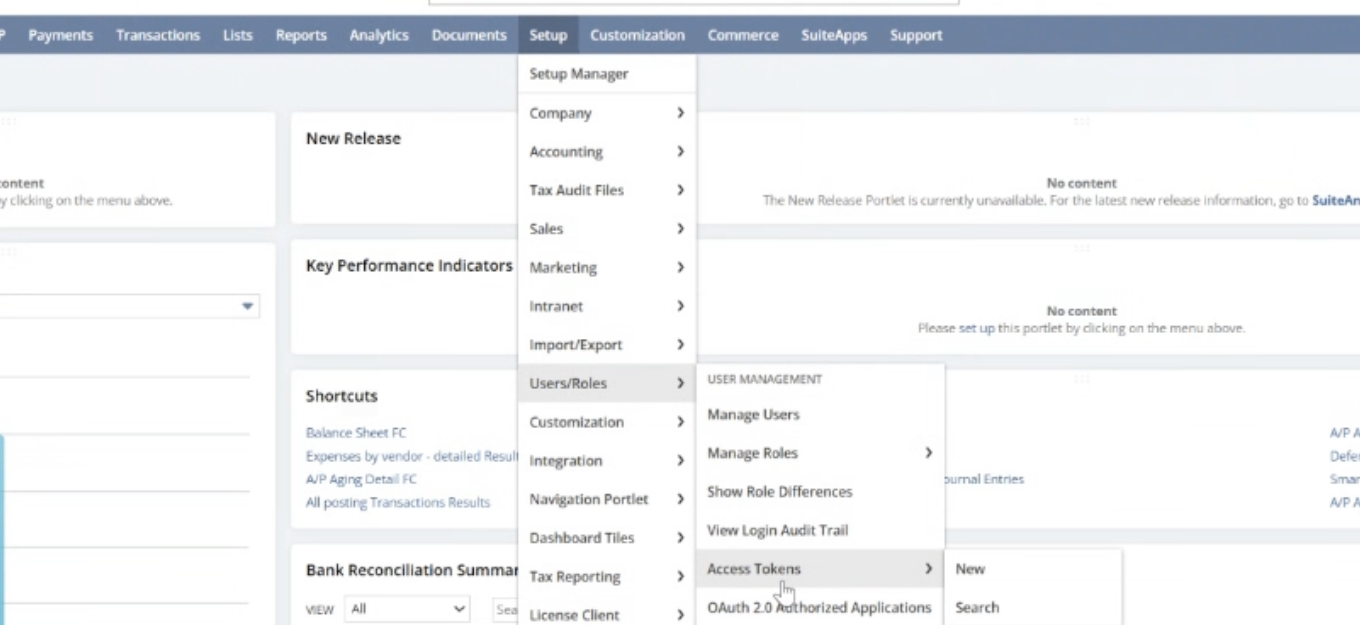
-
This opens the Access Token creation page.
-
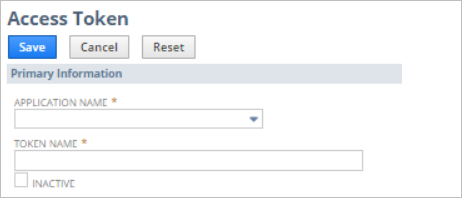
On the Access Token page:
- Select the Application Name (the integration you created earlier)
- The Token Name is auto-filled using Application Name, User, and Role
-
Click Save
The confirmation page will display the Token ID and Token Secret
Please note them down. If you lose them, repeat the process to generate new credentials.
Get the Account ID and Suitetalk
- Go to Setup > Company > Company Information
- Look for ACCOUNT ID
- Under Company URLs, find SUITETALK (REST WEB SERVICES)
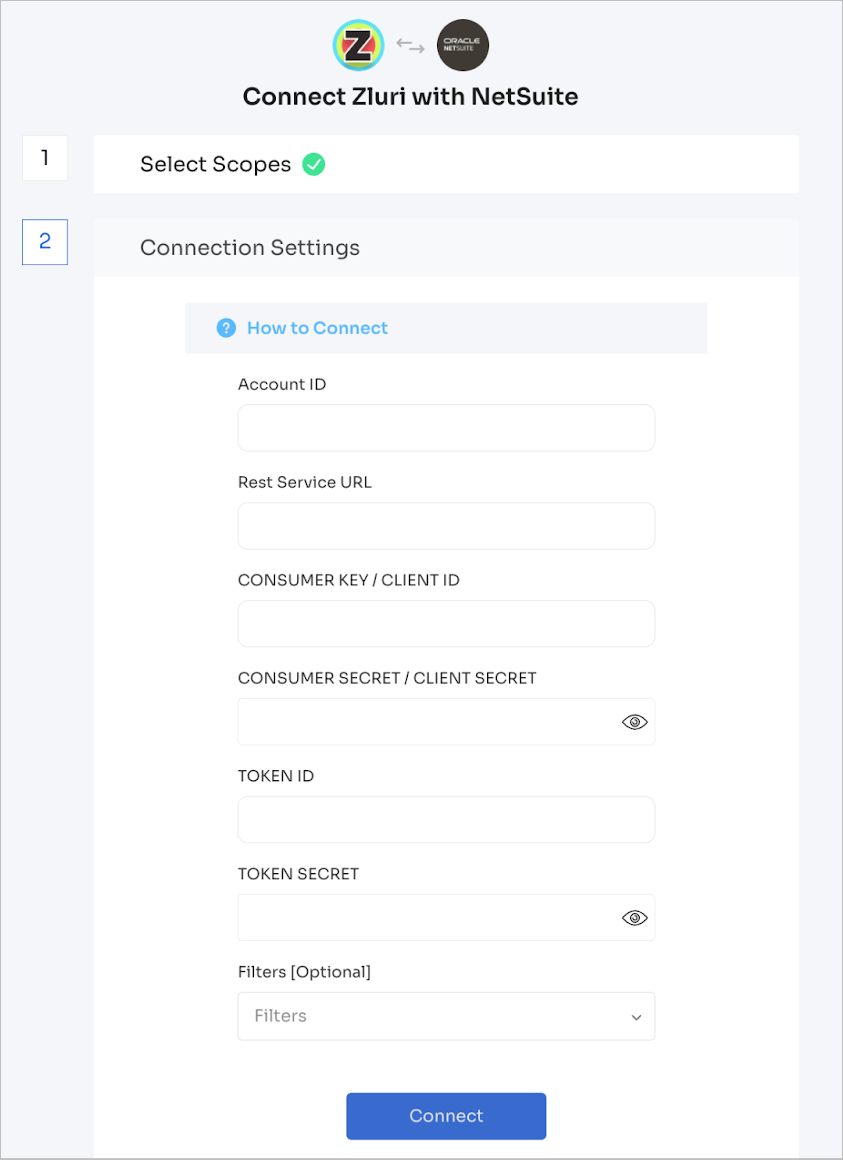
Required Details for Zluri
Make sure you collect the following:
- Rest service URL (e.g.,
https://xyz.suitetalk.api.netsuite.com) – without trailing slash - Account ID
- Consumer key
- Consumer secret
- Token ID
- Token Secret
Once you have these details:
-
Log in to Zluri
-
Go to Sources → Integrations, search for NetSuite
-
Click Connect
-
Select Relevant Scope

-
Fill in the form with the above values
If everything is entered correctly, you’ll see a Connection Successful message.
Go to Sources → Integration → Connected to confirm that NetSuite is connected.
Got questions? Feel free to submit a ticket or contact us directly at [email protected].
Got questions? Feel free to submit a ticket or contact us directly at [email protected].
Updated 7 months ago