Rippling SAML
To enable users to log in to Zluri through Rippling, you need to set up SAML. This integration allows users to authenticate into Zluri using their Rippling-managed credentials, centralizing access control and improving security compliance.
Follow these steps to set up SAML SSO between Rippling (as the Identity Provider) and Zluri (as the Service Provider).
Configuration steps
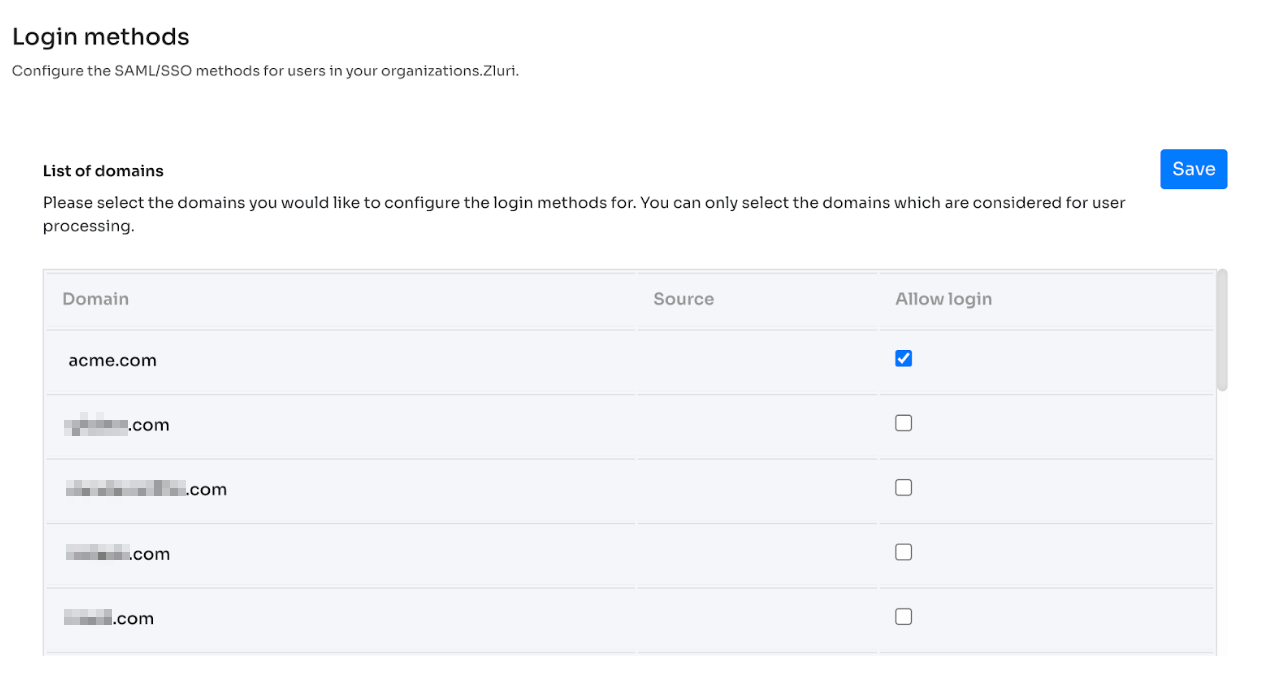
Select domains allowed for SSO in Zluri
In Zluri, navigate to Settings → SSO and select the domains allowed for SSO login. Click Save when done.
If your domain is not listed, you can add it from Settings → Directory Management.
Create a custom app in Rippling
- Log in to Rippling as an admin, navigate to Home, click IT Management, and select Custom App from the left sidebar.
- Click on Create New App and give the app a descriptive name.
- Fill in the required details:
- Give the app a descriptive name
- Select a category
- Upload a logo file
- Select Single Sign-On (SAML) as the authentication method.
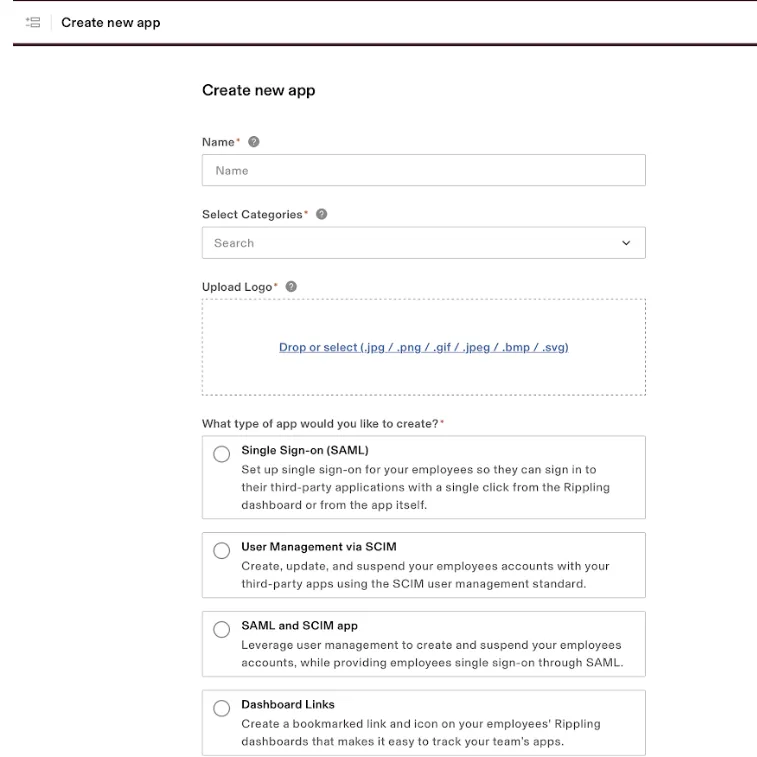
- Click Continue.
- In the pop-up, select the option confirming that you are the app admin and click Continue.
Configure SAML settings
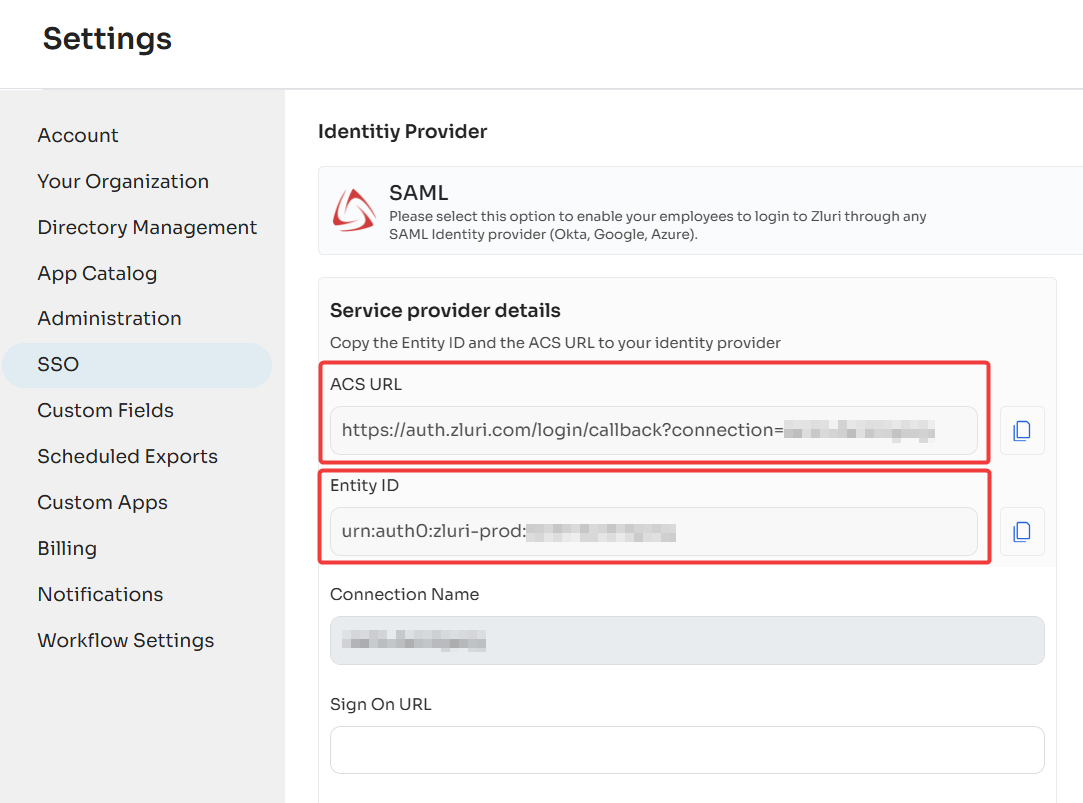
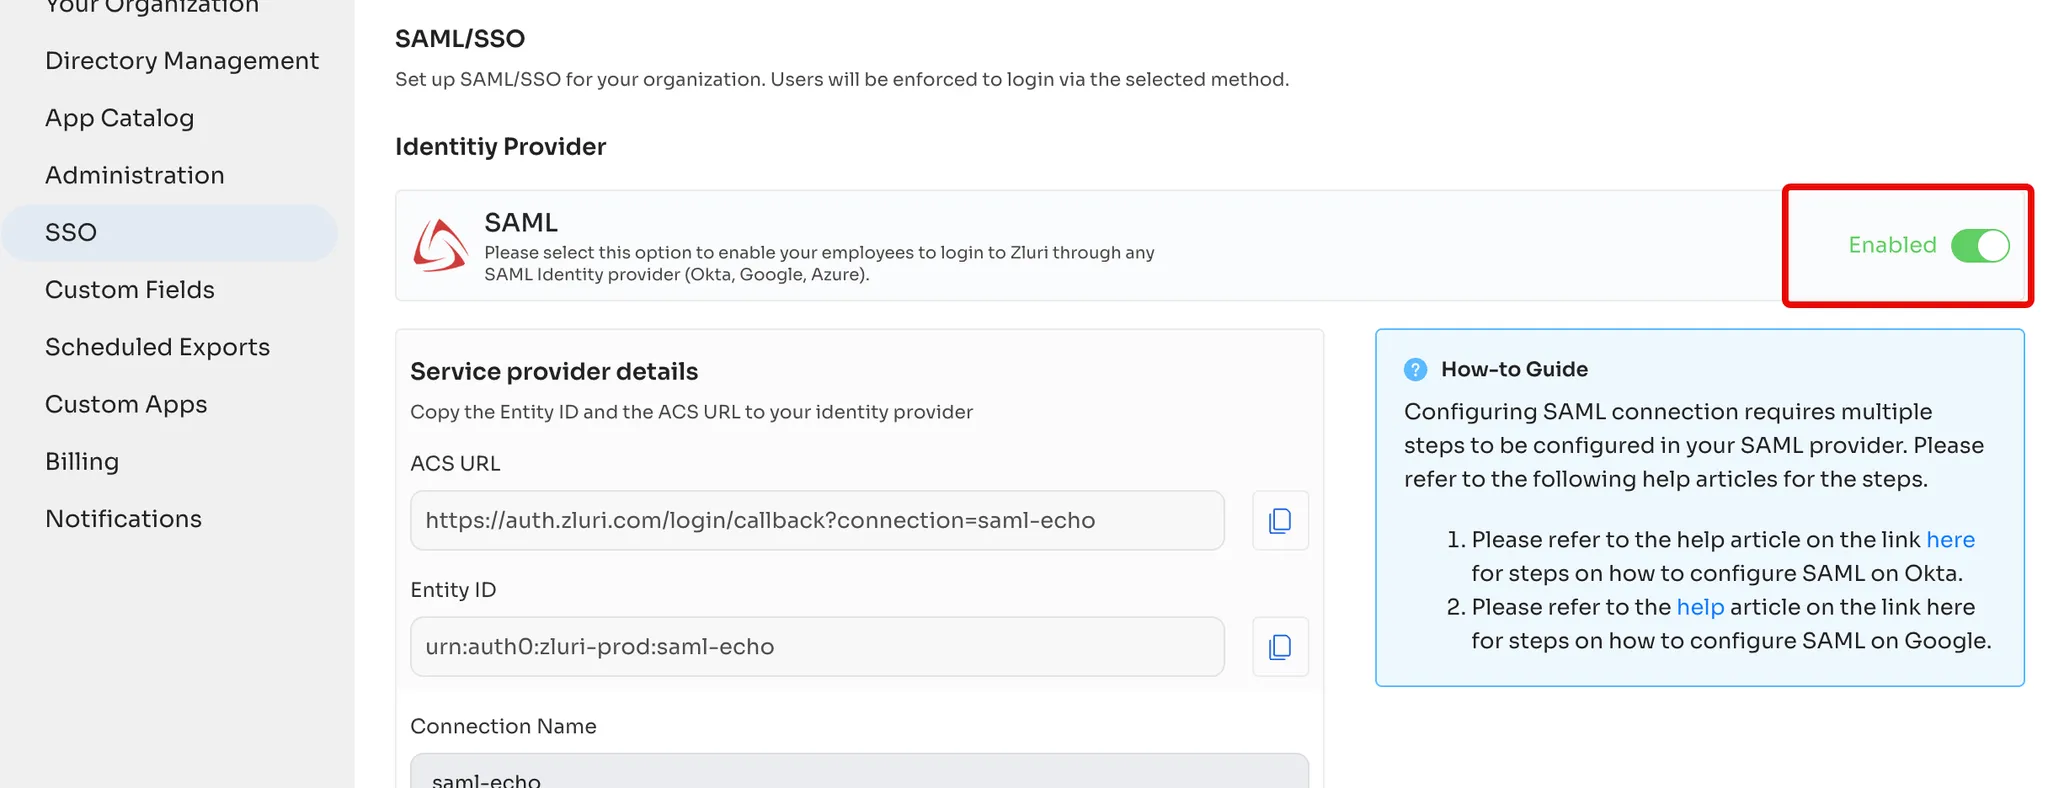
Obtain ACS URL and Entity ID from Zluri
- Navigate to Zluri's SSO Settings, scroll down, and click SAML.
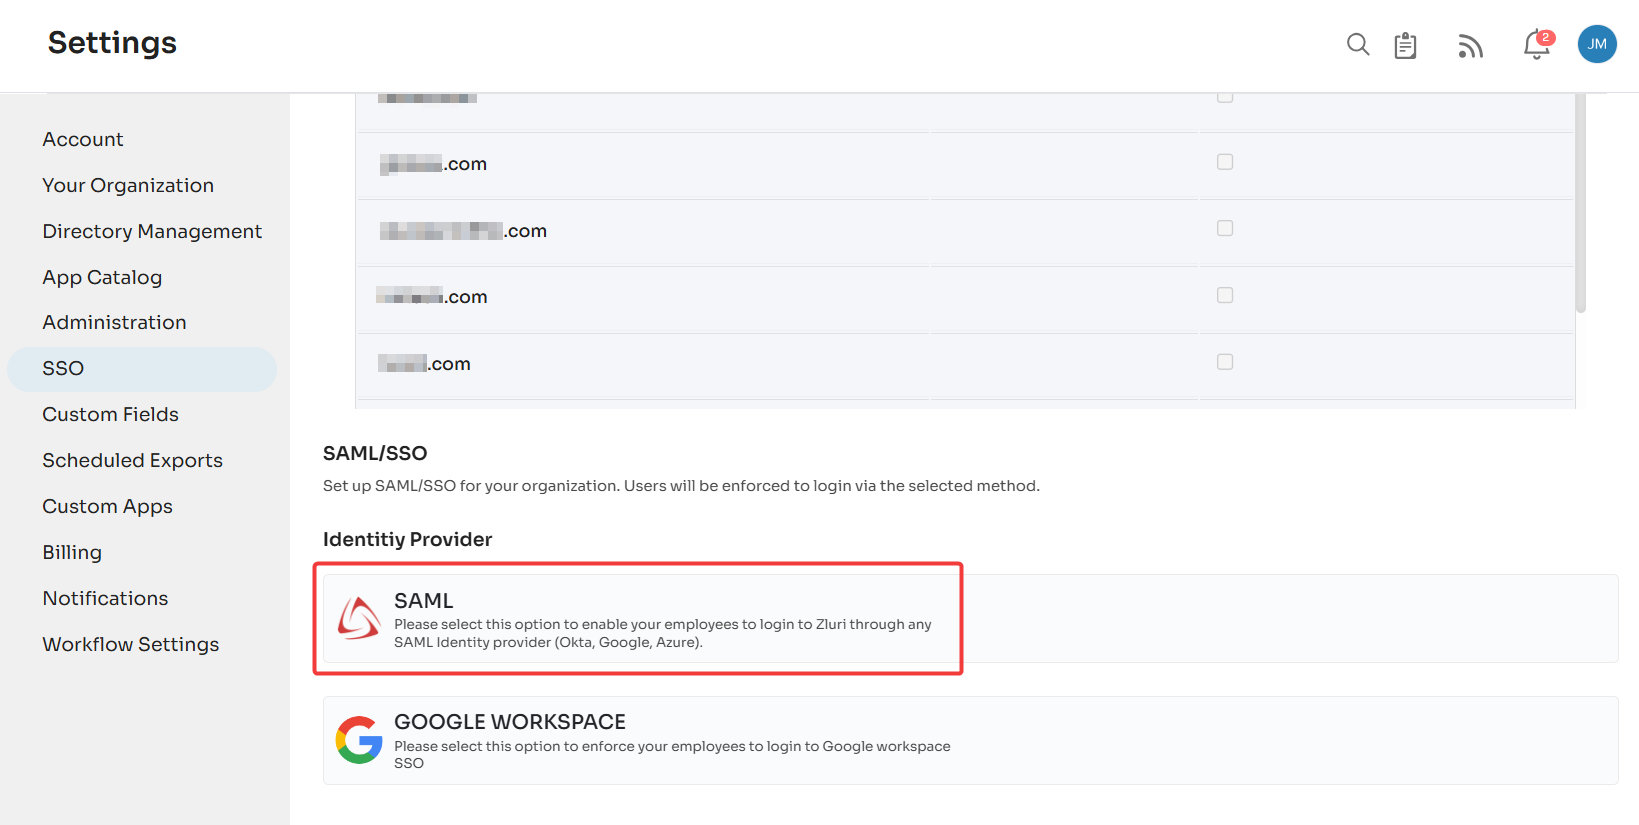
- Copy the ACS URL and Entity ID.
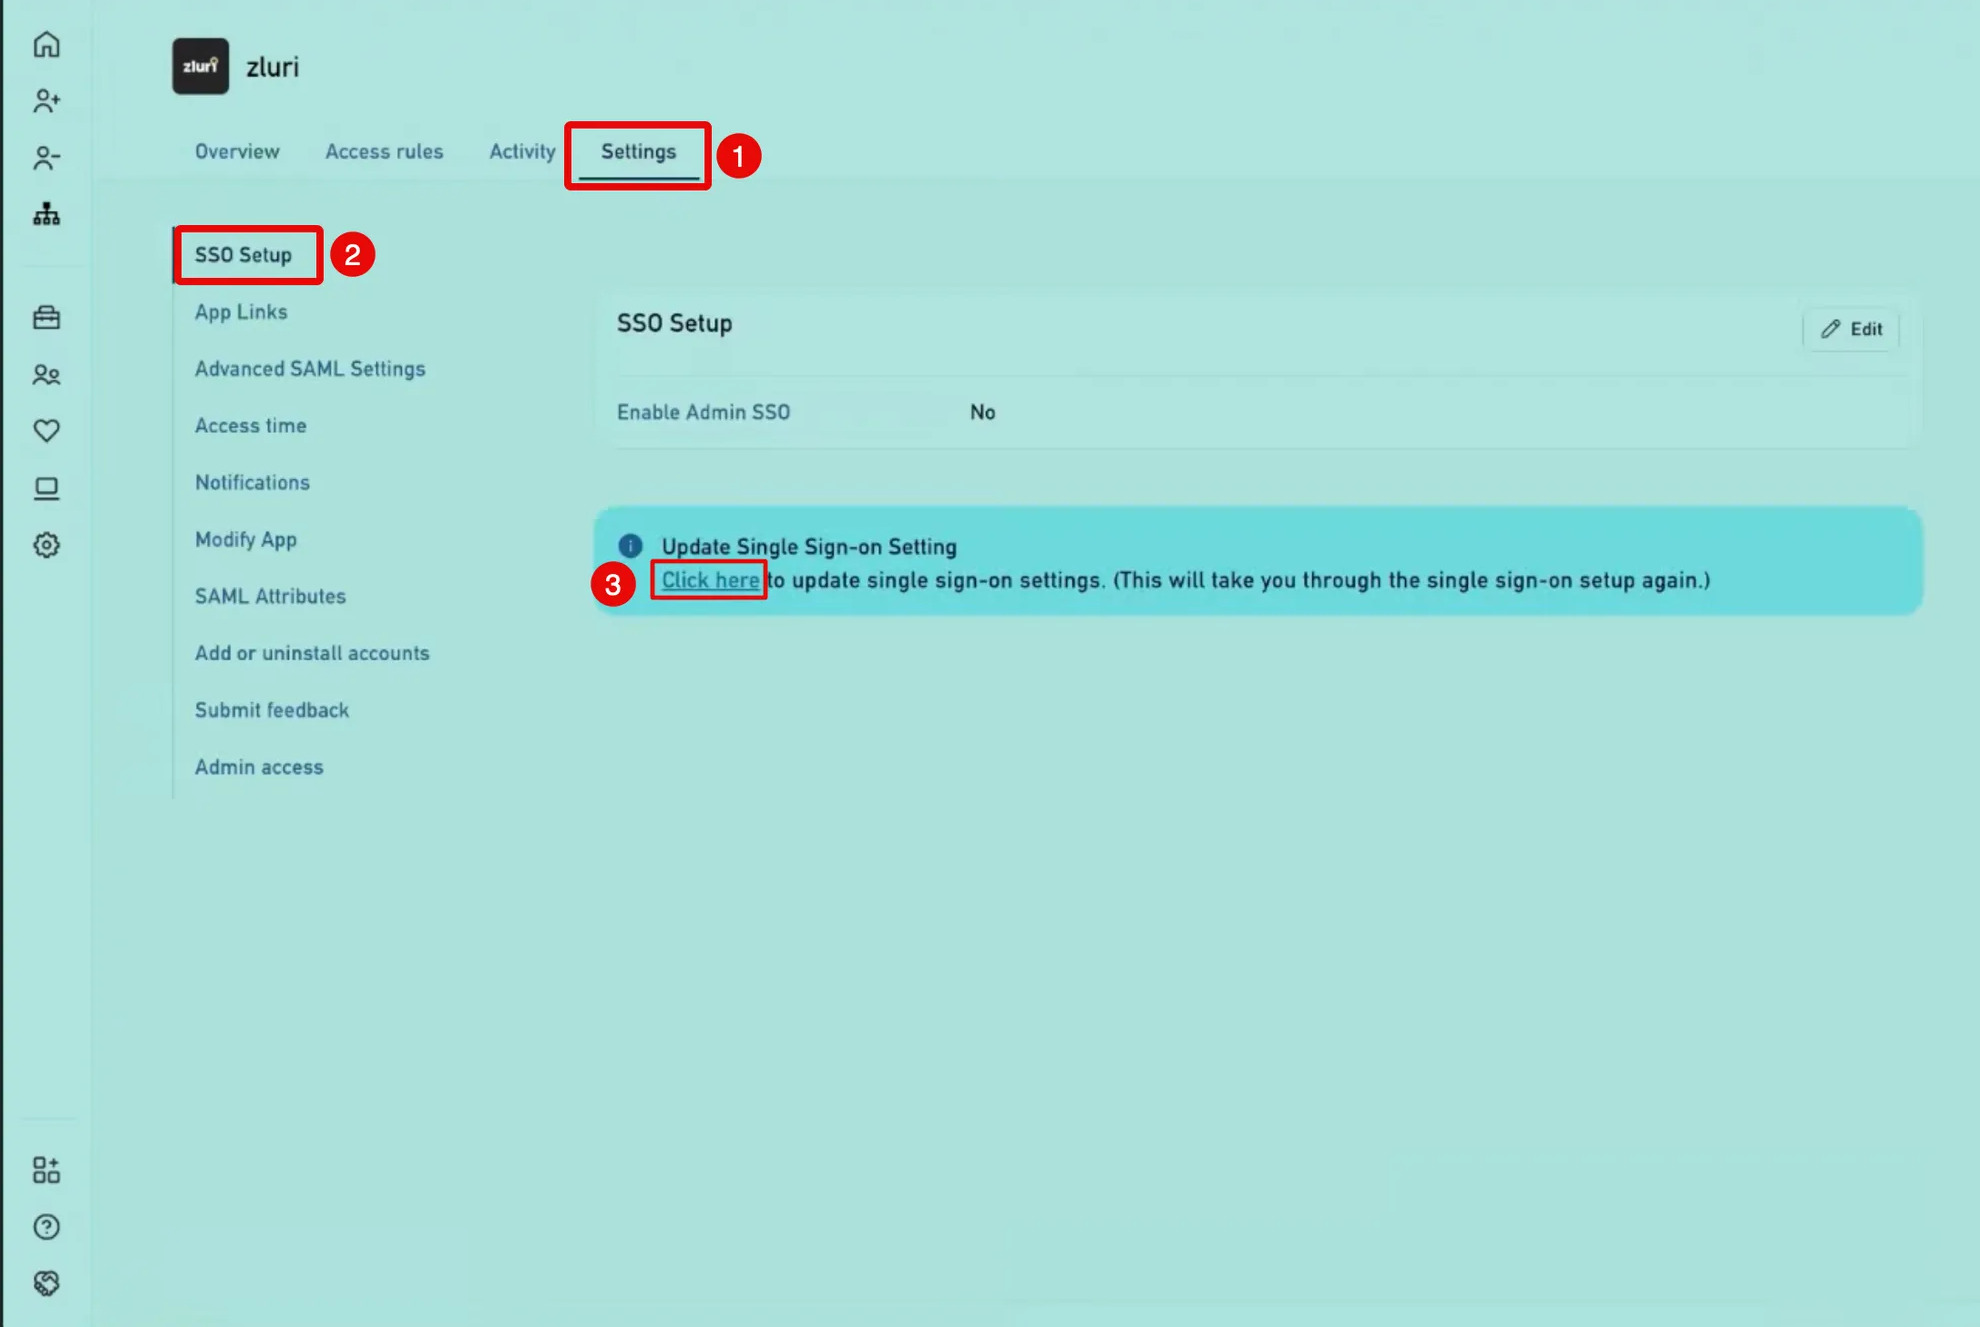
Add SAML details in Rippling
-
In the Settings tab, go to SSO Setup and select Click here under Update Single Sign-on Settings.
-
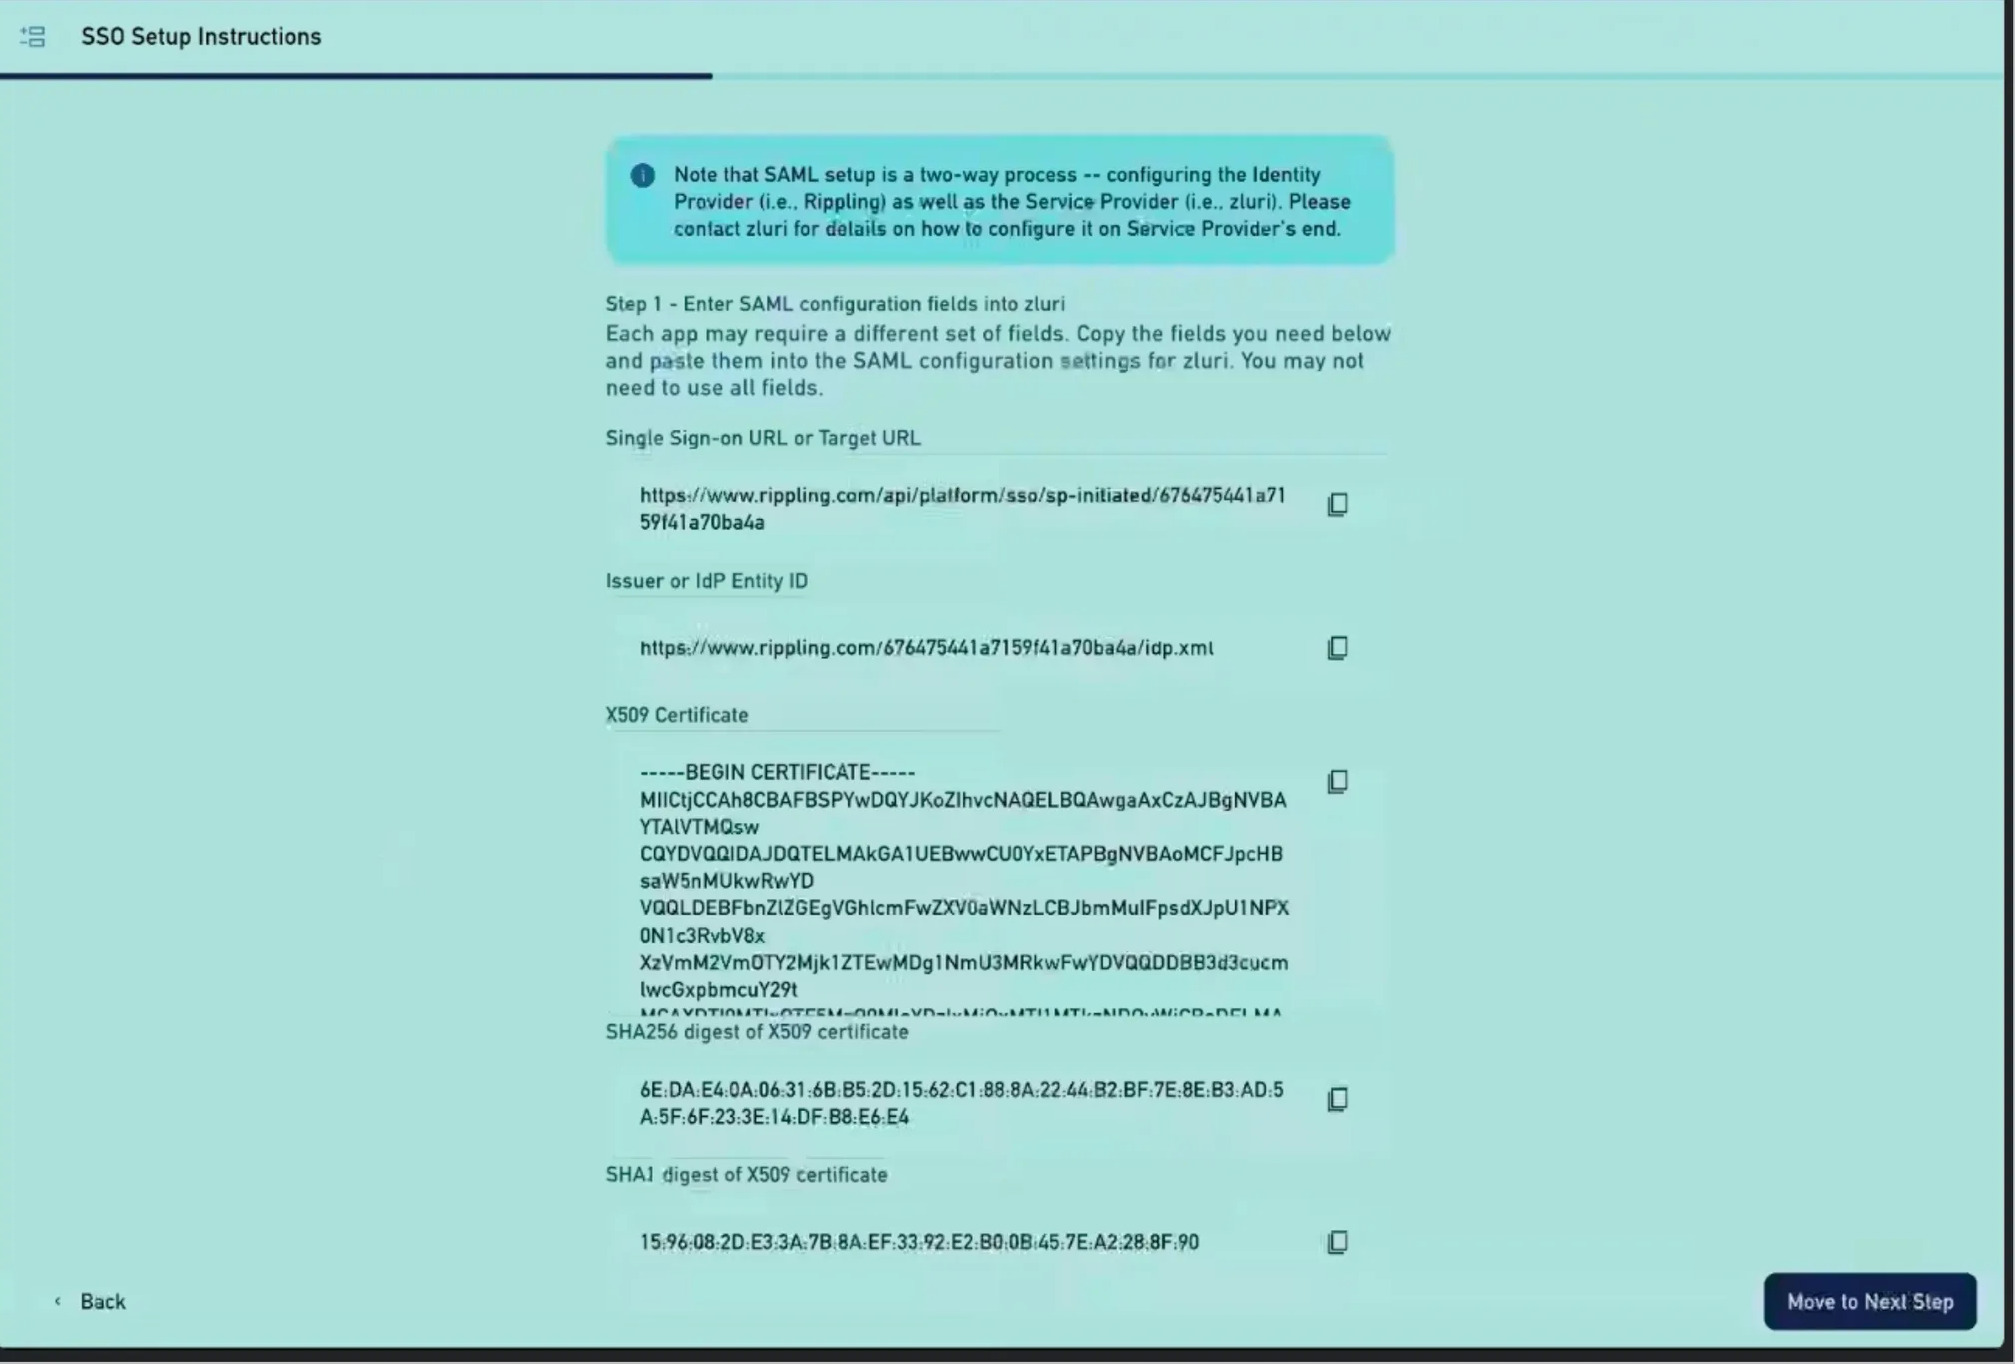
Paste the ACS URL and Entity ID into the respective fields in Rippling, which was previously obtained from Zluri.
-
After configuring SAML, copy the Single Sign-On URL and download the X.509 Signing Certificate from Rippling.
-
Click Move to Next Step.
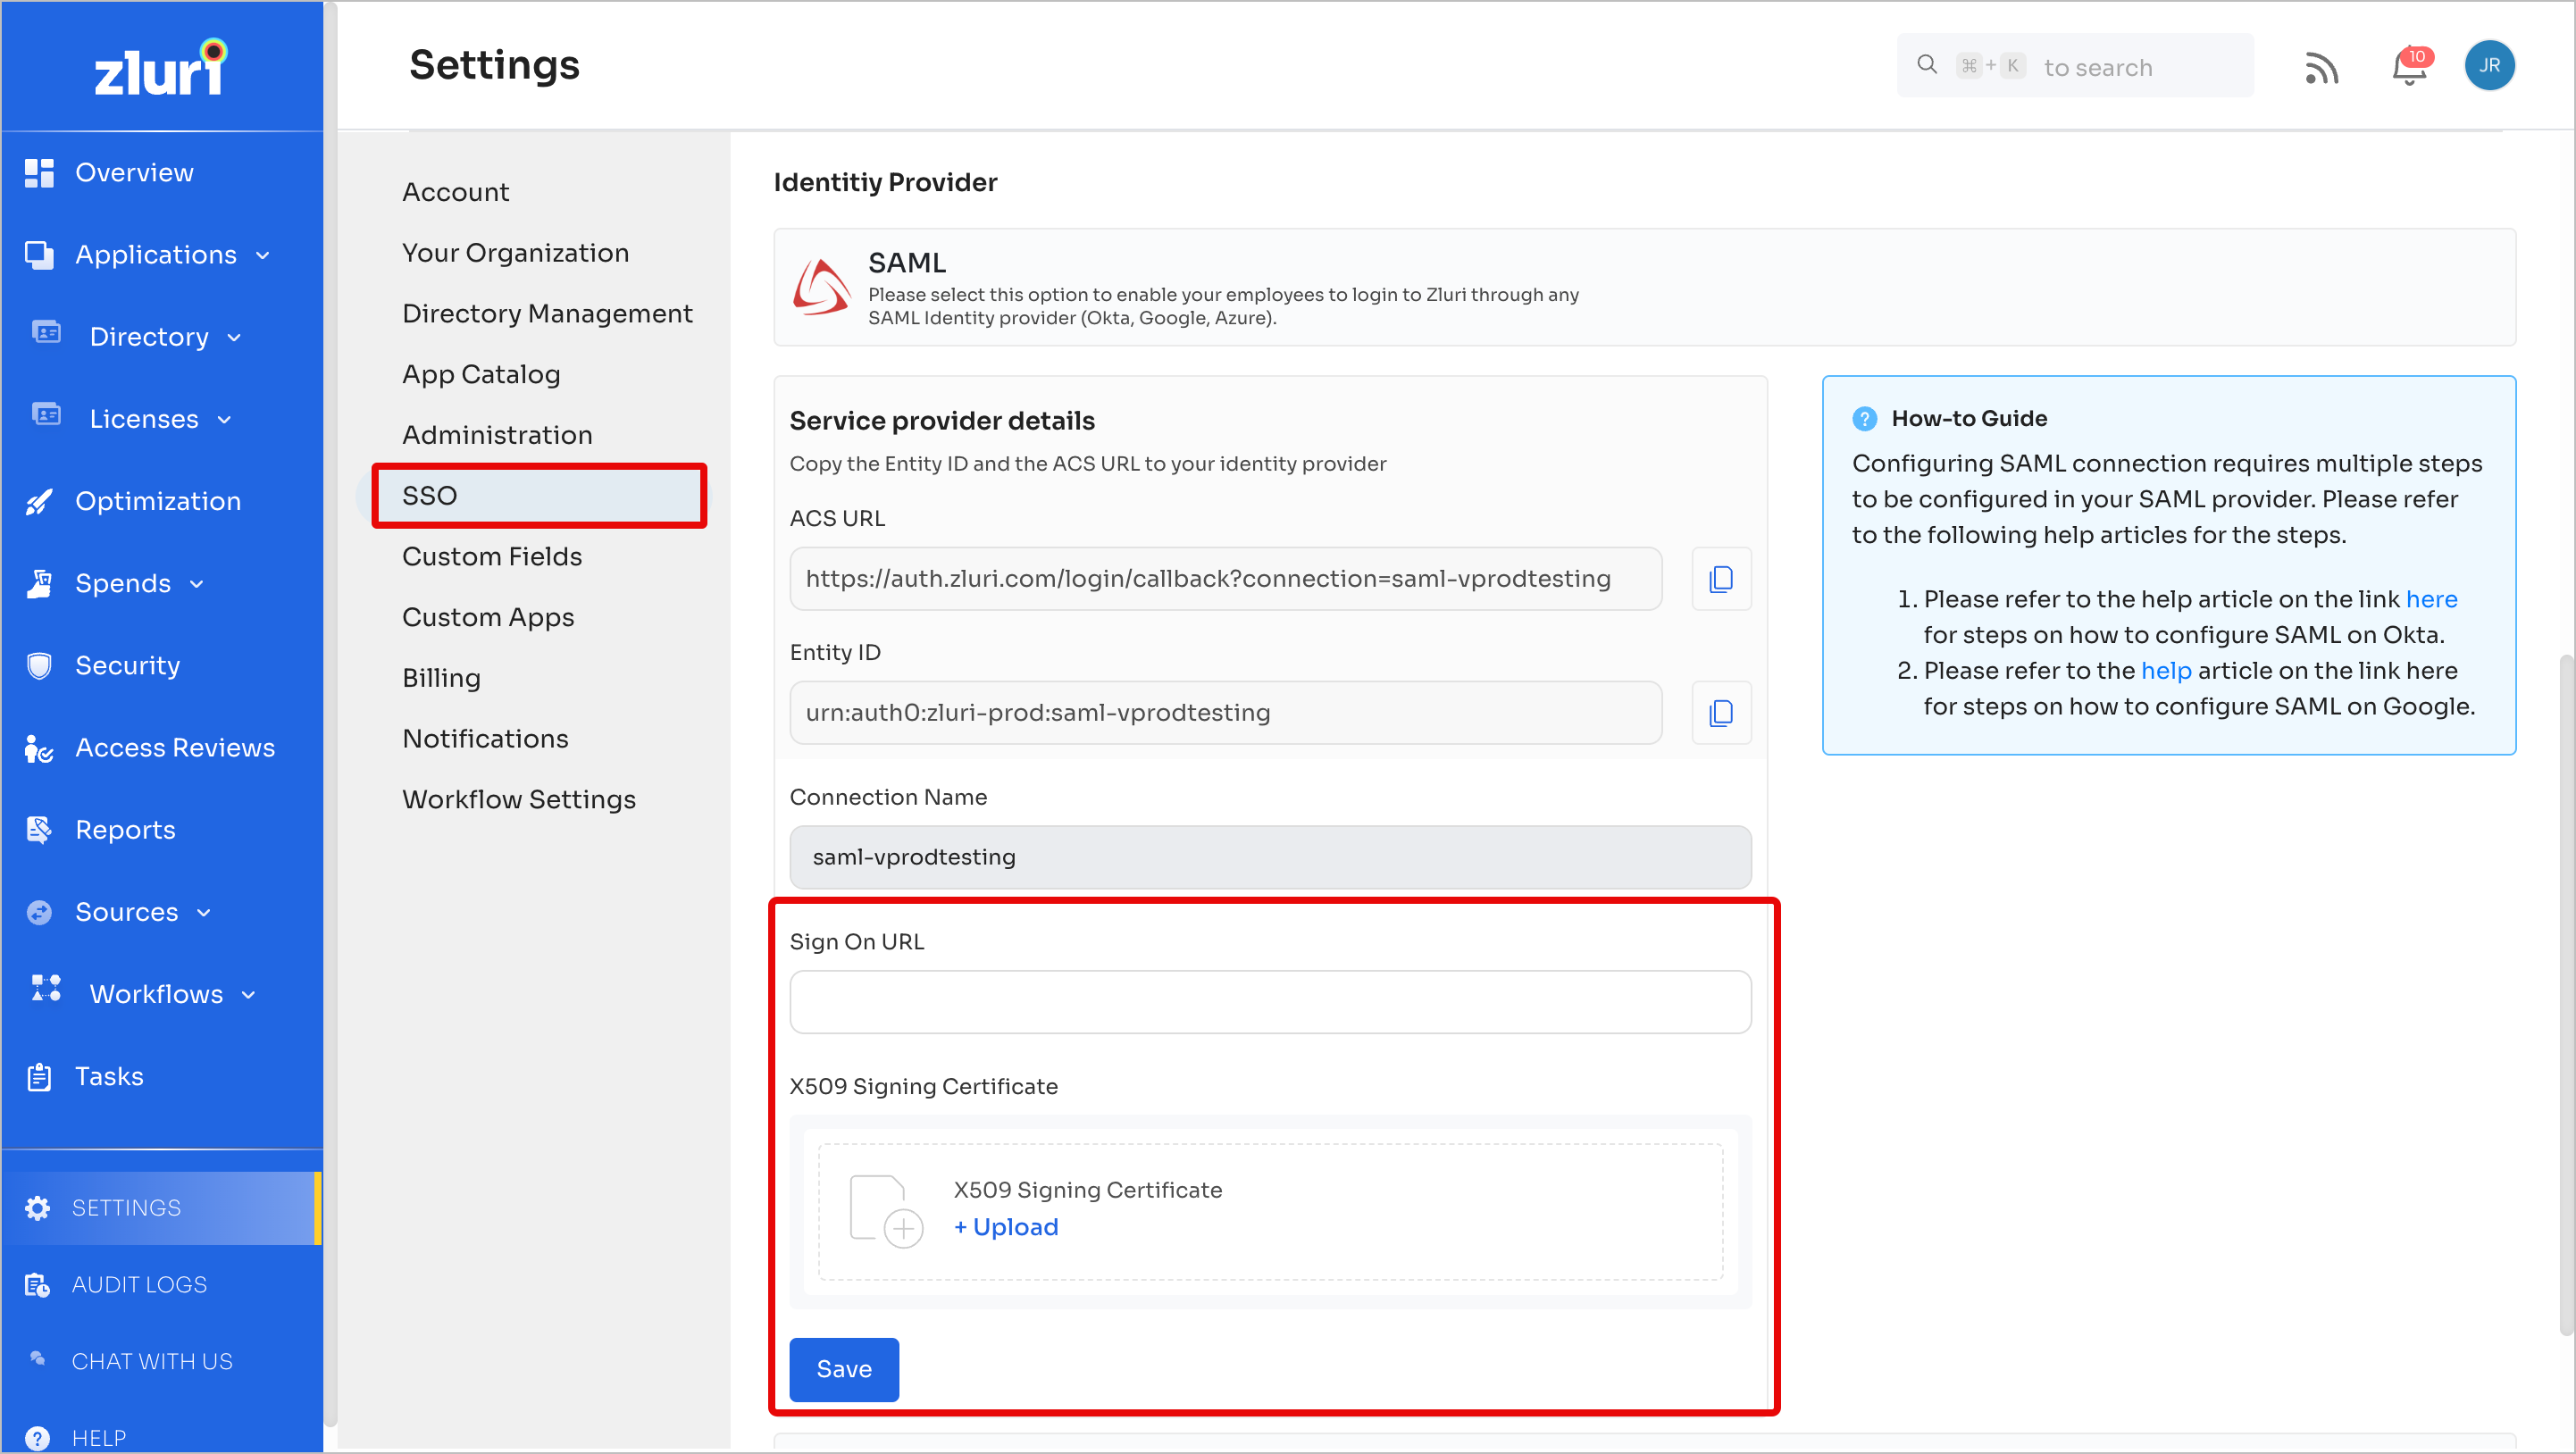
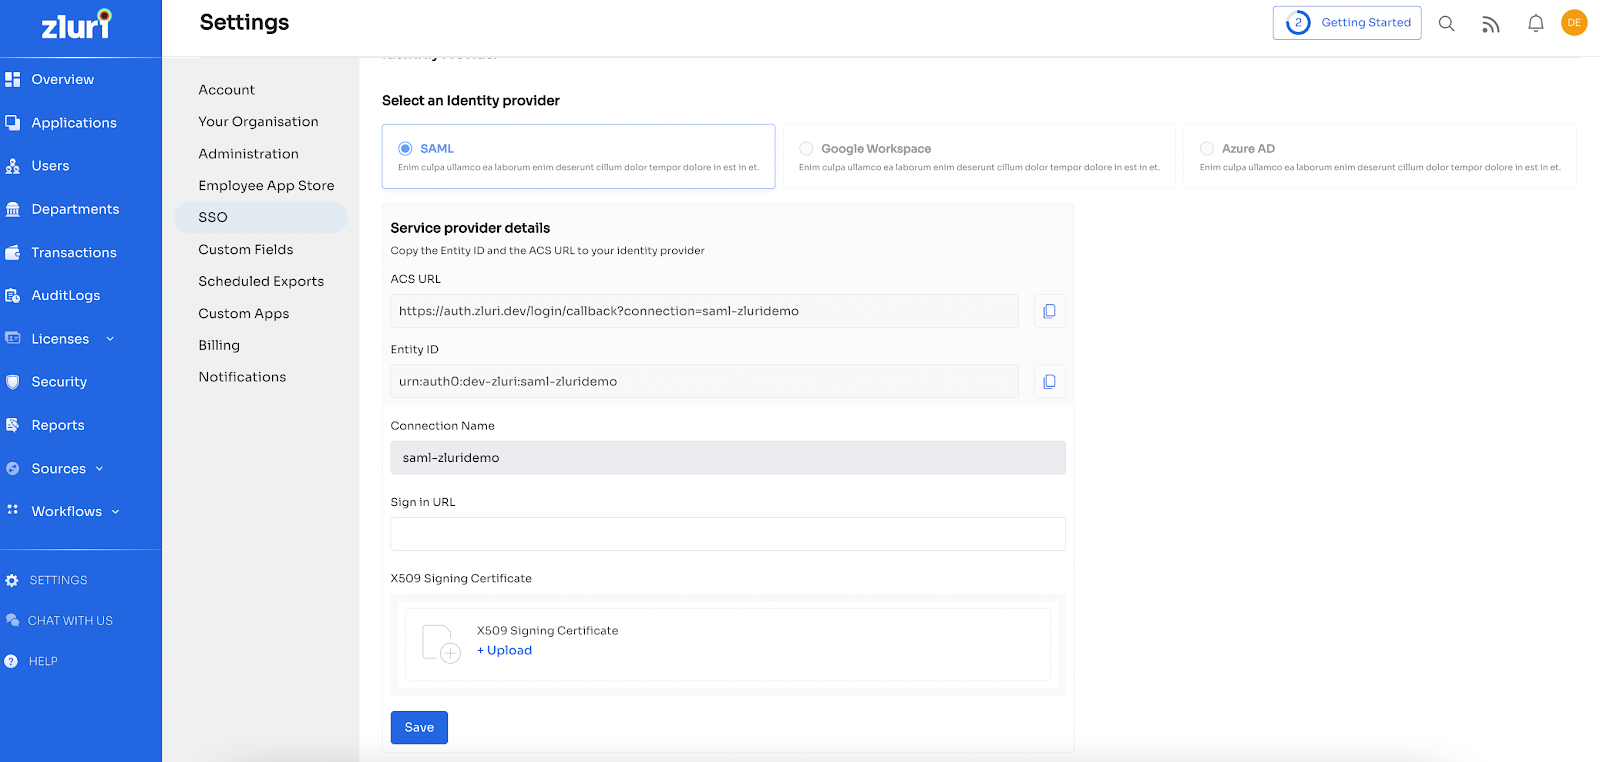
Complete SAML Setup in Zluri
-
In Zluri’s SSO settings, paste this SSO URL and upload the X.509 Signing Certificate. Click Save.
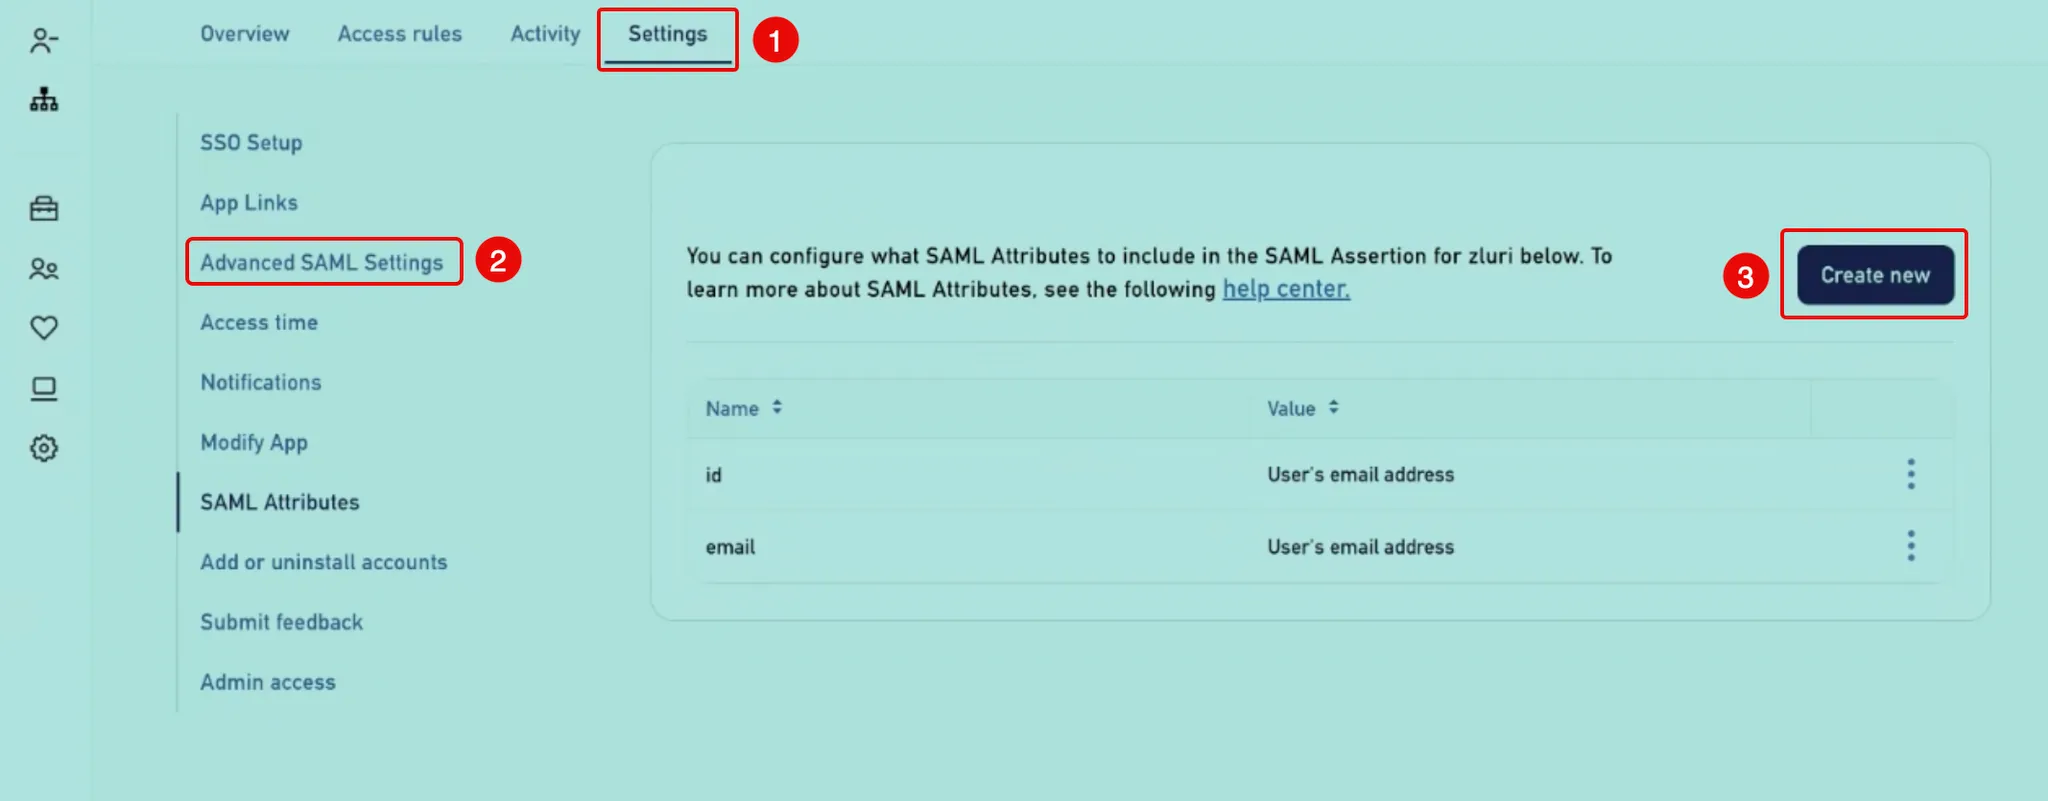
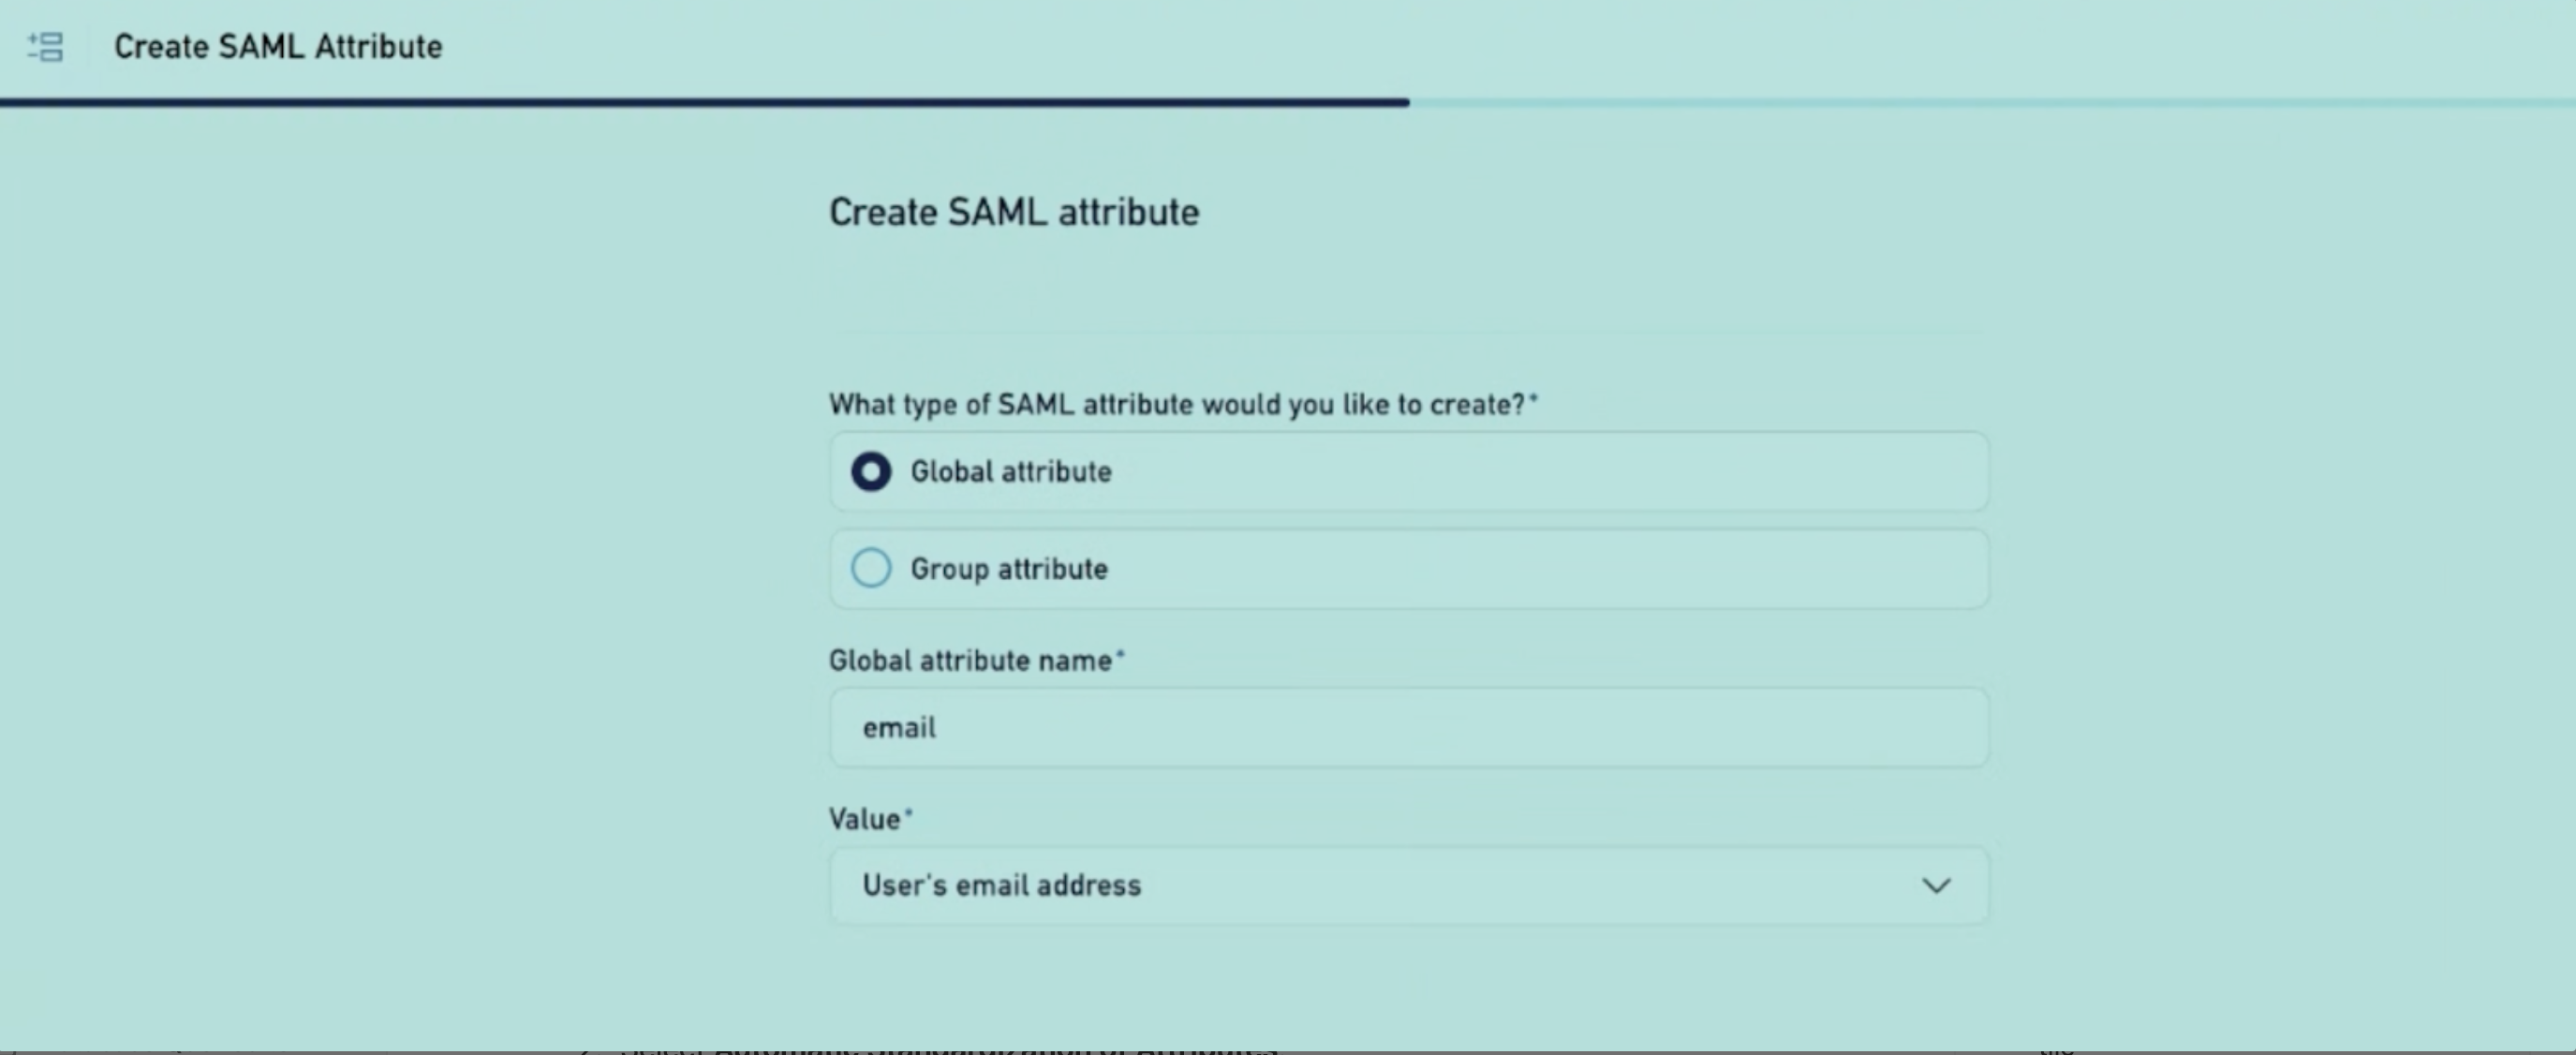
Configure SAML attributes
In Rippling, navigate to Zluri tile → Settings →Advanced SAML Attributes.
-
Click Create New.
-
In Create SAML attribute:
-
Set the attribute type to Global attribute.
-
Enter a name for the attribute.
-
Choose a Value as email address and save.
-
Disable automatic standardization of attributes
Rippling automatically modifies attribute names to match standard naming conventions. To pass the email attribute correctly, disable this setting:
-
Go to Settings → select Advance SAML Settings in the left sidebar.
-
Select Automatic Standardization of Attributes.
-
Select the checkbox to disable the setting. Click Save.

Assign users and test login
- Navigate to the Overview tab and select Grant Access for the specific user.
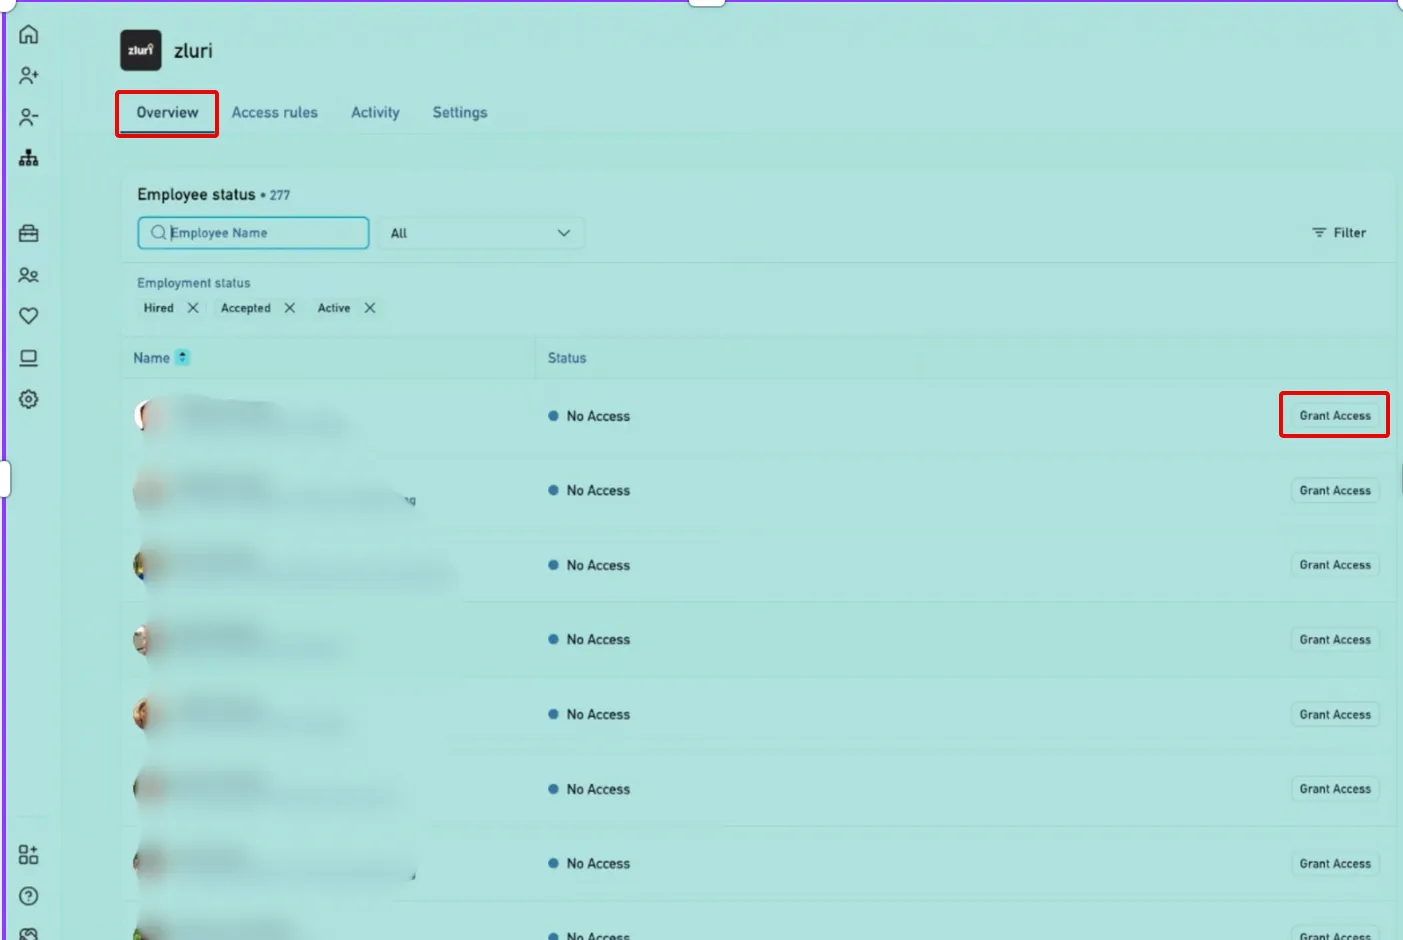
- Enable SAML toggle in Zluri.
Then click Test connection to try logging in with your Rippling credentials. If the login is successful, the setup is complete. Next time any user of your organization tries to log in, they will be redirected to the Rippling login page.
Editing an existing SAML setup
Rotate SAML certificates
X.509 certificates have a defined lifetime (e.g., in Google Workspace, it has a validity of 5 years). You should rotate a certificate if it's about to expire or if it becomes compromised.
If a certificate expires before you rotate it, your users won’t be able to use SSO to sign in to any SAML applications that use that certificate until you replace it with a new certificate.

To rotate the certificate:
-
Open the SAML app in your SSO, navigate to the certificate page, and recreate it.
-
Once you get the new certificate, please upload it to the Zluri platform.
Save the connection, and you can continue to use the SAML connection as configured.
Add/remove SAML domains
To add or remove SAML domains, go to SSO Settings, select/deselect the domains that you want to configure for SAML, then click Save.
Got questions? Feel free to submit a ticket or contact us directly at [email protected].
Updated 11 months ago