
Jira ITSM (IT Service Management)
Jira ITSM (IT Service Management) enables organizations to manage their IT services effectively, streamlining processes related to incident management, change management, problem management, and more.
Zluri's Jira ITSM integration lets you create tasks as tickets for better task management cycle tracking. This is a two-way communication — updating tasks in Zluri updates them in Jira and vice versa.
This document describes how to set up and configure this feature.
Prerequisites
- Admin privileges in Jira
- Owner or Admin privileges in Zluri
- Workflow settings enabled in Zluri. Please reach out to your Zluri Customer Success Manager to access this feature.
Add fields to all screens
-
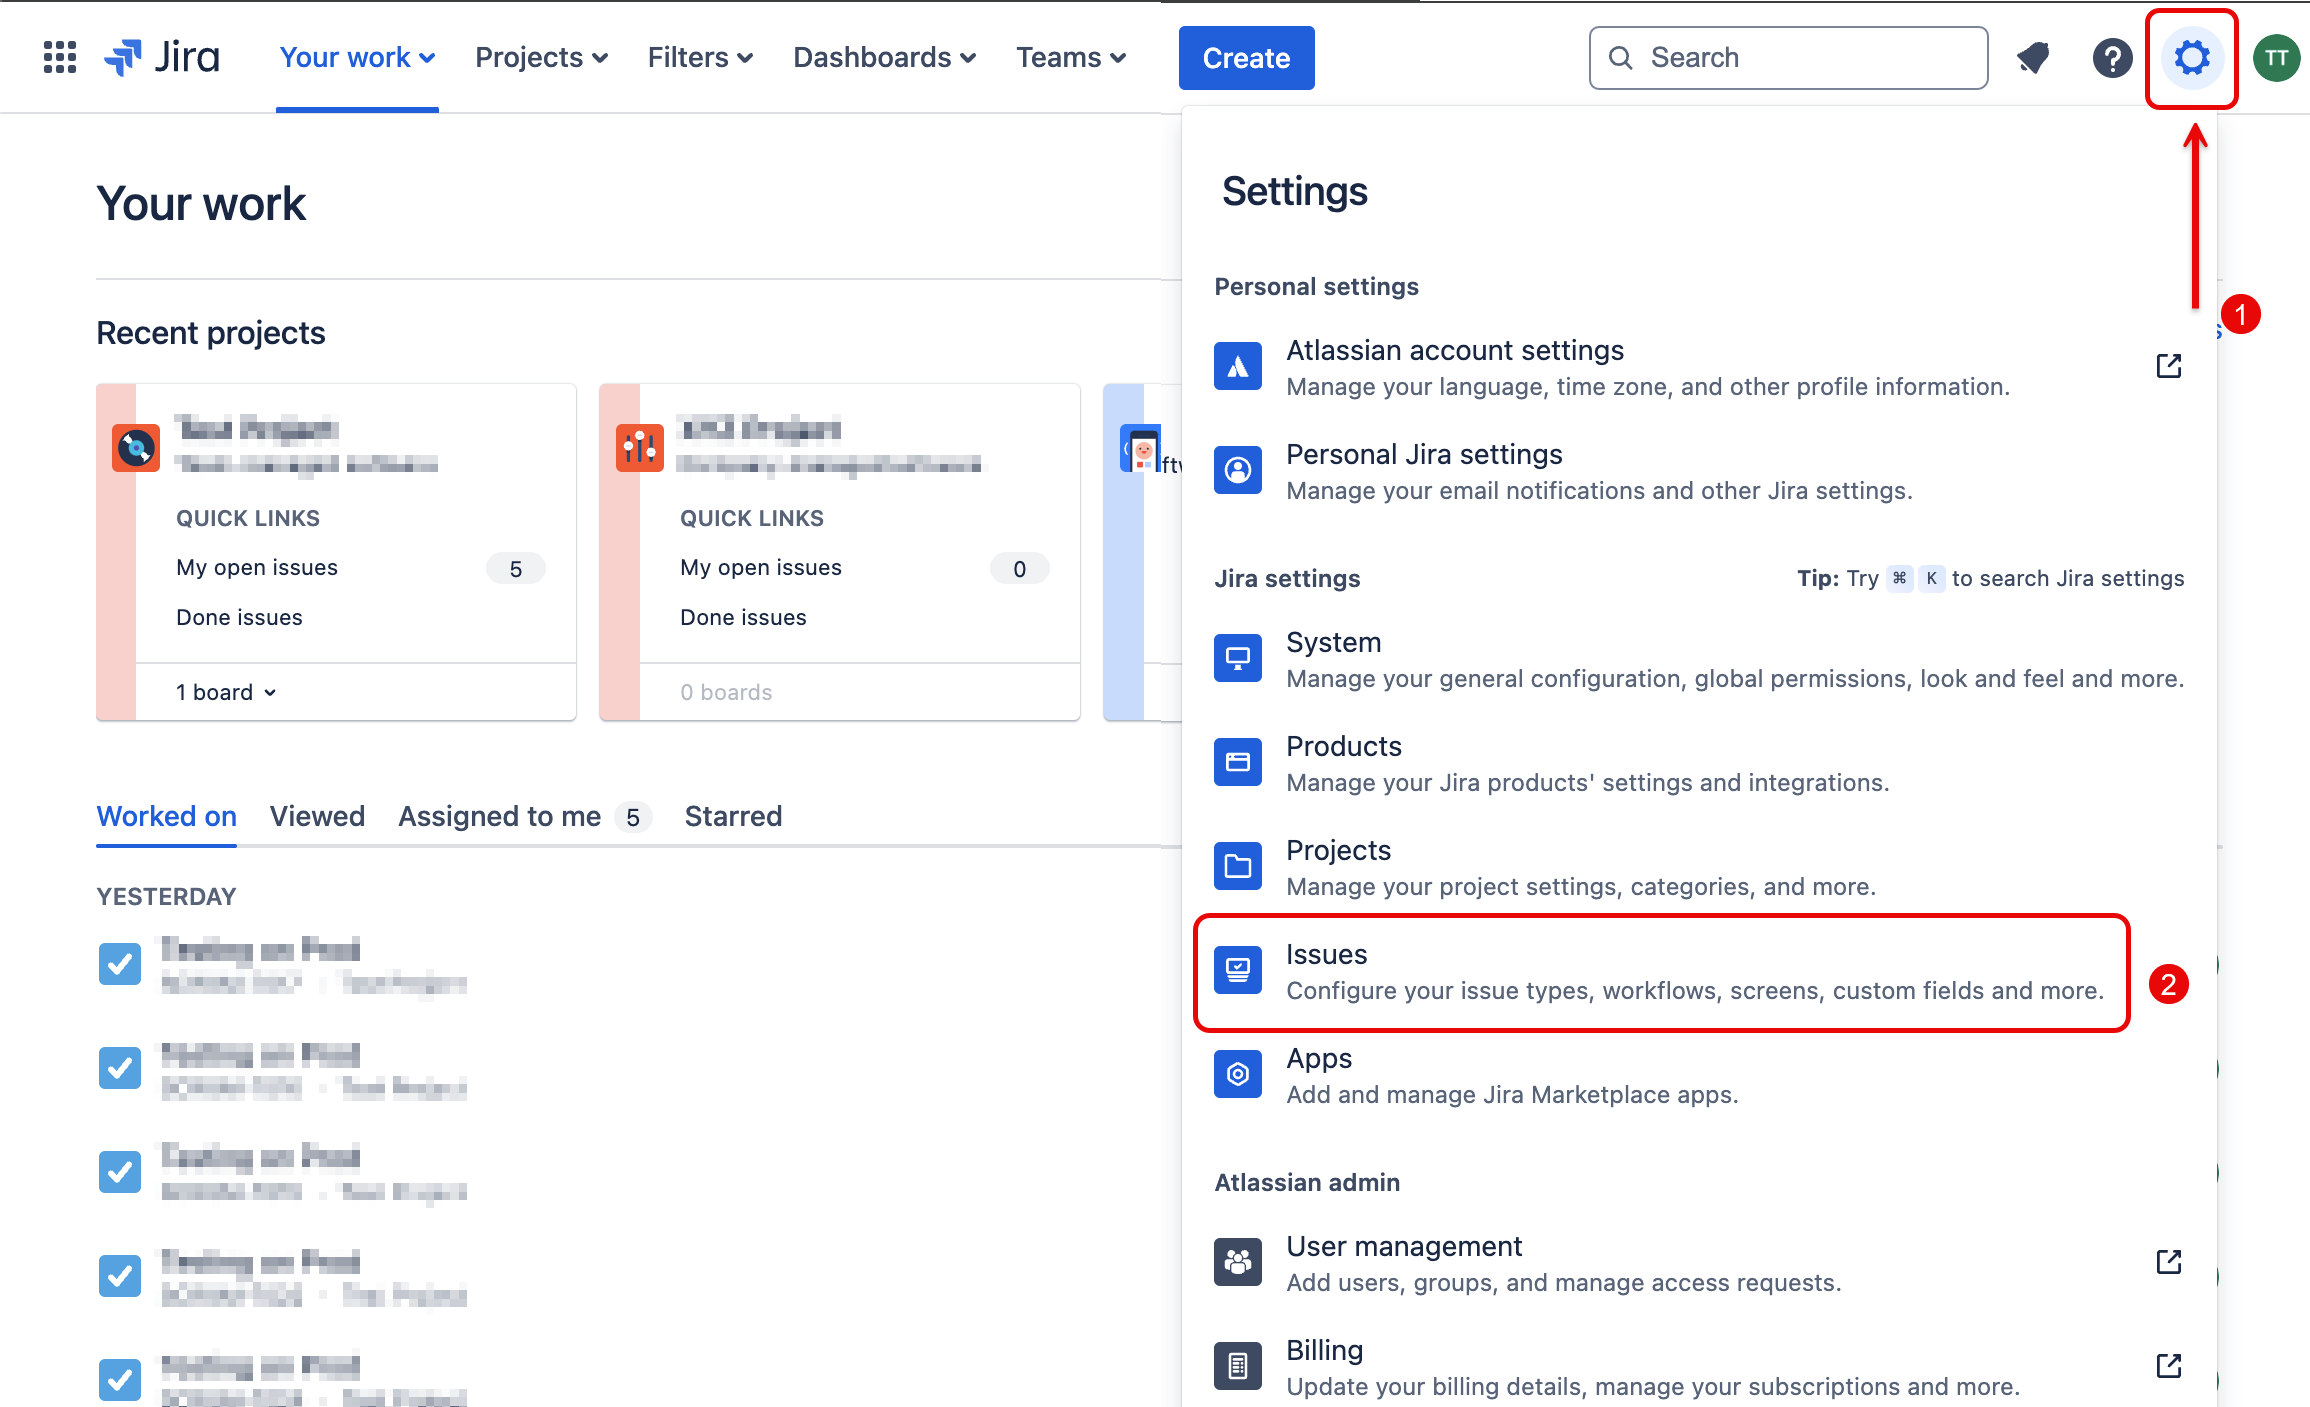
In your Jira Dashboard, click the ⚙️ Settings icon in the top-right corner of the screen, then select Issues.
-
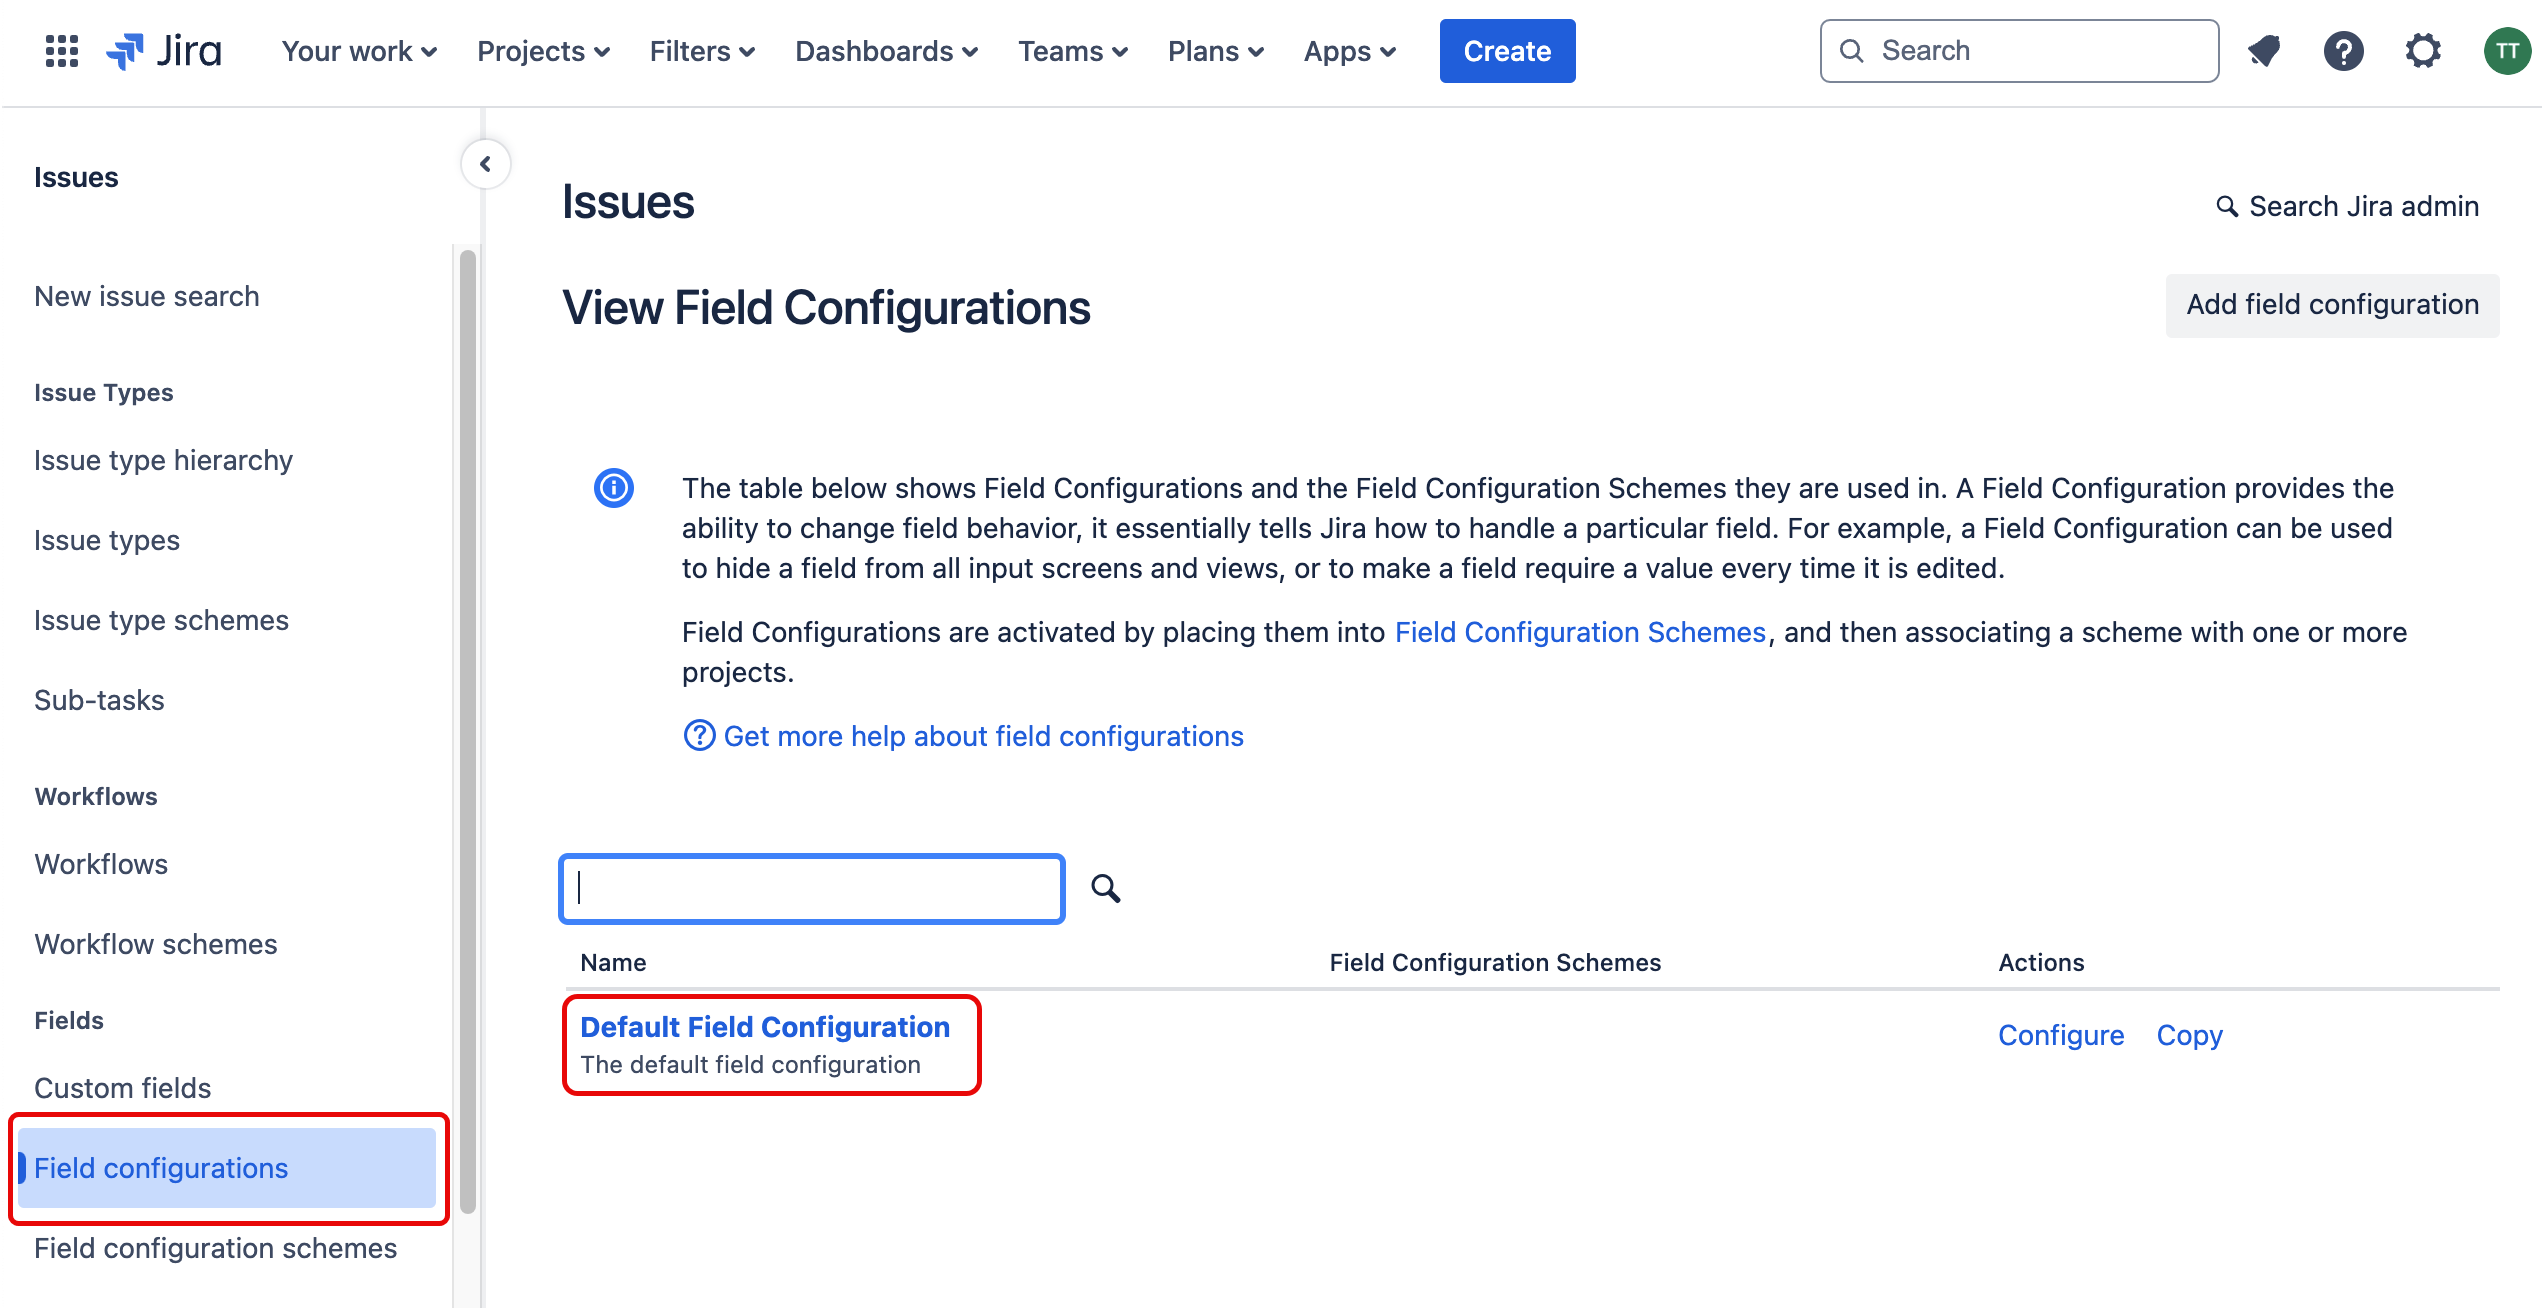
Click Field configurations in the left sidebar, then select the appropriate field for the project you are working on (Default Field Configuration in this example).
-
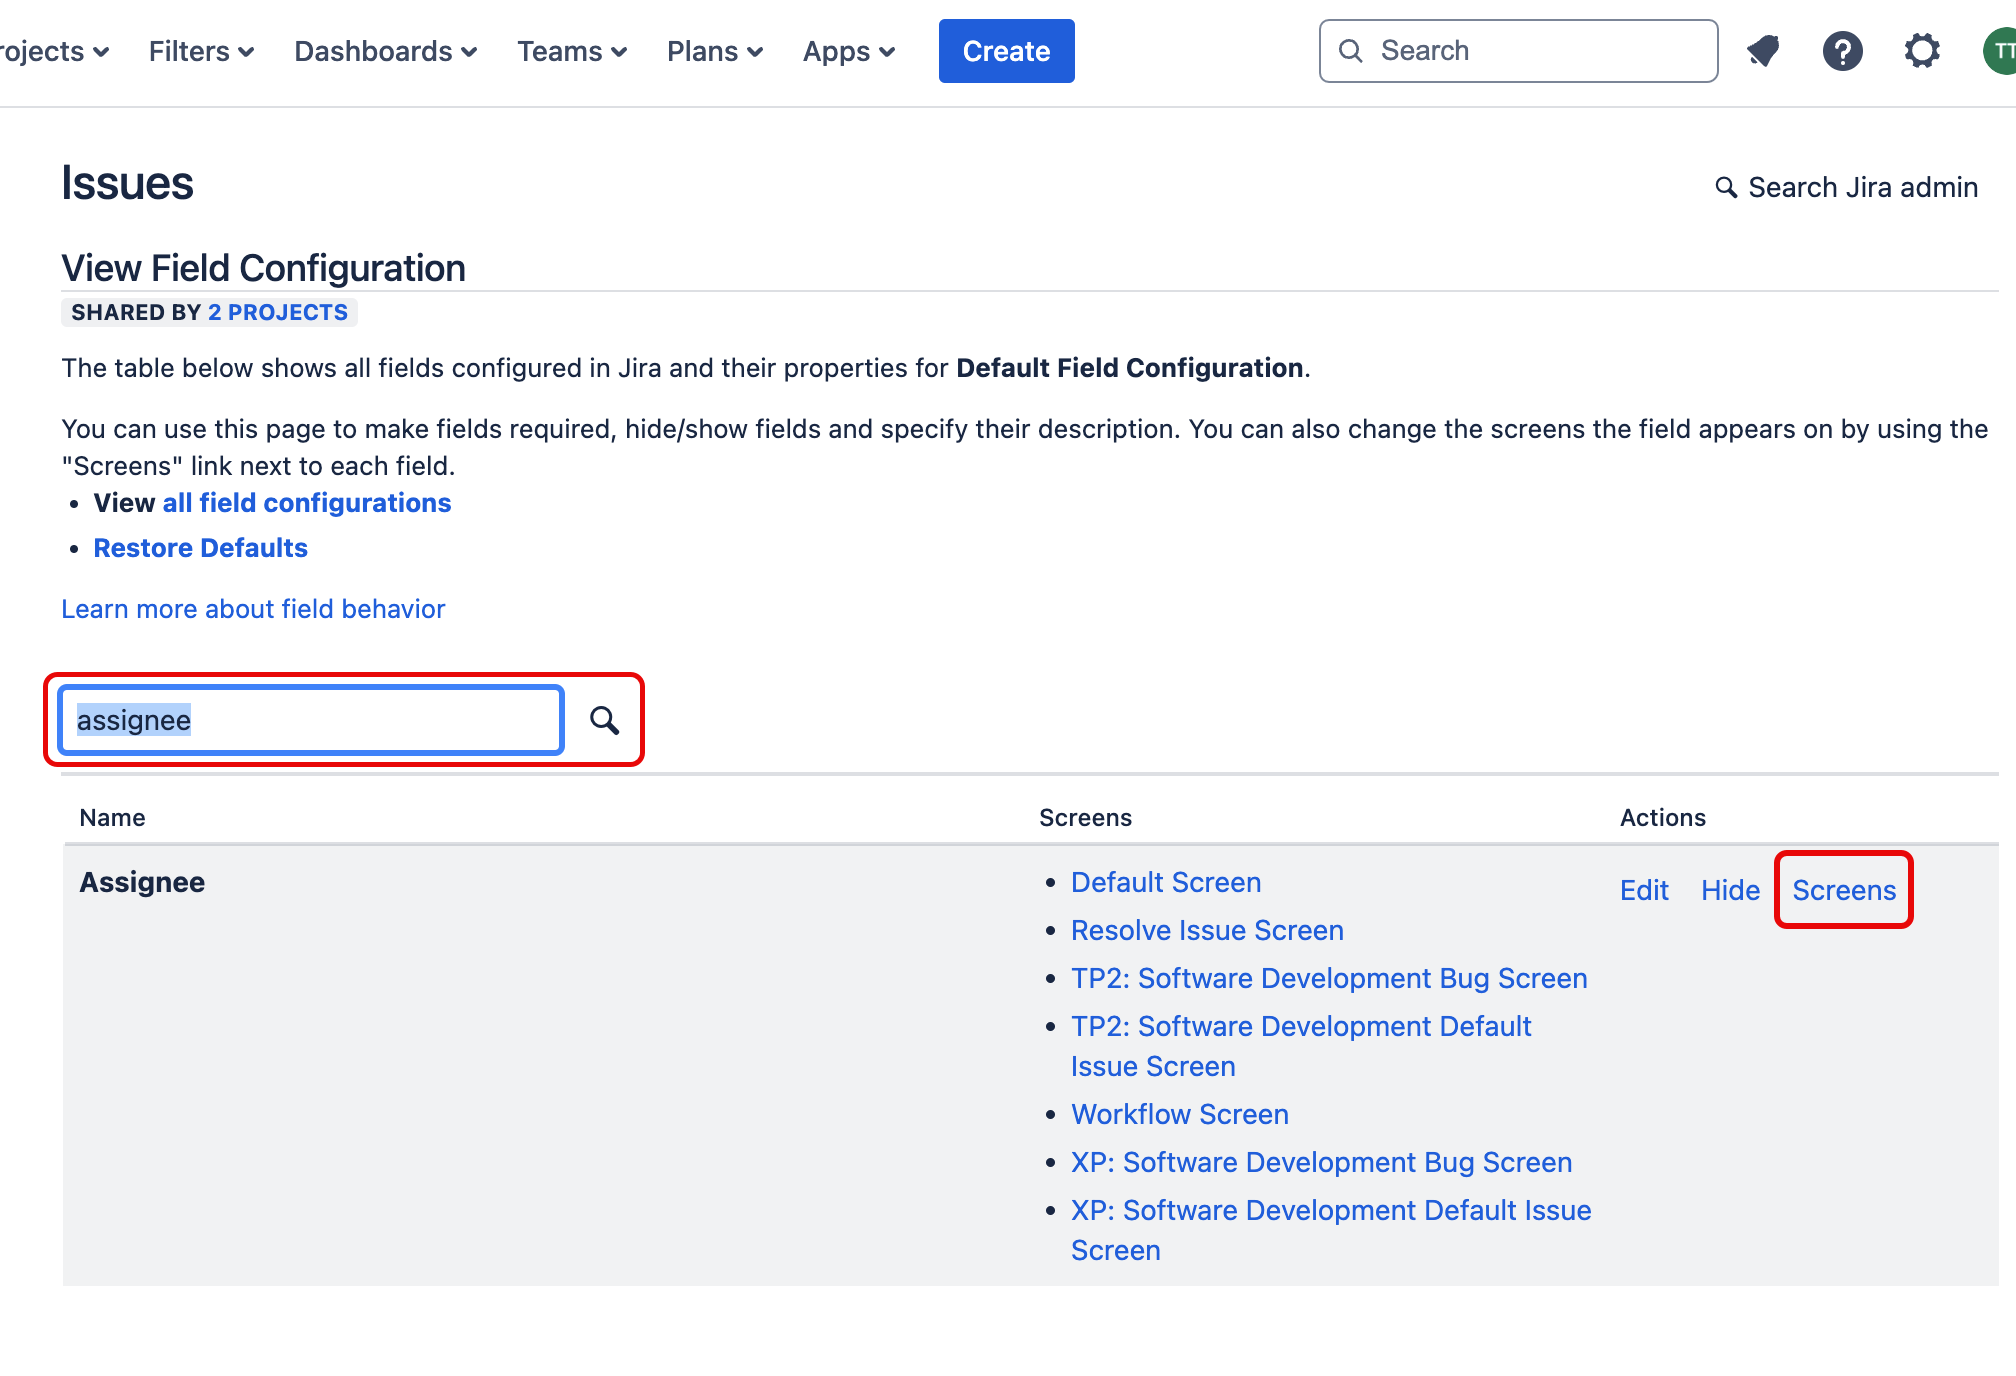
Search for Assignee in the search bar, then click Screens on the right.
-
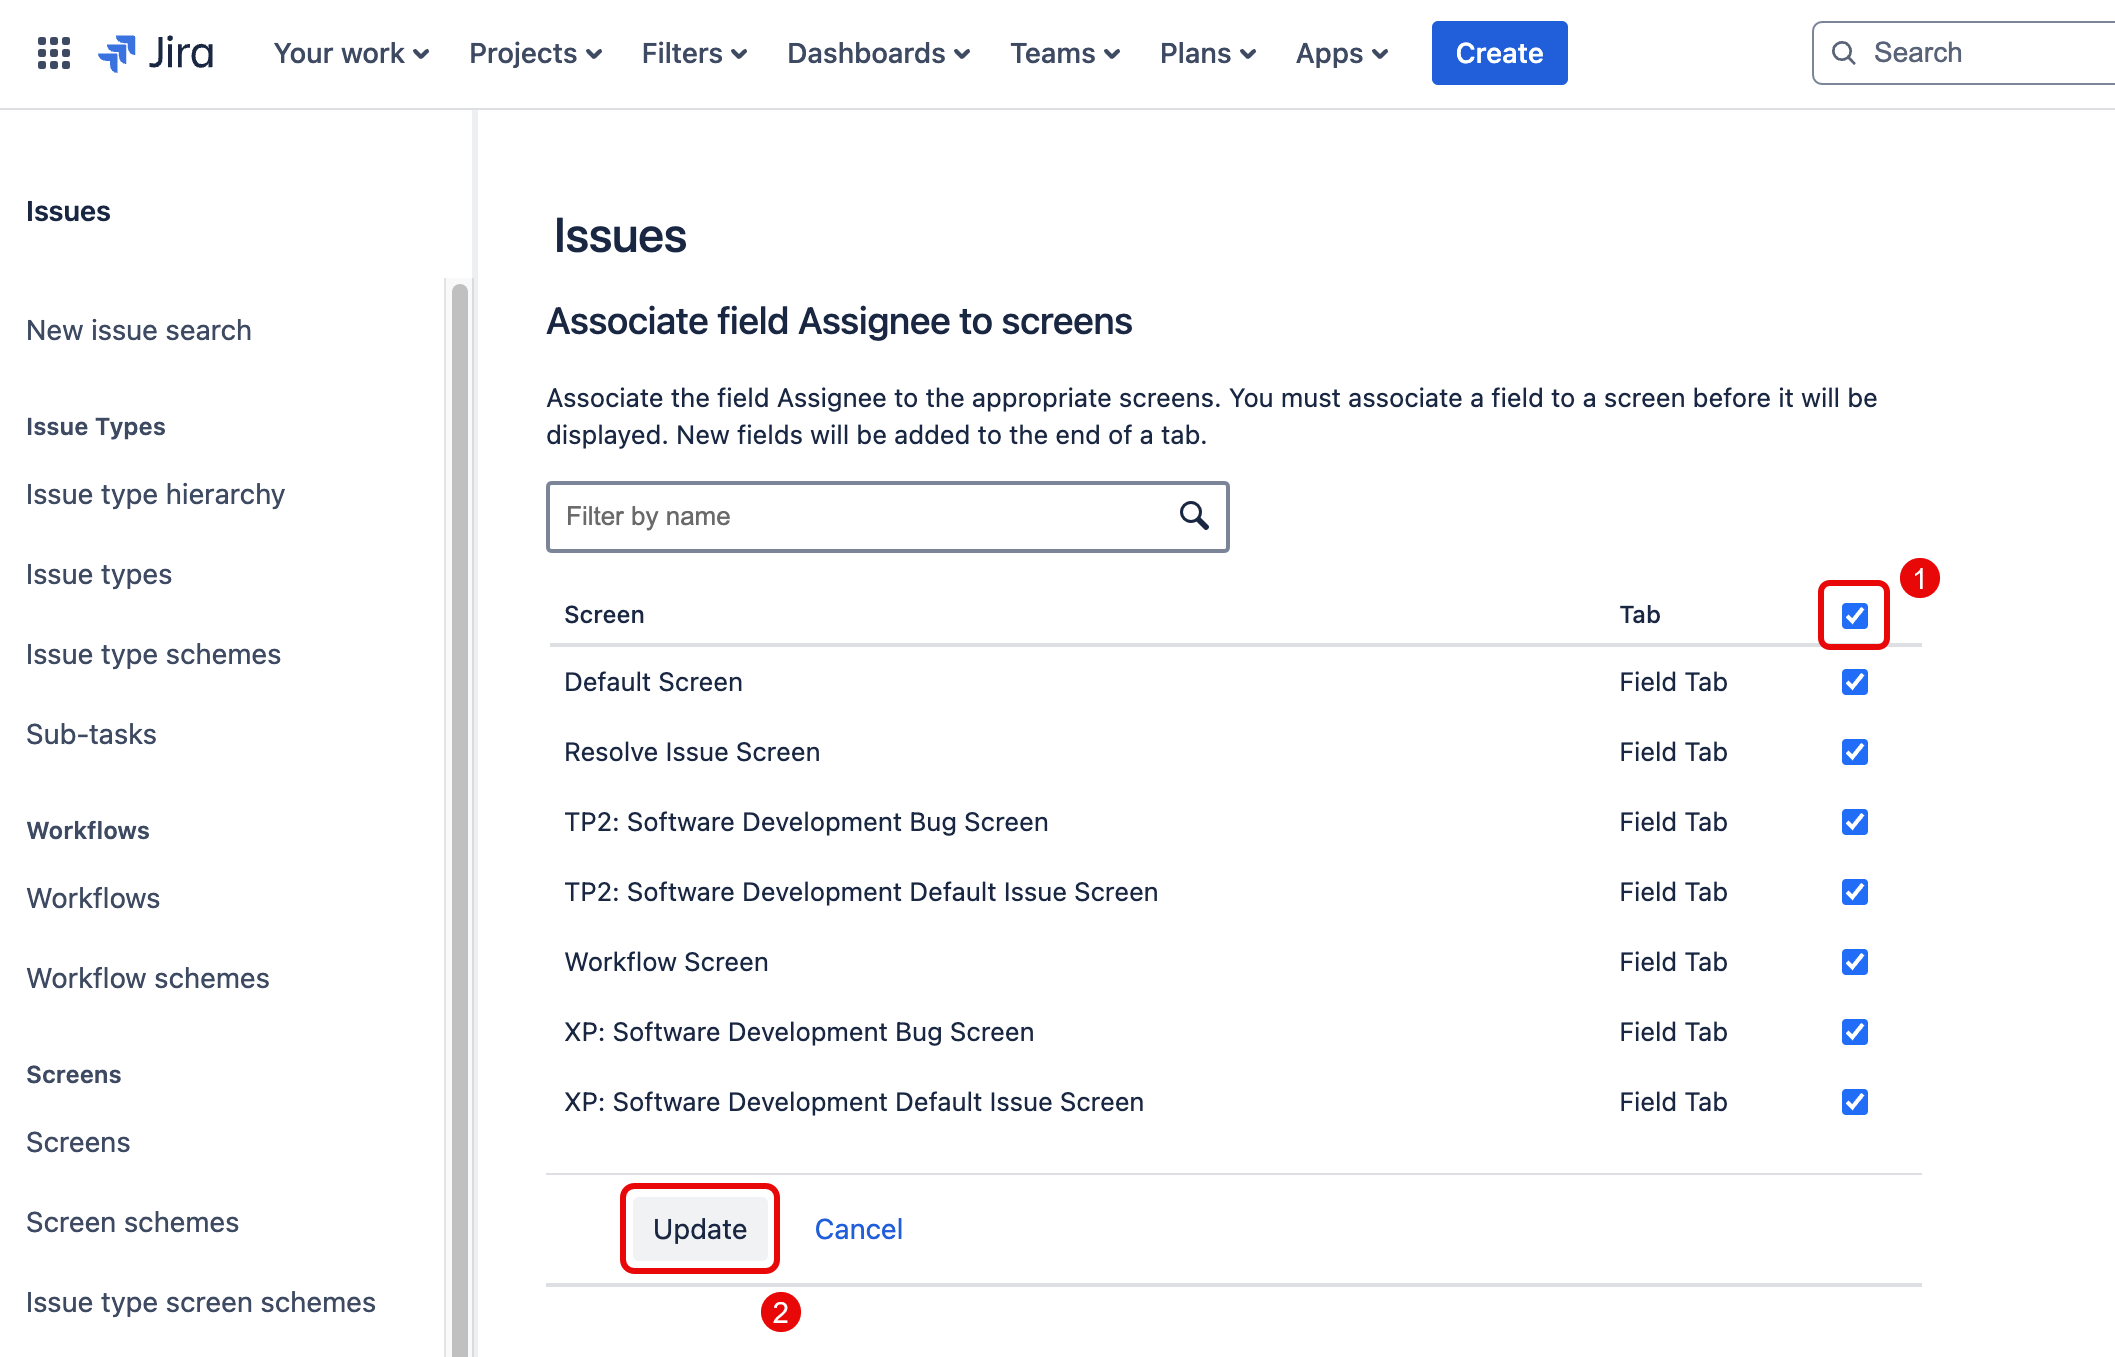
Click the Select all checkbox, then click Update.
-
Repeat points 1-4 for the following fields:
- Summary
- Description
- Epic Link
- Due Date
- Labels
- Priority
- Issue type
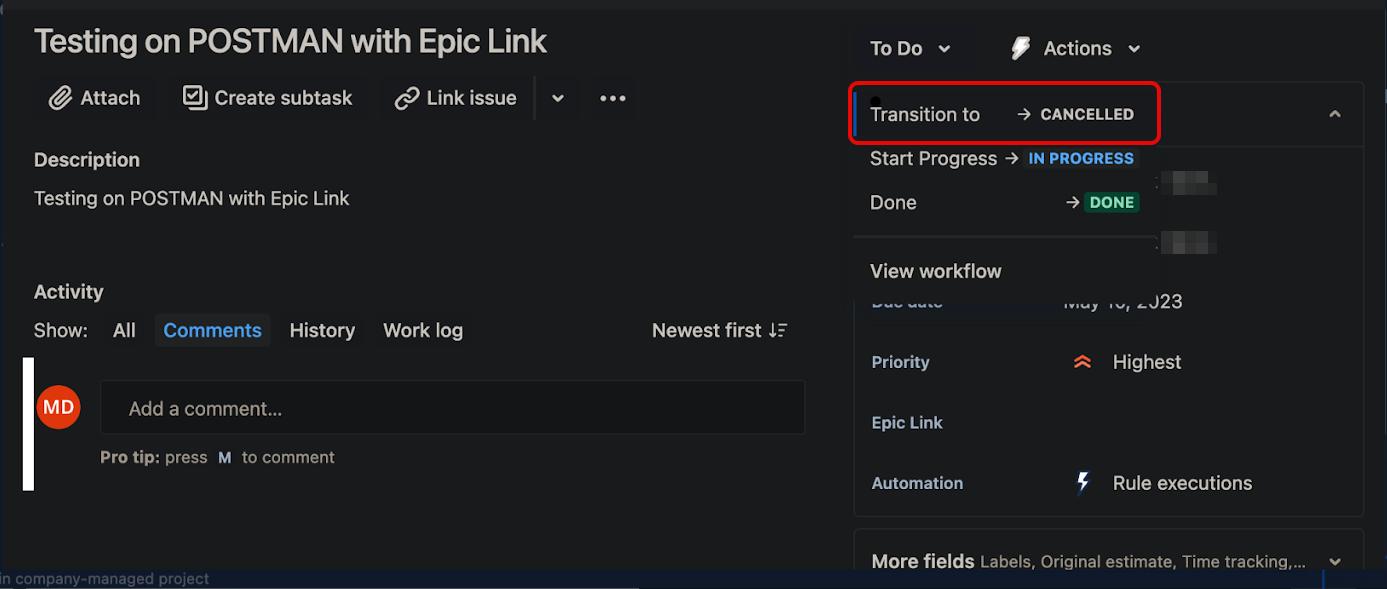
Add new "Cancelled" status for issues
- Click the ⚙️ Settings icon in the top-right corner of the screen, then select Issues.
- Select Workflows in the left sidebar.
- Click on the three dots on the right side for the project for which you want to add the additional status
- Click on Add Status Button

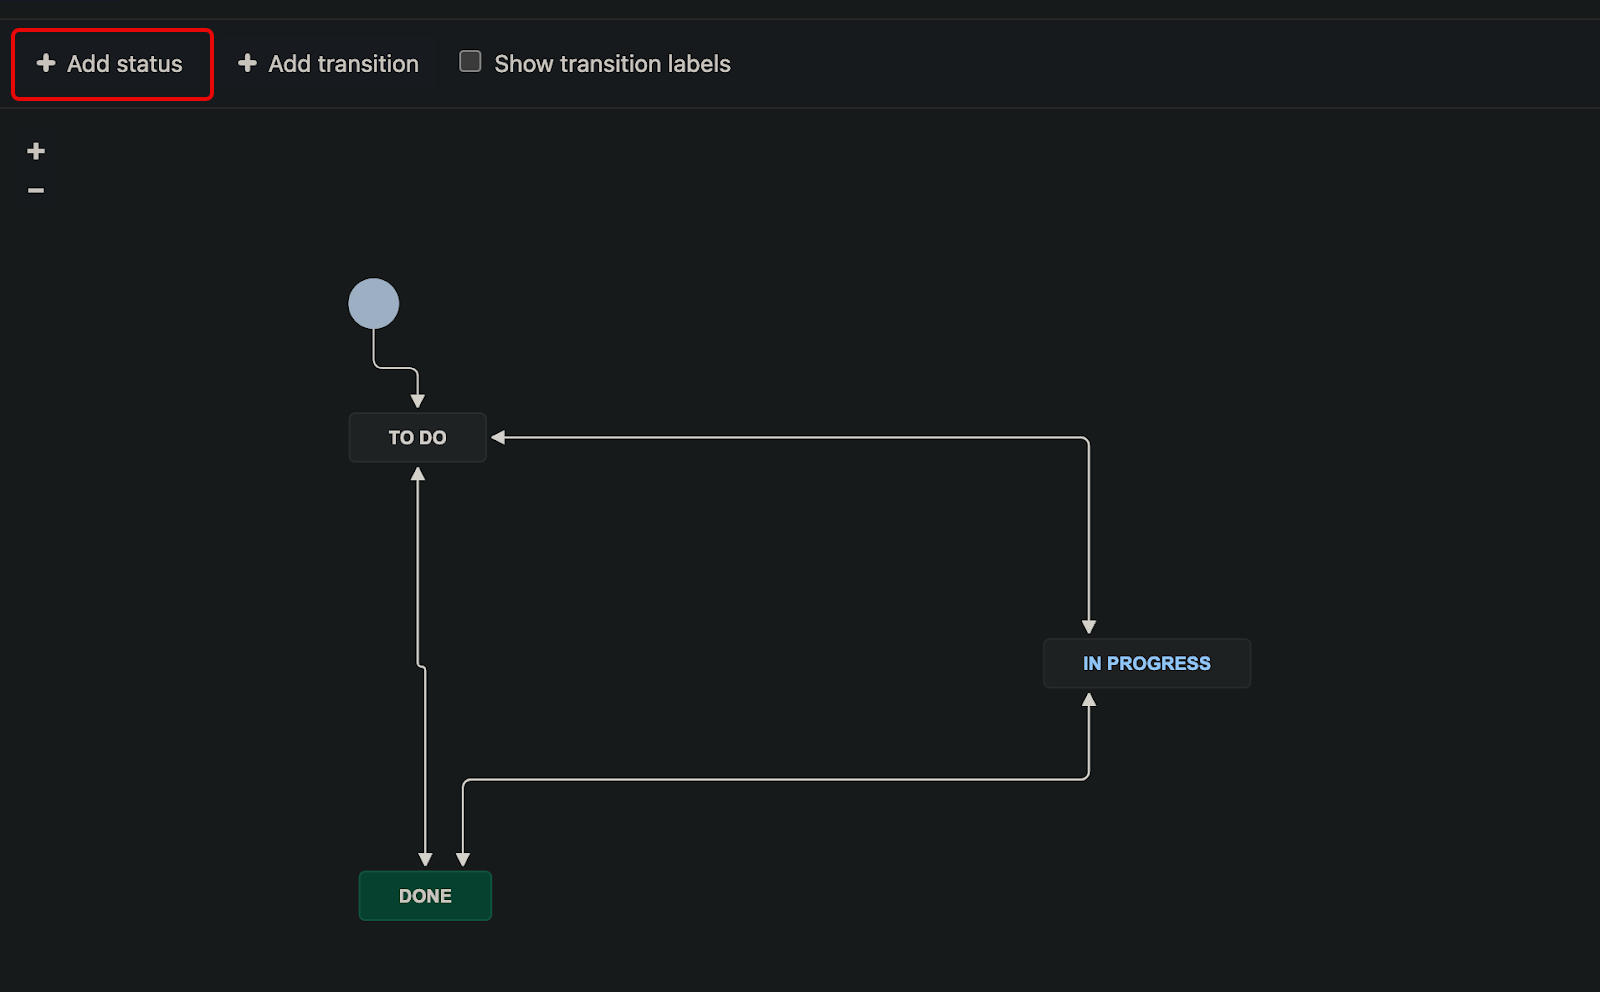
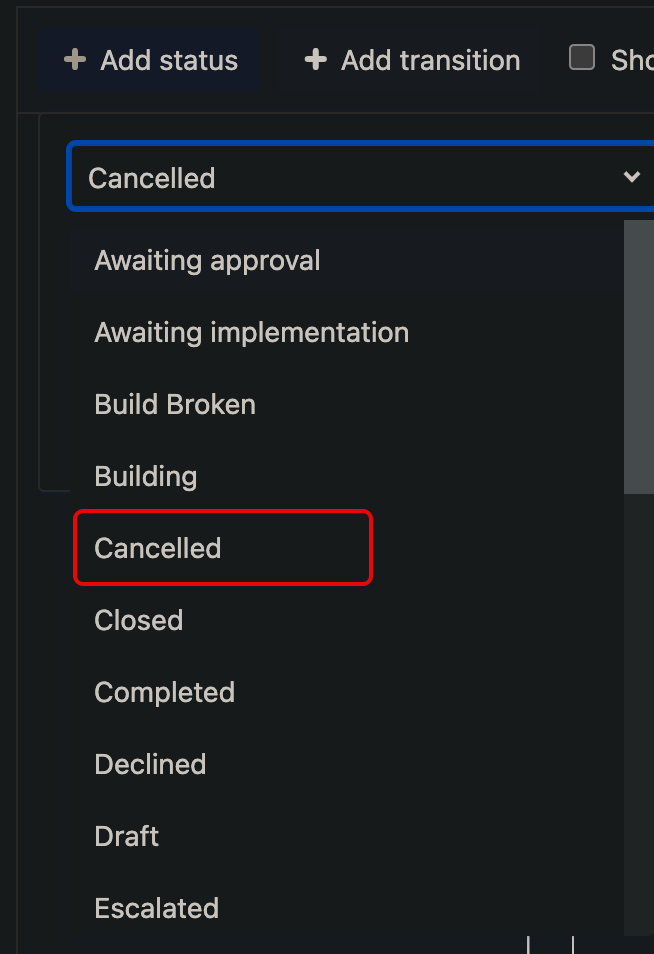
- Search for and select Cancelled.
If the Cancelled status is not present, then we can type out "Cancelled"* and add it as a new status.
-
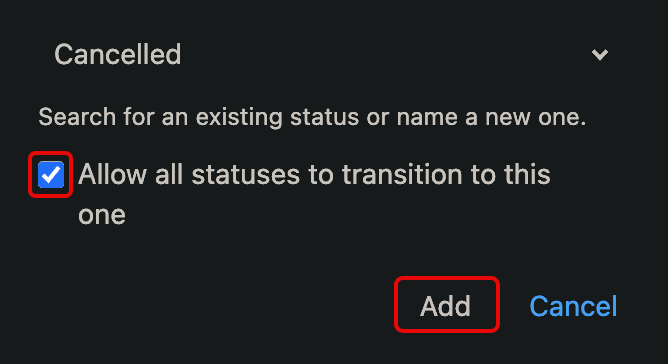
Select the checkbox for Allow all statuses to transition to this one and click Add.
-
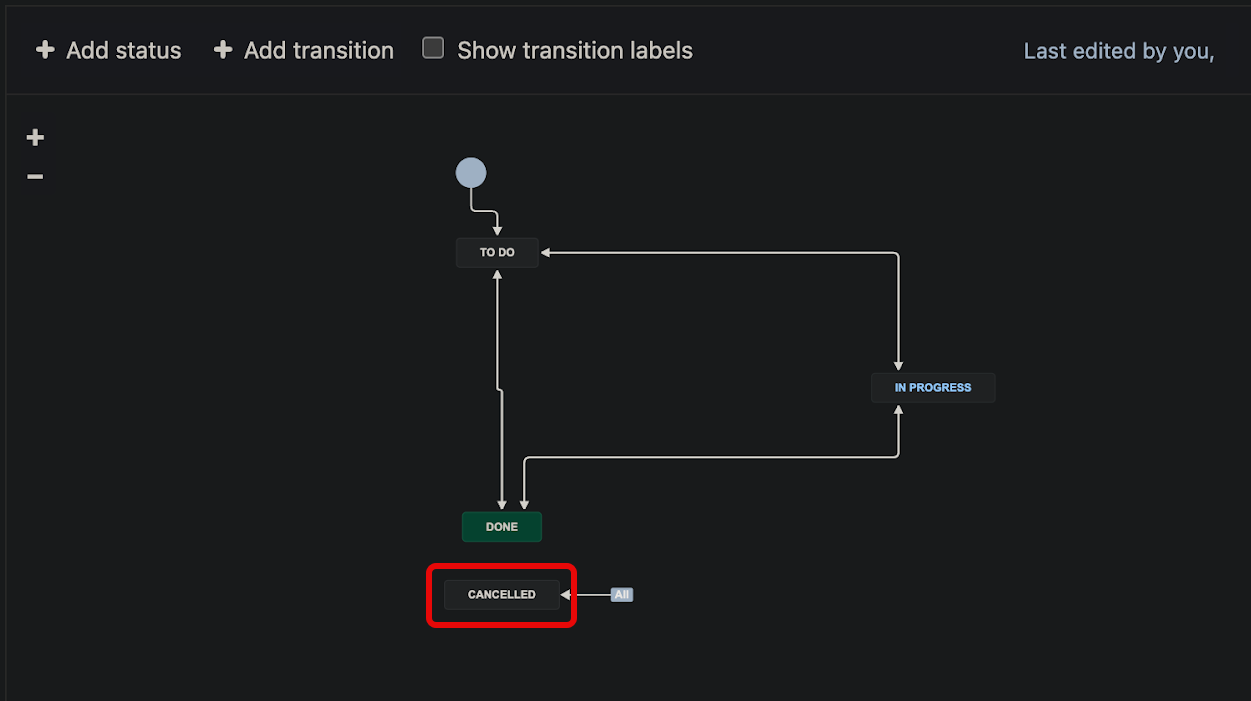
You'll now see the Cancelled button on the bottom.
-
Click on Publish Draft.

-
Back in the Issues screen, verify that the new status has been added to the list.
Configure Workflow Settings in Zluri
- Log in to Zluri with Owner or Admin credentials
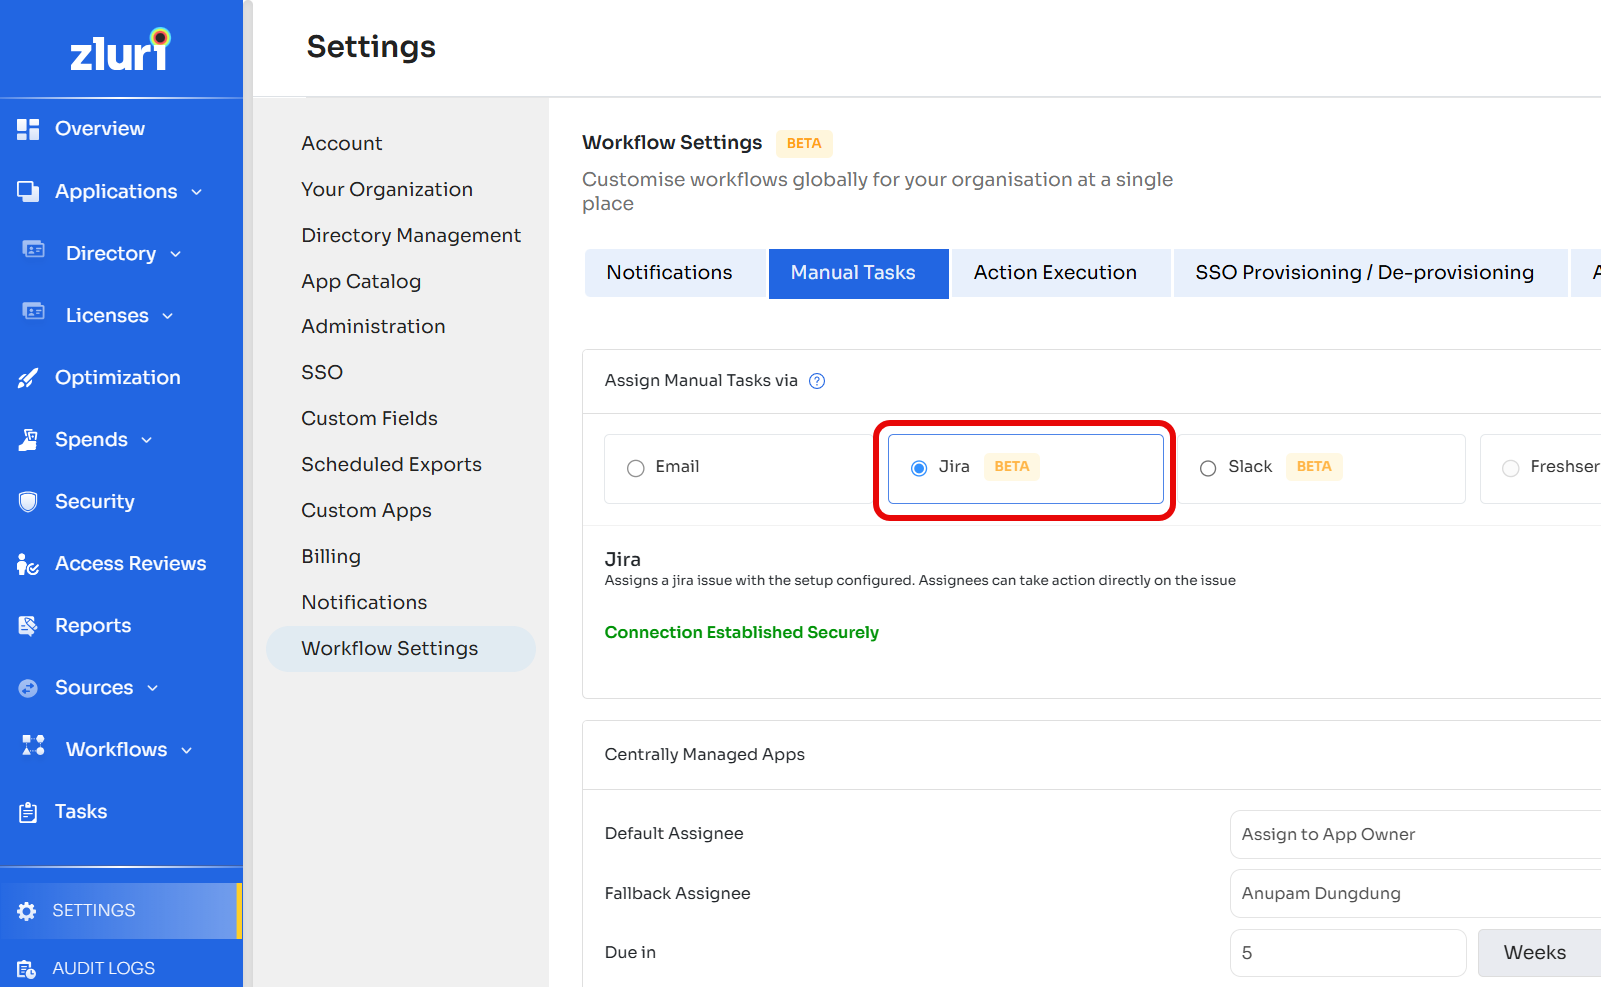
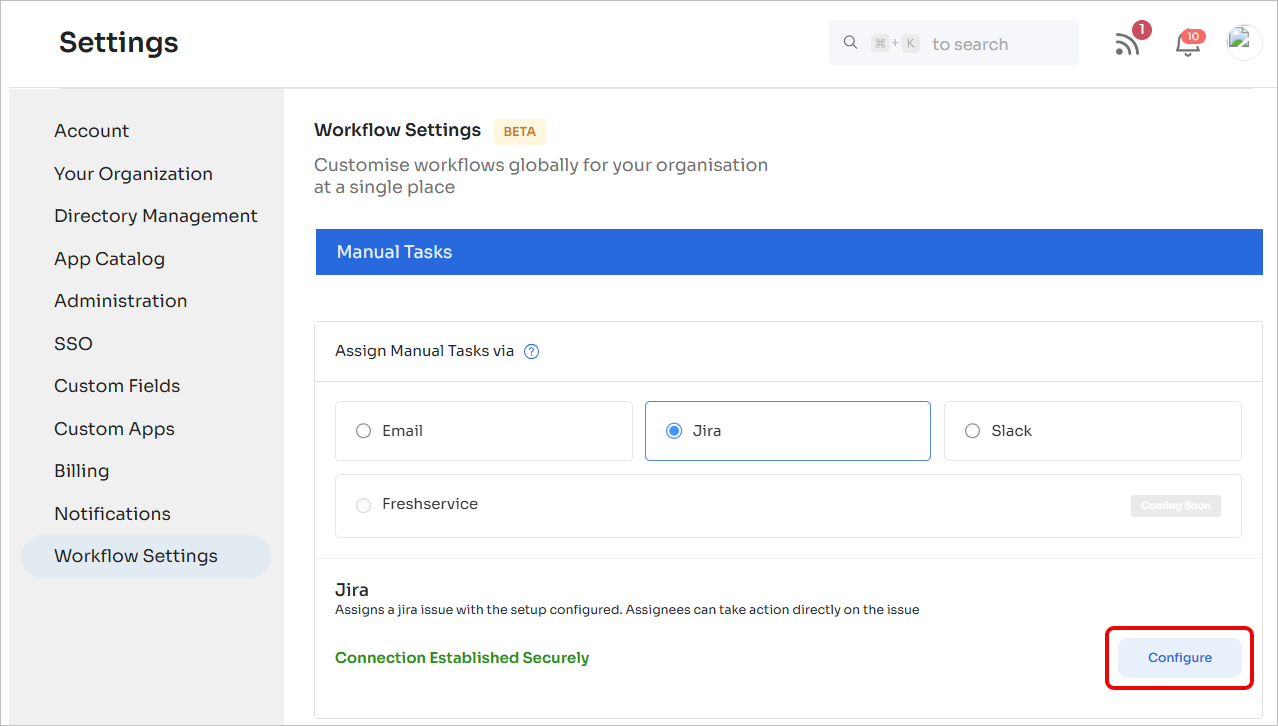
- Navigate to Settings → Workflows Settings → Manual Tasks.
If you don't have access to this feature, please reach out to your designated Zluri Customer Success Manager.
-
Select Jira for default task assignment.
Scenario 1: Connect to a new Jira instance
Follow these instructions in case you don't have the Jira integration already connected to Zluri. Otherwise, skip to scenario 2: One or more Jira instances already connected to Zluri
-
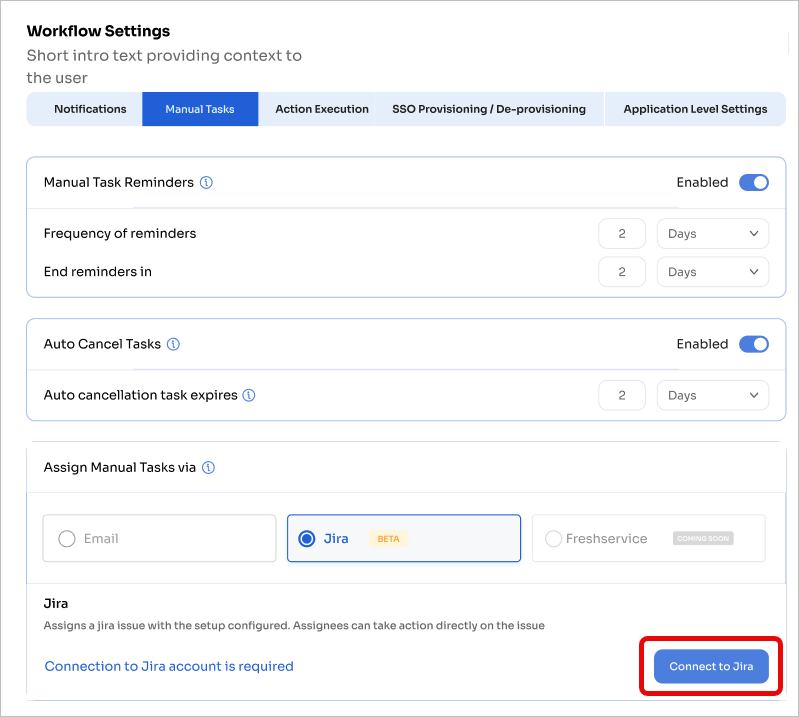
Click the Connect to Jira button to initiate the connection process.
-
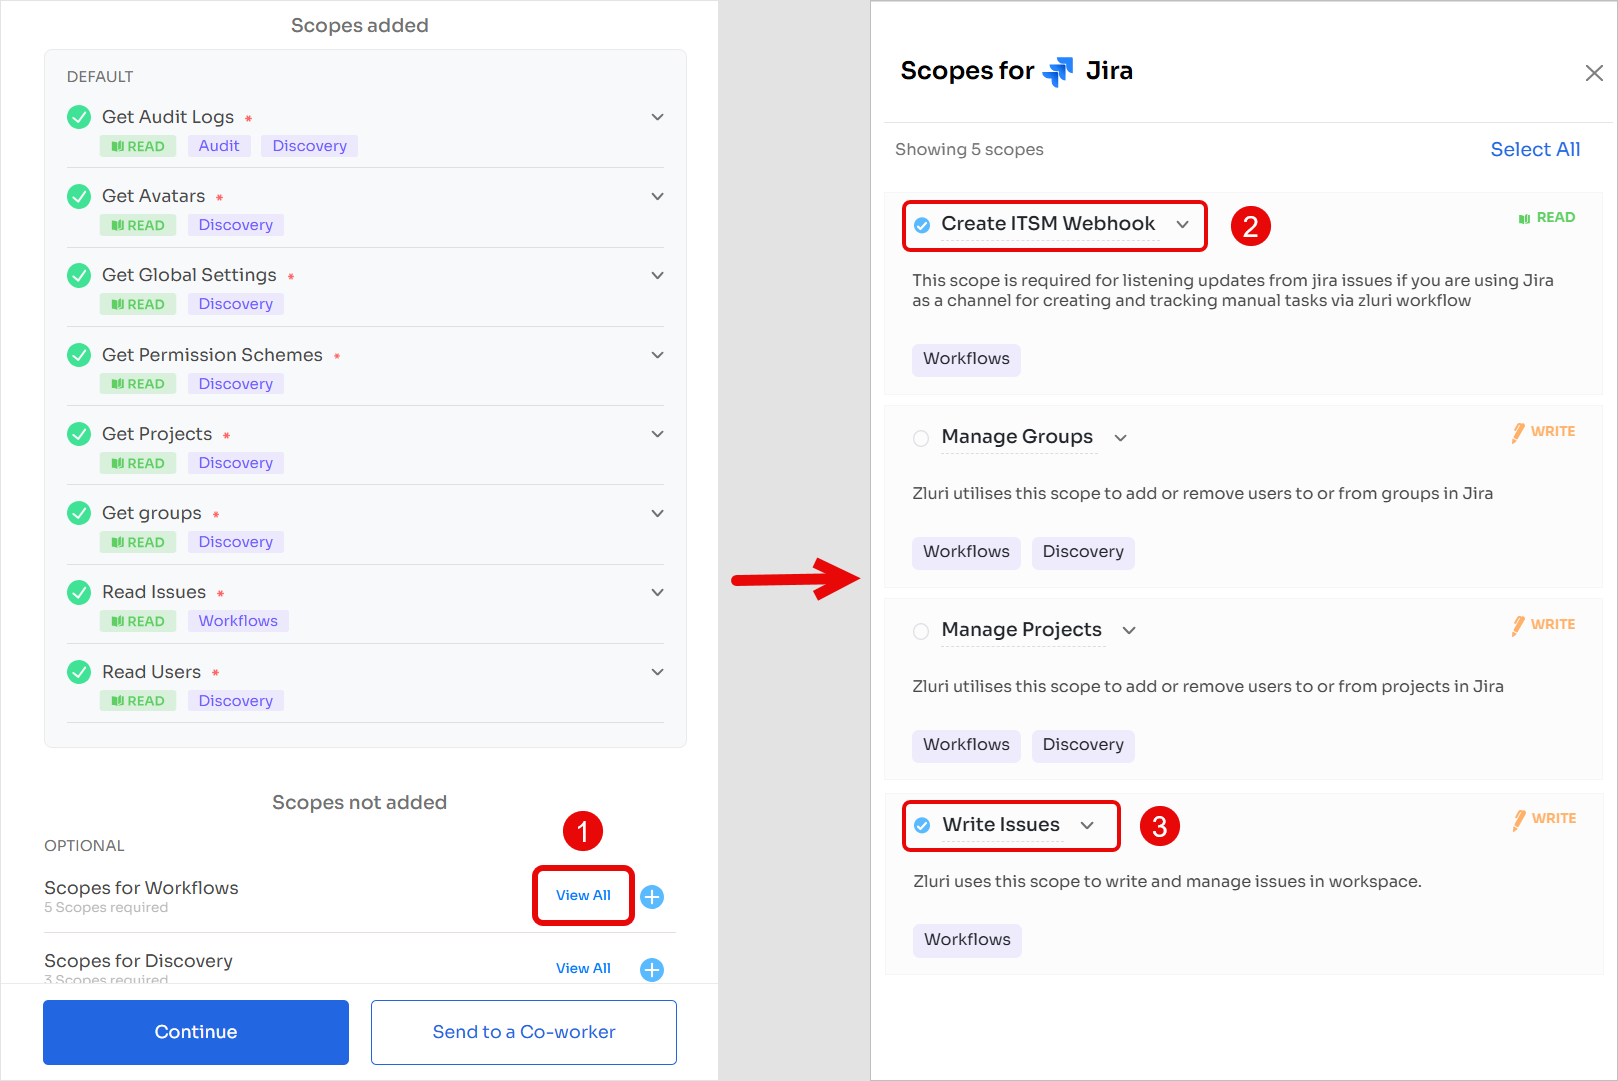
Connect Jira to Zluri; make sure to select the Create ITSM Webhook and Write Issues scopes.
Scenario 2: One or more Jira instances already connected to Zluri
Follow these instructions if you have already connected one or more Jira instances to Zluri.
You can only use Jira ITSM if the integration is connected with Create ITSM Webhook and Write Issues scopes. If not, follow the instructions in Scenario 1 to reconnect the integration.
-
Log in to Zluri with Owner or Admin credentials
-
Navigate to Settings → Workflows Settings → Manual Tasks.
-
Click Configure.
-
Select the desired Jira instance from the list.
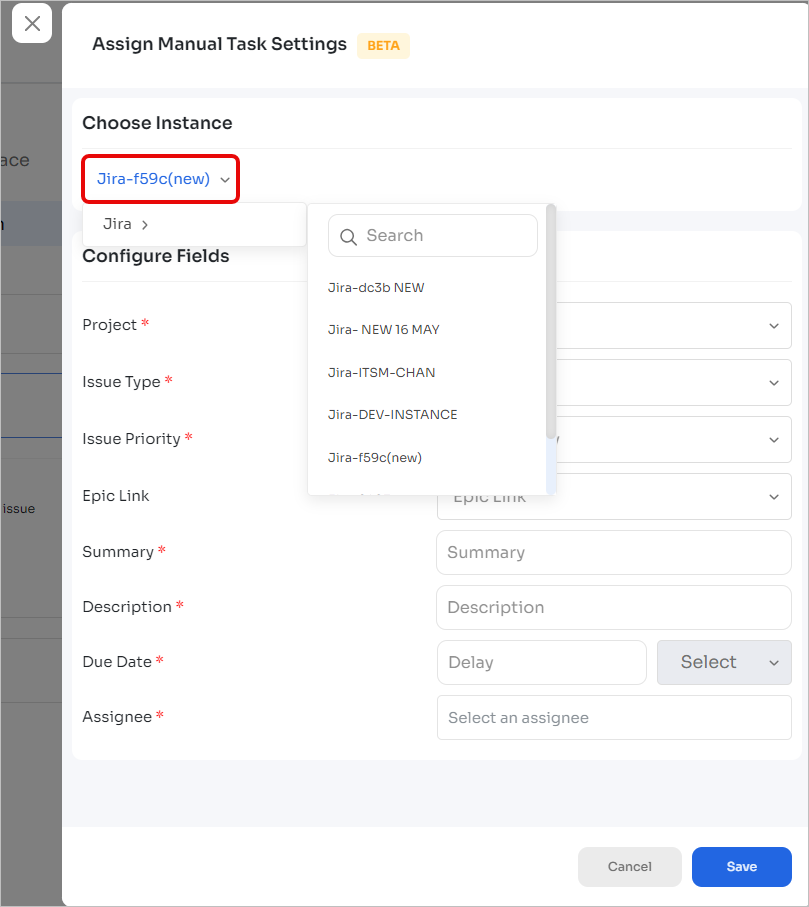
-
Configure the default fields that you'll use for creating tasks. Ensure that the necessary fields are mapped correctly to avoid any data discrepancies. Click Save once done.
Post-setup
Creating new tasks
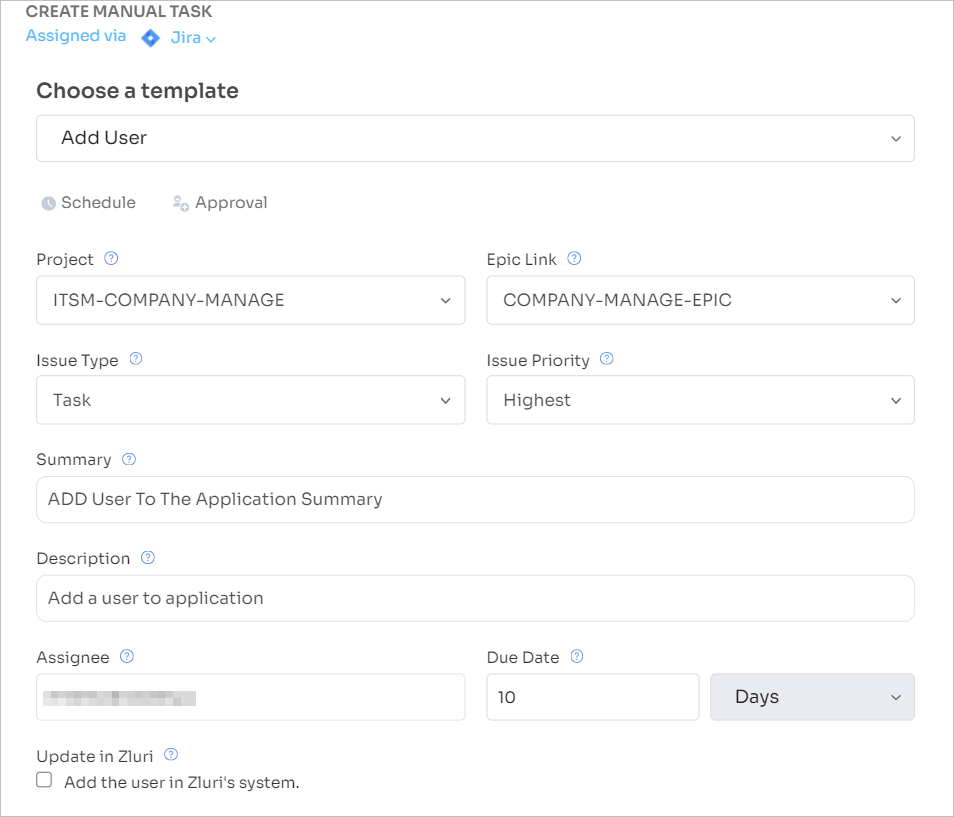
Any Manual tasks will now be assigned to Jira by default.

Additionally, all the default fields will be pre-populated with the parameters configured through the workflow settings.
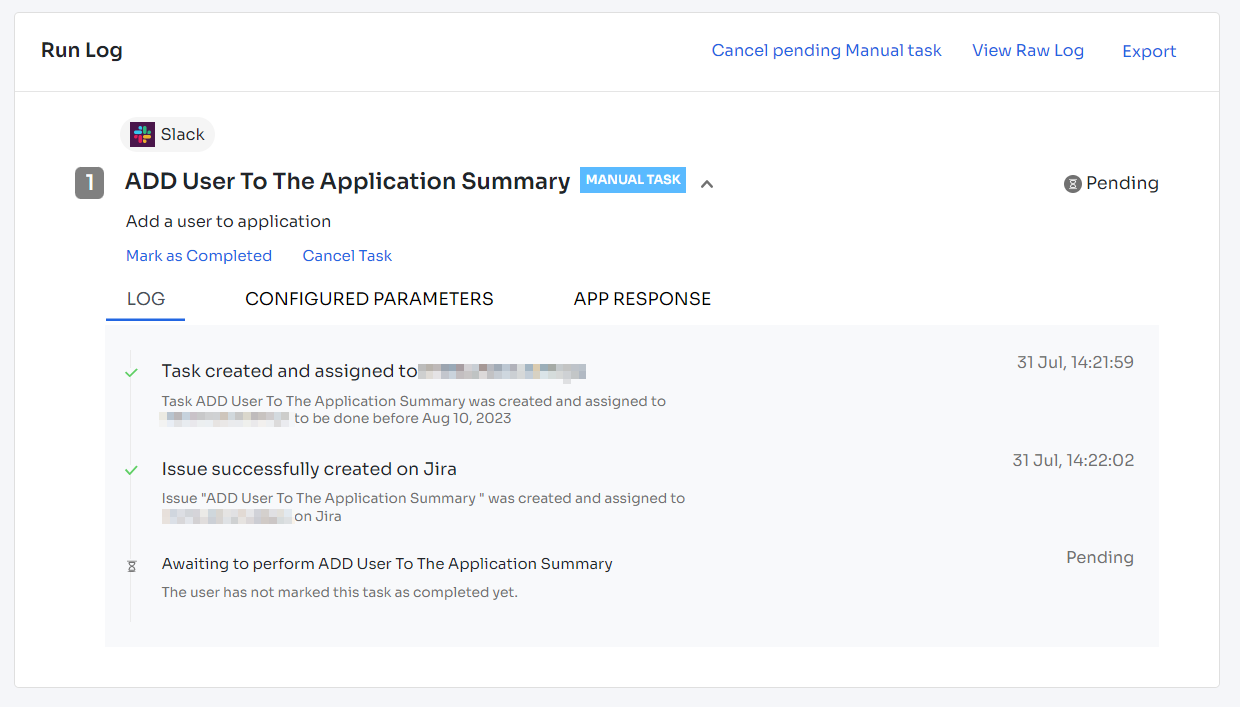
Viewing run logs
After running a workflow, you can see its run log:
-
Navigate to Workflows → Onboarding (or Offboarding) → Run Logs.
-
Click View Log for the specific workflow run.
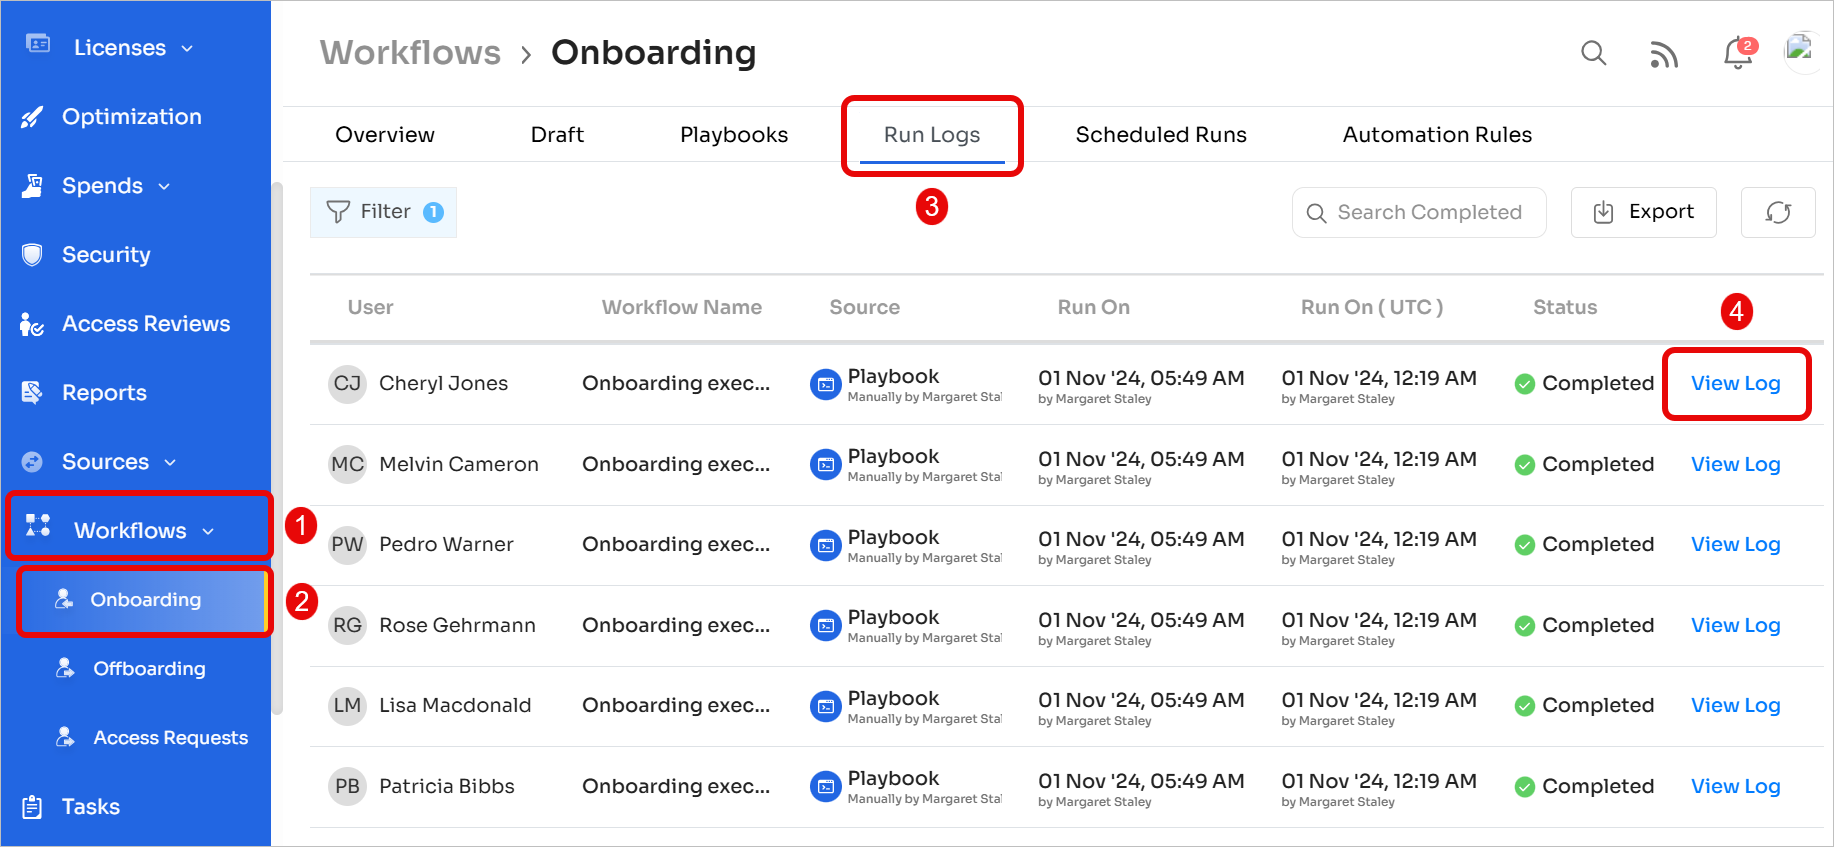
Here, you can see:
-
Task name and type
-
Application involved
-
Current task status
-
Pending action(s)
-
Timestamps
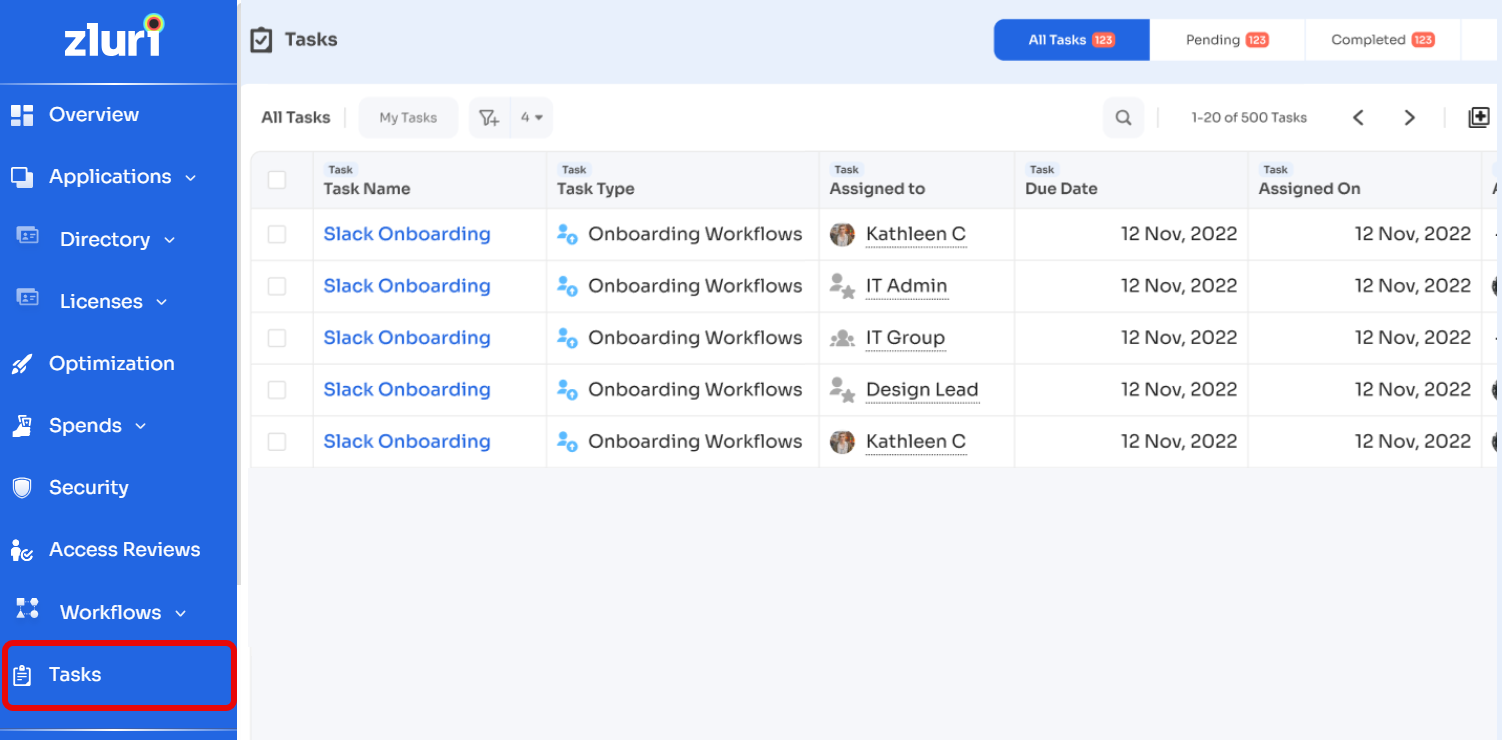
View and manage tasks
You can view and manage tasks in the Tasks dashboard.
Got questions? Feel free to submit a ticket or contact us directly at [email protected].
Updated 7 months ago