Connect
Connect Cyberark to Zluri
Prerequisites
- System Administrator privileges in CyberArk
Integration steps
Create a service user in CyberArk
-
Log in to the CyberArk Admin Portal.
-
Navigate to Core Services → Users → Add User and enter the following information:
-
Login name: A login name for the user. We will use this as Client ID while connecting the integration
-
Suffix: Enter the account’s login suffix
-
Display name: A descriptive name for the user
-
Password Type: Enter a password manually or let CyberArk generate one for you. We will use this as Client Secret while connecting the integration
-
Status: Check the Is service user checkbox

-
-
Click Create User
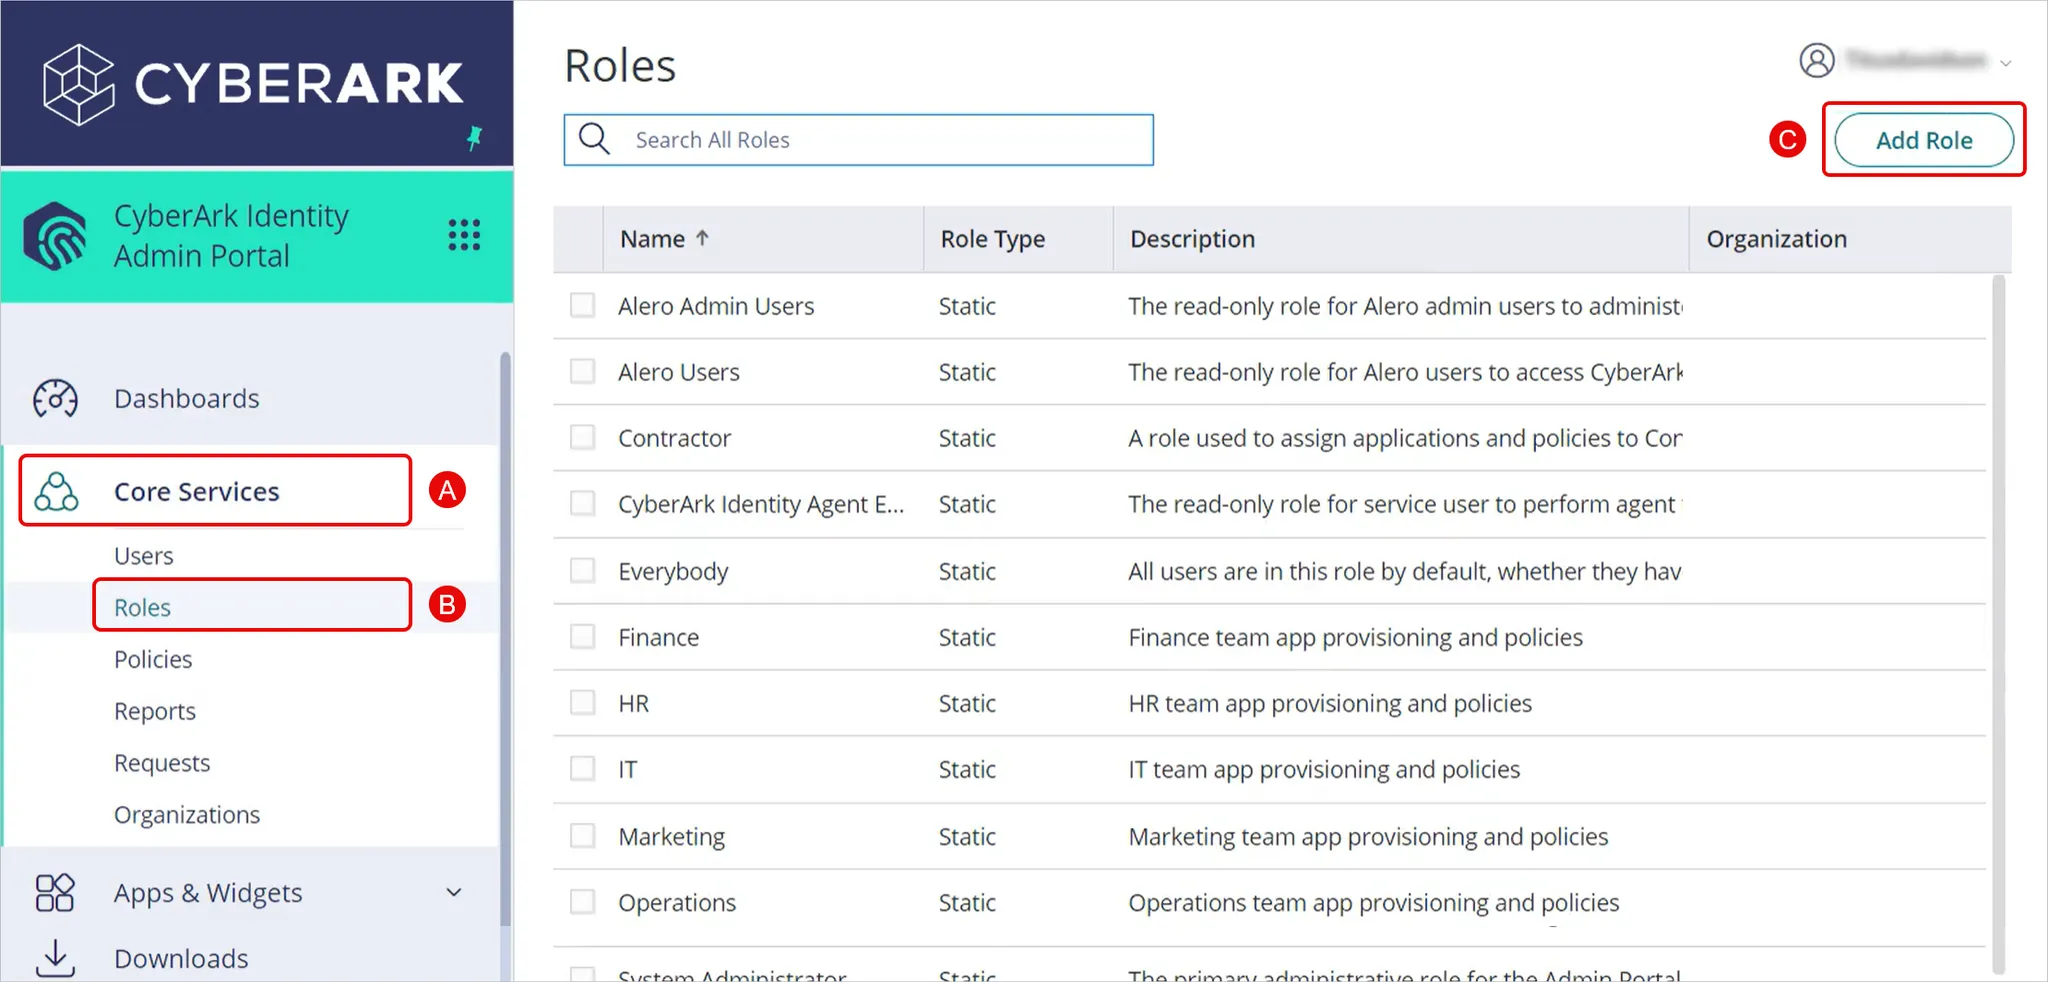
Create a new role for Zluri
-
Navigate to Core Service → Roles. Click Add Role
-
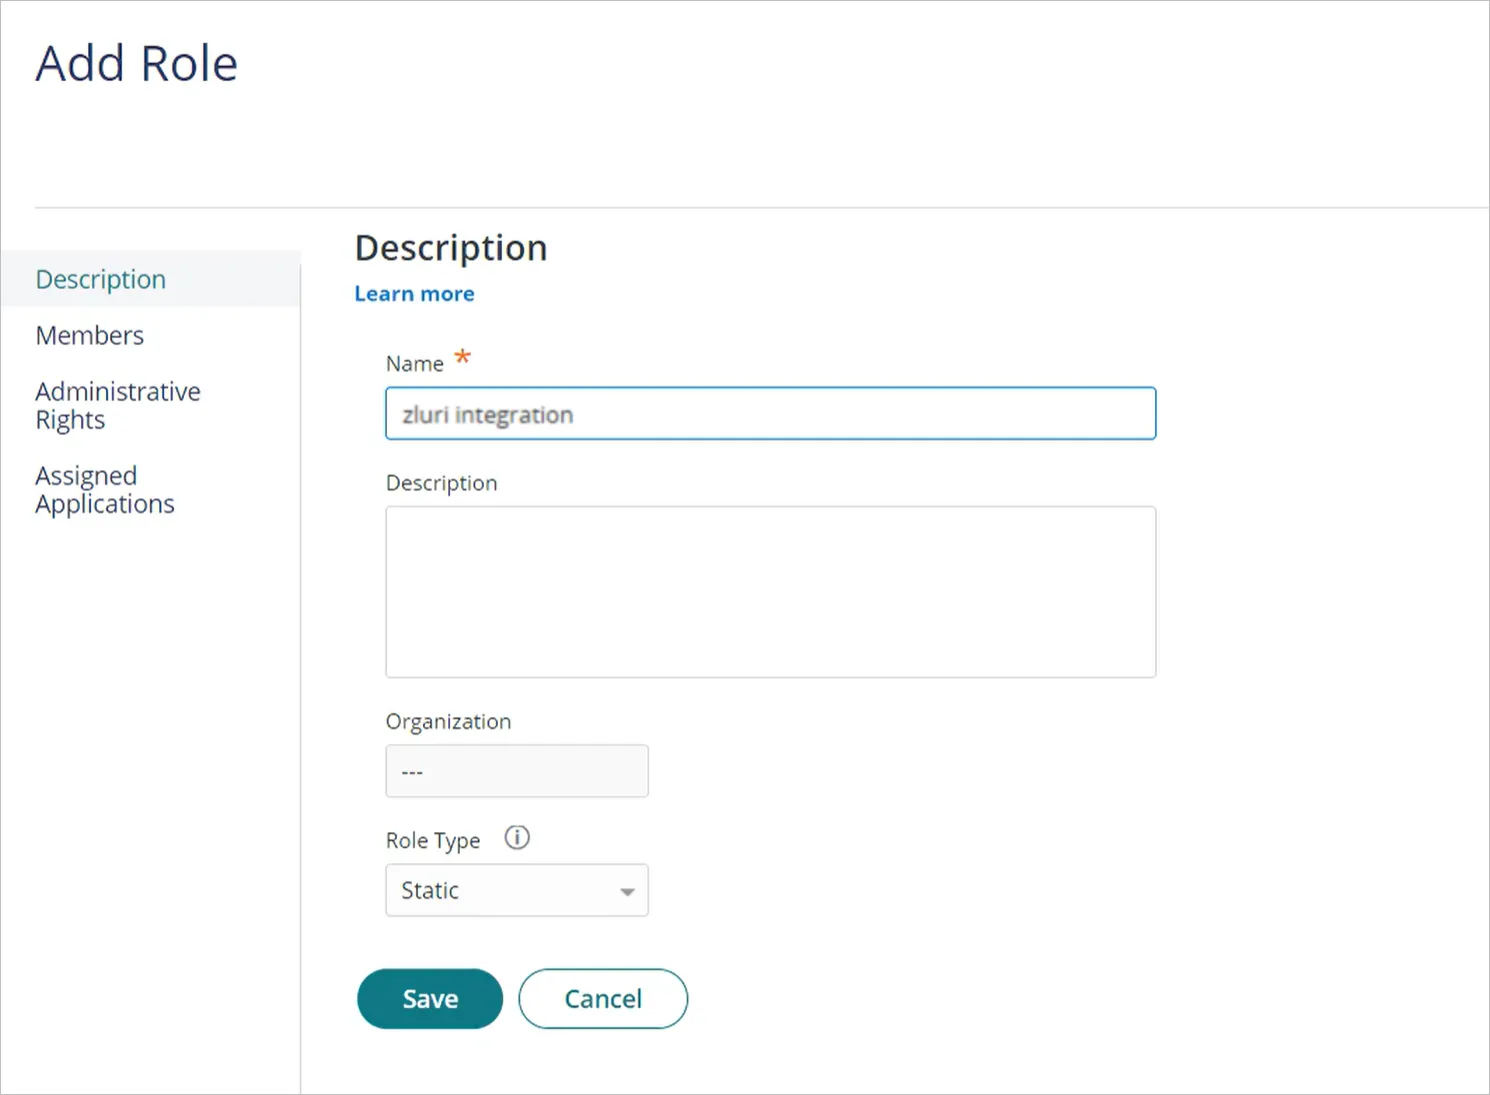
Give the role a descriptive name, set the Role Type as Static, and save
-
In the Members section, click Add
-
Search for and select the user you created previously and click Add
-
Click Save in the next screen
-
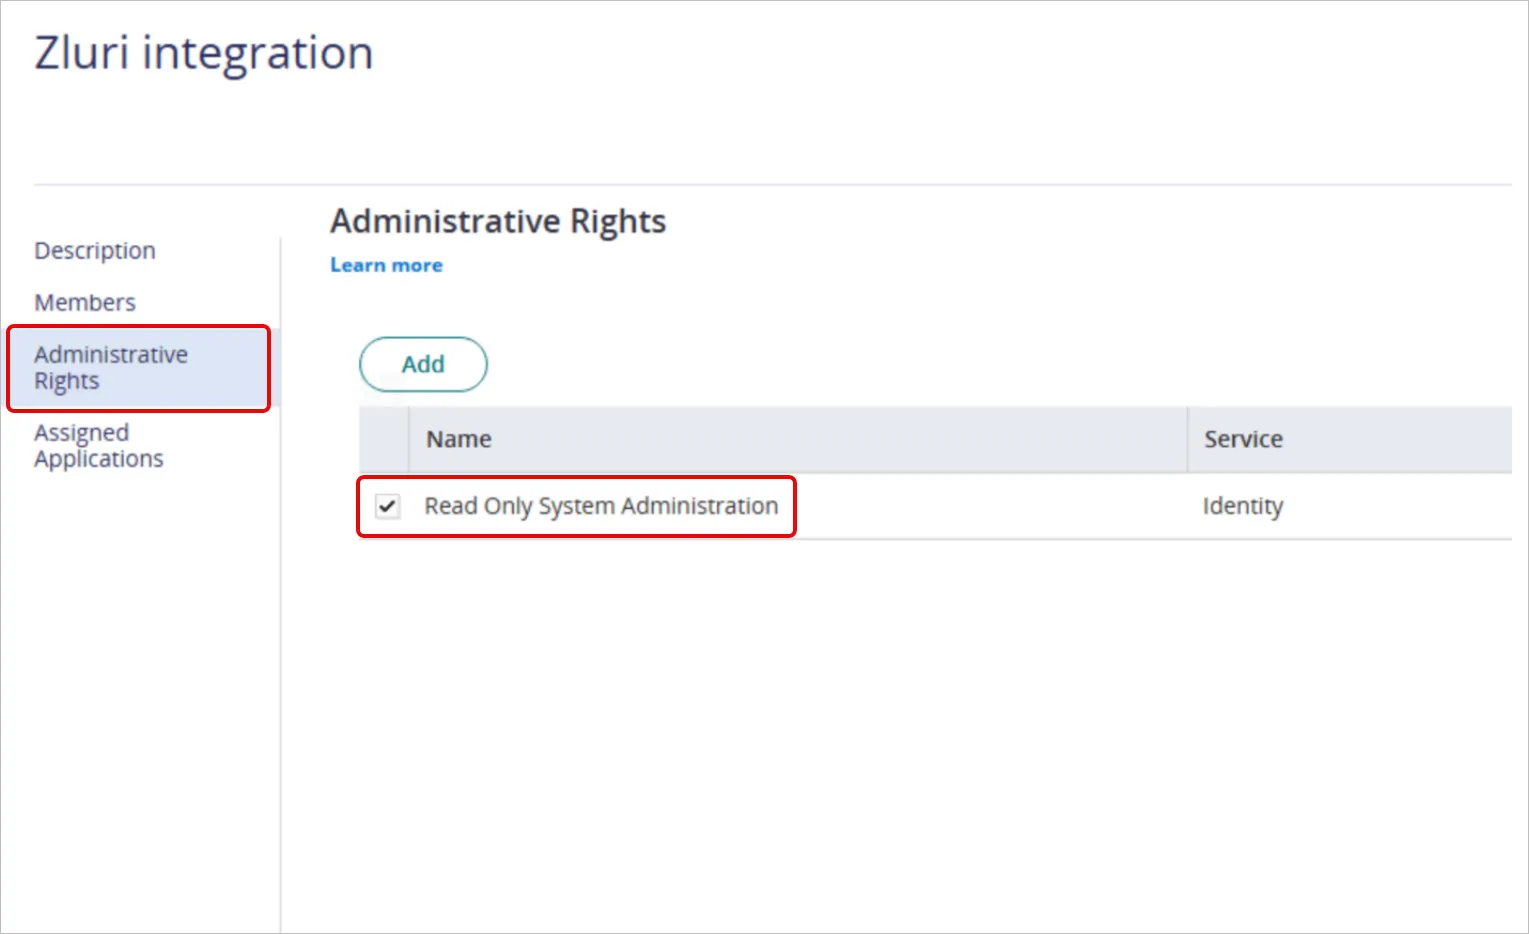
In the Administrative Rights tab, select Read-only System Administration.
-
In the Assigned Application tab, select CyberArk OIDC Trust App

-
Click Save
Access Tenant ID
Click your user icon in the top-right corner, then click About.
Connect the Cyberark instance in Zluri
-
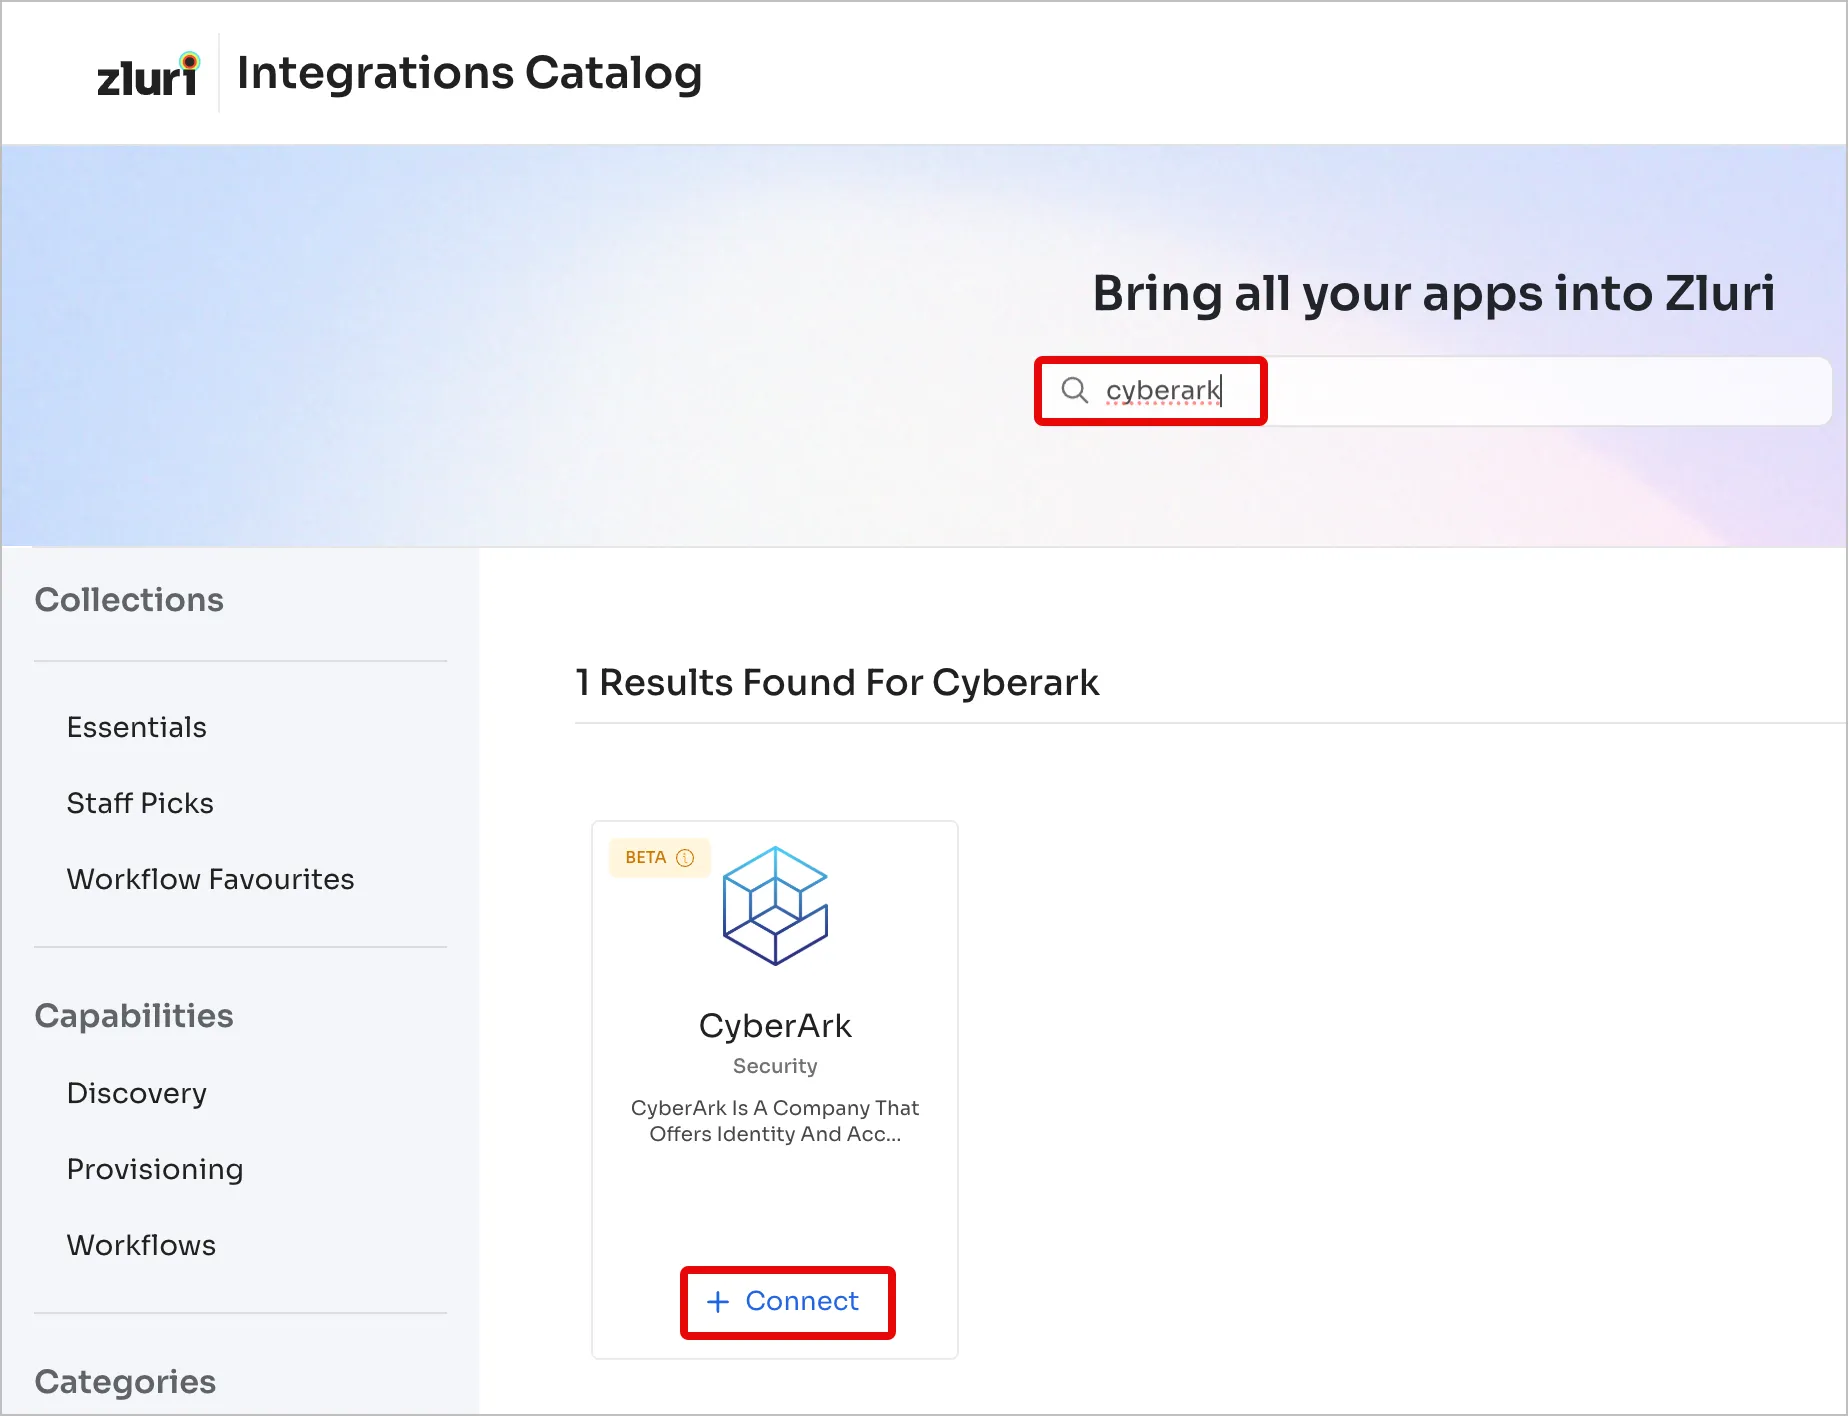
Open the Integrations Catalog, search for “cyberark”, and click ➕ Connect.
-
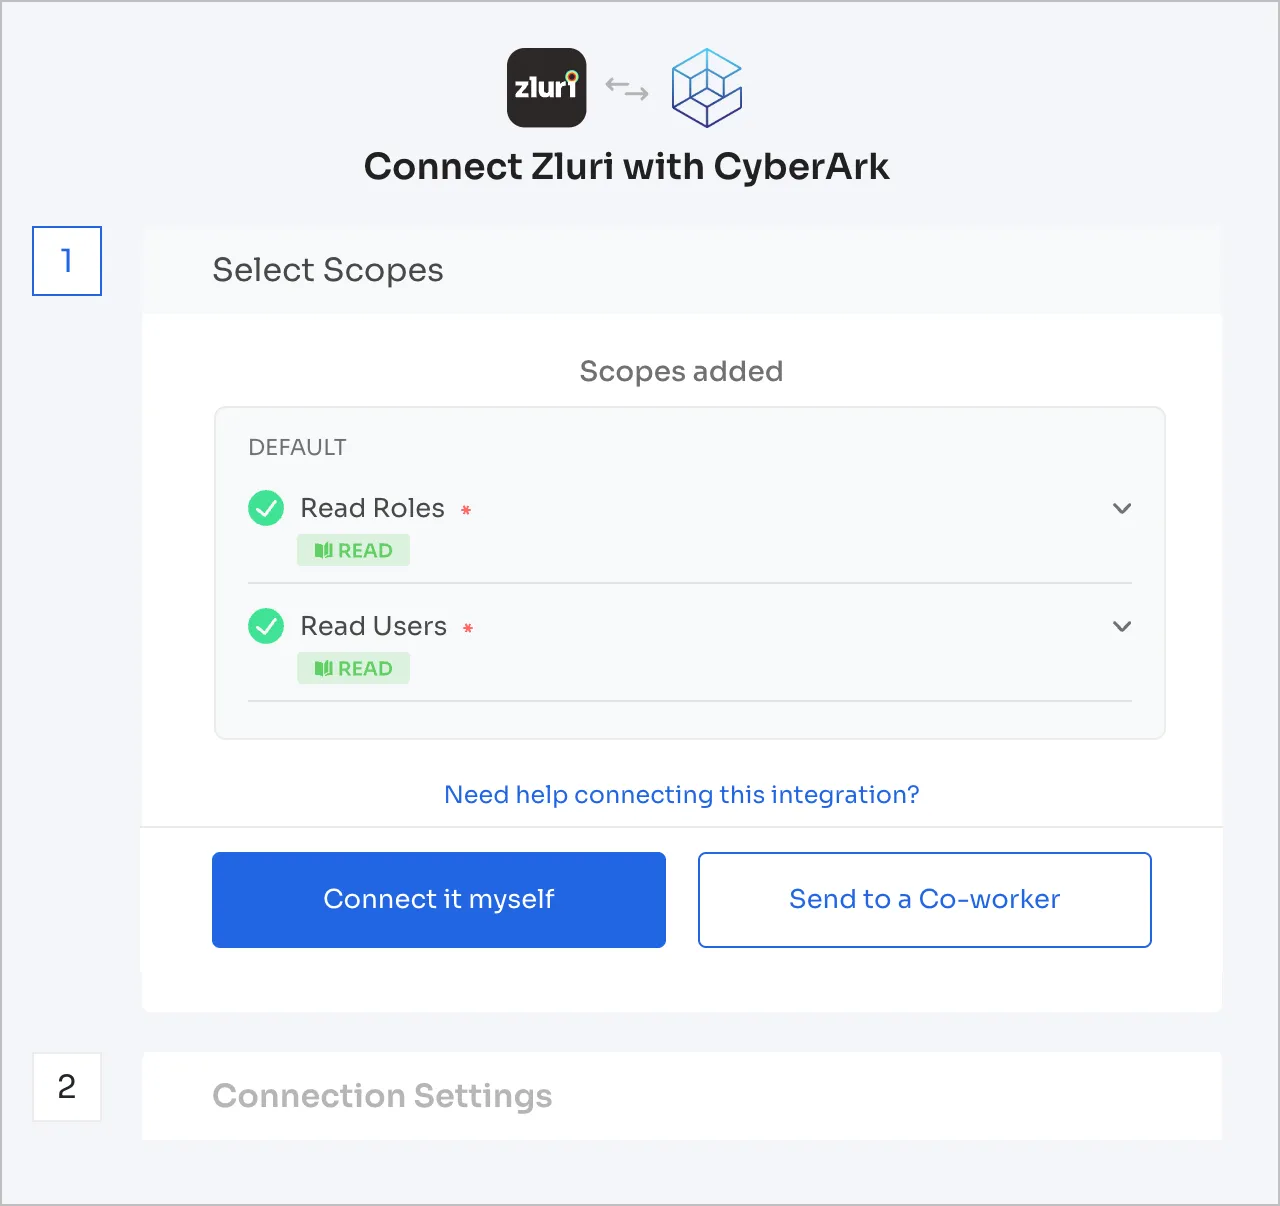
Click Connect it myself. You can click the down-arrow button towards the right of a scope to learn what it does.
-
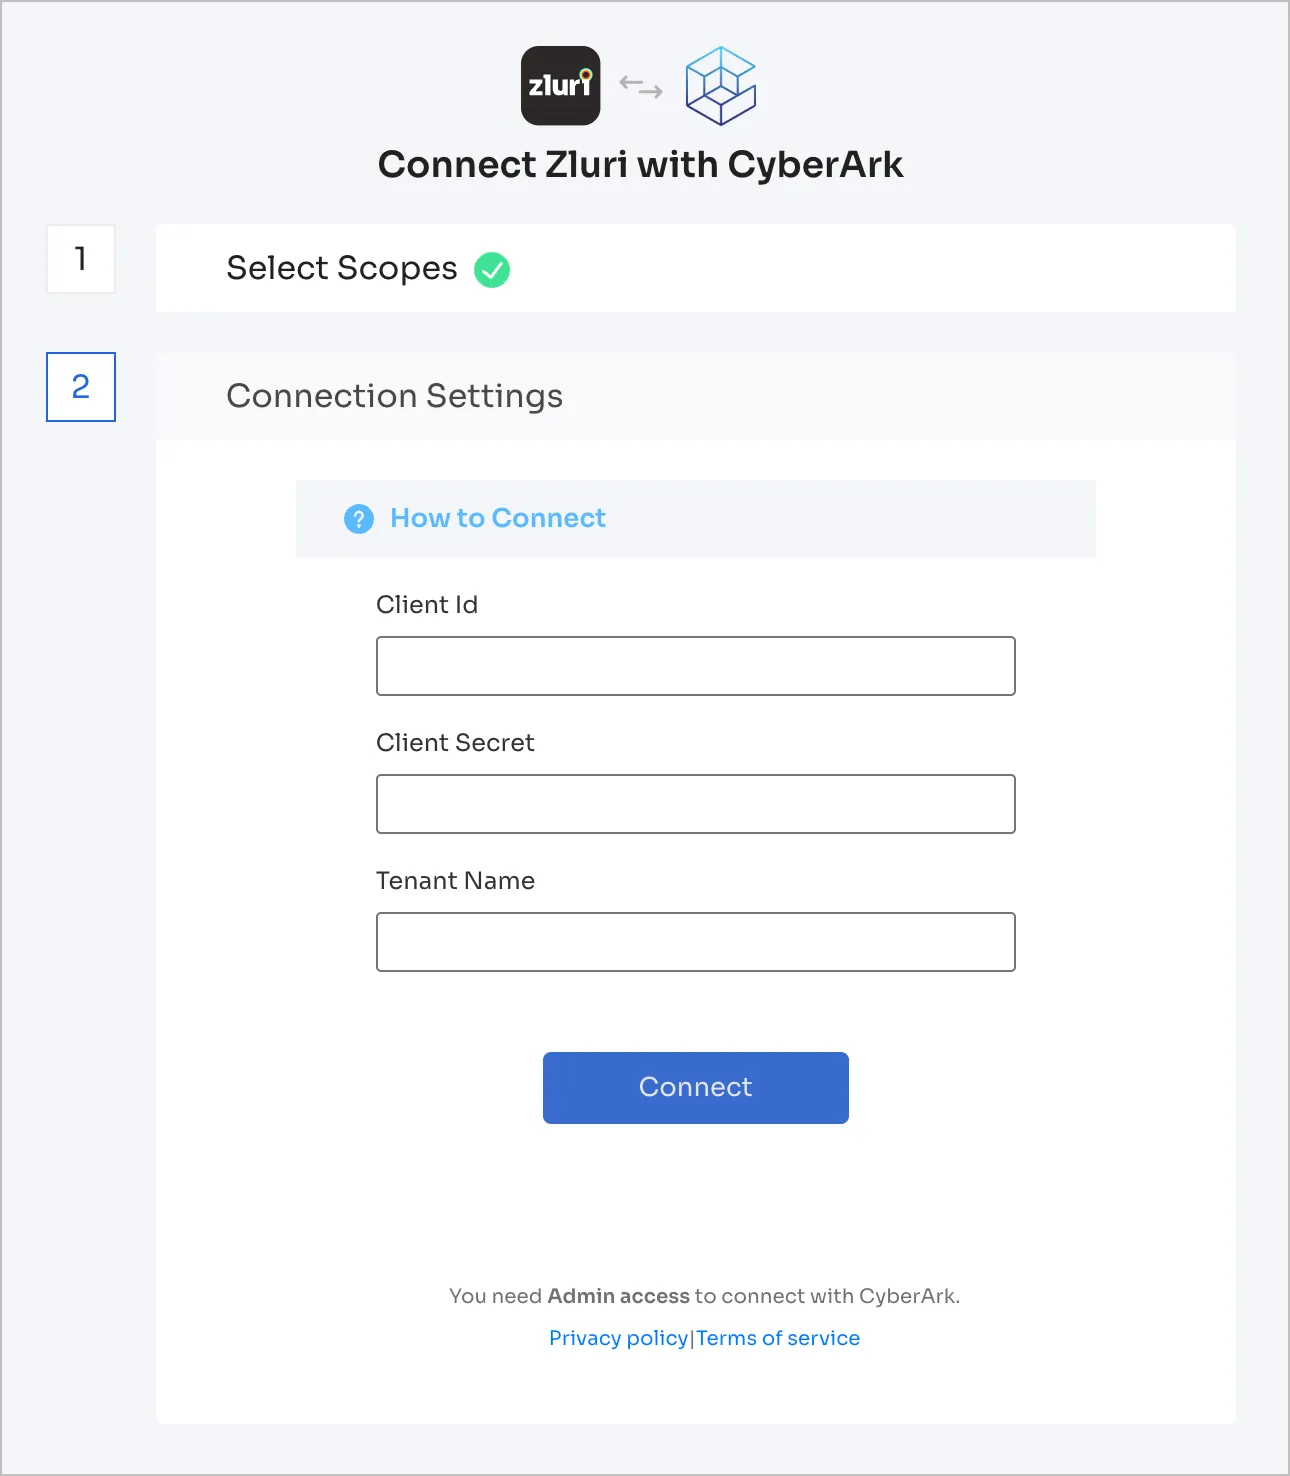
Enter the following information:
-
Client ID: The service user’s username
-
Client Secret: The service user’s password
-
Tenant Name: The environment’s Tenant ID
-
-
Click Connect, give the connection a name and description, and you’re ready to go!
Got questions? Feel free to submit a ticket or contact us directly at [email protected].
Updated 11 months ago