Automation Rules
Automation Rules control how Zluri handles access requests submitted by employees whether to auto-approve them, reject them, or route them to approvers based on defined conditions.
These rules help enforce policies, streamline approvals, and reduce manual effort.
Admins can configure rules at two levels:
- Application-Specific Rules – Apply only to a single app
- General Rules – Apply across multiple apps when no app-specific rule exists
To access this section:
>
Each rule includes a trigger (e.g., when an access request is submitted), a condition (e.g., department = Engineering), and an action (e.g., auto-approve, route to approver, reject).
Admins can activate, deactivate, reorder, or delete rules based on priority and business needs.
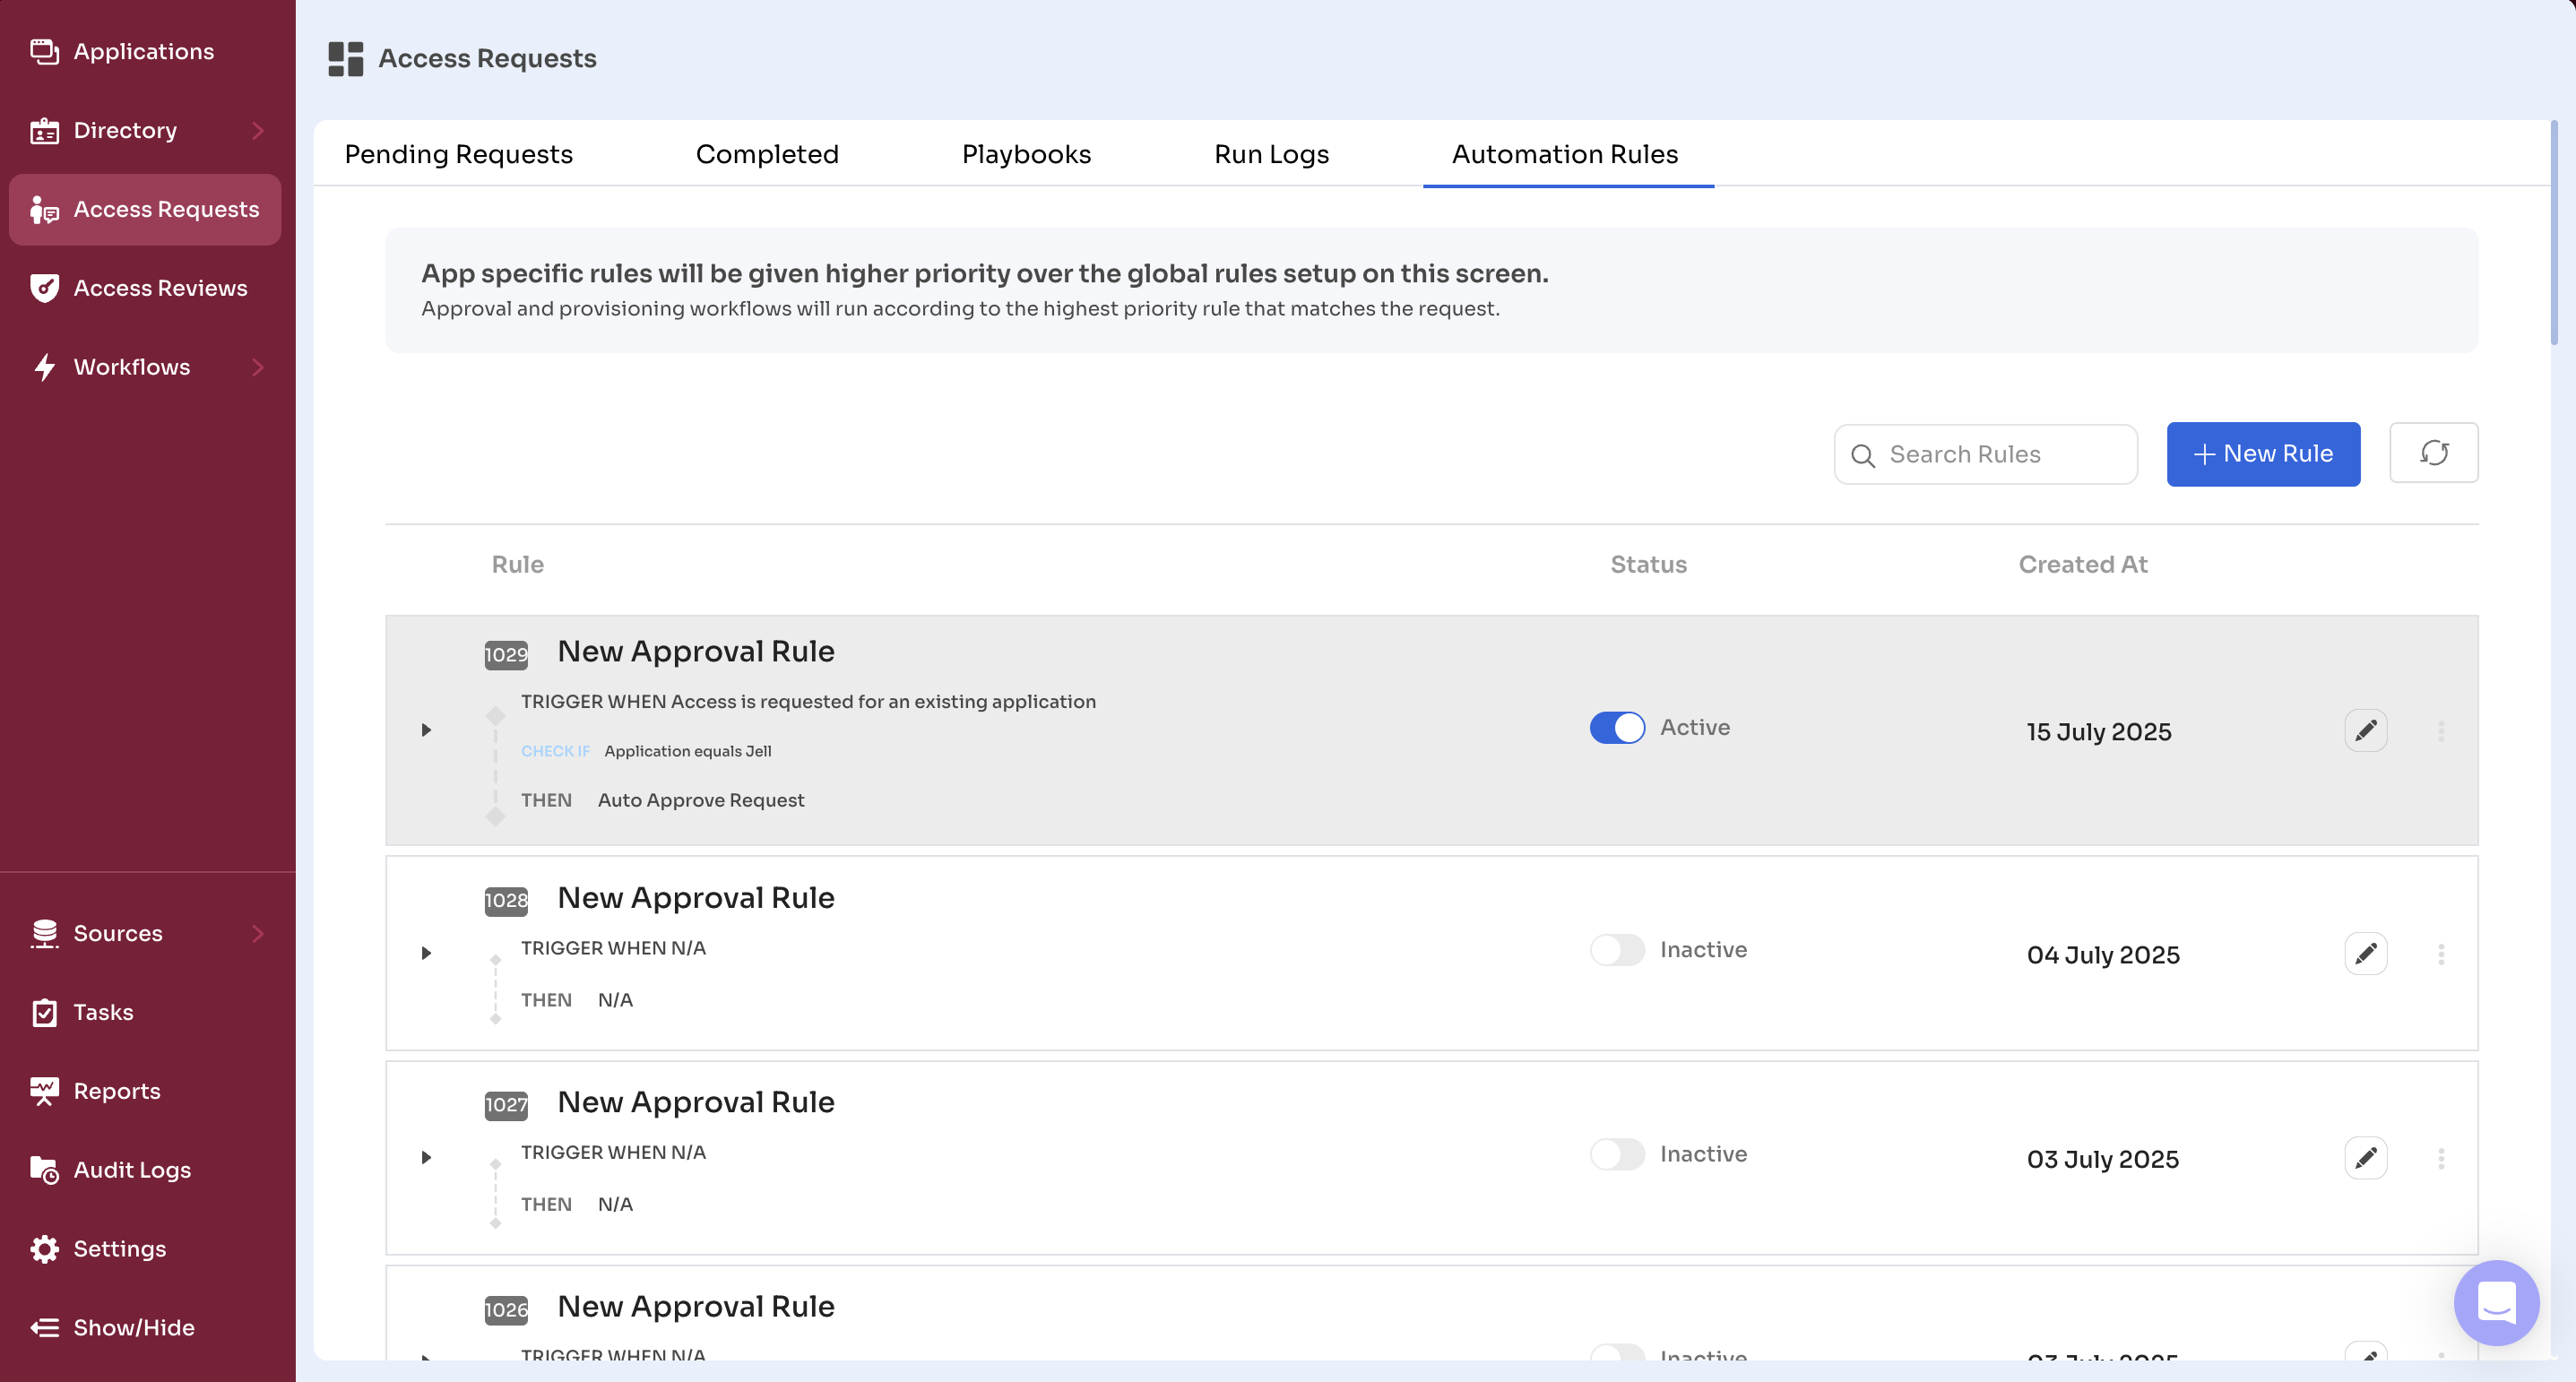
Understanding Rule Priority
Zluri applies automation rules in a defined sequence to ensure consistent outcomes when multiple rules match a request.
Rule Evaluation Logic
- The system first checks for any application-specific rules.
- If no app-level rule applies, it evaluates the list of general rules.
- If multiple general rules match, it selects the one with the highest priority (the topmost rule).
- Only one rule is executed per request—the first matching rule in the hierarchy.
This rule evaluation flow ensures consistent behavior and prevents conflicts.
Creating Application-Specific Rules
Application-specific rules allow you to define automation logic tailored to a single app. These rules take precedence over general rules and are ideal when:
- A specific app has stricter approval policies
- Provisioning or deprovisioning needs vary by application
- Assign a custom playbook or approval path for one app
How to Create an Application-Specific Rule
- Go to Admin View → Applications
- Select the target application
- Click the Automation tab
- Under Automation Rules, go to Access Requests
- Click New Rule
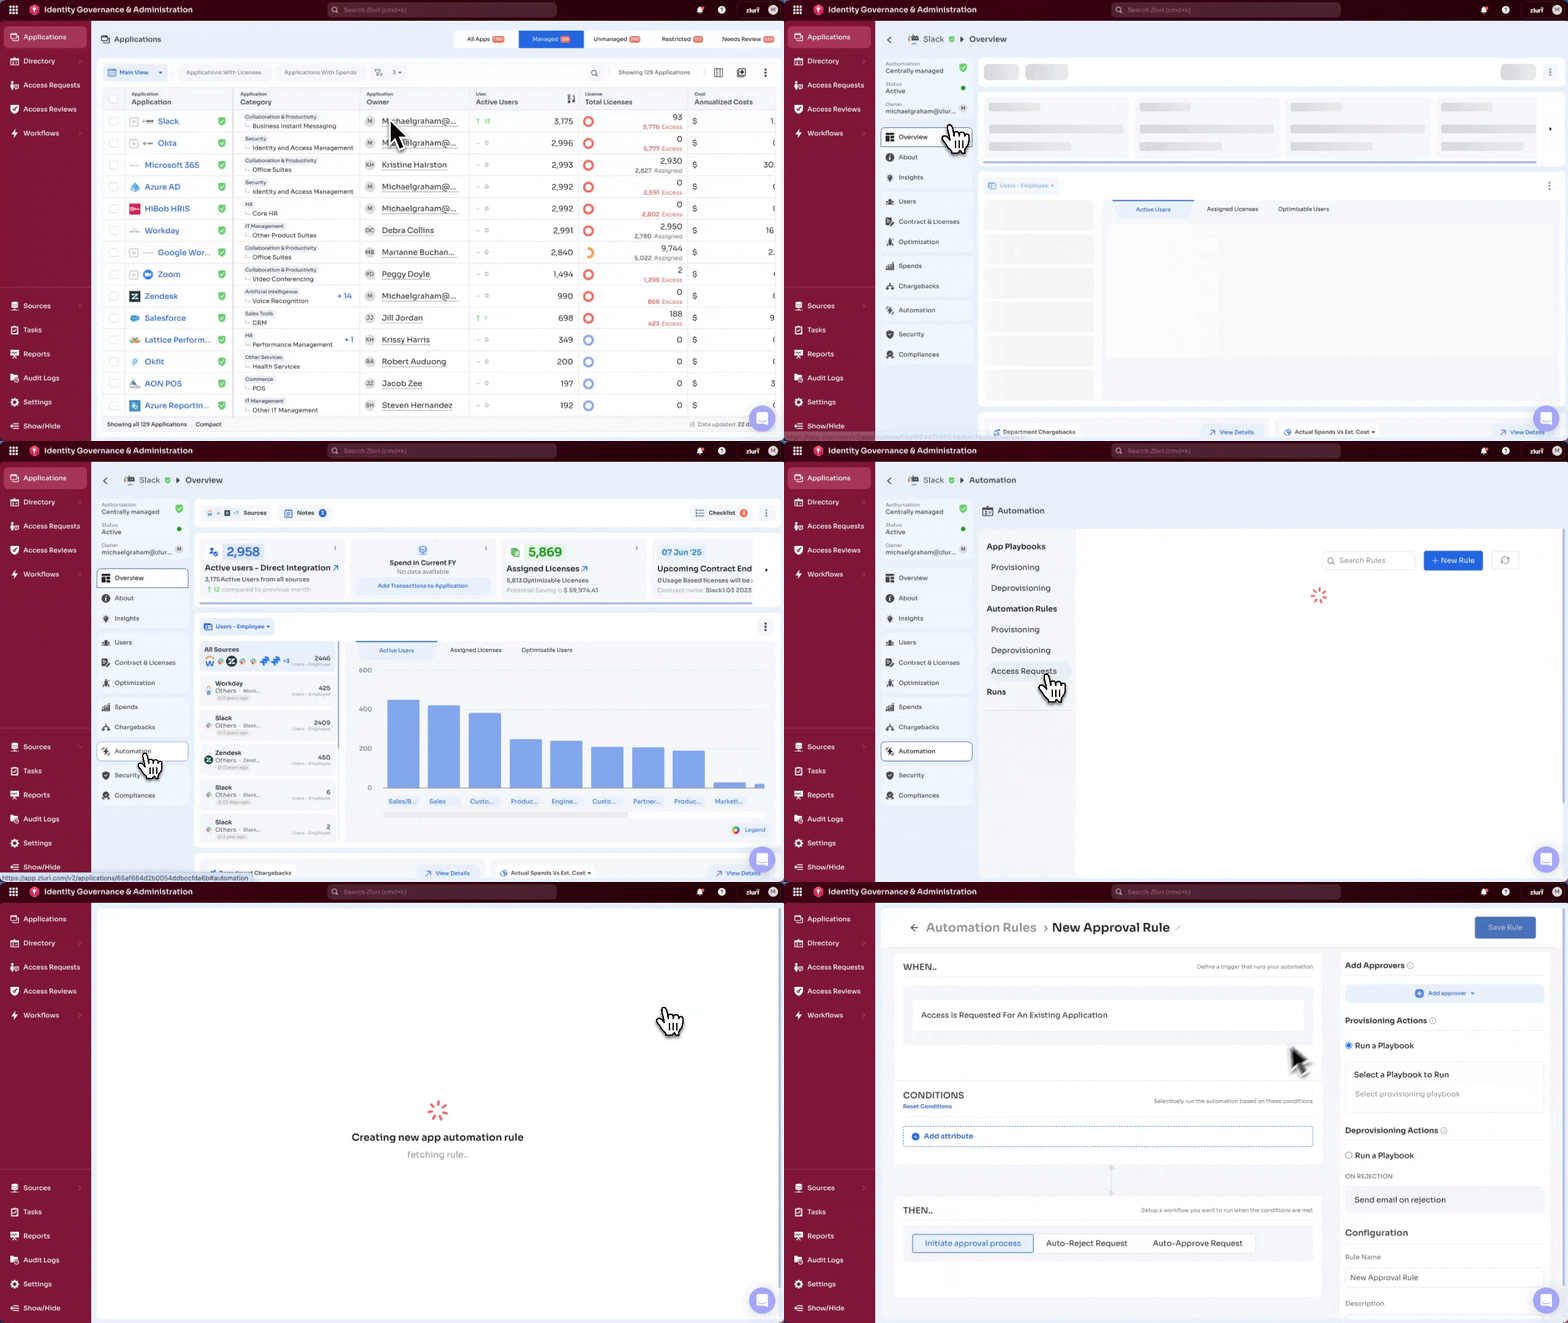
Rule Configuration
The New Rule form allows admins to define how Zluri processes incoming access requests based on specific conditions.
Key Notes:
- These rules apply only to managed applications—apps that are reviewed and authorized for use in the organization.
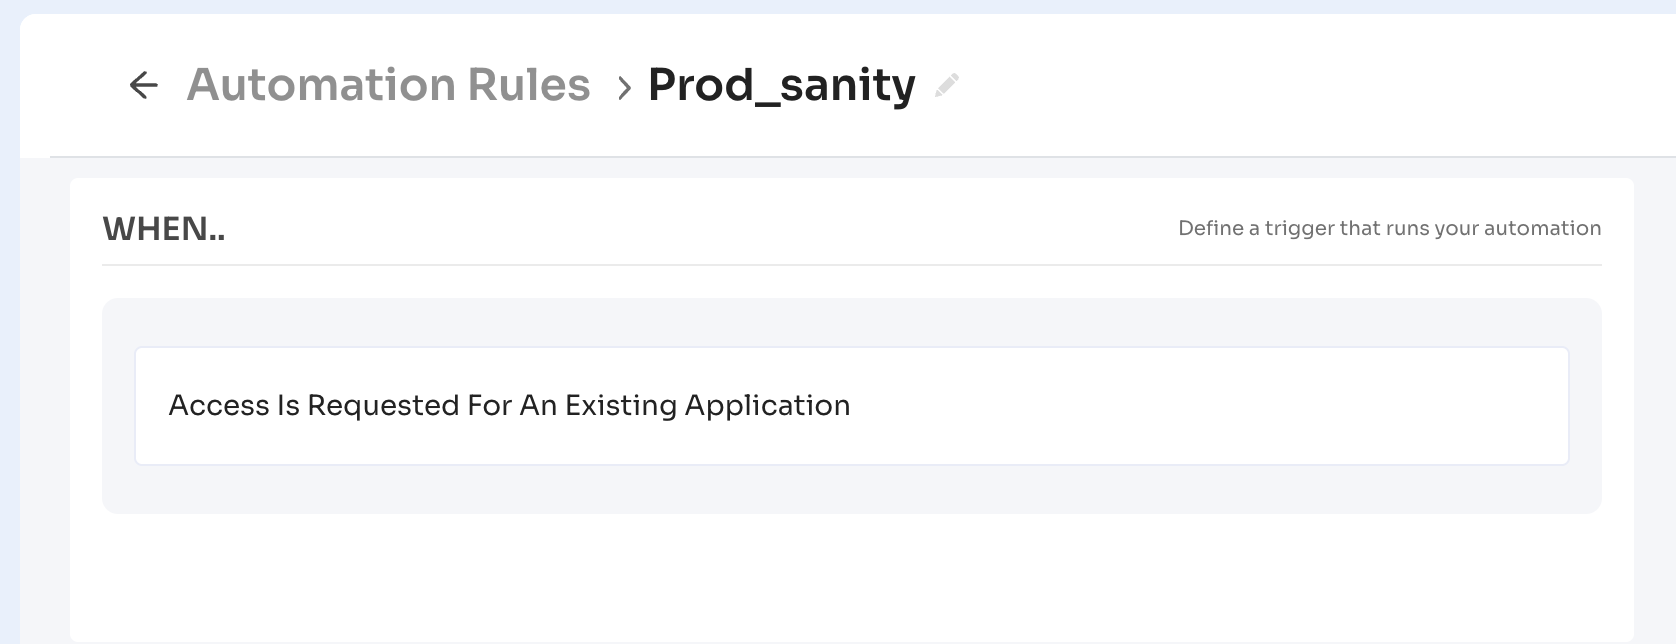
- All rules use the trigger “Access is requested for an existing application”, since they are scoped to known, managed apps only.
1. Conditions
Click Add Attribute to define when the rule should trigger. These attributes help tailor approvals and automation paths based on the requester’s context.
Attributes include:
- Department
- Job Title
- Location
- Requestor Type (self or others)
- App Role
- License Type
- Access Duration
Use AND / OR logic to create compound rules. For example, auto-approve a request only if the requester is in the Engineering department and asking for a Viewer role.
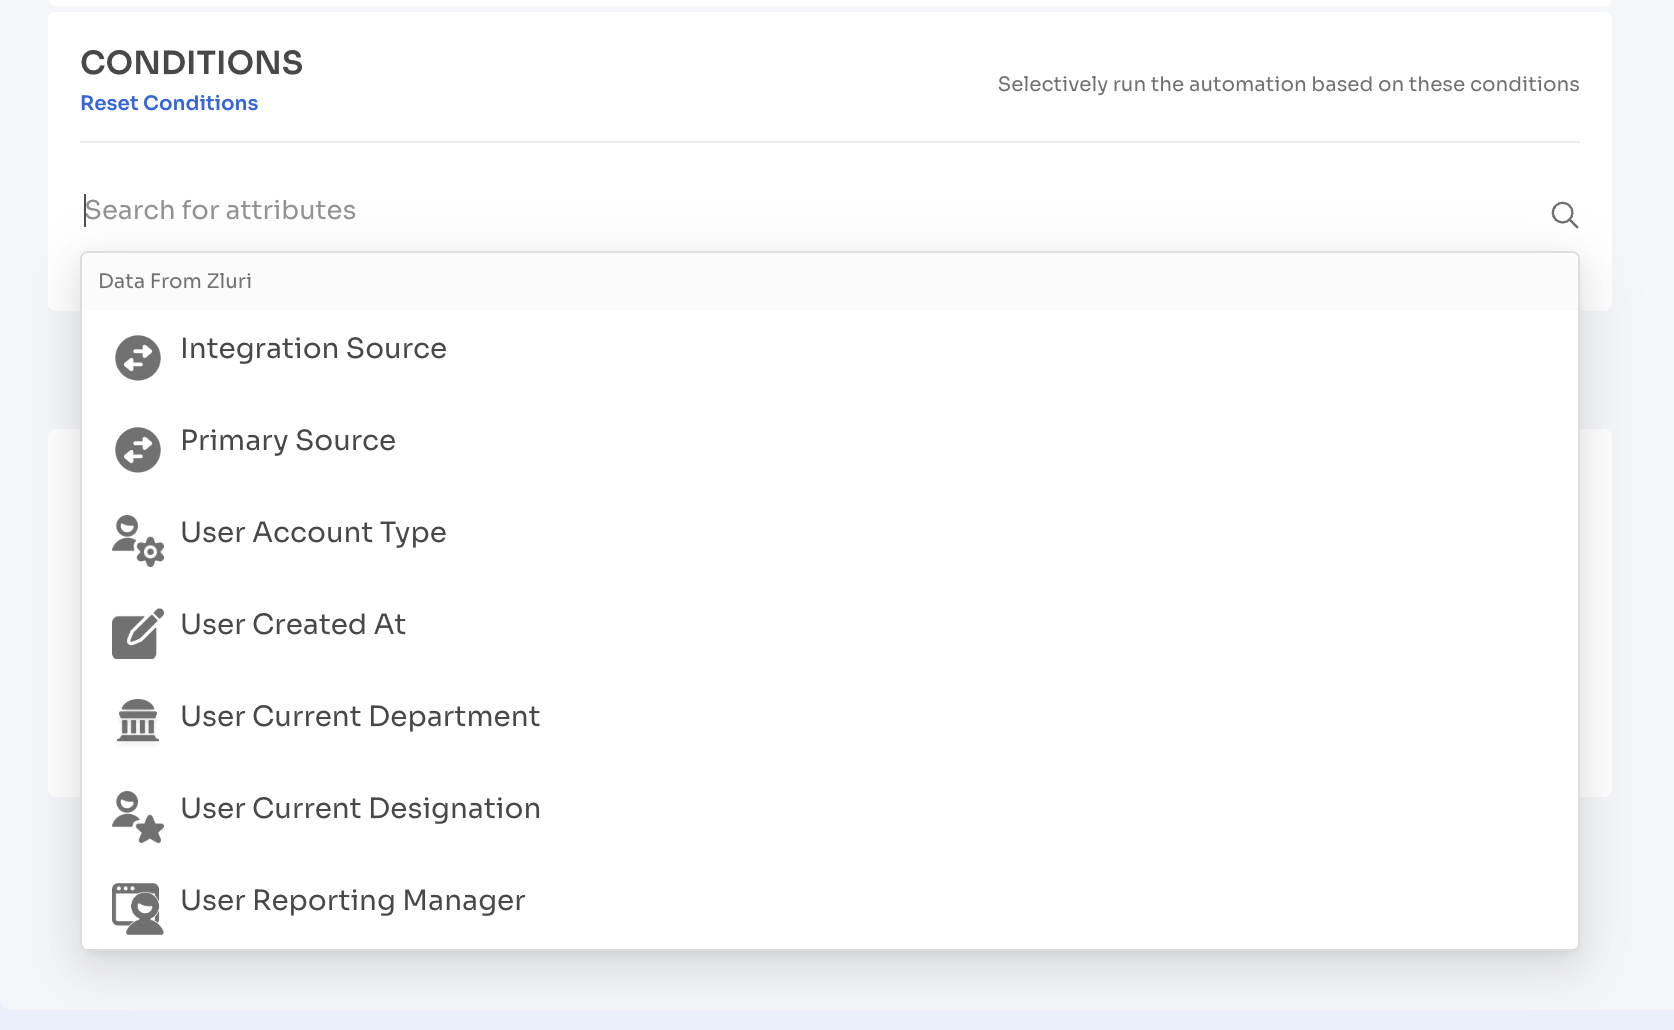
2. Approval Flow Options
You must choose one of the following actions:
- Initiate Approval Process – Route the request to approvers
- Auto-Approve Request – Instantly approve based on safe conditions
- Auto-Reject Request – Deny requests based on critical risk or policy violations

If you select Initiate Approval Process:
- Click Add Approver
- Choose from:
- Specific User(s)
- Zluri Role (e.g., App Owner, Reporting Manager)
- User Group
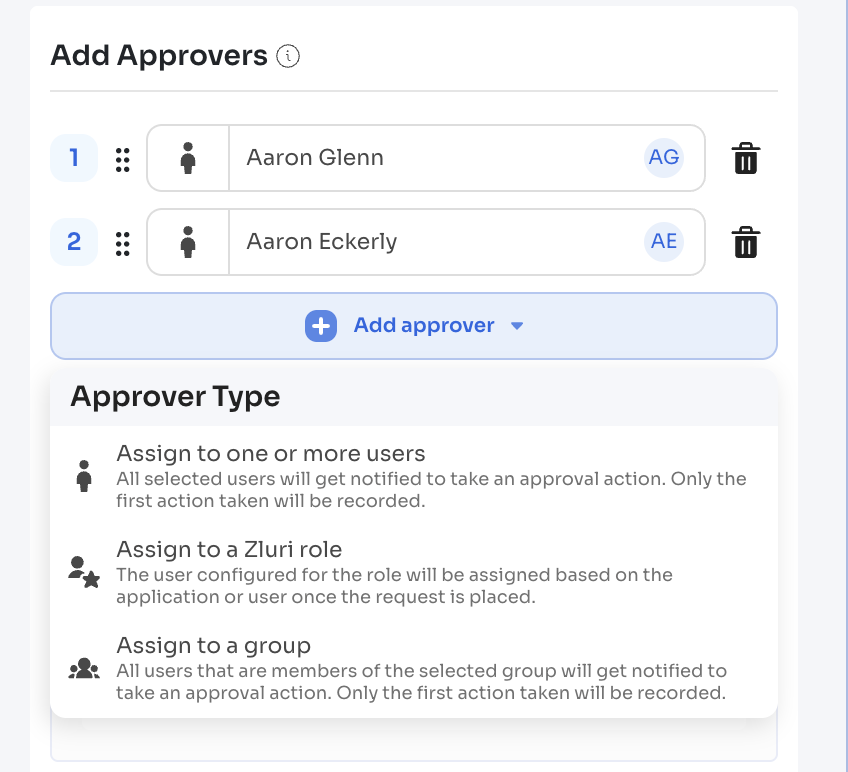
If you select Auto-Approve Request:
- Select a Provisioning Playbook (must be pre-created)
- Optionally add a Deprovisioning Playbook if access has an end date
If you select Auto-Reject Request:
- Add a rejection reason (optional)
- This rule is commonly used for restricted apps or security-flagged scenarios
3. Description and Notes
- Enter a Rule Name and optional Description
- Add internal notes (visible only to other admins)
Once saved, the rule will immediately apply to any new request matching the configured conditions for that specific app.
Creating General Rules
General rules apply across all applications and act as fallback logic when no application-specific rule is matched. These rules help:
- Standardize approval flows based on department, job role, or access type
- Automate processing for uncategorized or low-risk requests
- Maintain governance at scale without app-level configurations
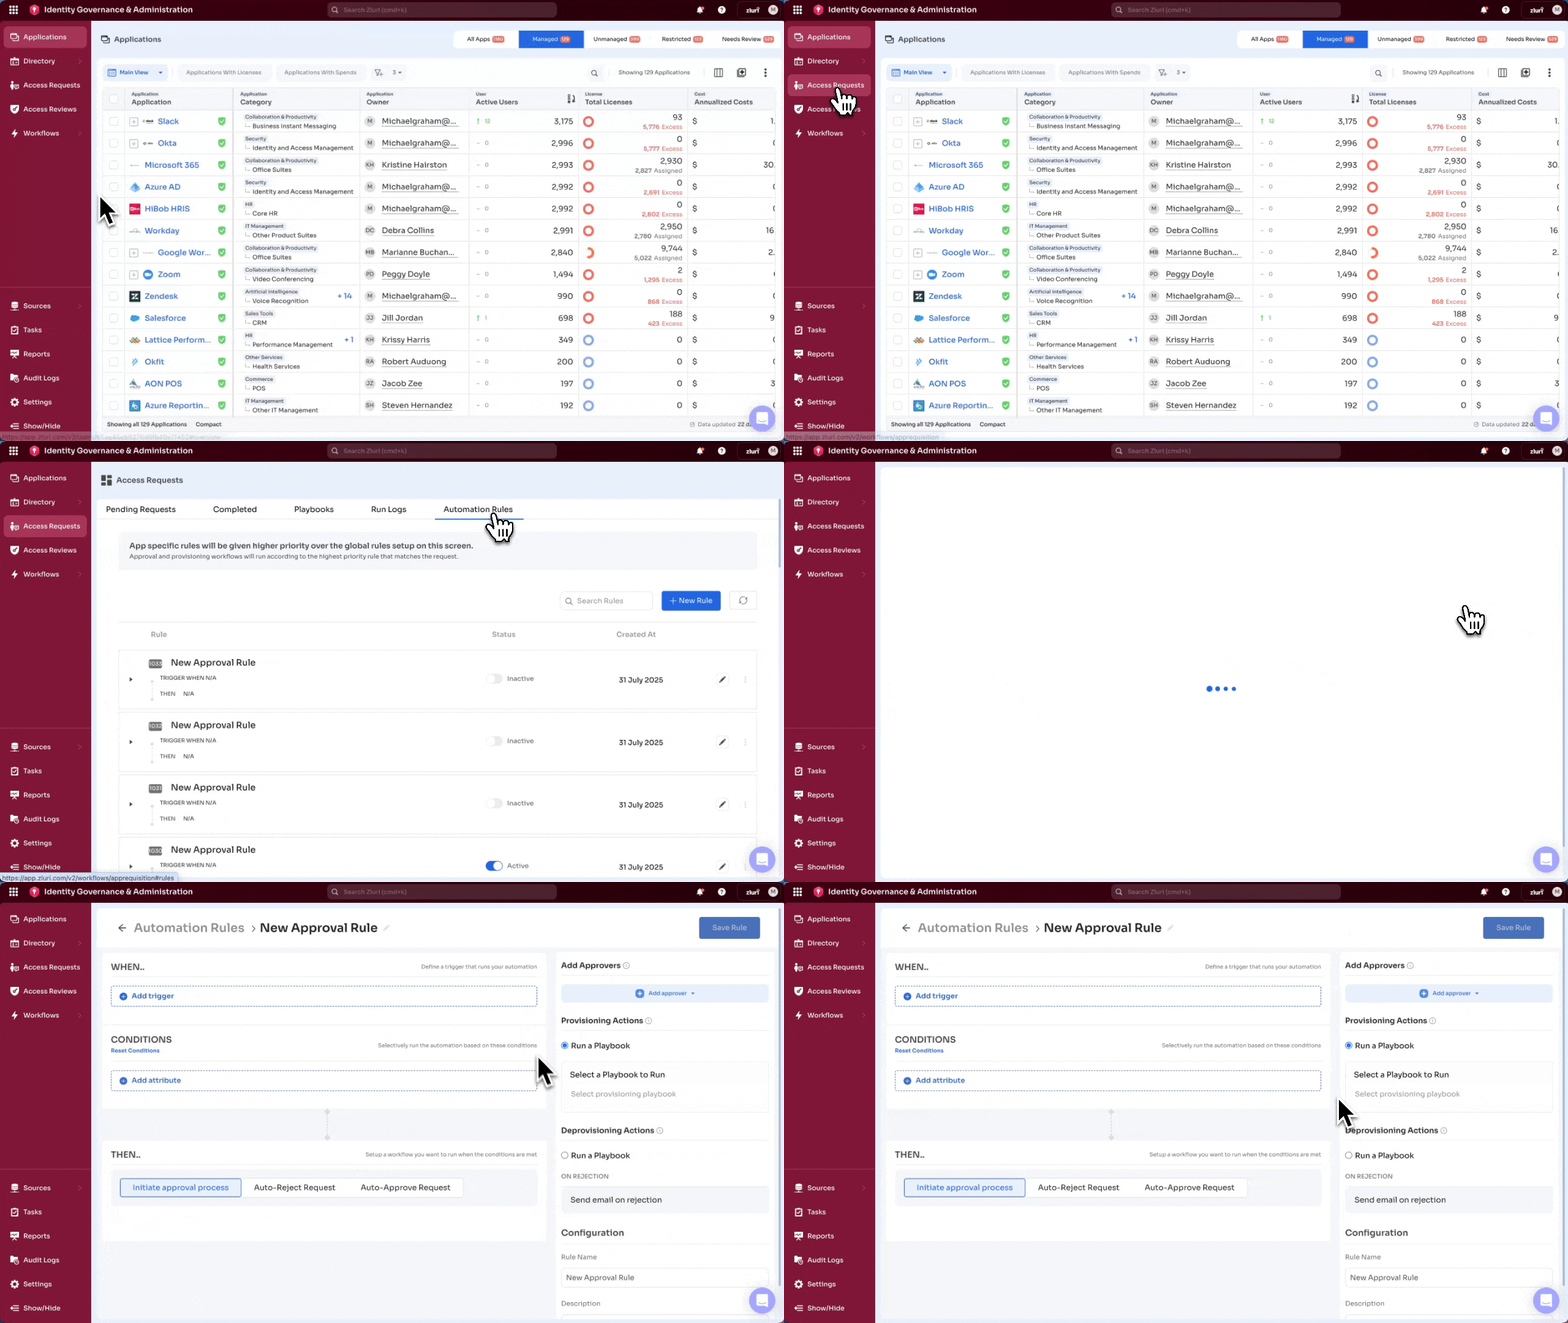
How to Create a General Rule
- Navigate to
Admin View → Access Requests → Automation Rules - Click New Rule in the top-right corner
Rule Configuration Overview
The general rule setup form includes five main sections:
1. Application Target
Admins can choose whether the rule applies to:
- New applications only
- Existing applications only
This defines the scope of applicability across the catalog.
2. Conditions
Conditions define when the rule should trigger. Attributes include:
- Department
- Job Title
- Location
- App Role or License Type
- Compliance tags
- Access Duration
- Risk Score
- Requestor type (self/other)
Combine multiple attributes using AND/OR logic.
3. Configuration
Fill out the following metadata:
- Rule Name
- Description (optional)
- Internal Notes (visible to other admins only)
Once saved, Zluri applies the rule to any incoming access request that meets the defined conditions—provided no application-specific rule takes precedence.
Approval Actions: Auto-Approve, Reject, or Review
Admins can define how Zluri handles incoming access requests by choosing from three approval actions. These actions reflect the organization's access policies—whether they lean toward automation, oversight, or restriction.
Importantly, policy logic can vary:
Even risky access may be allowed for certain roles (e.g., IT admins during an incident), while low-risk access may be denied if the requesting profile doesn’t meet internal compliance or operational policies.
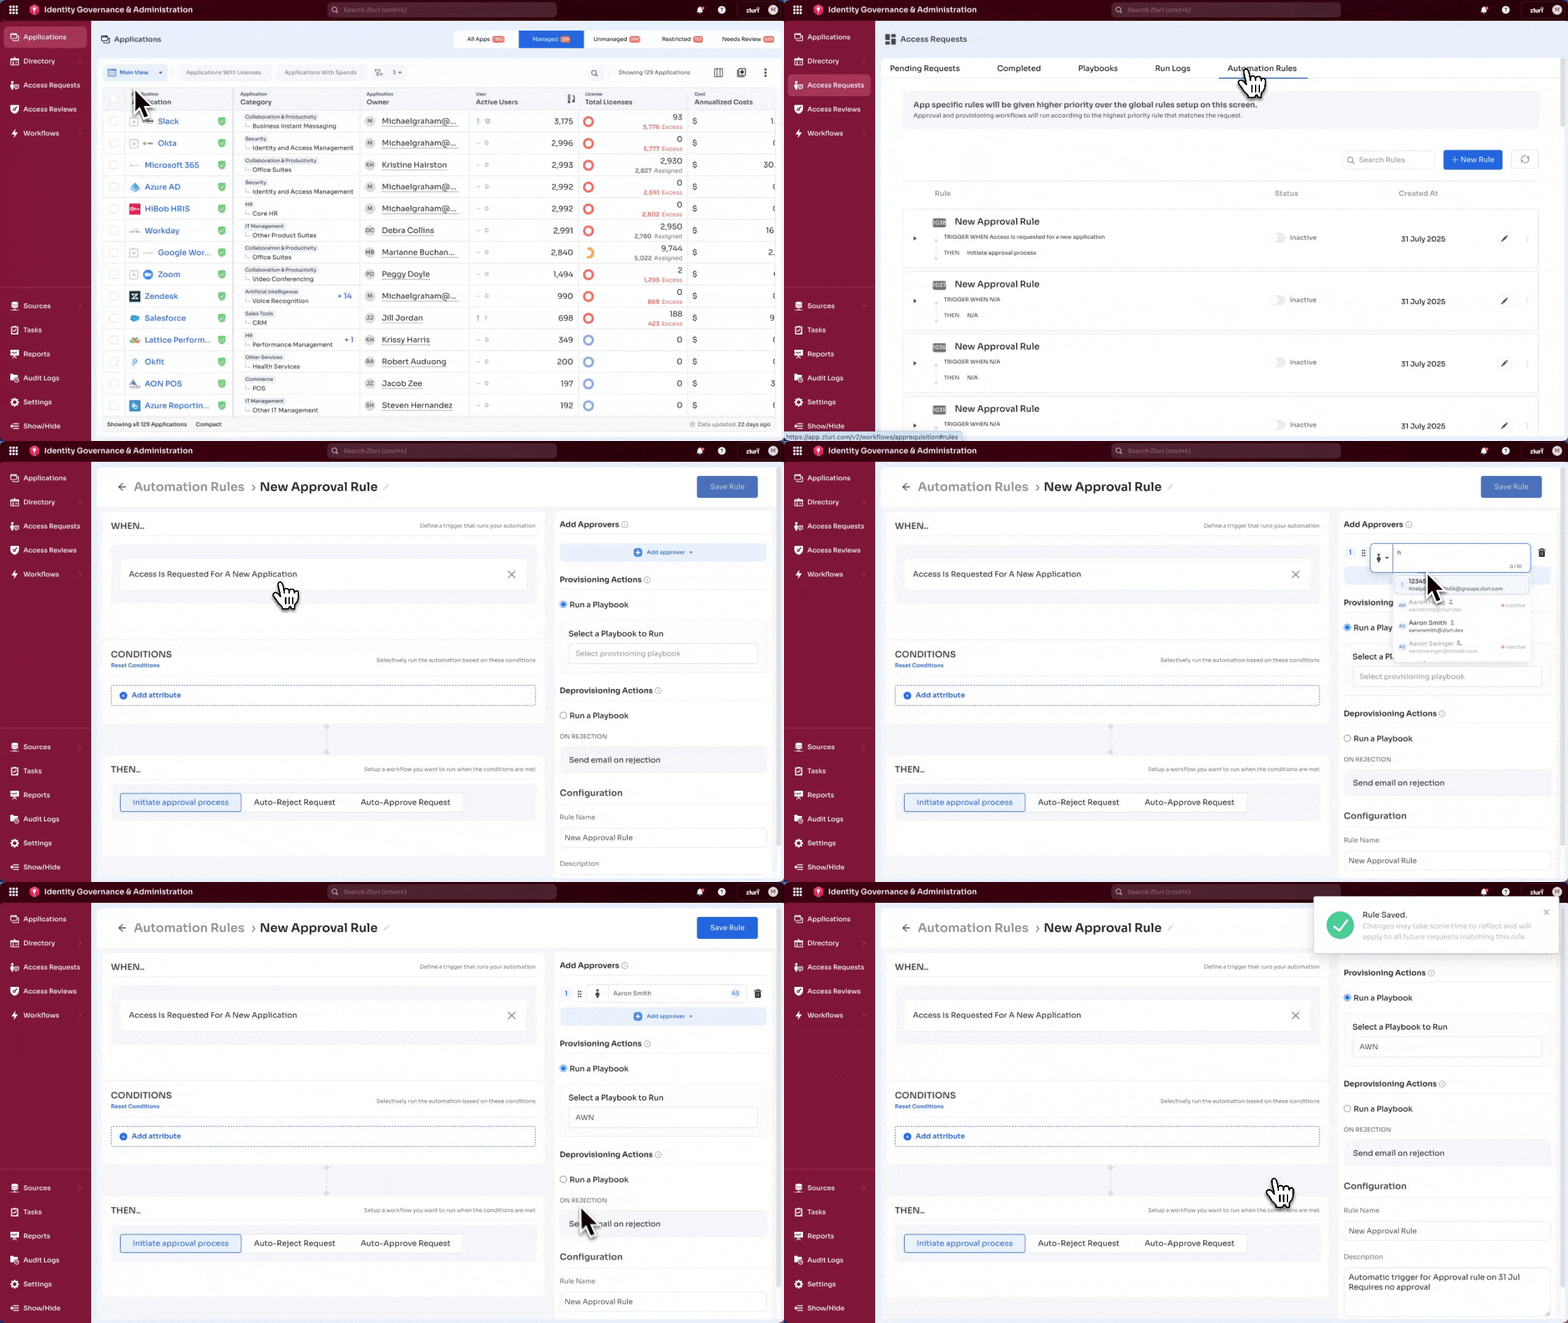
1. Initiate Approval Process
Use this option when:
- You want one or more approvers to manually review the request.
- The app is sensitive or requires business justification.
- The access level being requested is high-privilege.
To configure:
Use this action to manually review access requests before granting them.
Typical use cases:
- Sensitive roles or high-privilege access (e.g., admin, superuser)
- Business-critical apps that require business justification
- Access requests that don’t meet auto-approval conditions
Specific Users
Assign one or more individual users. Zluri supports both single-approver and multi-approver logic. When multiple users are assigned, Zluri records the first action taken.
Zluri Roles (e.g., Reporting Manager, App Owner)
Assign dynamic roles based on the requester and the application. Zluri automatically identifies and routes the request to the appropriate approver when the request is generated.
User Groups (e.g., Finance Approvers)
Use groups created within Zluri or groups synced from directory integrations like Okta or Google Workspace. When a group is assigned, Zluri notifies all members and records the first approval or rejection action.
Multiple approval levels can be added by repeating this configuration step for each level.
Once approved, Zluri can:
- Trigger a provisioning playbook
- Assign a manual task if automation isn’t configured
2. Auto-Approve Request
Use this option when:
- The app is low-risk
- You want to minimize approval delays
- Access is frequently requested and safe to grant automatically
To configure:
- Click Auto-Approve Request
- Select a Provisioning Playbook to automate access
- (Optional) Select a Deprovisioning Playbook if access is time-bound
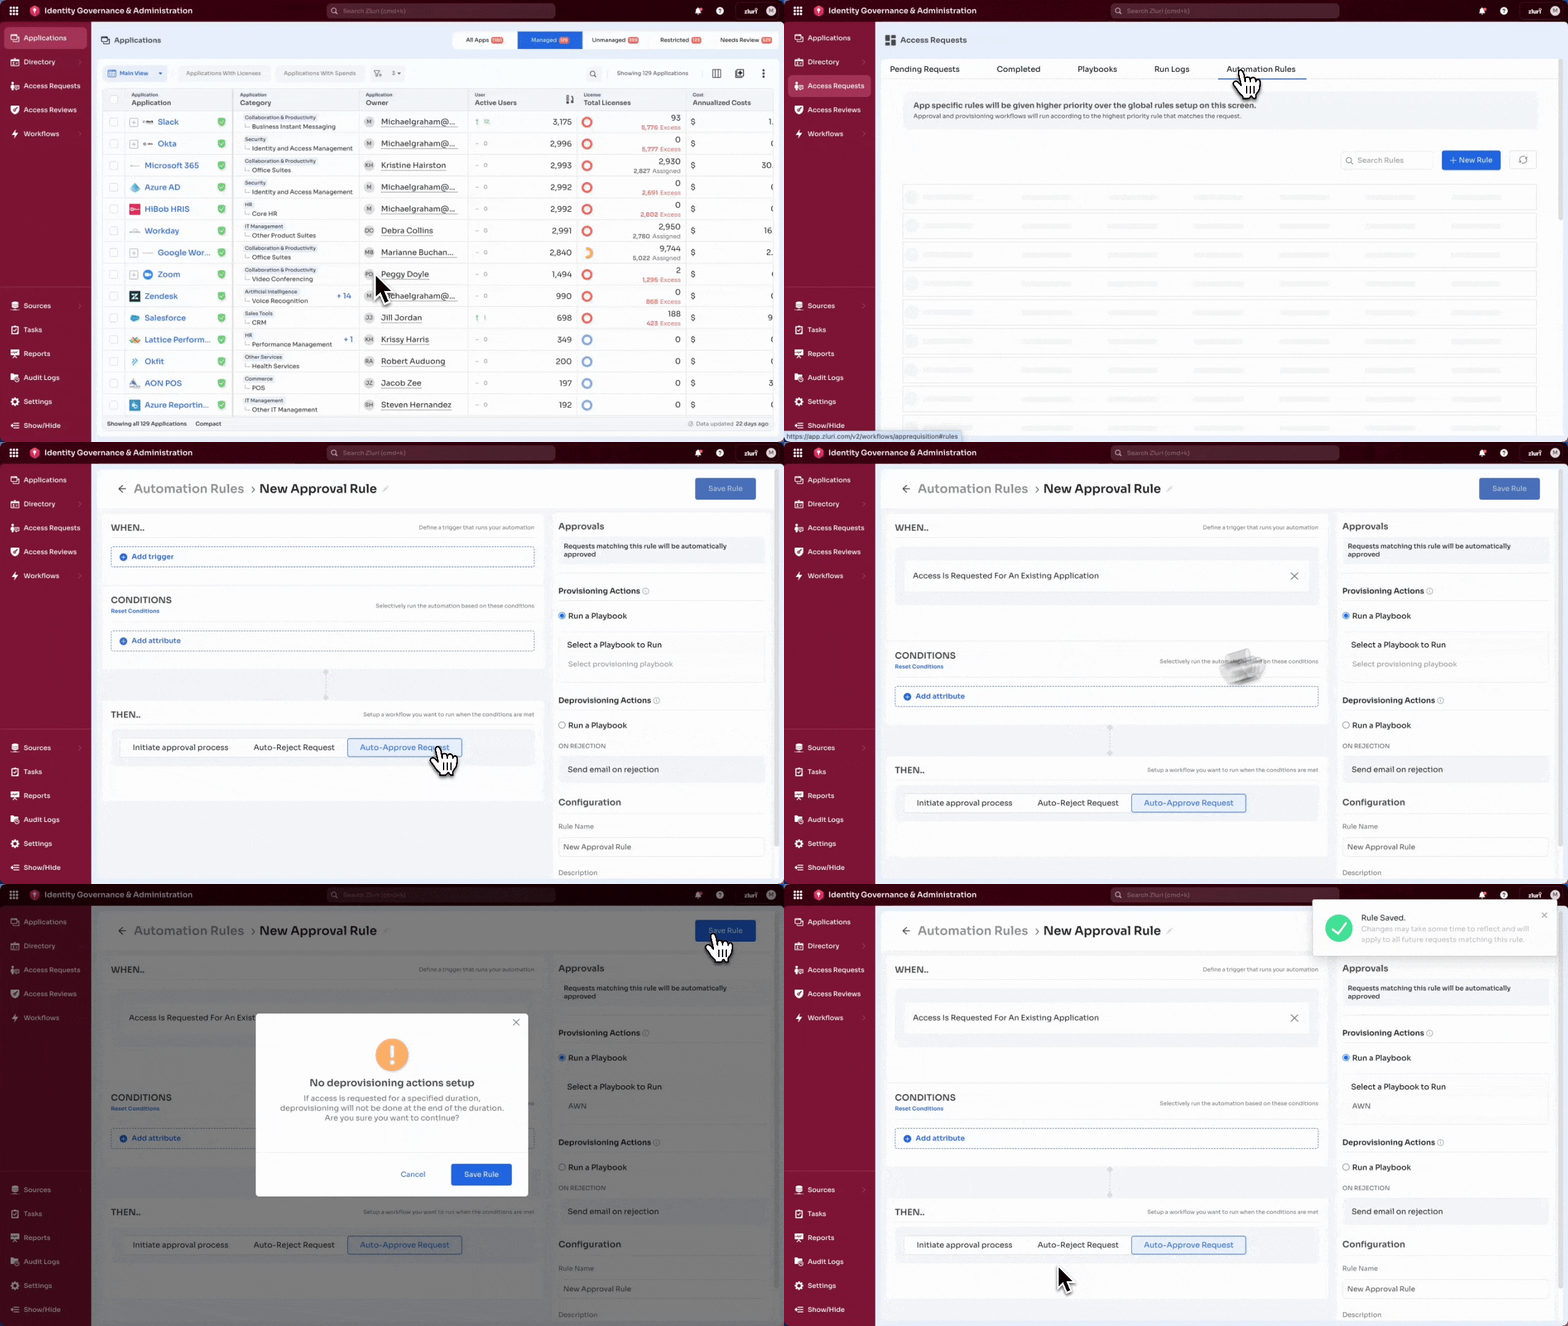
When triggered, the request is instantly approved and provisioned.
3. Auto-Reject Request
Use this option when access must be explicitly denied—based on the app, access level, or requester profile.
Common use cases include:
- The request targets a high-risk or sensitive application, or an admin-level role not meant for general assignment
- The request comes from a user profile or department that is restricted from accessing the app, license, or role
- The app is newly discovered or unsanctioned, and not yet approved for employee access
- The request violates the organization’s access request policies—for example, requesting unmanaged tools outside the App Catalog
To configure:
- Select Auto-Reject Request
- (Optional) Enter a Rejection Reason
The rejection reason appears in the notification delivered to the requester. - Click Save
Screenshot: Auto-reject rule configuration with rejection reason field
Once saved, this rule prevents the request from progressing and sends a rejection alert to the requester immediately.
Managing Rules (Edit, Disable, Delete)
Admins can update, disable, or delete automation rules at any time. This ensures access policies remain aligned with evolving organizational needs.
Rule Management Locations
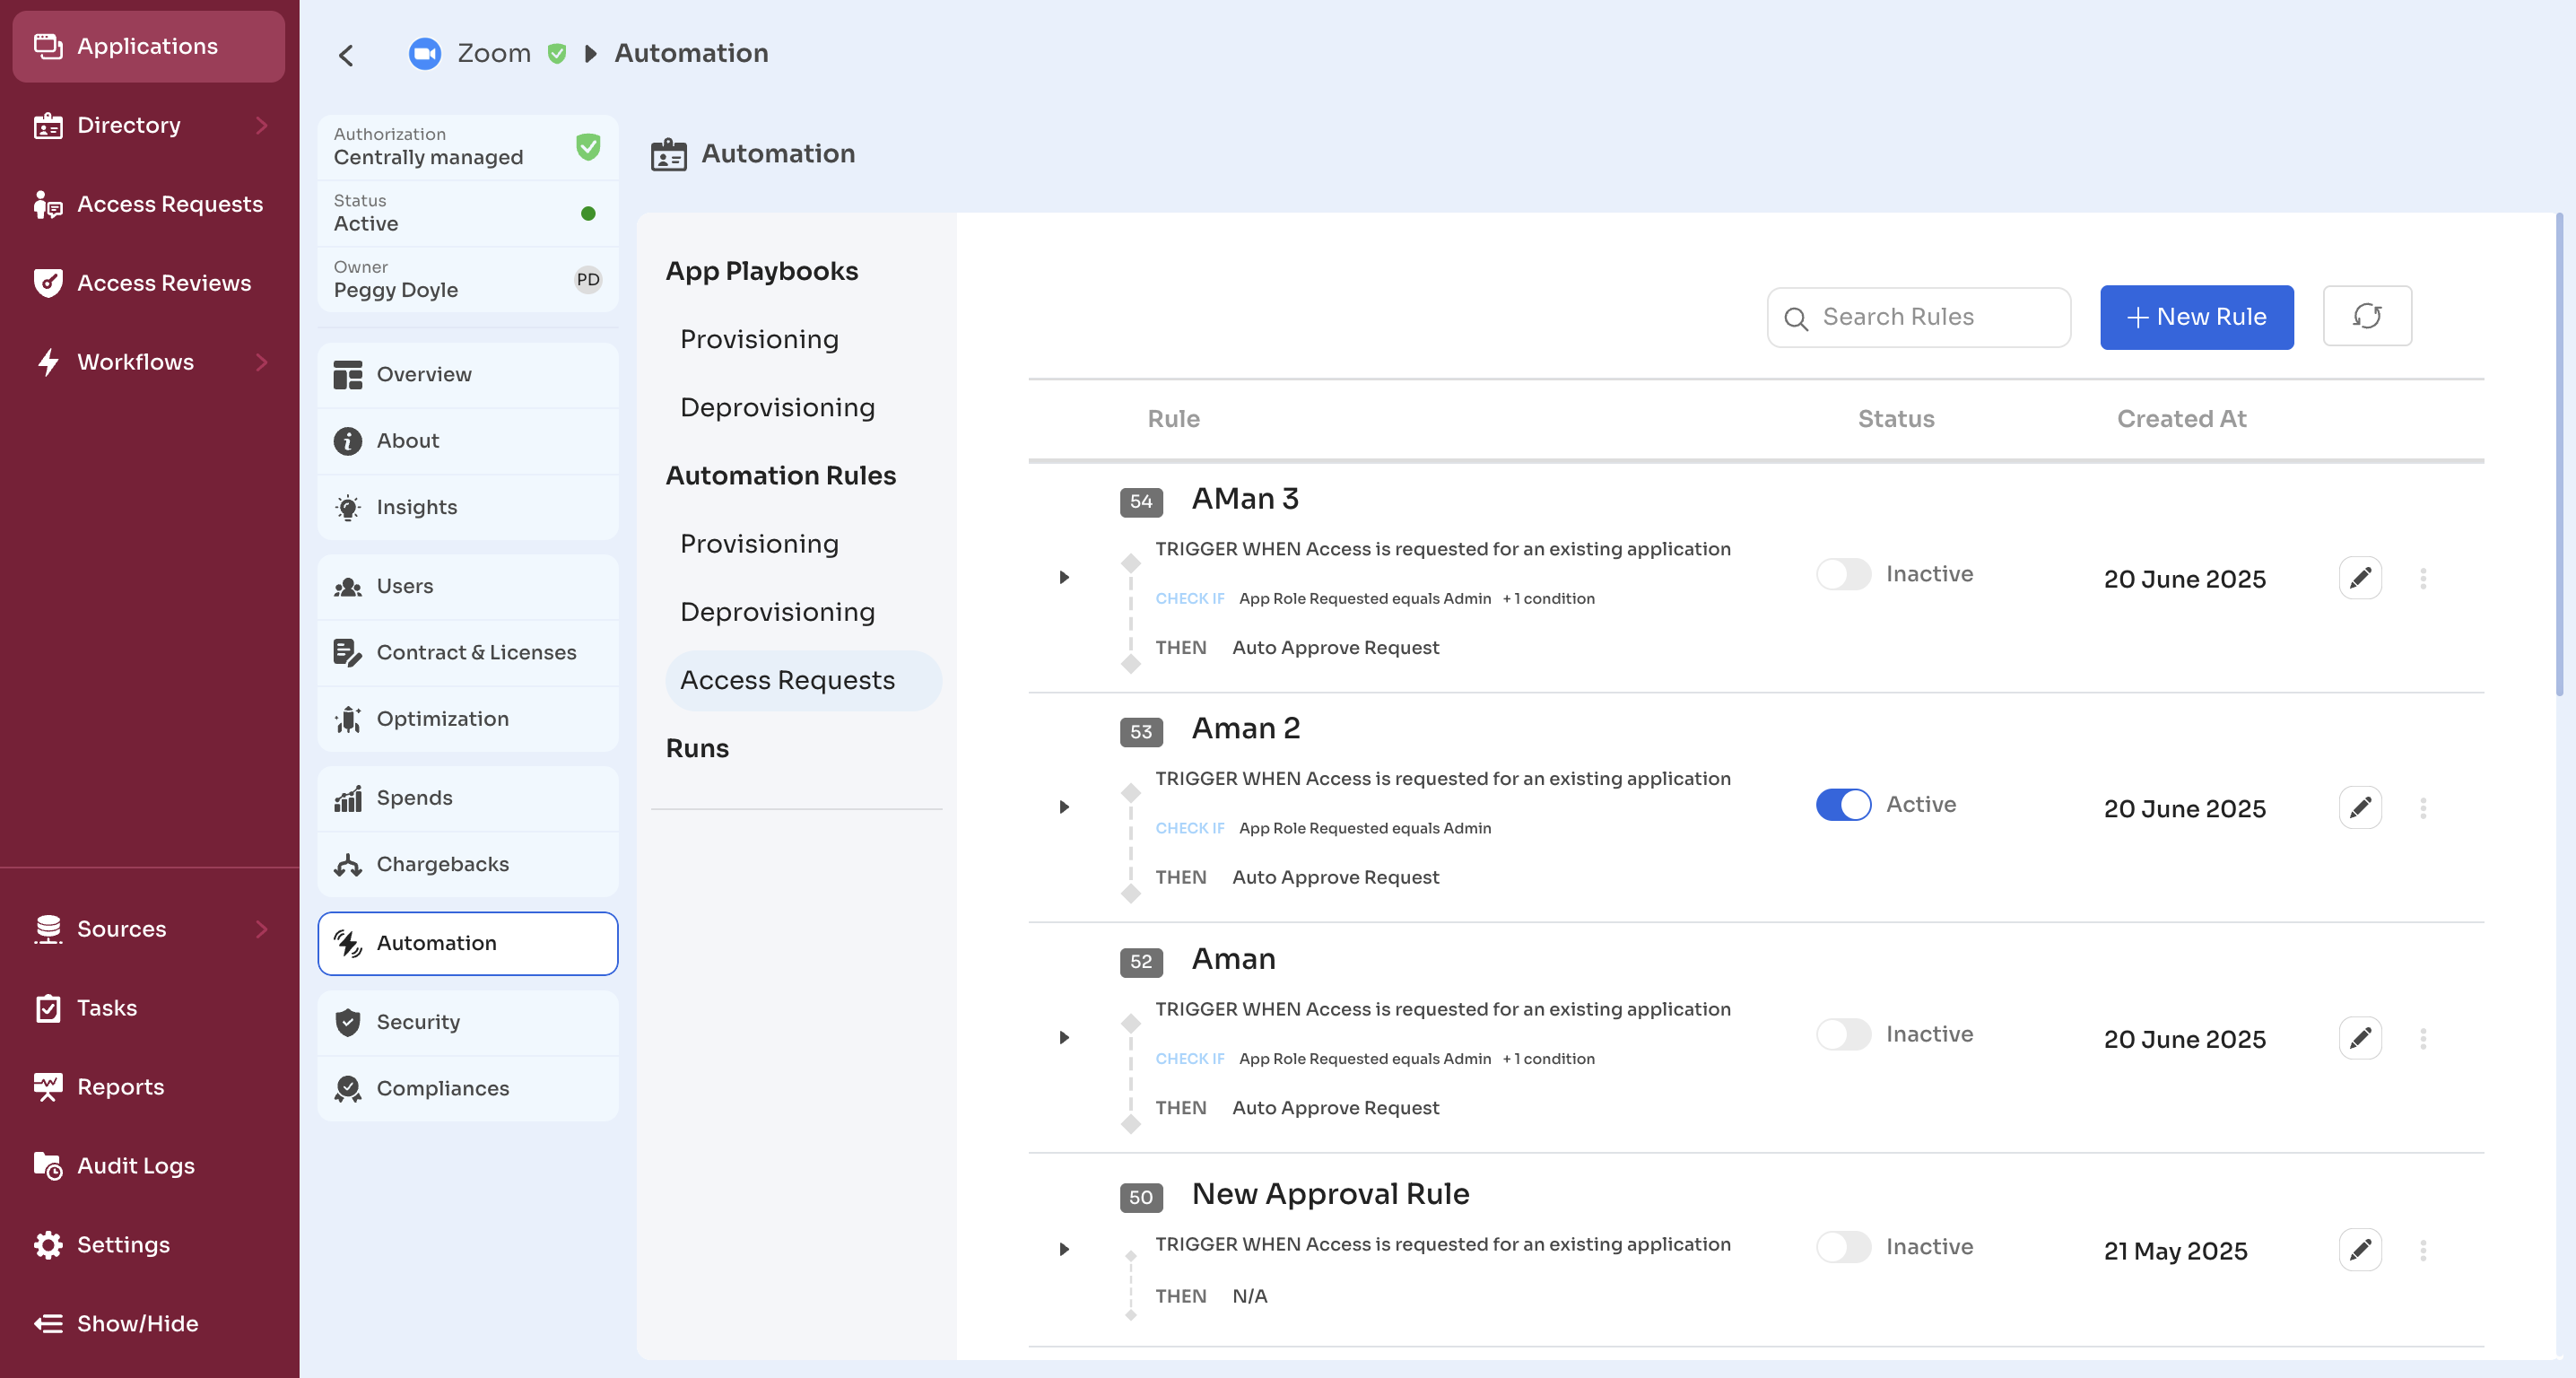
- Application-Specific Rules:
Admin View → Applications → [Select App] → Automation → Access Requests
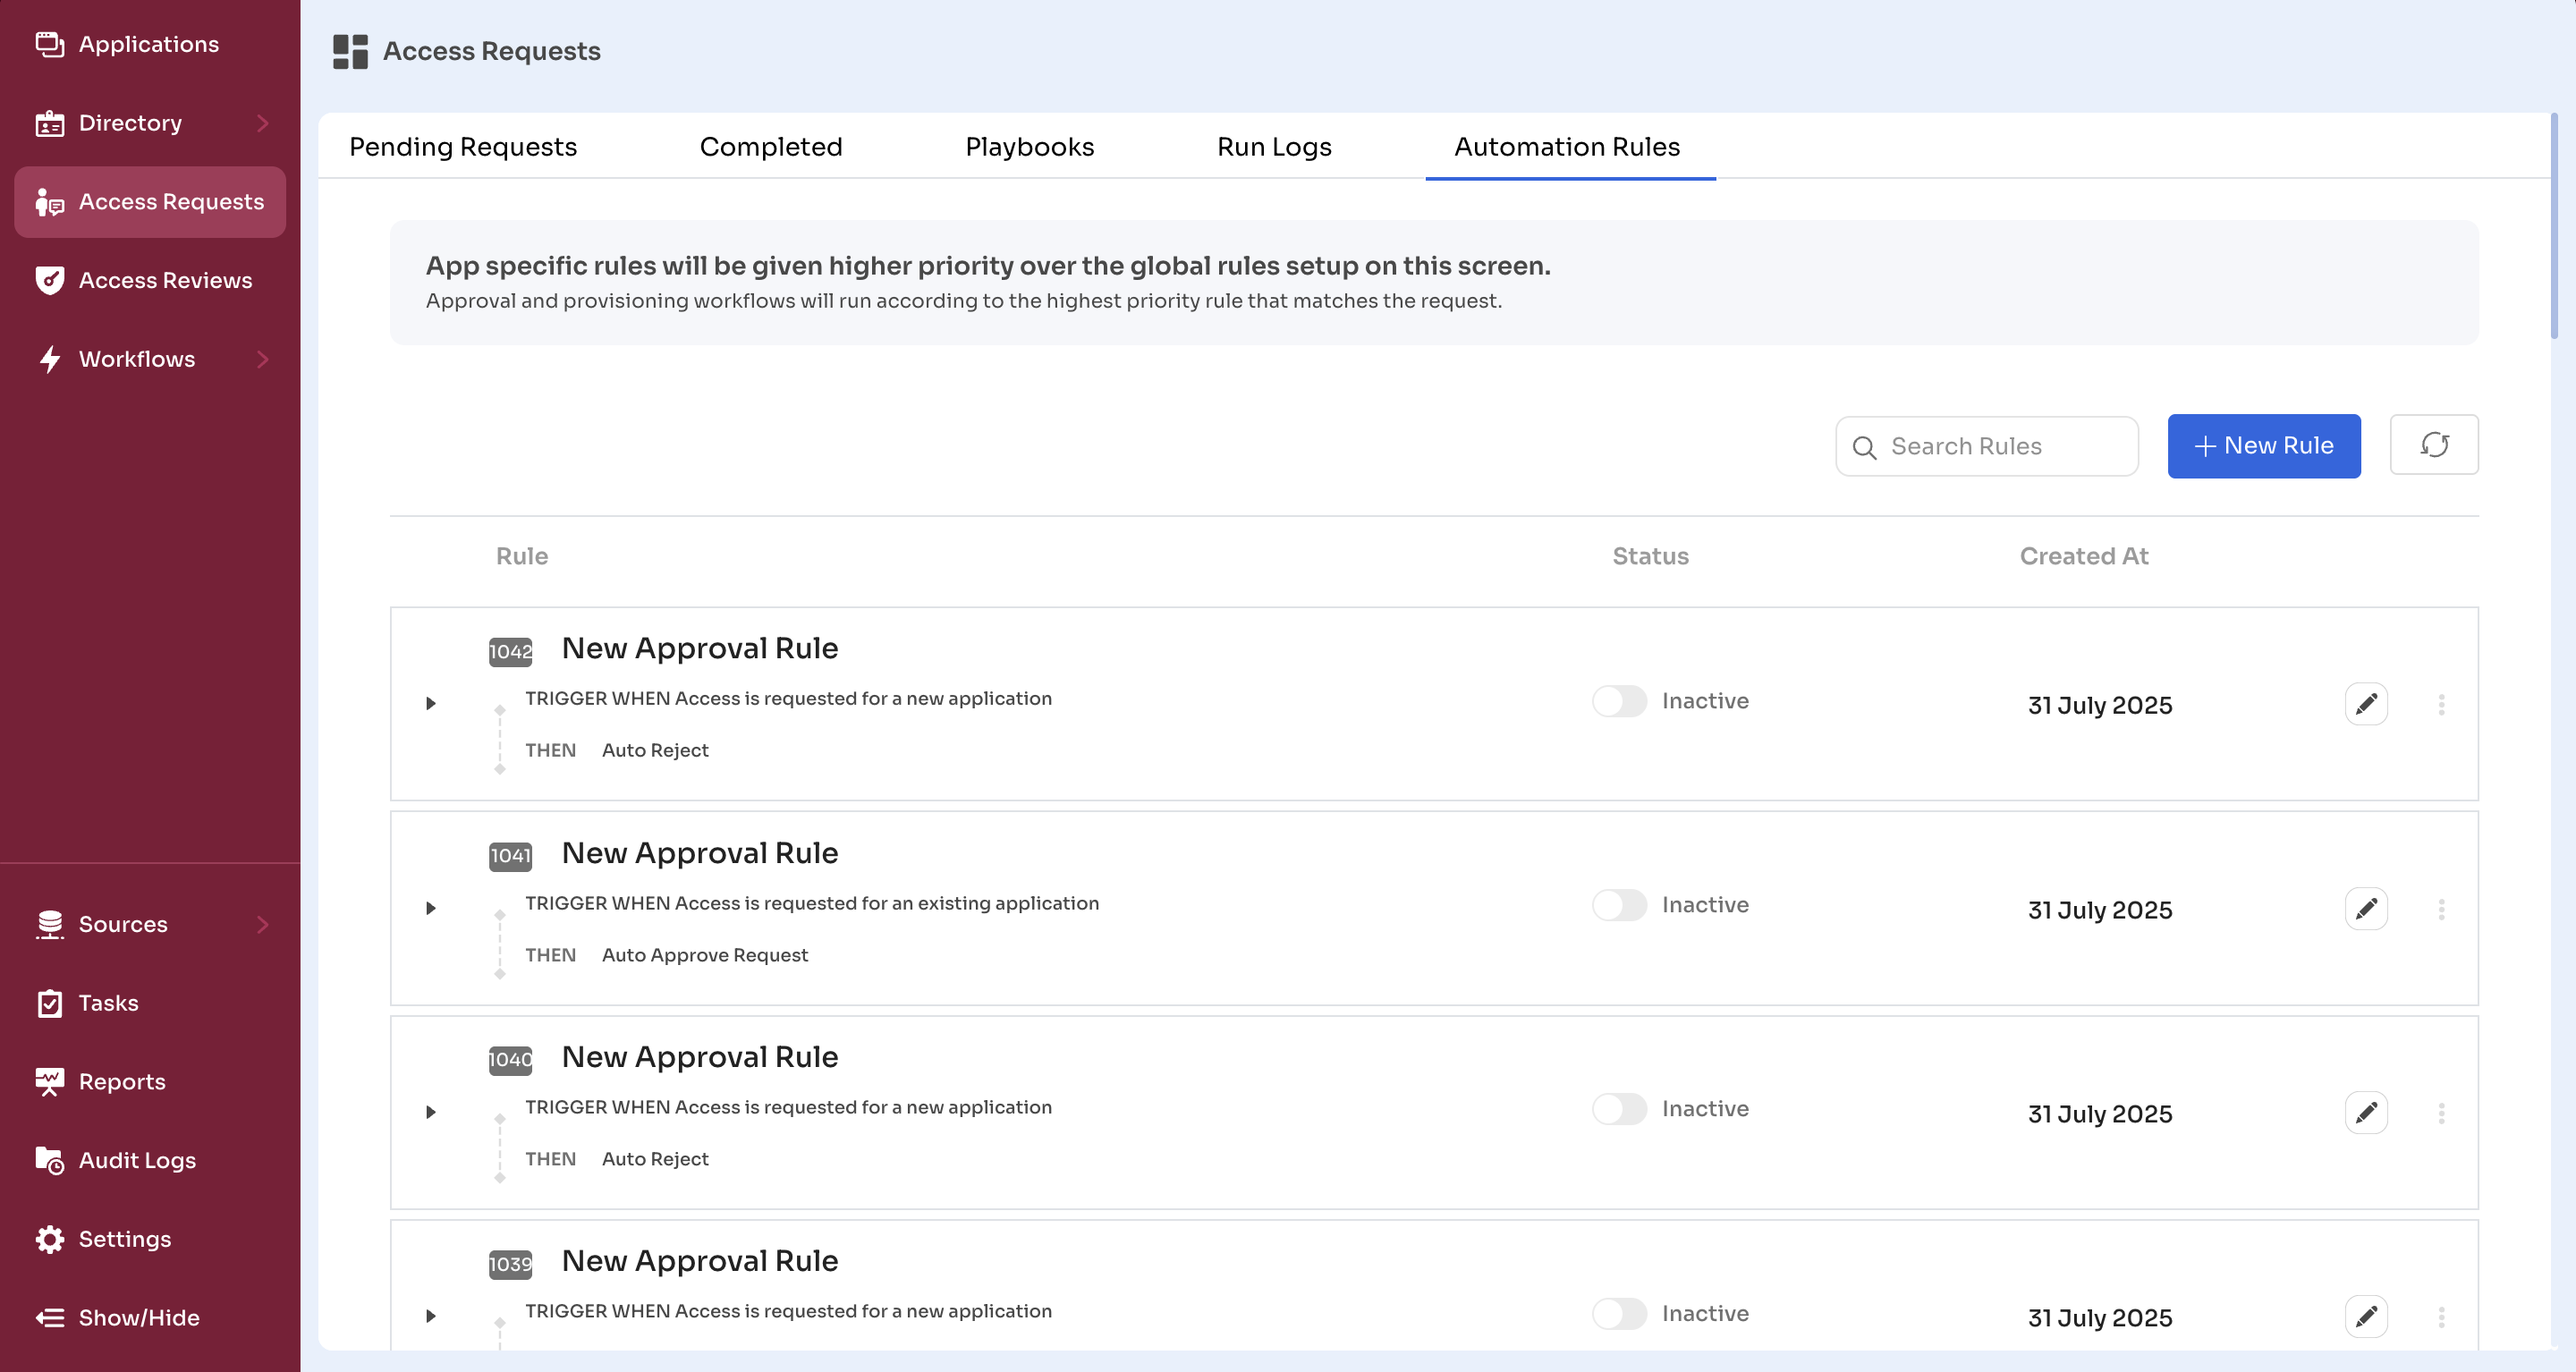
- General Rules:
Admin View → Access Requests → Automation Rules
Editing a Rule
- Click the (✏️ )Edit icon next to the rule
- Modify conditions, approval flows, or provisioning logic
- Click Save

Enabling or Disabling a Rule
- Use the toggle switch beside the rule name
- Active (blue) = Enabled
- Inactive (grey) = Disabled
Disabled rules remain stored in the system but are excluded from all future evaluations.
This change has no impact on any requests that were already processed using the rule.

Deleting a Rule
- Click the three-dot (⋮) menu next to the rule
- Select Delete
- Confirm the deletion

Deleting a rule permanently removes it from the rule engine. It does not affect requests that were already processed under the rule.
To preserve logic for future reference, consider disabling instead.
Updated about 1 month ago
