Connect
This guide explains how to integrate your AWS account with Zluri using secure role-based access and credentials
Prerequisites
Before starting the integration, ensure the following:
- Admin access to the AWS Management Console.
- Permission to create and manage IAM roles.
- Zluri account with access to the AWS integration page.
Steps to Connect
Step 1: Log in to Zluri
- Open your Zluri dashboard.
- Navigate to Sources → Integrations → Browse Catalog.
- Search for AWS and click ➕ Connect.
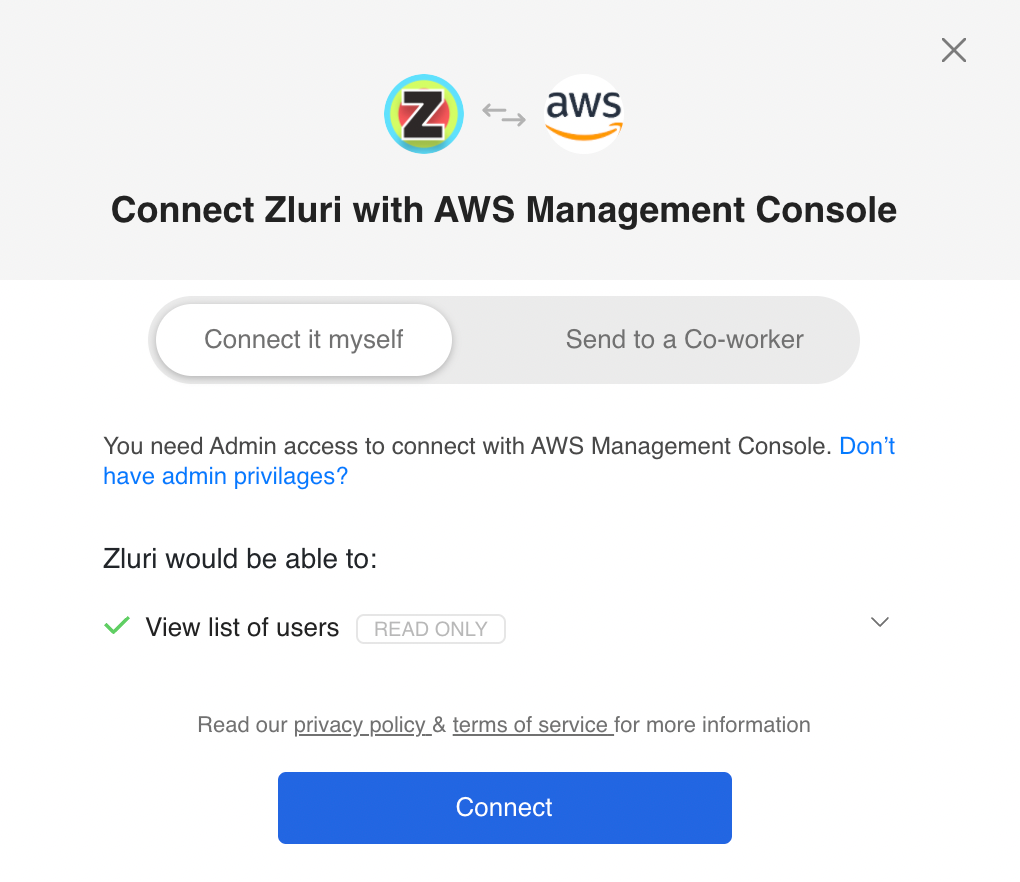
Step 2: Authorize the Integration in AWS
-
Integration with AWS requires authorization from an AWS Administrator.
-
If you have AWS Admin credentials, authorize the connection yourself.
-
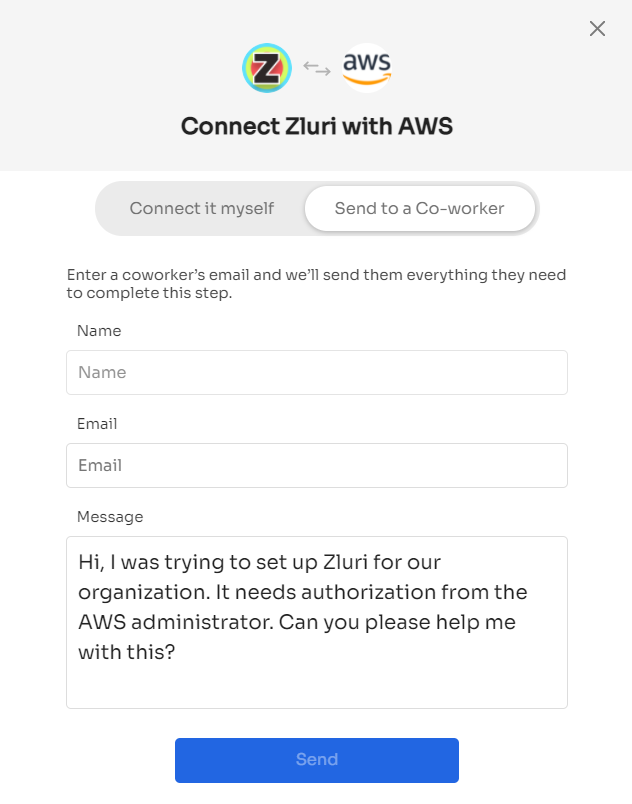
If needed, send an invitation to a co-worker with AWS Admin privileges to complete the authorization.
-
To invite a co-worker:
- Enter their name, email, and an optional note.
- Zluri will send them an invite link with a unique Connect Code.
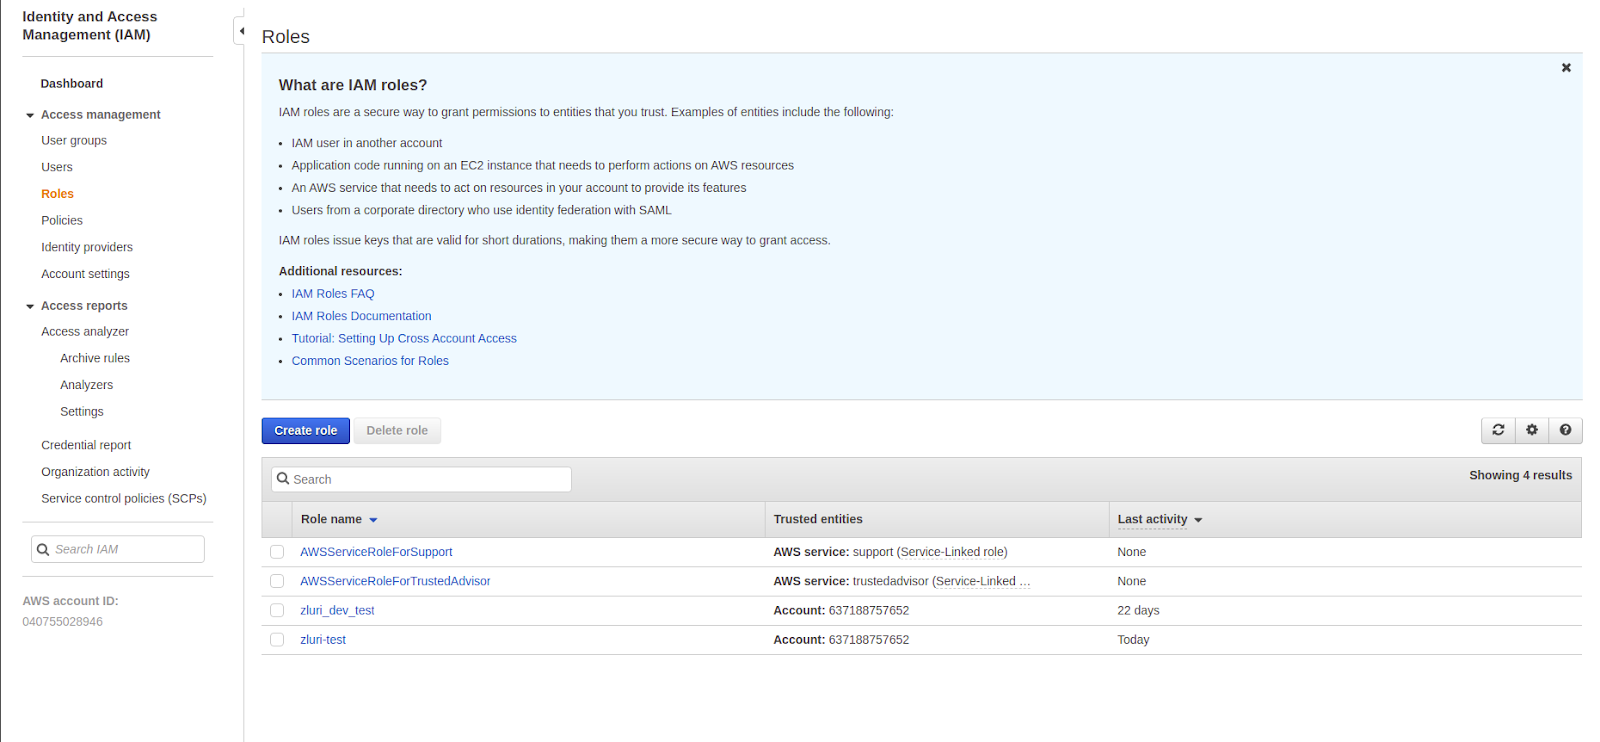
Step 3: Get the External ID and Role ARN from AWS
-
Log in to the AWS Management Console.
-
Navigate to IAM → Roles.
-
Click Create Role.
-
Select Another AWS account as the trusted entity type.
-
Enter the Zluri AWS account ID:
908321198367. -
In the Options section, select Require external ID.
-
Set the External ID to the value provided on the AWS integration page in Zluri.
-
Click Next to continue.
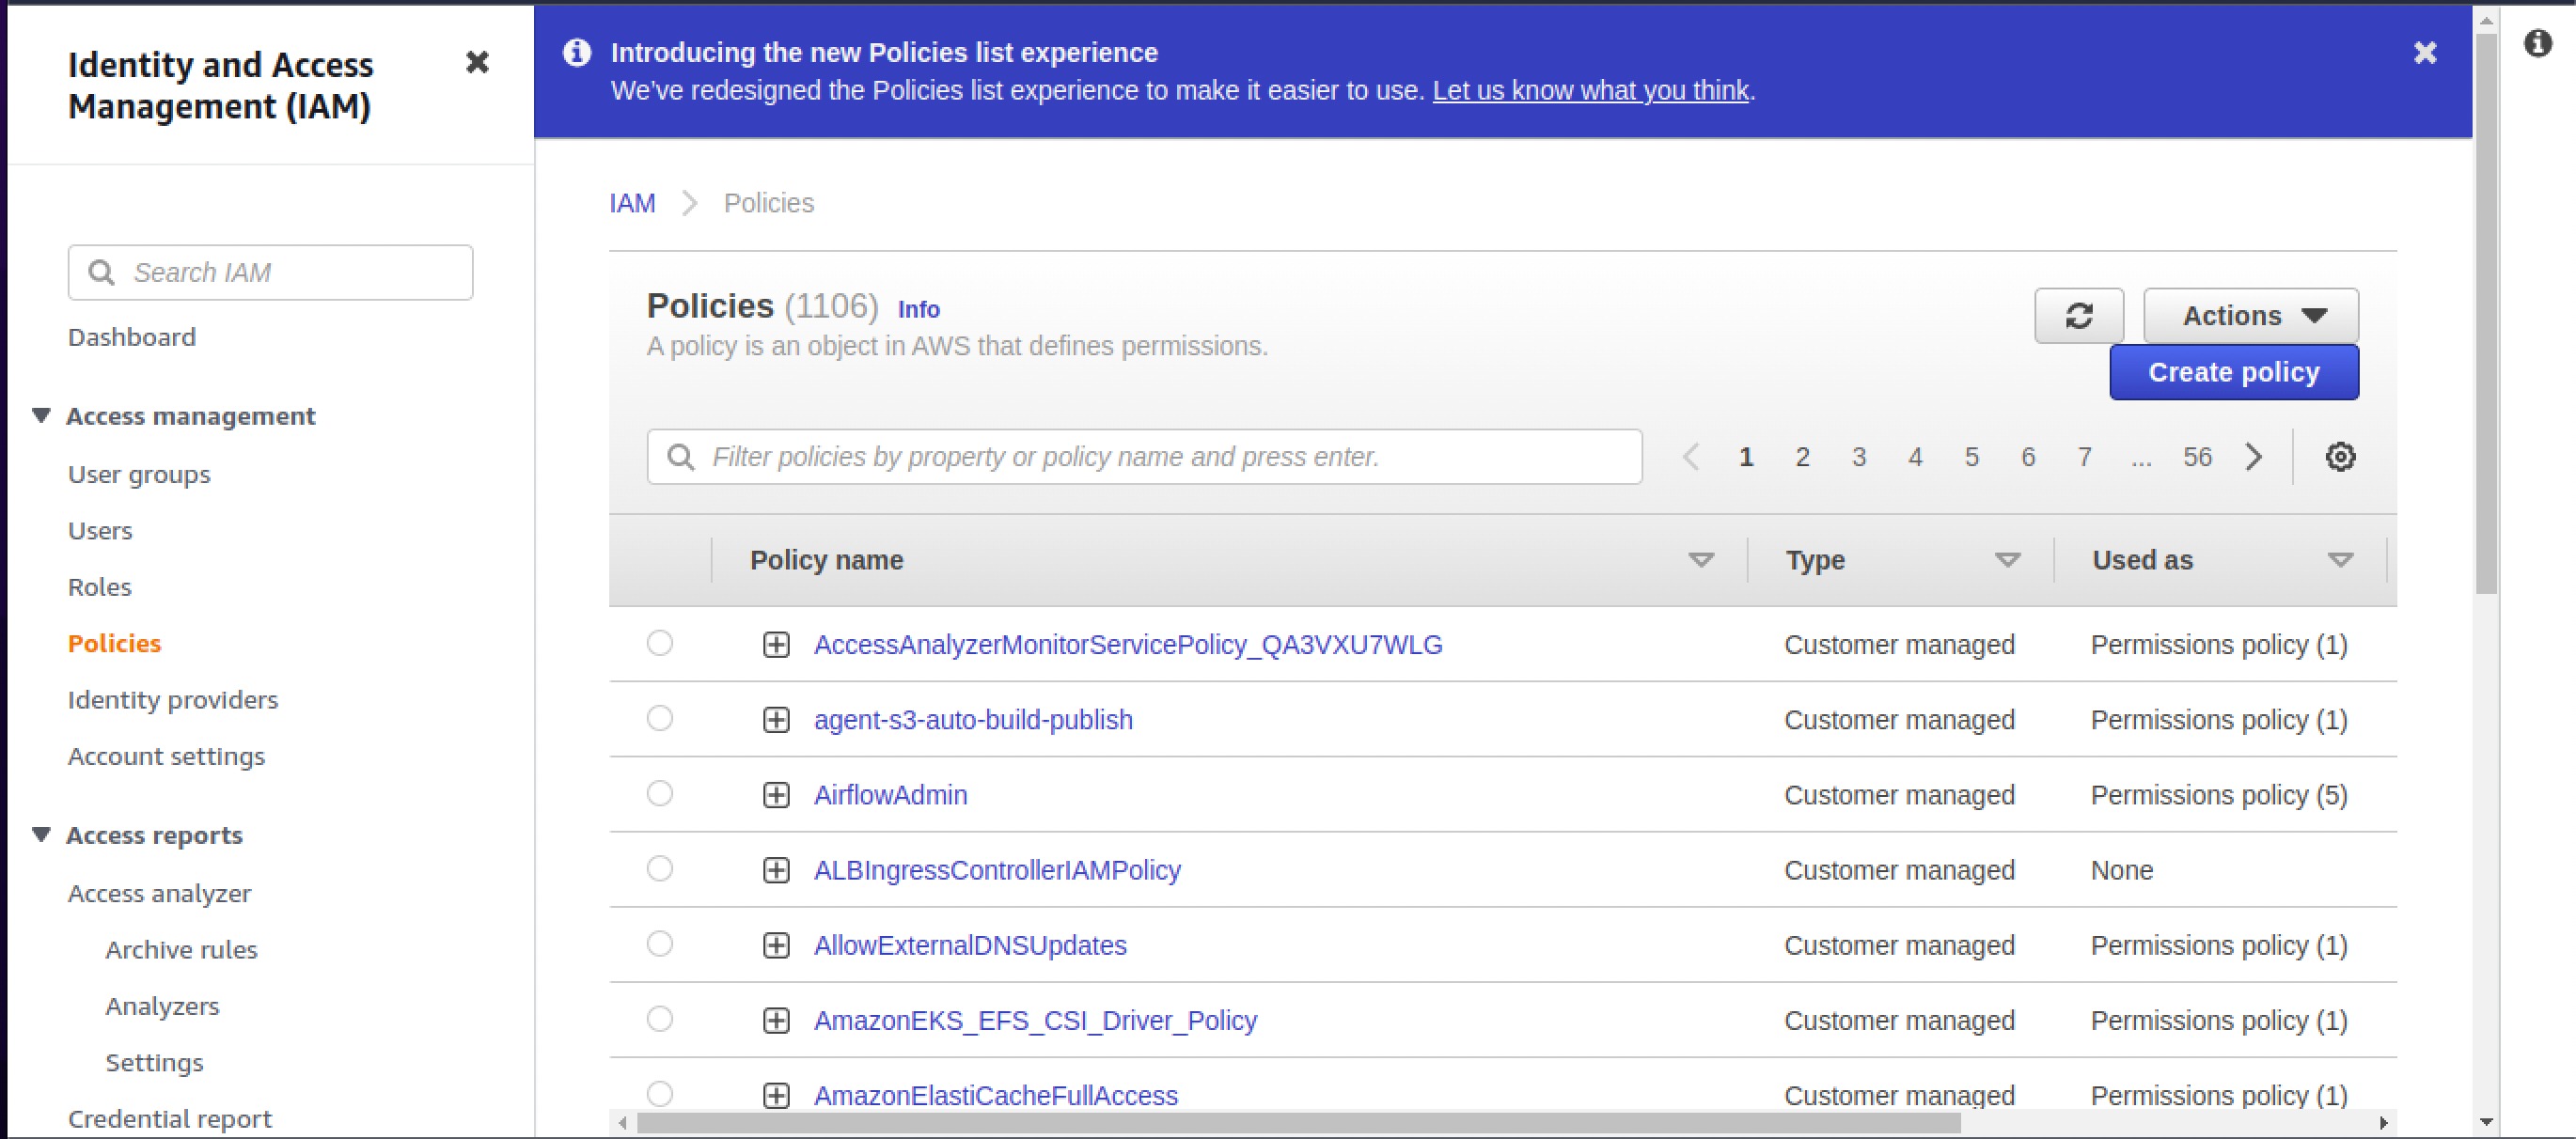
Step 4: Attach Required Policies
-
On the Permissions page, click Add Permissions and choose Attach policies.
-
Search and select the following policies to grant Zluri required access:
AWSOrganizationsReadOnlyAccessAWSSSOReadOnlyAWSSSODirectoryReadOnly
Optional (for billing data):
- Select Create Policies if you wish to grant Zluri access to billing data.
- Choose Cost Explorer Service, set the access level to Read, and select All resources.
What does the ‘Read billing info’ scope in AWS integration give us?
Zluri utilizes this scope/permission to fetch all bills from AWS from the last month. These bills are then processed as subscriptions. The subscriptions will appear under the Subscriptions tab in Zluri.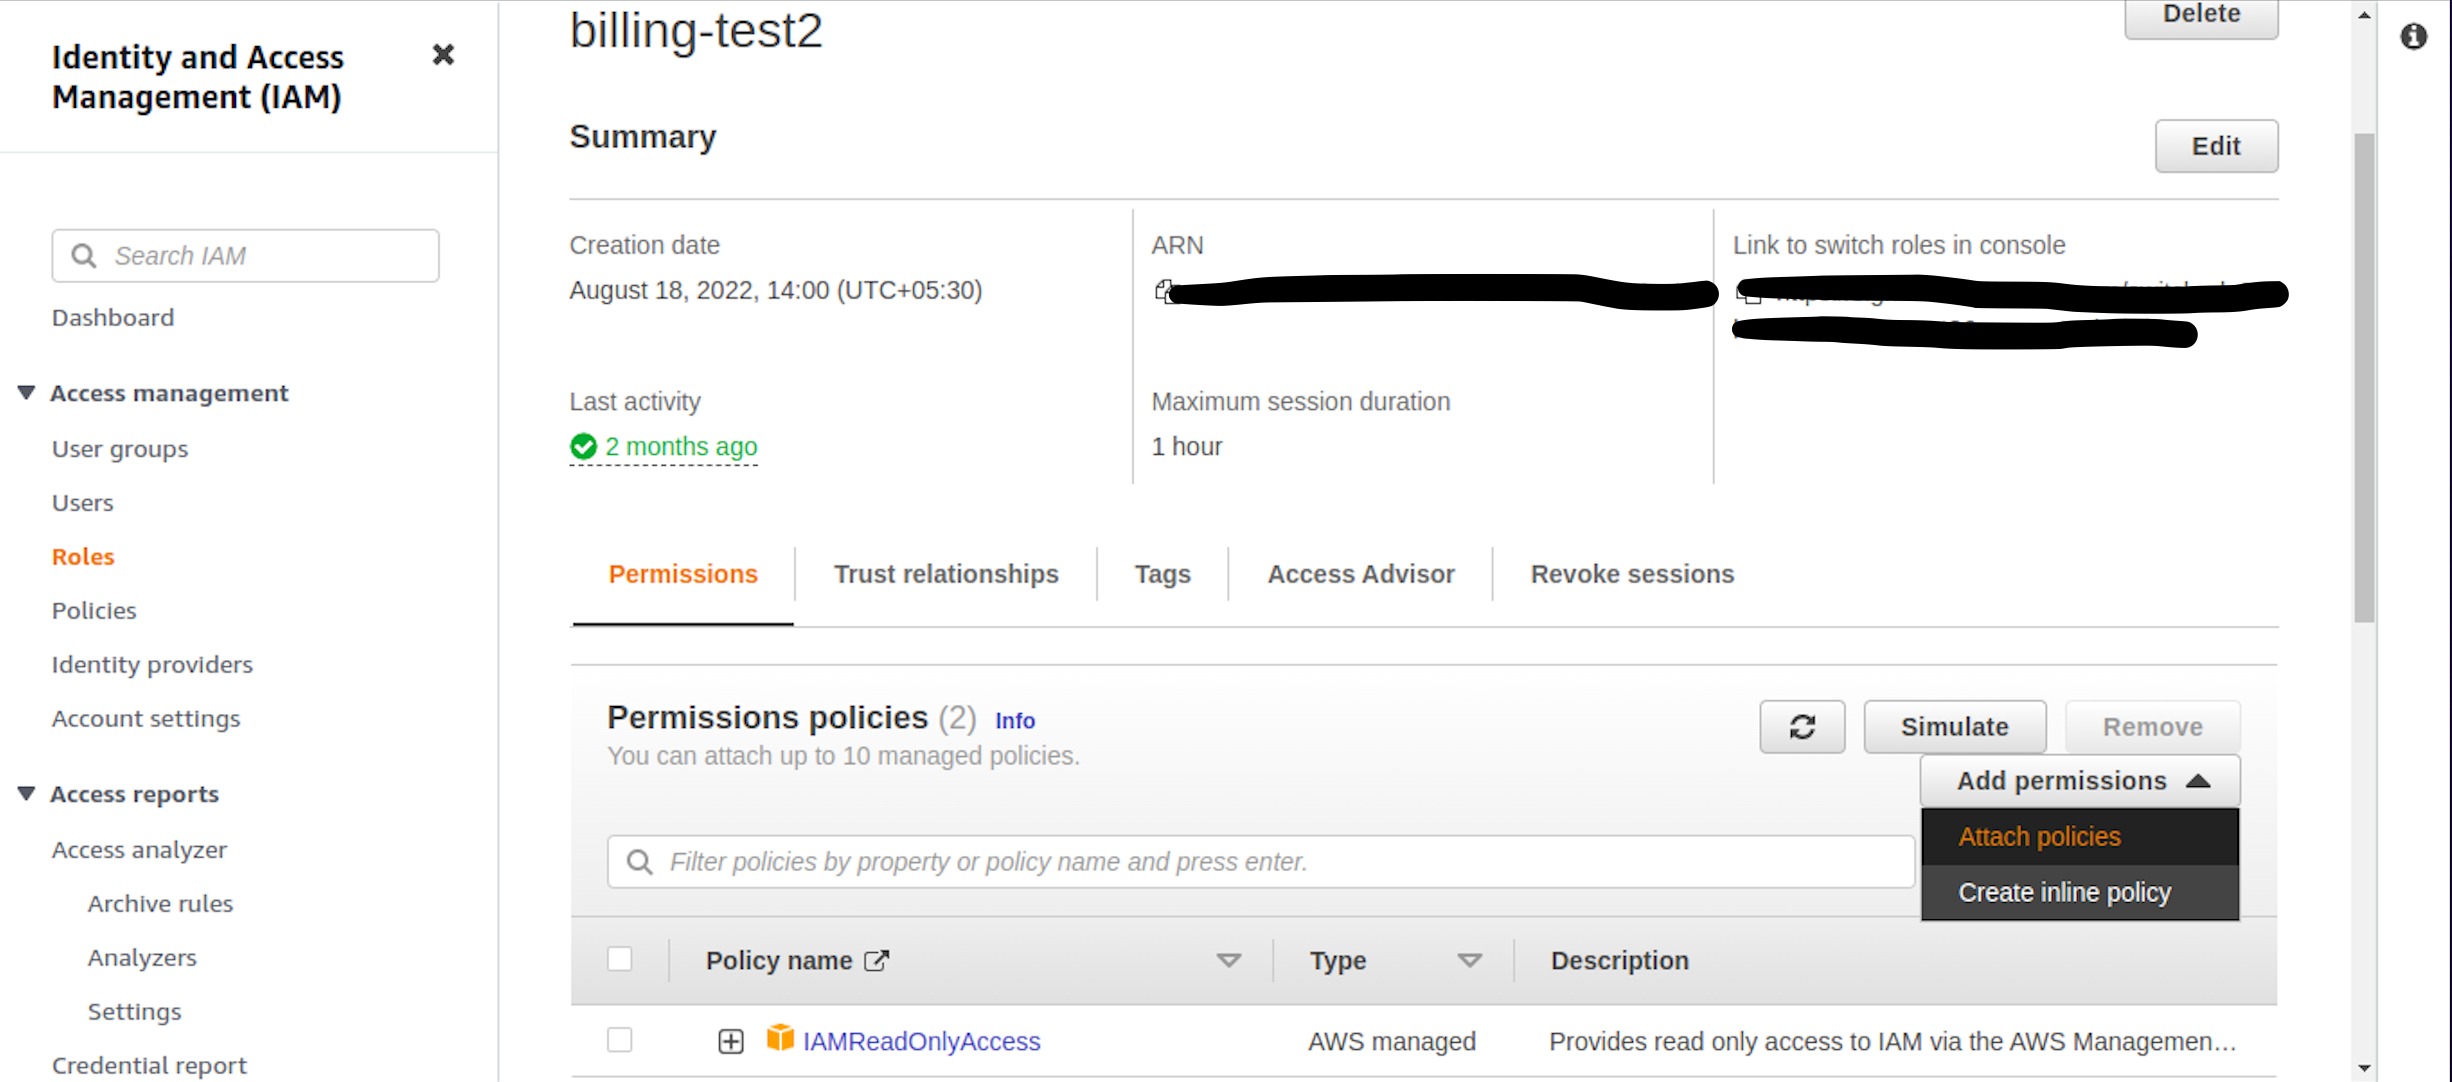
-
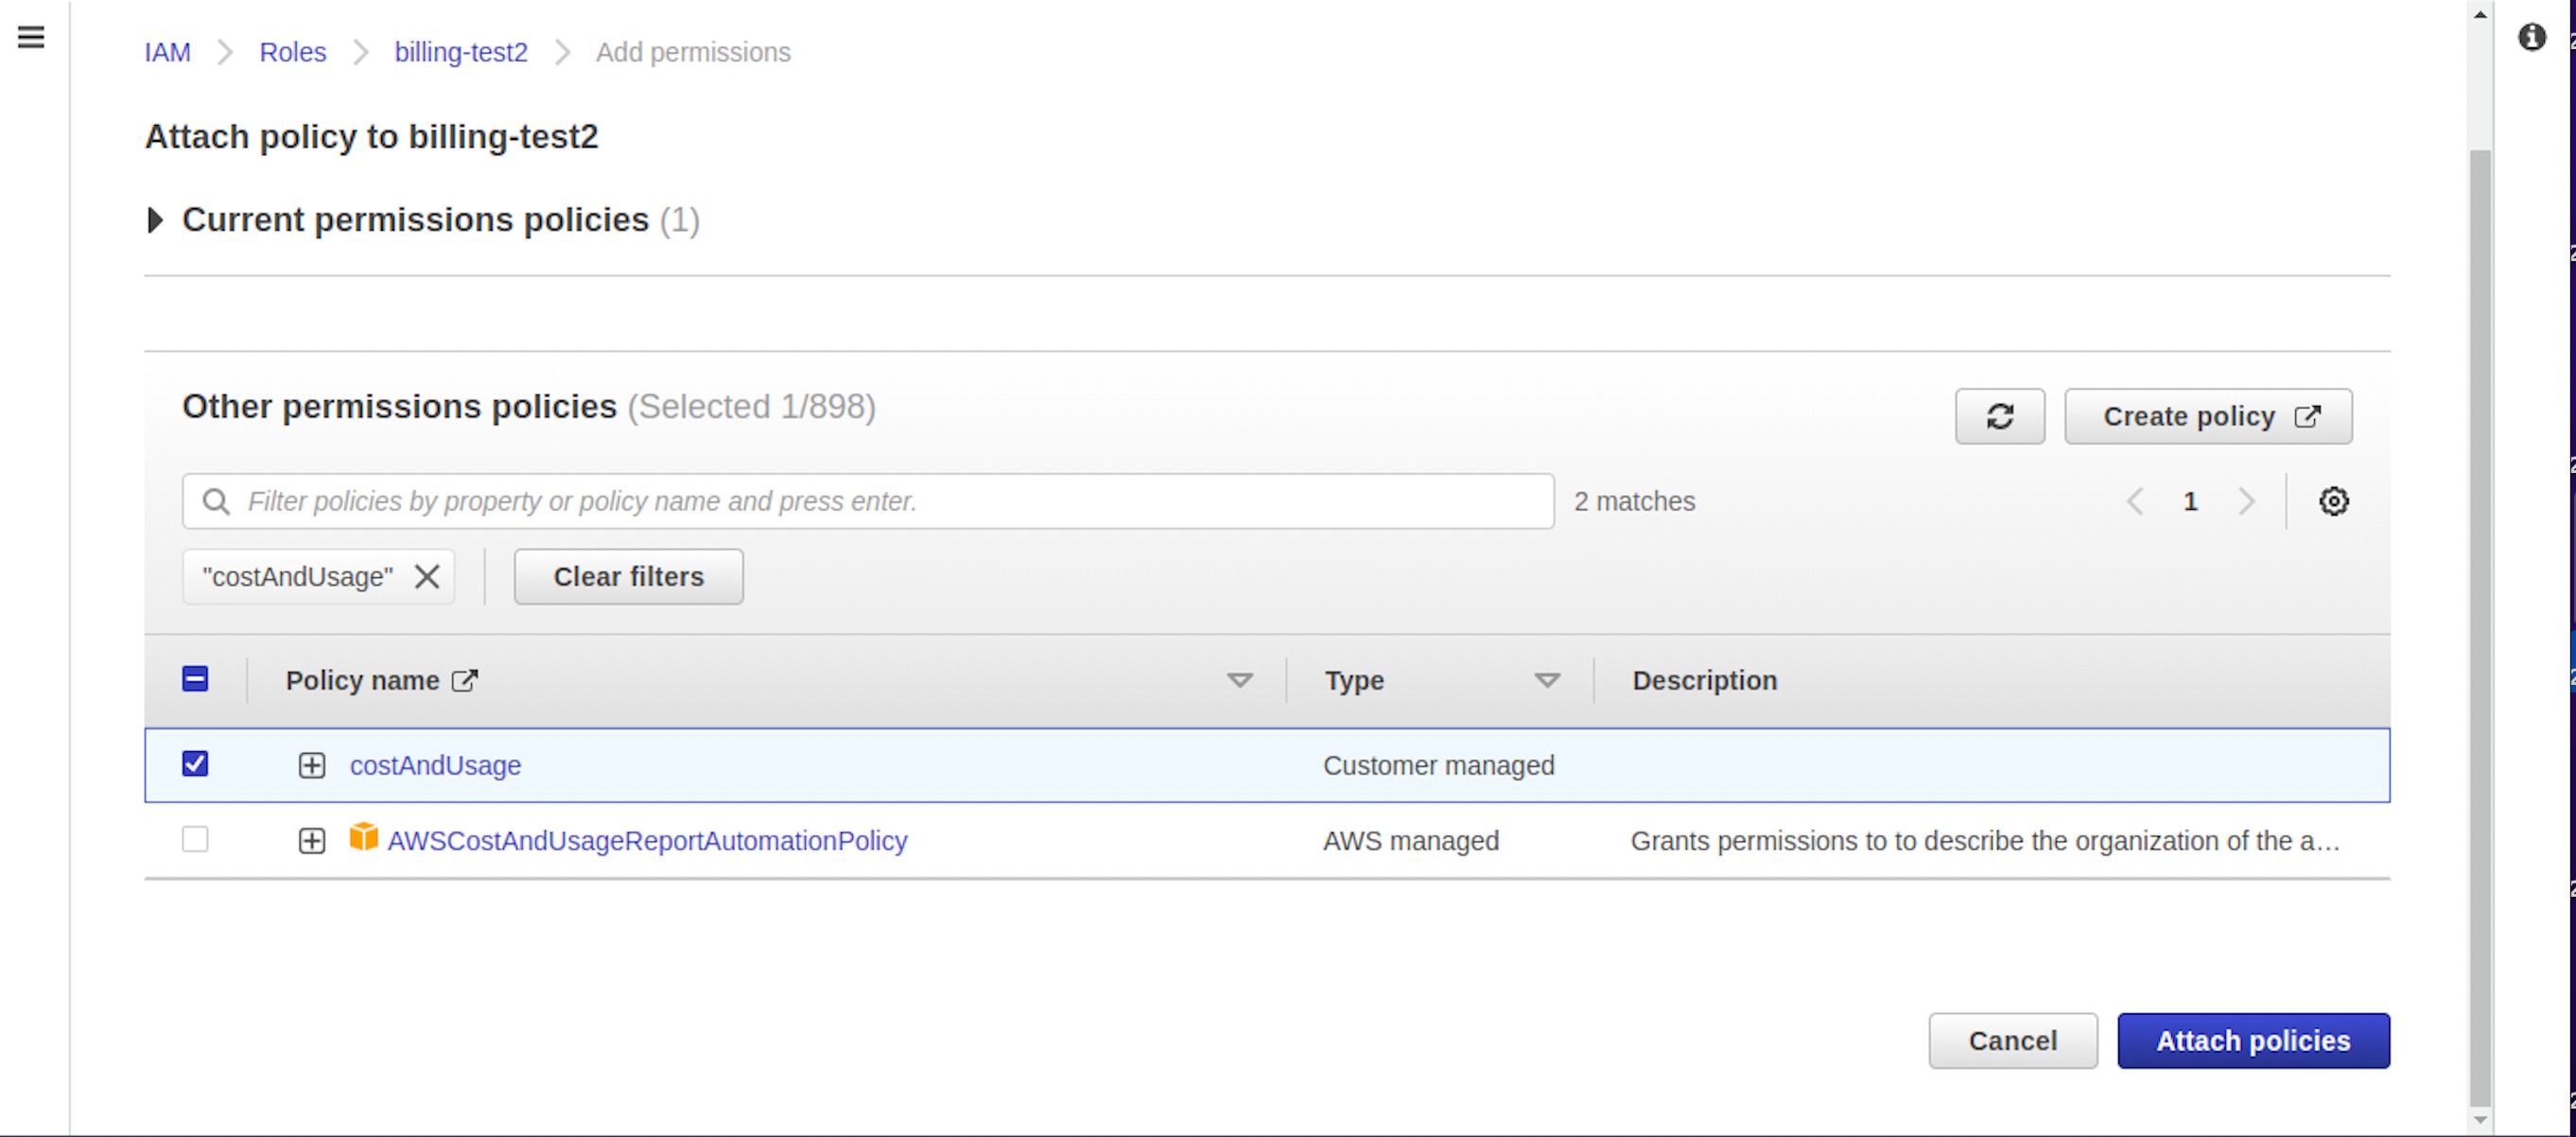
Name the policy and click Create Policy.
-
Attach the created policy to the role.
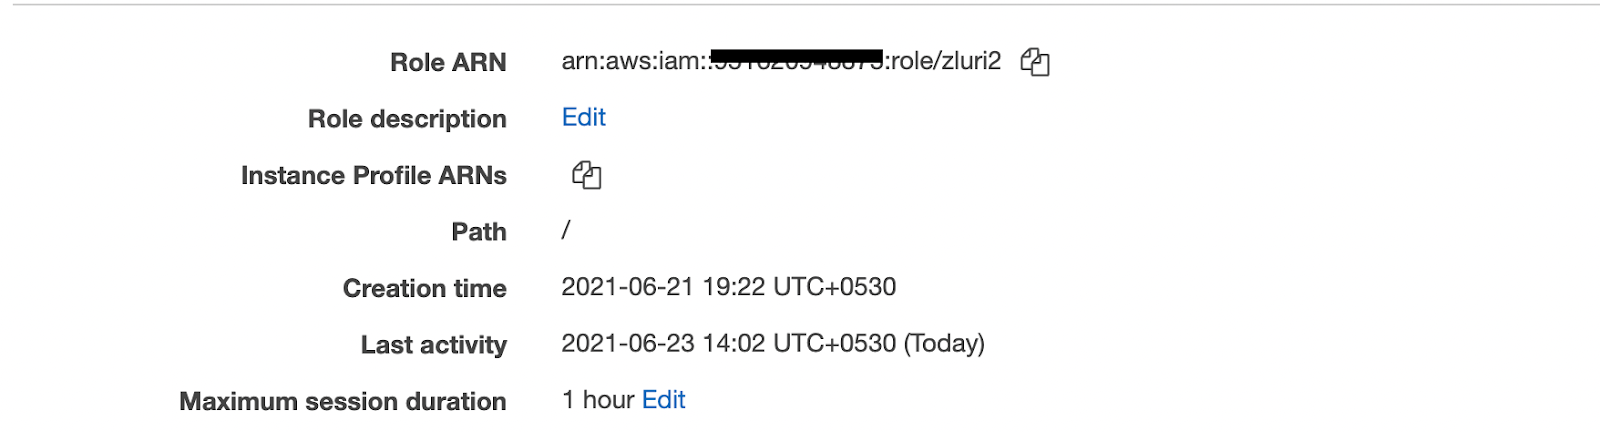
Step 5: Retrieve Role ARN and External ID
-
On the Role Summary page, copy the Role ARN.
- This is needed for Zluri.
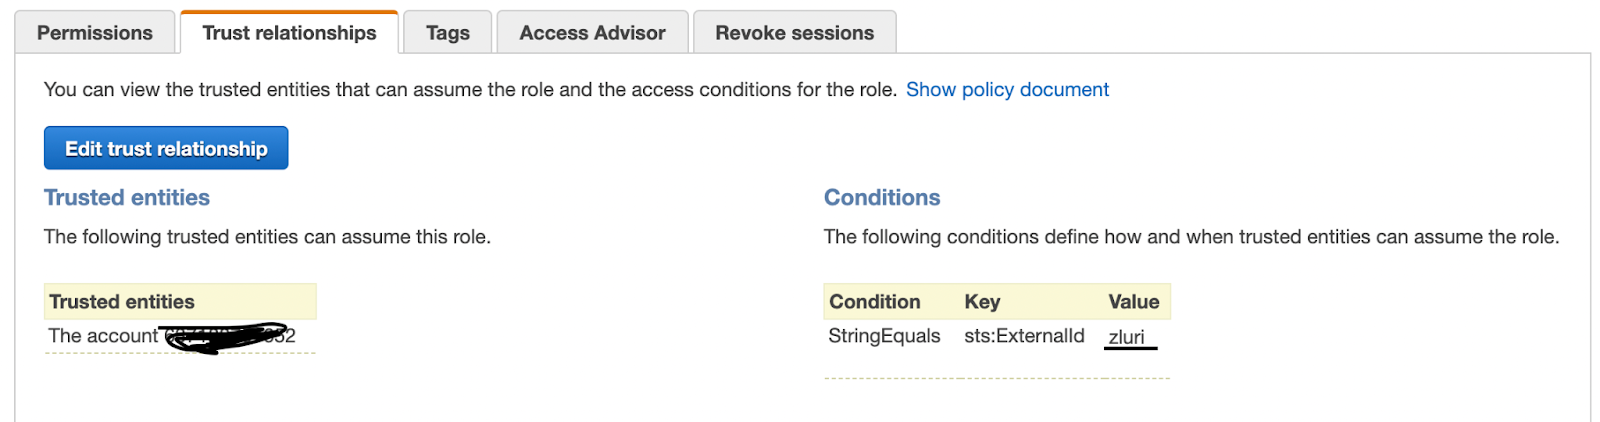
-
Click on Trust relationships to view and copy the External ID.
Step 6: Complete the Integration in Zluri
- Log in to Zluri.
- Navigate to Sources → Integrations → AWS.
- Paste the following details into the integration form:
- Role ARN (from Step 5)
- External ID (from Step 5)
- AWS Region (e.g.,
us-west-1,eu-central-1)
- Click Connect to complete the integration.
Uninstallation
To uninstall the AWS integration:
- Go to the Integrations tab in Zluri.
- Hover over the AWS Integration and click More Info.
- Click Disconnect to remove the integration.
Integration Complete
Zluri is now connected to AWS, and data will begin syncing automatically.
Got questions? Feel free to submit a ticket or contact us directly at [email protected].
Updated 8 months ago