How to use Bulk User Mapping for Desktop Agents (CSV Upload method)
Bulk User Mapping allows device-to-user mapping through a CSV upload.
Overview
The Bulk User Mapping via CSV feature for Desktop Agents in Zluri lets administrators perform device-to-user mapping in bulk using a downloadable CSV template. This reduces manual effort and errors, particularly when managing a large number of devices.
This help guide explains how to use the Bulk User Mapping feature for Desktop Agents in Zluri. The feature was developed to support organizations that either do not have an MDM in place or use an MDM that Zluri does not support for automatic device-to-user mapping.
About Desktop Agents
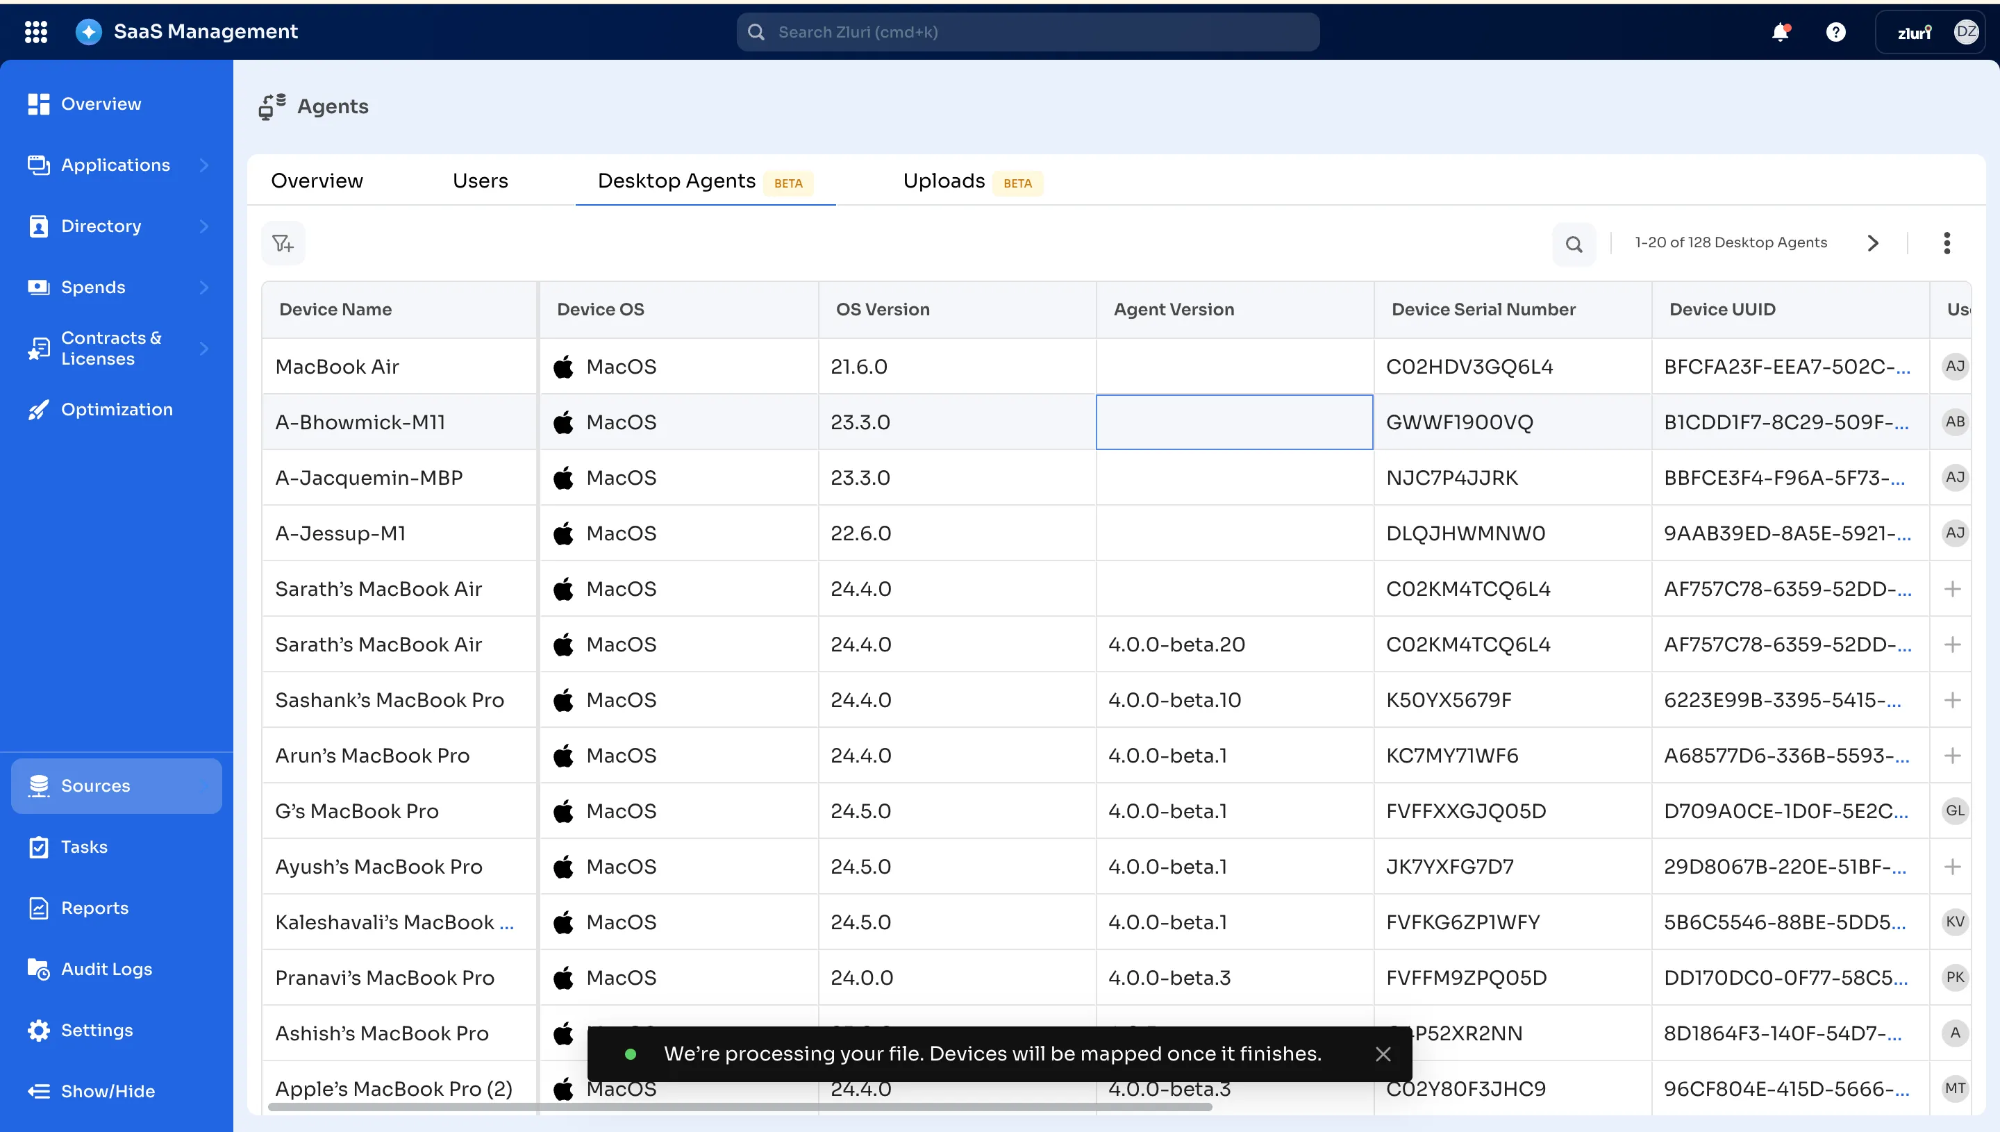
Whenever a desktop agent is installed on a device, and the organization token is successfully read, the device is listed on the Desktop Agents page. All relevant device details are displayed alongside it. Each desktop agent must be mapped to a specific user to ensure that any data associated with that agent is linked correctly to the corresponding user on the platform.
Important: A Desktop Agent will appear on the Desktop Agents page only after the organization token has been entered and successfully read by the system.
Methods for mapping devices to users
Zluri provides three methods for mapping devices to users, which are discussed below.
Method 1: Manual device-user mapping
Admins can manually map a device to a user by following these steps.
-
Log in to Zluri and navigate to Sources → Agents → Desktop Agents.
-
Scroll horizontally towards the ‘User’ column, and select ‘+Map to User’.
-
Search for the user that you wish to map.
-
Once an admin selects a user, the mapping is complete.
Read the detailed guide on Manual Device-User Mapping.
Method 2: Automatic mapping via MDM integration
If an organization has integrated an MDM solution (e.g., Kandji), Zluri will automatically map devices to users based on data from that integration.
However, there are scenarios where automatic mapping is not available:
- The organization uses an MDM that Zluri does not support for automatic mapping.
- The organization may not be using any MDM at all.
In the above cases, the admin needs to revert to manual mapping or use bulk user mapping via CSV upload.
Method 3: Bulk user mapping via the CSV method
In the above two methods, some limitations and challenges created the need for a process that can enable bulk device-to-user mapping. To achieve these requirements, Zluri introduces Bulk Device-to-User Mapping via CSV for Desktop Agents, allowing administrators to bulk map users to devices without manually assigning each one.
In this method, administrators can download a CSV file containing details of all devices with agents. The agents listed are those with an organization token added manually or via MDM automation. Administrators can then add user emails to the CSV and upload it back into the Zluri SaaS management system for bulk user mapping.
-
Navigate to the Desktop Agents tab.
-
Log in to the Zluri SaaS Management platform.
-
Navigate to Sources → Agents → Desktop Agents.
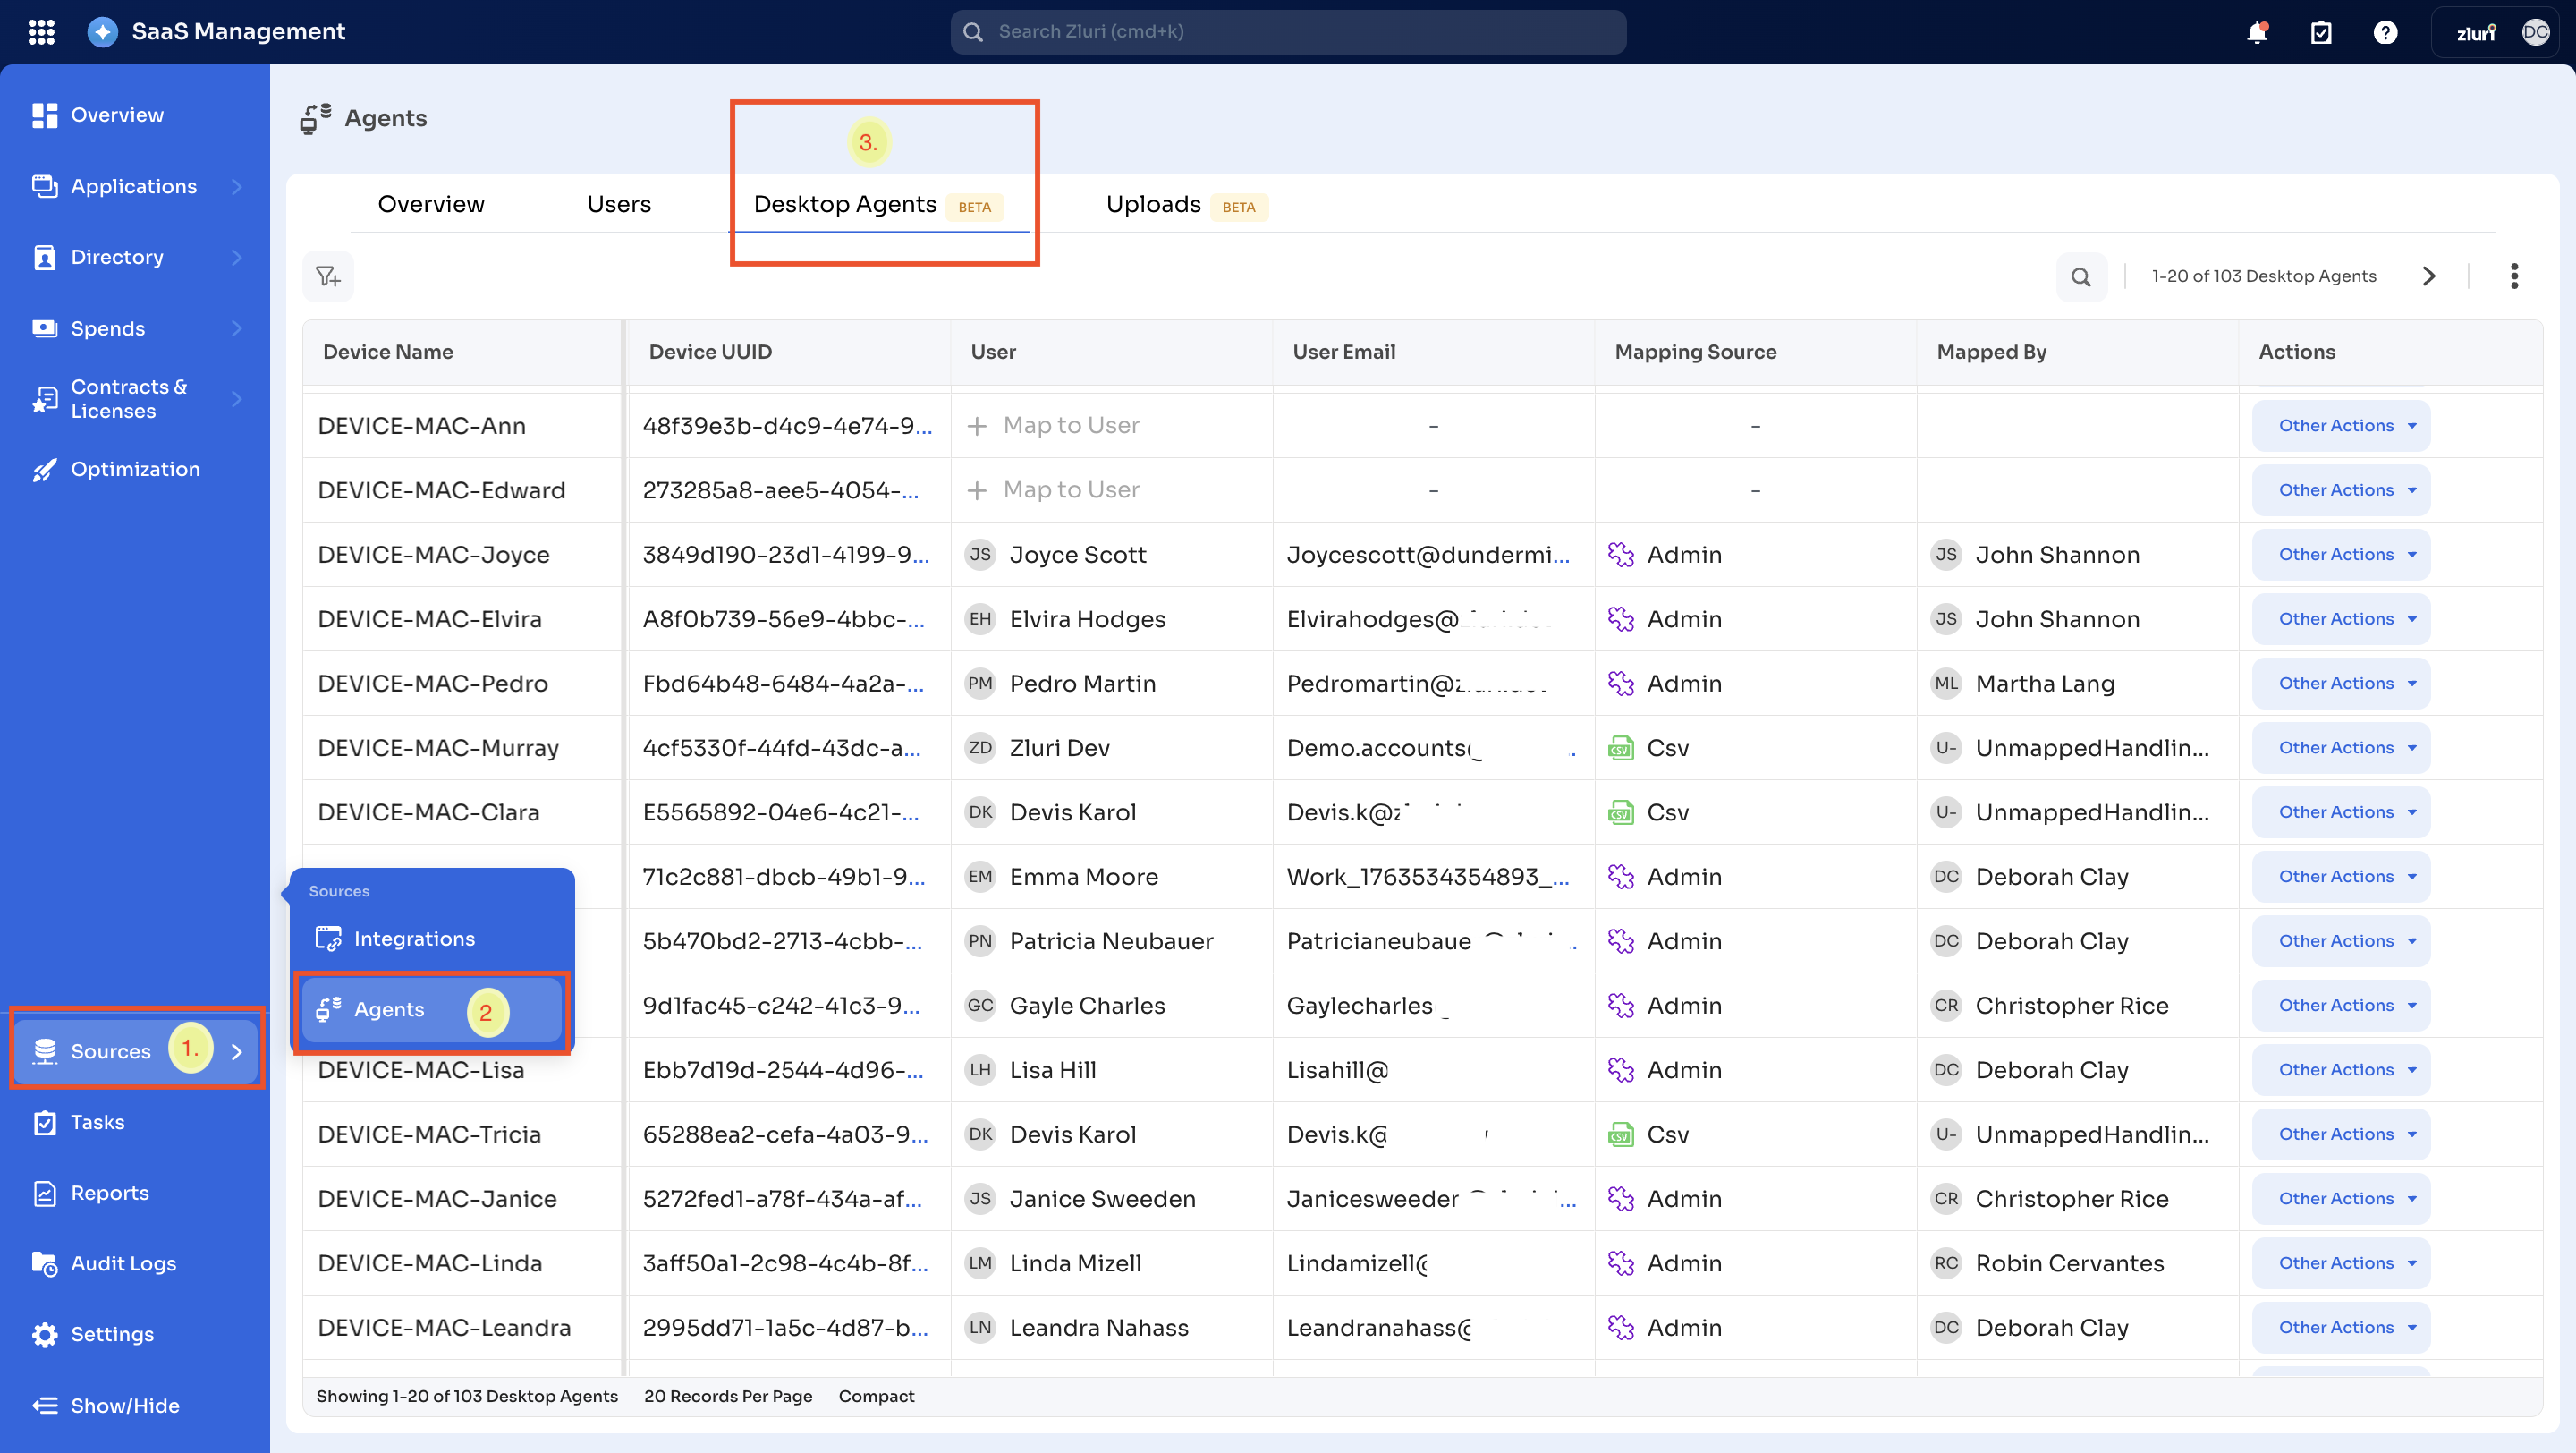
-
-
Agents page: On the Agents landing page, you will see four tabs:
a. Overview
b. Users
c. Desktop Agents [BETA] (In this tab, you will manage Desktop Agents and user mapping.)
d. Uploads

-
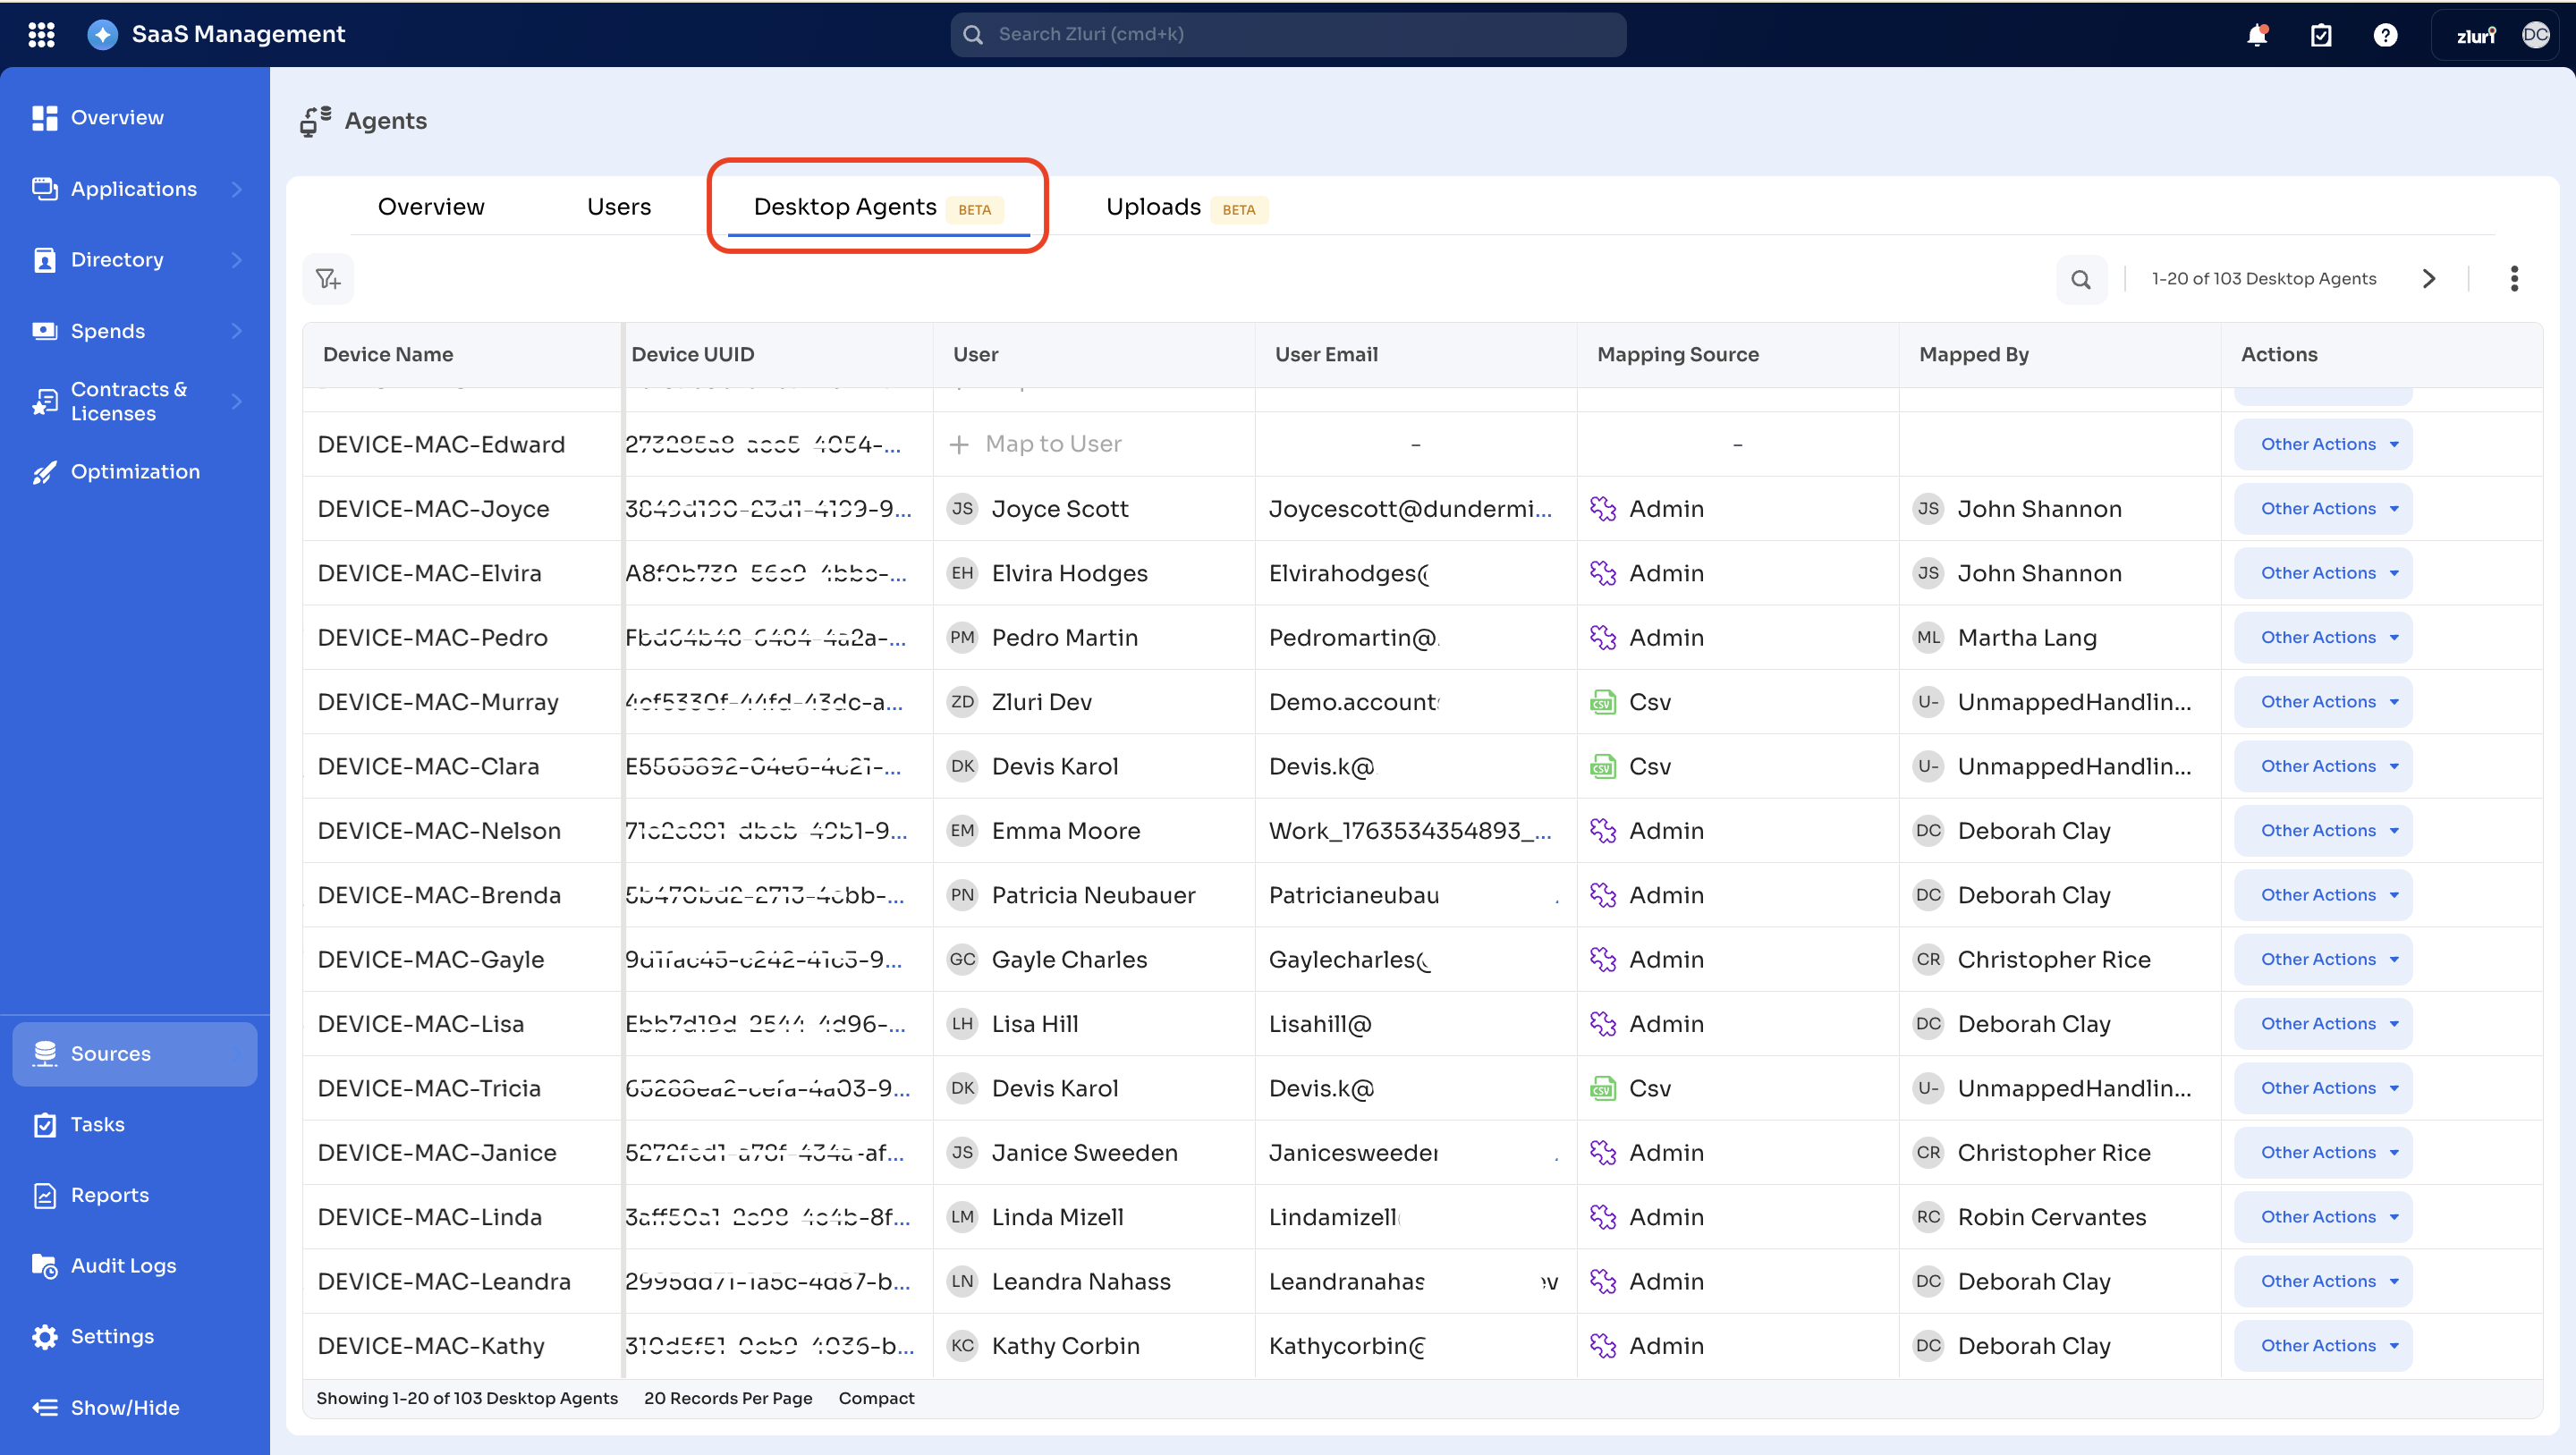
Desktop Agents [BETA]: On the Desktop Agents tab, you will manage Desktop Agents and user mapping.
- Initiate Bulk Update
-
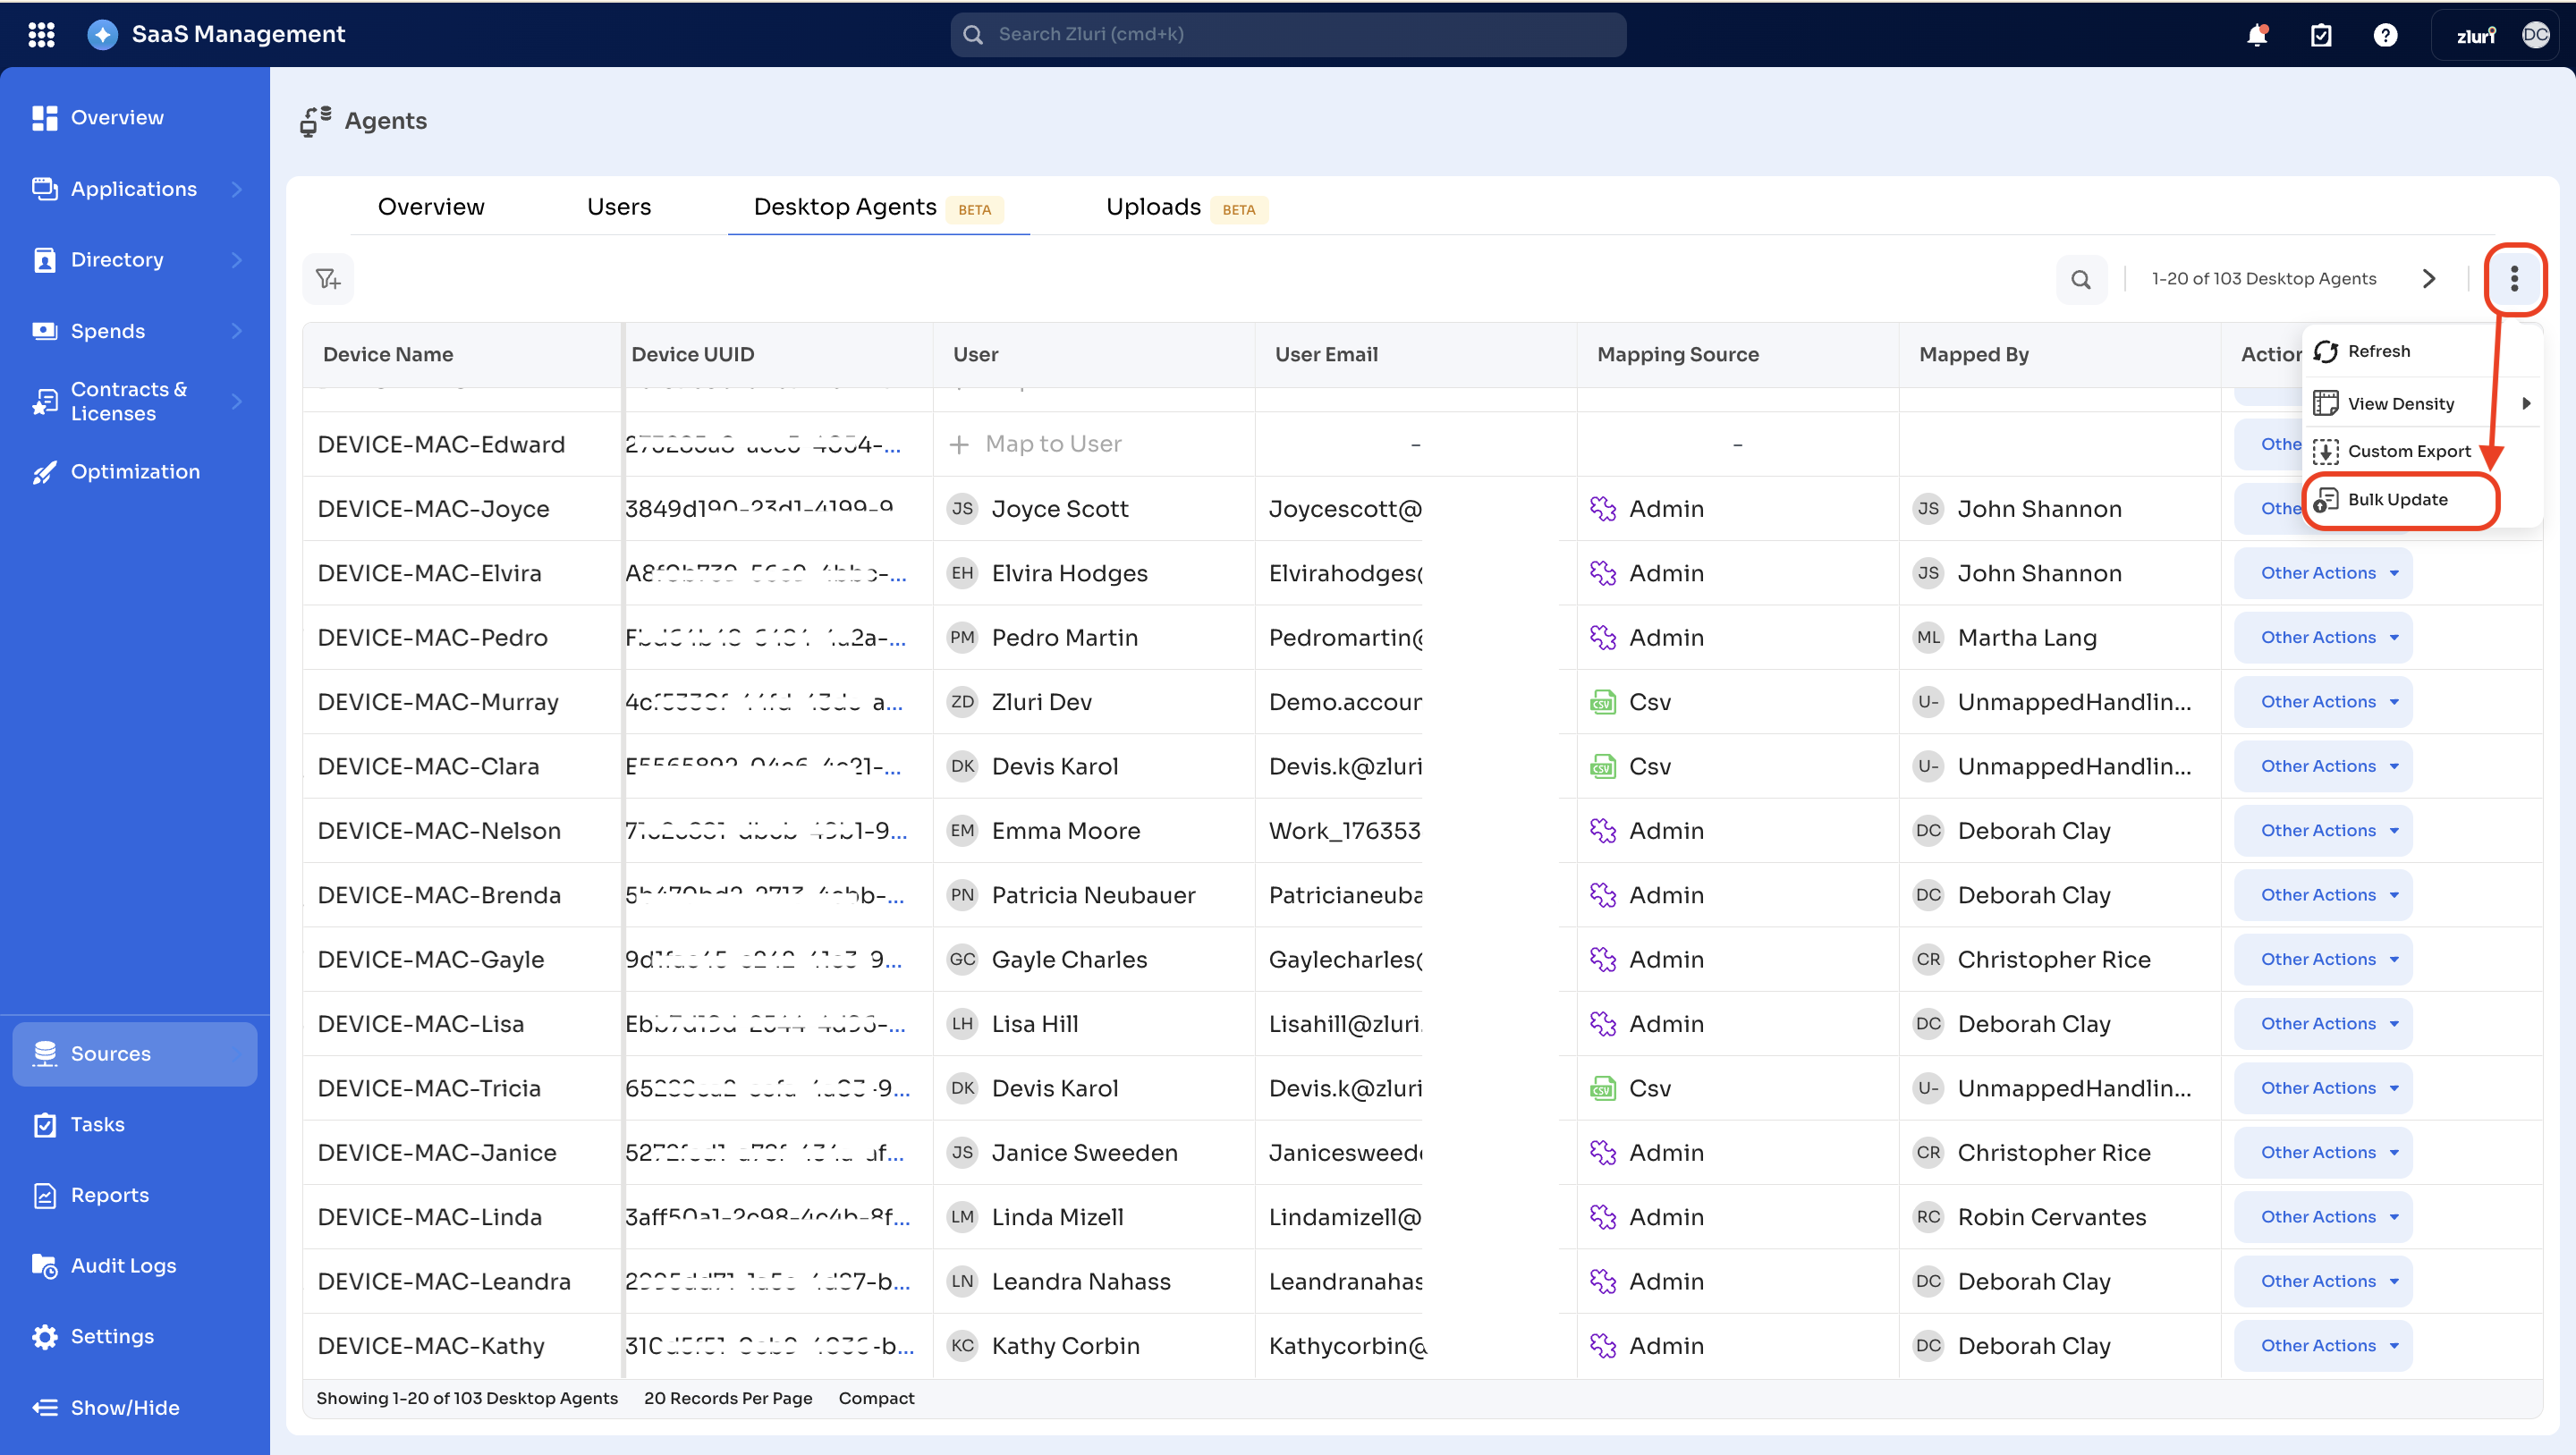
On the Desktop Agents page, click the three-dot icon in the upper-right corner.
-
From the dropdown menu, select the option of Bulk Update.
-
Three-step process for bulk mapping via CSV sheet
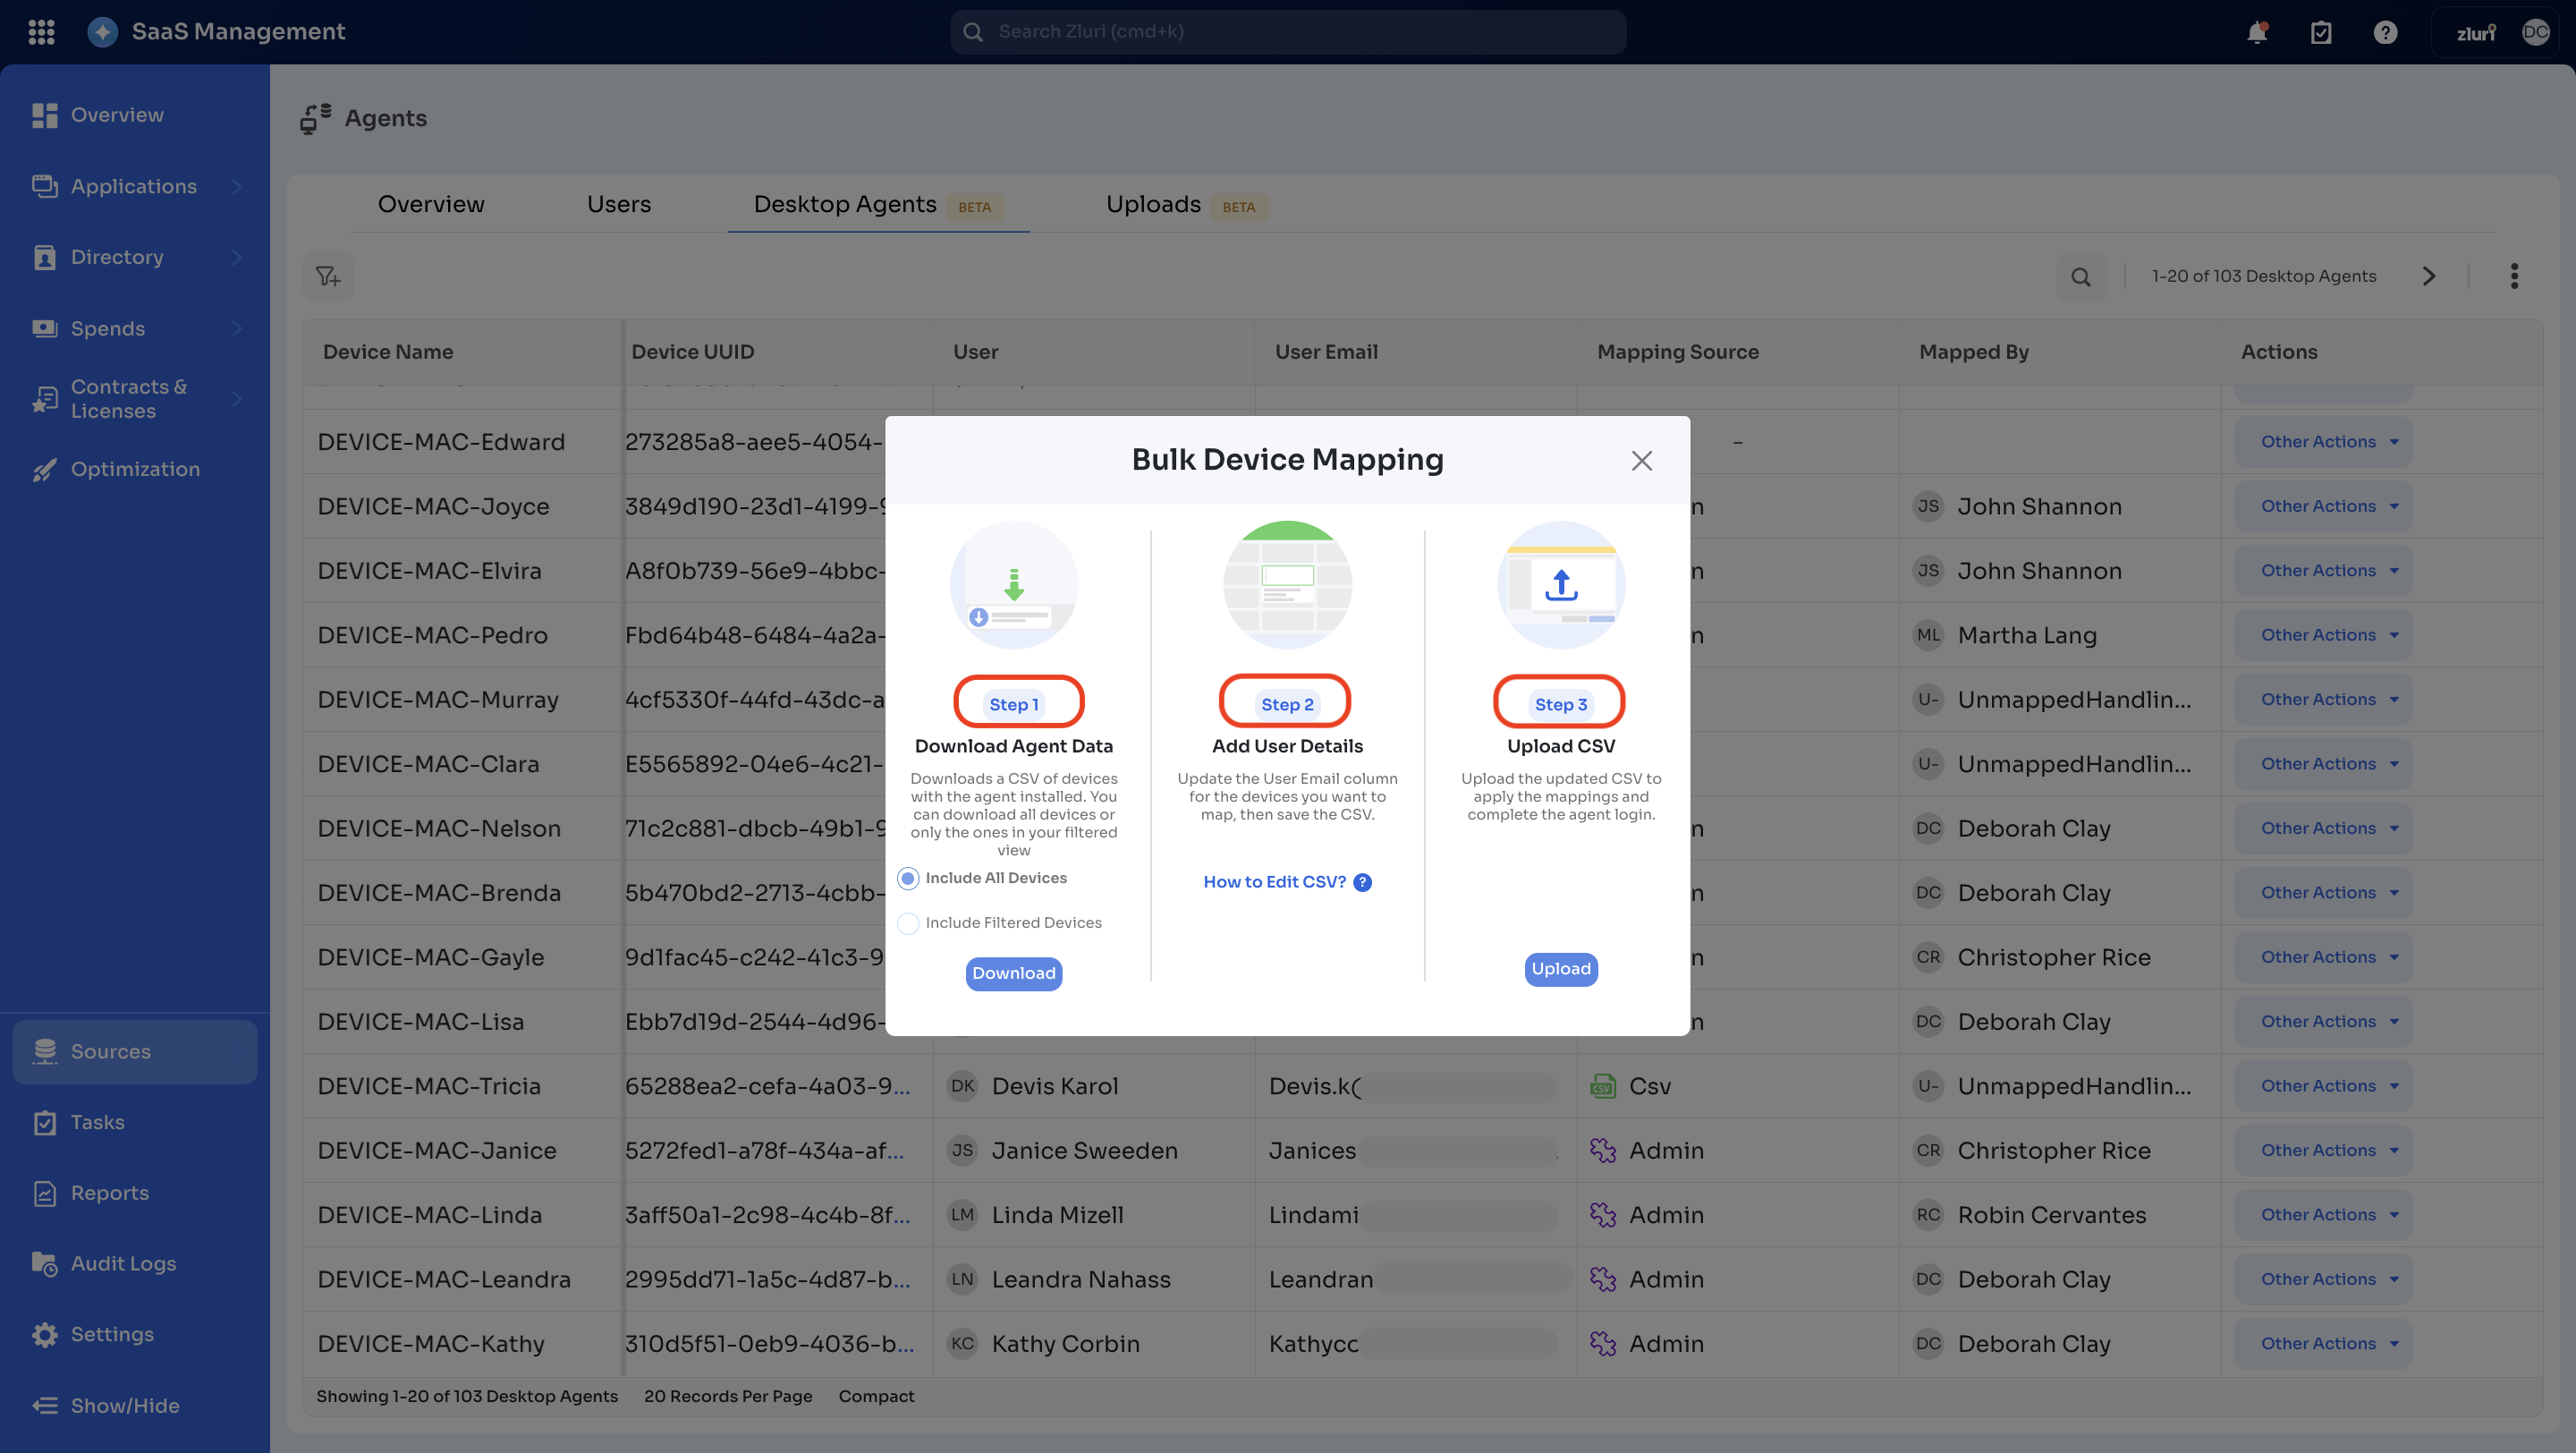
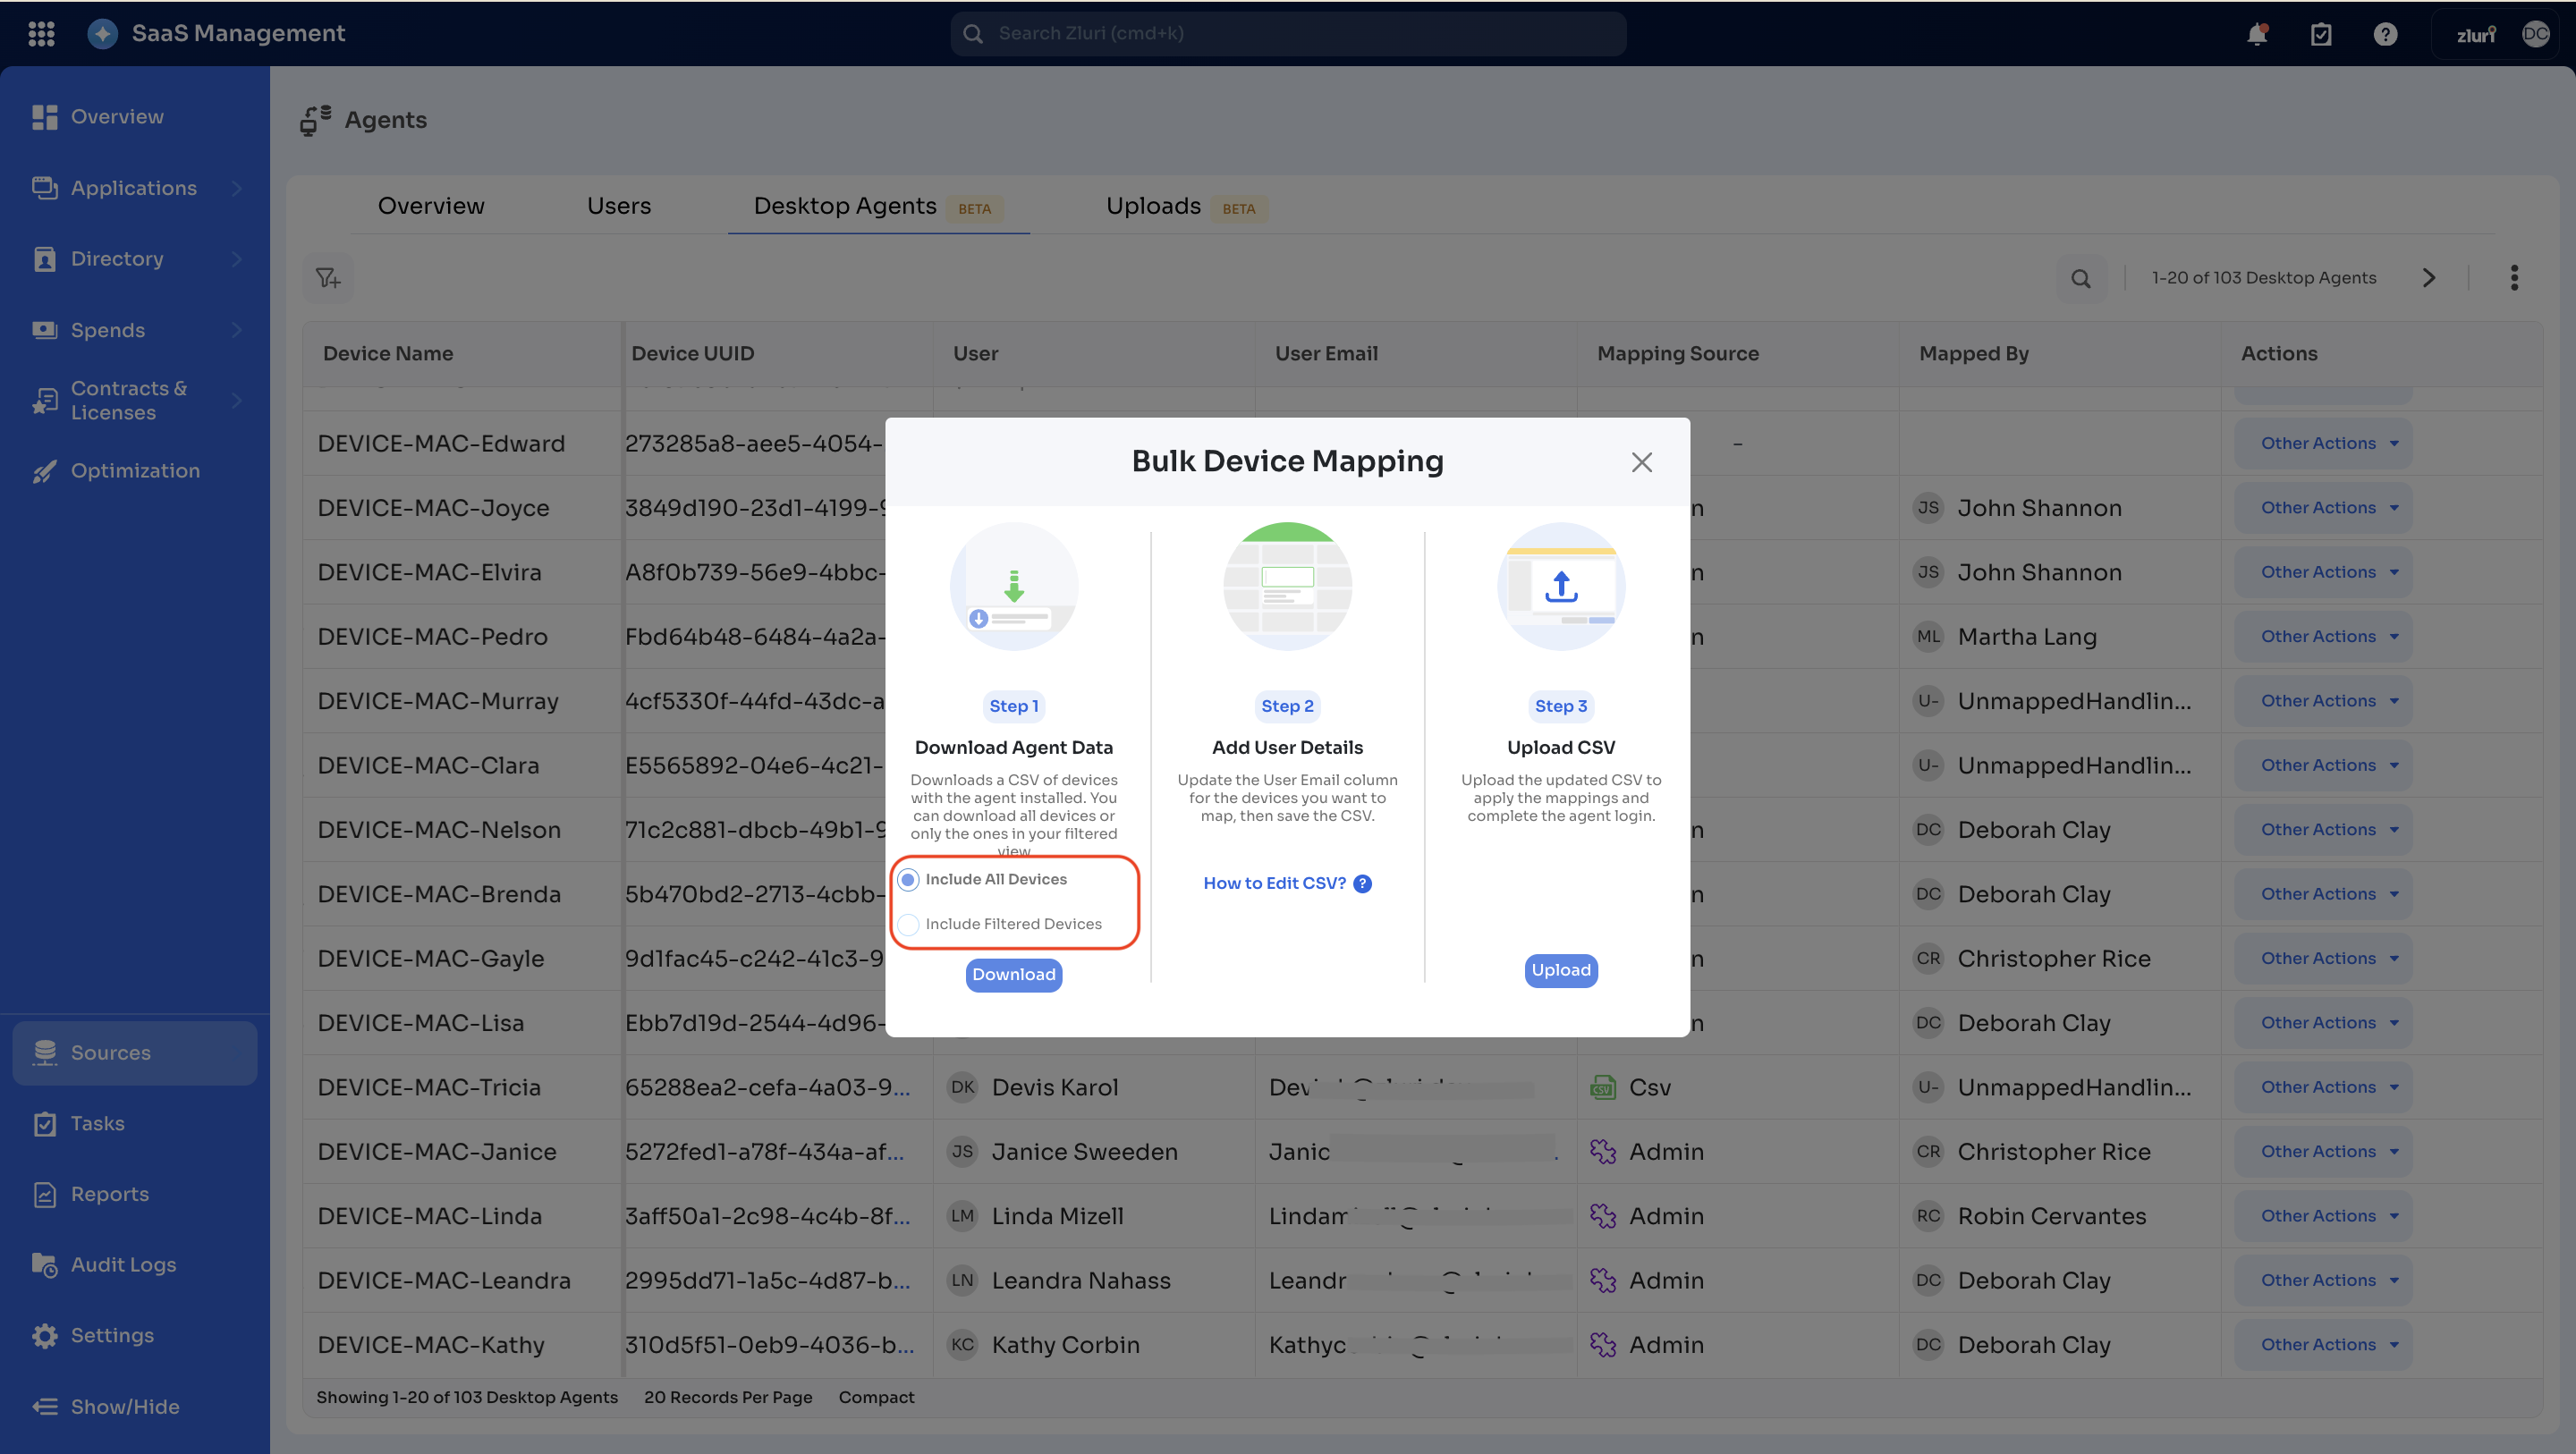
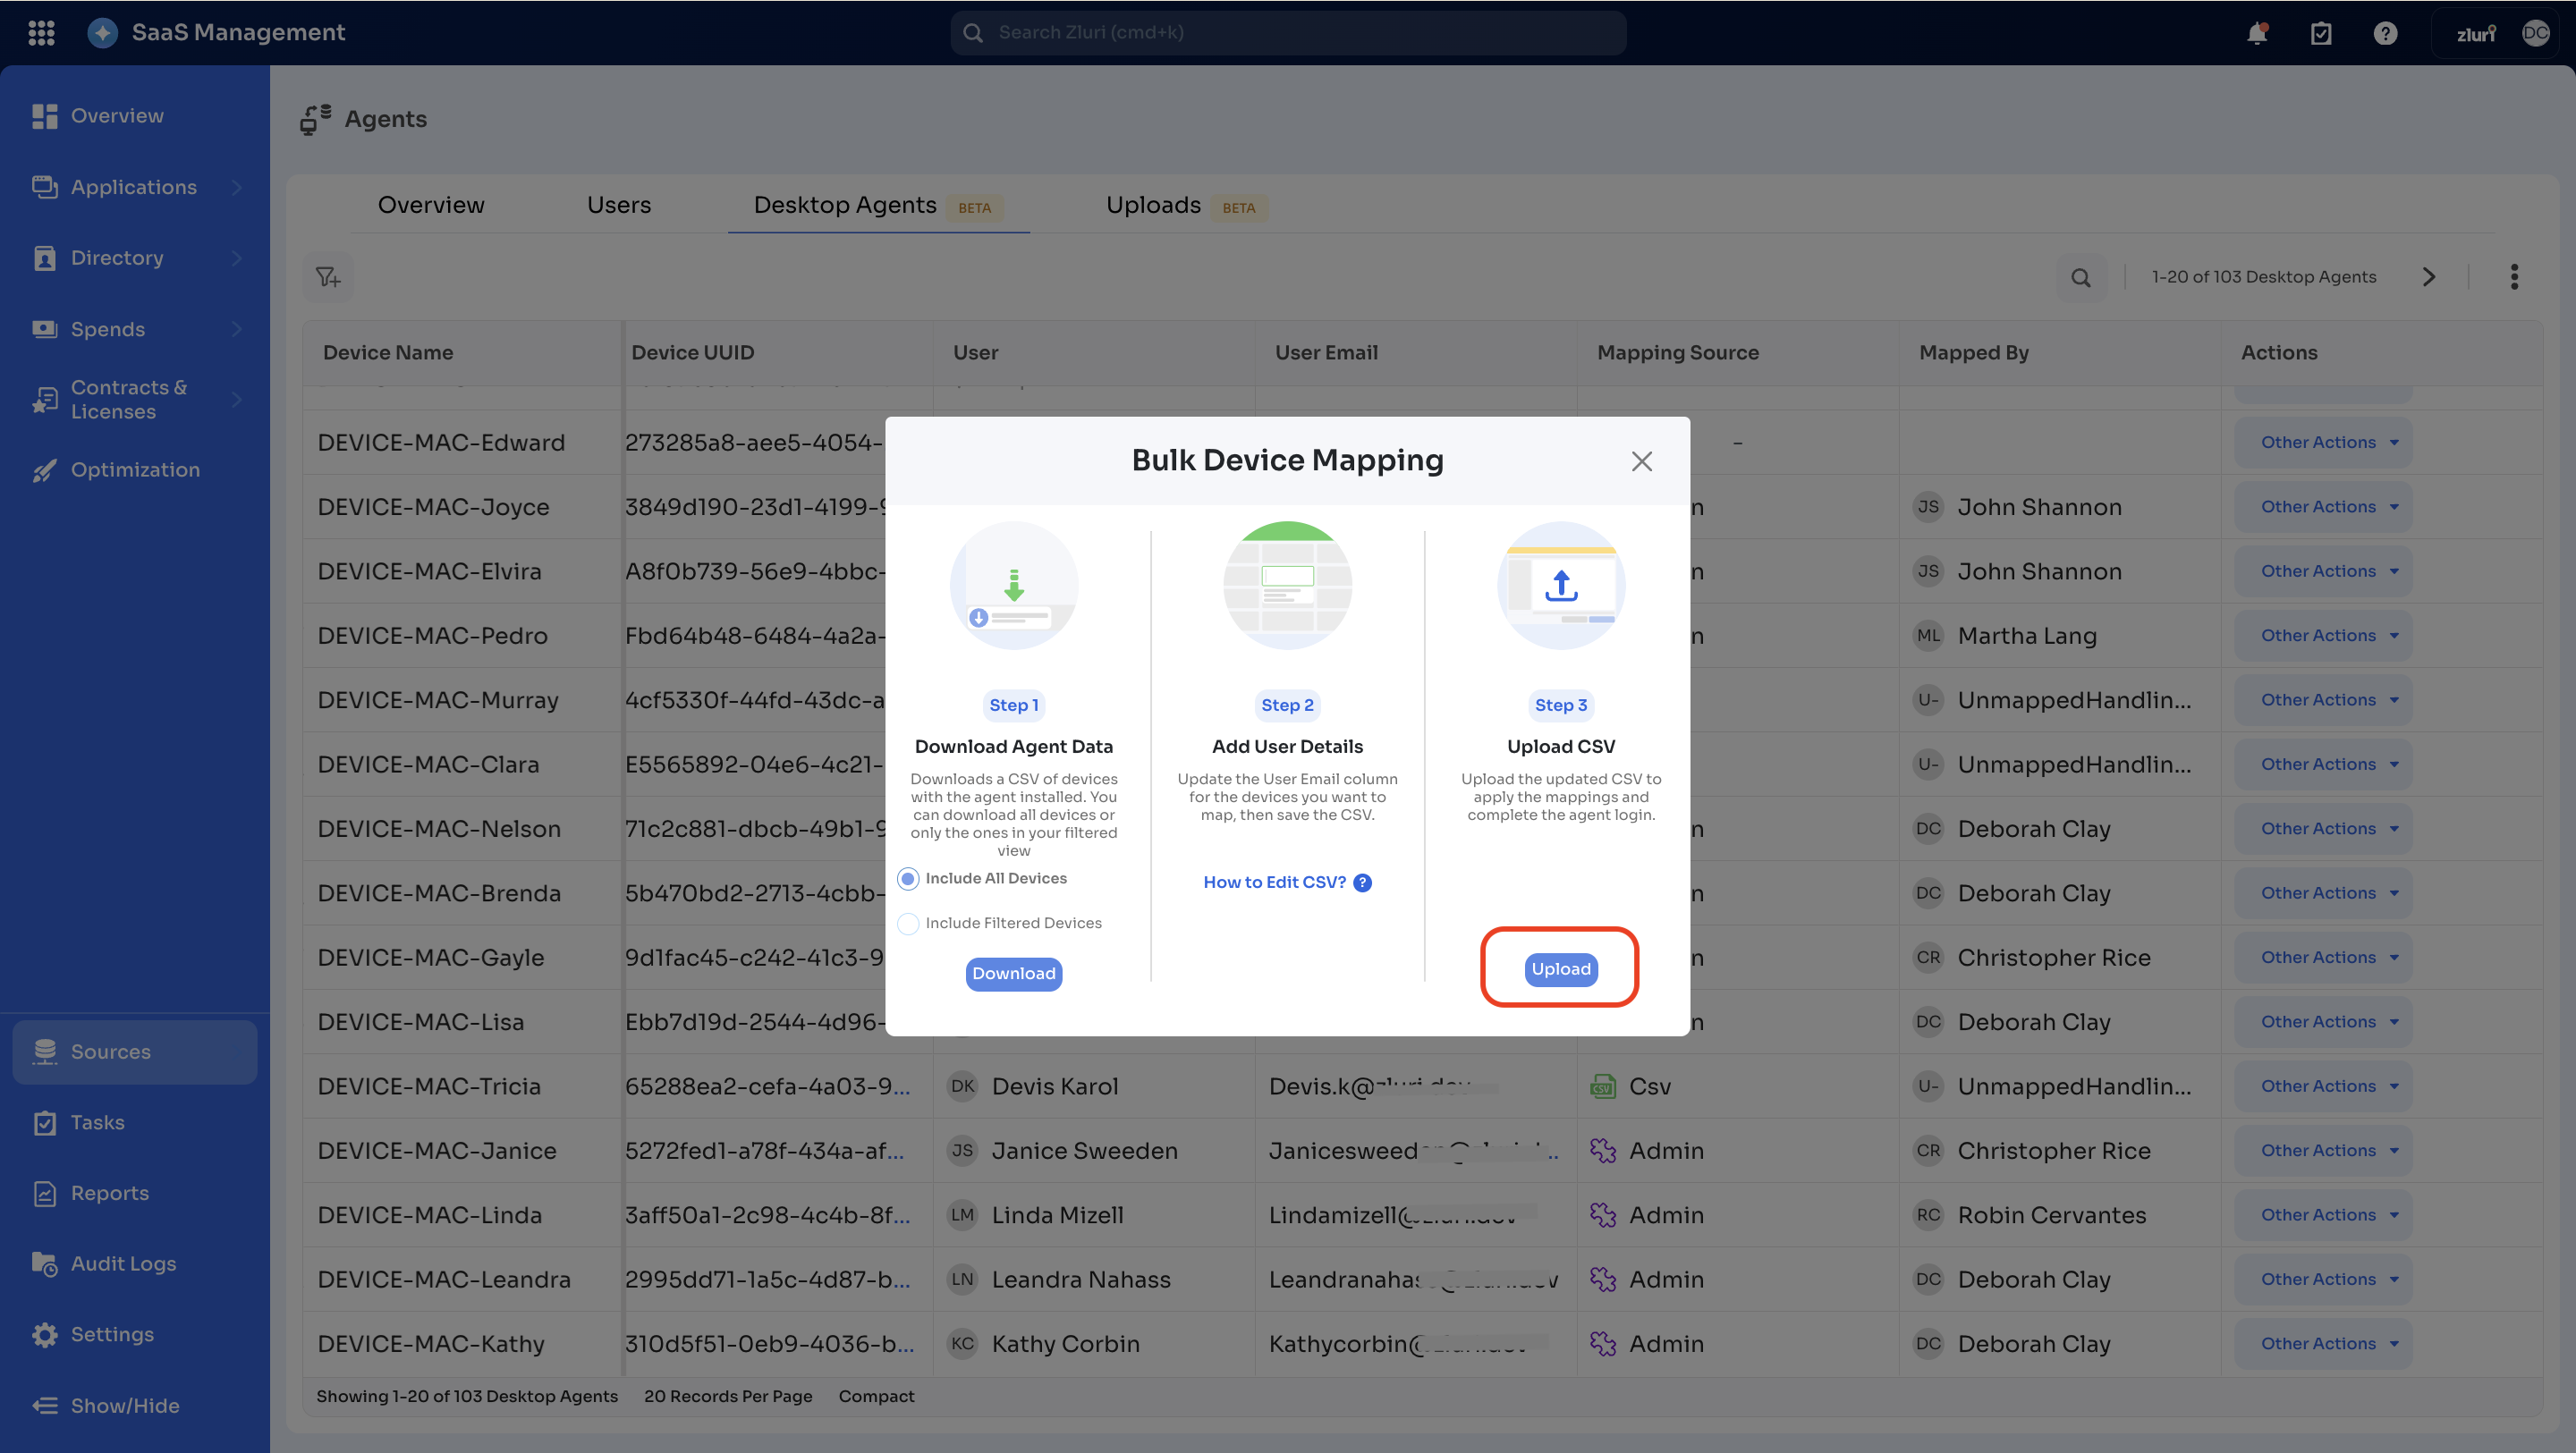
This will open the ‘Bulk Device Mapping’ window, which has three steps to follow:
Step 1 → Download Agent Data
Step 2 → Add User Details
Step 3 → Upload CSV
In the next section, we will break down these three steps—downloading agent data, adding user details, and uploading the CSV—in detail to help ensure a smooth workflow.
Three-step process for Bulk Mapping via CSV sheet
Step 1: Download Agent Data
First, download the device list as a CSV file.
-
You will get two download options:
-
Include All Devices: Downloads the complete list of devices.
-
Include Filtered Devices: Downloads a filtered list based on selected criteria.
-
-
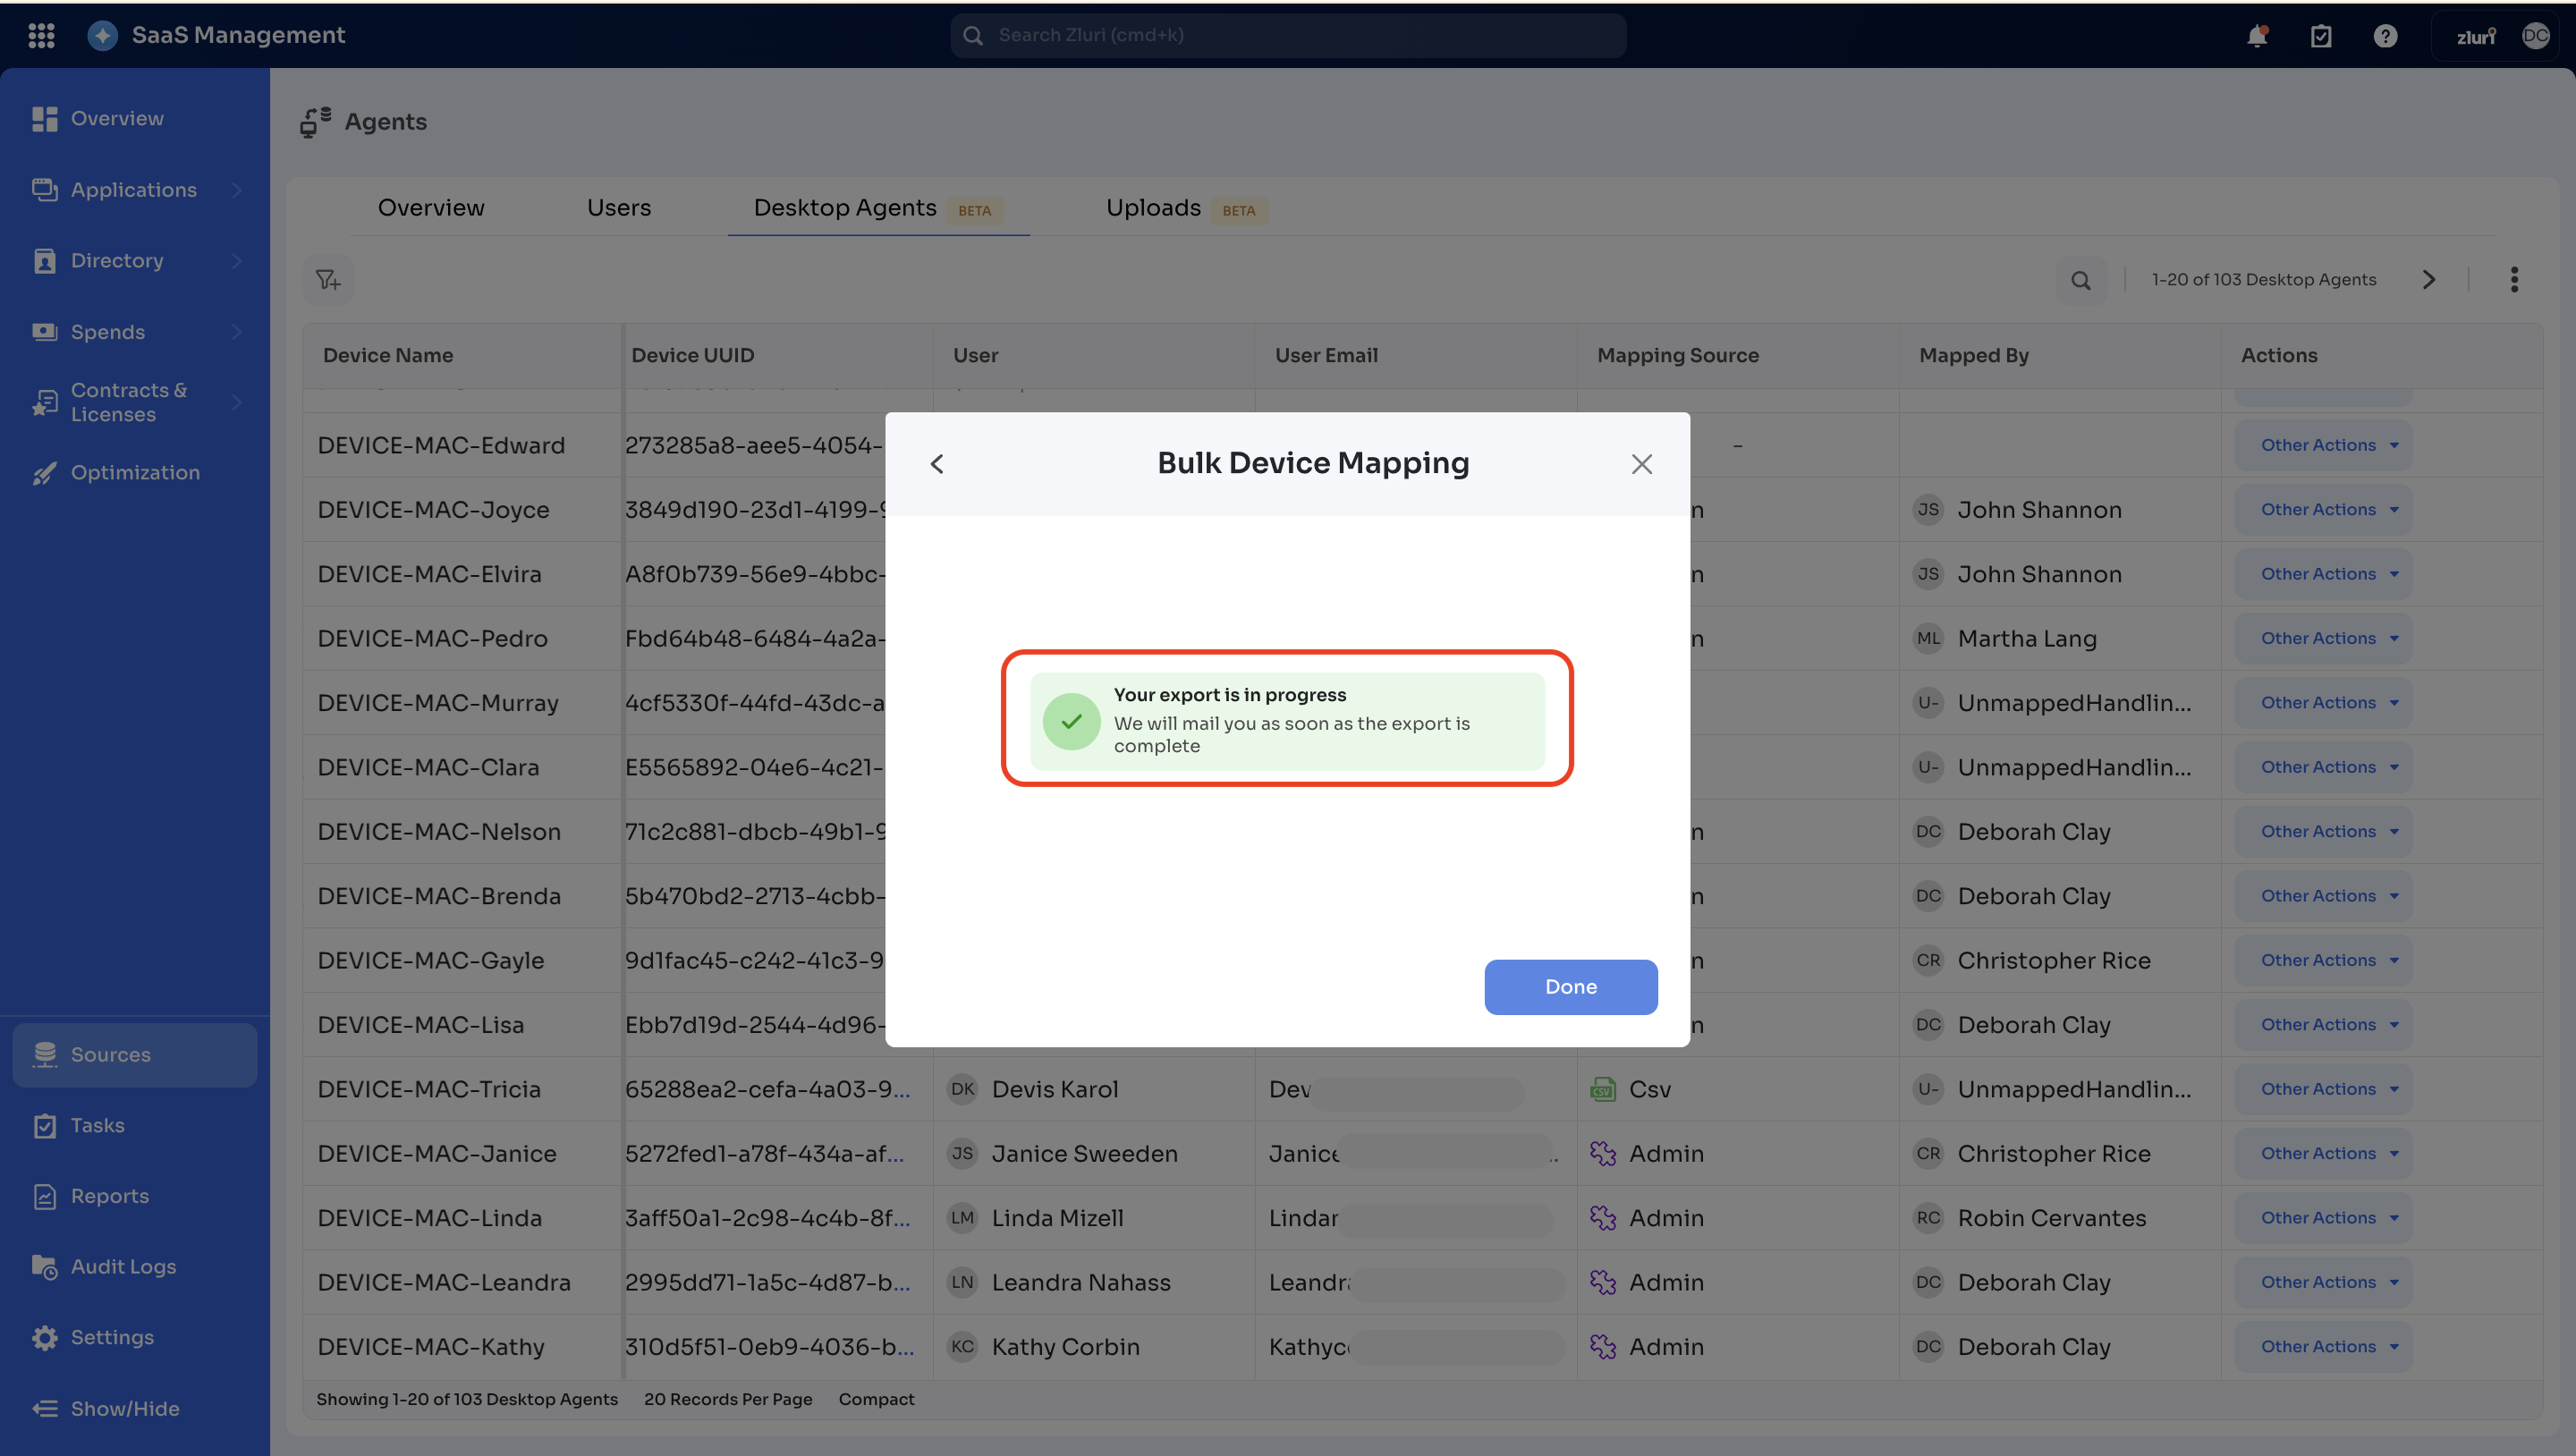
When the admin clicks the ‘Download’ button in the previous step, a pop-up will display with this text:
Your export is in progress. We will mail you as soon as the export is complete.
-
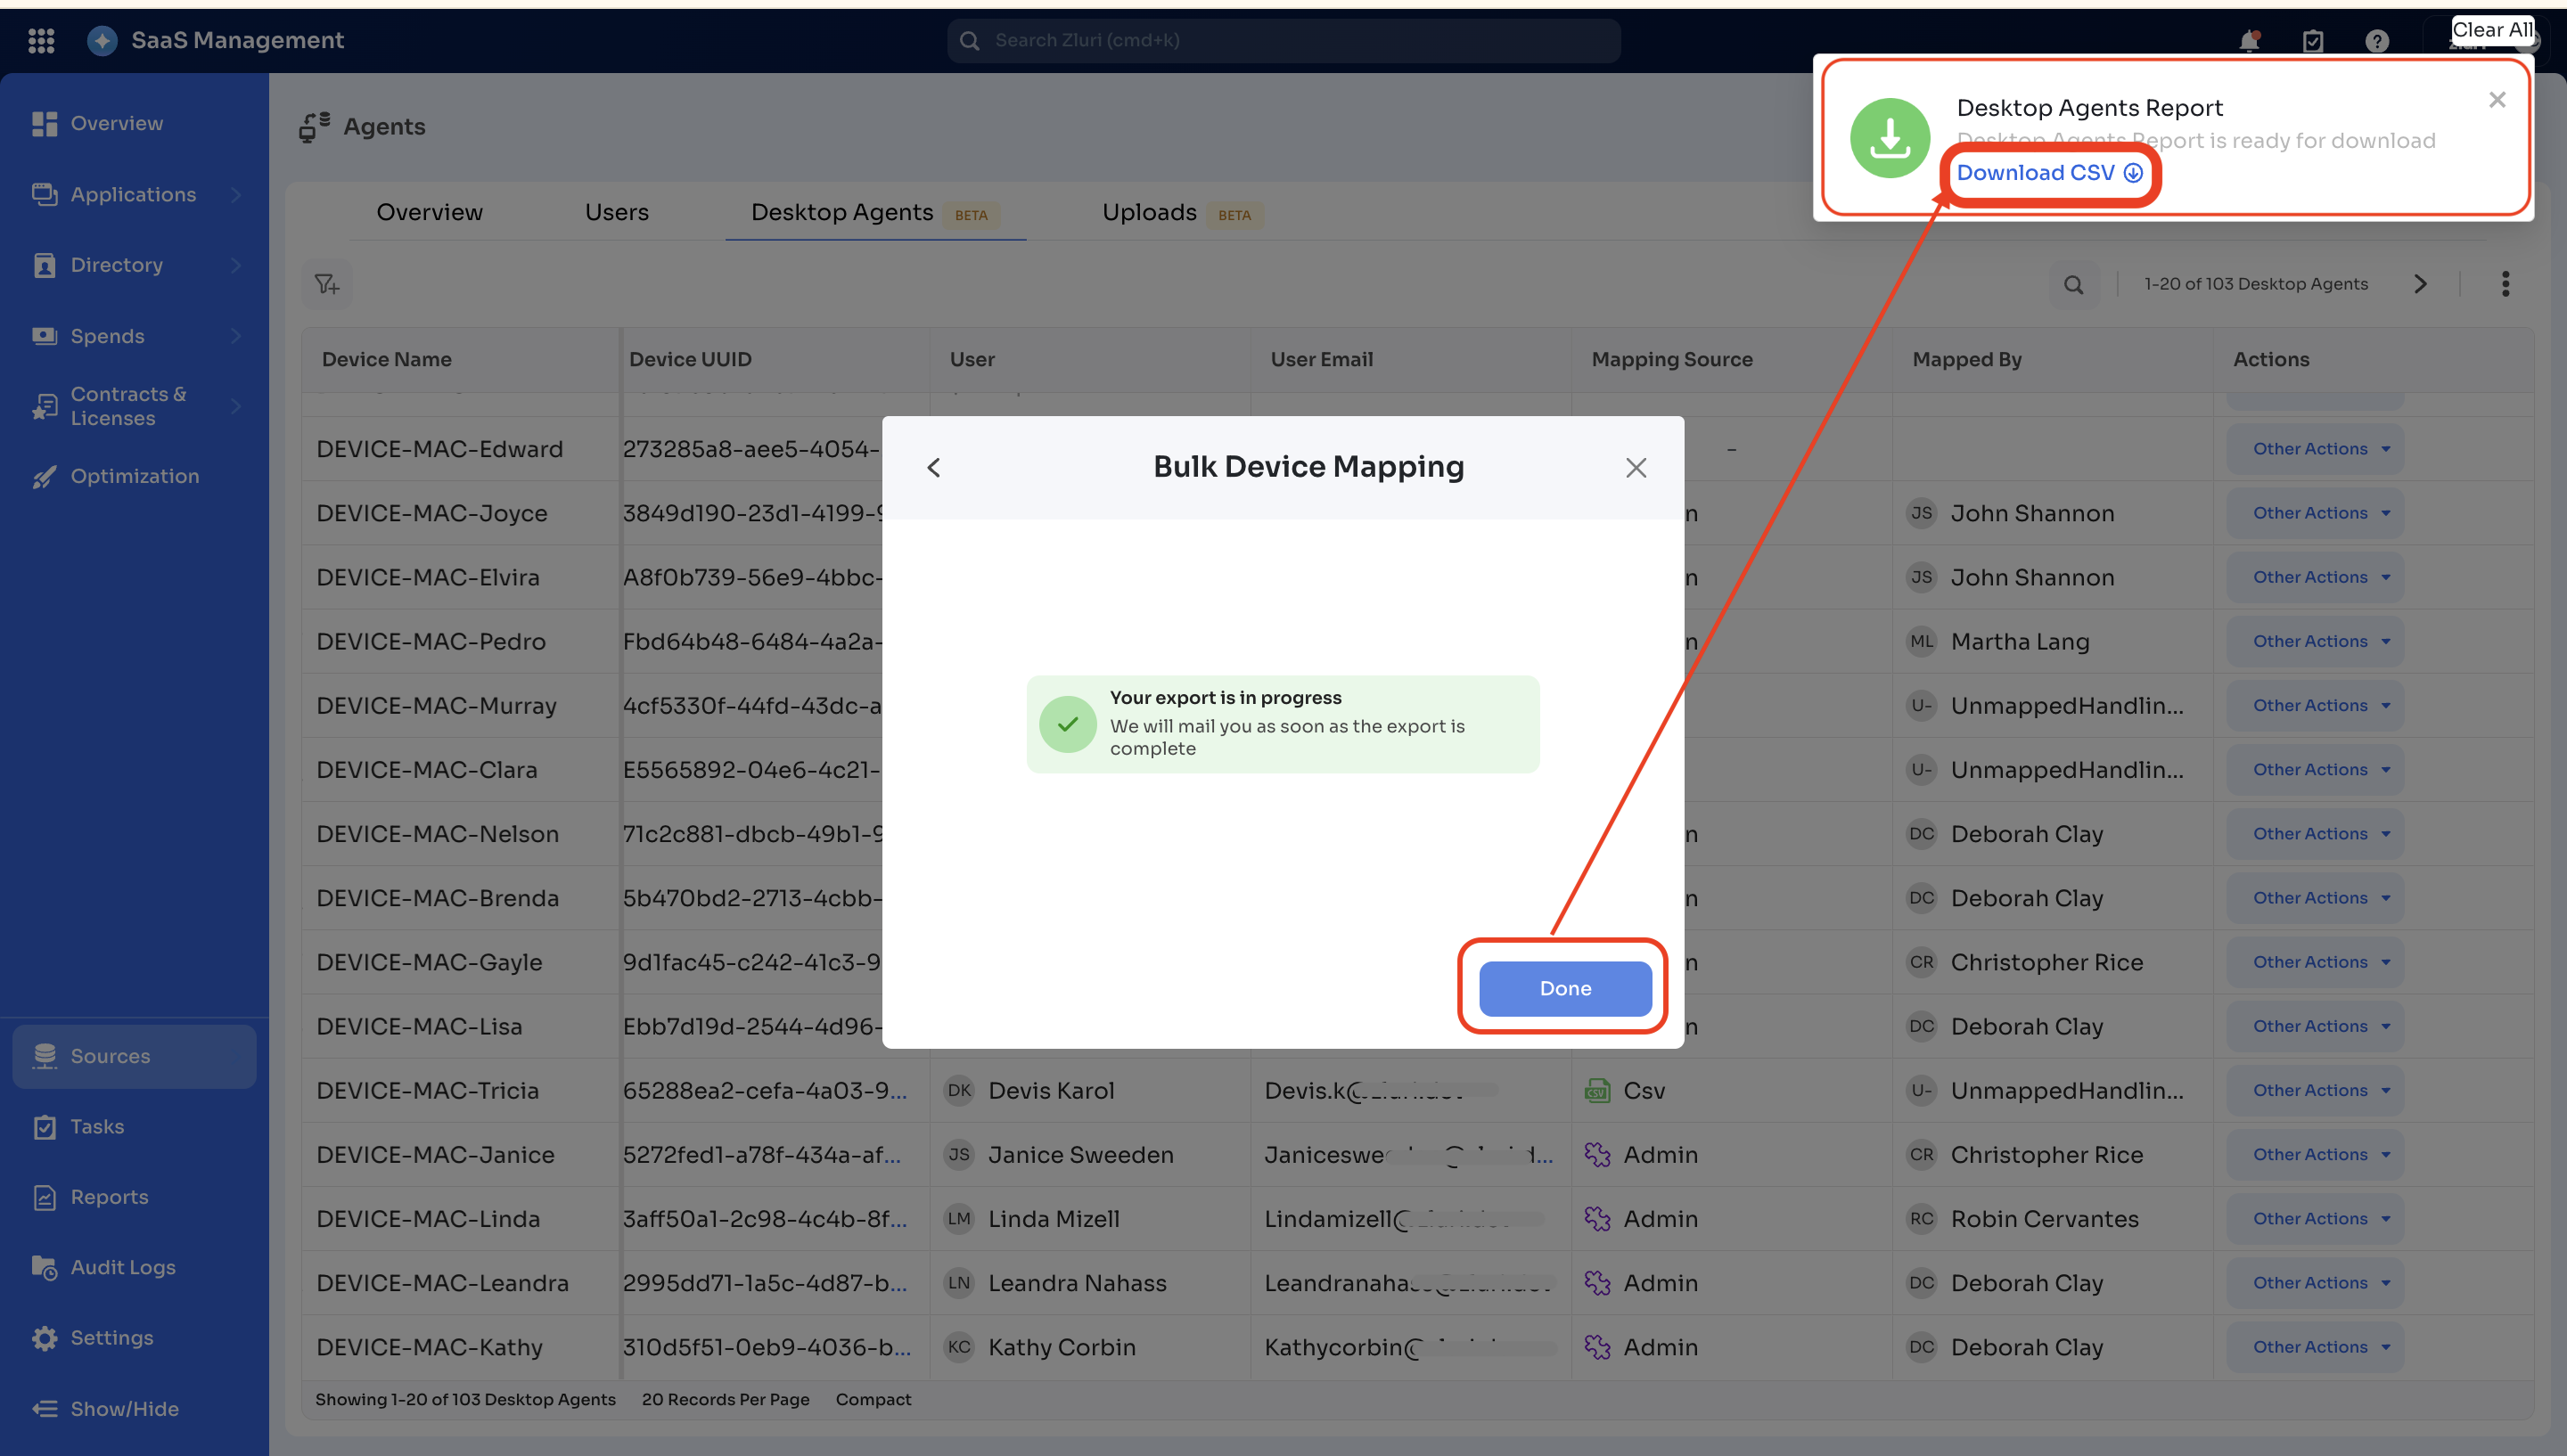
When the export is ready, the system will notify the admin after clicking on the
Donebutton.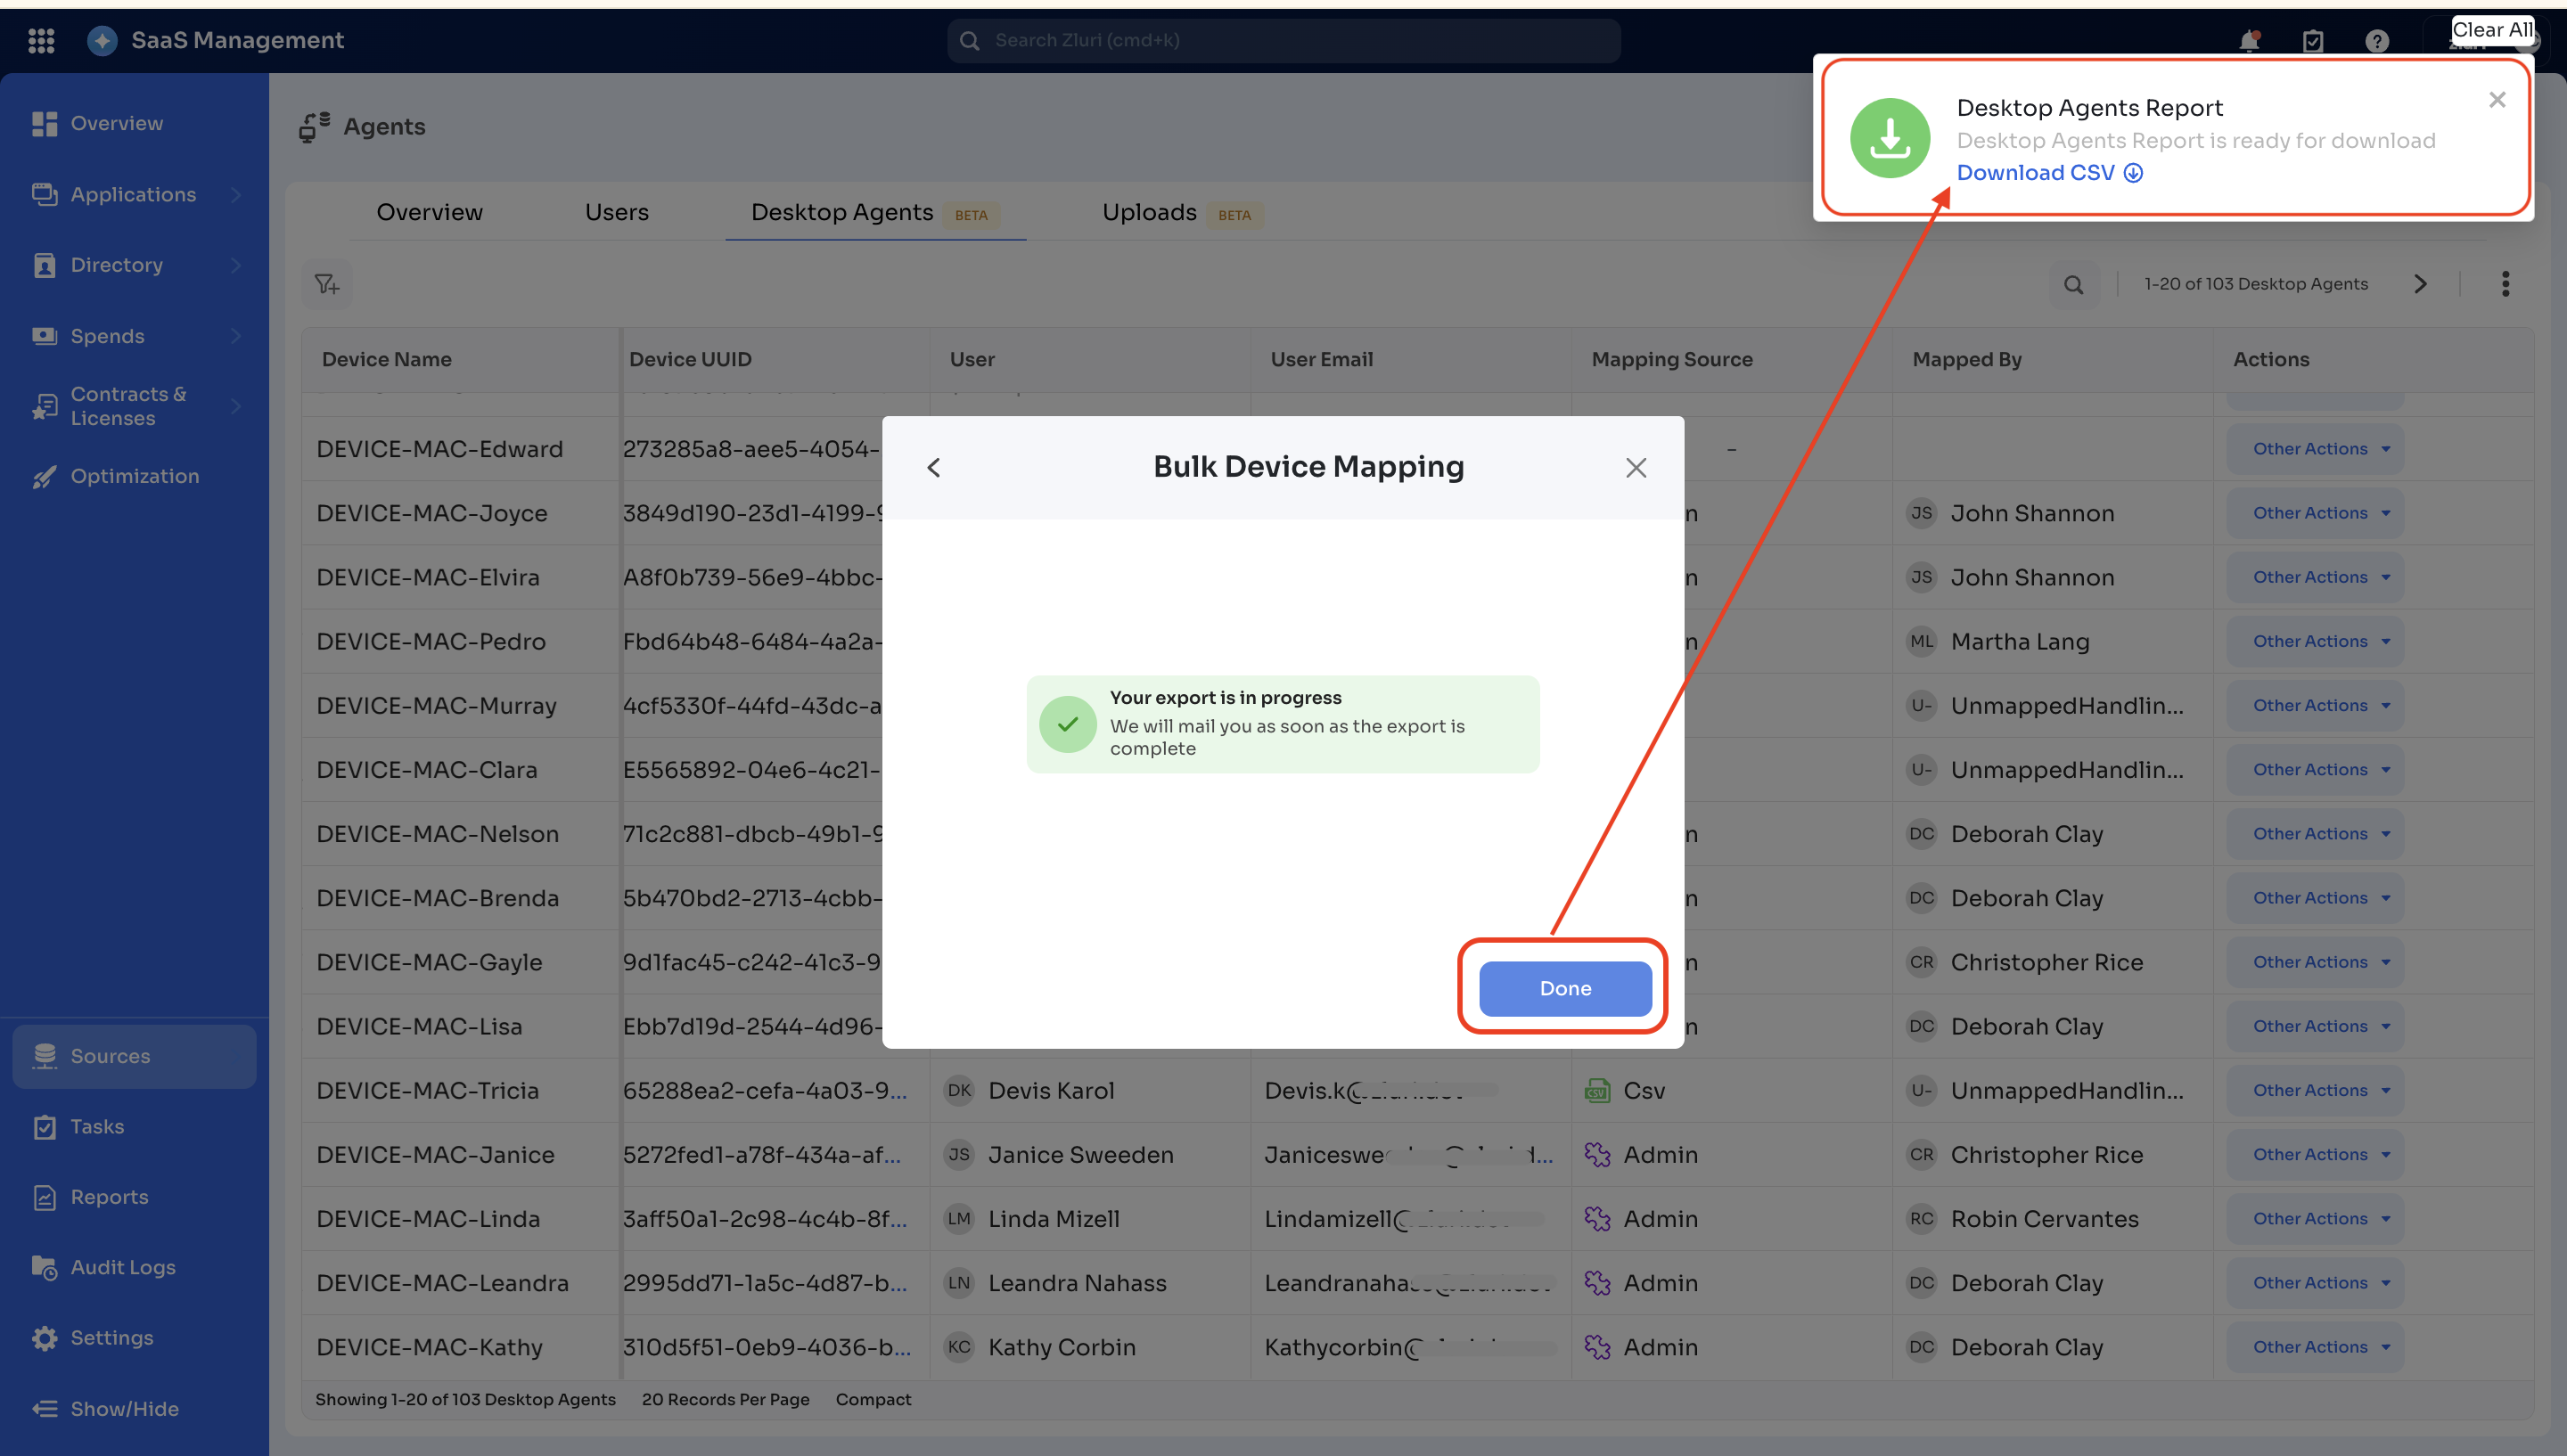
-
Click on the ‘Download CSV’ button to download the CSV file for editing.
Step 2: Add details in the ‘User Email’ column
Next, in the downloaded CSV file, add the required details in the ‘User Email’ column.
Let us now understand the CSV file structure, editing steps, and critical guidelines for editing the CSV file.
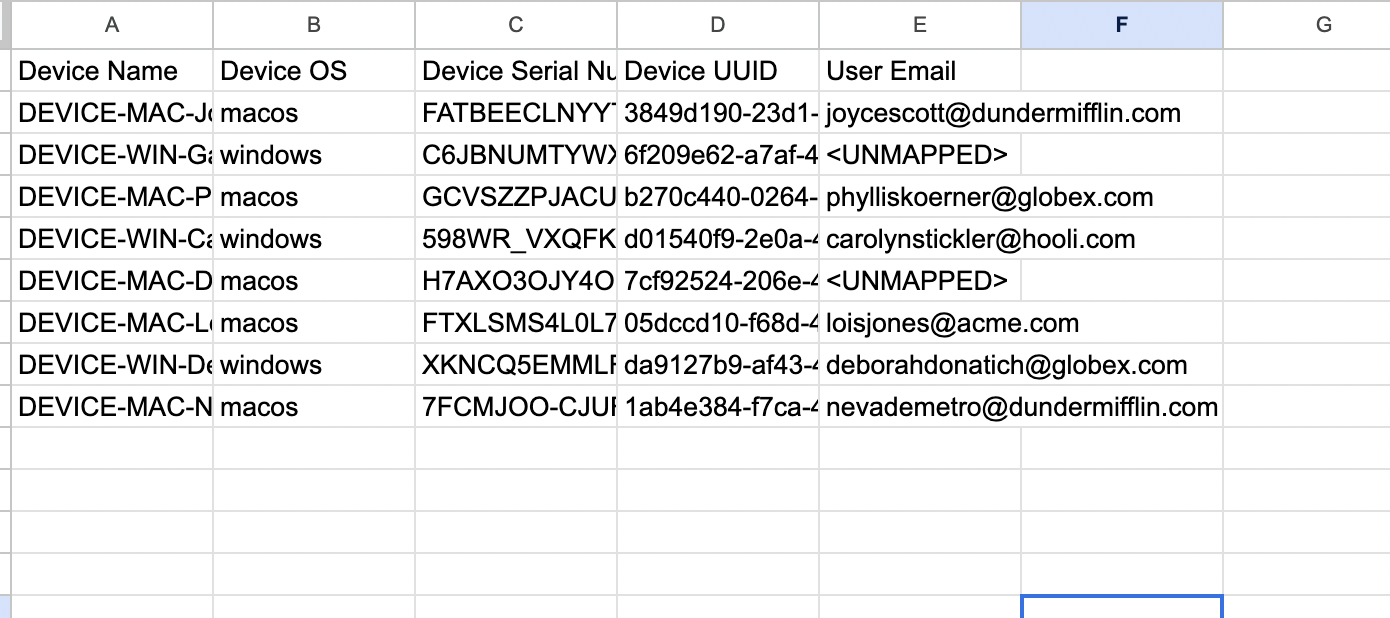
1. CSV structure: The downloaded CSV file will include columns such as
- Device Name
- Device OS
- Device Serial Number
- Device UUID
- User Email → The ‘User Email’ column can be
-
'UNMAPPED'
-
May contain prefilled data ( It will be prefilled in instances where the mapping already exists in the system).
-
2. Editing the CSV
- Admins are required to add the appropriate User Email for each device.
- When editing the downloaded CSV, only the User Email column must be edited. Please ensure that the other columns, such as Device Name and Serial Number, are not altered.
3. Important guidelines : What’s allowed and not allowed in CSV file editing.
Admins should avoid making editing mistakes in the CSV file. When updating the CSV, it is important to follow specific guidelines to prevent upload errors and ensure accurate device-to-user mapping.
The section below outlines what is allowed and what is not allowed when editing the CSV.
→Allowed edits
-
Editing the ‘User Email’ column:
The User Email column is the only column where admins are allowed to make changes.Admins can:
-
Add User Emails:
- If a device’s User Email field is 'UNMAPPED', admins are allowed to fill it in with a valid email address to map the device to a user.
-
Modify User Emails:
- If the admin modifies and replaces the prefilled user email addresses with another valid user email ID and uploads the CSV back into the system, the mapping will update successfully.
- The previous email ID will be unmapped from the device details, and the new email ID will be mapped to the device details. The system recognizes a valid email ID, so Zluri updates the device-to-user relationship accordingly.
-
Maintaining CSV structure:
- Admins can add or modify only the User Email column, ensuring that the rest of the CSV structure remains unchanged.
- Admins can add or modify only the User Email column, ensuring that the rest of the CSV structure remains unchanged.
-
→ Not allowed edits
-
Modifying prefilled device details: Admins are not allowed to modify any of the prefilled device-related columns, such as:
- Device Name
- Device OS
- Device Serial Number
- Device UUID
Reason: Changing any of these values can invalidate the mapping or cause errors because these fields are core to the device's identity in the system. Altering them will cause the entry to be considered invalid, and the system will ignore it.
-
Adding extra columns or rows: Admins must not add any extra columns or rows to the CSV. Only use the structure provided in the sheet.
Reason. Adding new columns or rows can cause the system to fail in processing the file correctly due to the invalid data. The feature only supports adding user mappings to existing devices. It cannot handle new devices that are not registered in the system, nor can it read any new columns that have been added. -
Removing User Emails: If a User Email is prefilled in a row and the admin removes it without adding a replacement, then uploads the CSV back into the system, the device will lose its user mapping. No user mapping will be available in this case.
Reason: When the CSV is uploaded with an empty User Email field for that device, Zluri removes the previously mapped email. Since no new email is provided, the device remains unmapped. -
Modifying User Emails: If the admin changes a User Email to a wrong or invalid email ID and uploads the CSV, the mapping will not update. The device will continue to remain mapped to the previous valid user.
Reason: The new email ID is invalid, so Zluri cannot process it. The system ignores the invalid entry and retains the existing mapping.By adhering to these guidelines, admins will ensure that the device-to-user mapping process via the CSV bulk mapping method runs smoothly and without errors.
Step 3: Upload CSV file
-
Click on the Upload button.
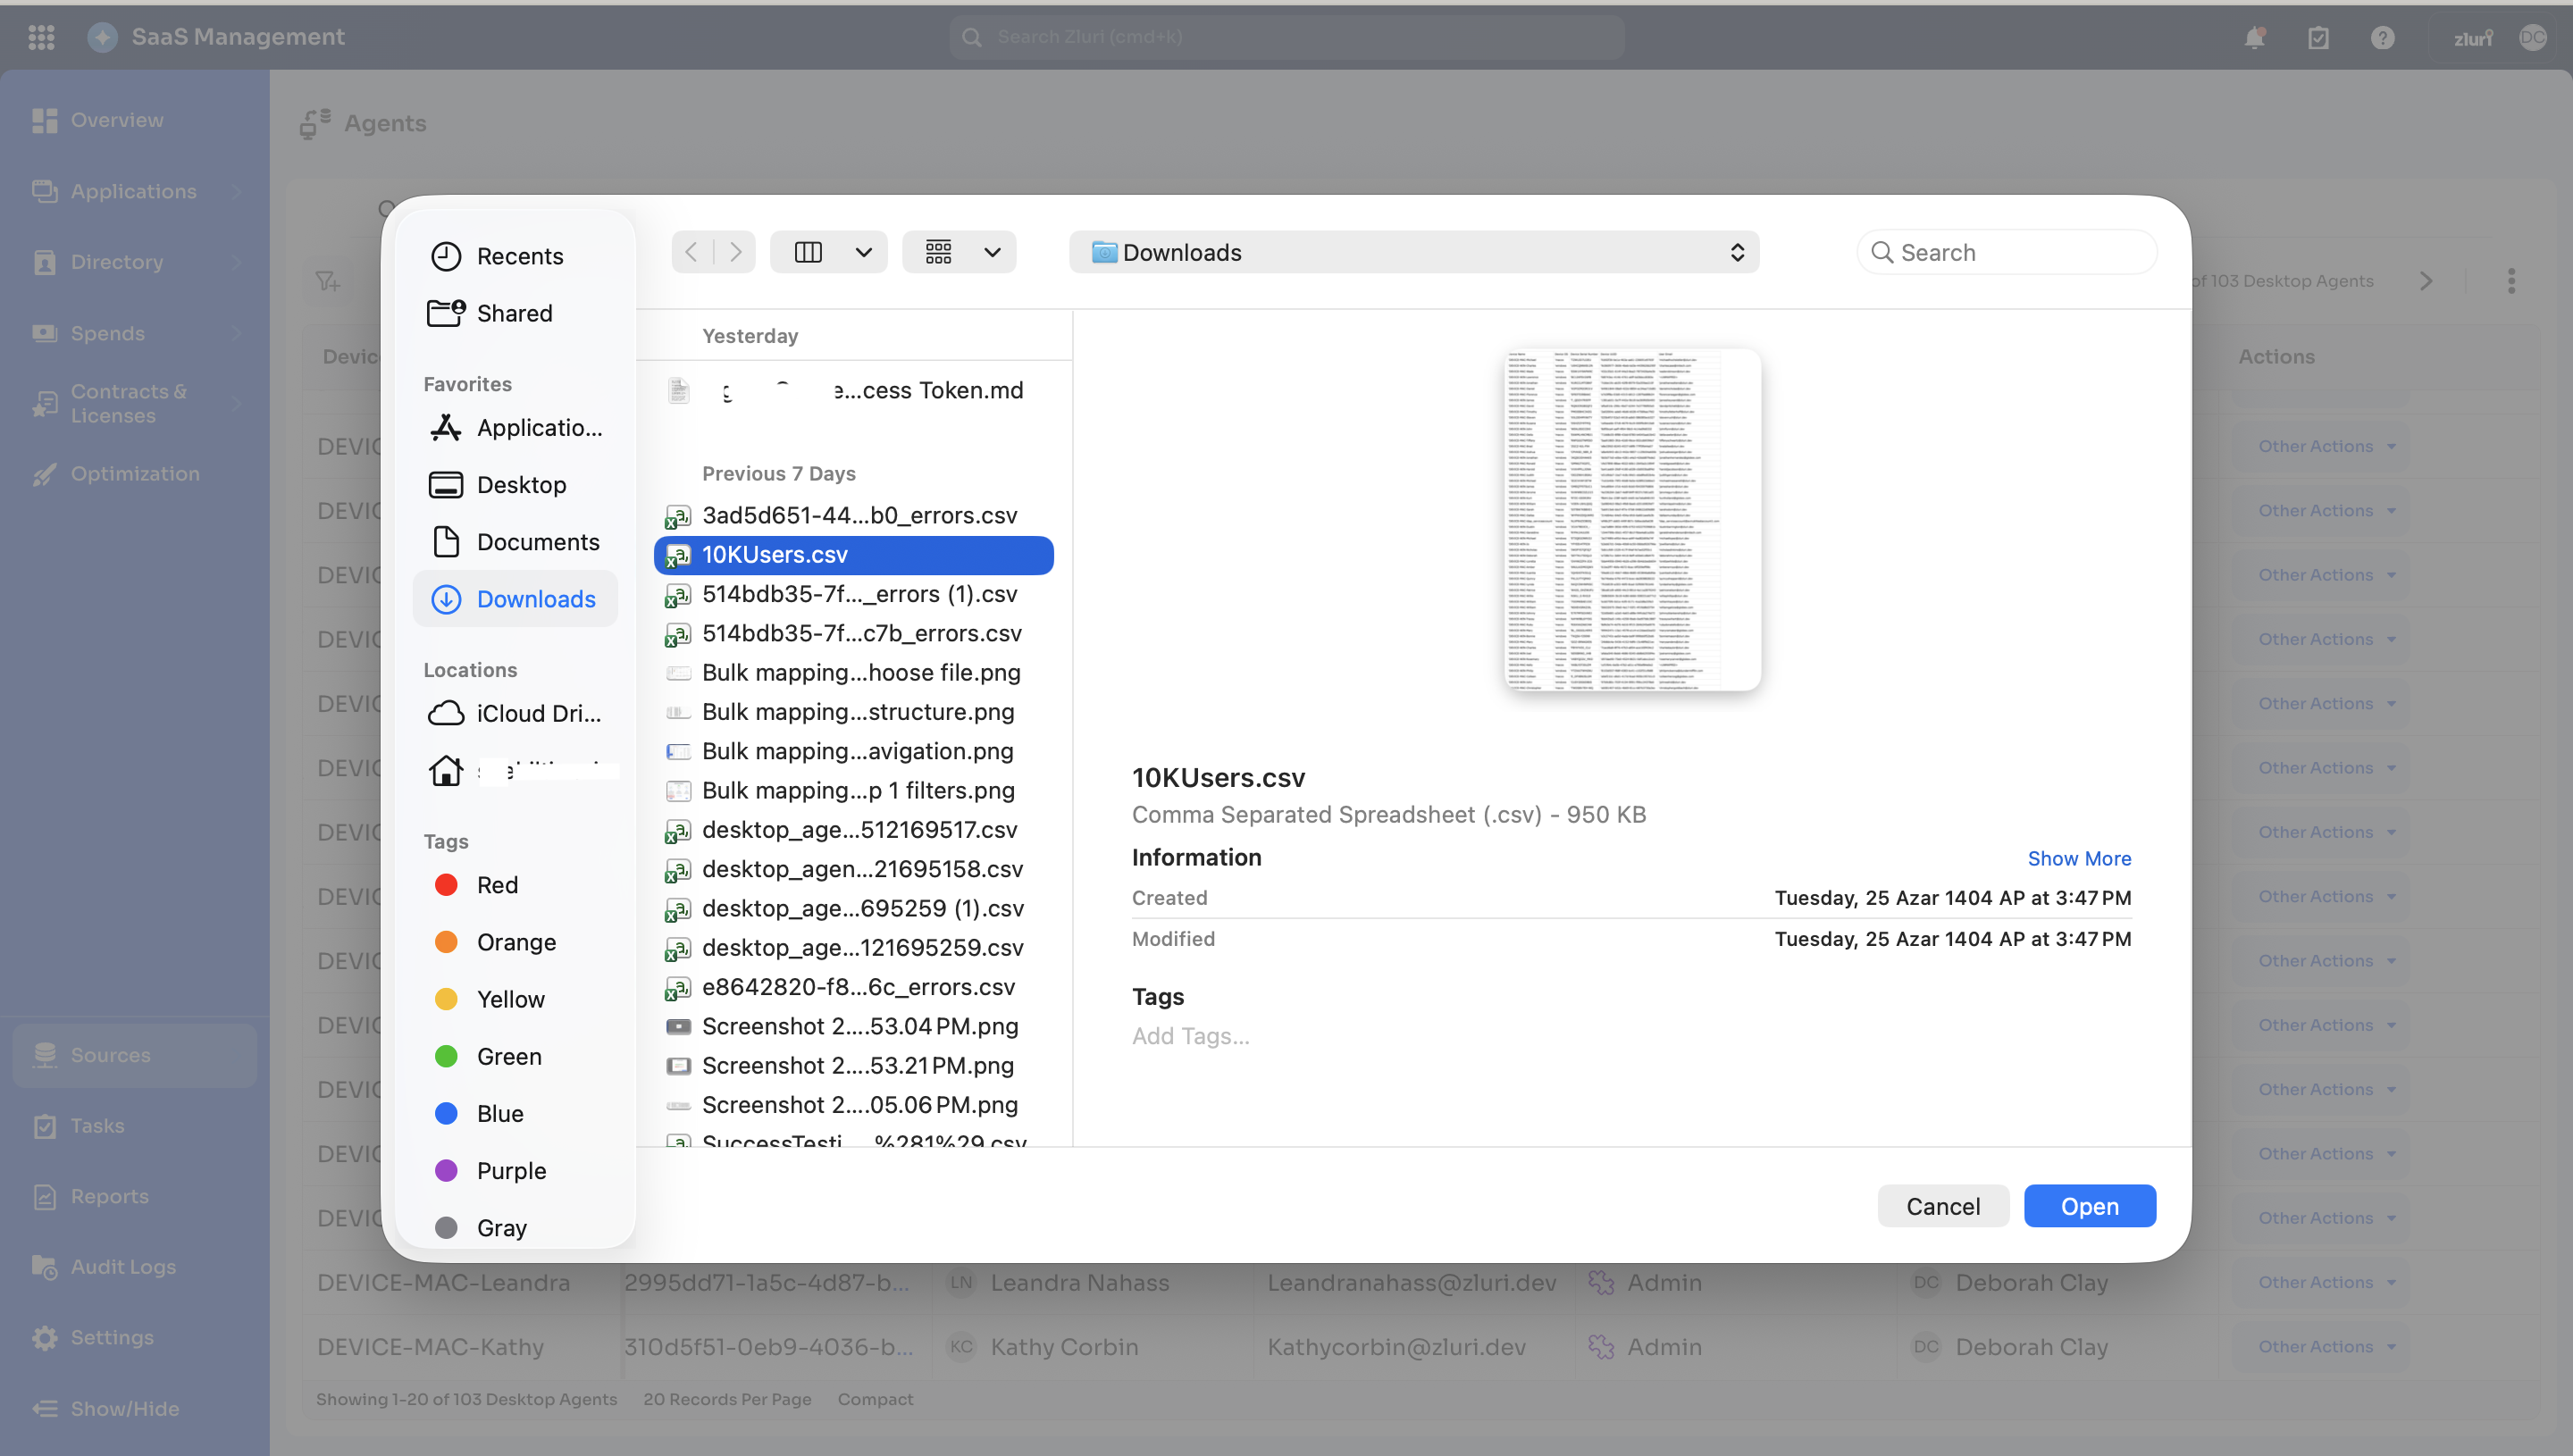
-
Select and upload the edited CSV file containing the user's email details.
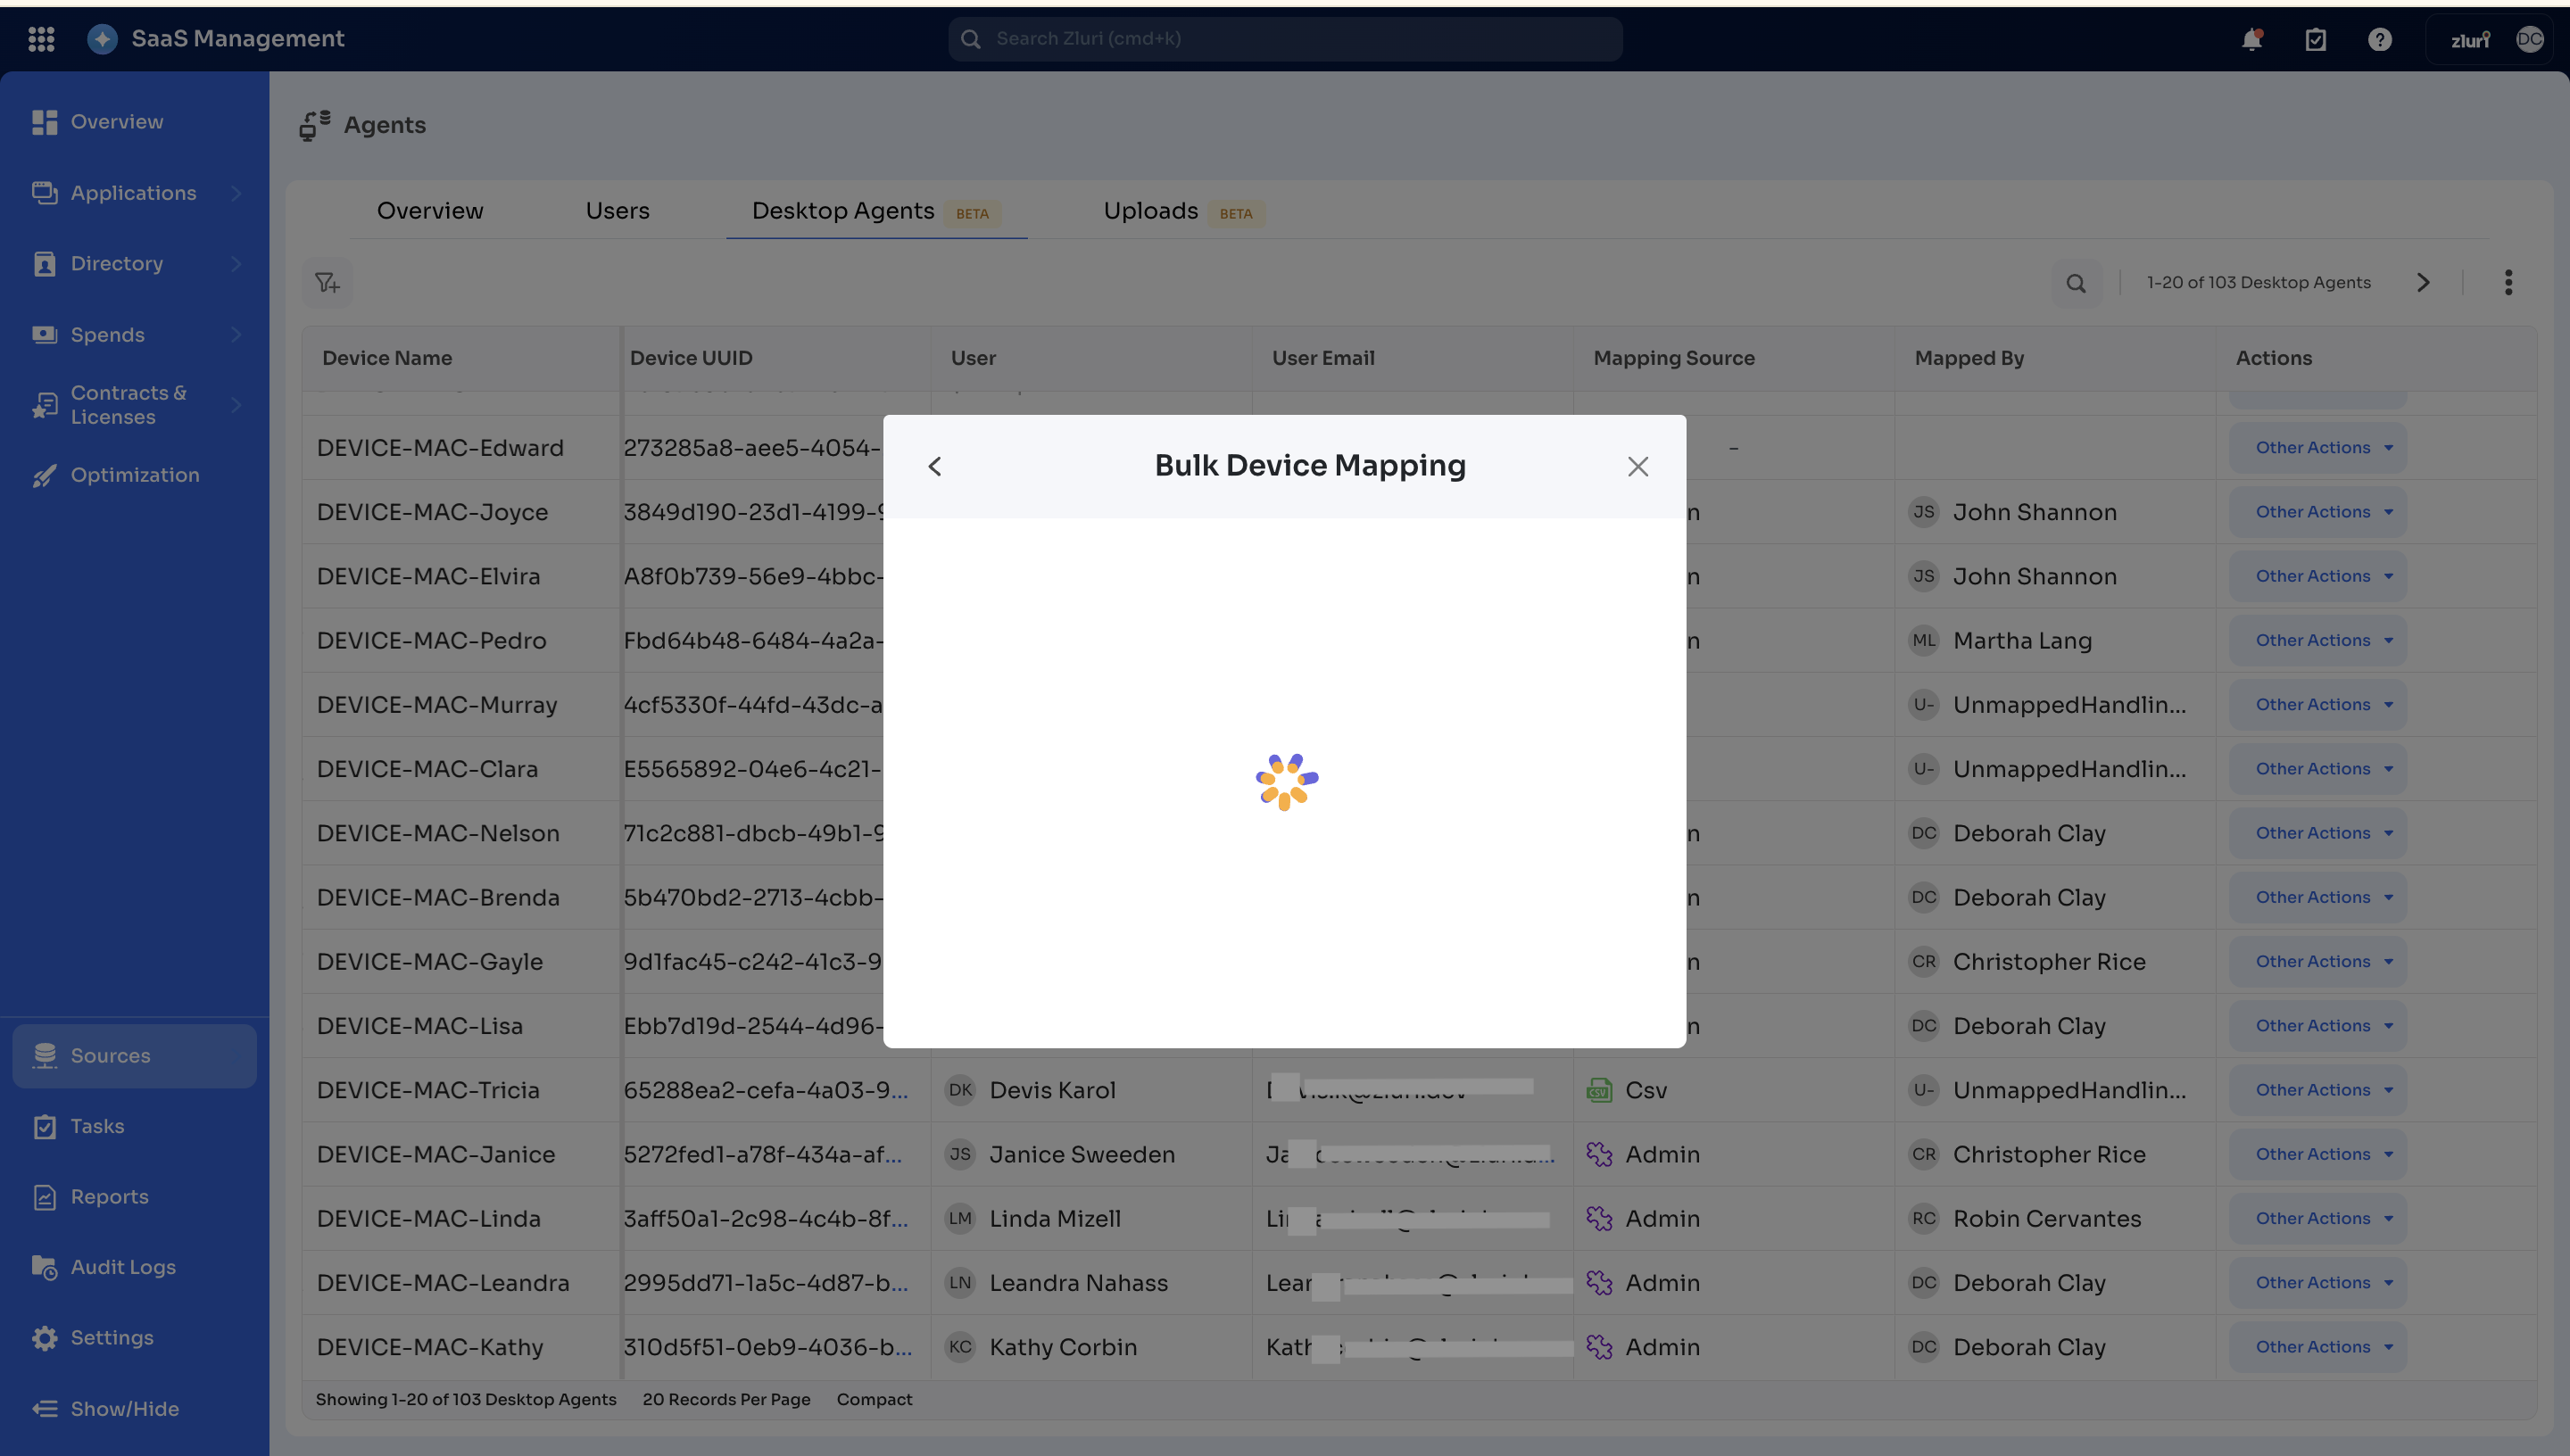
-
A loading icon will appear, indicating that the upload is in progress.
-
A window with a summary of validation and error messages will appear. We will discuss two scenarios for this step in detail.
a. Scenario 1: Success message only
b. Scenario 2: Partial Success
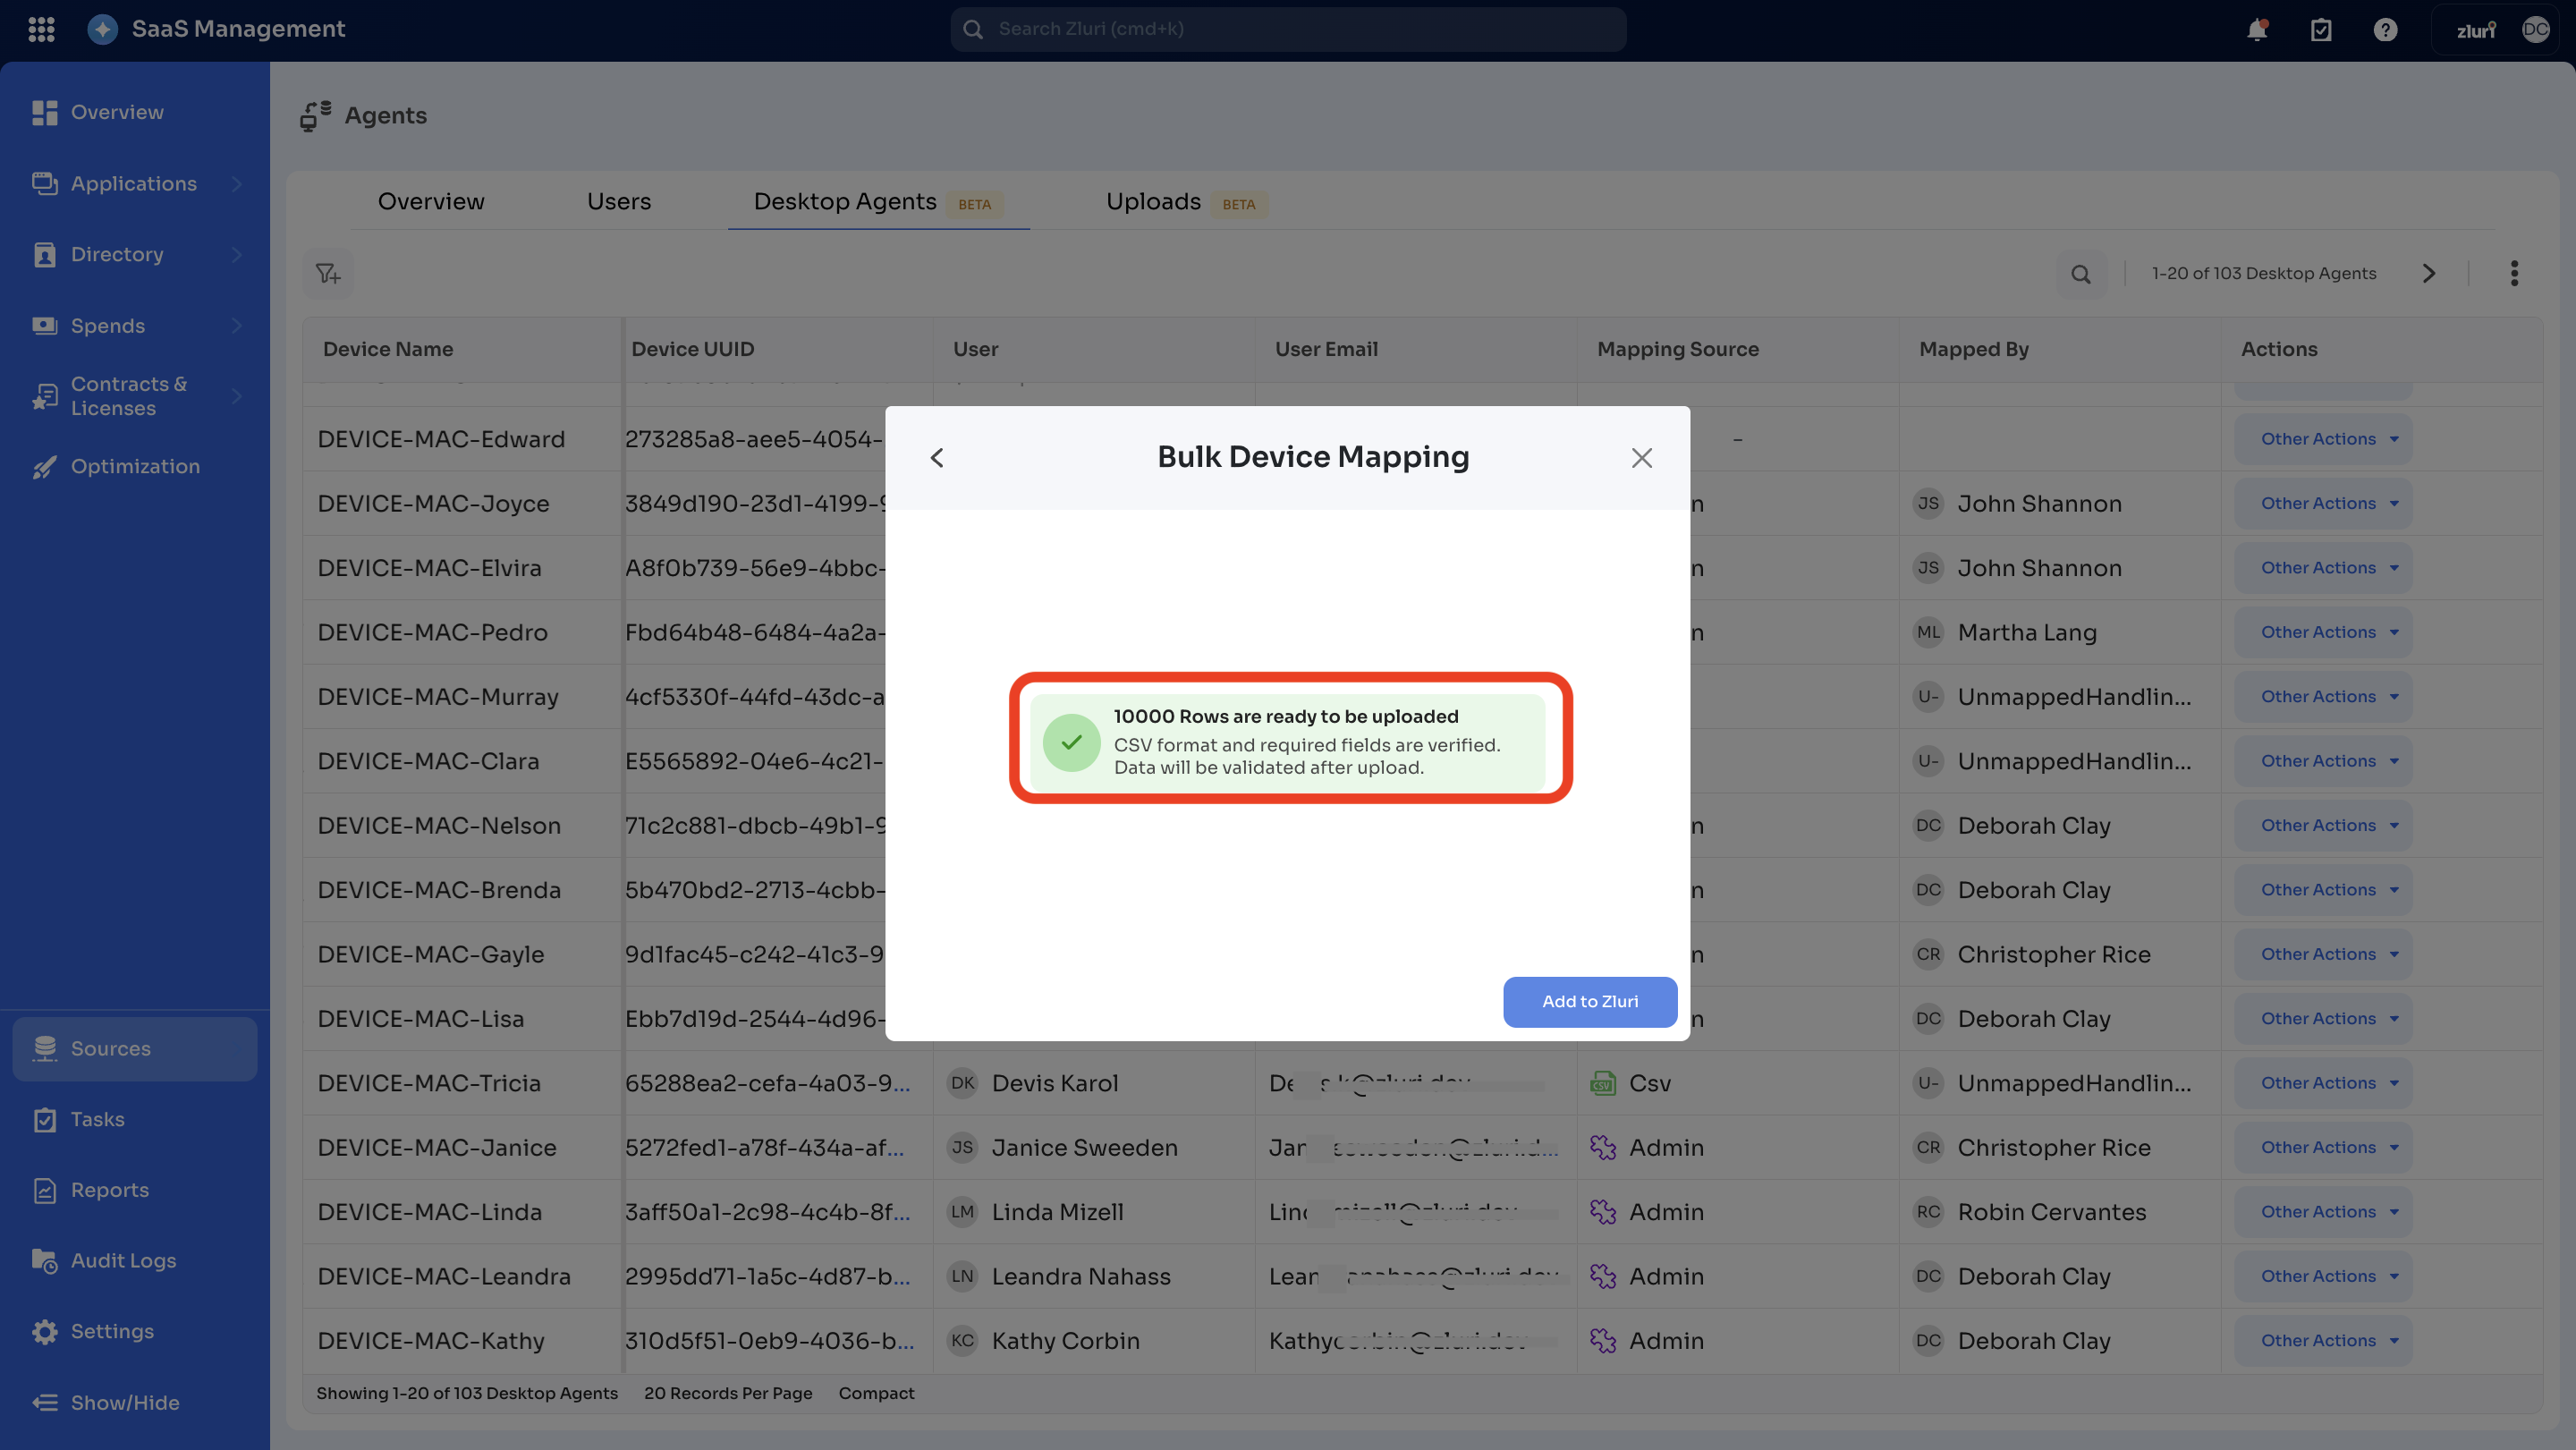
a. Scenario 1: Success message only
-
You will see the number of rows ready to be uploaded in the system in the green notification.
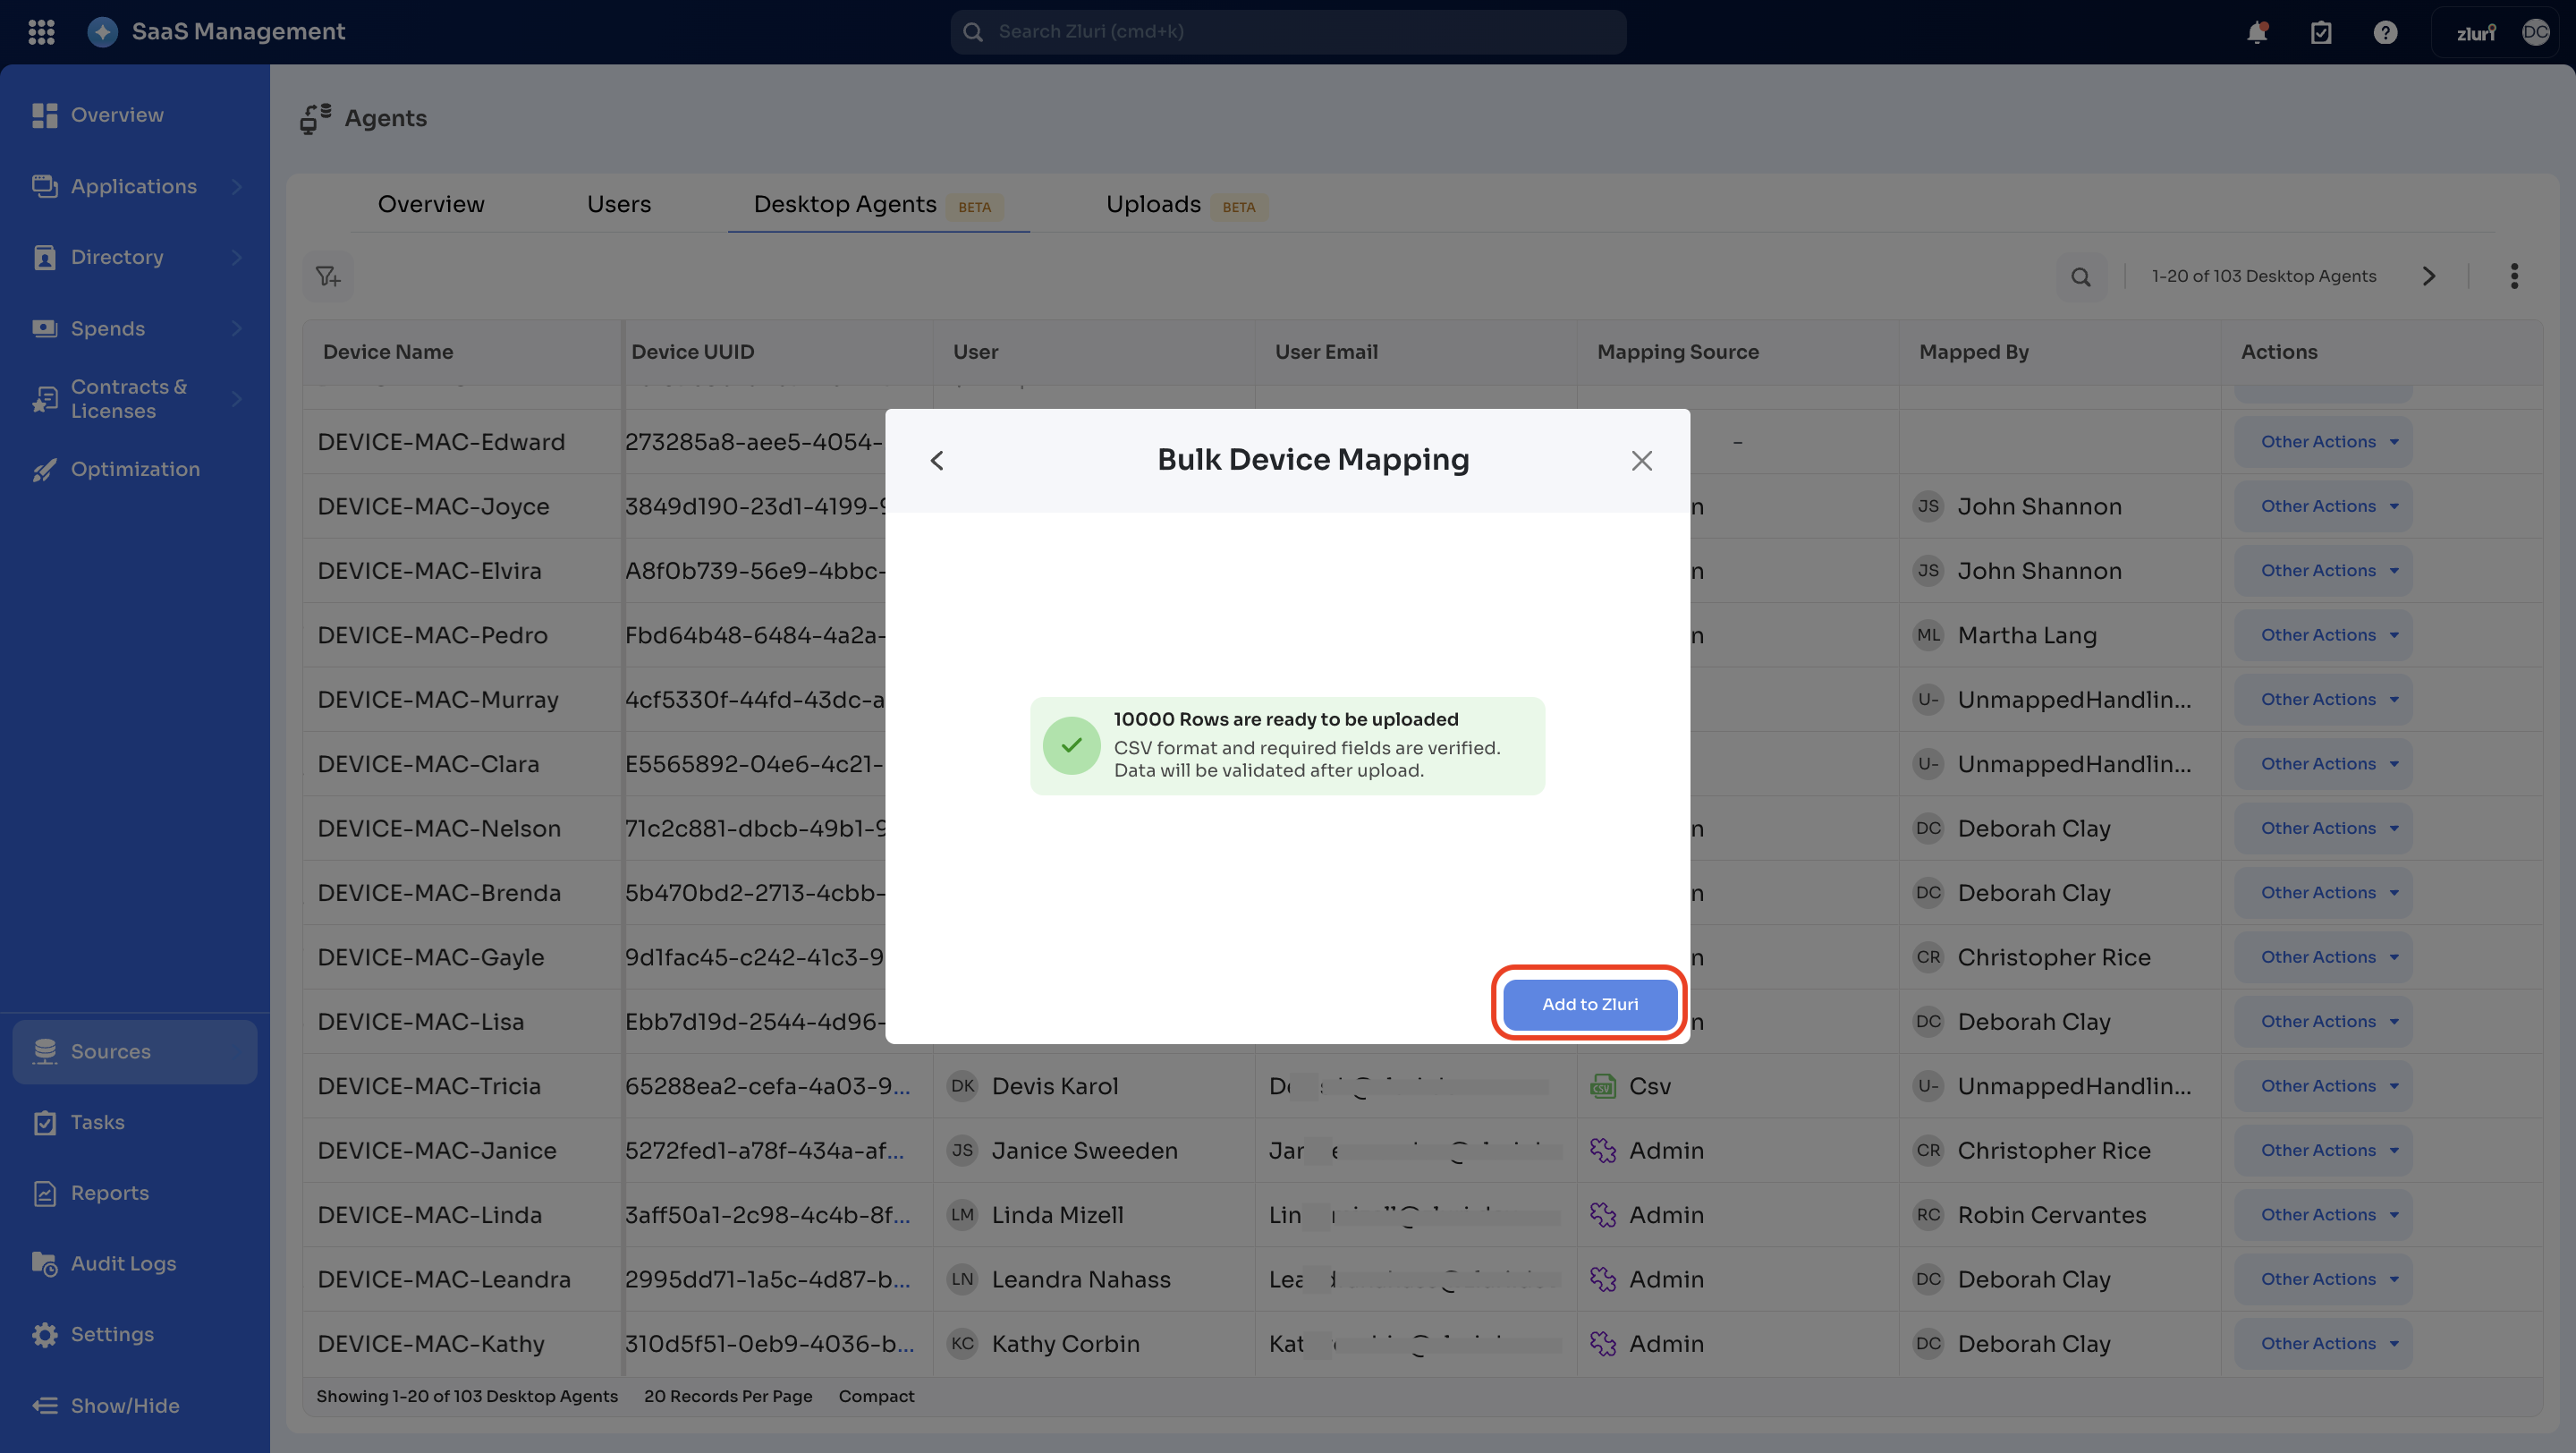
-
You can click on the ‘Add to Zluri’ button, and it will upload all the verified rows to the system for device user mapping.
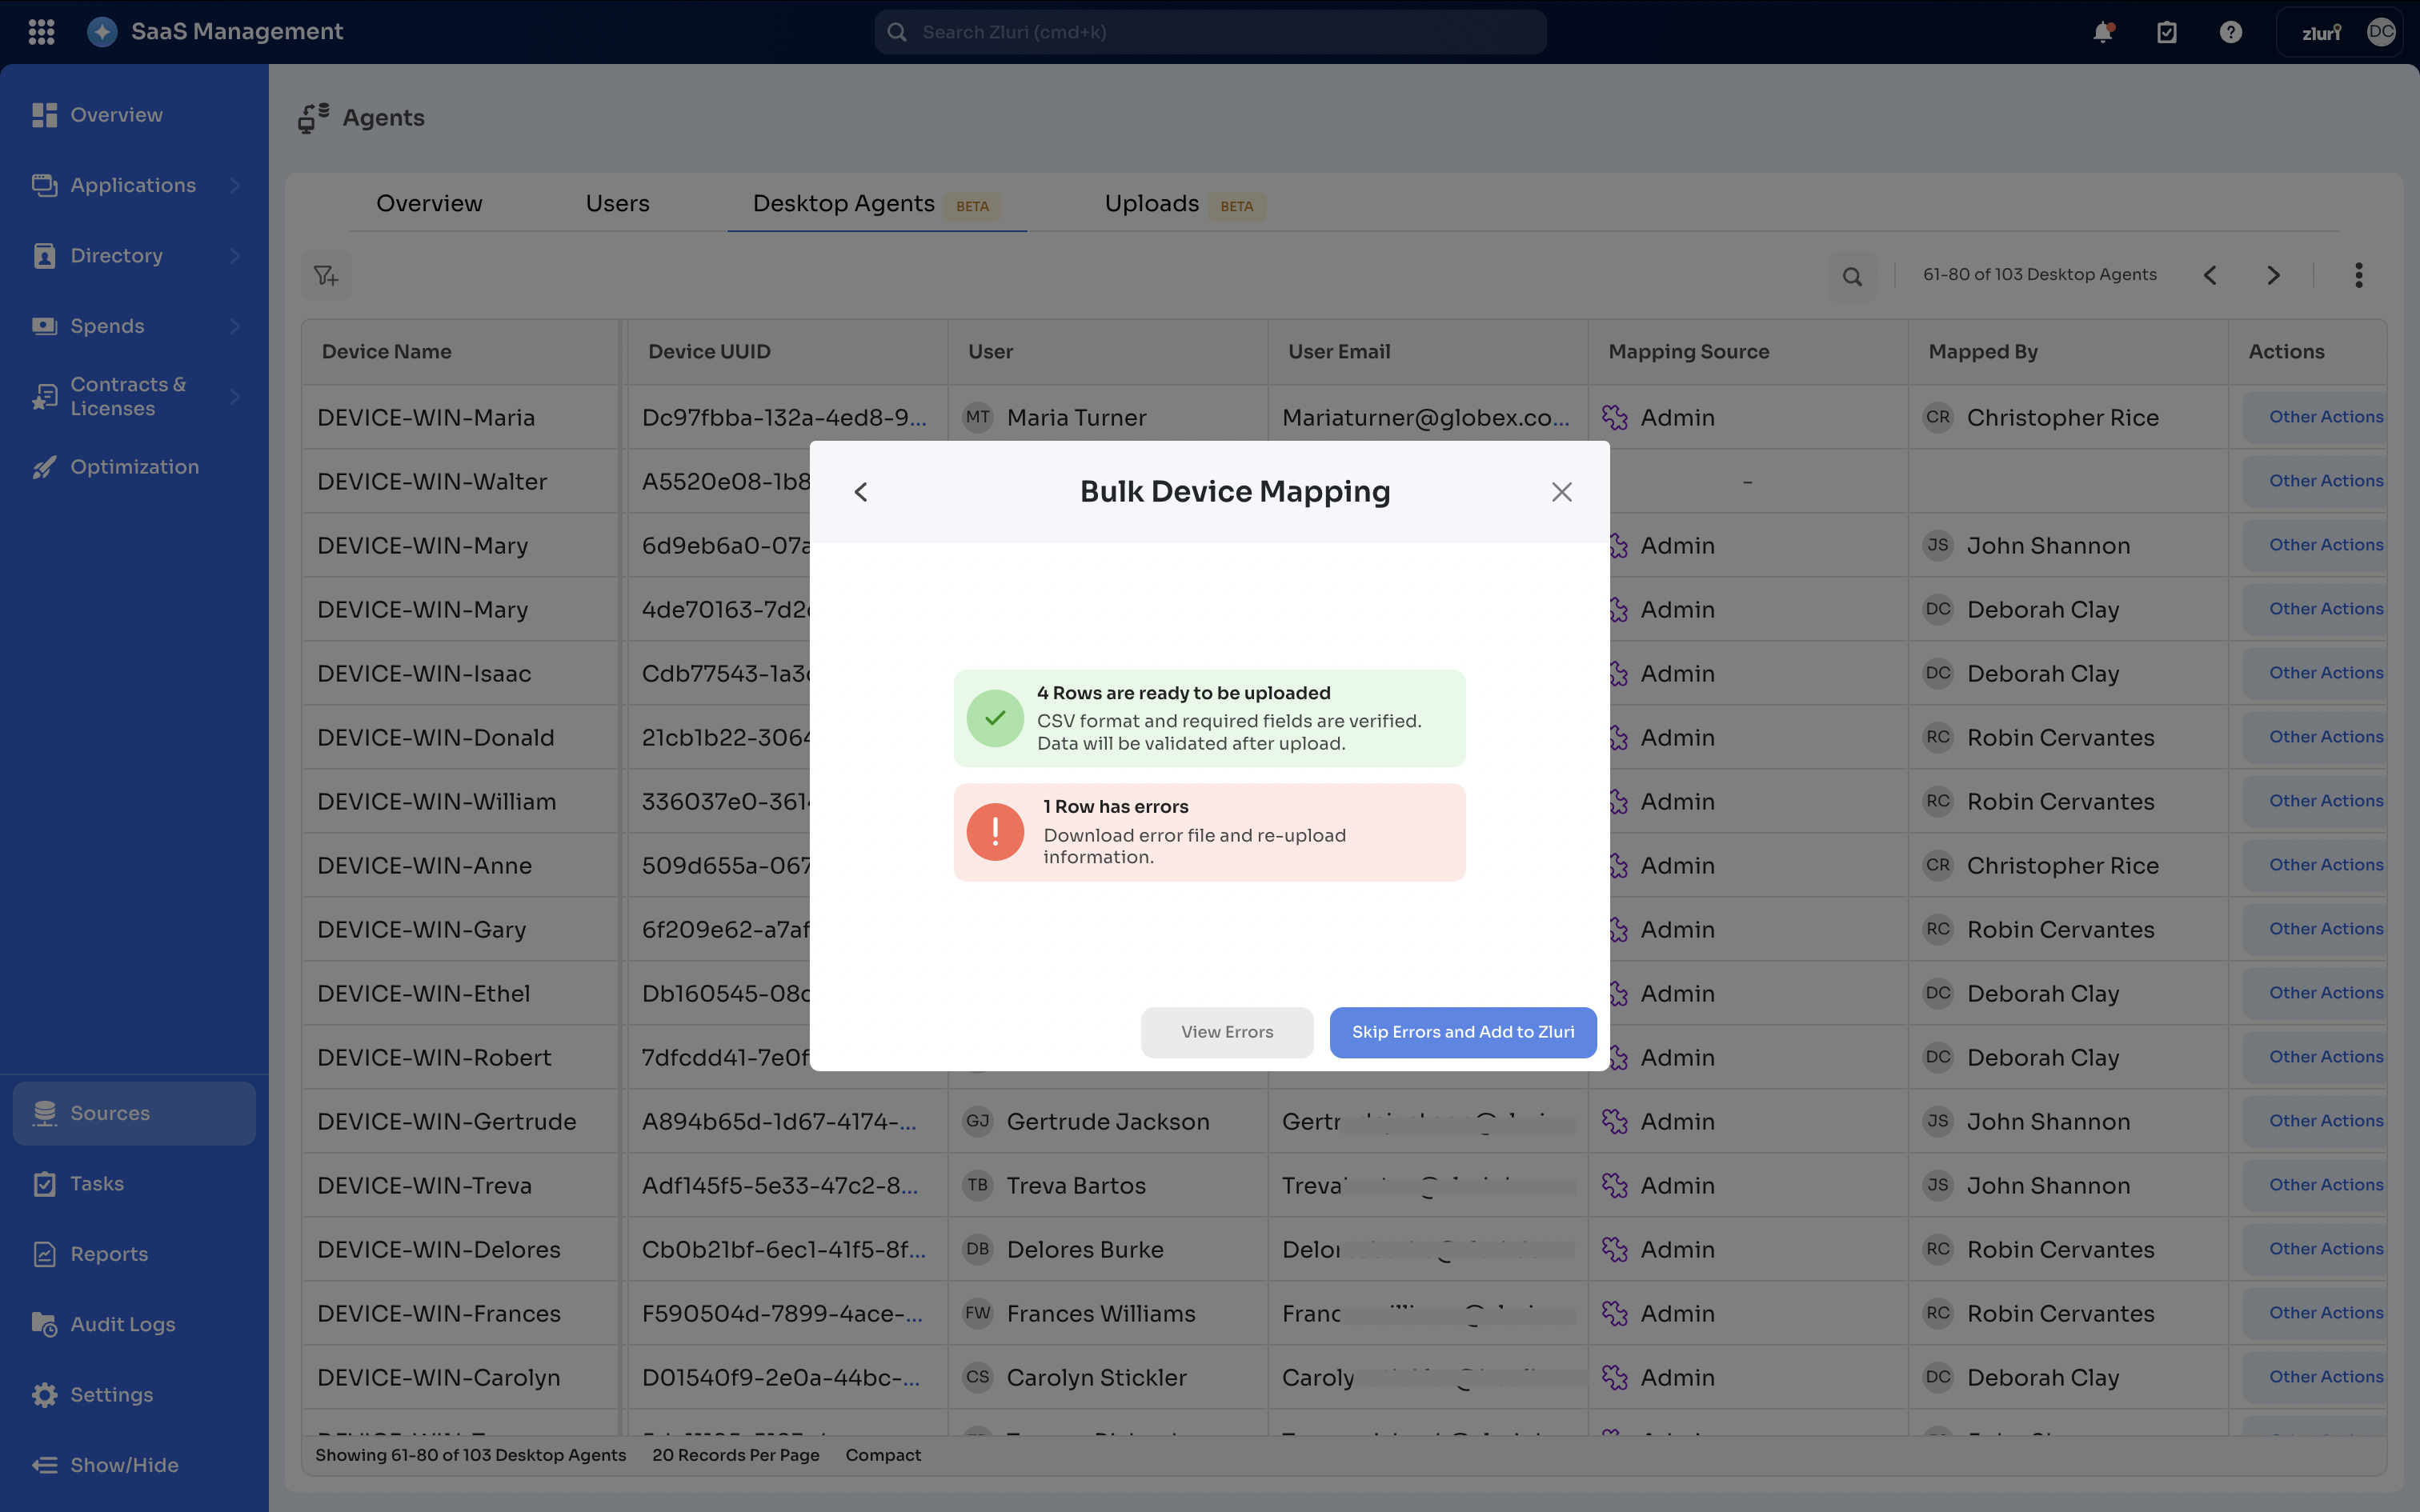
b. Scenario 2: Partial Success
In this case, the uploaded CSV file is verified partially by the system. A few rows in this file have been verified successfully, but some have encountered errors. Therefore, after the upload, the system will display a summary with two types of messages:-
Message in green text: This text message notifies about the number of rows successfully validated for upload. In this case, the information has been verified, and these rows are ready to be added to the system.
-
Message in red text: This text message notifies about the number of rows that encountered errors. In this case, rows are not verified for device user mapping, and the user is required to download the error file, review the error, make the necessary edits, and then re-upload the corrected information.
-
-
As we understood in the previous steps, some rows were verified successfully, while others encountered errors. The summary page we discussed in step 4 provides two options for taking subsequent actions in both cases.
a. Option 1 → View errors
b. Option 2 → Skip Errors and Add to Zluri
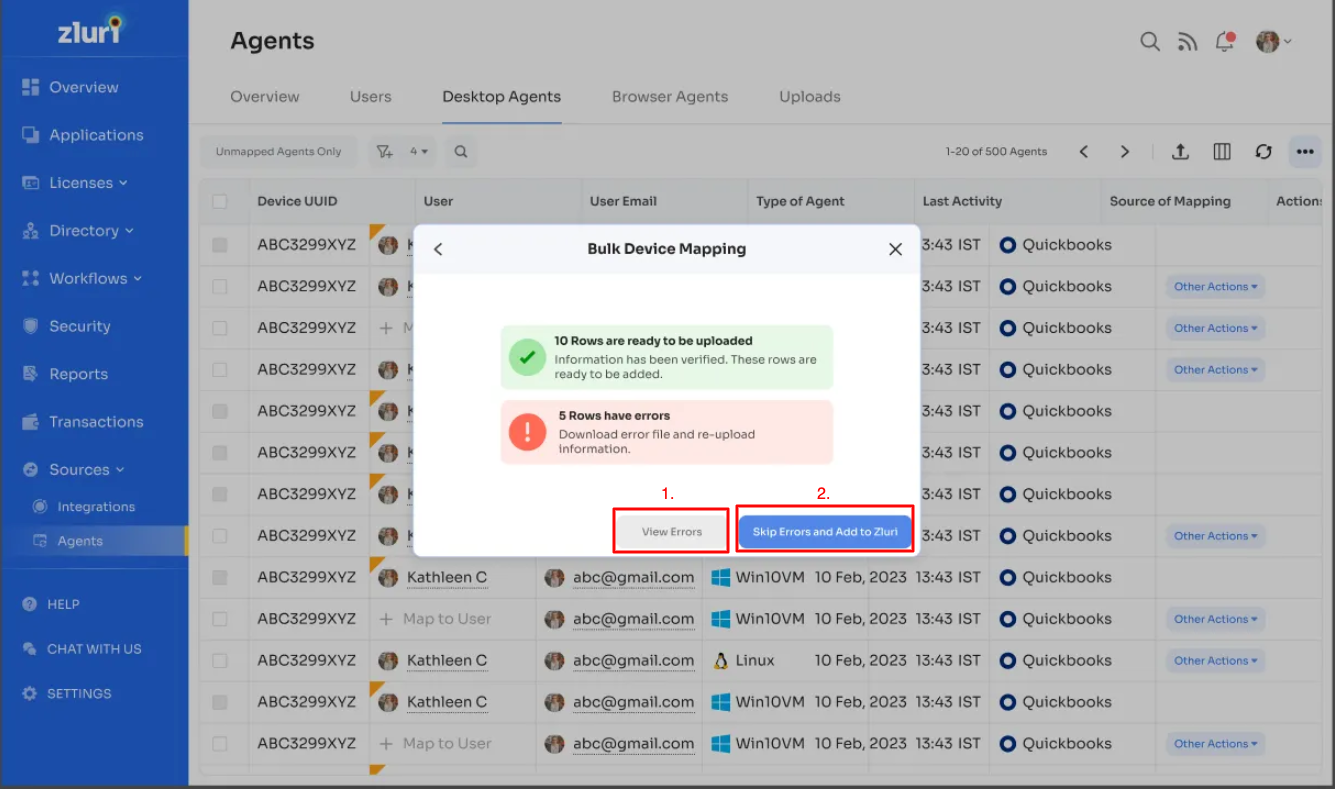
a. Option 1 → View Errors button
Admins can view detailed error messages that explain why specific rows failed to upload (for example, missing device name or invalid data). They can also download the error CSV using the ⬇️ down-arrow button to review and fix the issues.
When reviewing this error file, note that device-to-user mapping fails under some conditions. In those failed cases, the first column of the downloaded error file lists all the errors for each row.
Examples include: “Device UUID: INVALID_UUID_FORMAT” and similar messages.

b. Option 2 → Skip Errors and Add to Zluri button
This option allows the admin to skip all rows containing errors and upload only the valid rows. After clicking on the ‘Skip Errors and Add to Zluri’ option, device-to-user mapping is completed only if the following success conditions are met**.
Conditions:
-
The User Email corresponds to an active user in the system.
-
The user account type is Employee, unless external users are explicitly supported.
After selecting the ‘Skip Errors and Add to Zluri’ option, the admin is redirected to the Uploads page, where a notification confirms that the file is being processed. After the upload is complete, the system will process the file and map users to devices based on the information provided in the CSV file.
Overview of the Uploads page
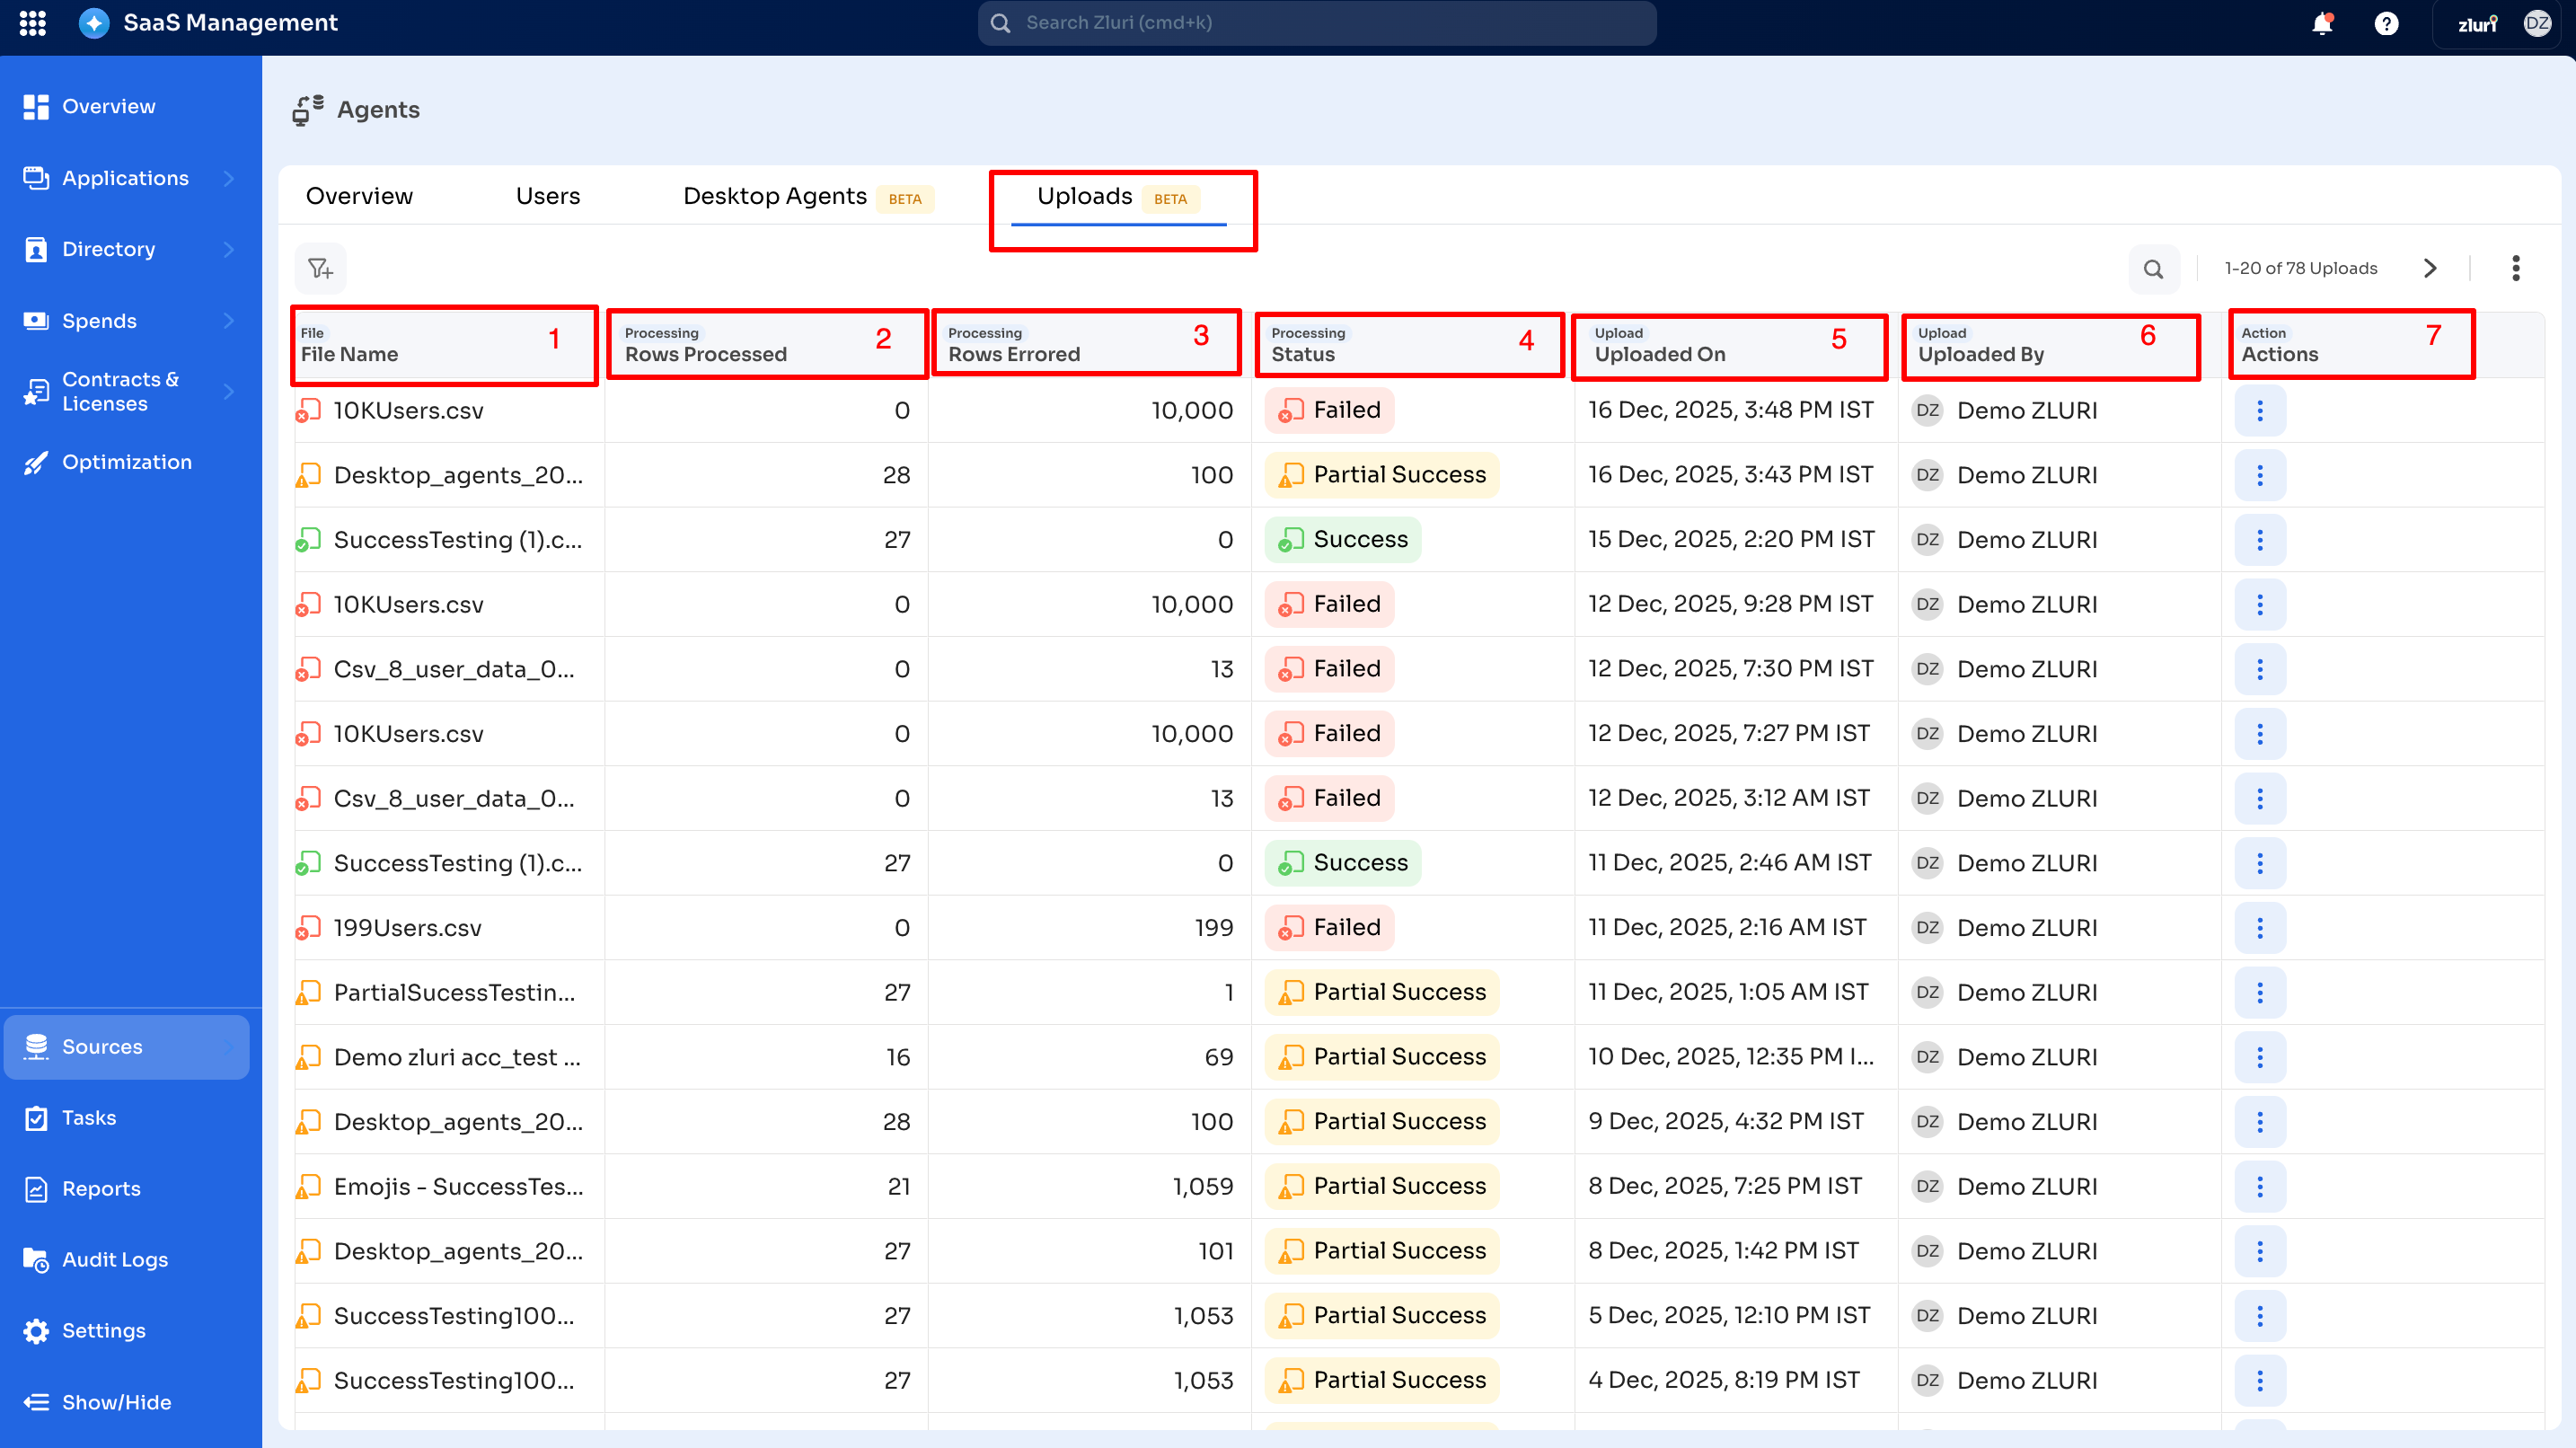
Once the bulk mapping is complete, you can track the status of all uploaded CSVs on the Uploads page in the Zluri SaaS management system.
This page provides the following details:
-
File name: Name of the uploaded CSV file.
-
Rows processed: Number of rows successfully processed.
-
Rows with Error: Number of rows that encountered errors.
-
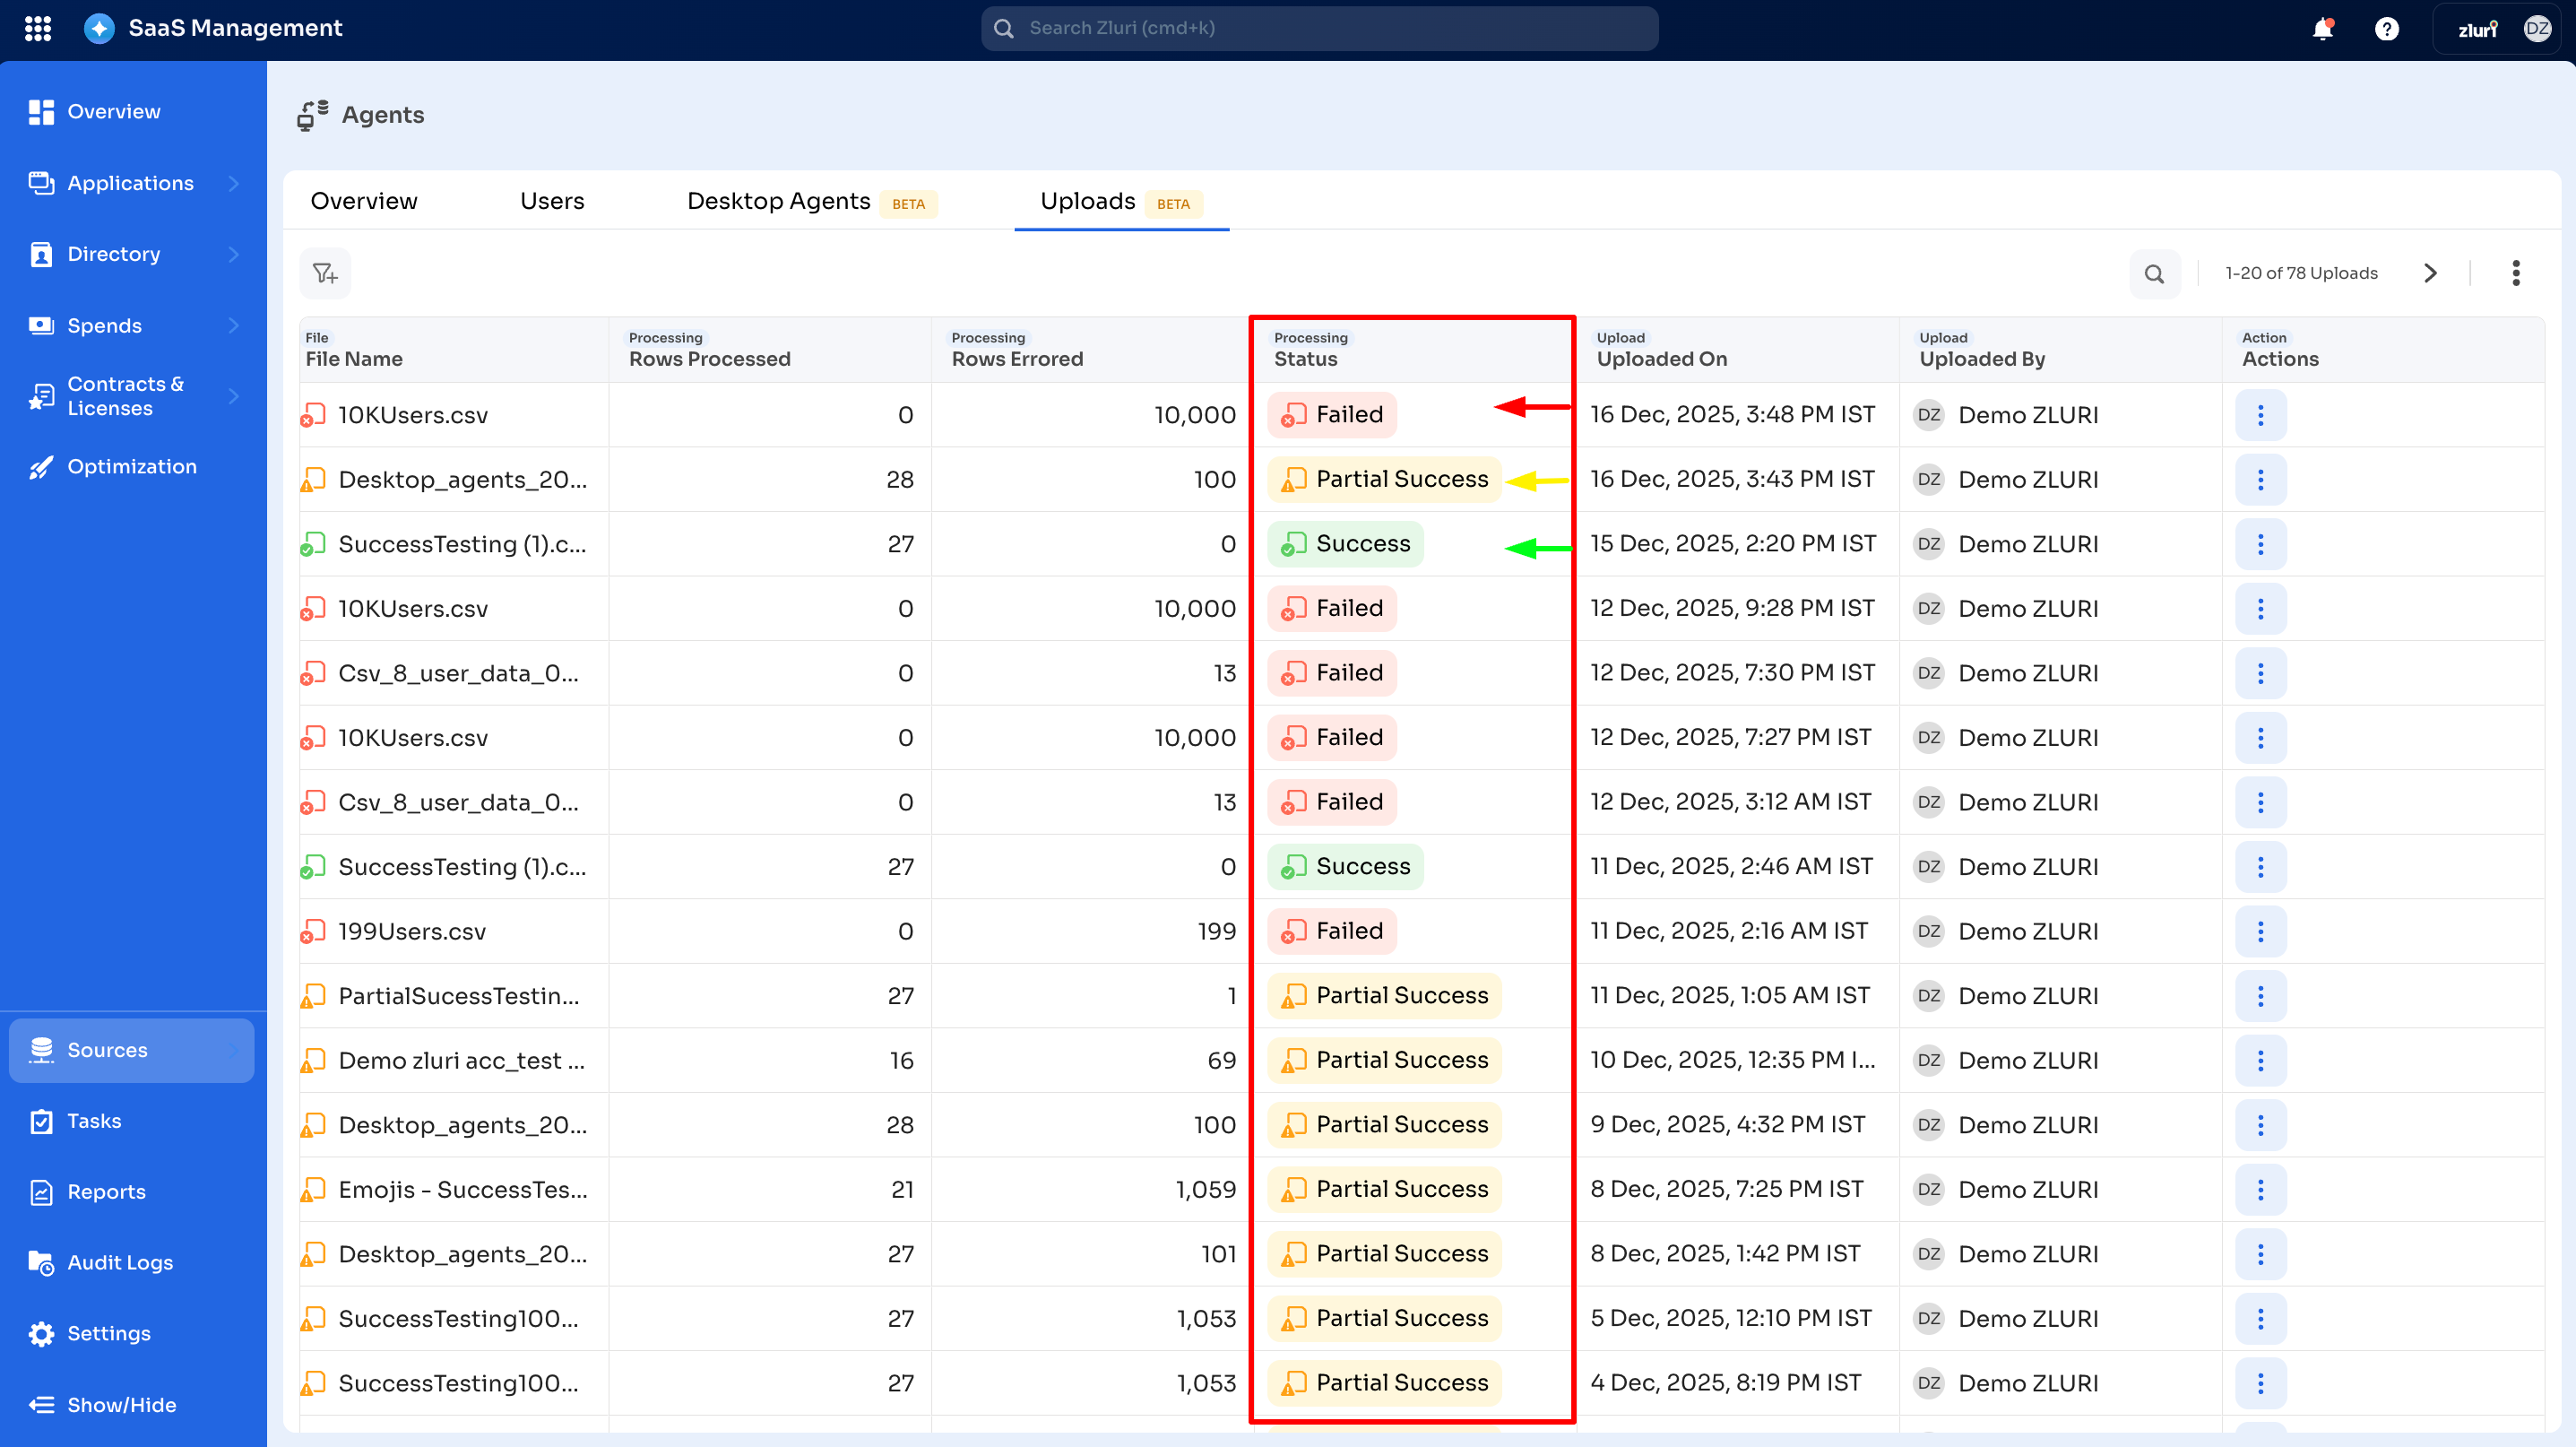
File status: Shows the status of the uploaded CSV file. There are mainly four types of statuses: Success, Failed, Processing, and Partial Success.
-
Uploaded on: Date and time of the upload.
-
Uploaded by: The email ID of the user who uploaded the CSV file into the system.
-
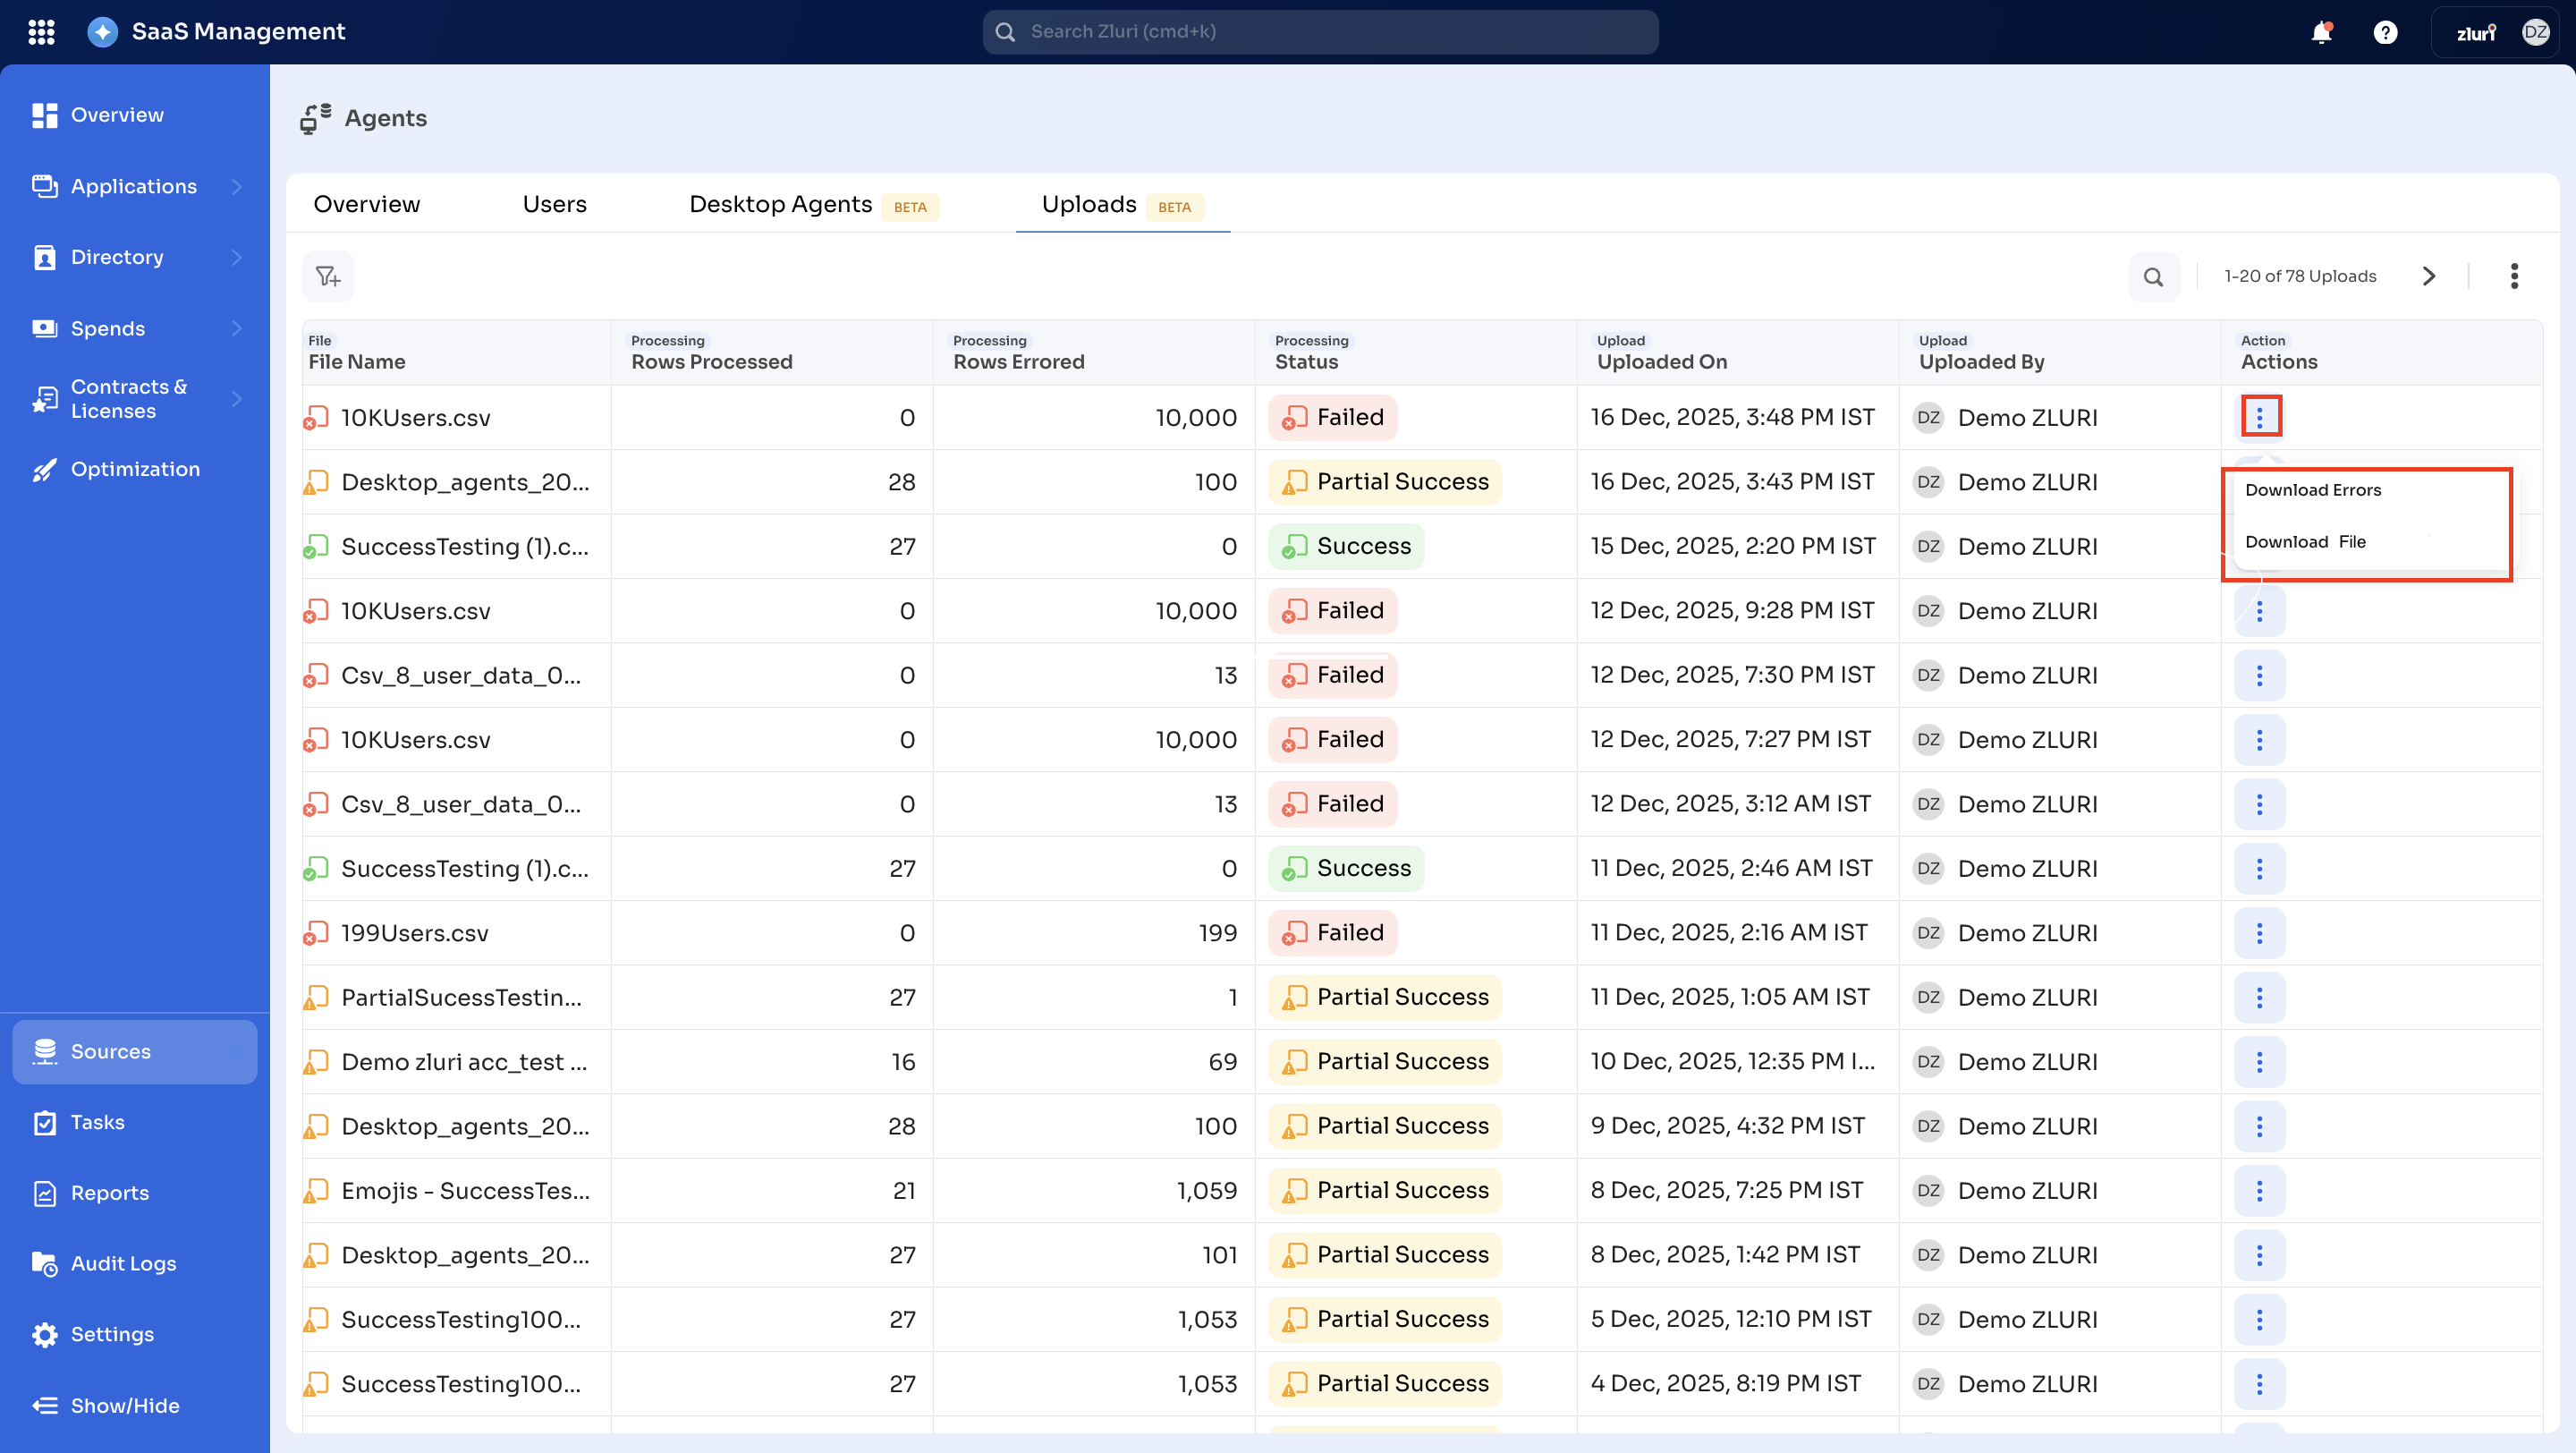
Actions: On clicking this three-dot icon, it will provide two options in case of error or failed statuses:
-
Download Errors: Button to download the error CSV file.
-
Download File: Button to download the main CSV file.
-
Conclusion
The Bulk User Mapping via CSV feature for Desktop Agents is a powerful feature that enables administrators to manage device-to-user mappings in Zluri efficiently. By using CSV files, admins can bulk map users to thousands of devices in a fraction of the time it would take to do so manually, while reducing errors and ensuring accurate data.
This feature is handy when no MDM integration is available or when existing integrations do not support automatic mapping. By following the step-by-step process outlined in this document, administrators can easily map users to devices and maintain clean, up-to-date records in the Zluri SaaS management platform.
Got questions? Feel free to submit a ticket or contact us directly at [email protected].