CSV Connector
Prerequisites:
Before starting, ensure you have:
- CSV files with your data ready
- Administrator access to Zluri
- Understanding of which data types you want to import
- Sample files ready (for initial setup)
- Understand Data Entities
Stage 1: Create Your Connector (One-Time Setup)
Step 1: Start Connector Creation
-
Log in to Zluri
-
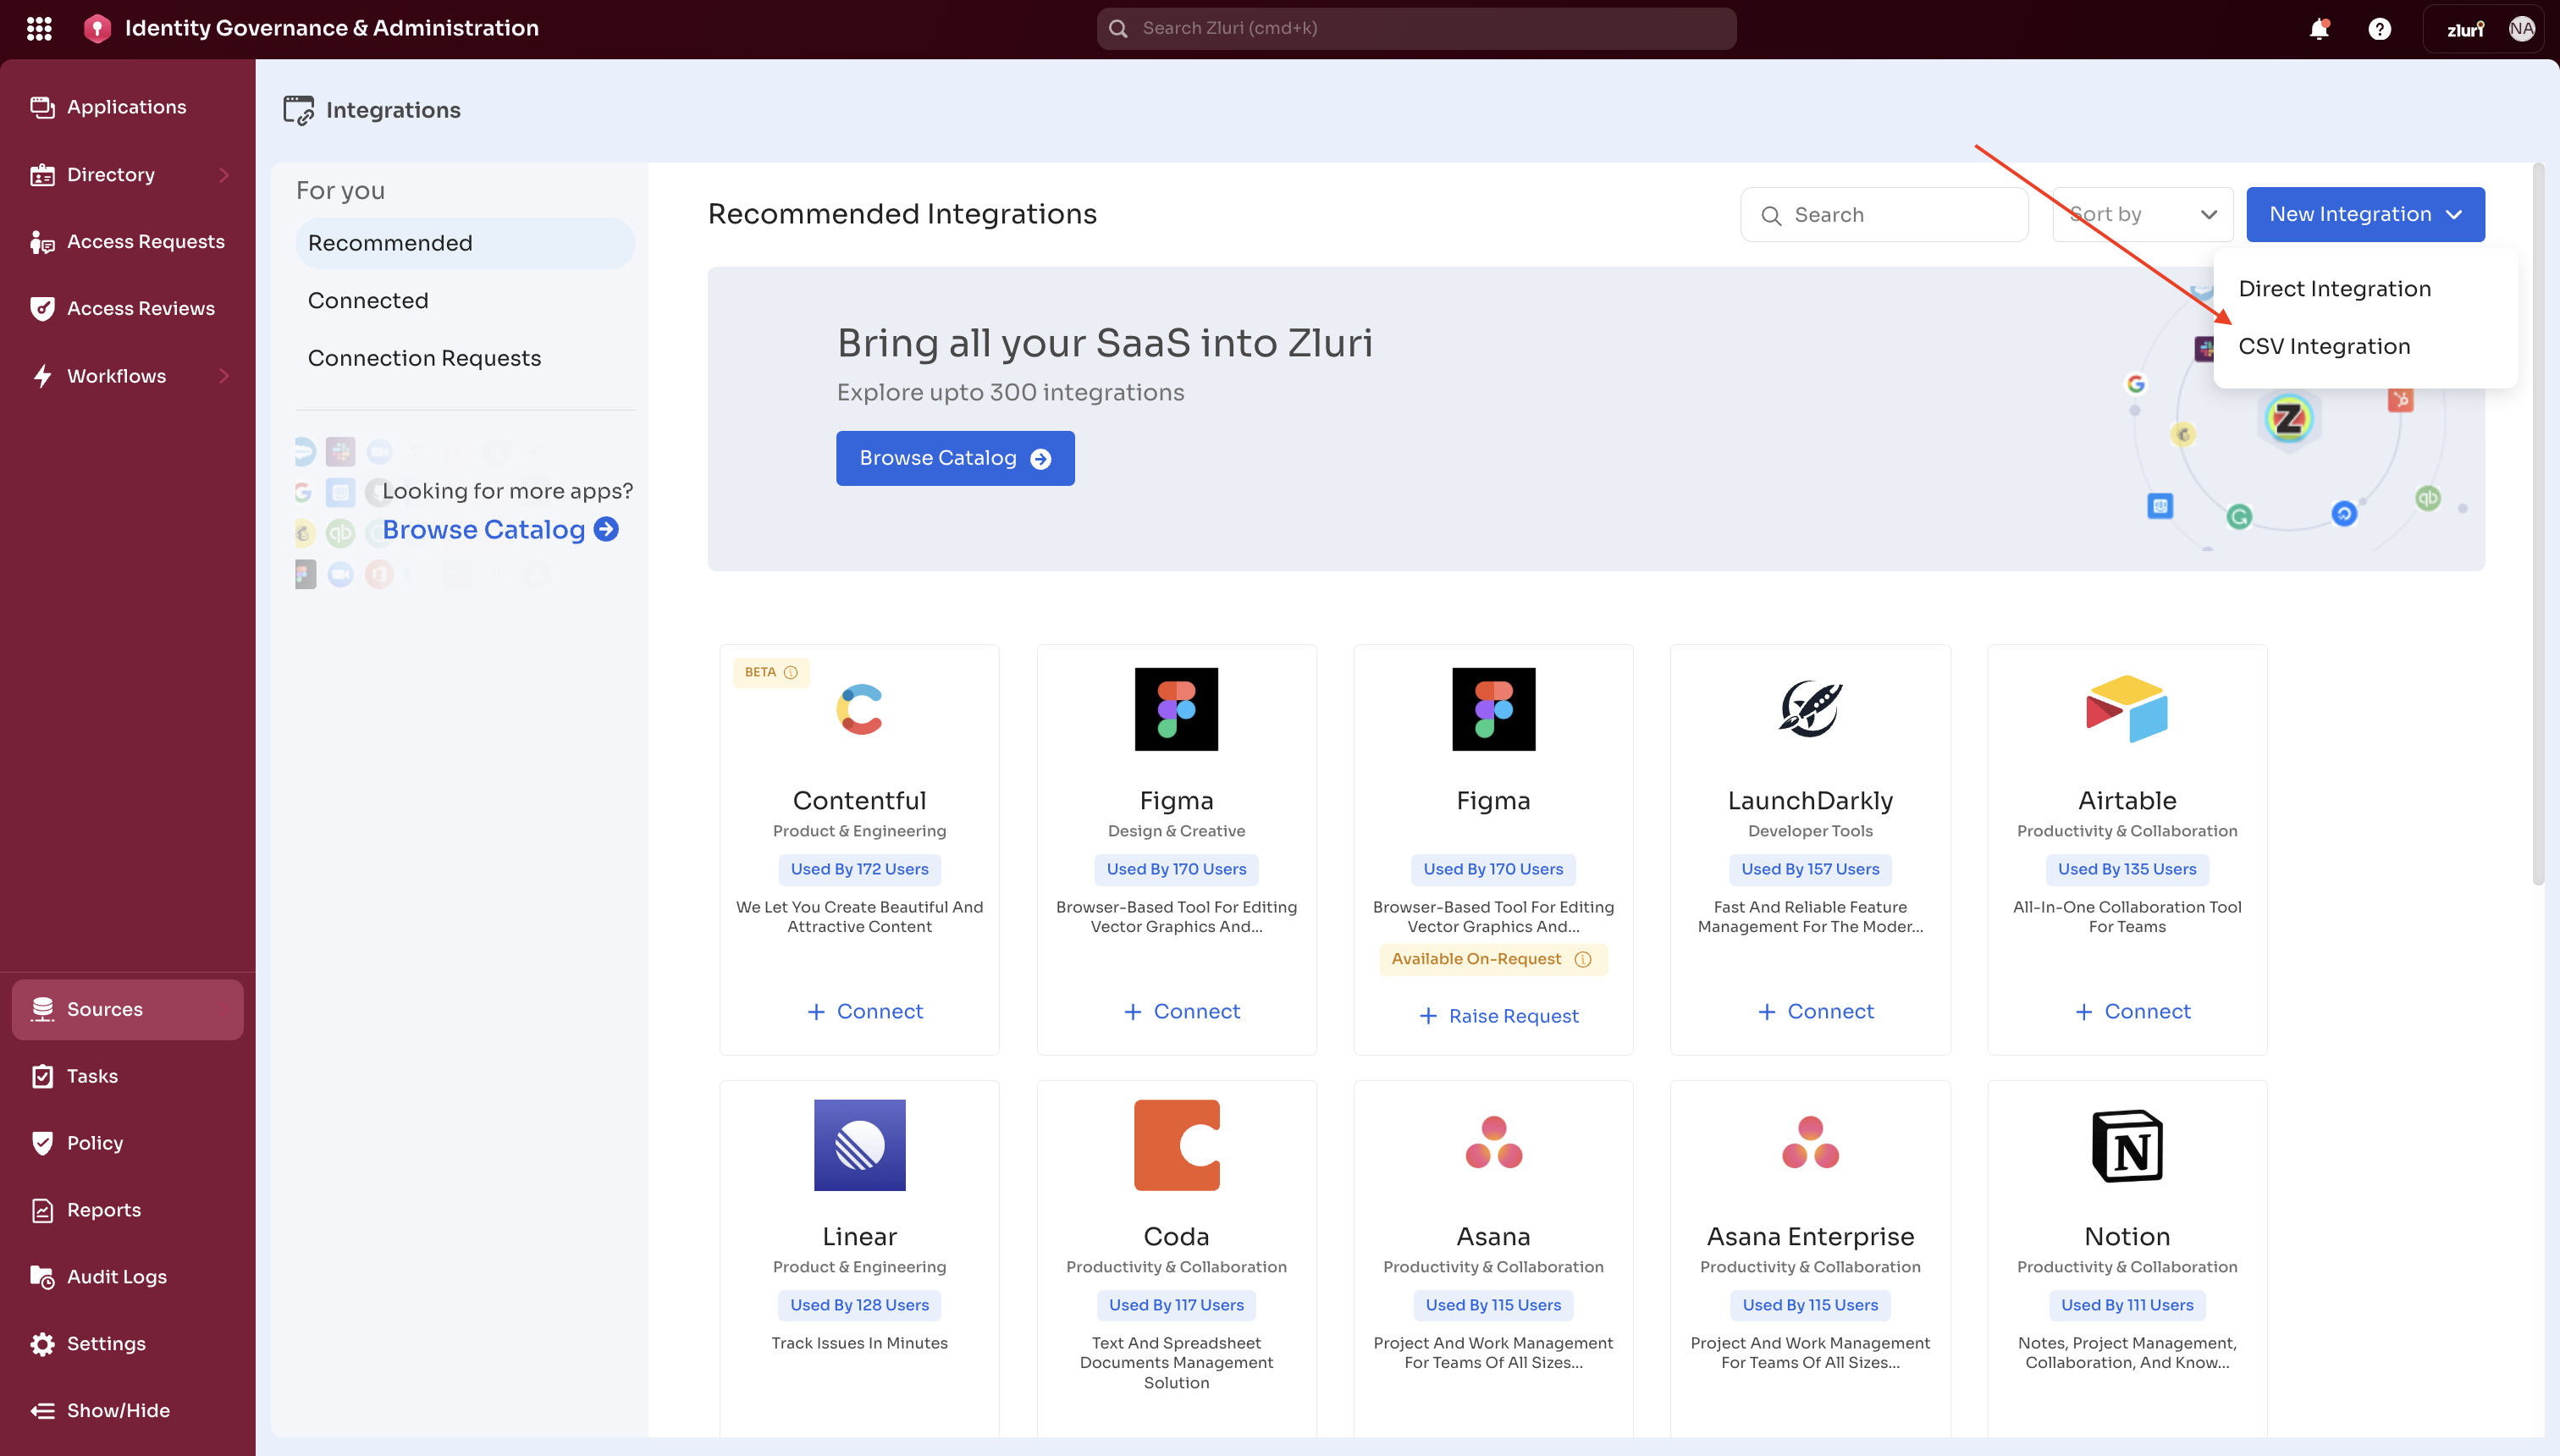
Navigate to Sources > Integrations > Recommended. Click on New Integration on the top right corner and then CSV Integration.
-
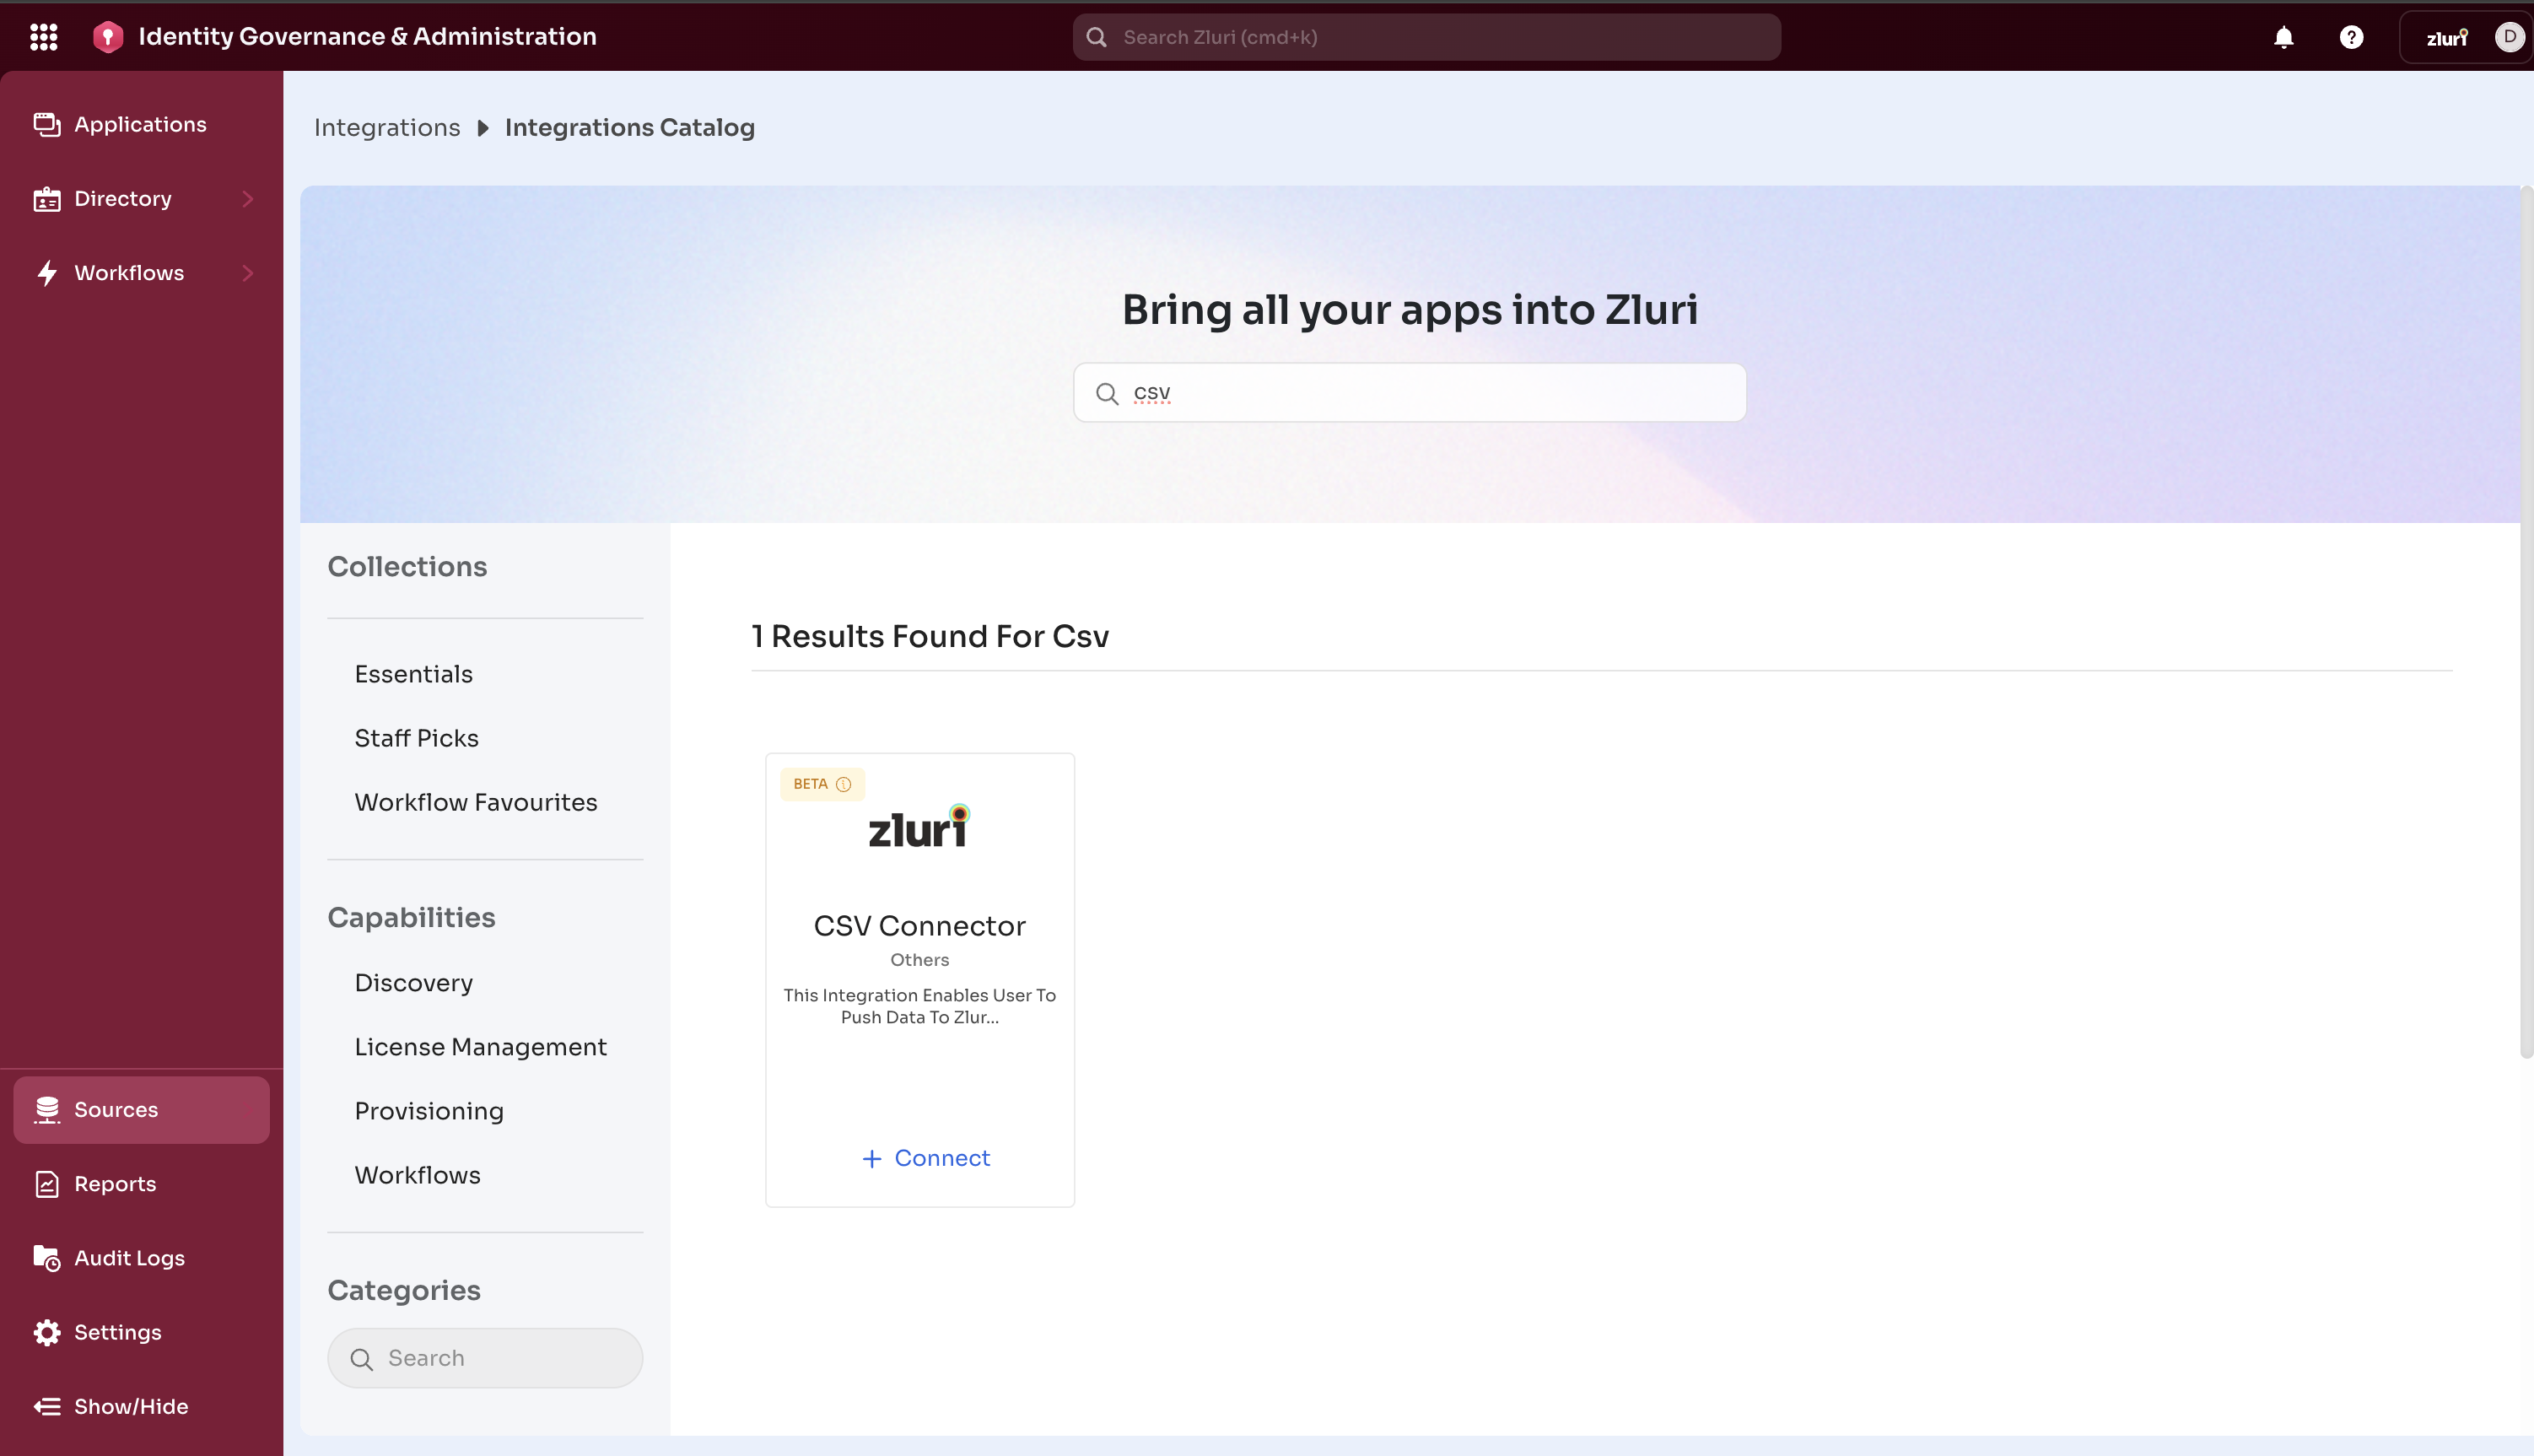
OR Go to Sources > Integrations >Catalog > Search for CSV Connector
-
Click “Connect”.
Step 2: Configure Connector Details
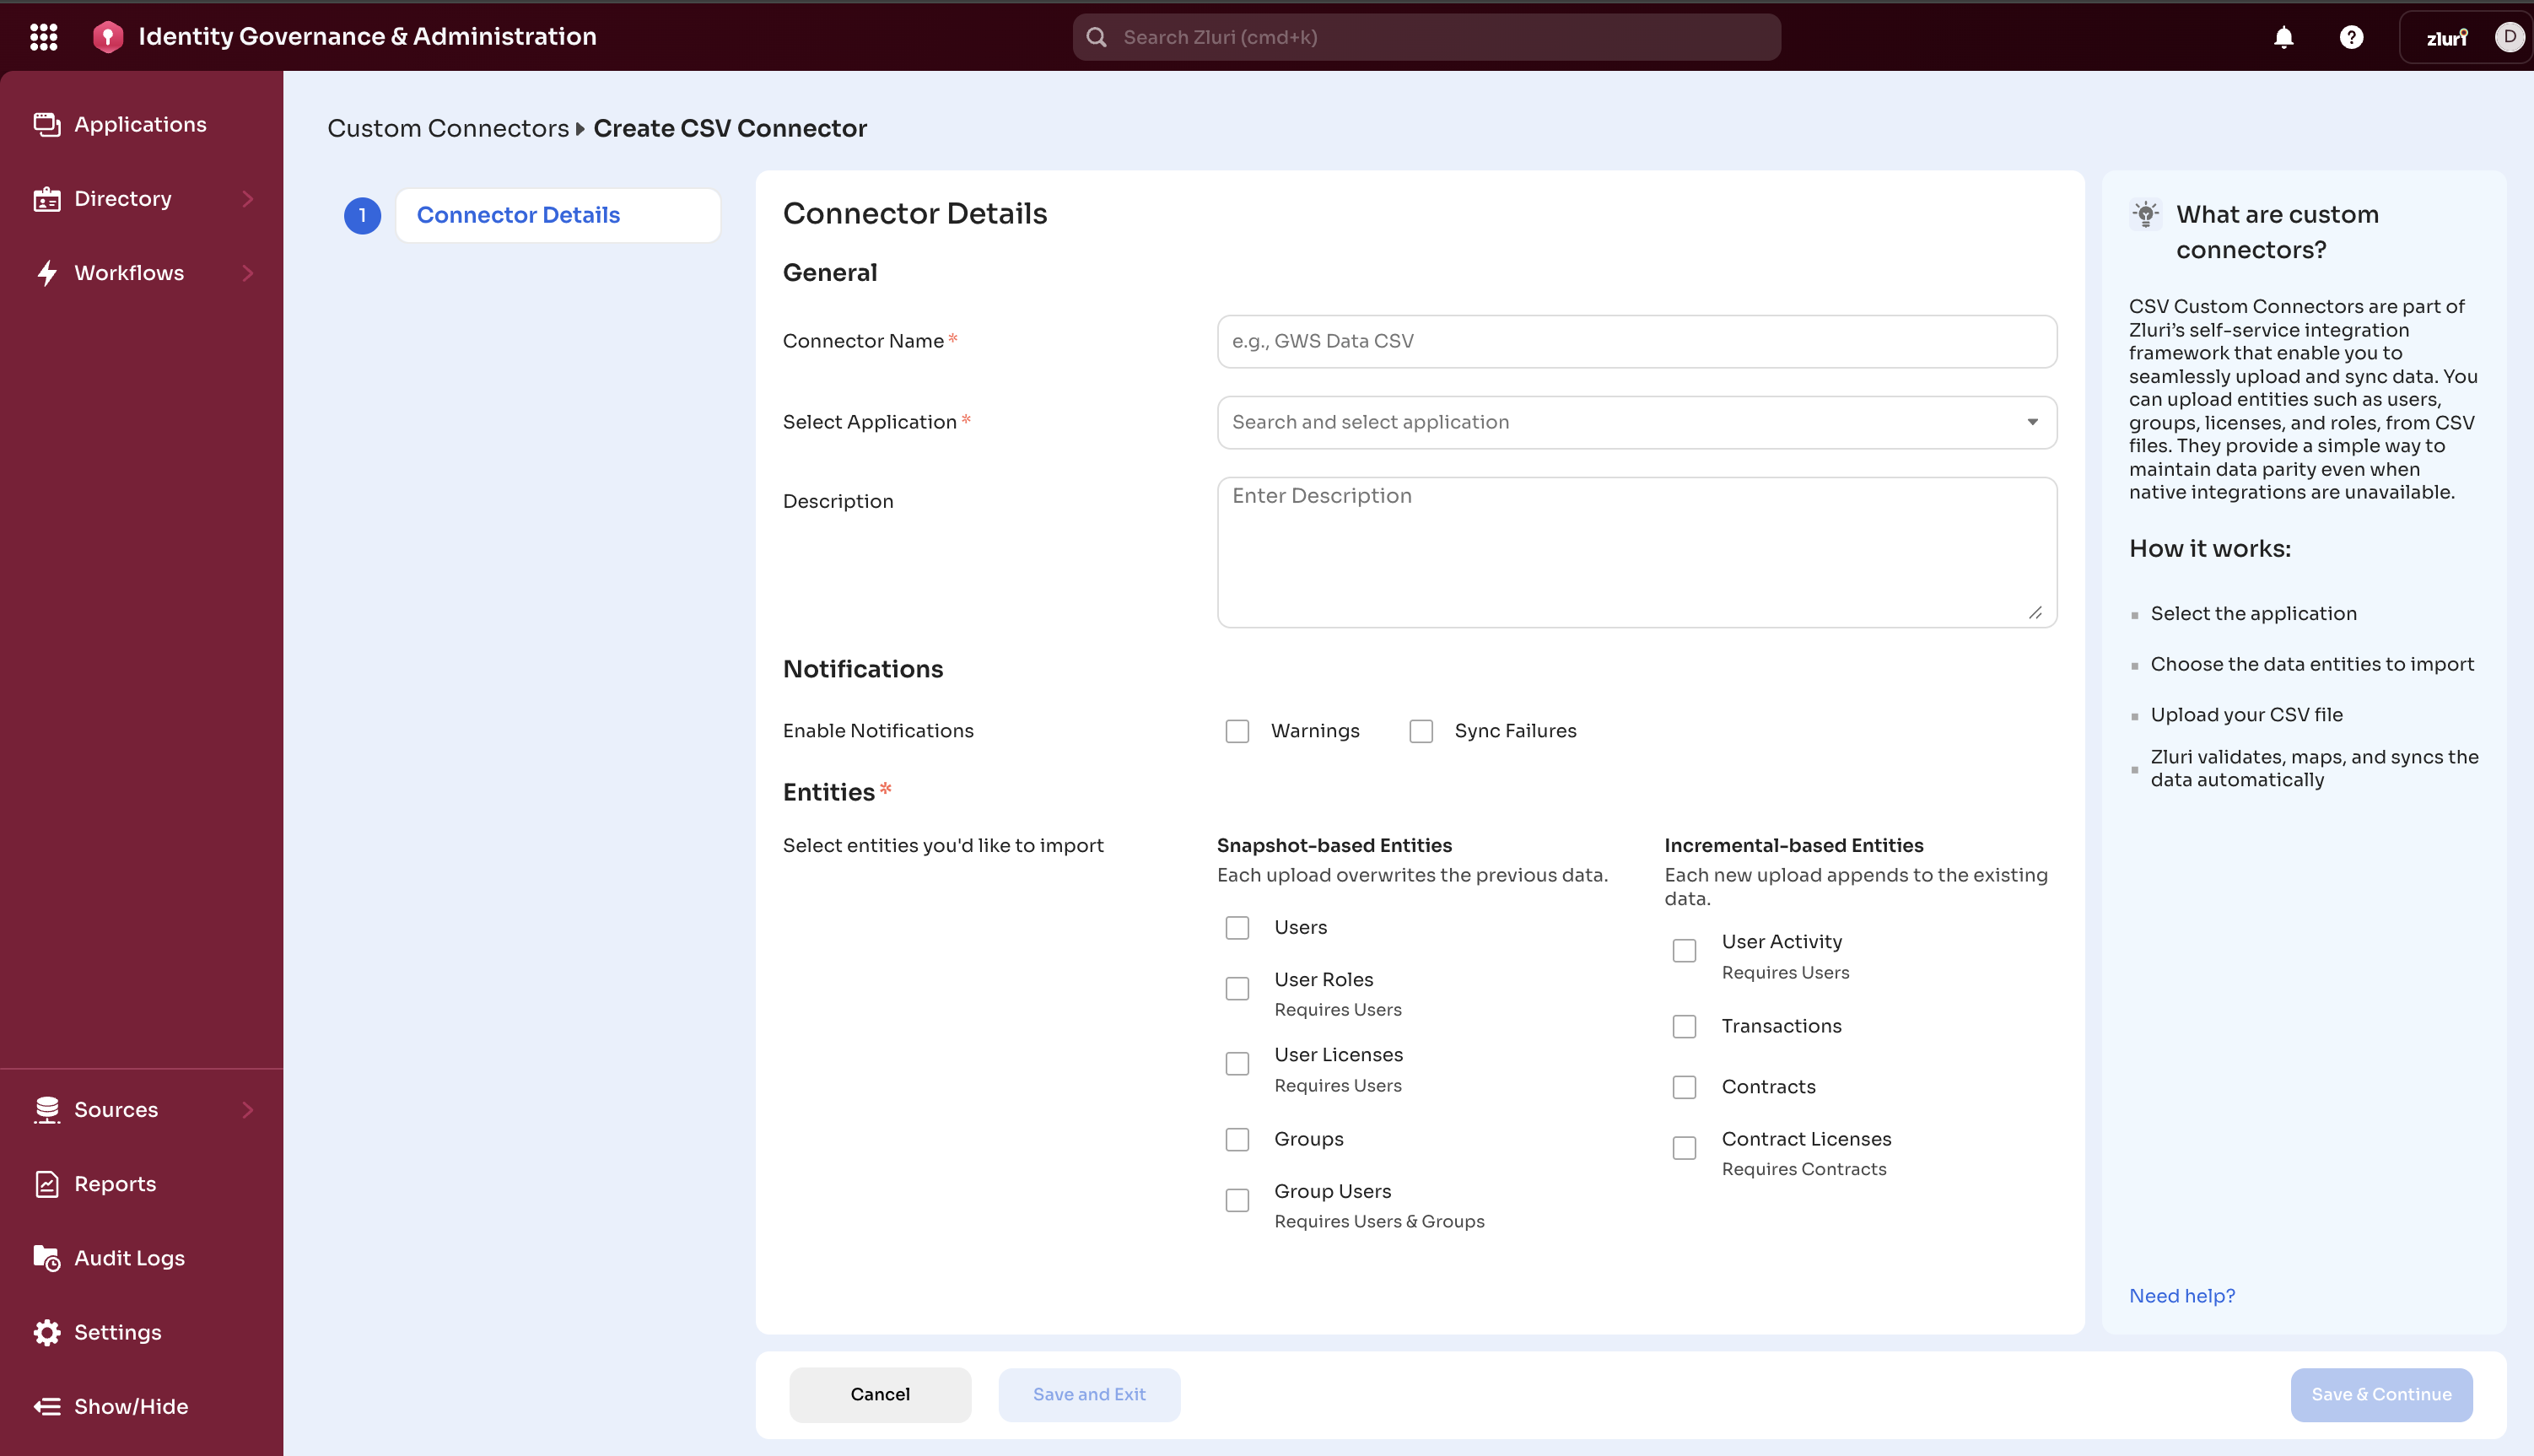
Fill in the following information:
-
Application: Select or search for the application this data relates to
-
Connector Name: Give your connector a descriptive name (e.g., “HR System Users”)
-
Description: (Optional) Add notes about what this connector imports
-
Data Types: Select which types of data you’ll be importing:
Entity Dependency Notes Users None Select if importing employee data User Roles Requires Users Each role record must reference a valid user. Users must be included in the same sync. User Licenses Requires Users Each license record must reference a valid user. Users must be included in the same sync. User Activity Requires Users Each activity record must reference a valid user. Users must be included in the same sync. Groups None Select if importing teams/departments Group Users Requires Users & Groups Each group membership must reference valid users and groups. Both must be included in the same sync. Transactions None Select if importing vendor contracts Contracts None Select if importing payment/renewal records Contracts Licenses Requires Contracts Each contract license record must reference a valid contract. Contracts must be included in the same sync.
Notification Settings:
Configure who receives alerts about sync status:
Notification Types:
- Warnings (Recommended)
- Triggered when: Data validation finds issues but processing continues
- Contains: List of skipped or failed records
- Use case: Monitor data quality issues
- Sync Failures (Recommended)
- Triggered when: Hard sync failure where data couldn't be processed
- Contains: Error details and failure reason
- Use case: Critical alerts requiring immediate action
Adding Recipients:
- Select existing Zluri users from the dropdown
- Add external email addresses (non-Zluri users allowed)
- Best practice: Include at least 2 recipients for redundancy
- Choose notification types:
- Warnings (recommended): Post data validation if there are any skipped or validation failures, but the data is processed, Zluri will share warning notifications with failed records.
- Sync failures (recommended): Hard sync failure alert notification where the data couldn’t be processed post validation.
- Add team members who should receive notifications. You can select users from Zluri or add any new emails that aren’t a part of Zluri.
Click “Save & Continue” to move to the next step.
Step 3: Upload Sample Files
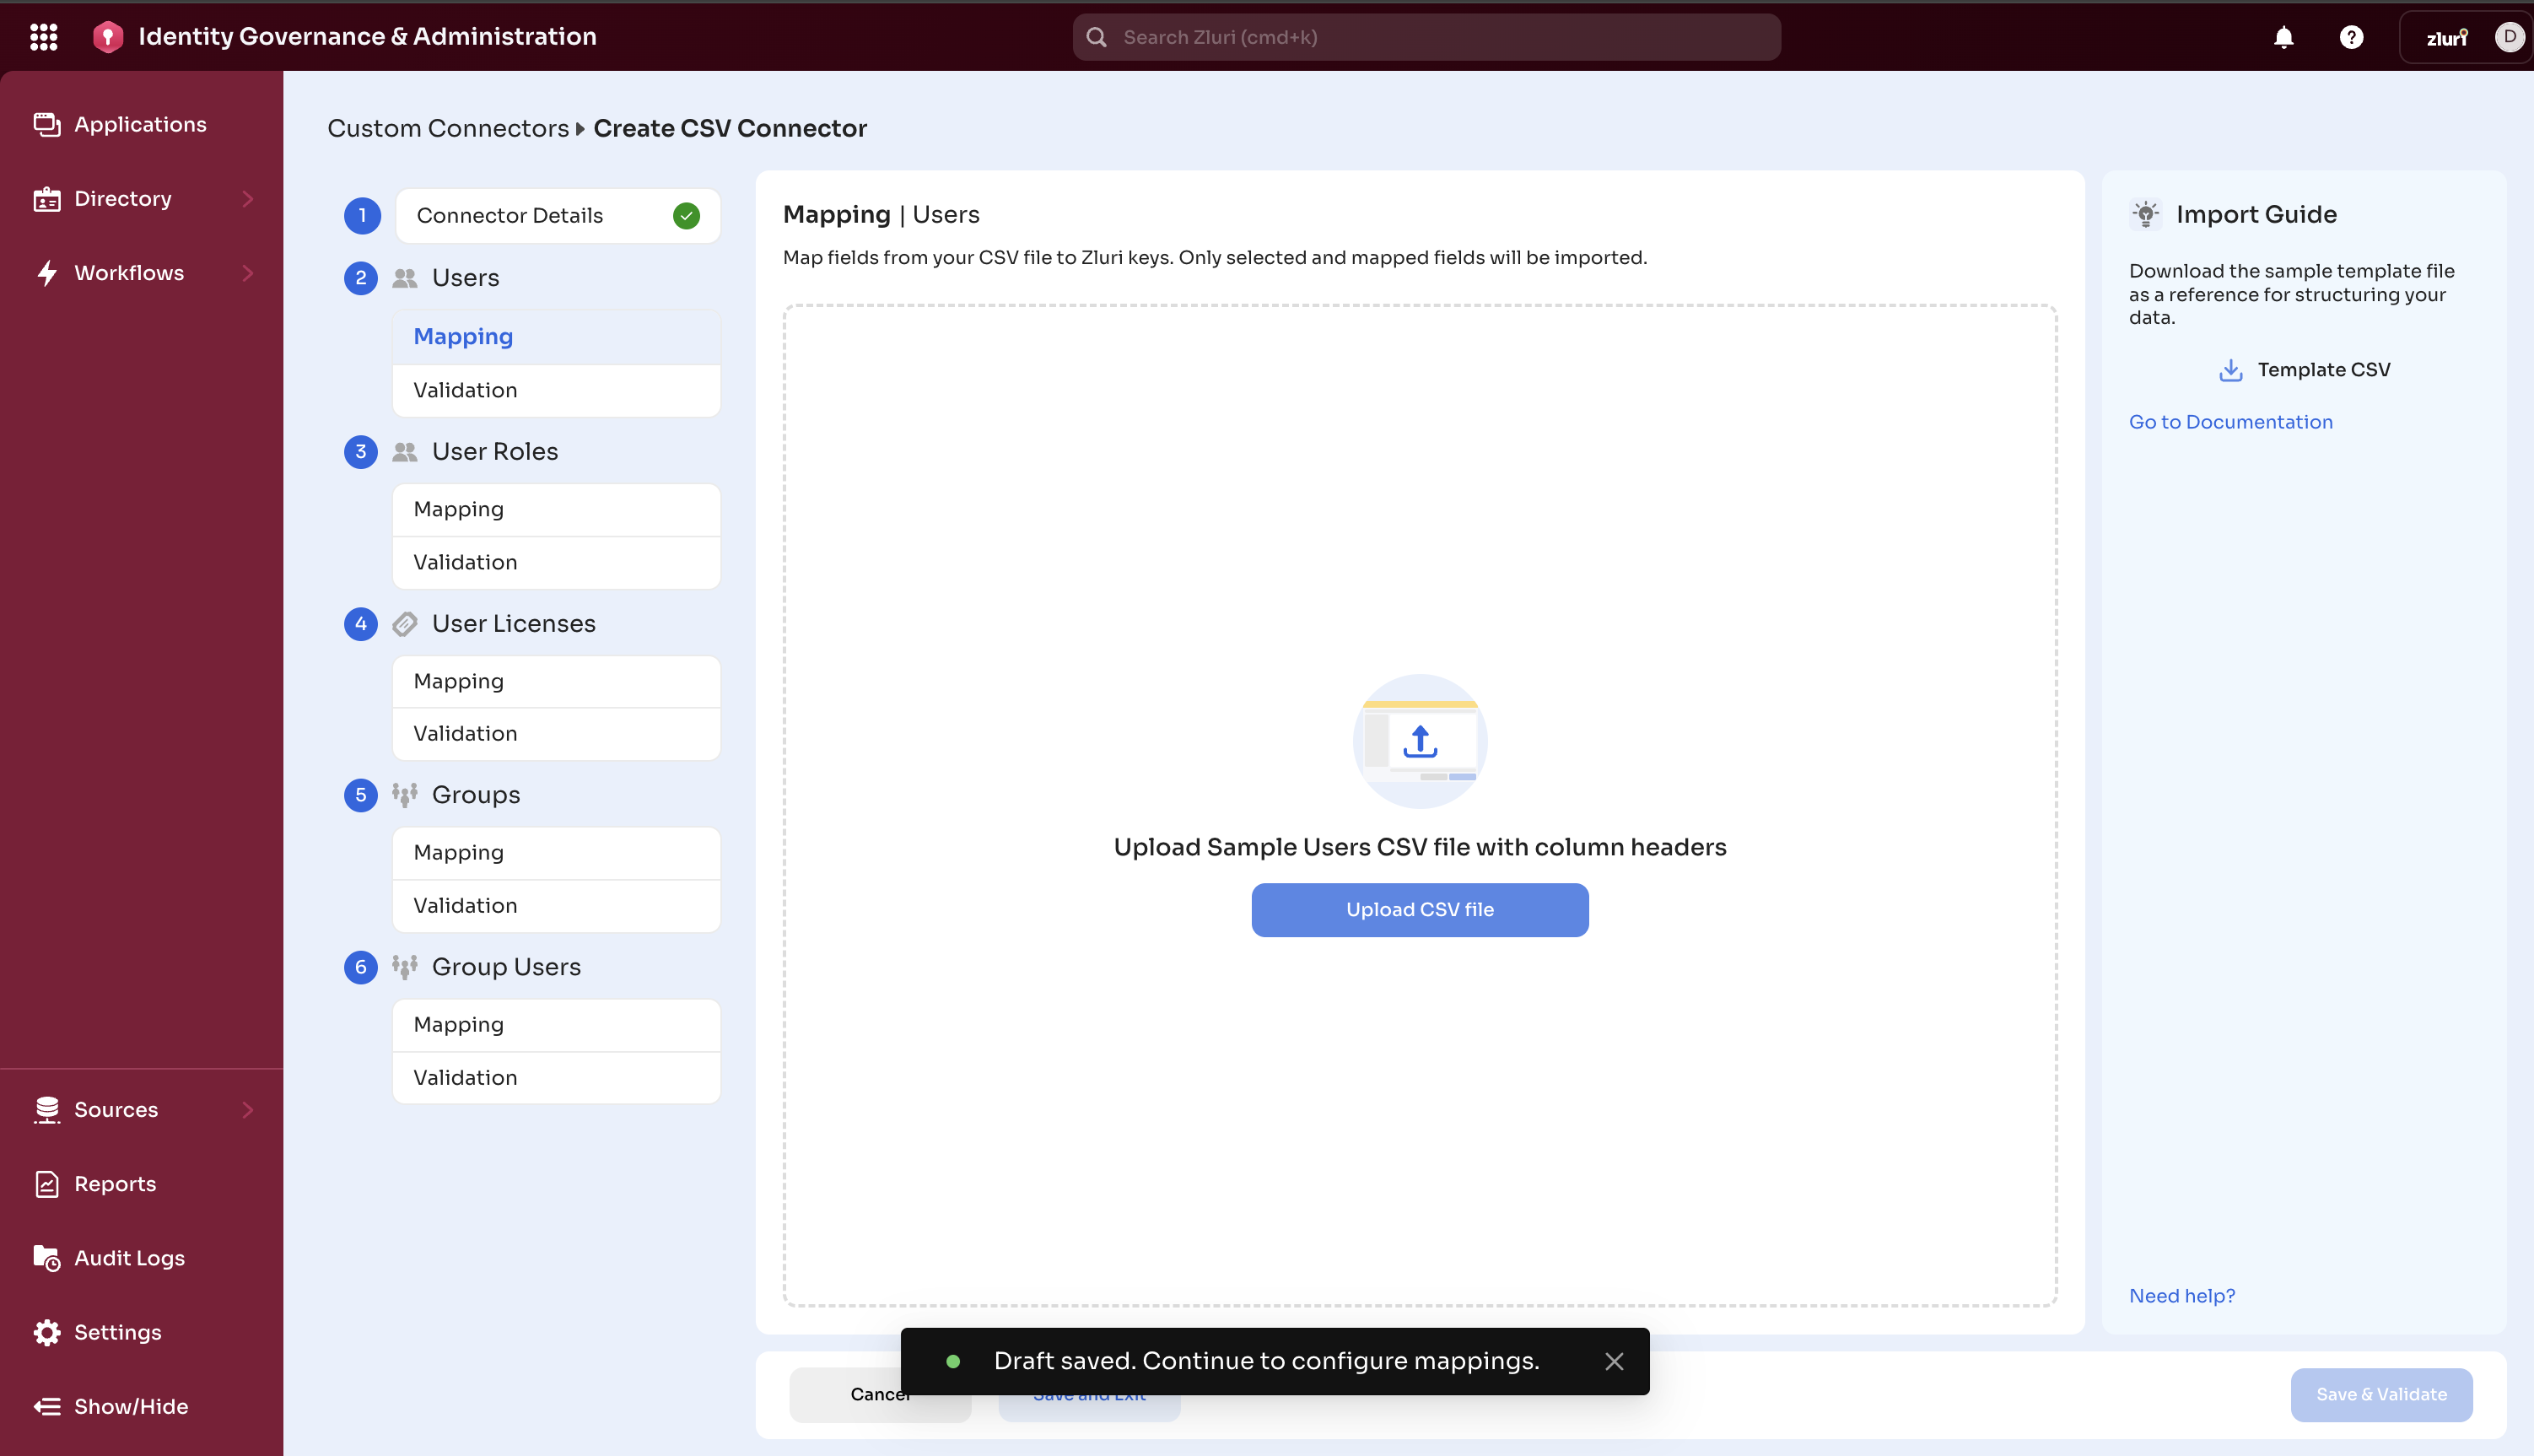
For each data type you selected, upload a sample CSV file:
- Click “Upload Sample File” for the data type
- Select your CSV file (must contain actual sample data)
- Wait for upload to complete (green checkmark appears)
Important:
- Upload only ONE sample file per data type
- Sample files should contain real data examples (5-10 rows minimum)
- Files must have headers in the first row
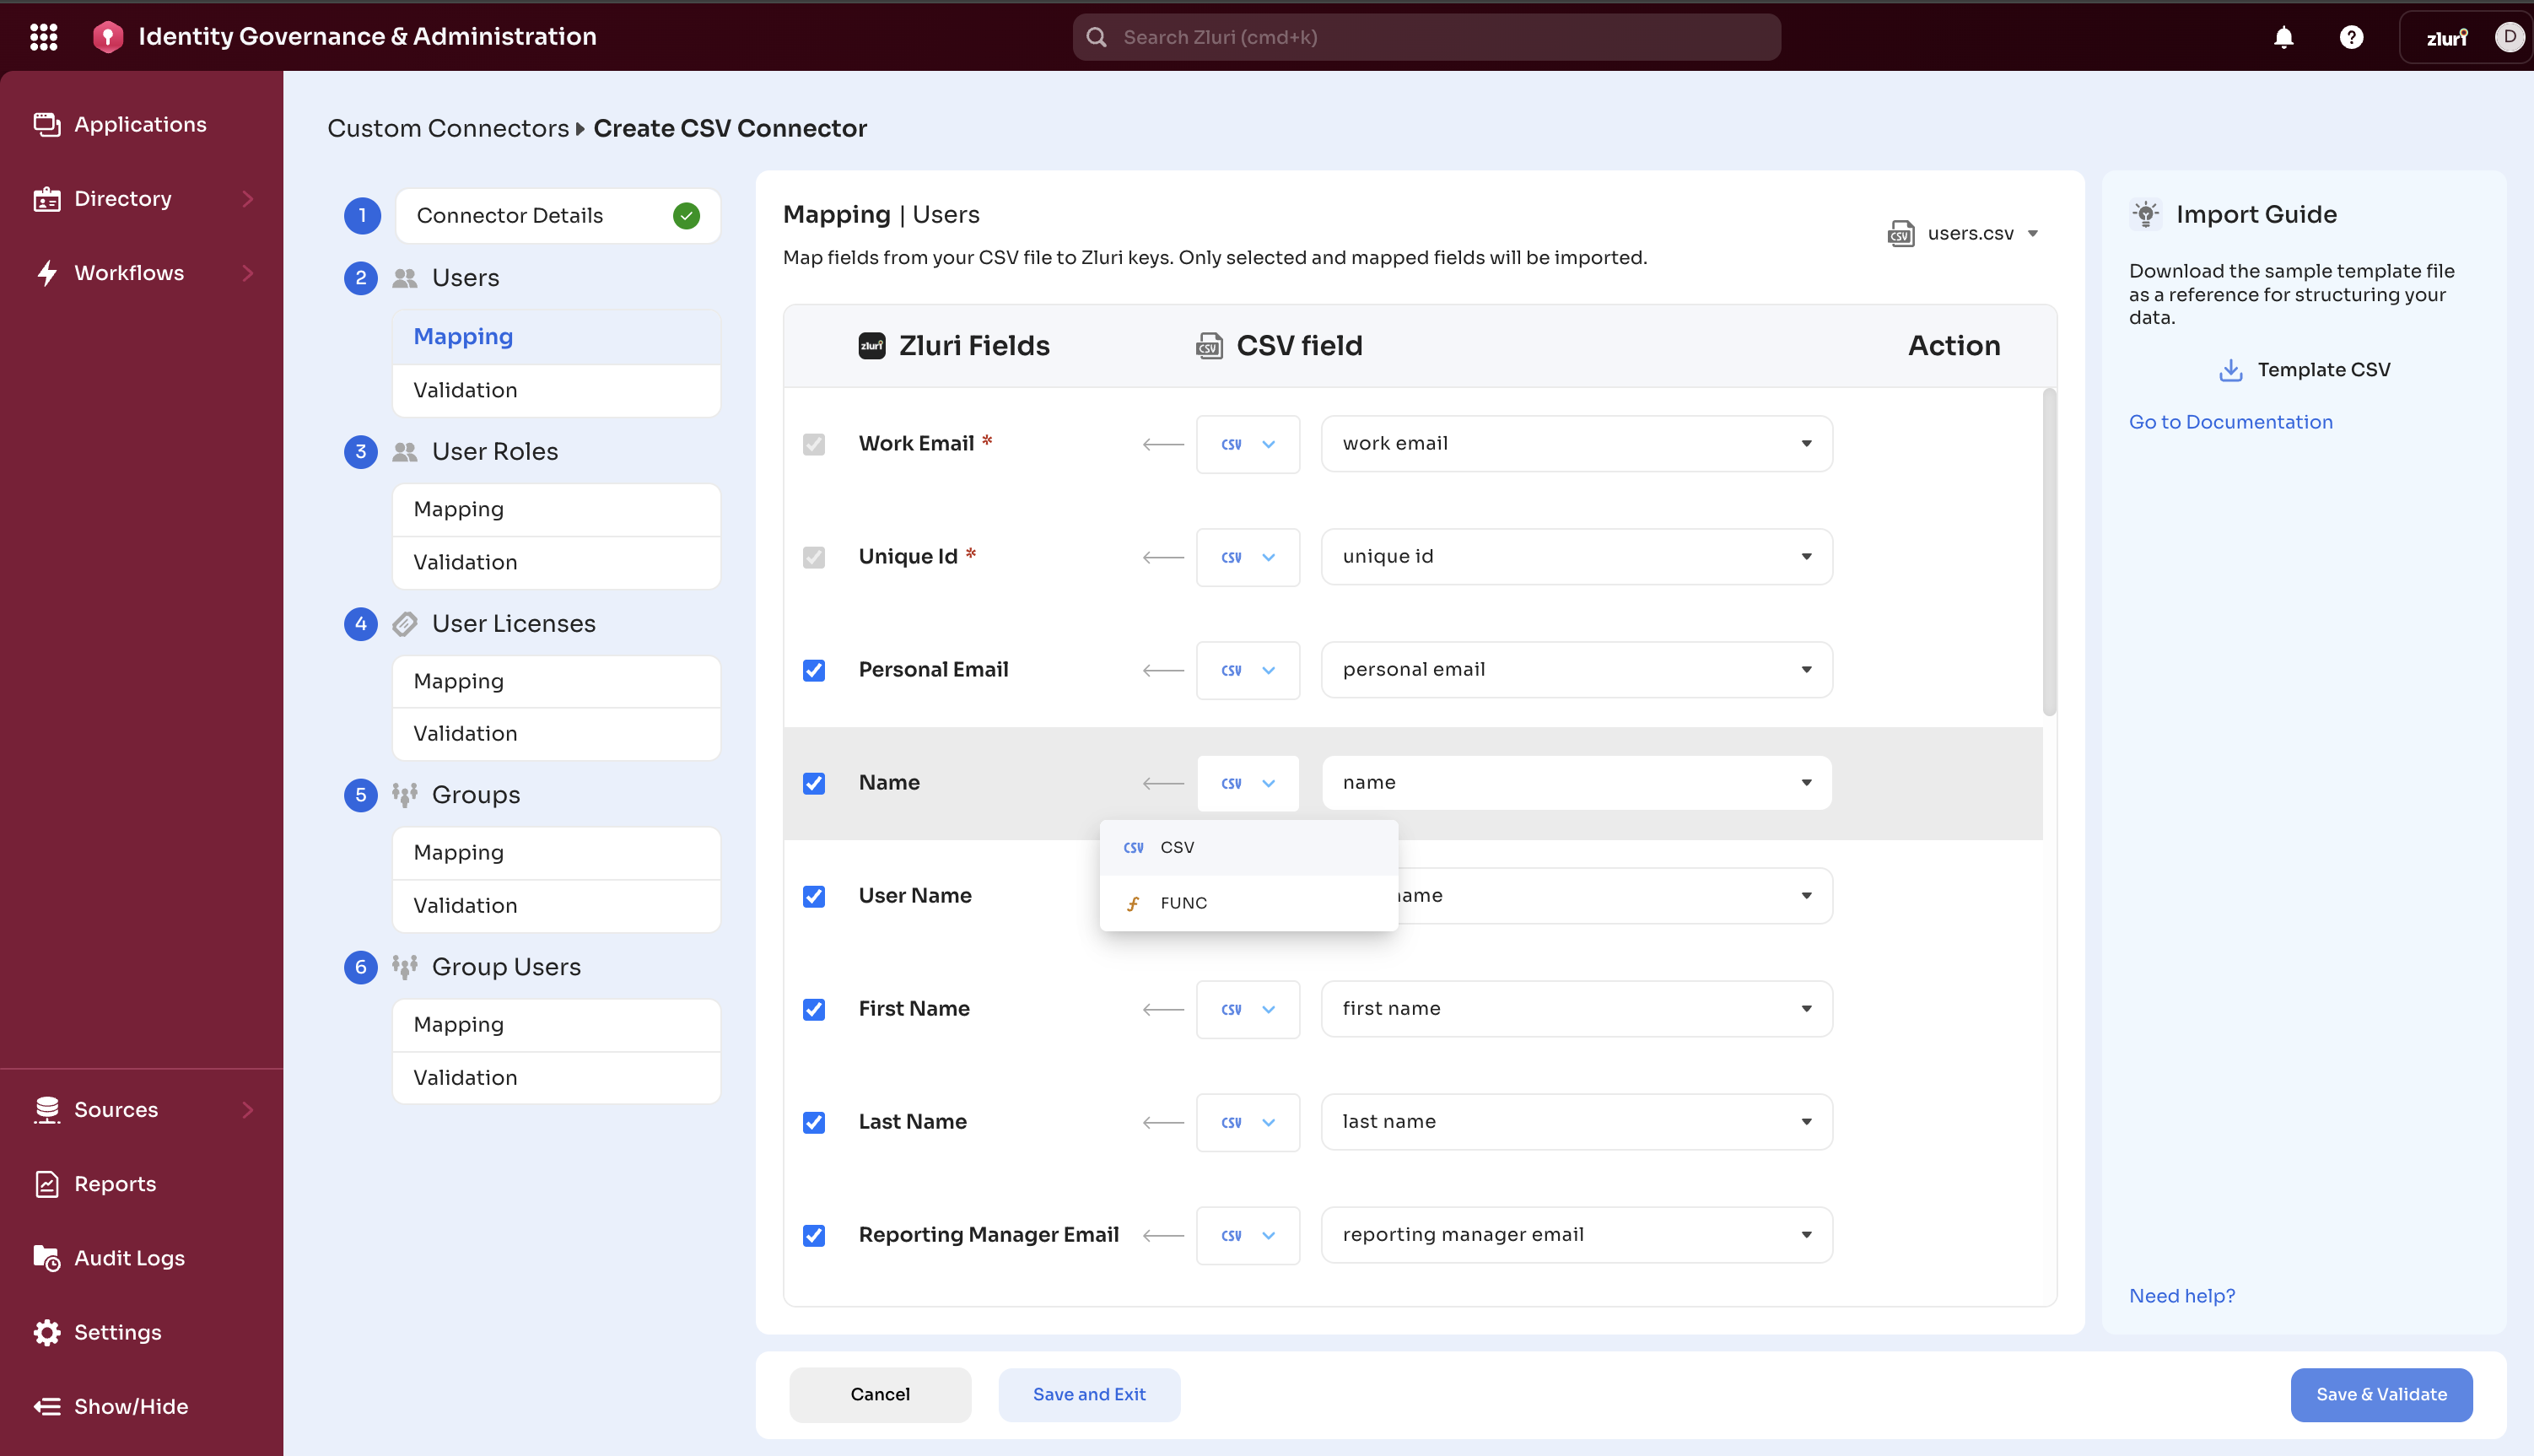
Step 4: Map Your Fields
This is the most important step - telling Zluri which columns in your CSV match which fields in Zluri.
For each data type:
- Click on the data type in the left sidebar
- You’ll see a mapping table with:
- Zluri Fields (left column) - Required fields marked with *
- Your CSV Columns (dropdown) - Select matching column
- Mapping Type (CSV or Function) - Usually keep as “CSV”
Mappings:
Auto-Suggestions:
- Zluri automatically suggests matching columns based on names
- Review auto-suggestions carefully. They may not be 100% correct
- You can override any suggestion by selecting a new field

Required Fields:
- Fields marked with * MUST be mapped
- You cannot proceed without mapping all required fields
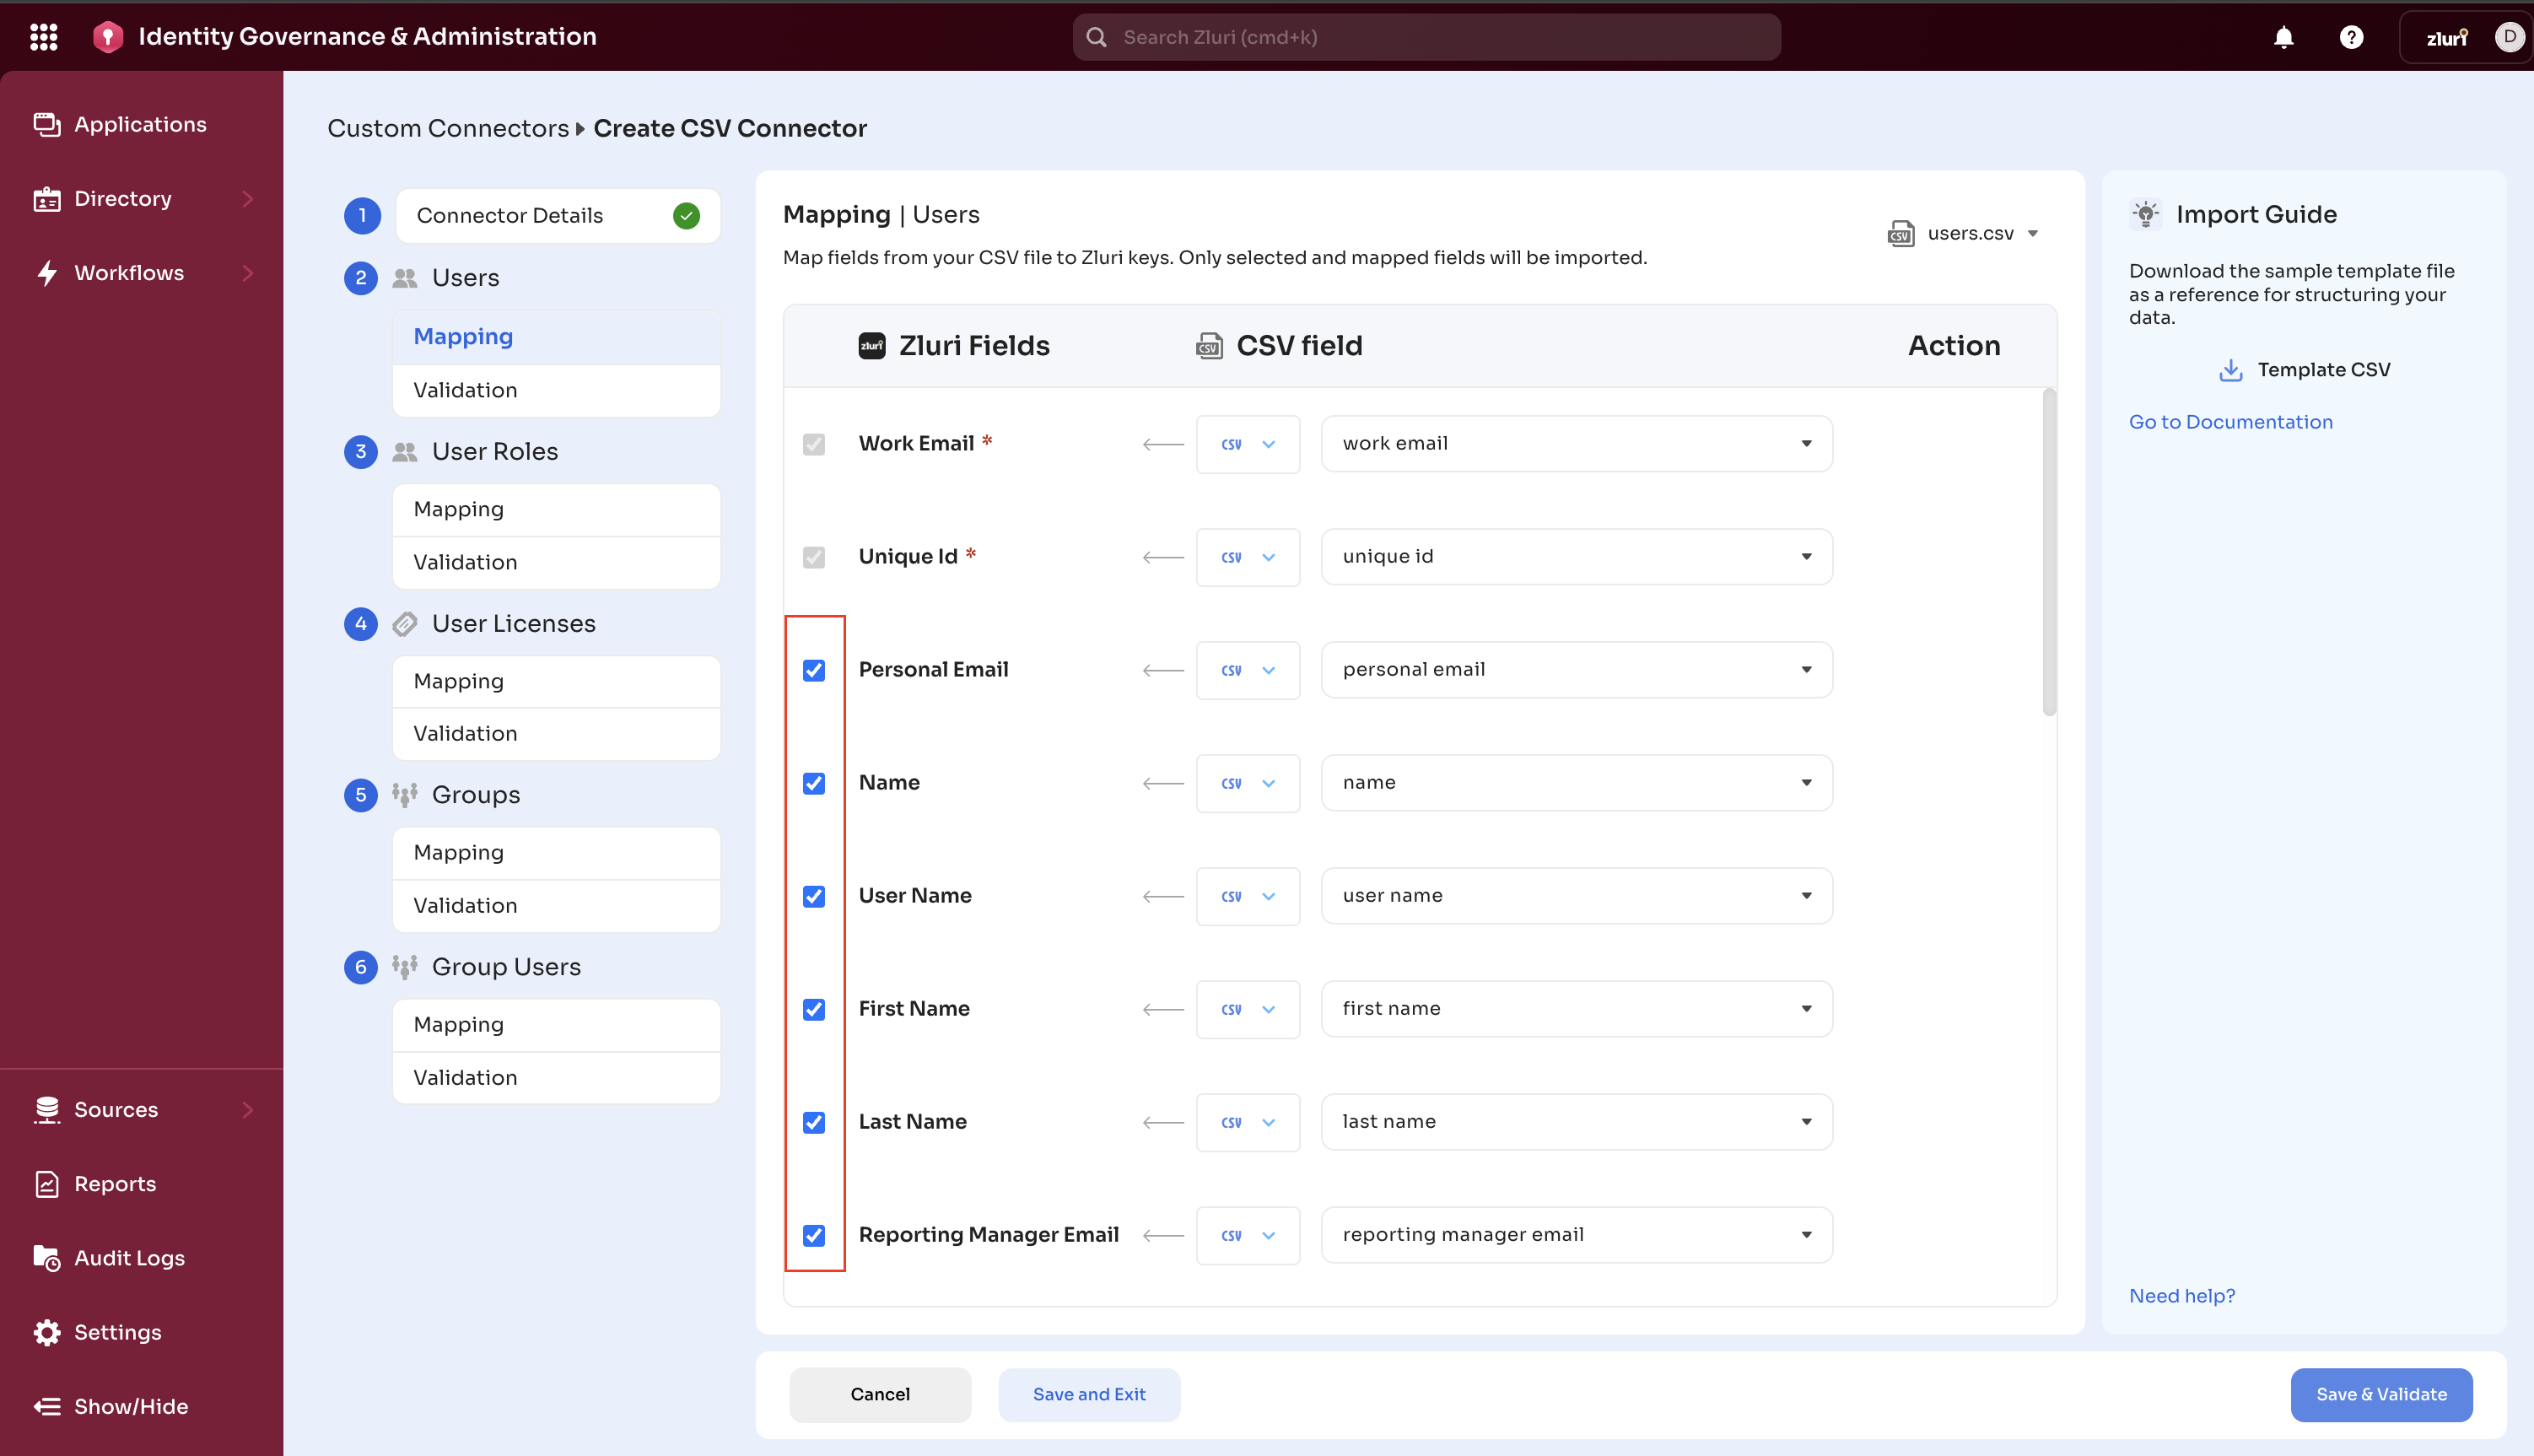
Optional Fields:
- Non-mandatory fields are all optional.
- Check the checkbox to add optional fields
- Can be left unmapped if you don’t have that data
- Uncheck the checkbox to skip optional fields in processing
Option 1: Direct Mapping (Recommended)
- Select the CSV column that matches each Zluri field
- Example: Your “Email Address” column → Zluri’s “User Email” field
Option 2: Custom Transformation
-
Click the function icon (ƒ) to write a transformation
-
Use it when you need to combine or transform data
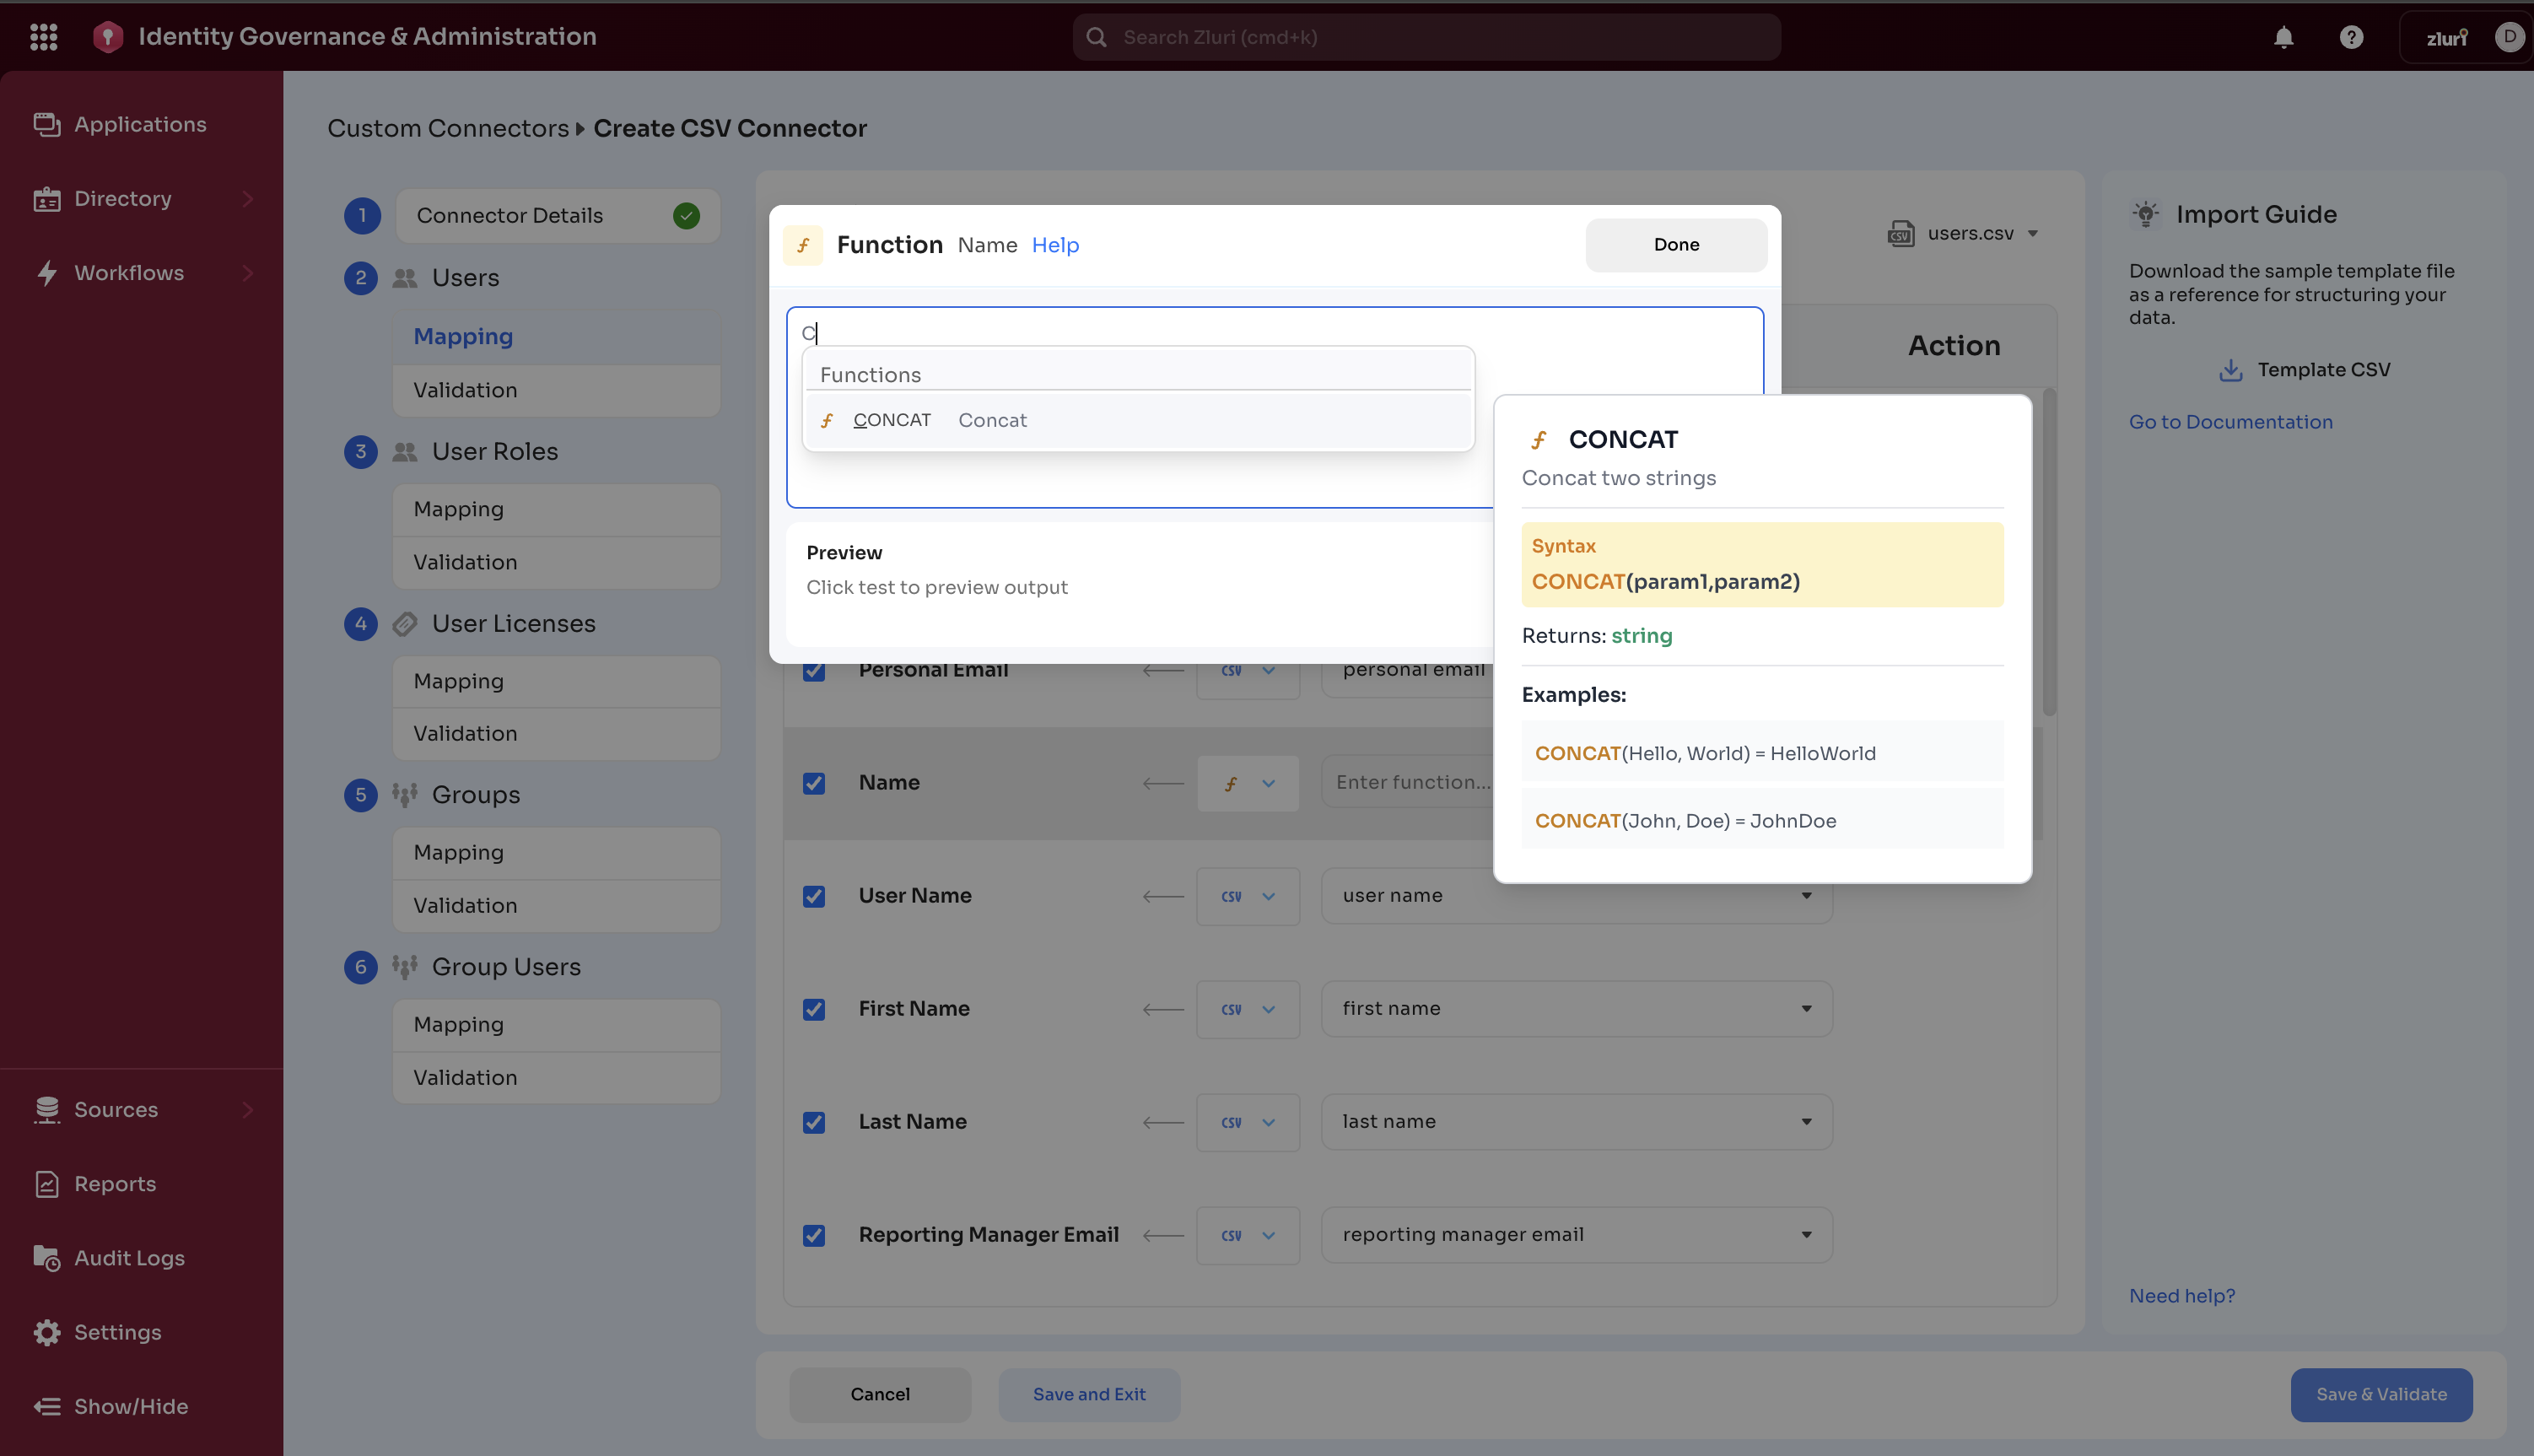
-
Example: Combine “First Name” + “Last Name” → “Full Name”
-
For help with complex transformations, please check this documentation [LINK]
Click Preview before “Done”.
Step 5: Map Enum Values
Some fields require specific values (like Status: Active/Inactive/Suspended). If your CSV uses different terms, you need to map them:
-
Click the “Map Values” button next to enum fields like Status.

-
A popup shows:
- Zluri Values (left) - Standard values Zluri expects
- Your CSV Values (right) - Values found in your file
-
For each Zluri value, select which of your CSV values should map to it Example:
-
Zluri “active” ← Your CSV’s “Active”, “Enabled”, “Yes”
-
Zluri “inactive” ← Your CSV’s “Inactive”, “Disabled”, “No”
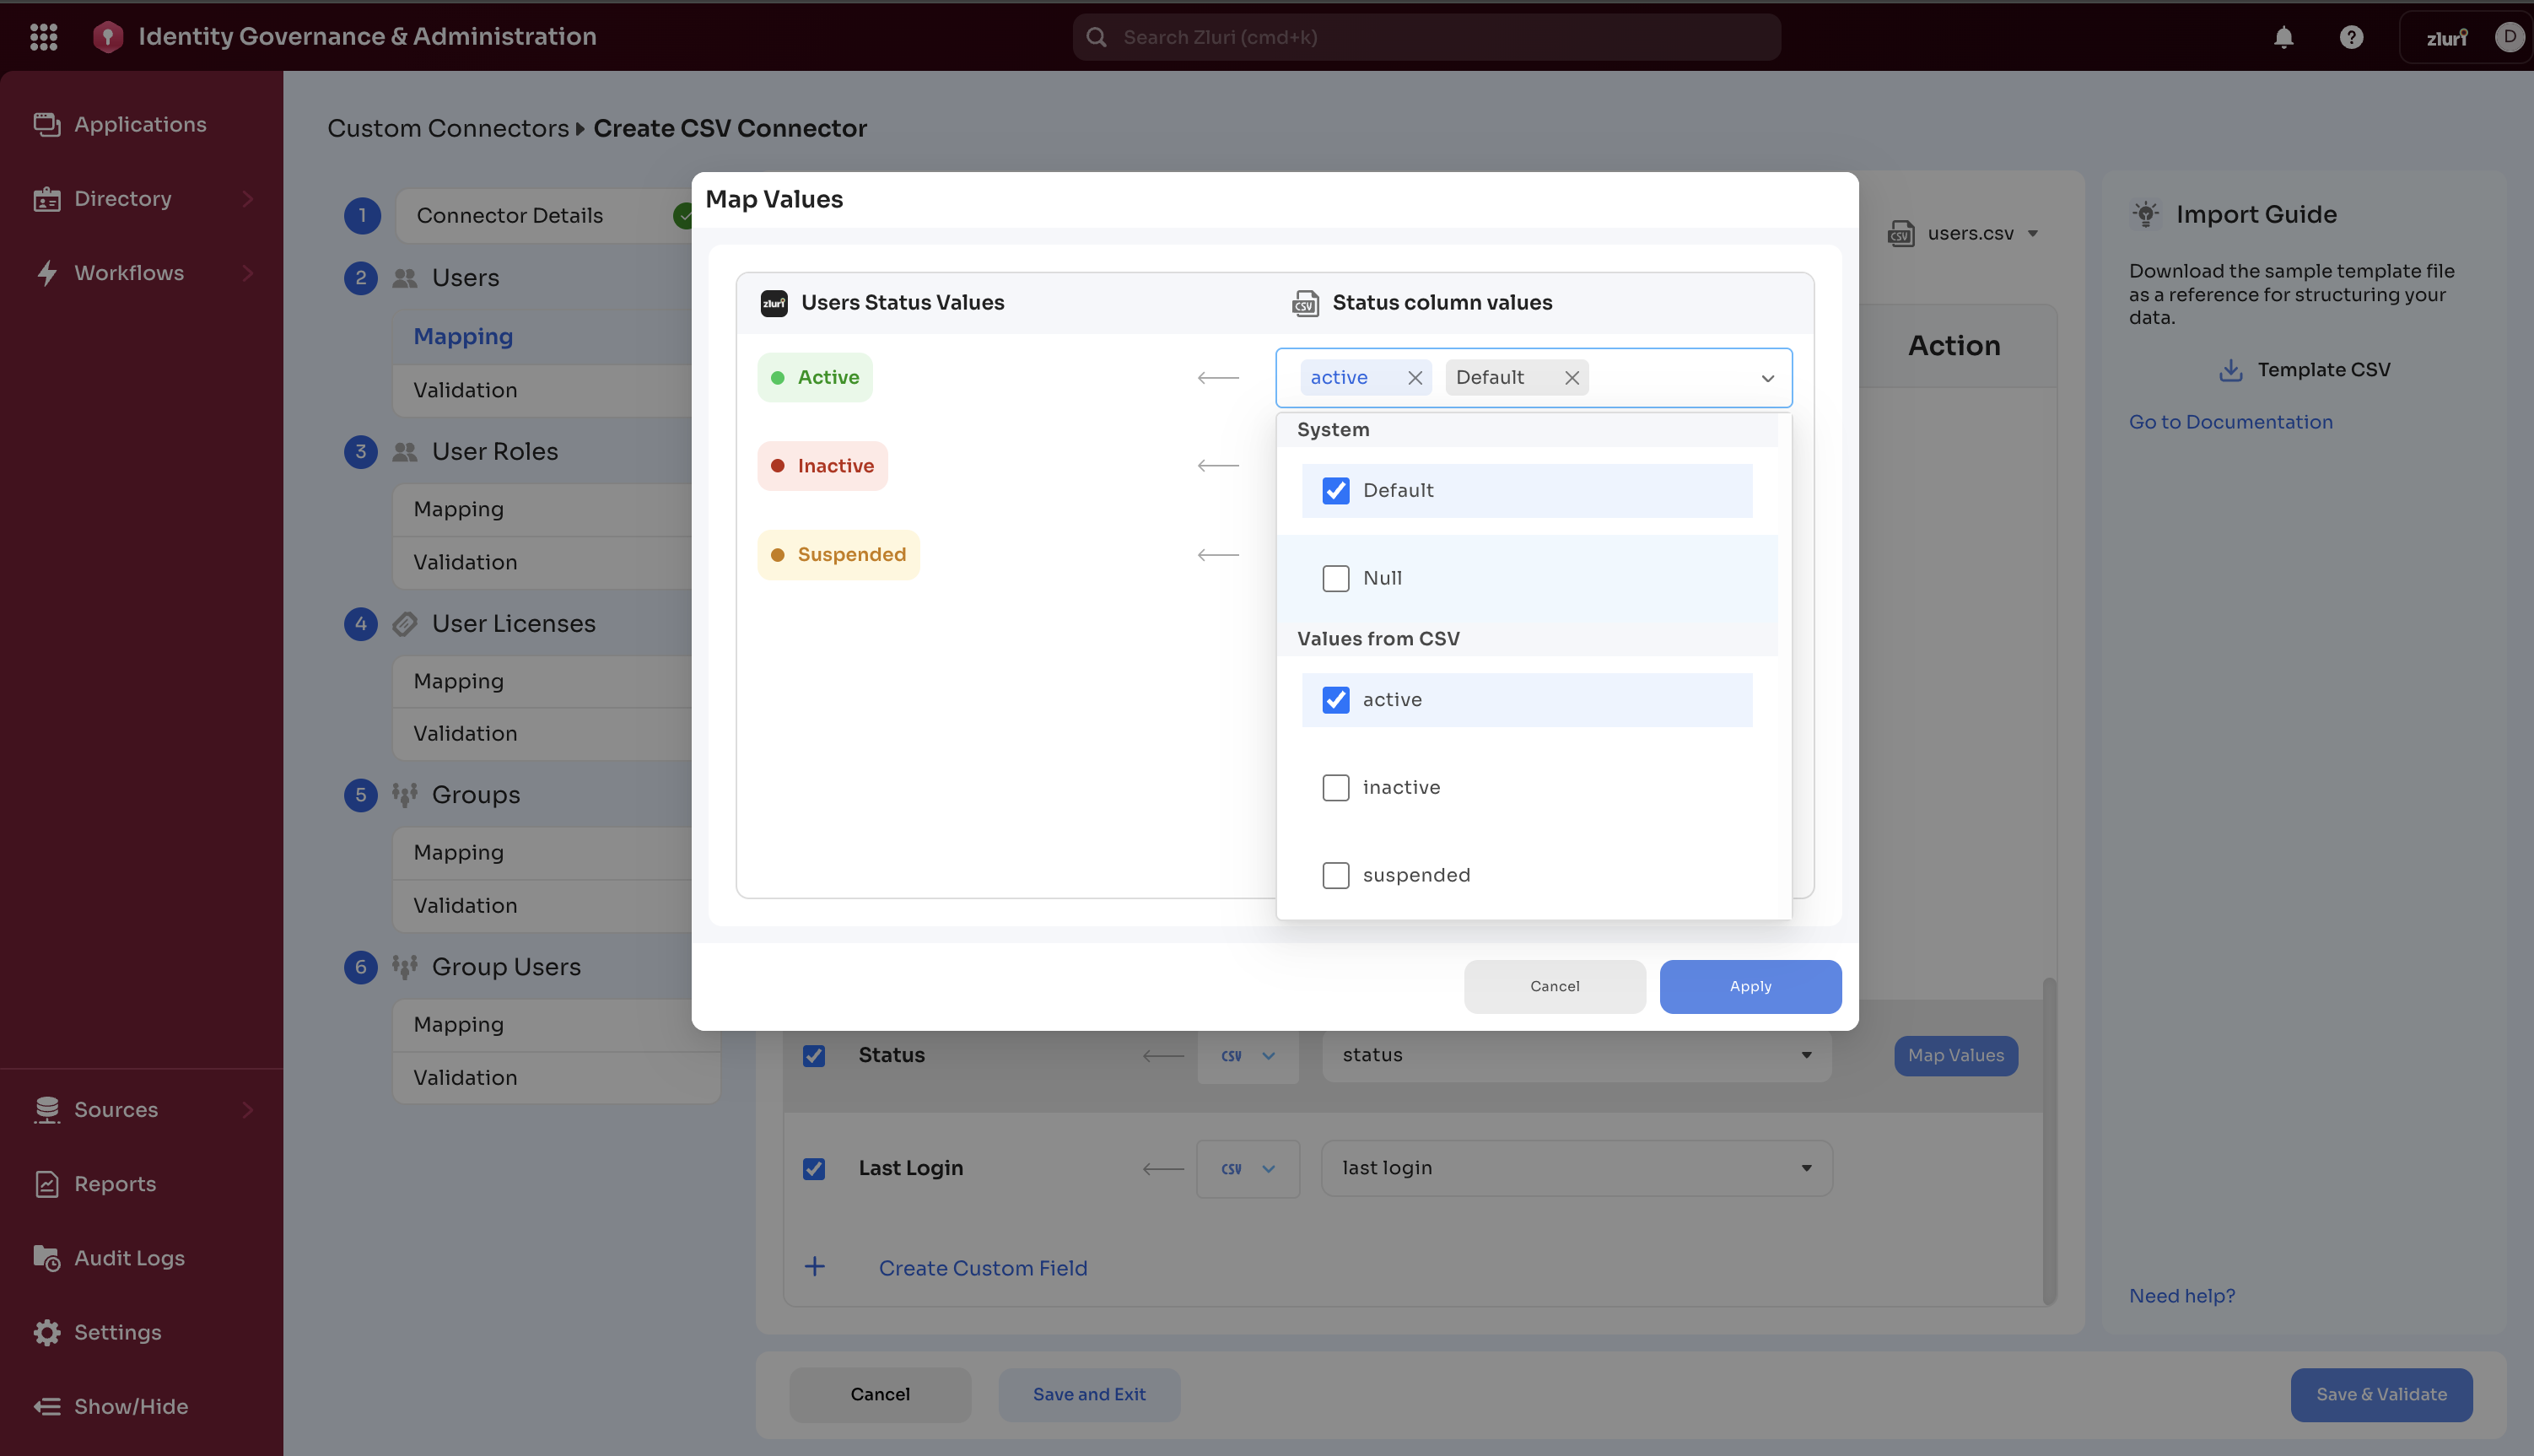
-
-
System values:
- Null:
- When to use: CSV column is empty/blank
- What it does: Specifies which Zluri value to use when the field is null
- Example: If Status is blank → map to "inactive"
- Default:
- When to use: CSV contains a value not explicitly mapped
- What it does: Fallback value for unmapped CSV values
- Example: Any status not listed (e.g., "Unknown") → map to "inactive"
- Null:
-
Click “Apply”
Make sure that you check the fields you want the connector to process.
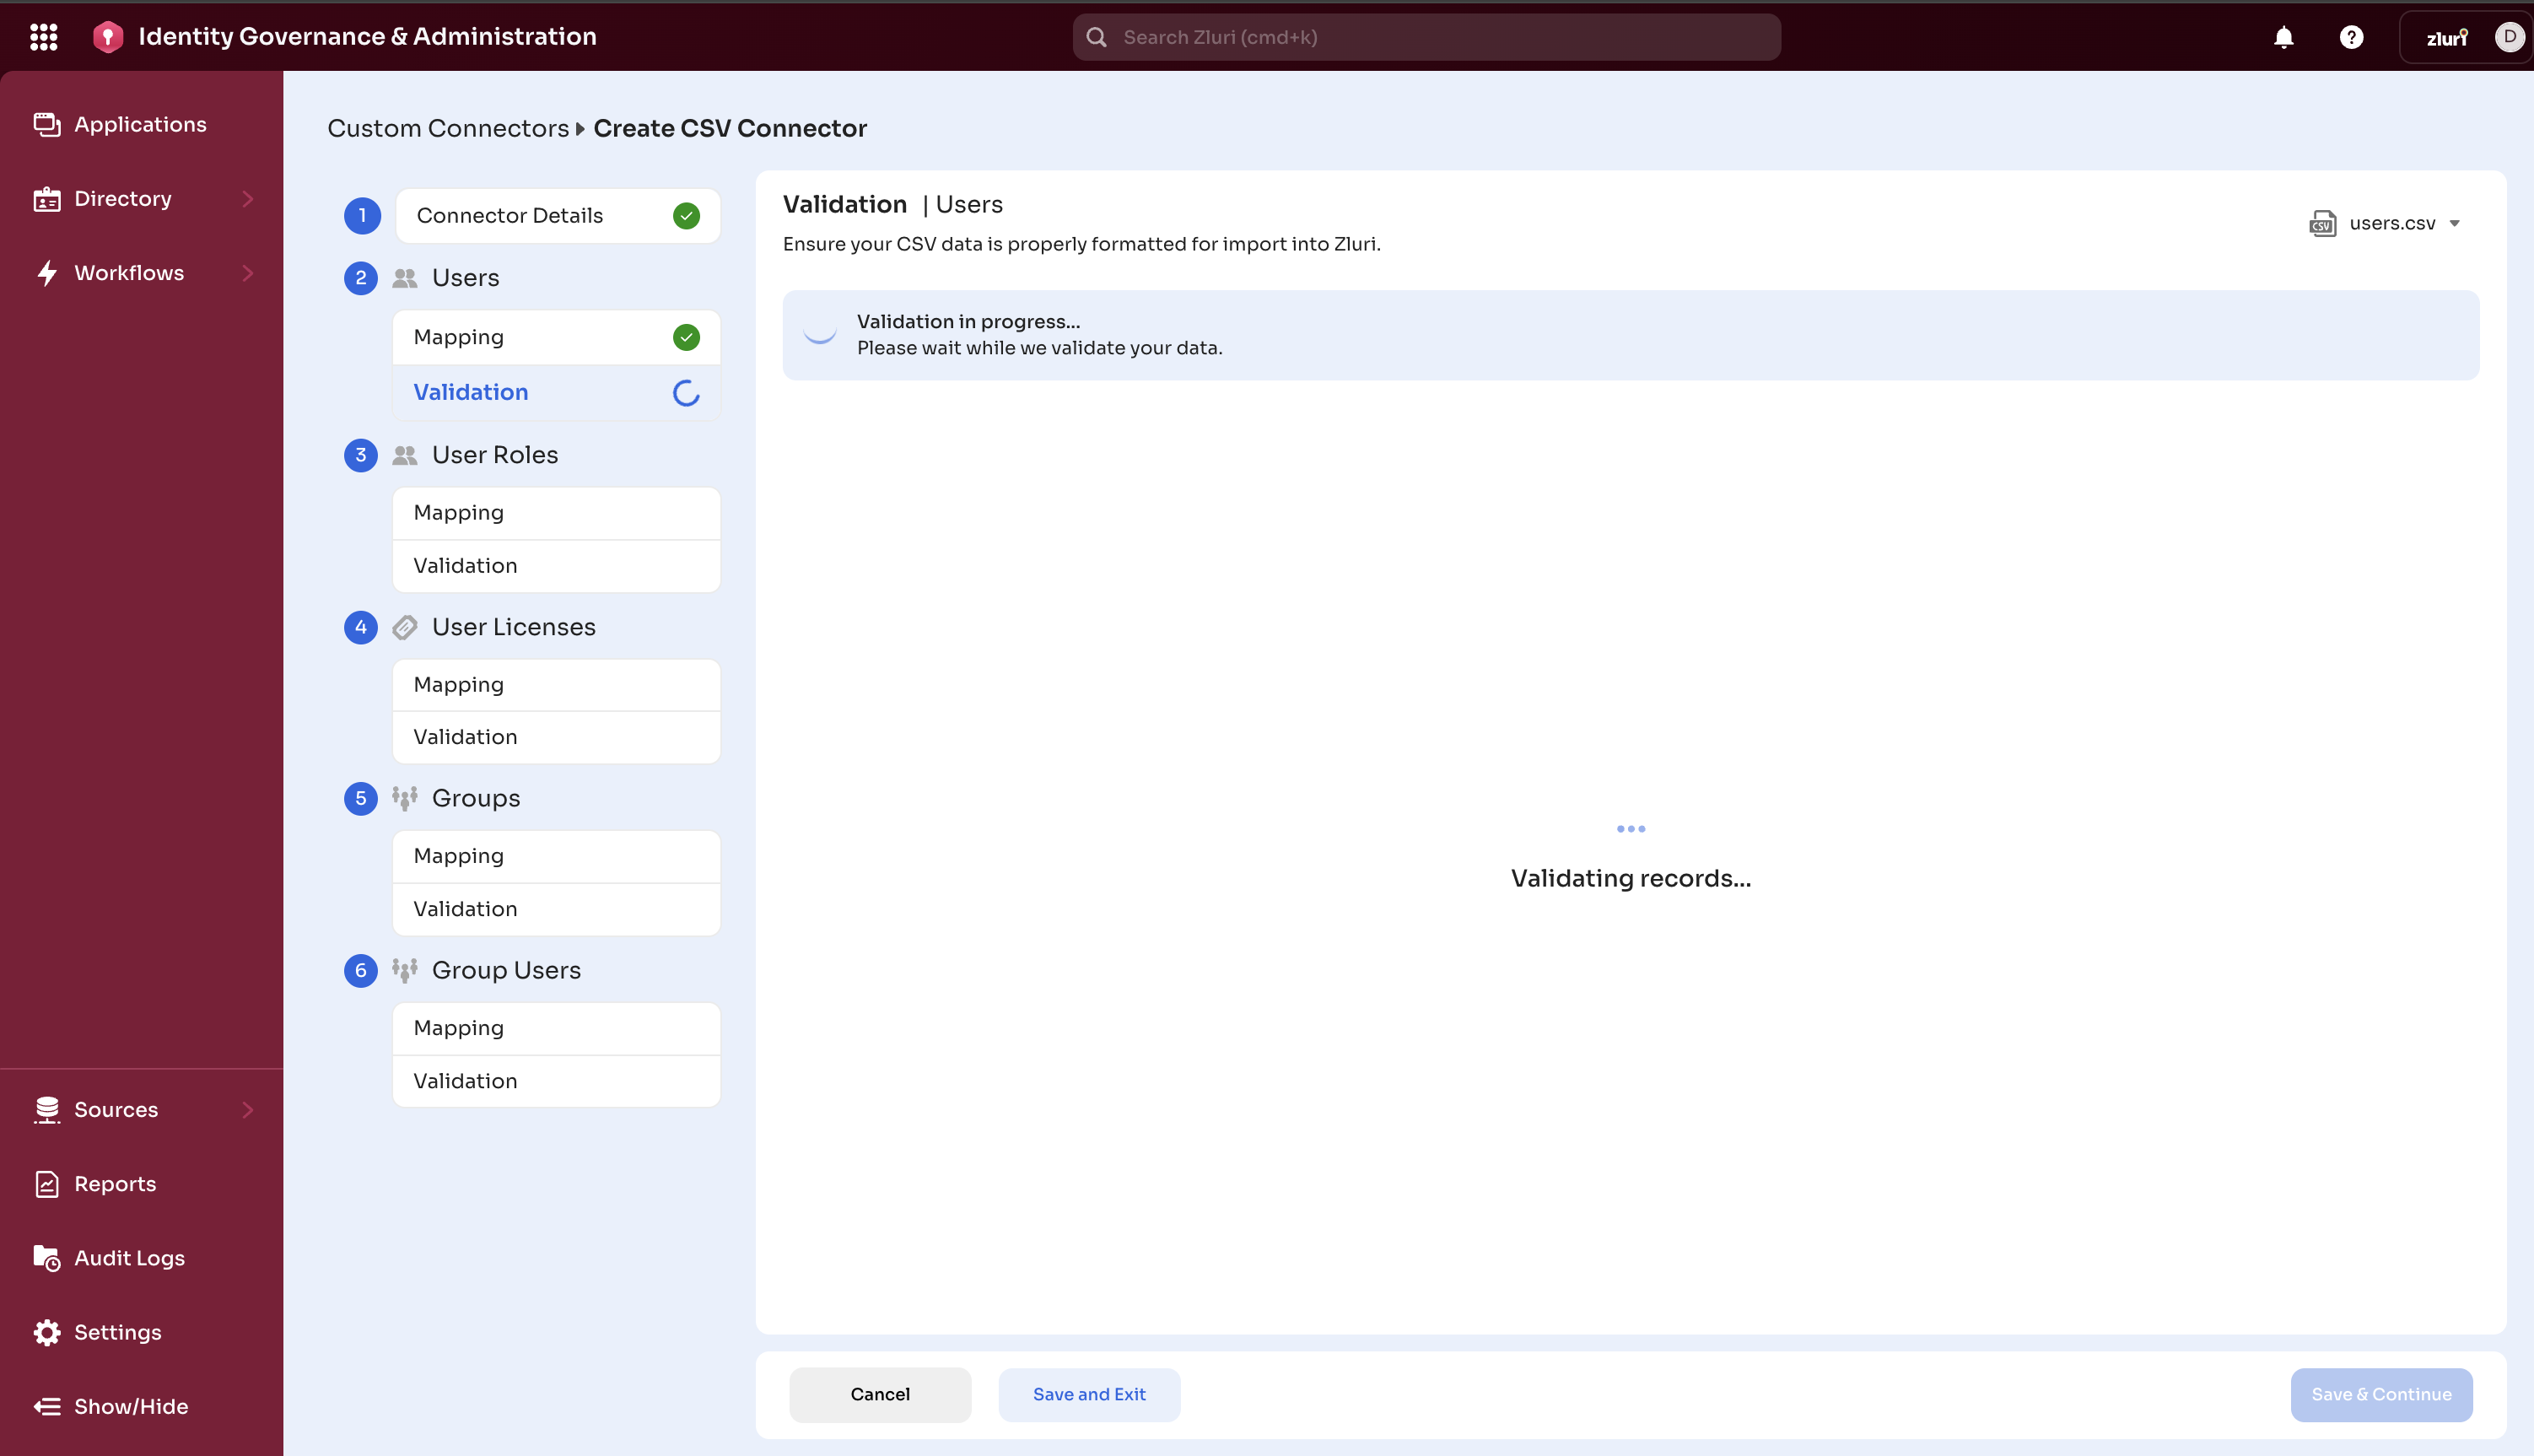
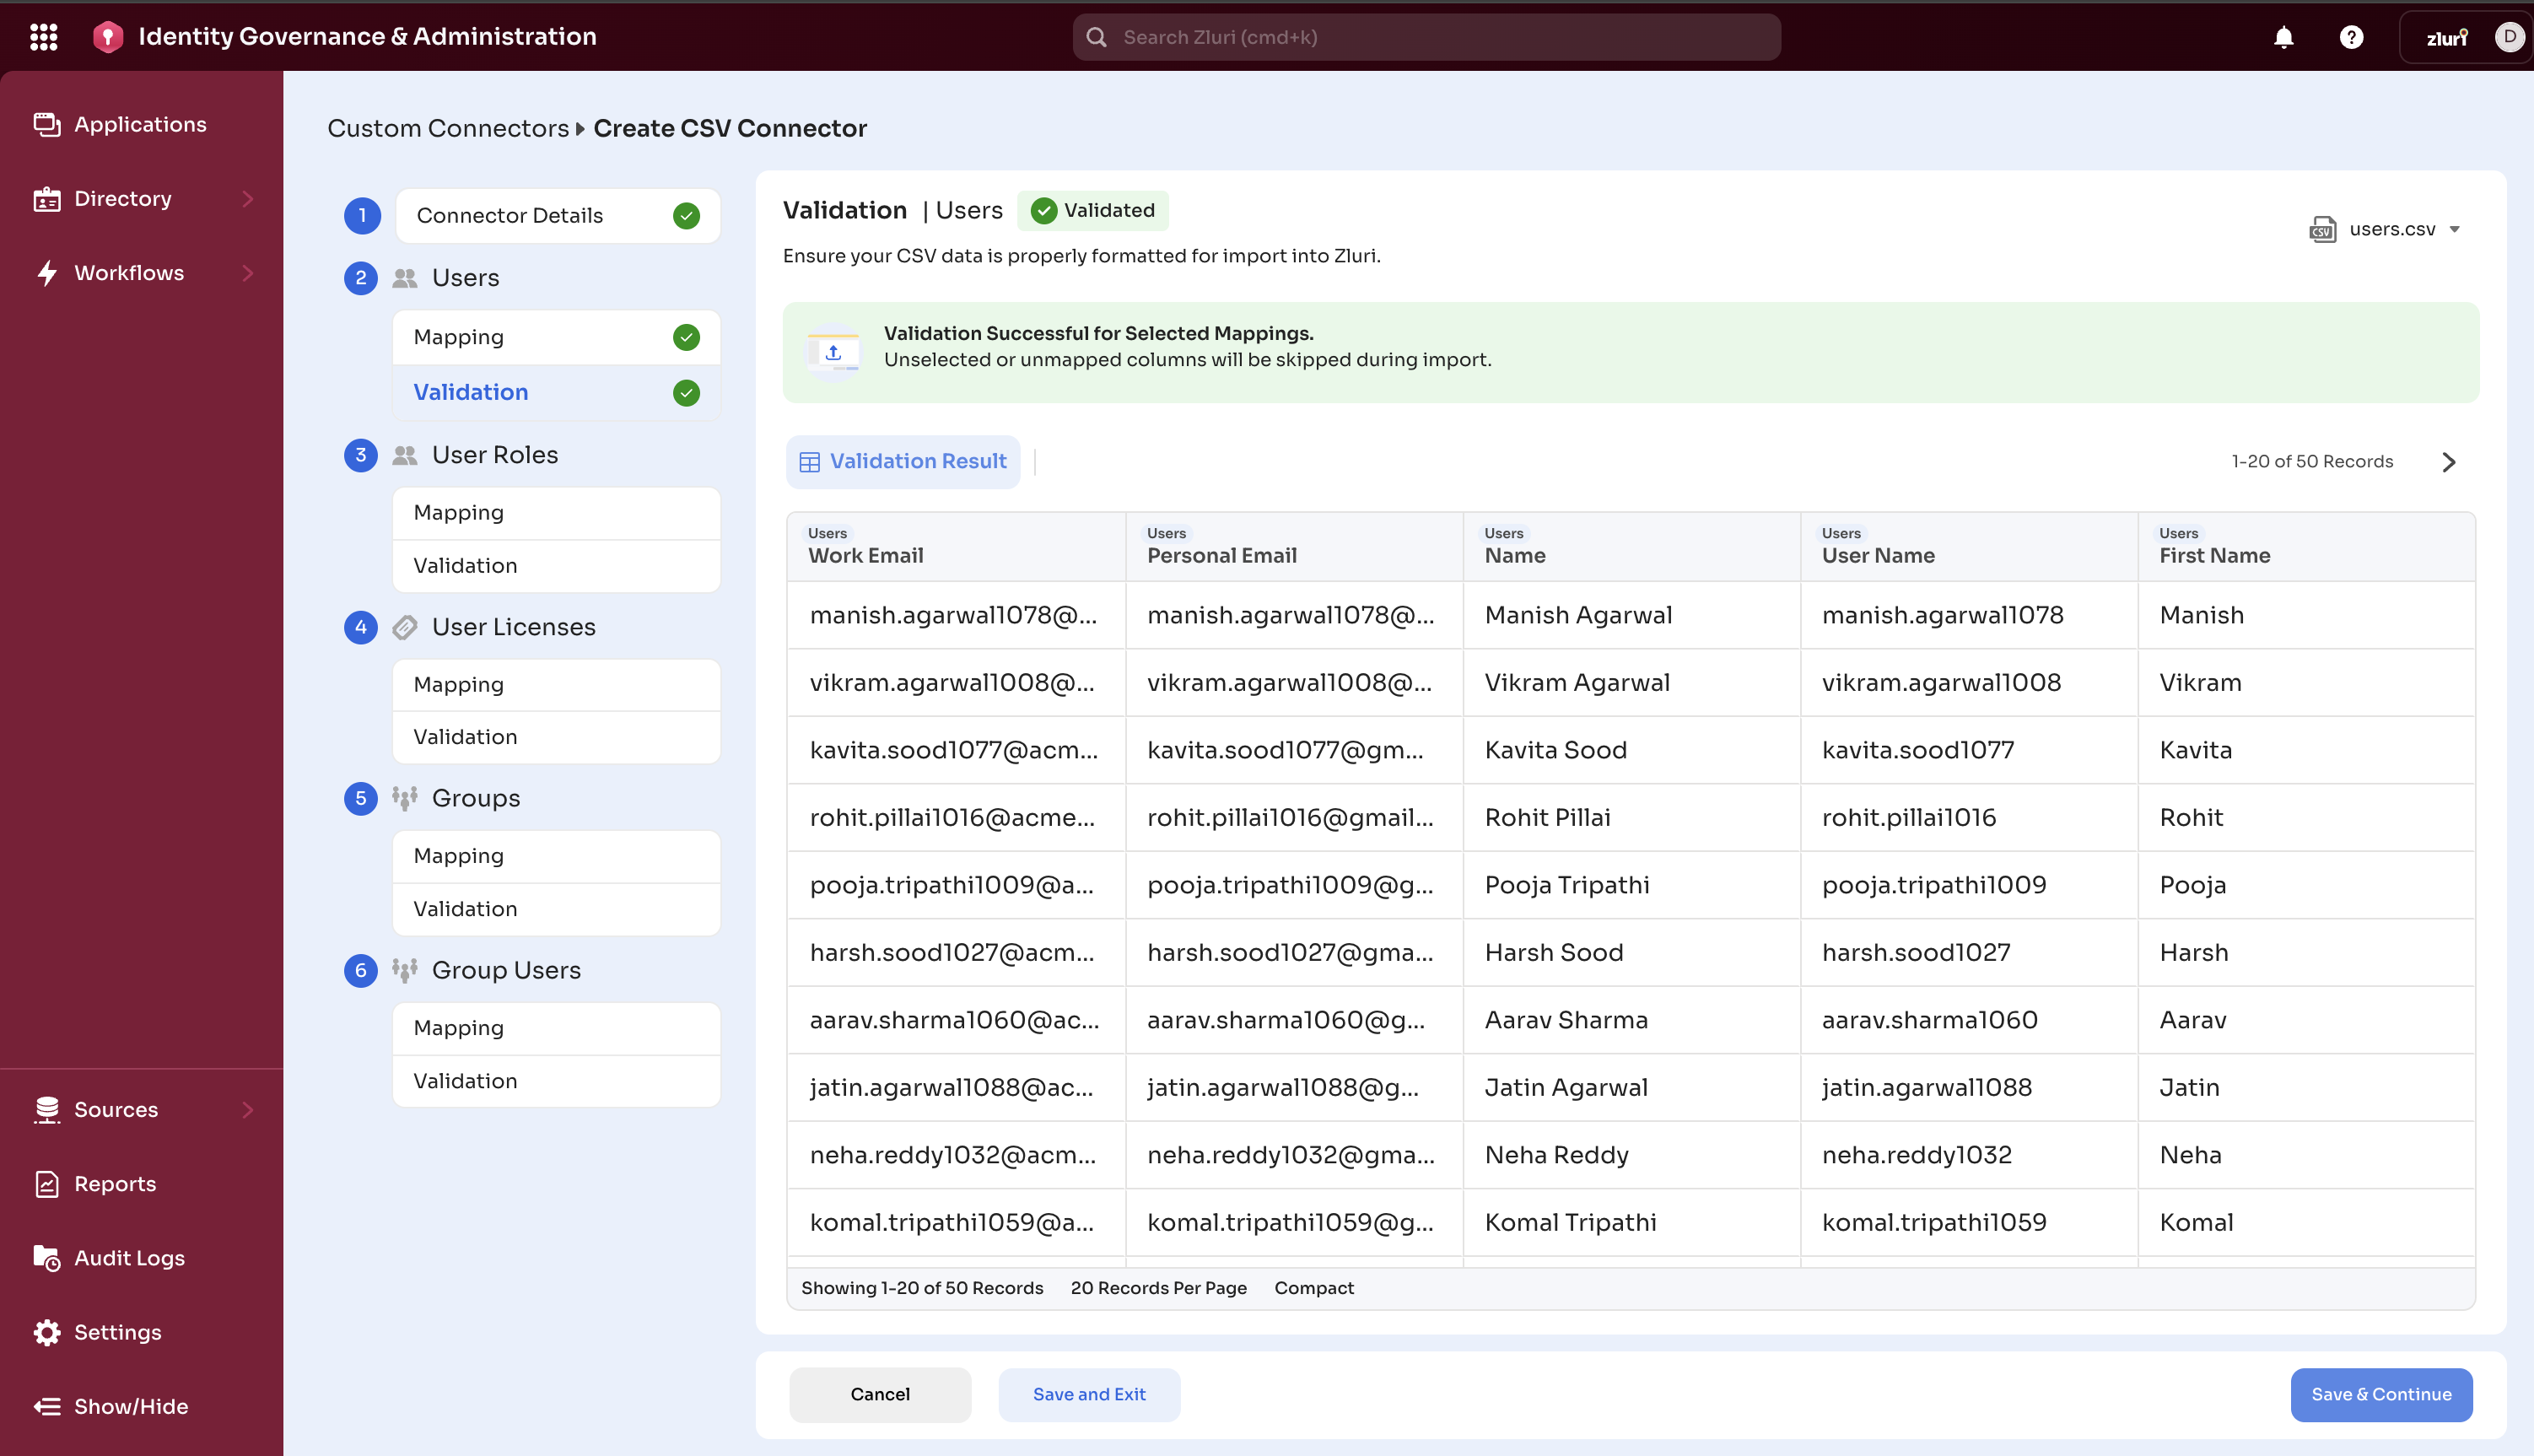
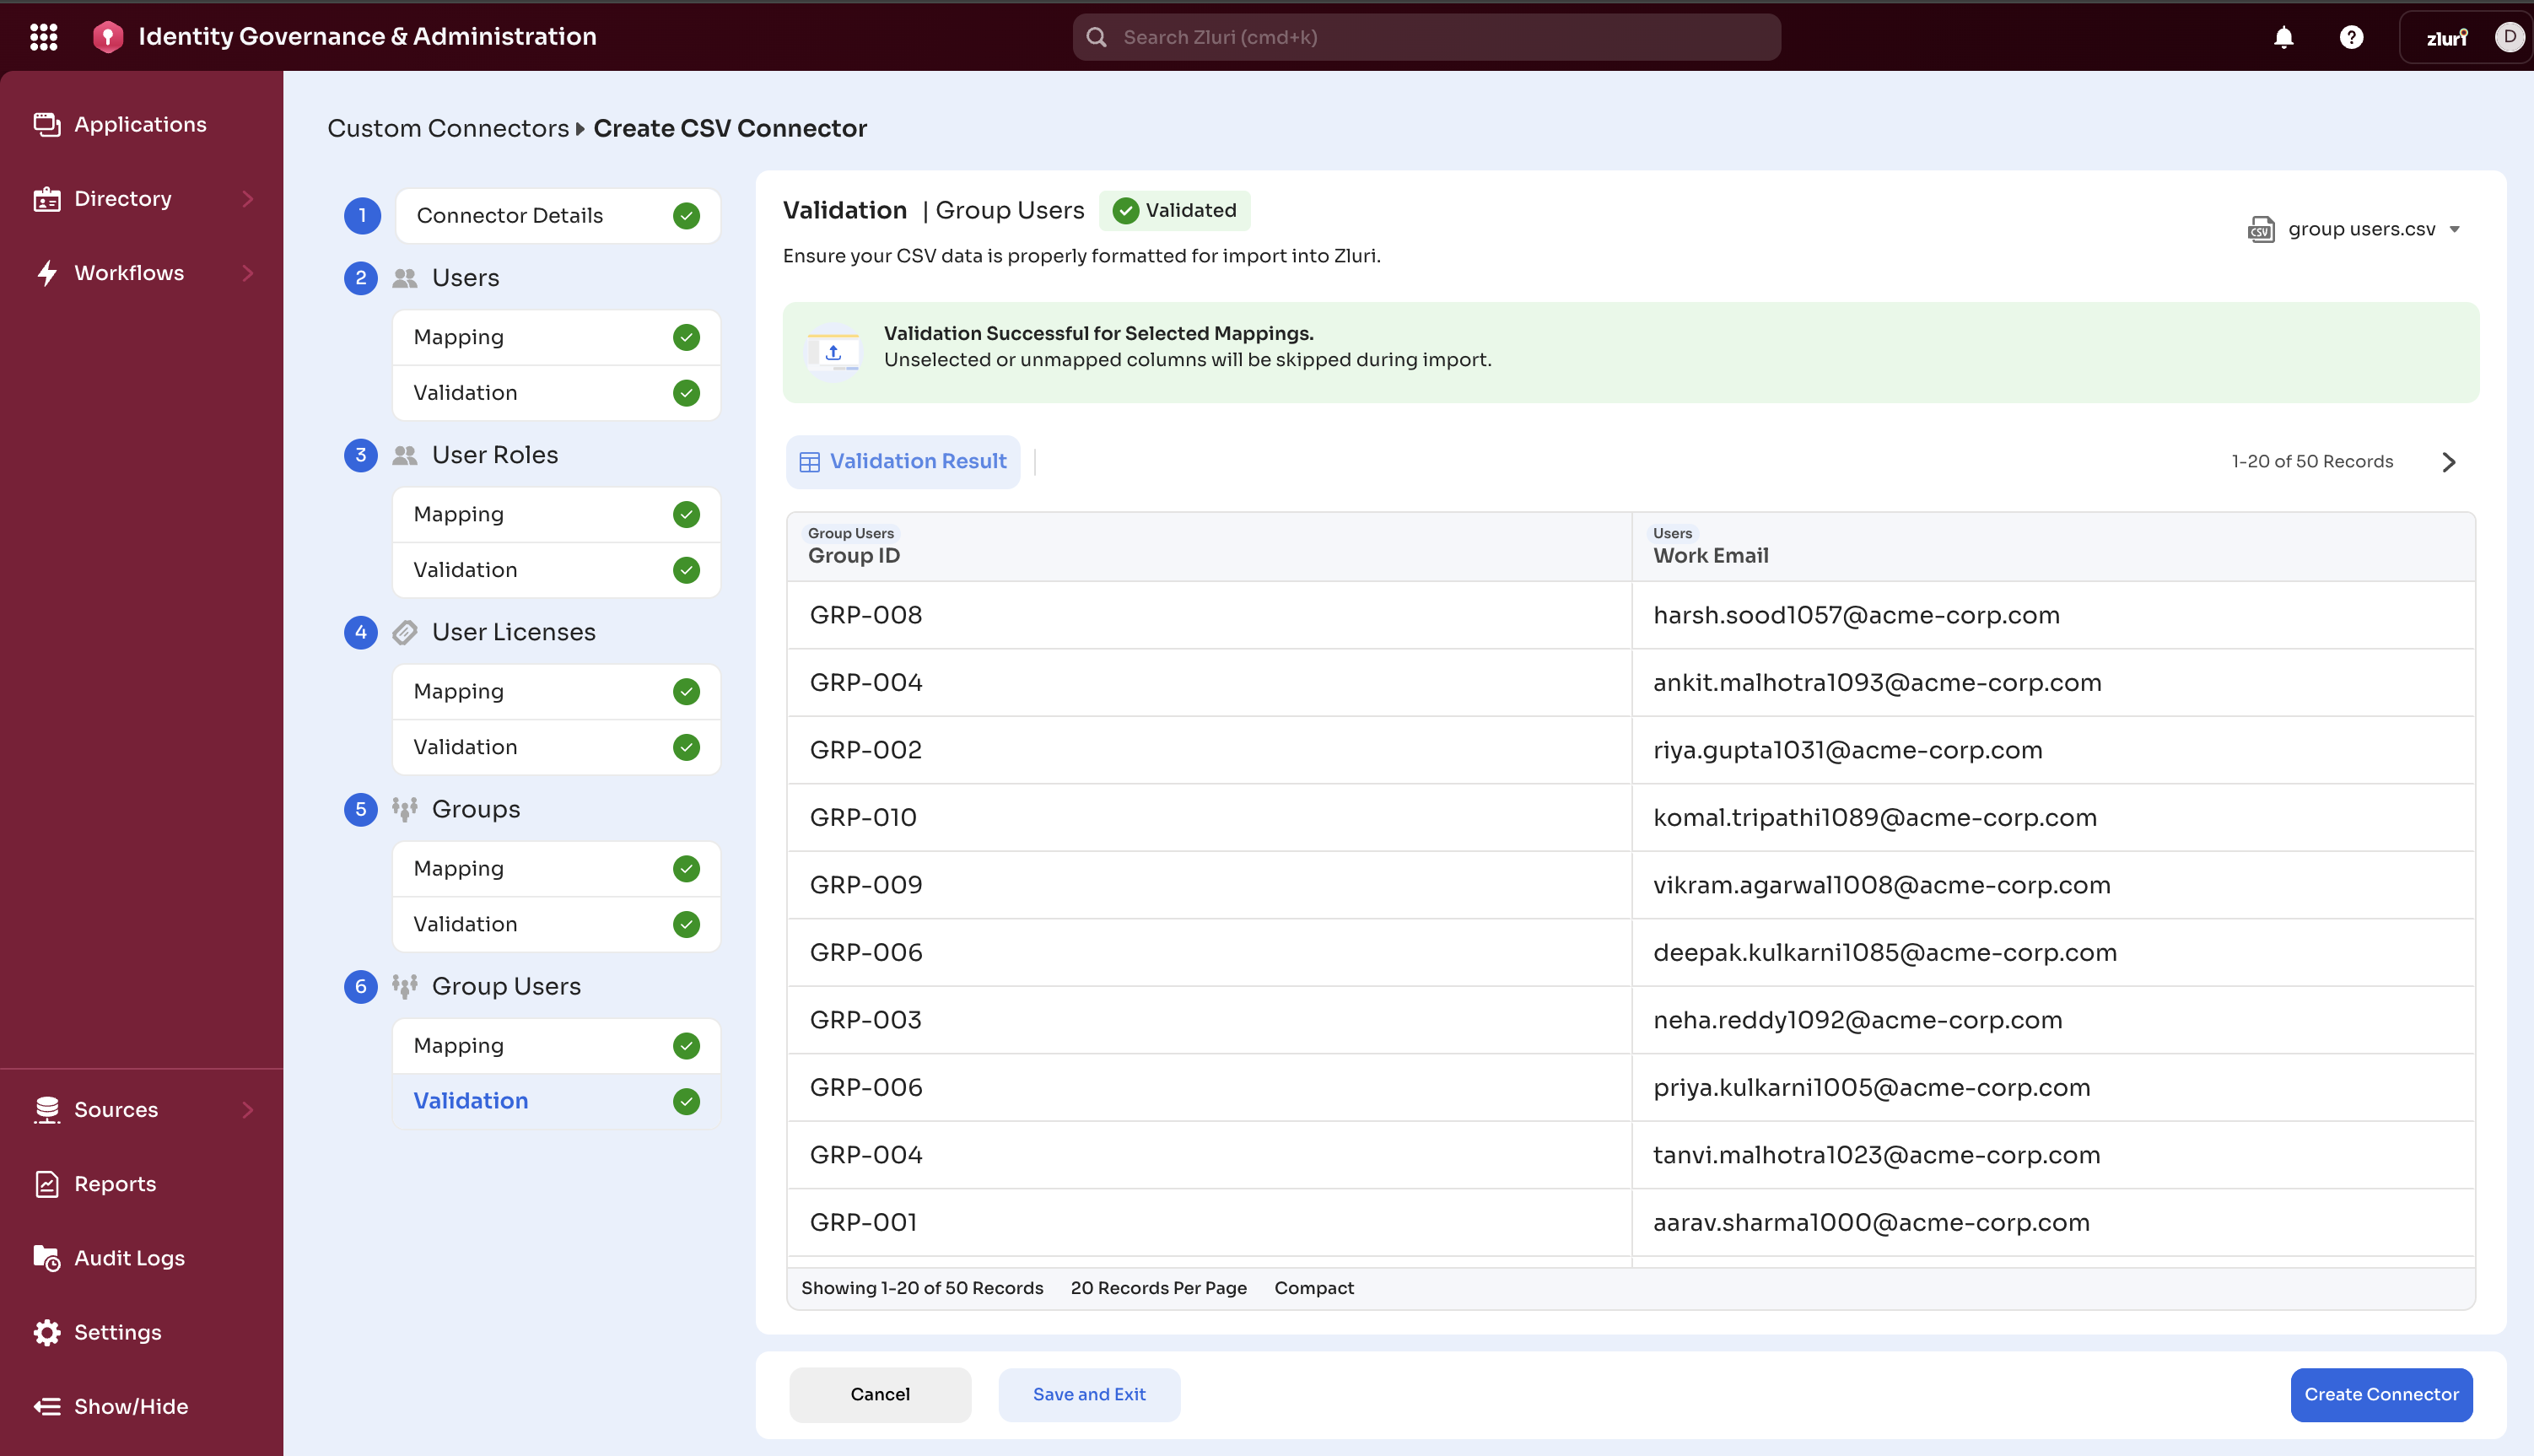
Step 6: Validate Your Setup
-
Click “Save & Validate” button
-
Wait for validation to complete (usually takes a few seconds)
-
Review results:
-
Success: All data validated correctly. Can proceed to sync.
-
Partial Success: Some rows have errors (see error report). You can skip records that are not validated and proceed to sync.
-
Failed: Critical validation errors. Cannot proceed without correcting OR re-uploading the correct file.
-
Understanding Validation Failures:
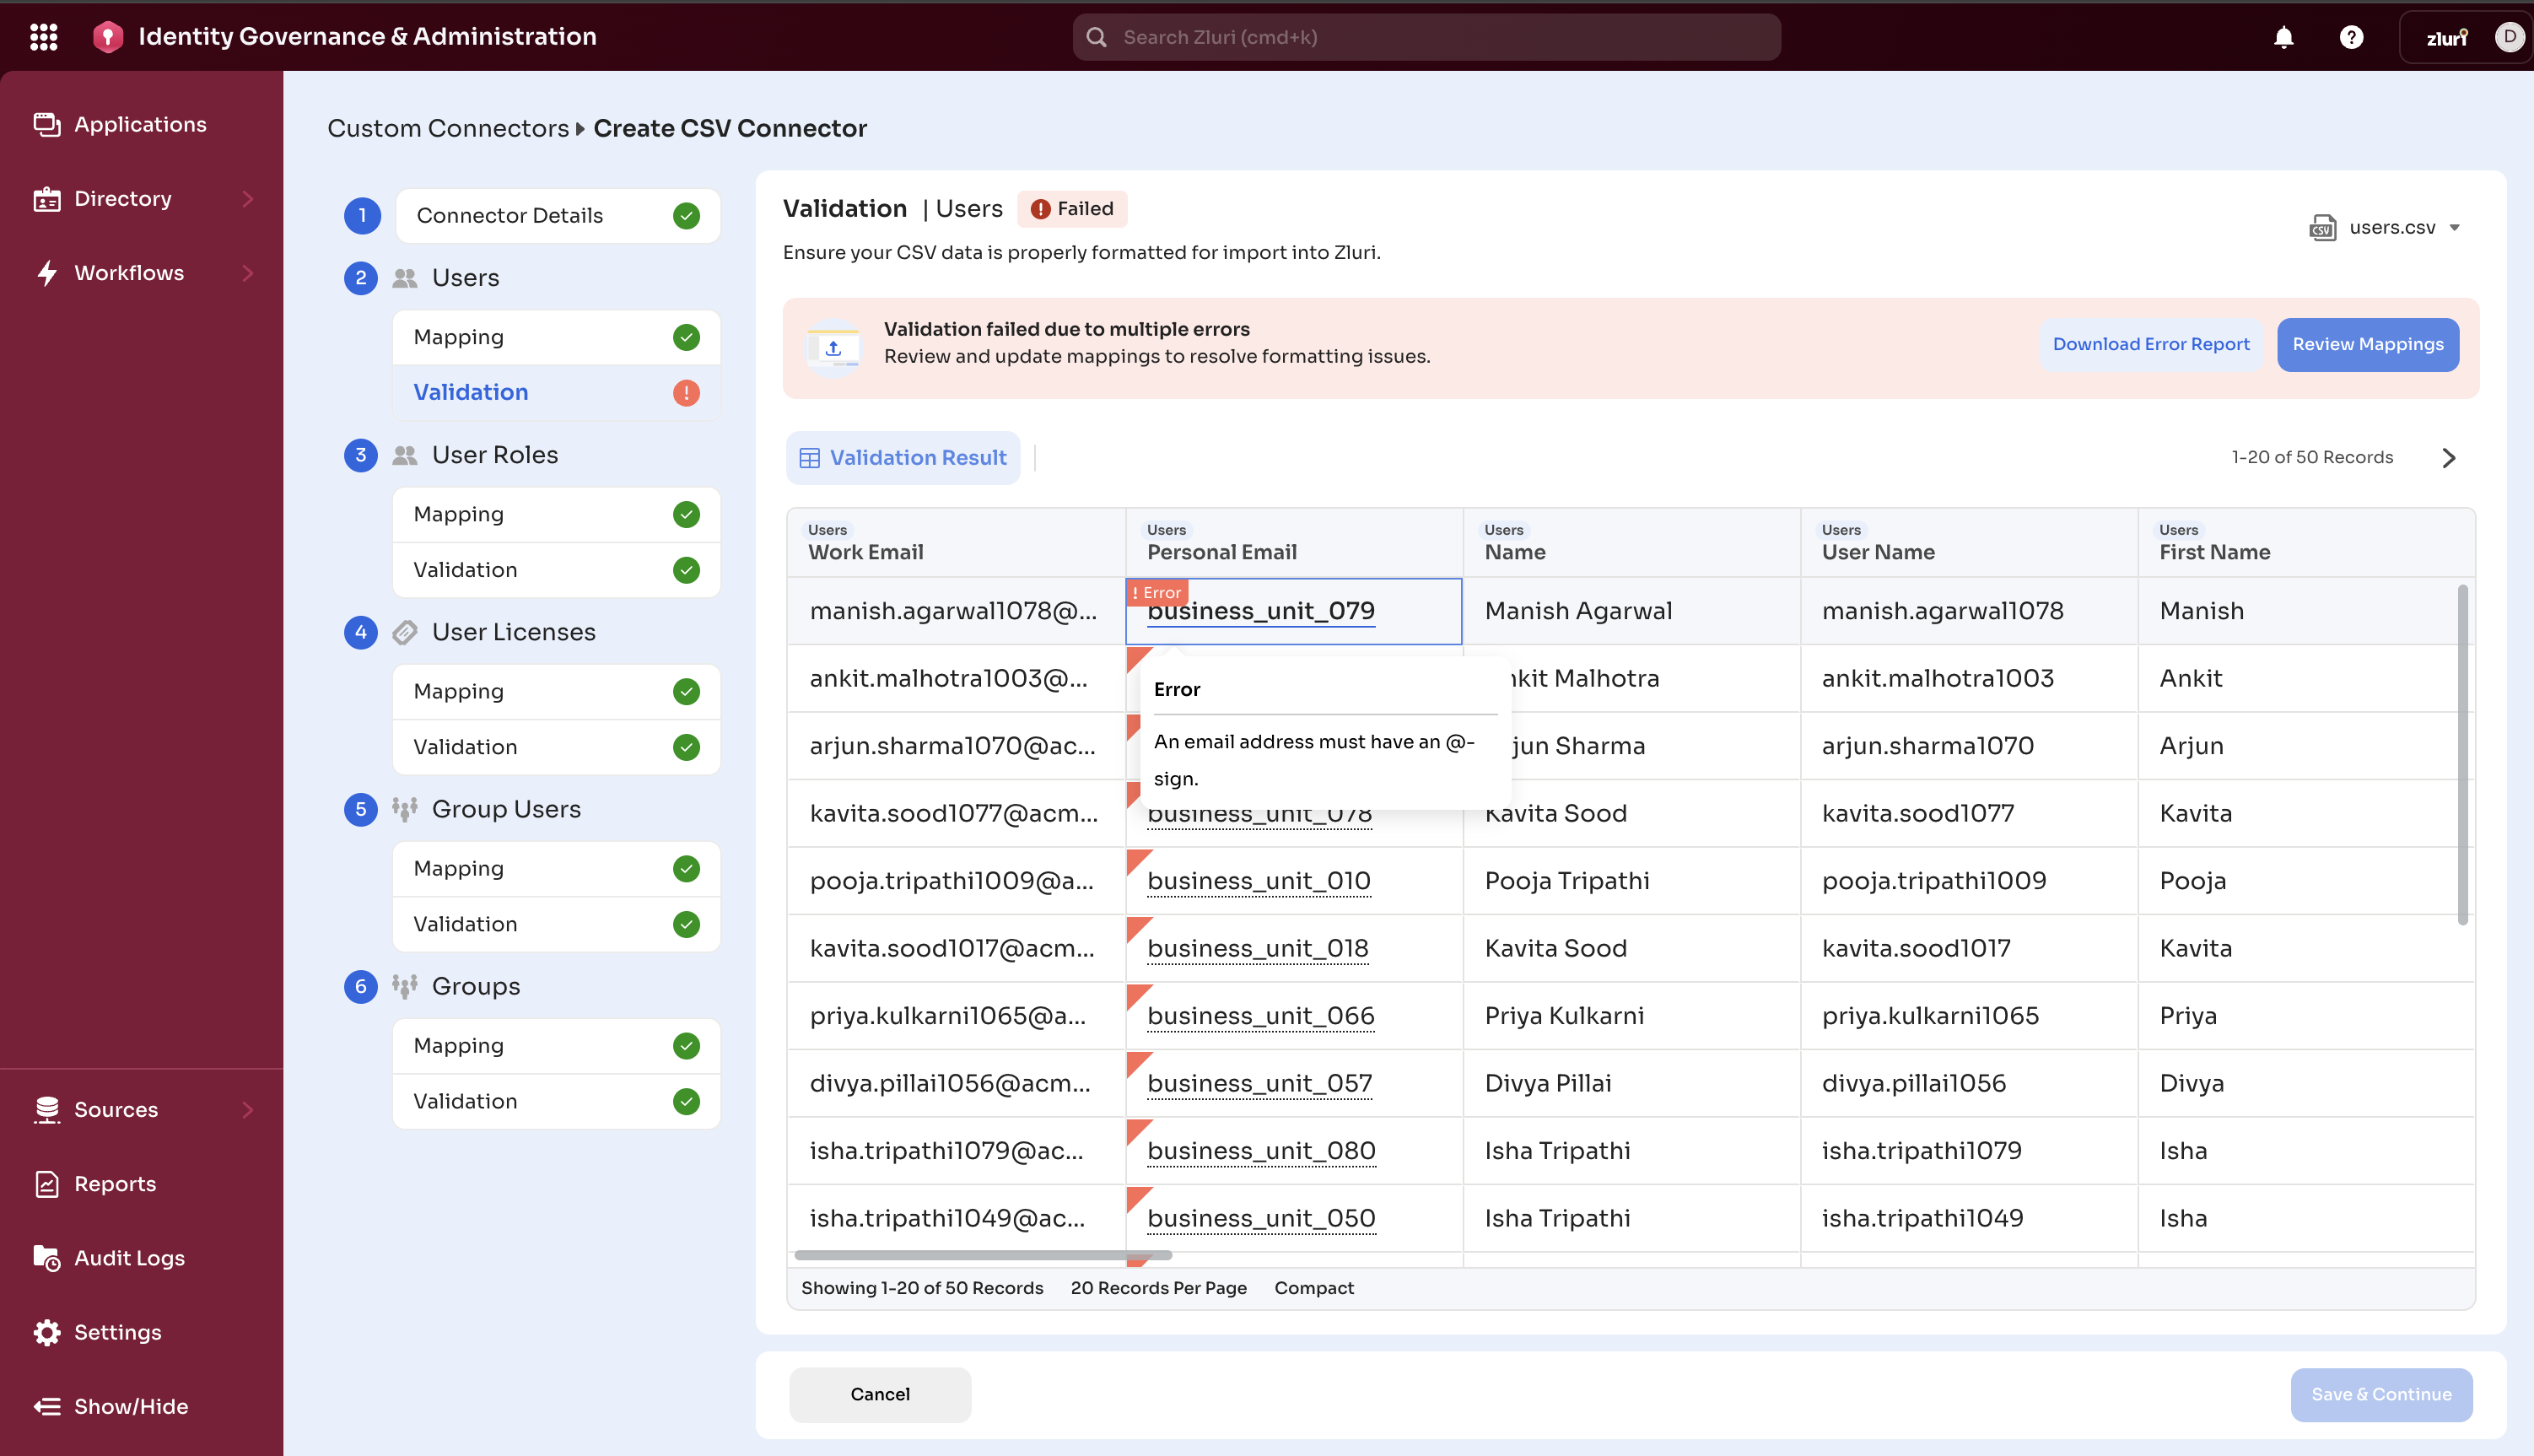
- Hover over errored cell to understand the error message.
- Fix issues in your sample file or check mapper and functions applied
- Download the error report (CSV file with error details)
- Re-upload and validate again
Step 7: Complete Setup
Once validation succeeds for each entity selected:
-
Review the summary
-
Click “Create Connector” to complete setup.
-
Your connector is now ready for regular use.
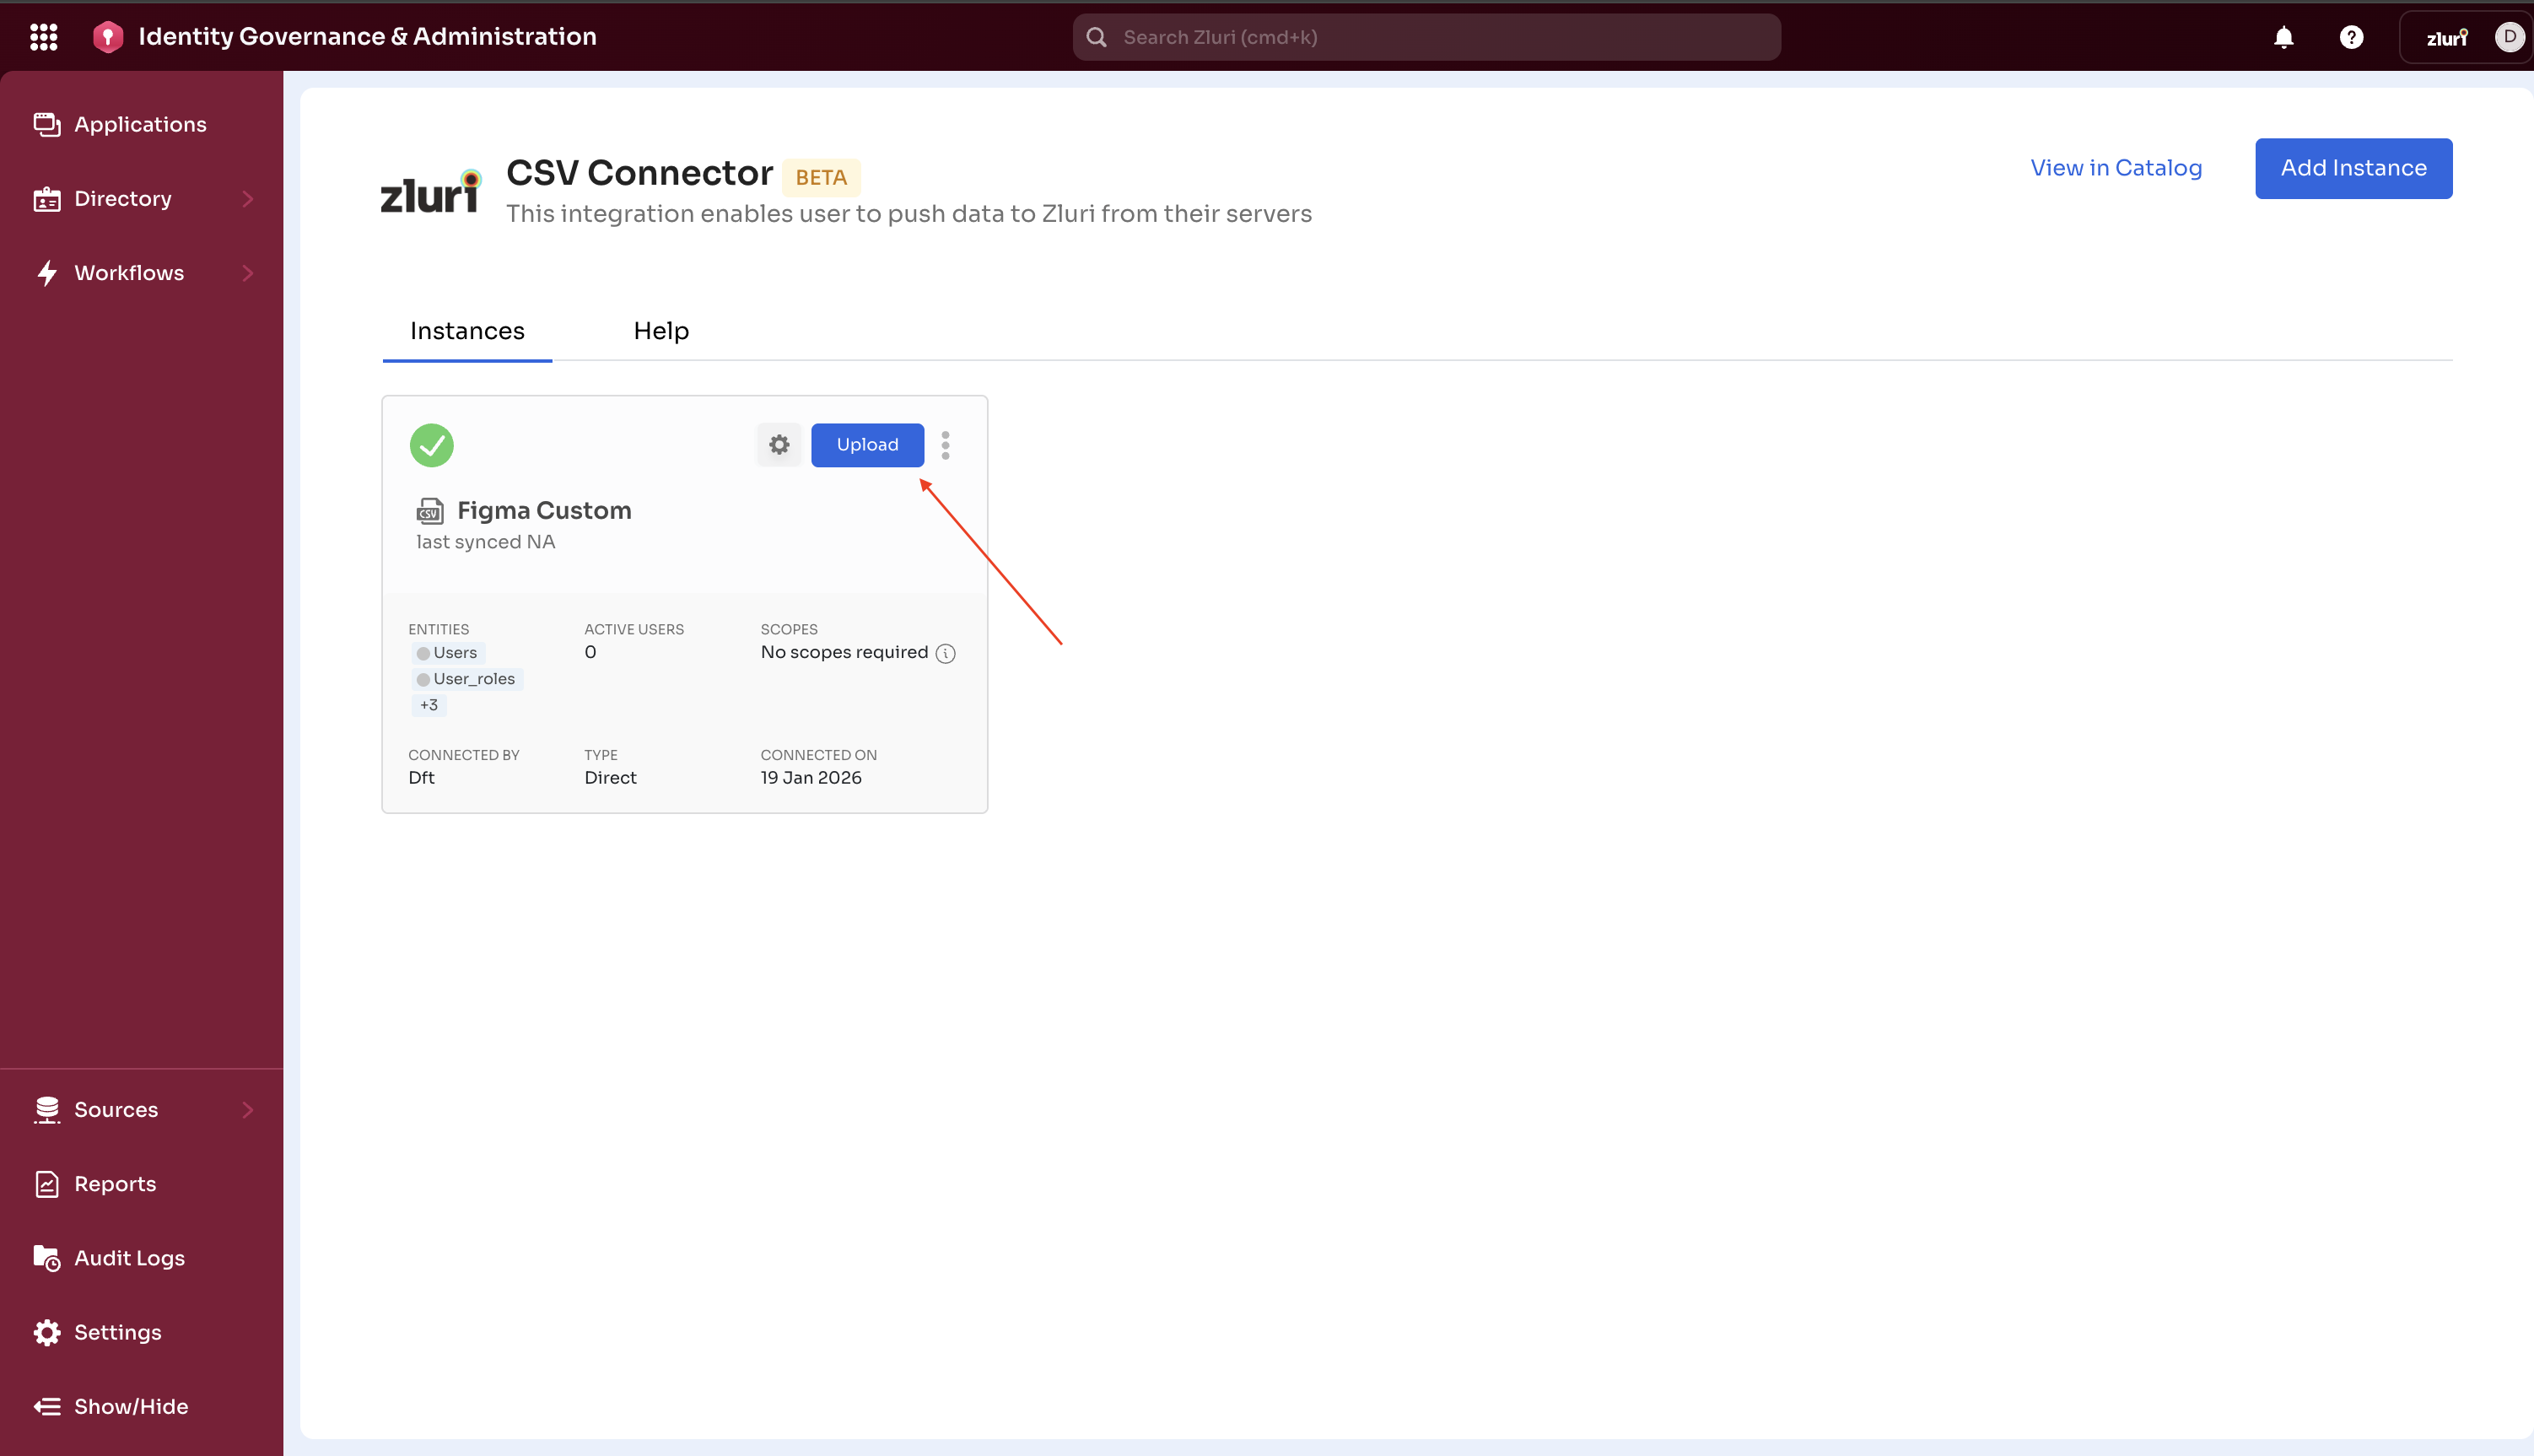
Stage 2: Regular Data Uploads
Once your connector is set up, uploading new data is simple.
1. Prepare CSV files → 2. Upload to Zluri → 3. Automatic validation →
4. Review results → 5. Start Sync → 6. Monitor progress
Step 1: Start a New Upload
-
Navigate to Sources > Integrations > Connected > CSV Connector
-
Click “Upload Data”
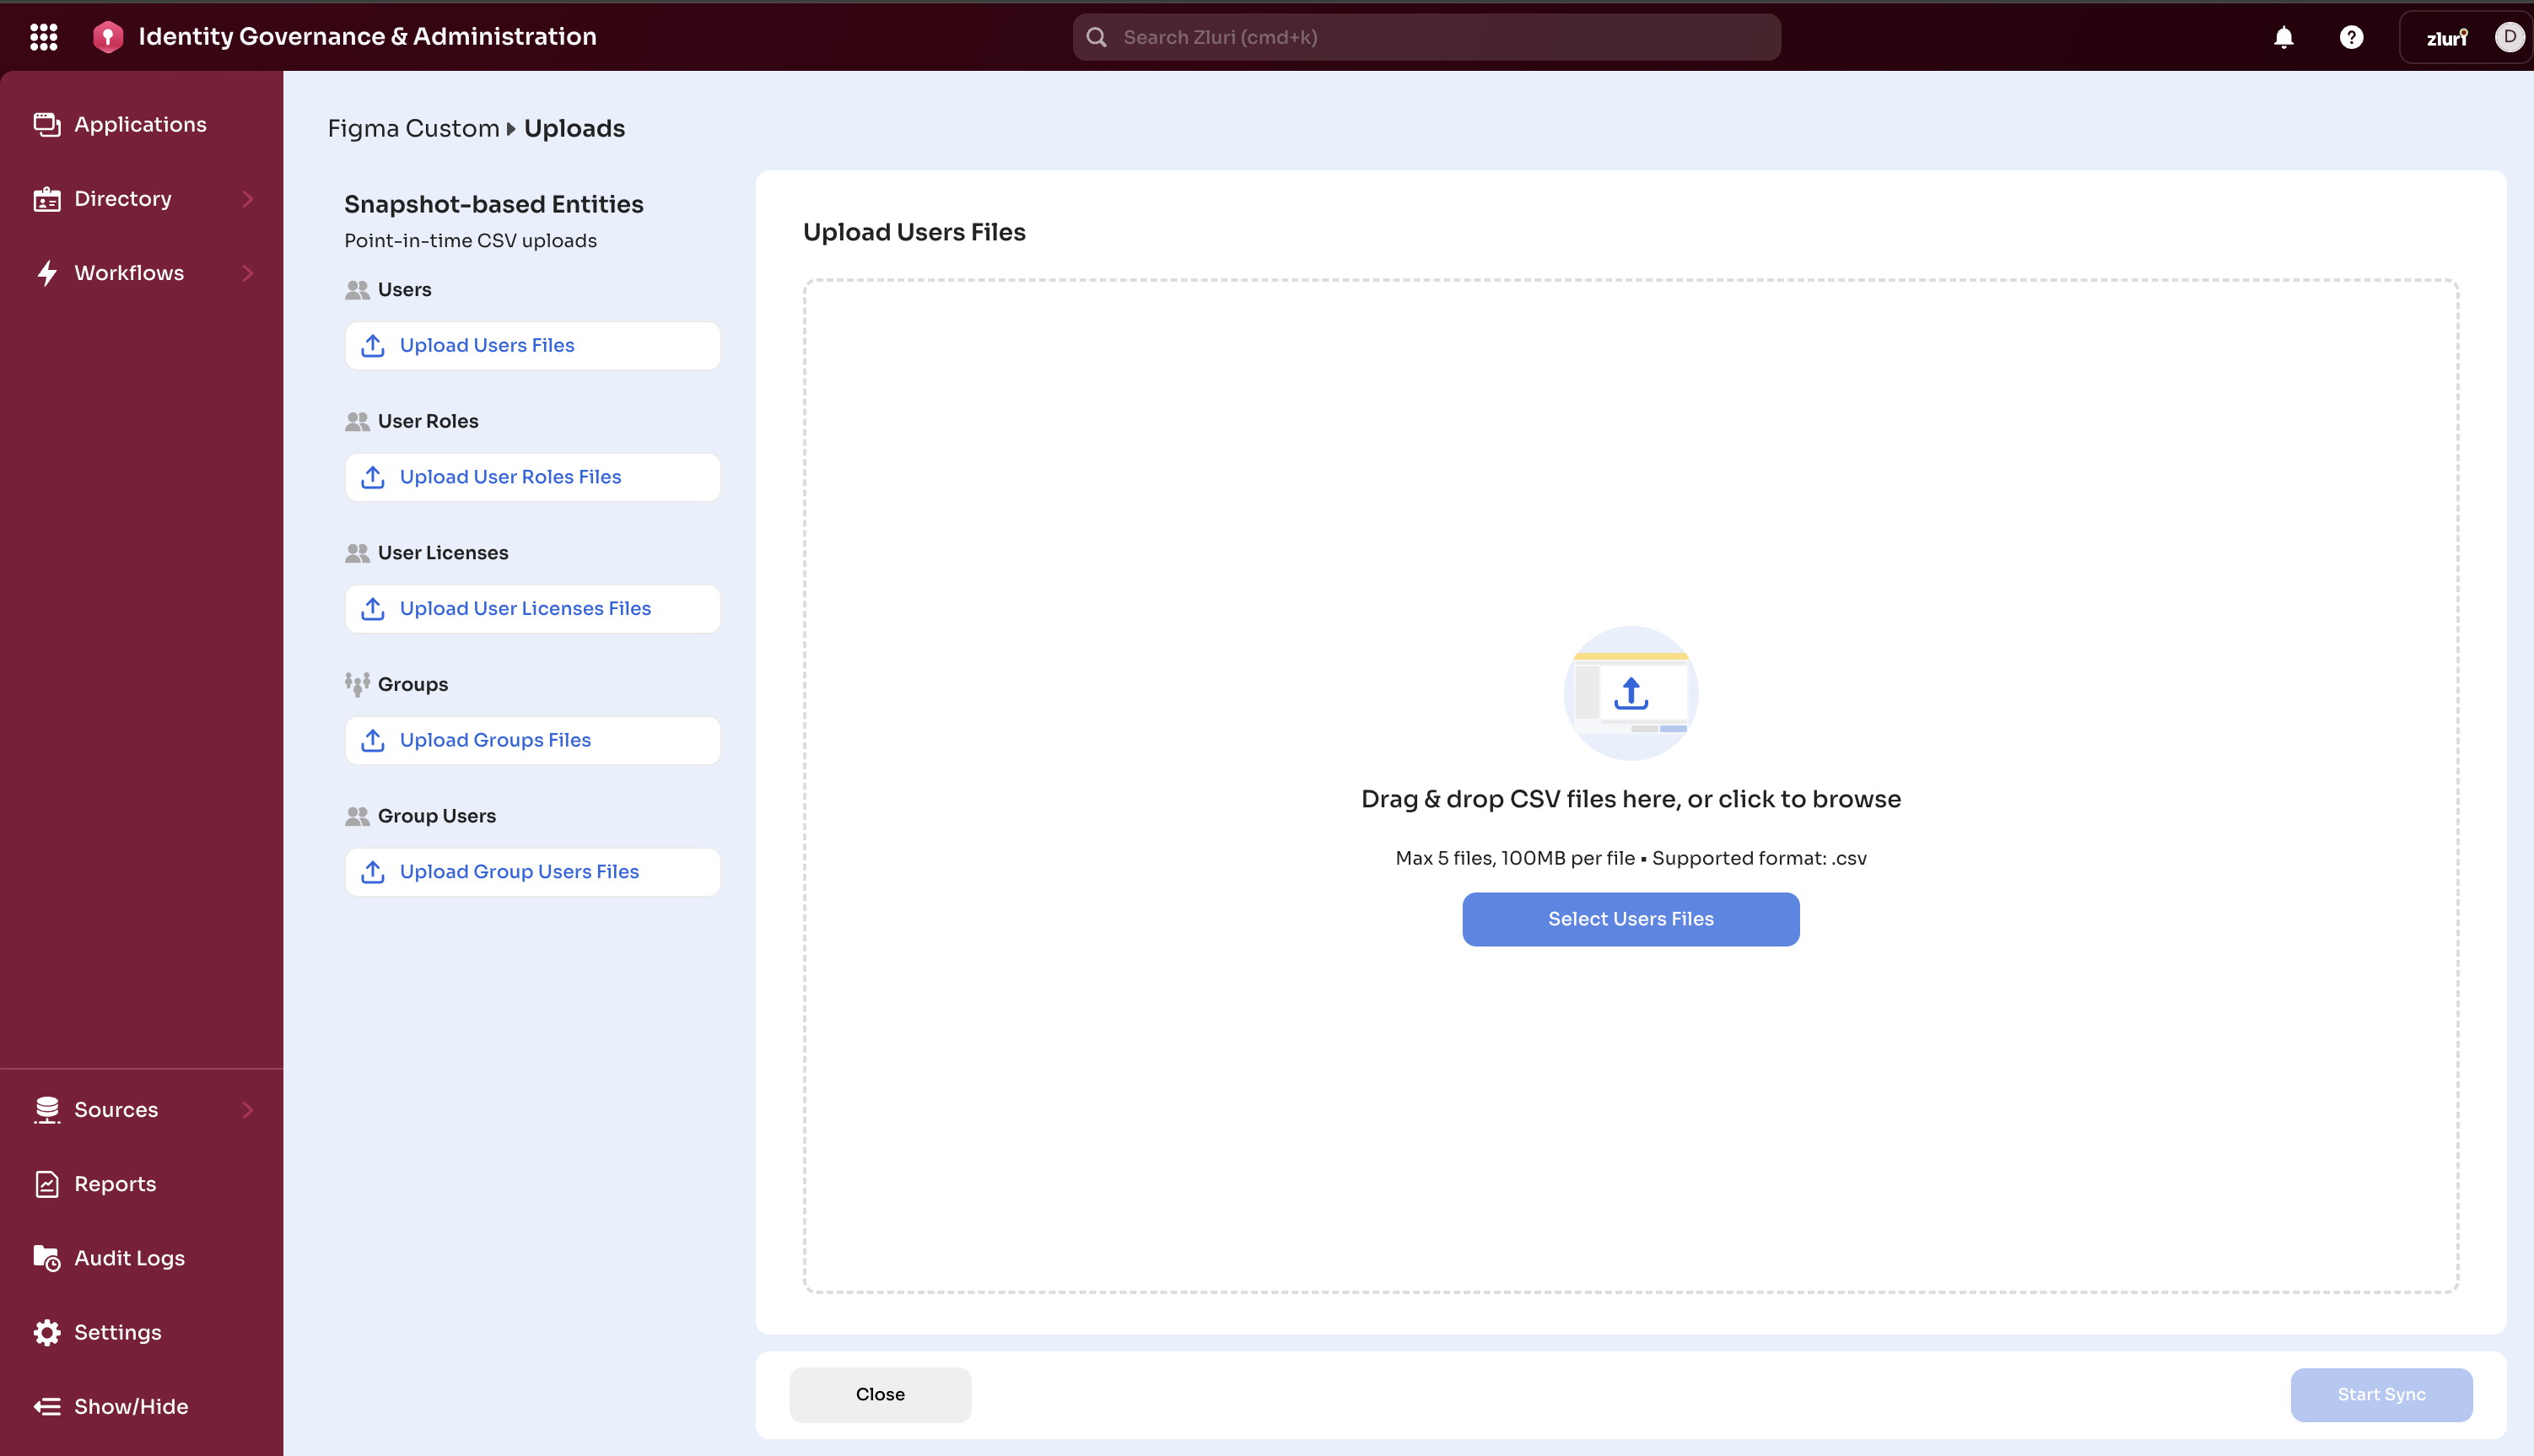
Step 2: Upload Your Files
-
Click “Select [Entity] Files” for the selected entities.
-
Make sure you’re uploading files for dependent entities as well.
-
Select one or more CSV files
- You can upload max 5 files at once for the same data type and can upload multiple times
- Each file is processed separately
-
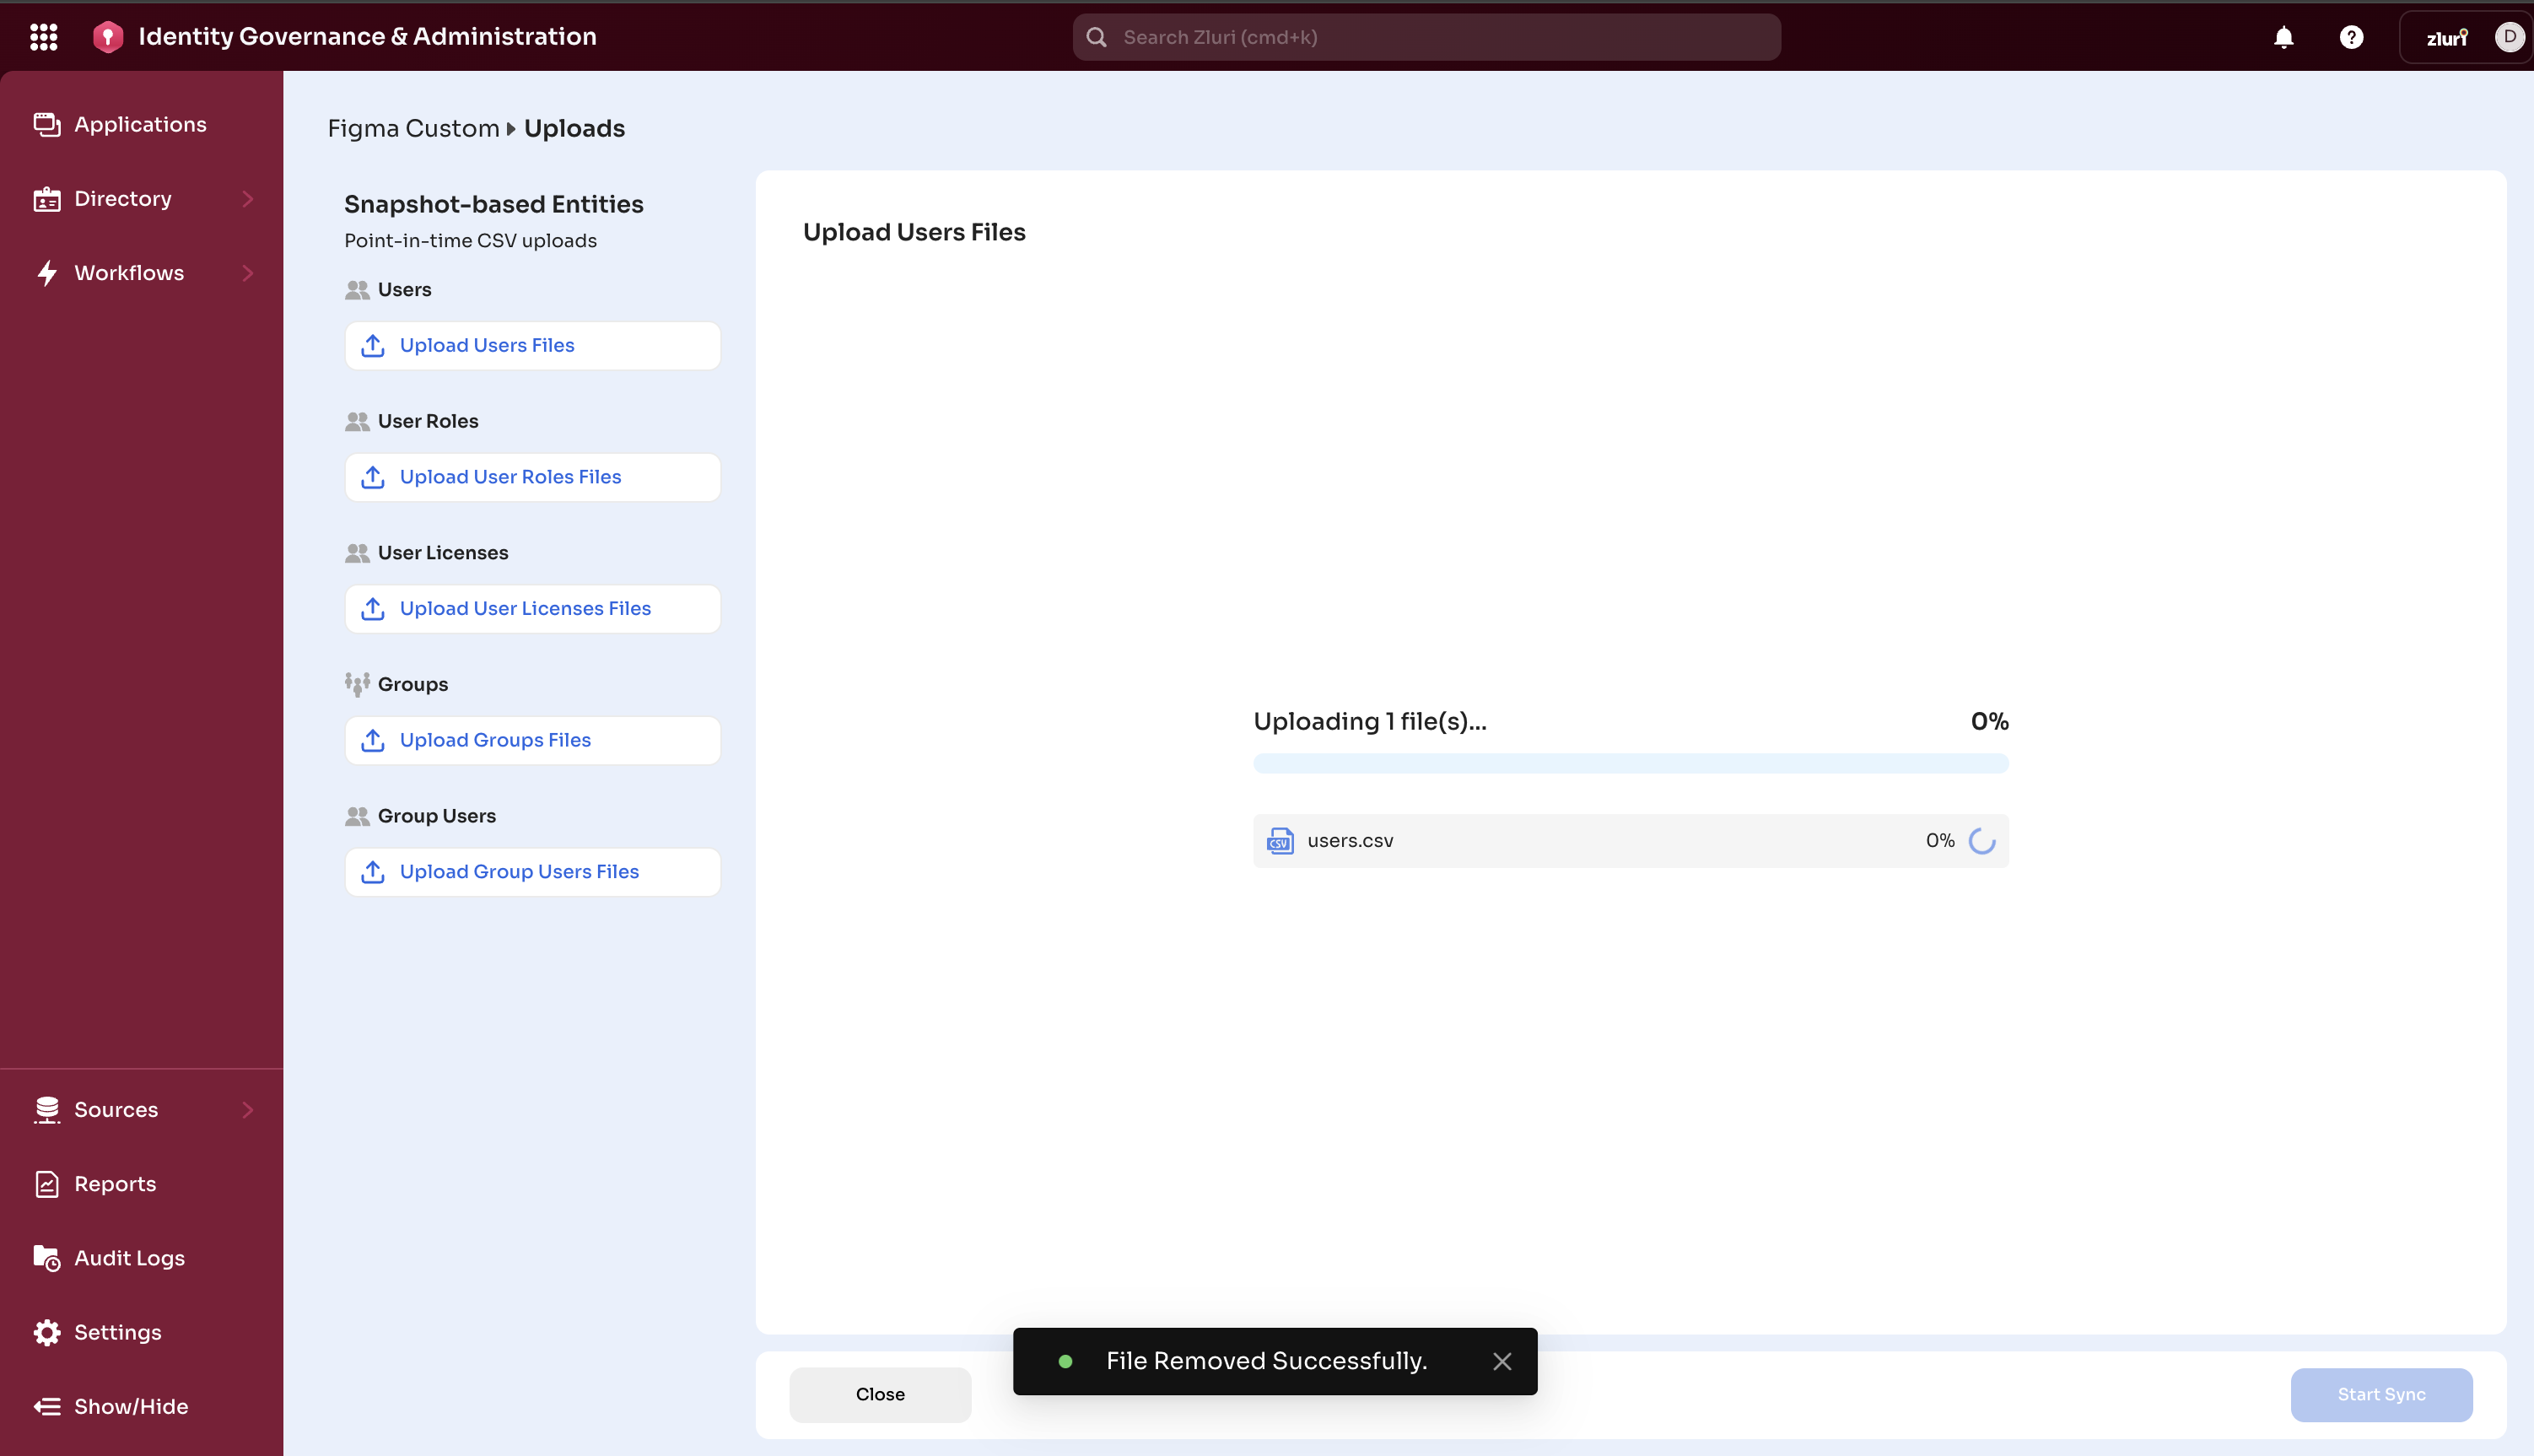
Click “Upload”
-
Wait for upload to complete
Step 3: Validate and Import
-
Once uploaded, the validation happens automatically.

-
Wait for validation (a few seconds, depends on file size)
-
Review results:
- Total Rows: Number of rows in your file
- Valid Rows: Rows that will be imported
- Error Rows: Rows with validation errors
If There Are Errors:
- Hover over errored cell to understand the error message.
- Click “Download Error Report”. The error report shows:
- Original row data
- Specific error messages for each field
- What needs to be fixed
- Fix errors in your original file
- Upload the corrected file
- Validate again.
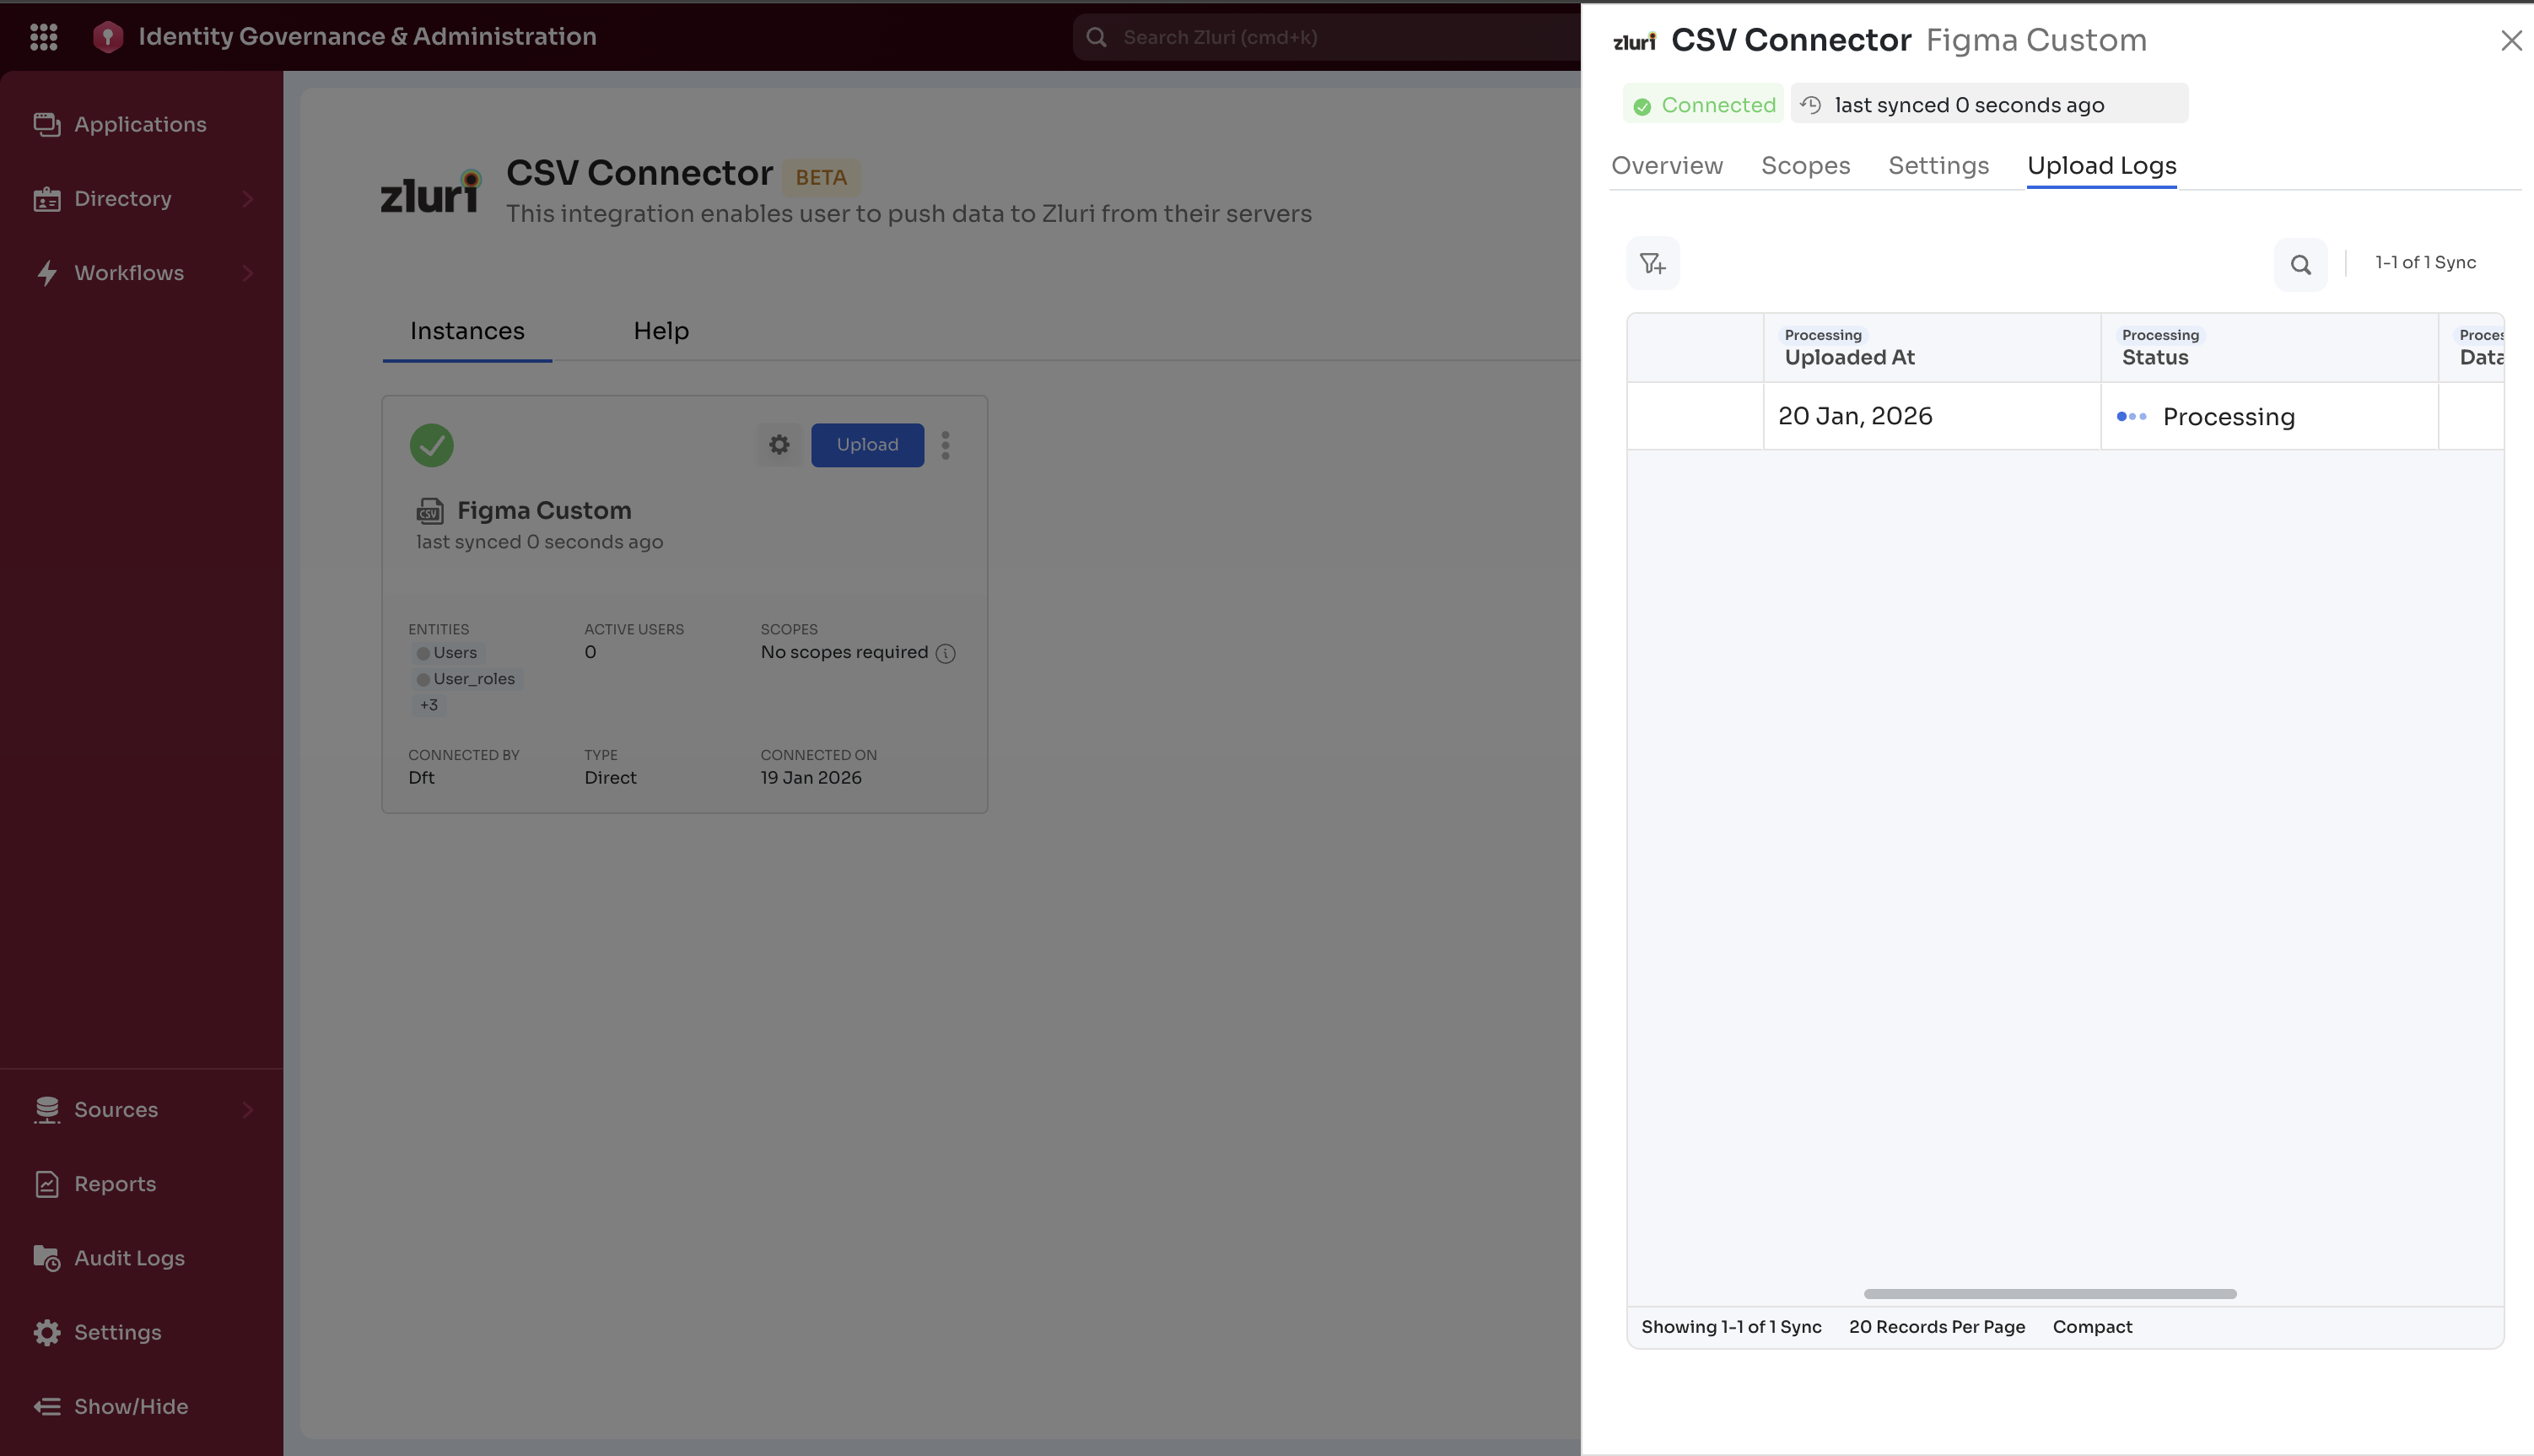
Step 4: Monitor Import Progress
-
The system automatically imports valid rows
-
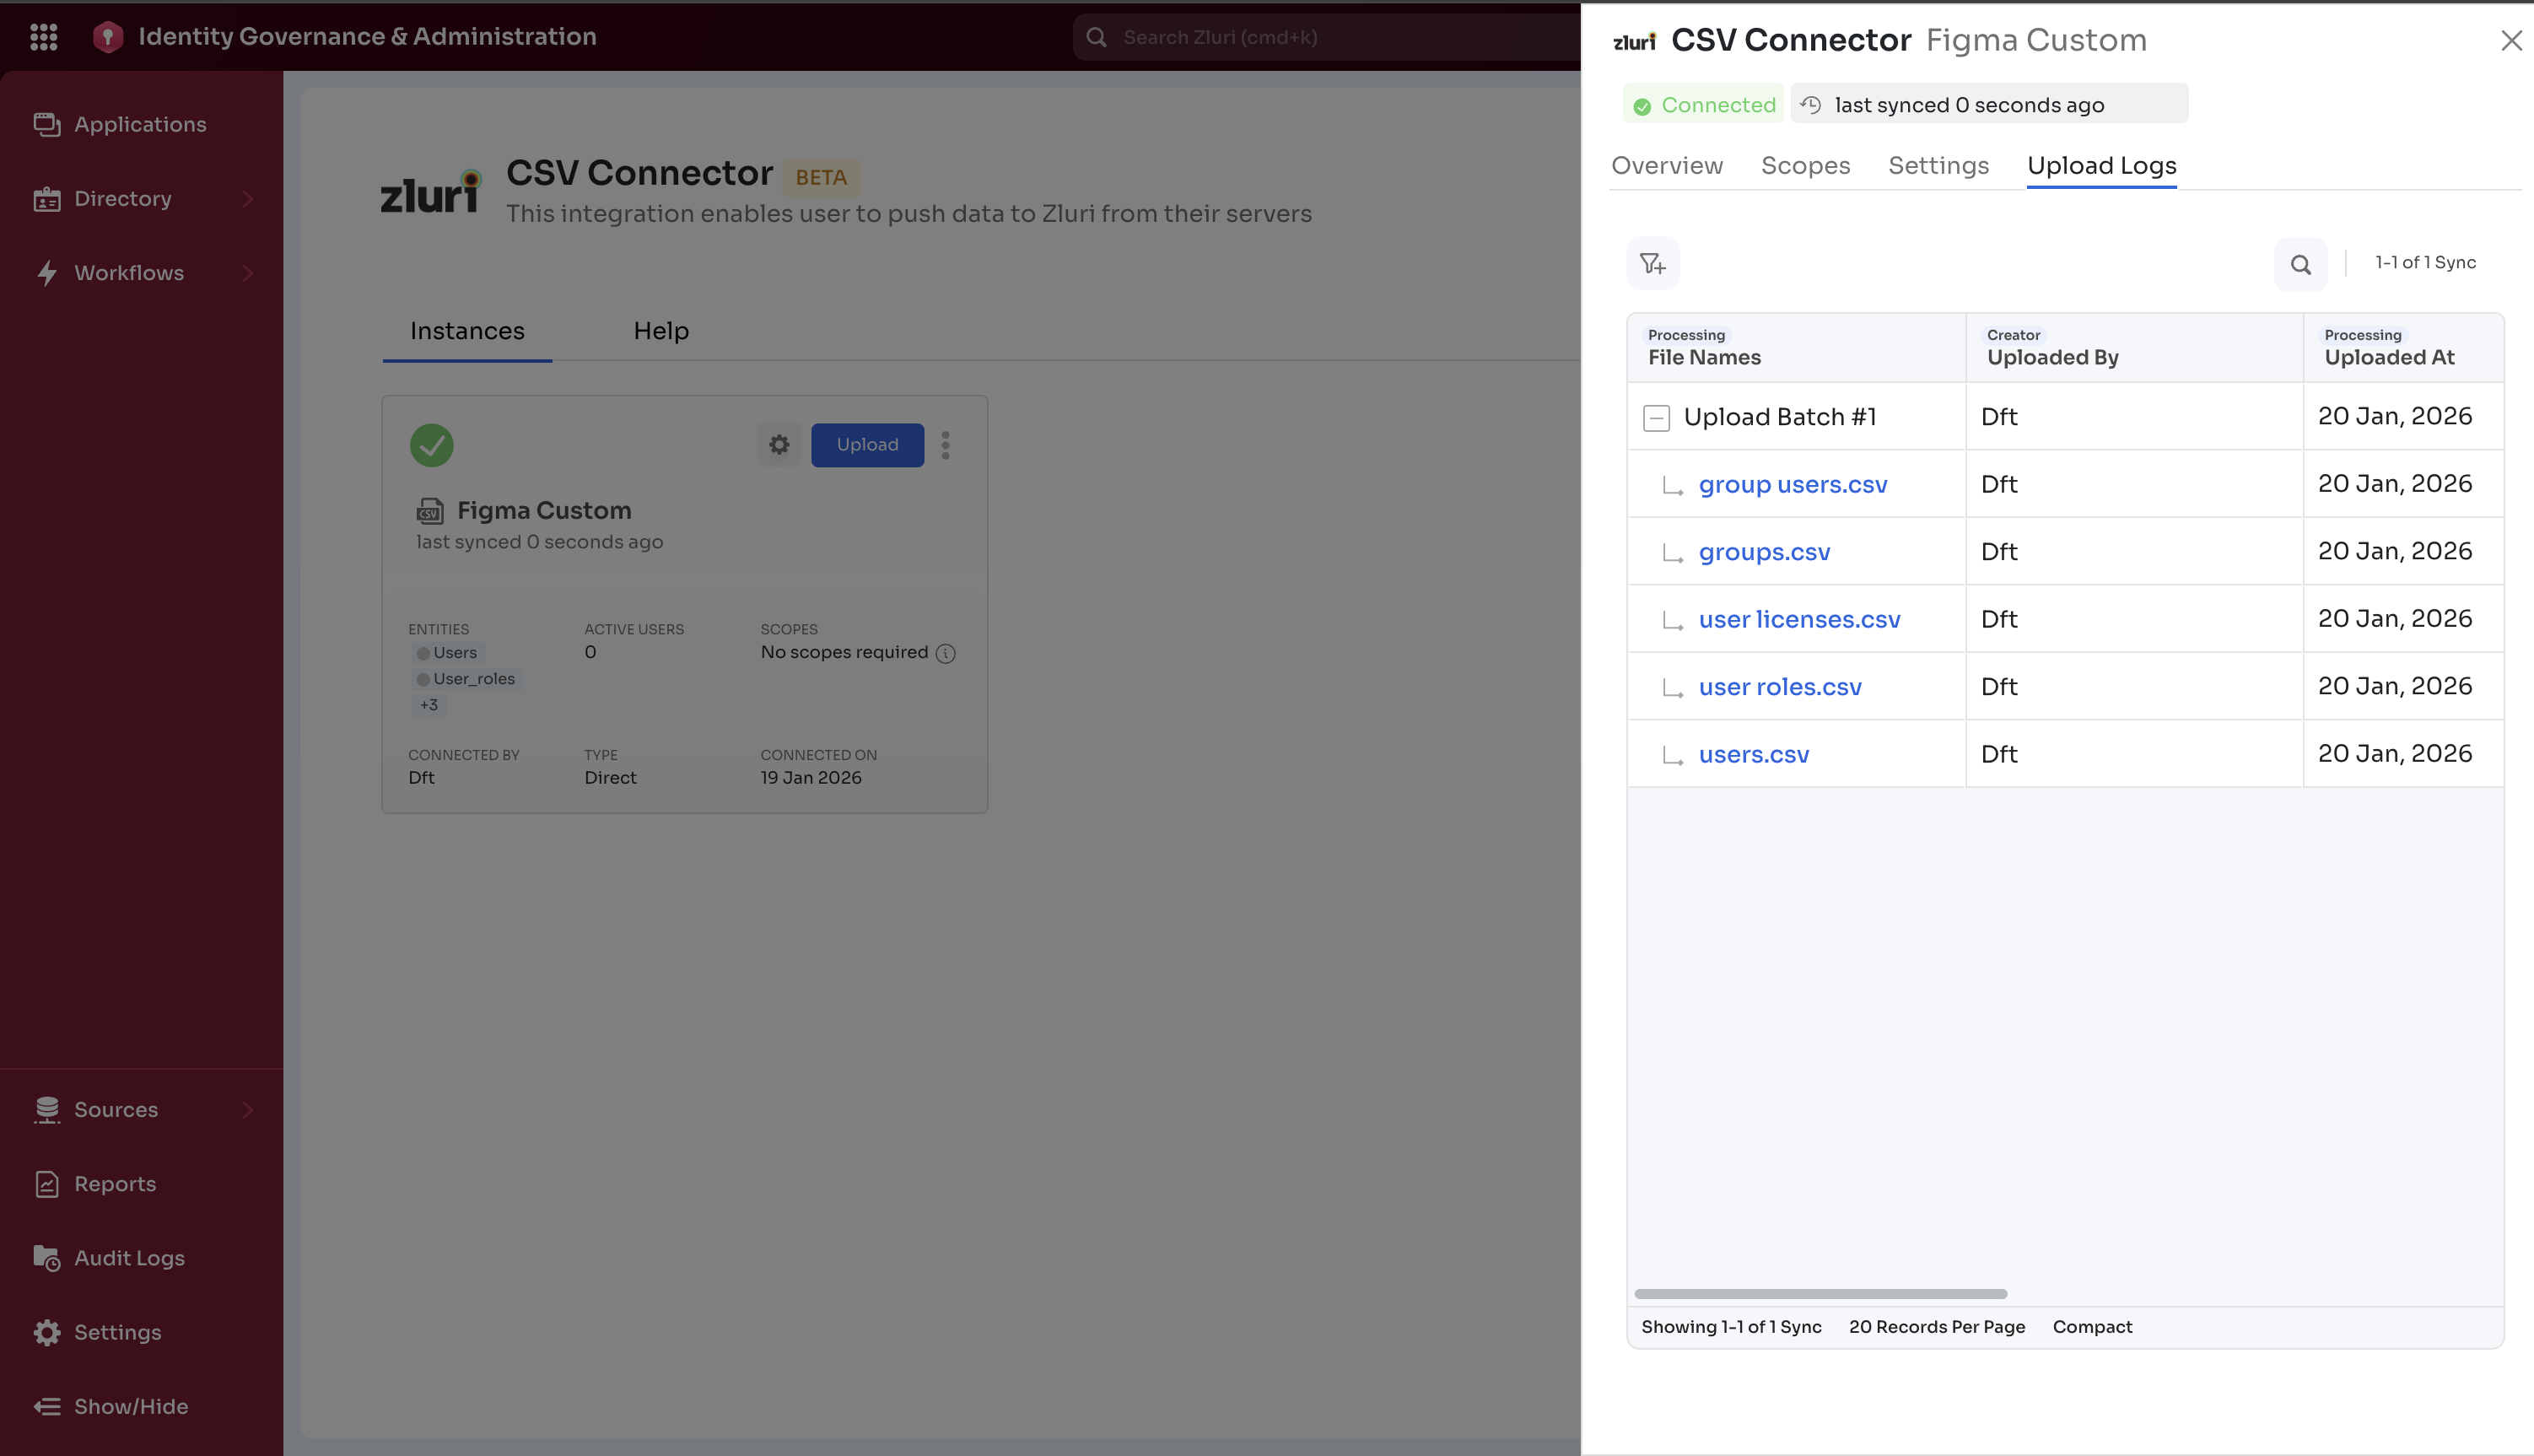
You can see import status in the upload logs for the connector:
-
Initiated
-
Processing
-
Pending
-
Failed
-
Aborted
-
Finished
-
-
Download the validated files from the uploaded batch by clicking on the file:
Updated 3 months ago