
Custom Fields Configuration
Custom fields allow administrators to extend Zluri’s data model by storing additional metadata beyond default attributes. Use custom fields to capture organization-specific information and apply it consistently across entities.
Supported Entities
Zluri supports custom fields for the following entities:
- Applications
- Users
- Departments
- Vendors
- Contracts
- Transactions
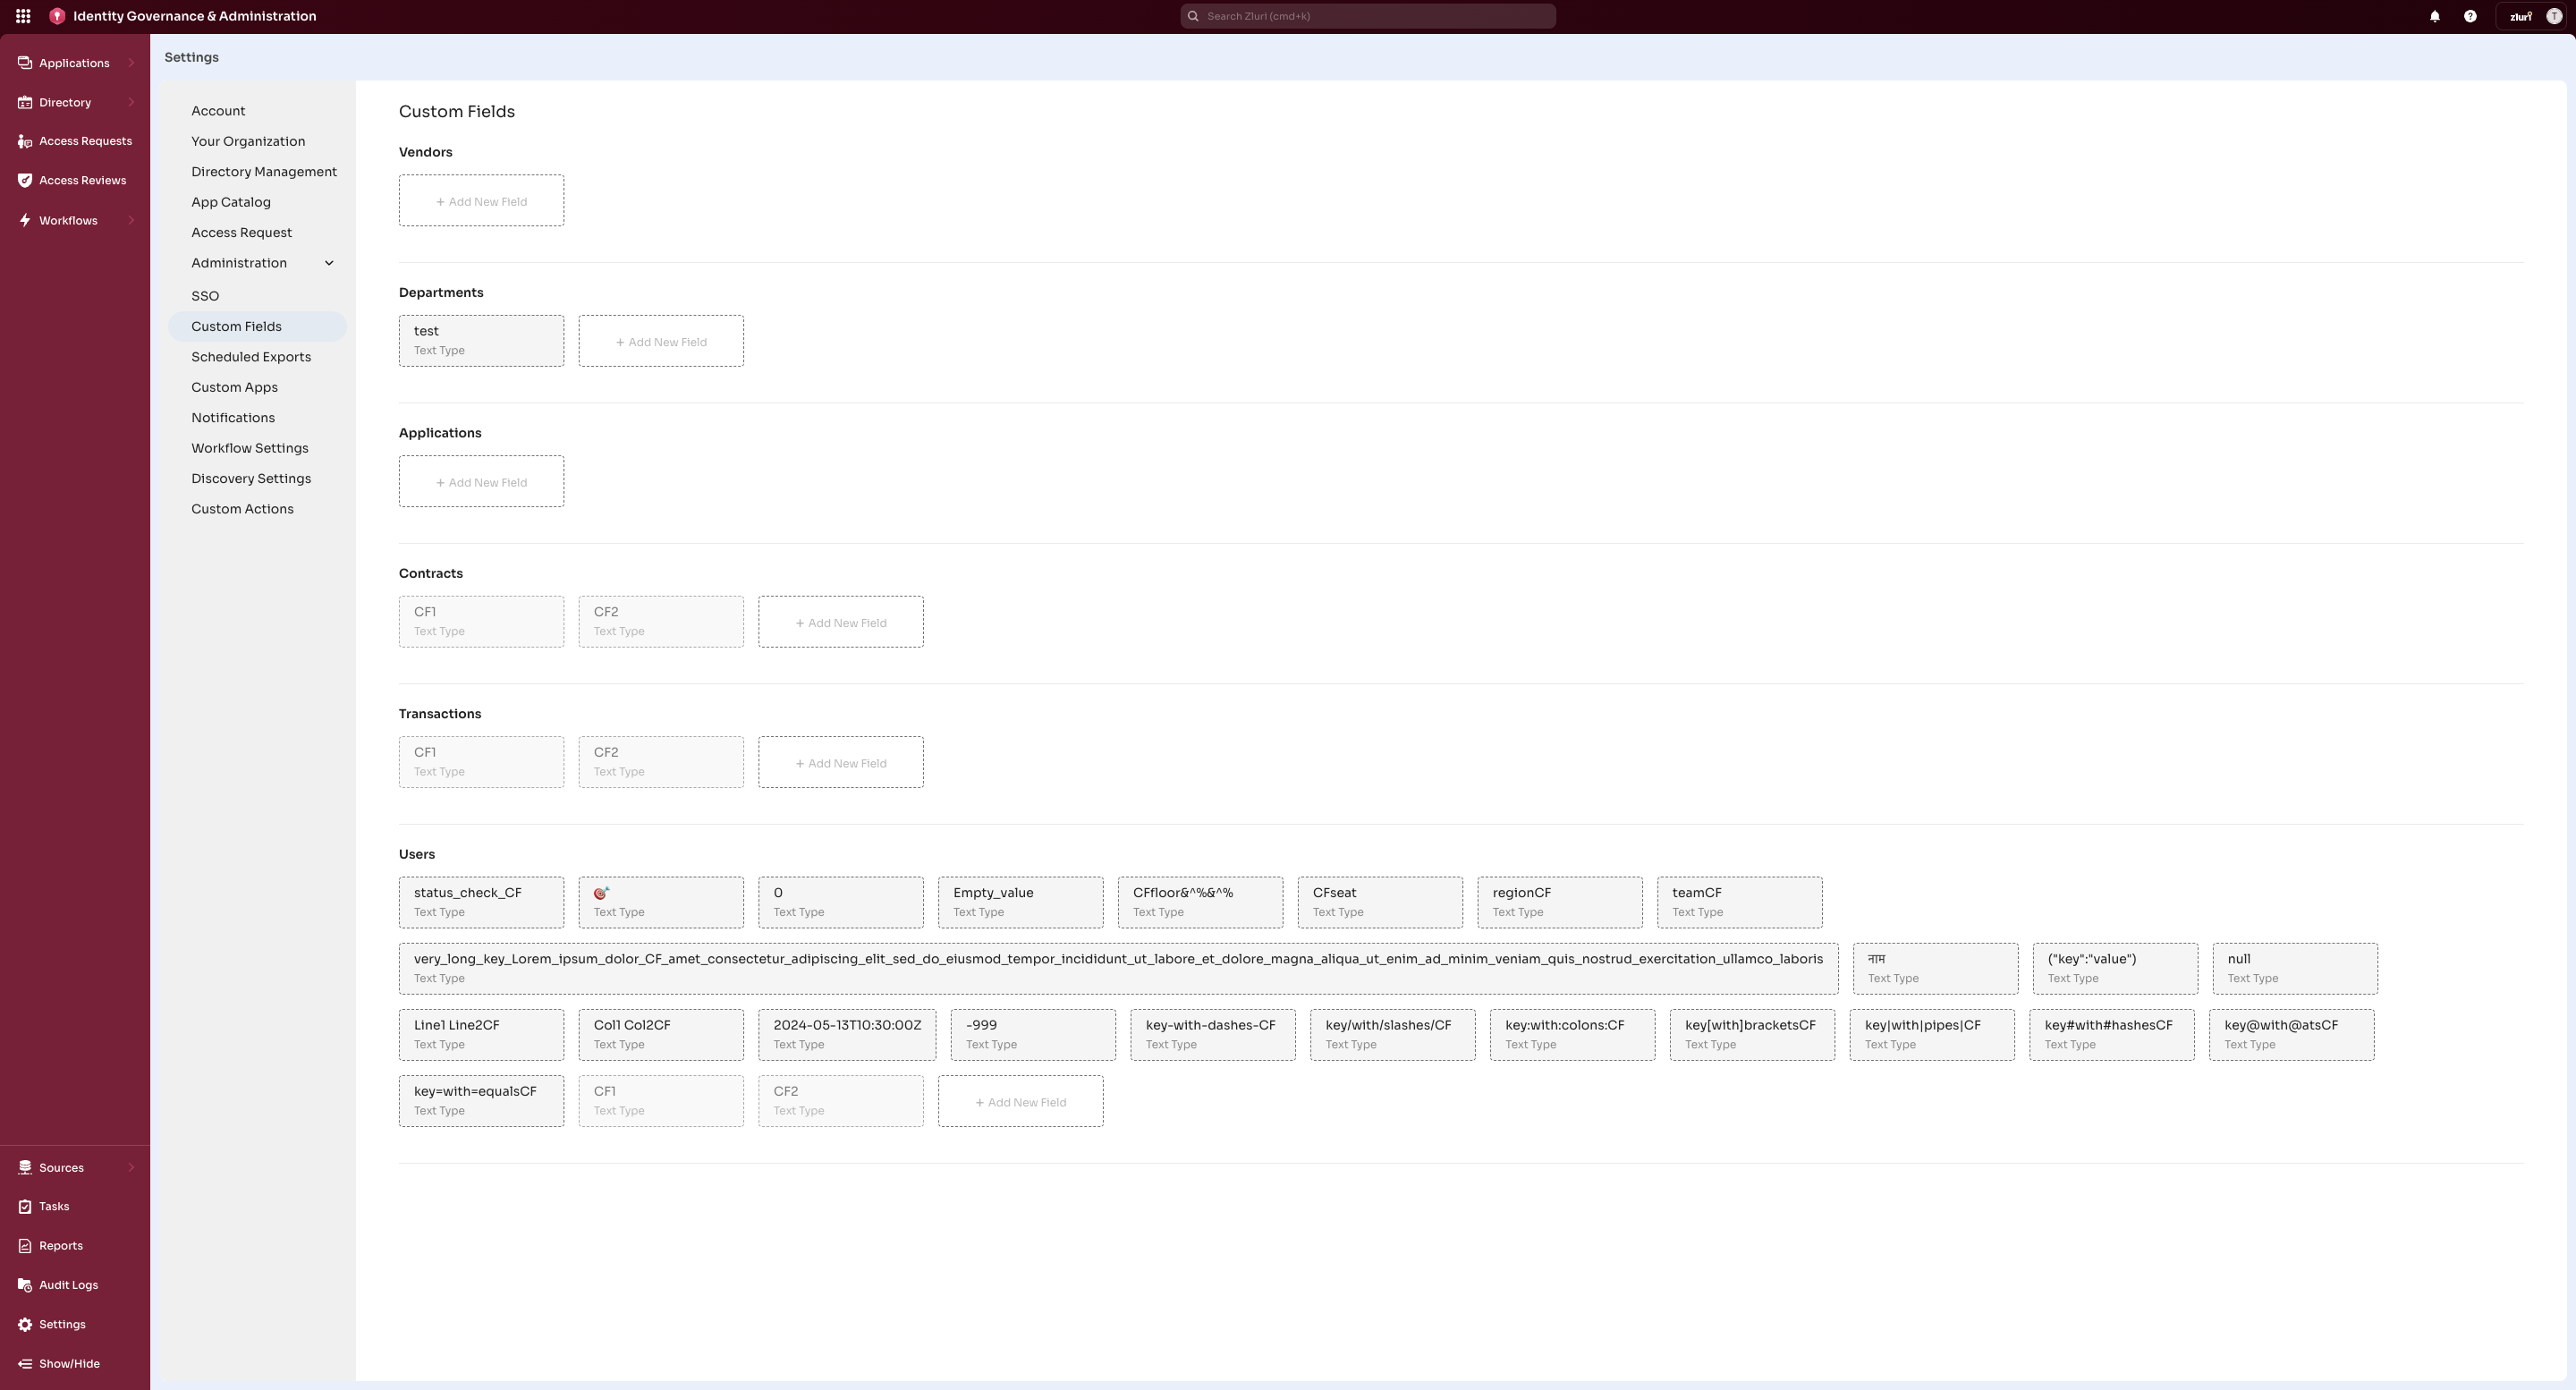
Each entity maintains its own set of custom fields. Fields apply only within the entity where they are created.
Adding a Custom Field
- Go to Settings → Custom Fields.
- Select the entity to extend.
- Click + Add New Field.
- Select a Field Type.
- Enter a Field Name.
- Configure field-specific options, if applicable.
- Click Add Field.
- In the confirmation dialog, click Add Field again to confirm.
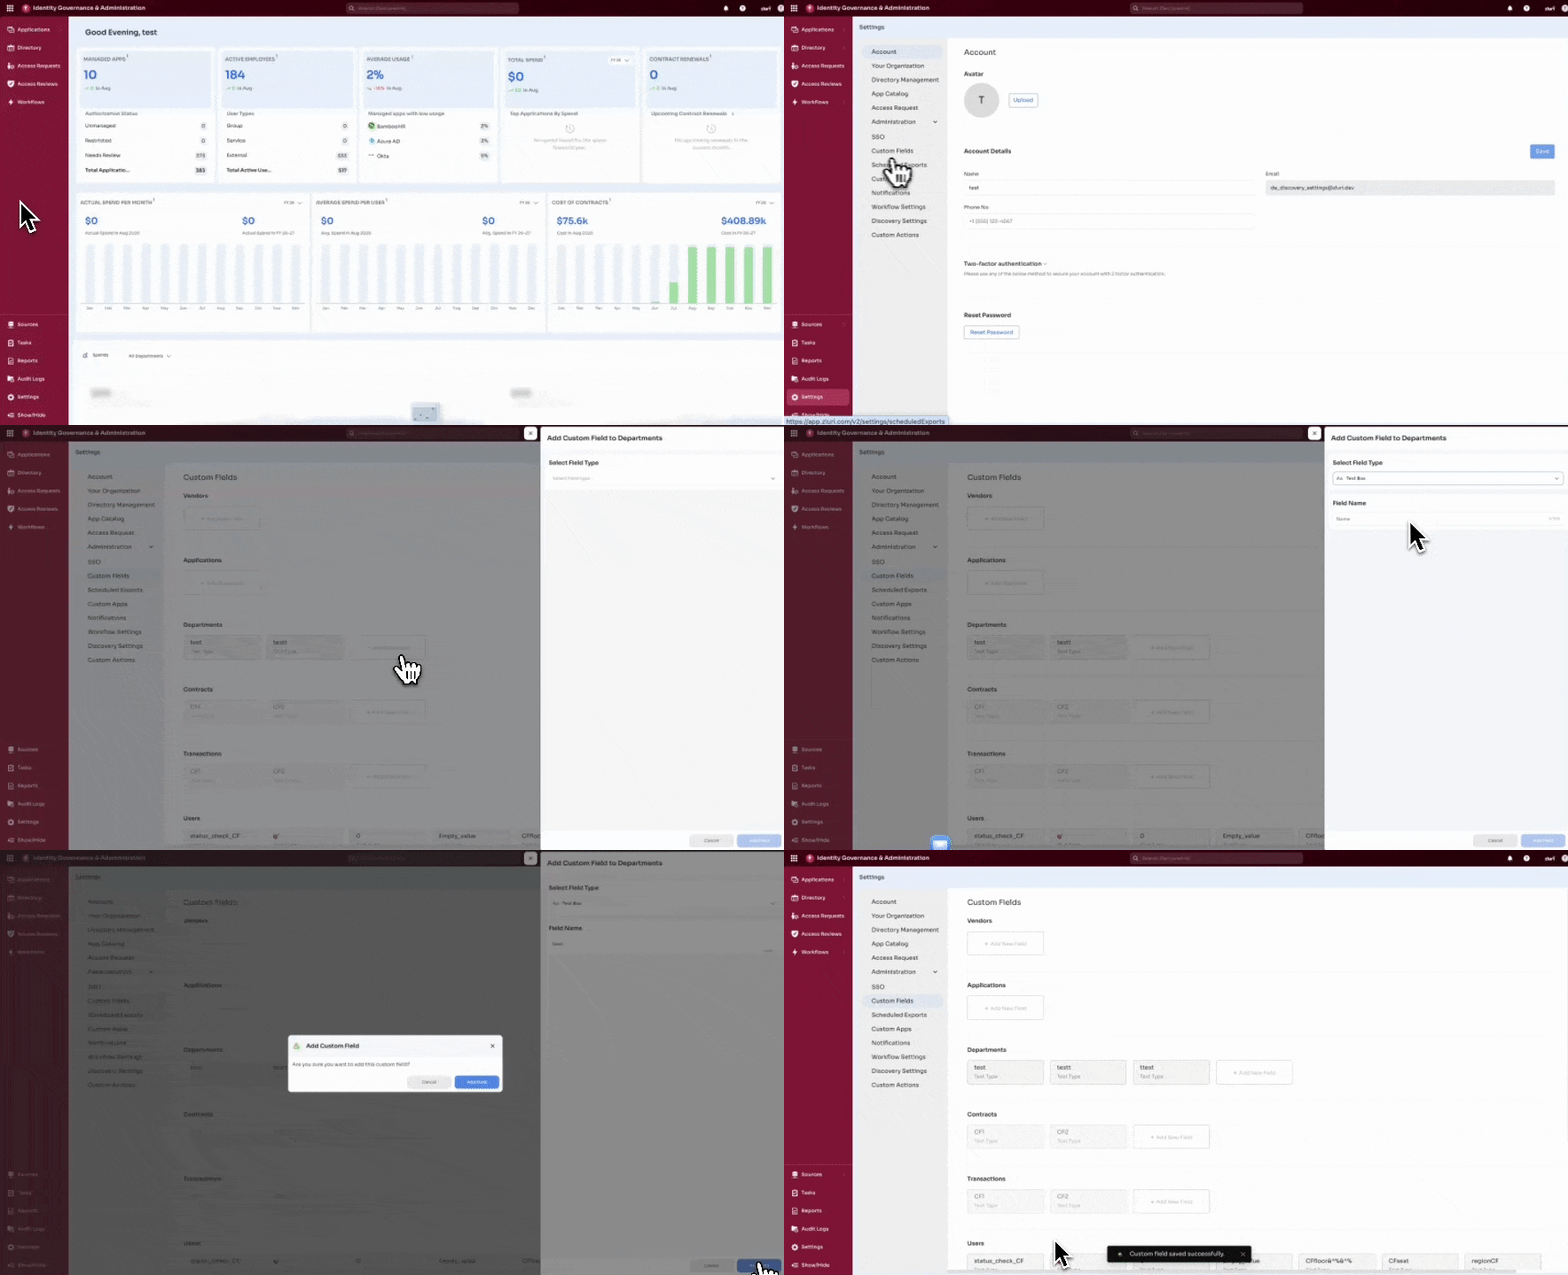
The field becomes available immediately for the selected entity.
Field Types
Zluri supports the following field types:
Text Box
Stores free-form text.
Dropdown
Stores a single value selected from a predefined list.
Boolean
Stores a Yes/No value.
Zluri automatically provides Yes and No as options.
Date Picker
Stores a date value.
Number
Stores a numeric value, including whole numbers, negative numbers, and decimals.
Zluri Entity
Creates a reference to another Zluri entity (for example, User or Application).
Editing and Deleting Custom Fields
Click an existing custom field to open the edit dialog.
From this dialog, you can:
- Update the Field Name
- Delete the field
Deleting a custom field removes it from all records where it was populated.
User attributed data sources
Zluri supports optional integration mapping only for User custom fields.
When editing a User custom field, you can connect it to an integration under Connect this custom field to an integration (Optional).
Configuration steps:
-
Open the User custom field.
-
Select an Integration Name.
-
Choose Schema Key or Function as the mapping type.
-
Select the corresponding Field Name from the integration.
-
Review the Sample JSON Data to confirm the mapped value.
-
Click Edit Changes.
-
In the confirmation dialog, click Save Changes to confirm.
When configured, Zluri syncs the custom field value from the mapped integration attribute after the next sync.
This option does not appear for Applications, Contracts, Vendors, Departments, or Transactions.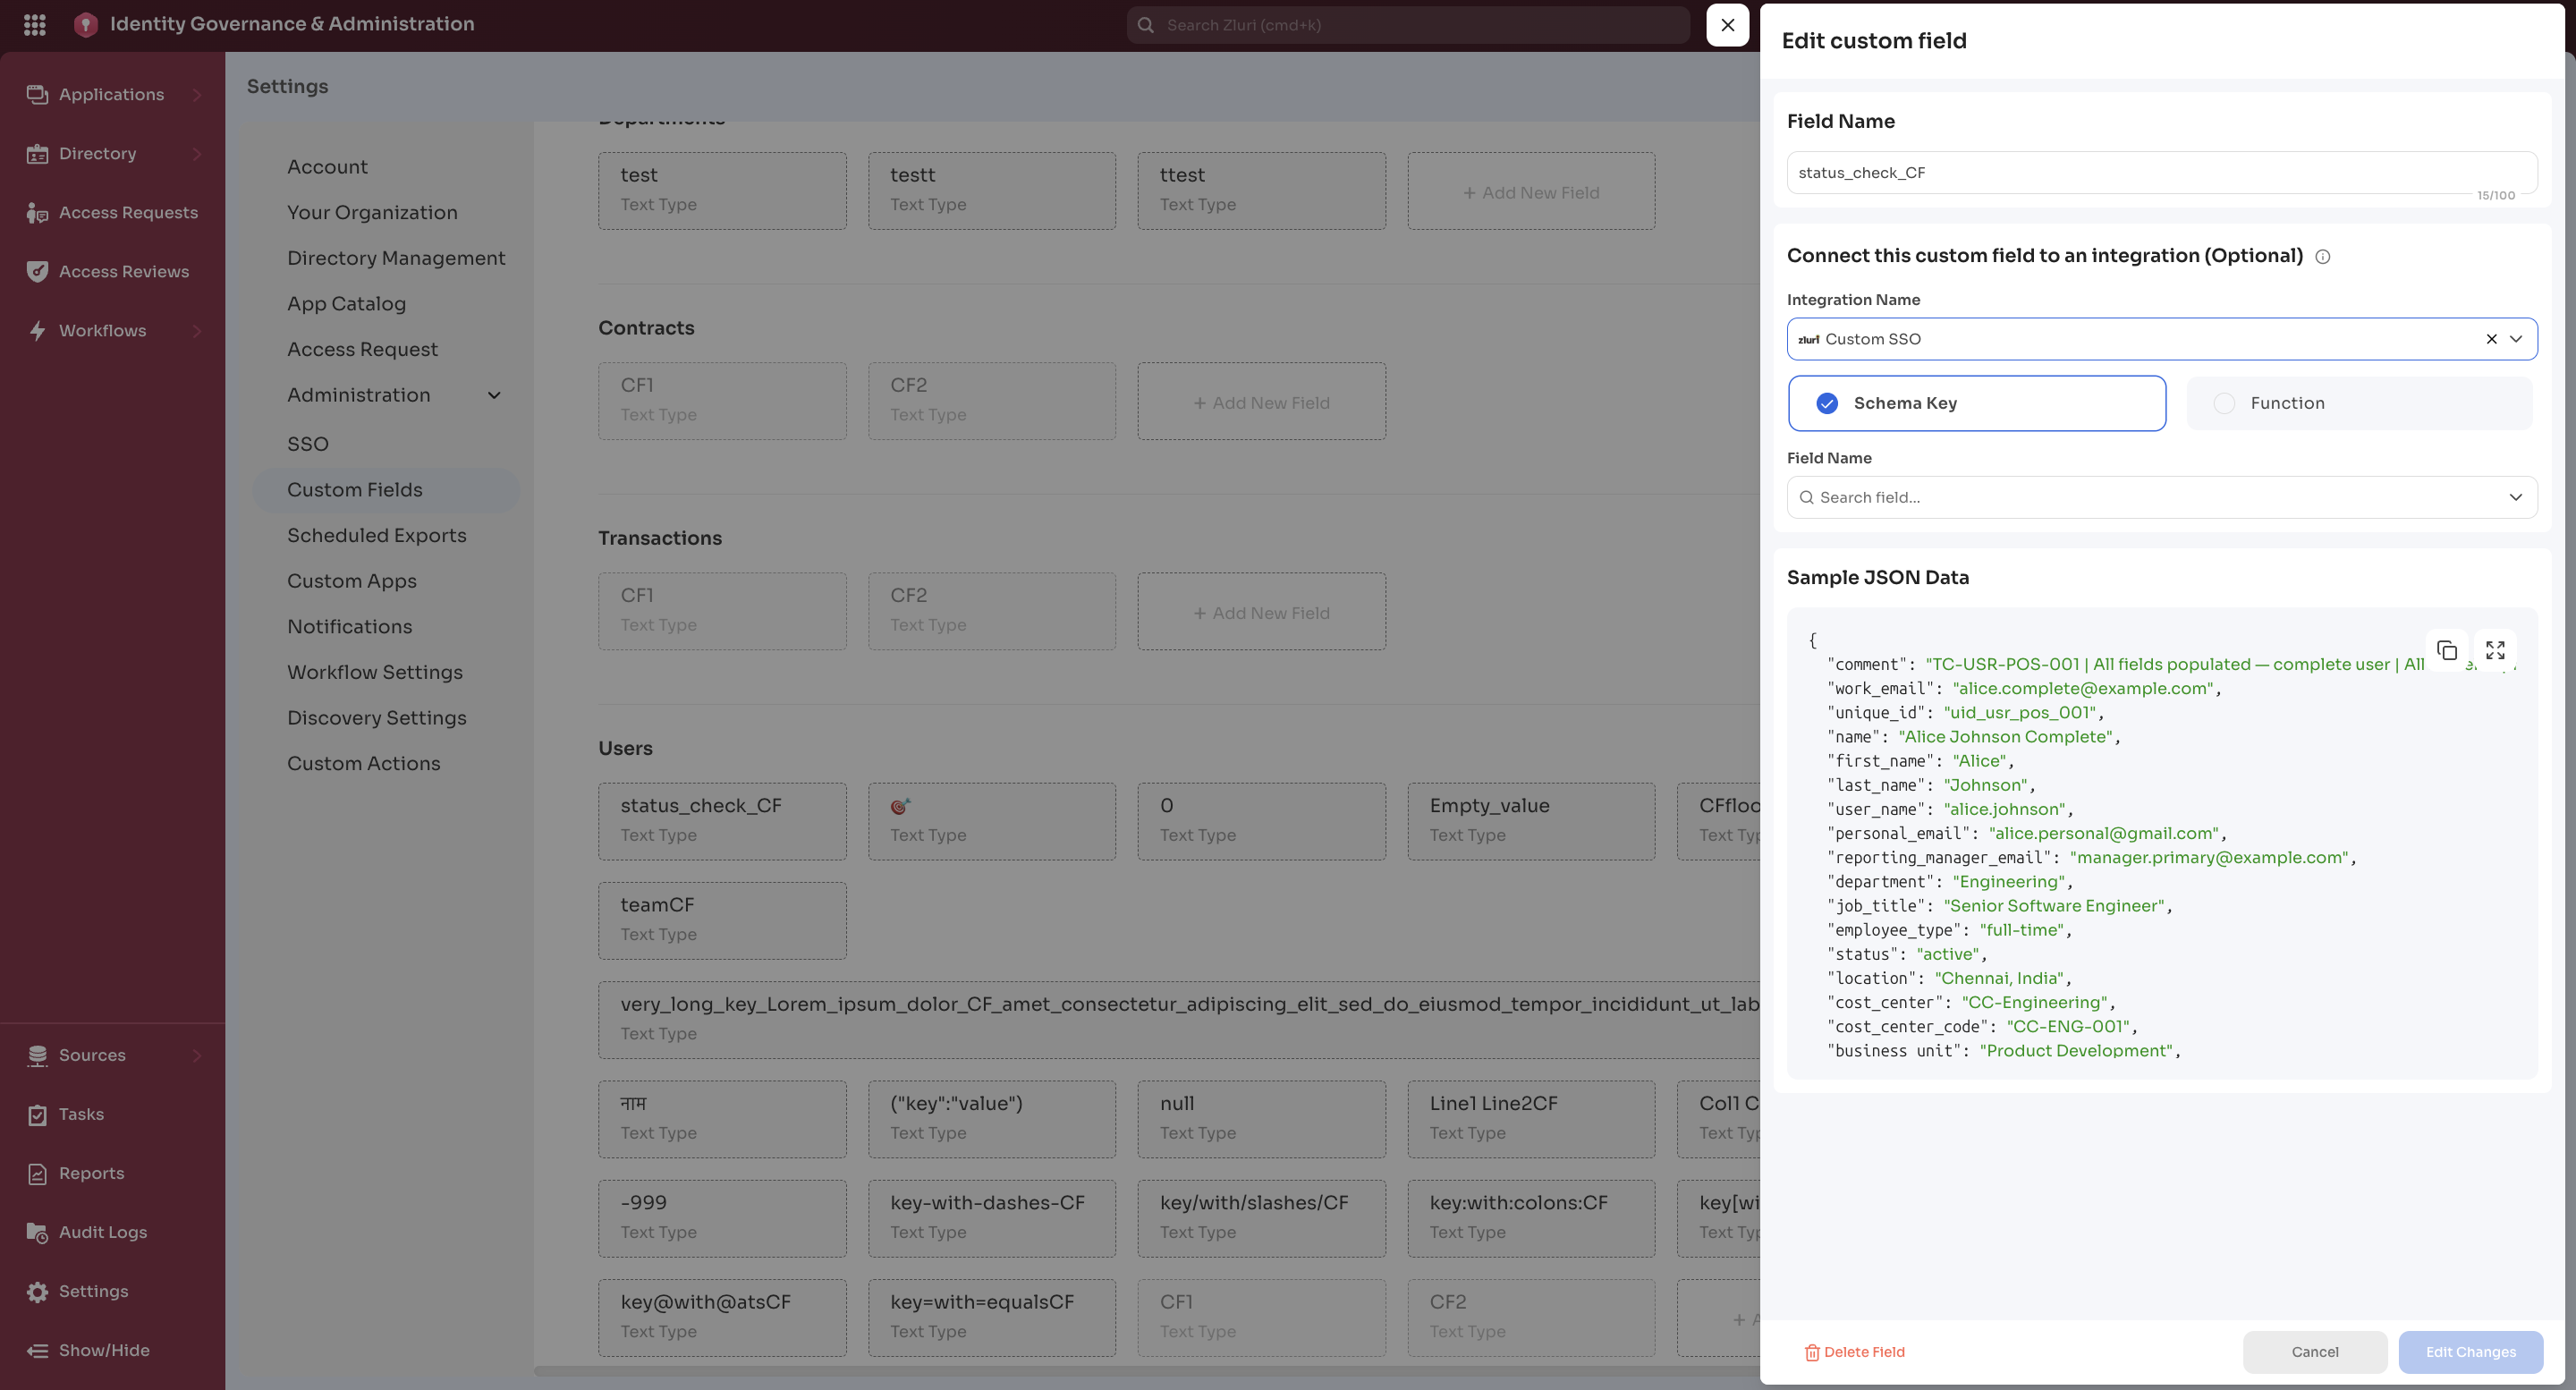
Where Custom Fields Appear
After creation, custom fields appear across the platform:
- As columns in list views
- As filters in tables
- In exports
- In workflows as conditions and variables
- In dashboards and insights, where applicable
Custom fields follow the visibility and access rules of their parent entity.
Updated 2 months ago