Notifications Customization
Overview
Zluri allows users to customize notification templates, branding, and sender identity.
By default, system-generated notifications may appear generic or originate from external sender domains. Customization ensures notifications are recognizable and aligned with the organization's communication standards.
What this feature enables
- Custom templates: define subject lines and email content for each existing notification. New notifications cannot be created; customization applies only to the notifications available in the Notification Library.
- Custom sender identity: send emails from the organization's domain
- Branded emails: apply logo, colors, header, and footer to all notifications
- Controlled delivery: manage how notifications are sent across available channels
Why customize notifications
Organizations may face:
- low engagement due to unfamiliar sender domains
- emails marked as spam
- inconsistent branding across communications
- notification fatigue from high-volume alerts
Customization helps:
- improve recognition and trust in notifications
- align notifications with internal branding policies
- improve response to workflow actions
What can be configured
Branding
Control the visual identity of all notification emails. For details, see Notification Branding.
Sender identity
| Setting | Description |
|---|---|
| Sender name | Display name shown in the email "From" field (required) |
| Sender email | Email address used to send notifications (required) |
| Reply-to email | Address used for responses |
Notification templates
| Element | Description |
|---|---|
| Subject | Define how the email appears in the inbox, with support for dynamic tokens |
| Email body | Edit content using a block-based editor with Text, Heading, Divider, and Spacer blocks |
| Placeholders | Insert dynamic values such as {{task_id}}, {{app_name}}, or {USER_NAME} directly in the subject or body. For date formatting options, see Date Formatting in Notification Templates. |
| Styles | Adjust margin, typography, color, text alignment, and background color for any block |
| Test notification | Send a test email to your inbox before saving changes |
Delivery settings
Control how notifications are delivered to users.
Channels:
- Slack
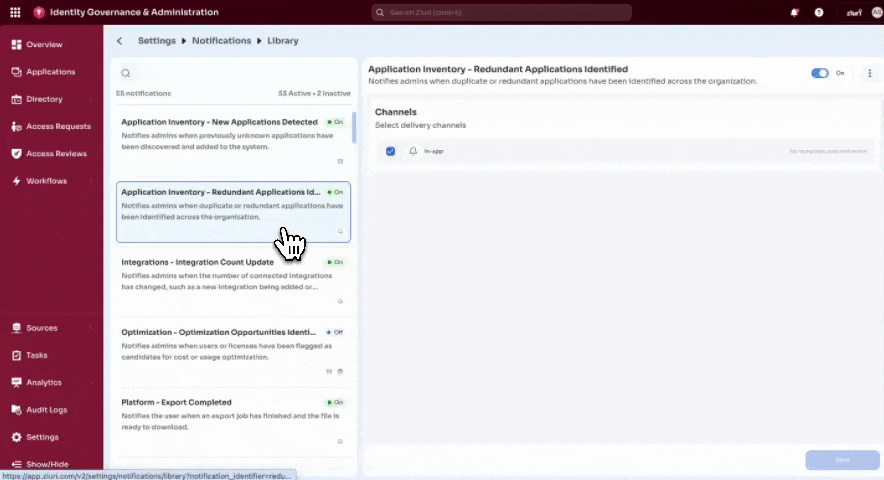
Step 1: Open notification settings
-
Go to Settings → Notifications
-
Click Manage Notifications under the Notification Library section
The Notification Library opens as a two-panel view. The left panel lists all notifications grouped by category, with a count showing how many are active or inactive. The right panel shows the detail and settings for the selected notification.
For the full list of notification categories and types, see Alerts & Notifications.
Step 2: Select and configure a notification
-
Select a notification from the left panel. The right panel shows its name, description, and current status.
-
Use the toggle at the top right of the detail panel to turn the notification on or off
-
Under Channels, check the box next to Email to enable email delivery
-
Click Save at the bottom right to apply changes
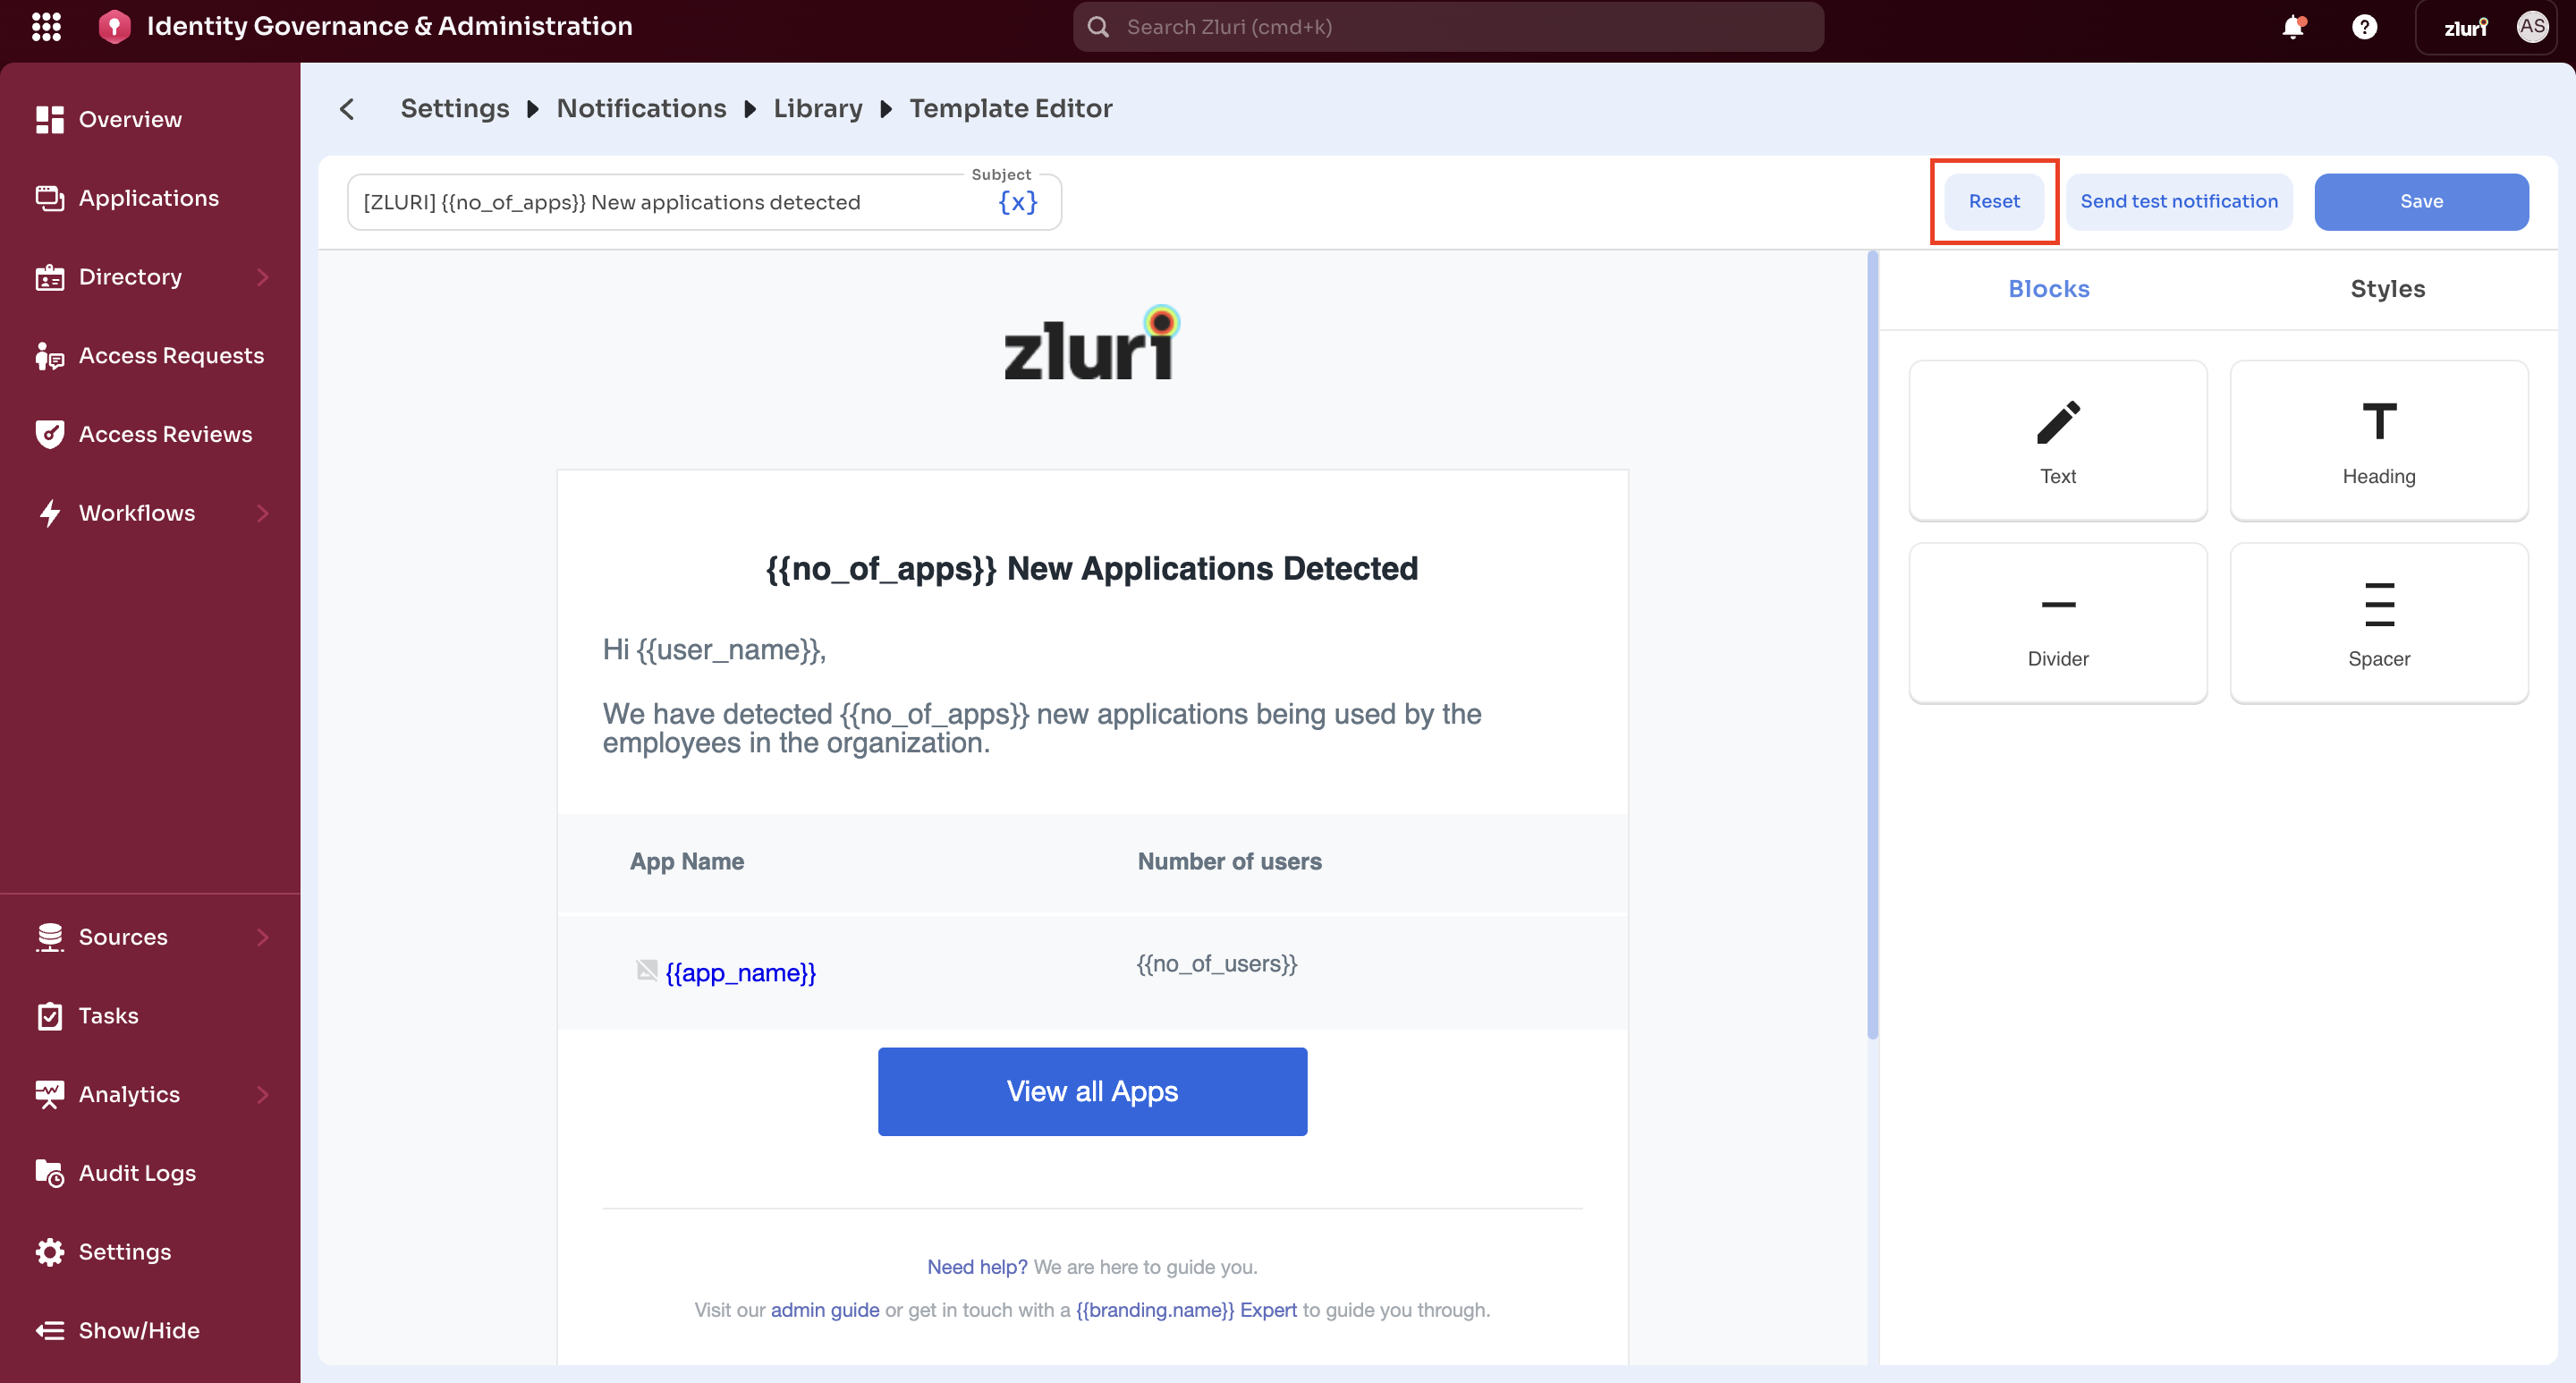
Step 3: Edit notification template
-
Under Channels, click Edit Template next to the Email channel. The Template Editor opens at Settings → Notifications → Library → Template Editor.
-
In the Subject field at the top, enter the subject line. Click the token button to insert dynamic placeholders such as
{{no_of_apps}}or{USER_NAME}. -
Edit the email body on the canvas. Placeholders appear inline and render dynamically in the sent email.
-
To add new content, select a block from the right panel:
- Text for paragraphs and body copy
- Heading for titles and section headers
- Divider to separate sections
- Spacer to add vertical space
-
Select a block on the canvas to edit it. Switch to the Styles tab to adjust:
- Margin
- Typography (font family, font size)
- Color
- Text align
- Background color
-
Click Send test notification to preview the email in your inbox
-
Click Save

Step 4: Reset notification template
-
In the Template Editor, click Reset at the top right
-
Review the confirmation dialog. Reset restores all settings for the notification, including channels, recipients, delivery mode, reminder rules, and template customizations. This action cannot be undone.
-
Click Reset Settings to confirm
Step 5: Configure branding
To configure logo, brand color, email header, footer, and footer links, see Notification Branding.
Step 6: Configure sender identity
- Go to Settings → Notifications → Email Configuration
- Under Sender Identity, enter:
- Sender Name — the display name recipients see (for example, IT Team). Required.
- Sender Email — the address notifications are sent from. Required.
- Reply to email — the address where replies are directed. Optional.
- Click Save
For details on DNS records and how email authentication works, see DNS-based Email Authentication: SPF, DKIM, and DMARC.
Best practices
Branding
- Use consistent logo and colors across all templates
- Avoid overly complex designs that affect readability
Content
- Keep messaging clear and action-oriented
- Use recognizable subject lines (for example, "Action Required: Access Review")
Sender identity
- Always configure a trusted domain to avoid spam filtering
- Use recognizable sender names (for example, "IT Team", "Security Team")
Example use cases
| Scenario | Configuration | Outcome |
|---|---|---|
| Access review notifications | custom domain and template | notifications are recognized and acted on |
| Budget alerts | targeted notification setup | relevant users receive alerts |
| Employee onboarding emails | branded templates and sender identity | notifications appear as internal communication |
| Workflow notifications | customized subject and content | clearer communication |
Error handling
| Scenario | What the user sees |
|---|---|
| Invalid logo format or file size | Validation error with supported formats (JPG, JPEG, PNG) and size limits |
| Domain verification fails | Error message indicating verification failed with option to retry |
| Empty subject or email body | Save or publish is blocked; missing fields are highlighted |
| Channel not configured | Channel option is disabled with a message to contact the admin |
| Unauthorized action | Action is blocked |
| Malformed token syntax | Zluri flags the syntax error. Token names are not validated against a supported list. |
| Reset to default | Configuration is restored to default; this action cannot be undone |
Permissions and access control
| Role | Access | Notes |
|---|---|---|
| Owner / Admin (with permission) | Yes — full access | Can create, edit, and publish all settings |
| End user / Employee | Personal preferences only | Within admin-defined limits |
| Unauthorized role | No | Action blocked; RBAC violation alert shown |
Key outcome
With notification customization:
- Employees recognize and trust communications
- Critical workflows (access reviews, approvals) see higher completion rates
- Organizations maintain compliance and audit traceability