Understanding the Workflow Builder
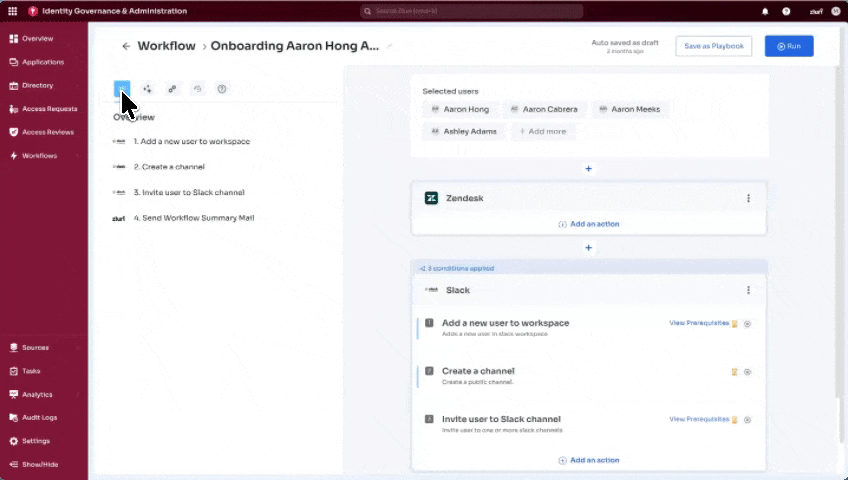
Creating new workflows and editing existing ones uses the same workflow builder interface. This interface consists of two main components: the control panel housing the primary workflow configuration tools and menus, and the workflow canvas for visually building and organizing workflow steps. These components enable efficient workflow configuration for the organization.
A workflow configuration page has two sections:
A. Control Panel
The control panel contains five tabs for managing workflow configuration.
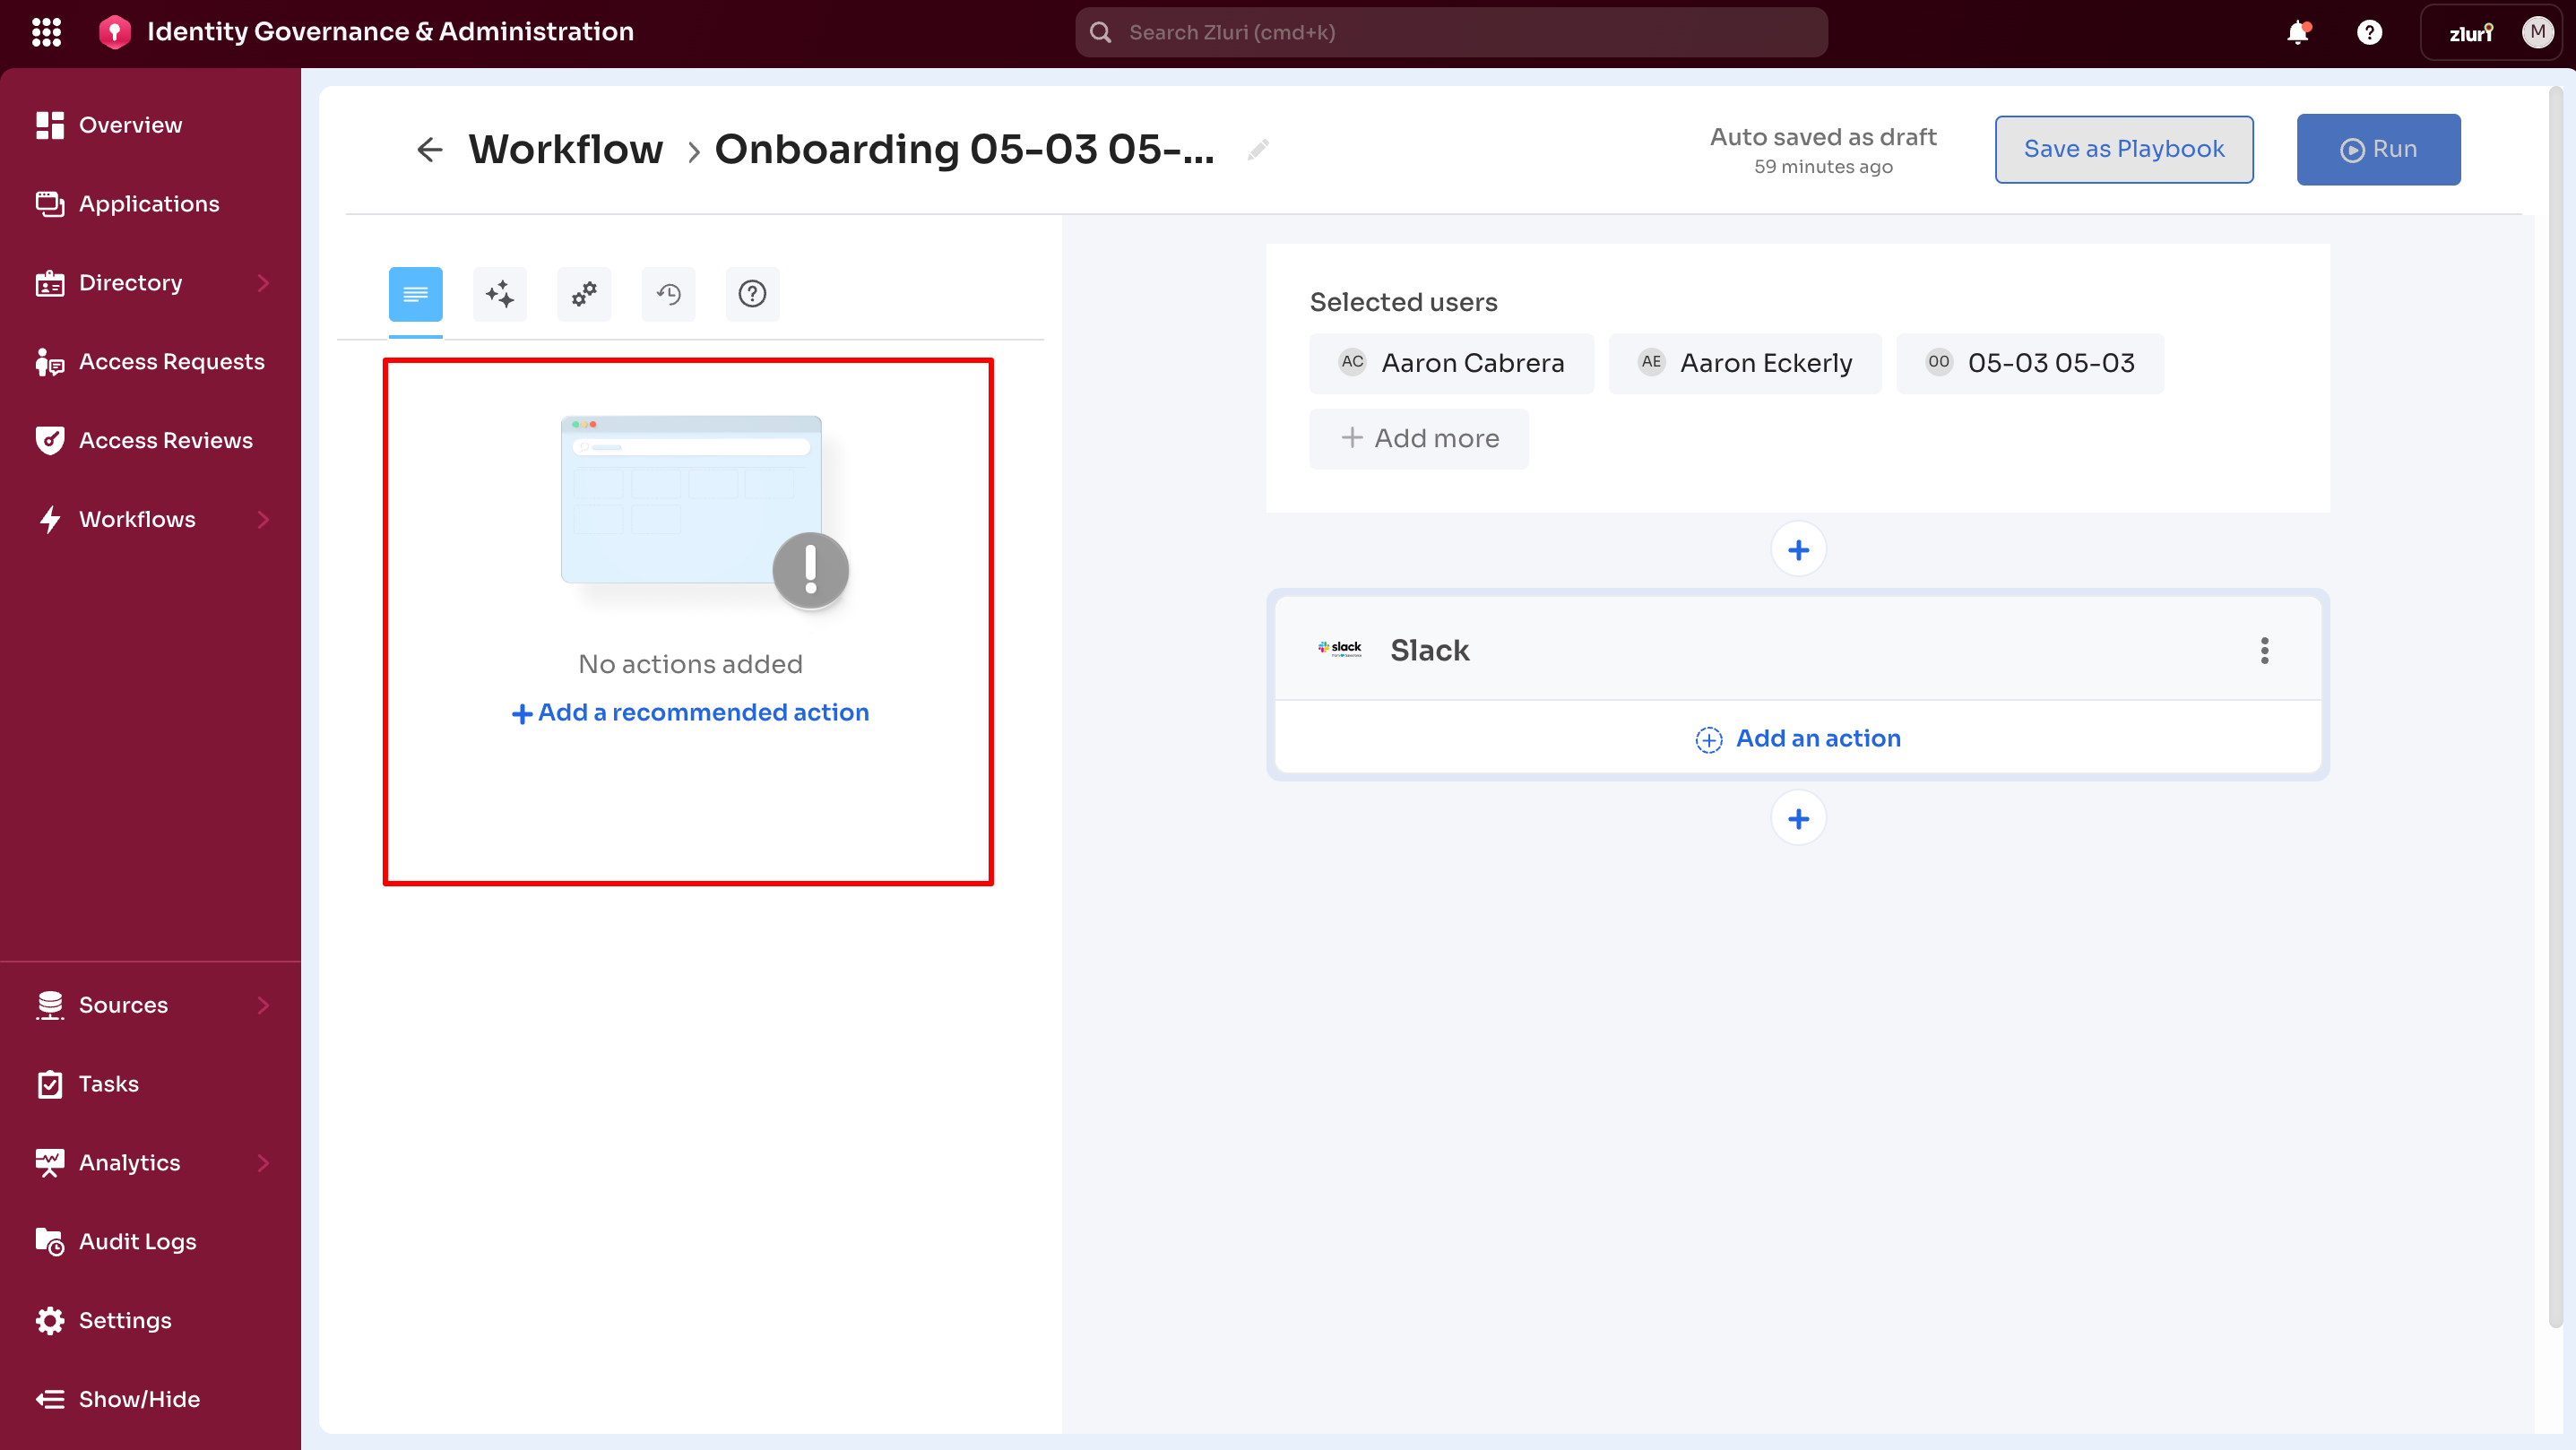
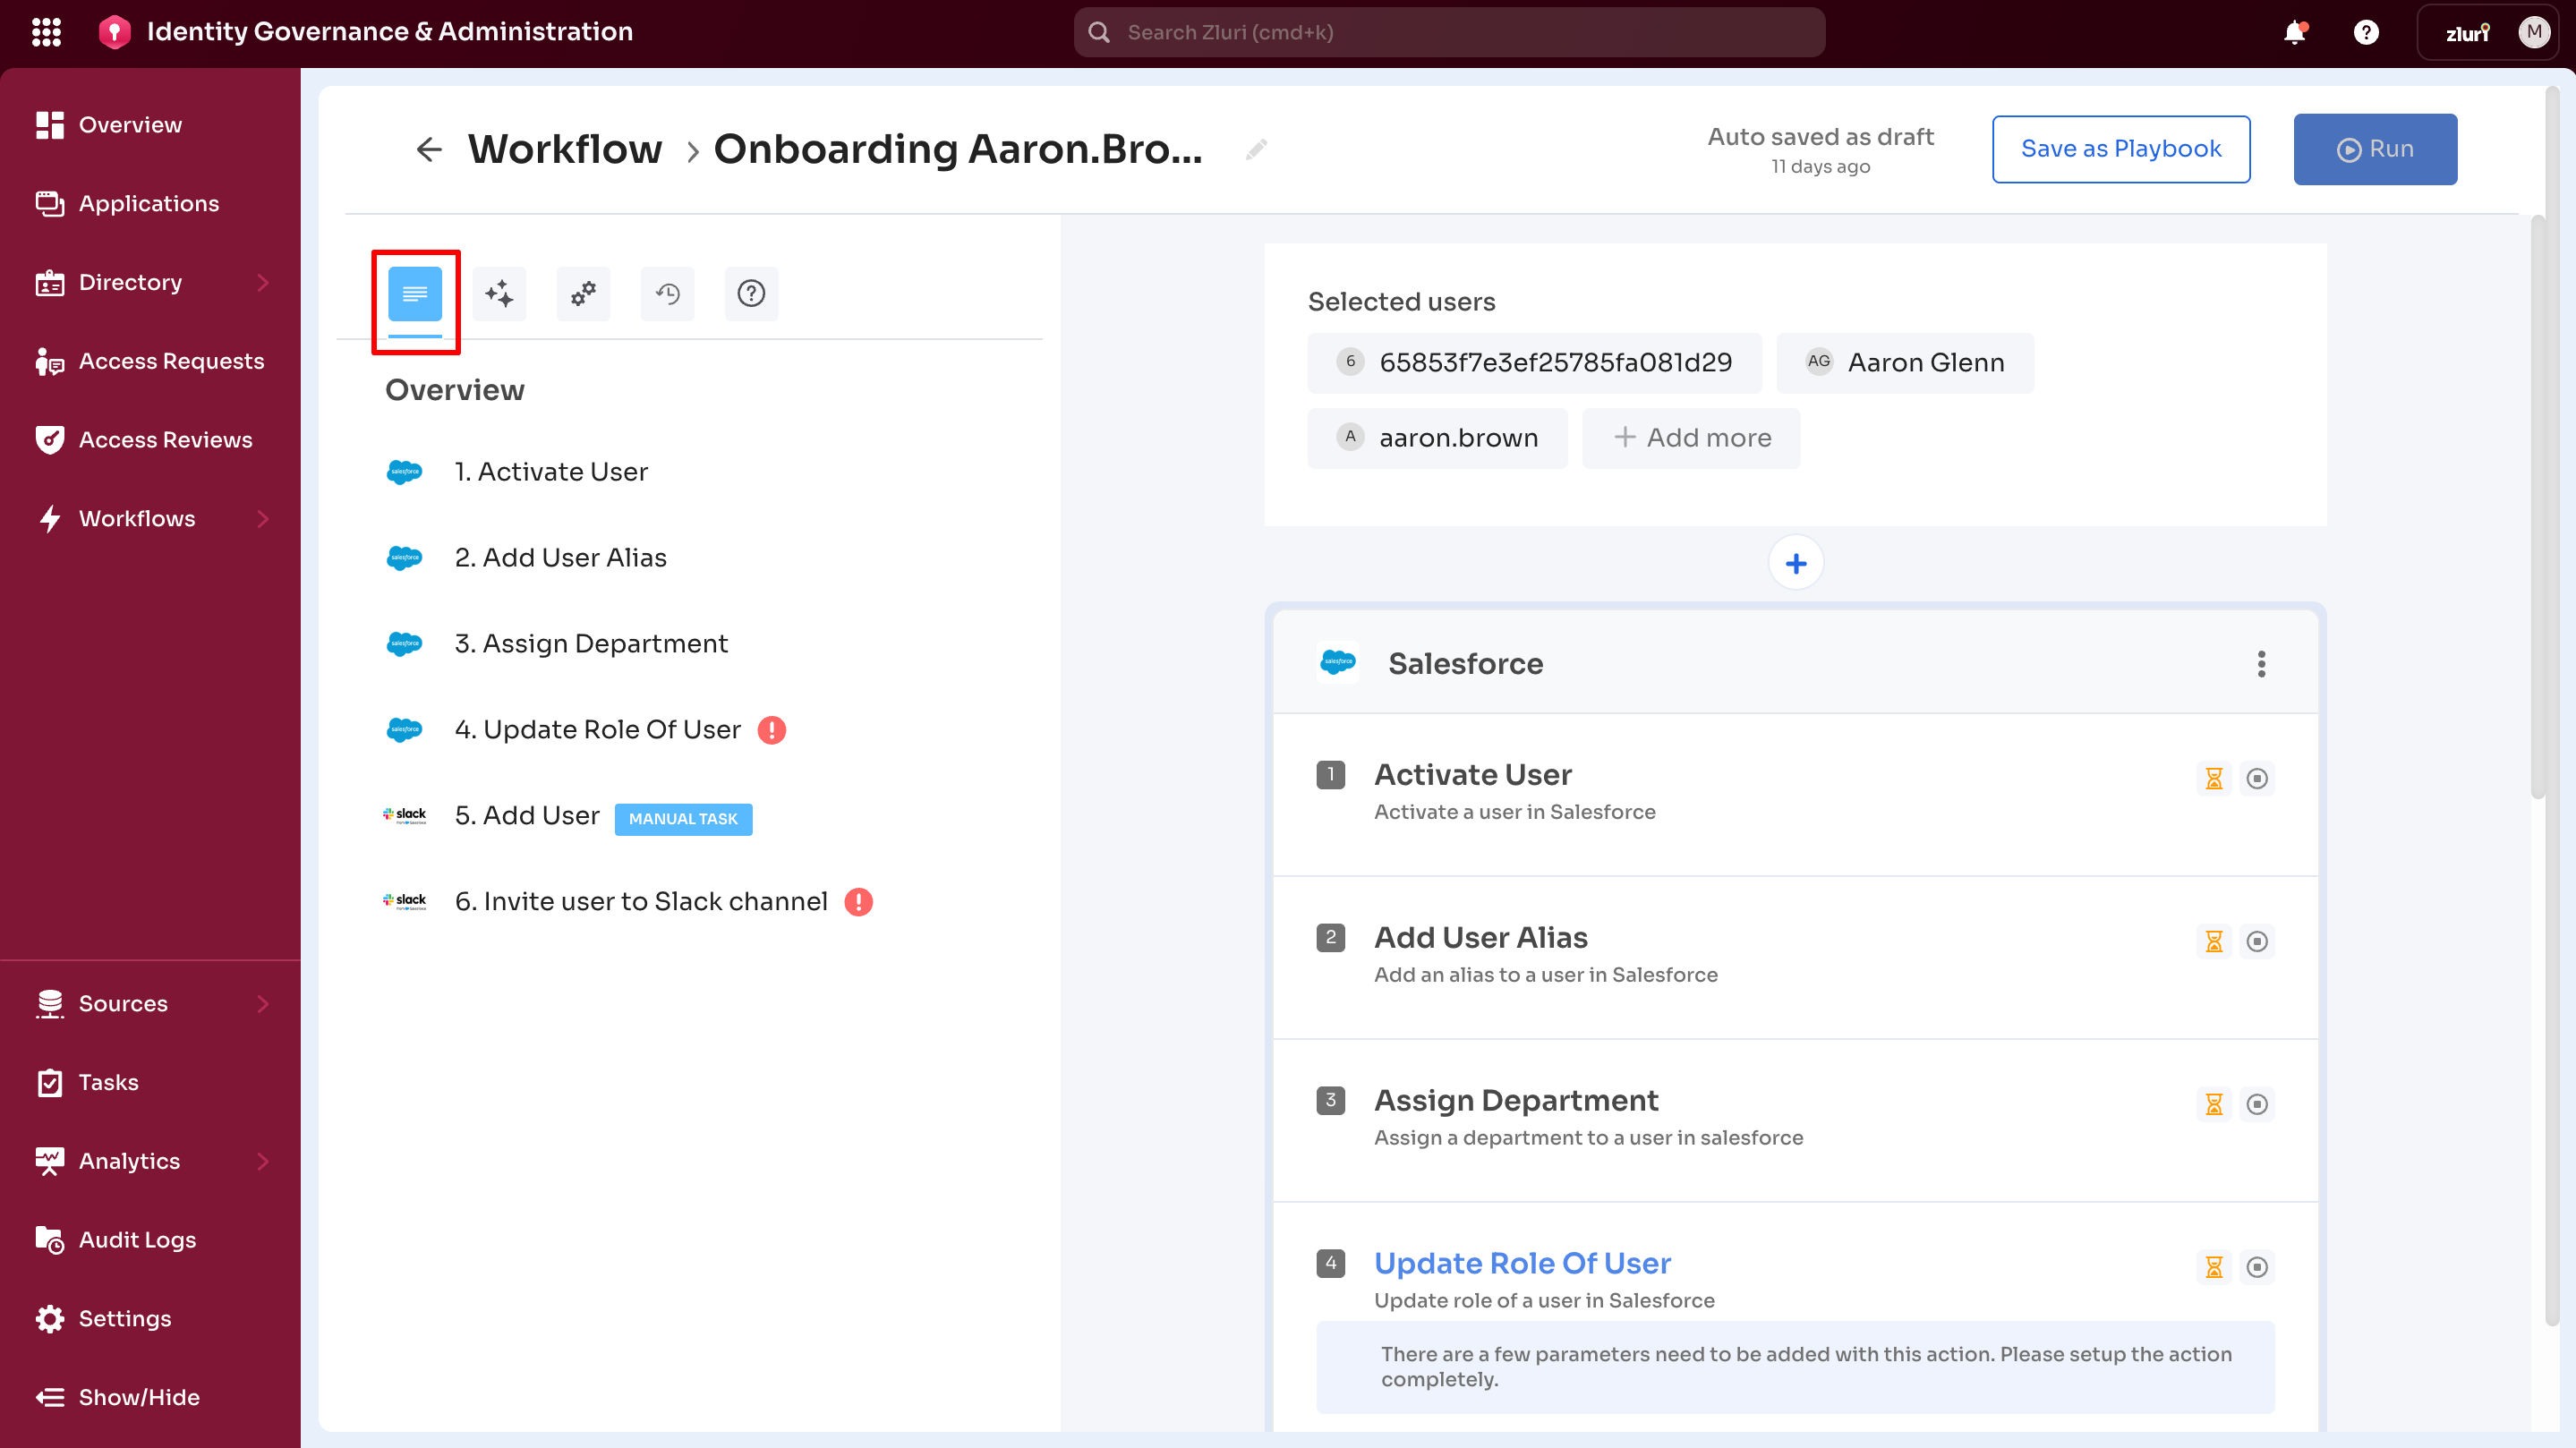
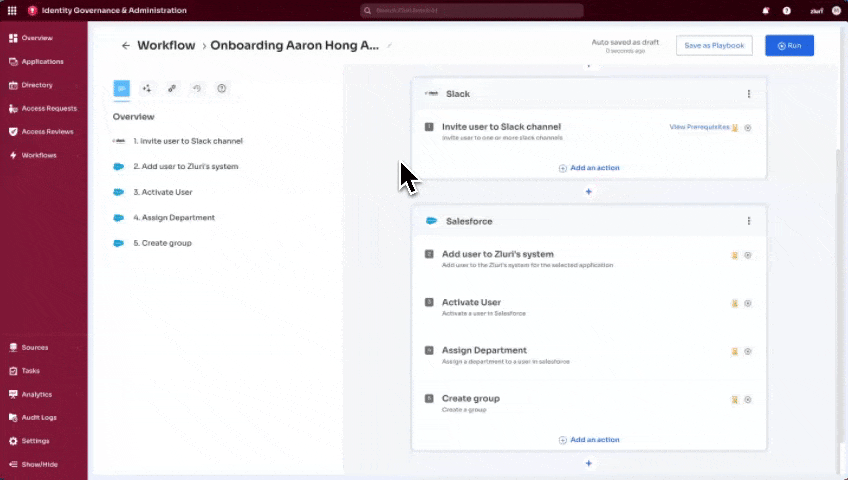
1. Overview Tab
Displays all workflow actions at a glance.
Default state:
- Empty at workflow start
- Contains a single + Add a recommended action option
- Selecting this option navigates to the Recommended tab
After adding applications:
- Shows complete workflow structure
- Lists all applications and configured actions
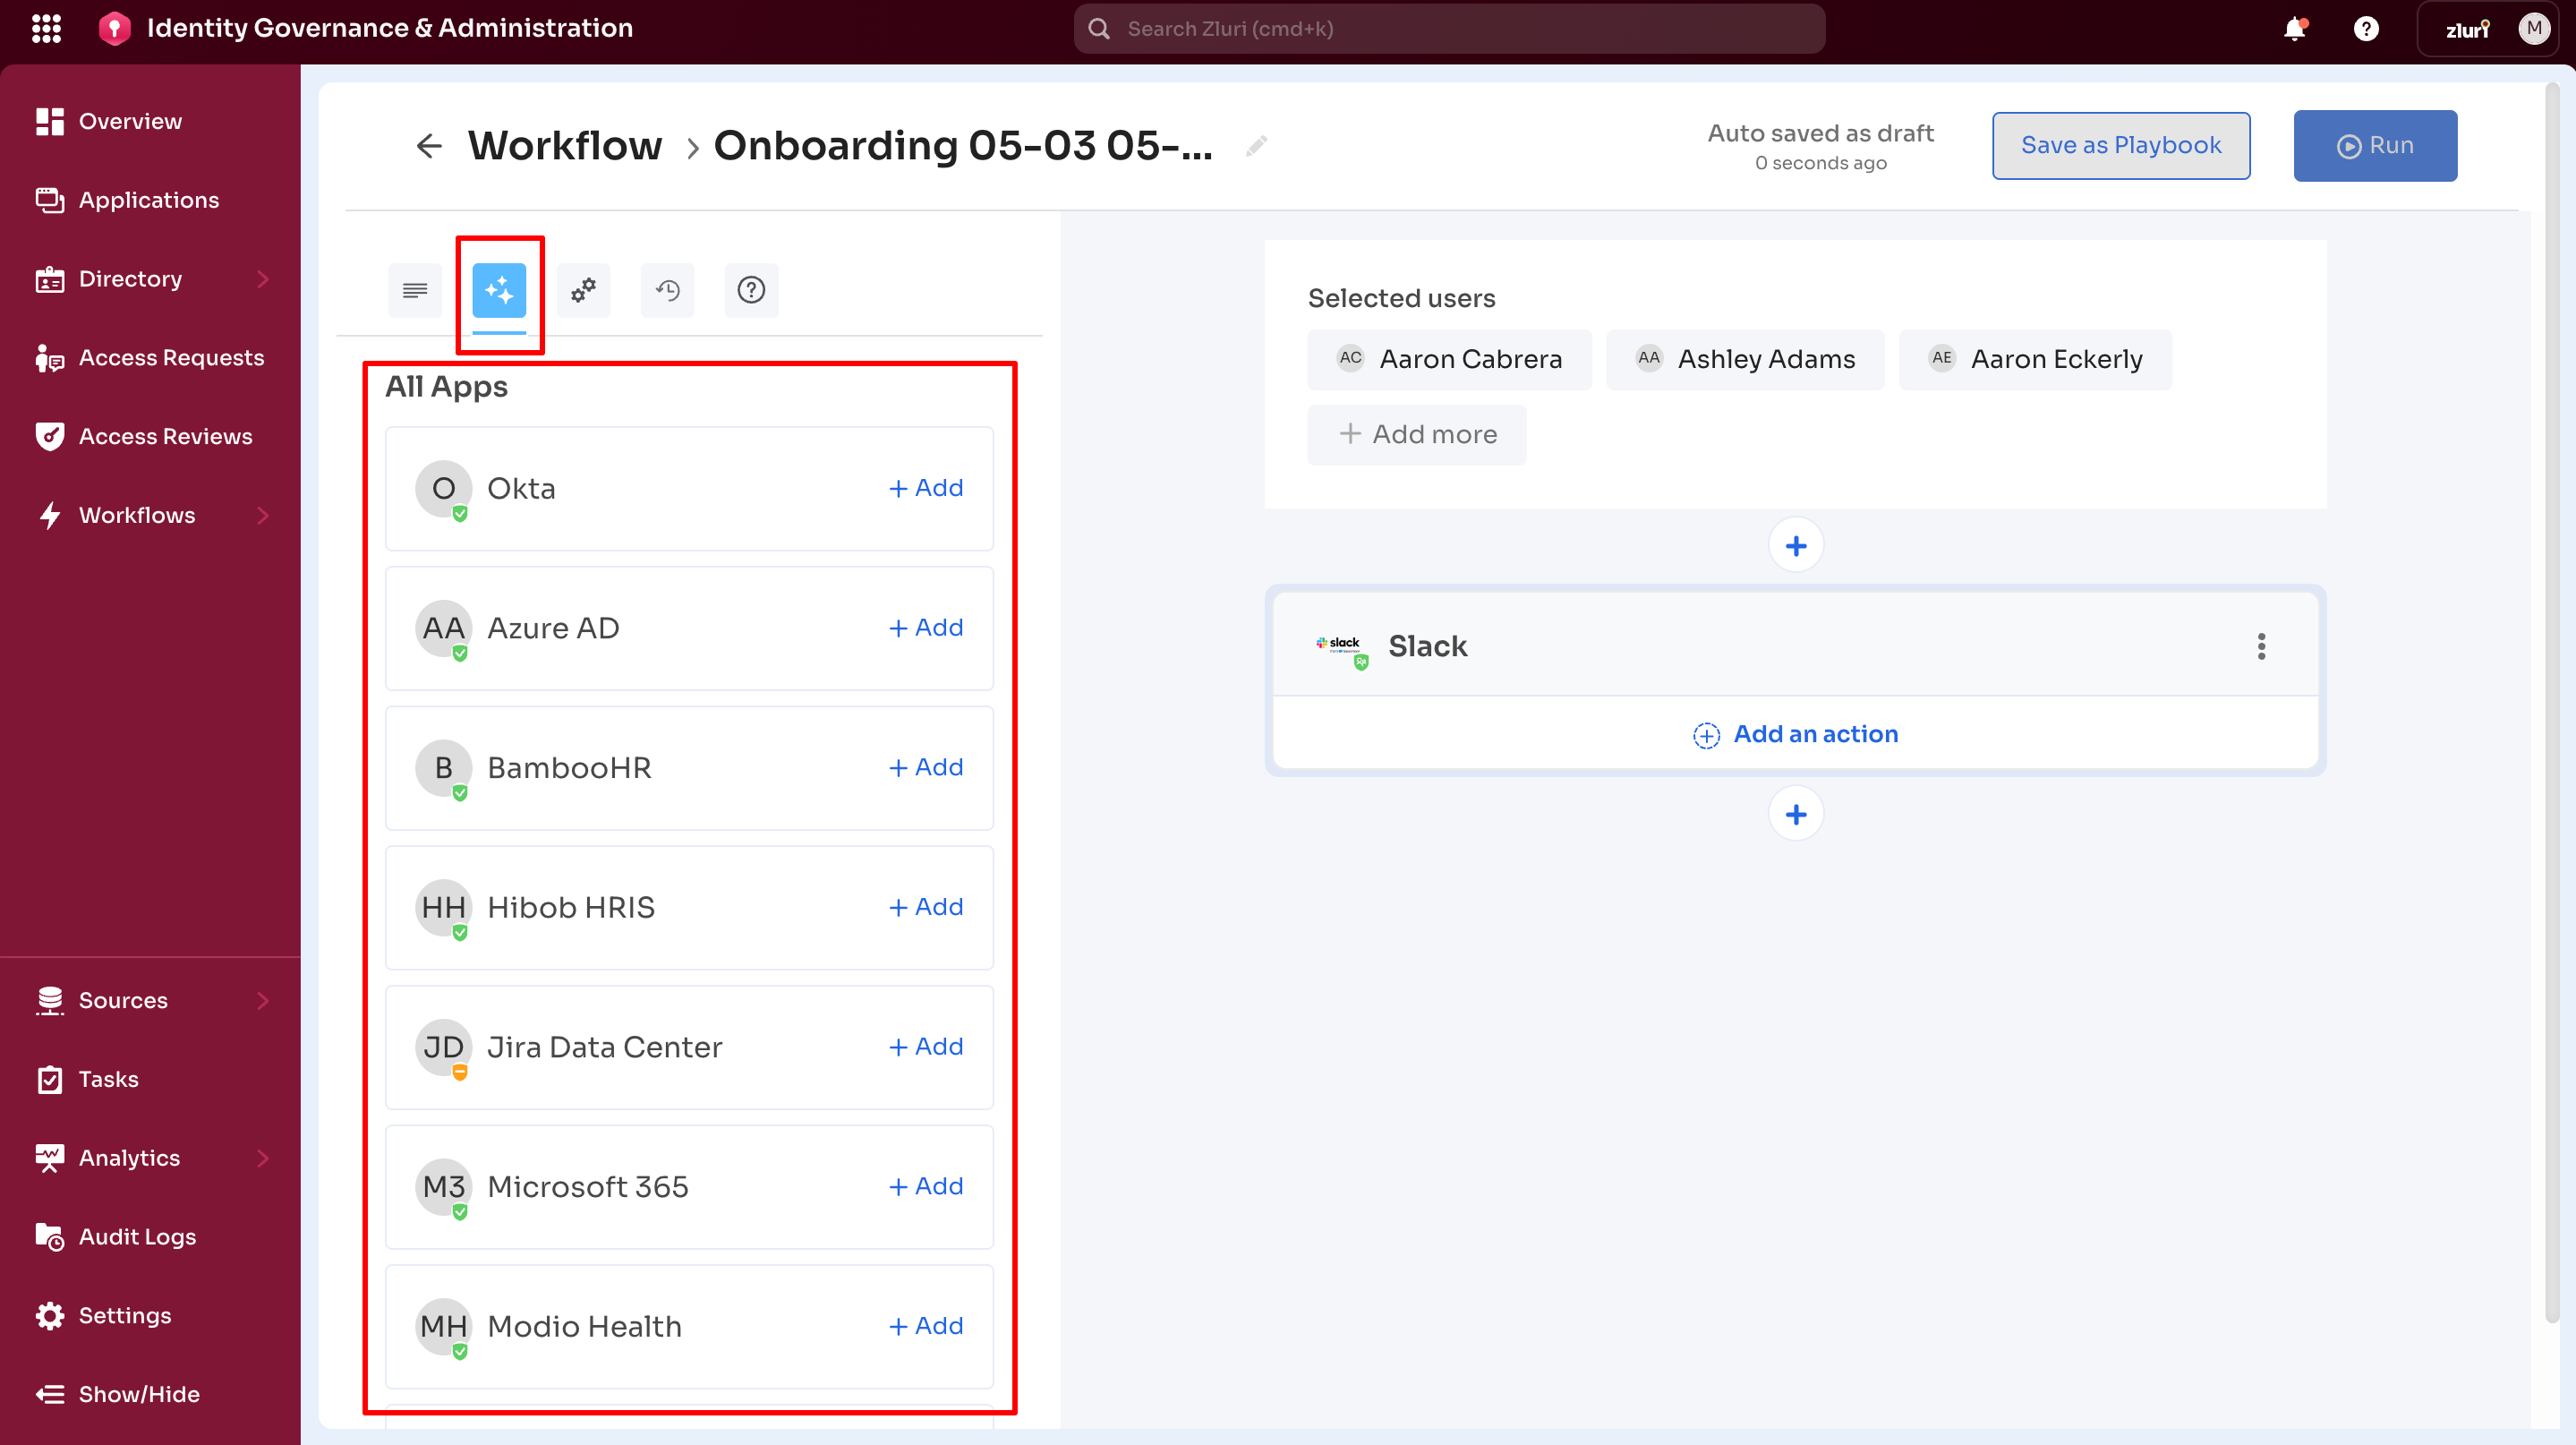
2. Recommended Tab
Presents recommendations updating dynamically based on workflow configuration.
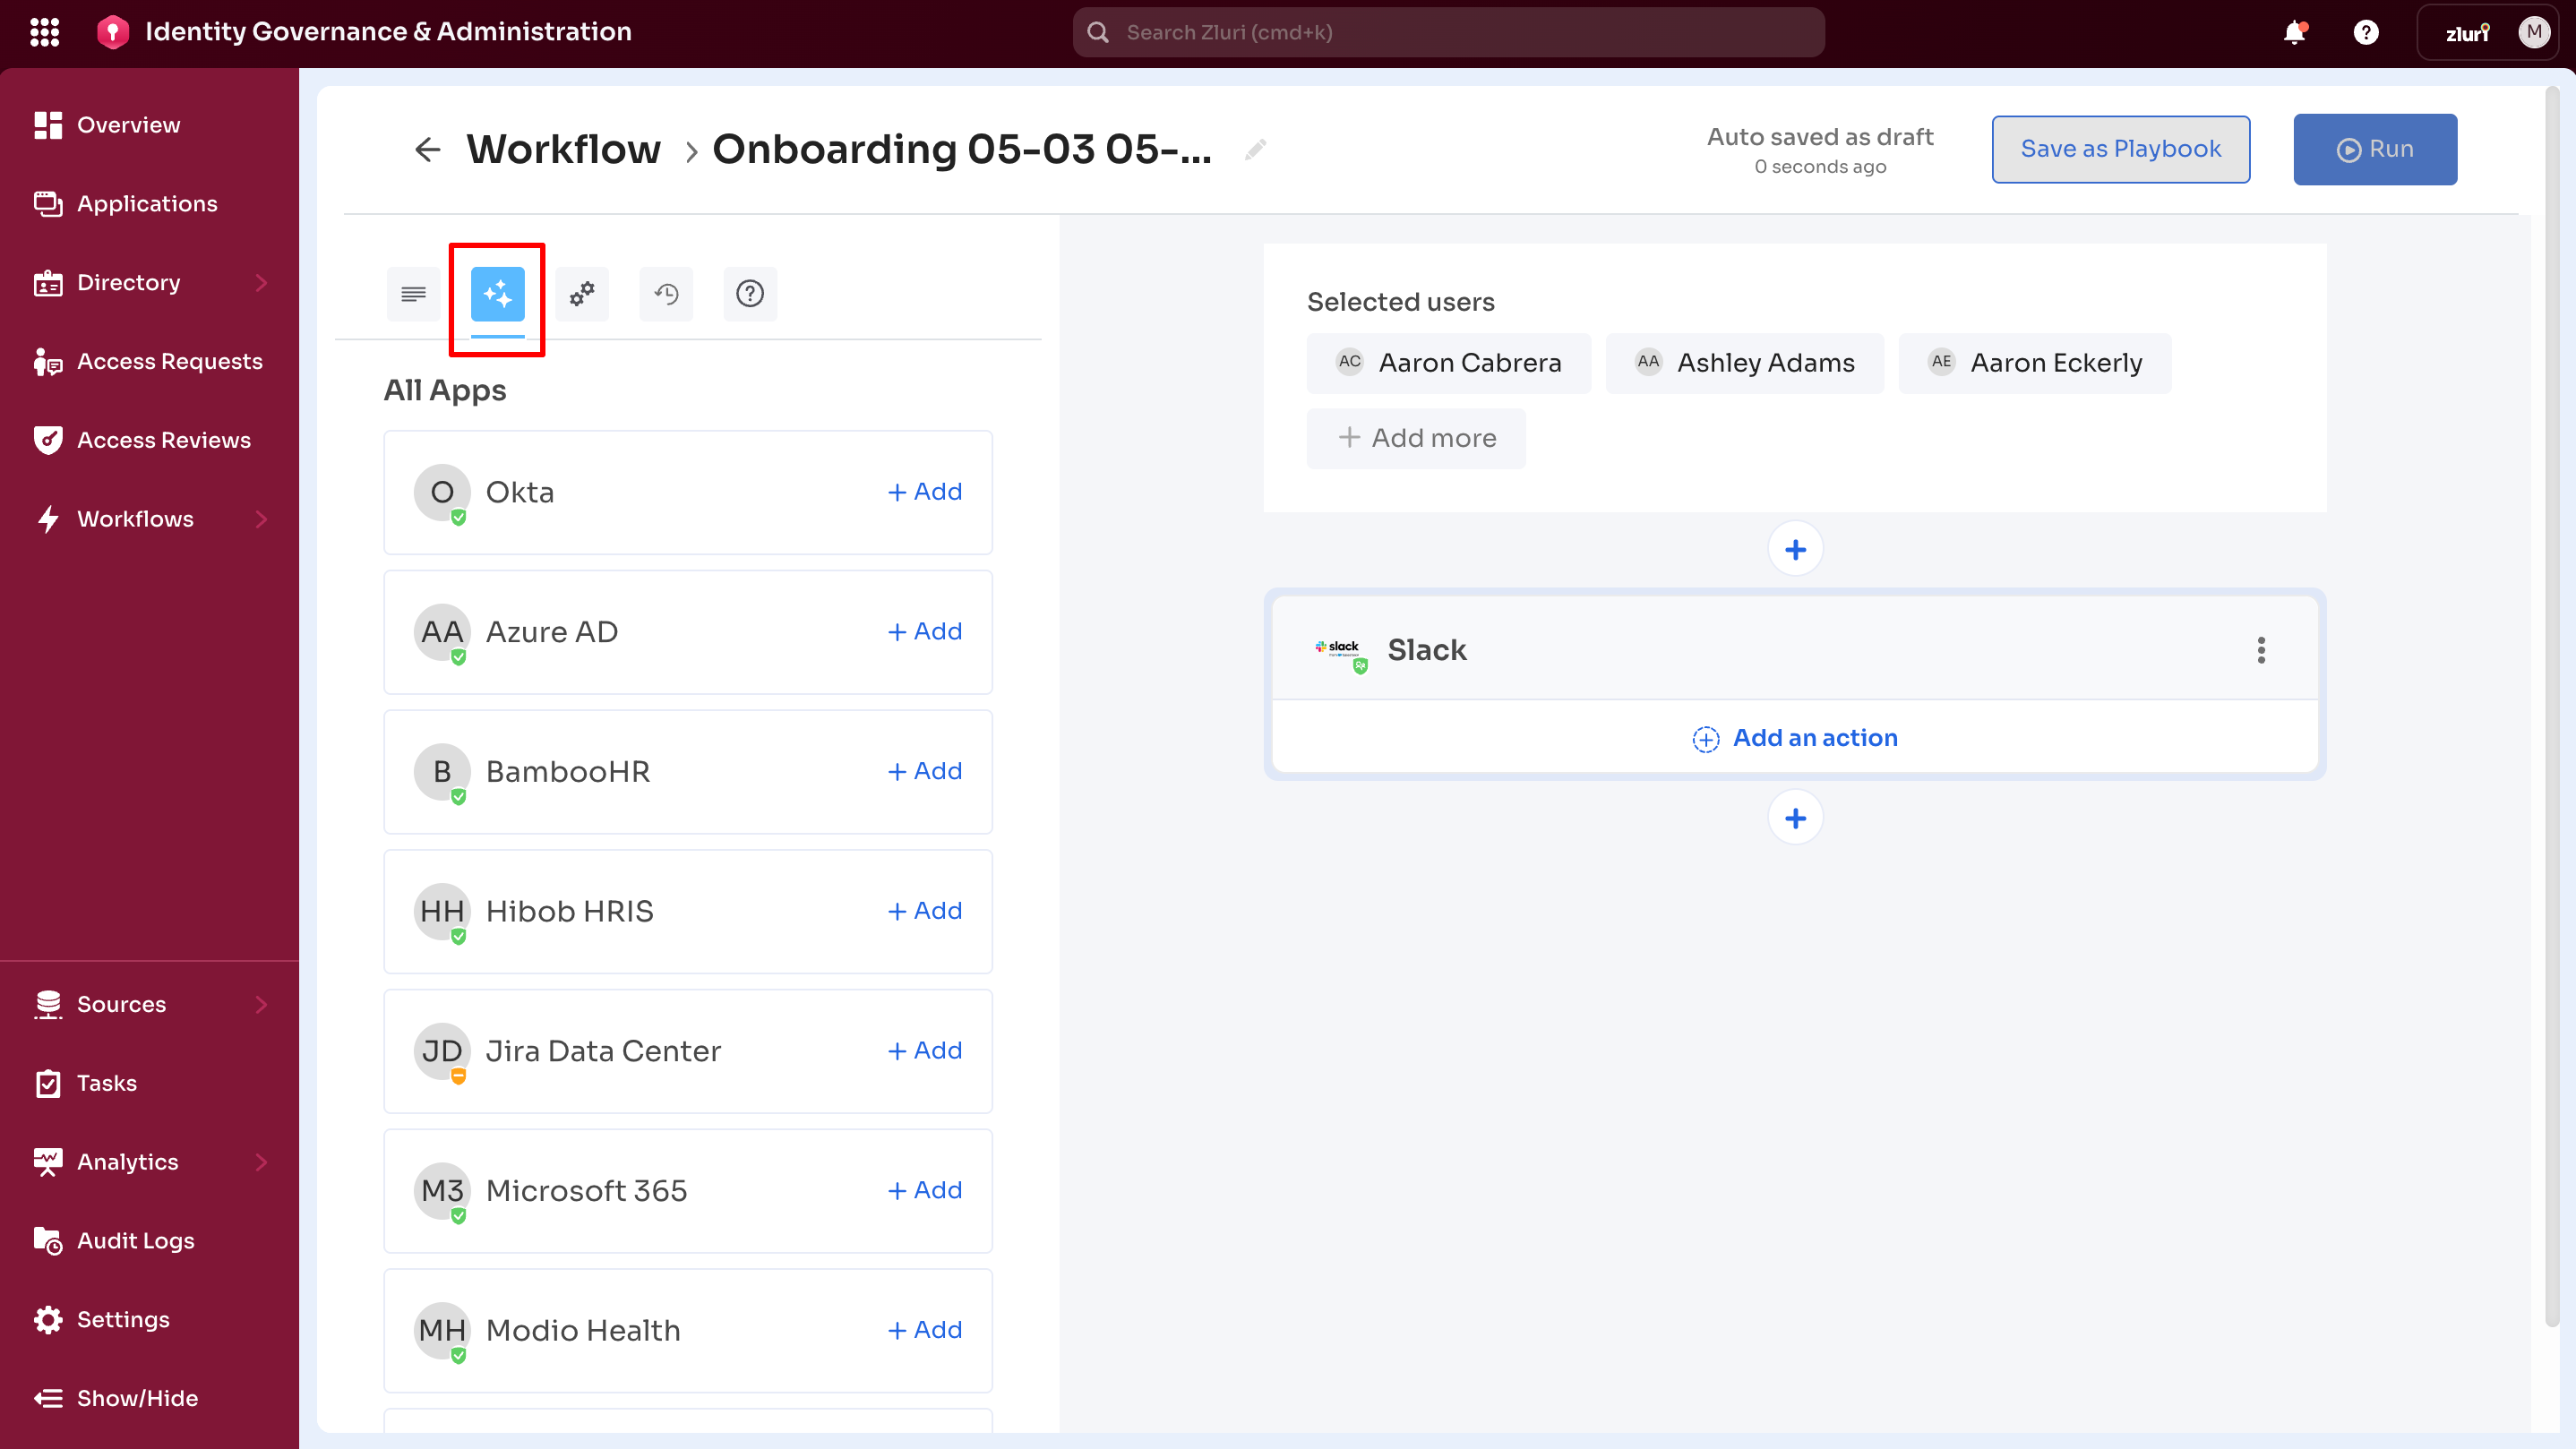
Before adding applications:
Displays a list of recommended applications based on the selected user's onboarding details. Each application shows:
- Application name
- + Add option to add it to the workflow
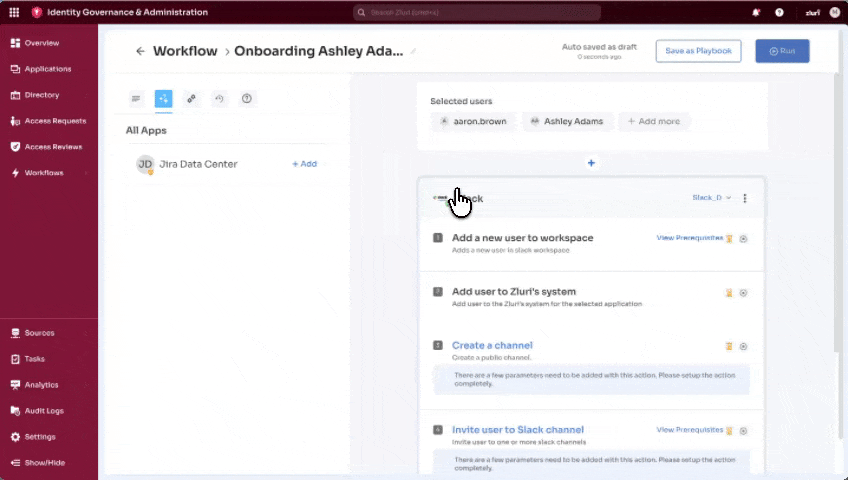
After adding an application:
The Recommended tab switches from showing applications to showing actions for the selected application.
Example: Adding the Slack application to the workflow and selecting it on the canvas displays the following on the Recommended tab:
- Action name (For example, "Add a new user to workspace", "Create a channel", "Invite users to Slack channel")
- Action status: ✅ Added indicates this action is already in the workflow
- + Add option for actions not yet added
Dynamic updates:
Selecting a different application on the workflow canvas updates the recommended actions automatically.
Example: Adding the Salesforce application after the Slack application, selecting the Salesforce application displays Salesforce-specific recommendations (For example, "Activate User", "Create Group"), each with its own ✅ Added status if already configured.
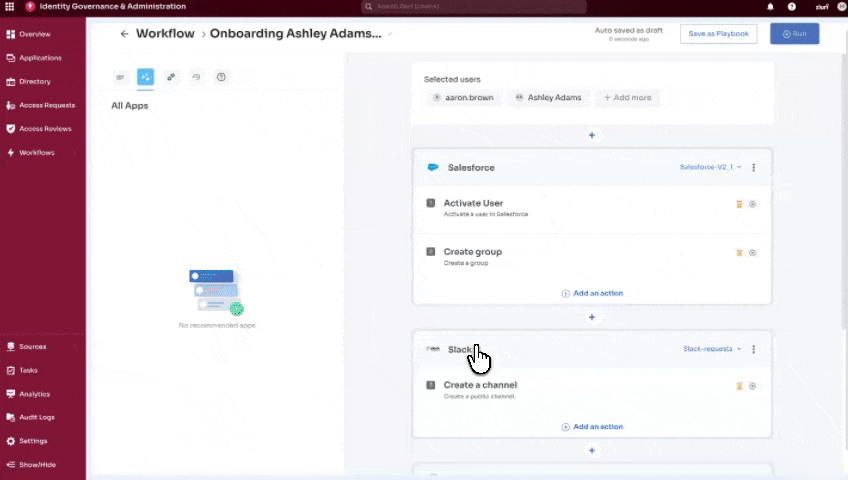
Note: The same action can be added multiple times to an application within a workflow using identical or different parameter configurations.
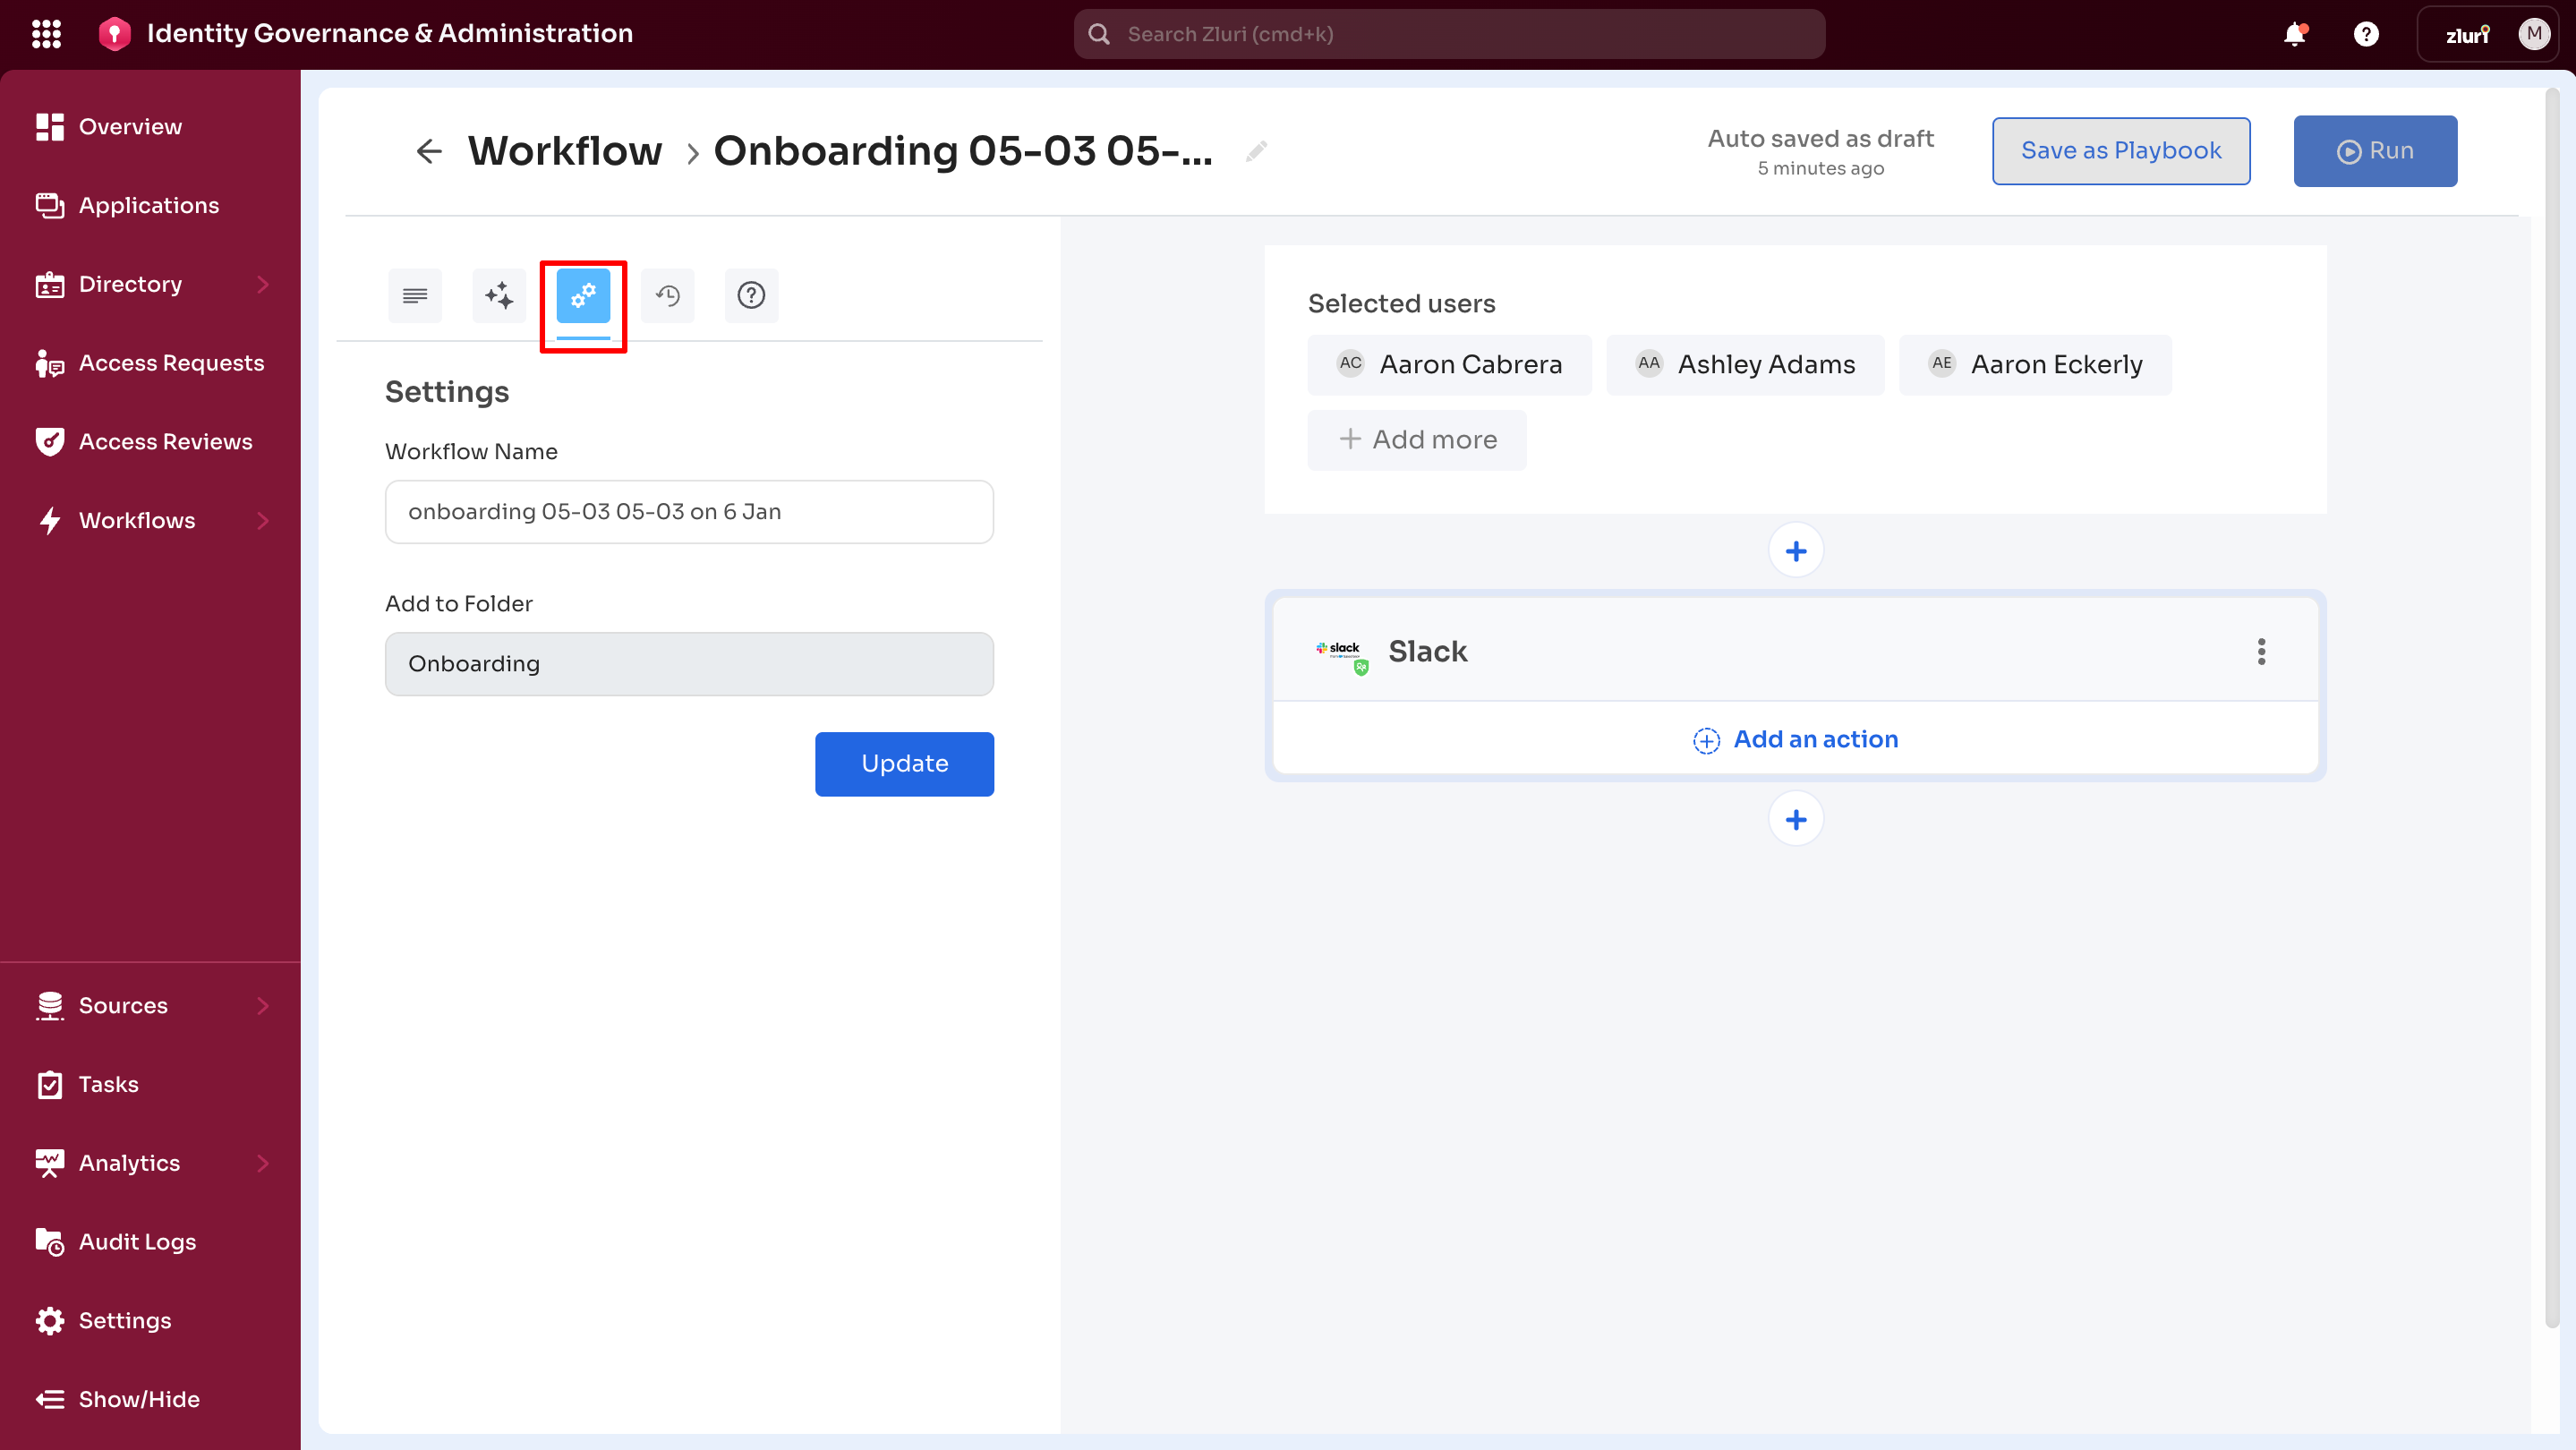
3. Settings Tab
- Workflow Name - Modify the workflow name
- Update option - Save name changes
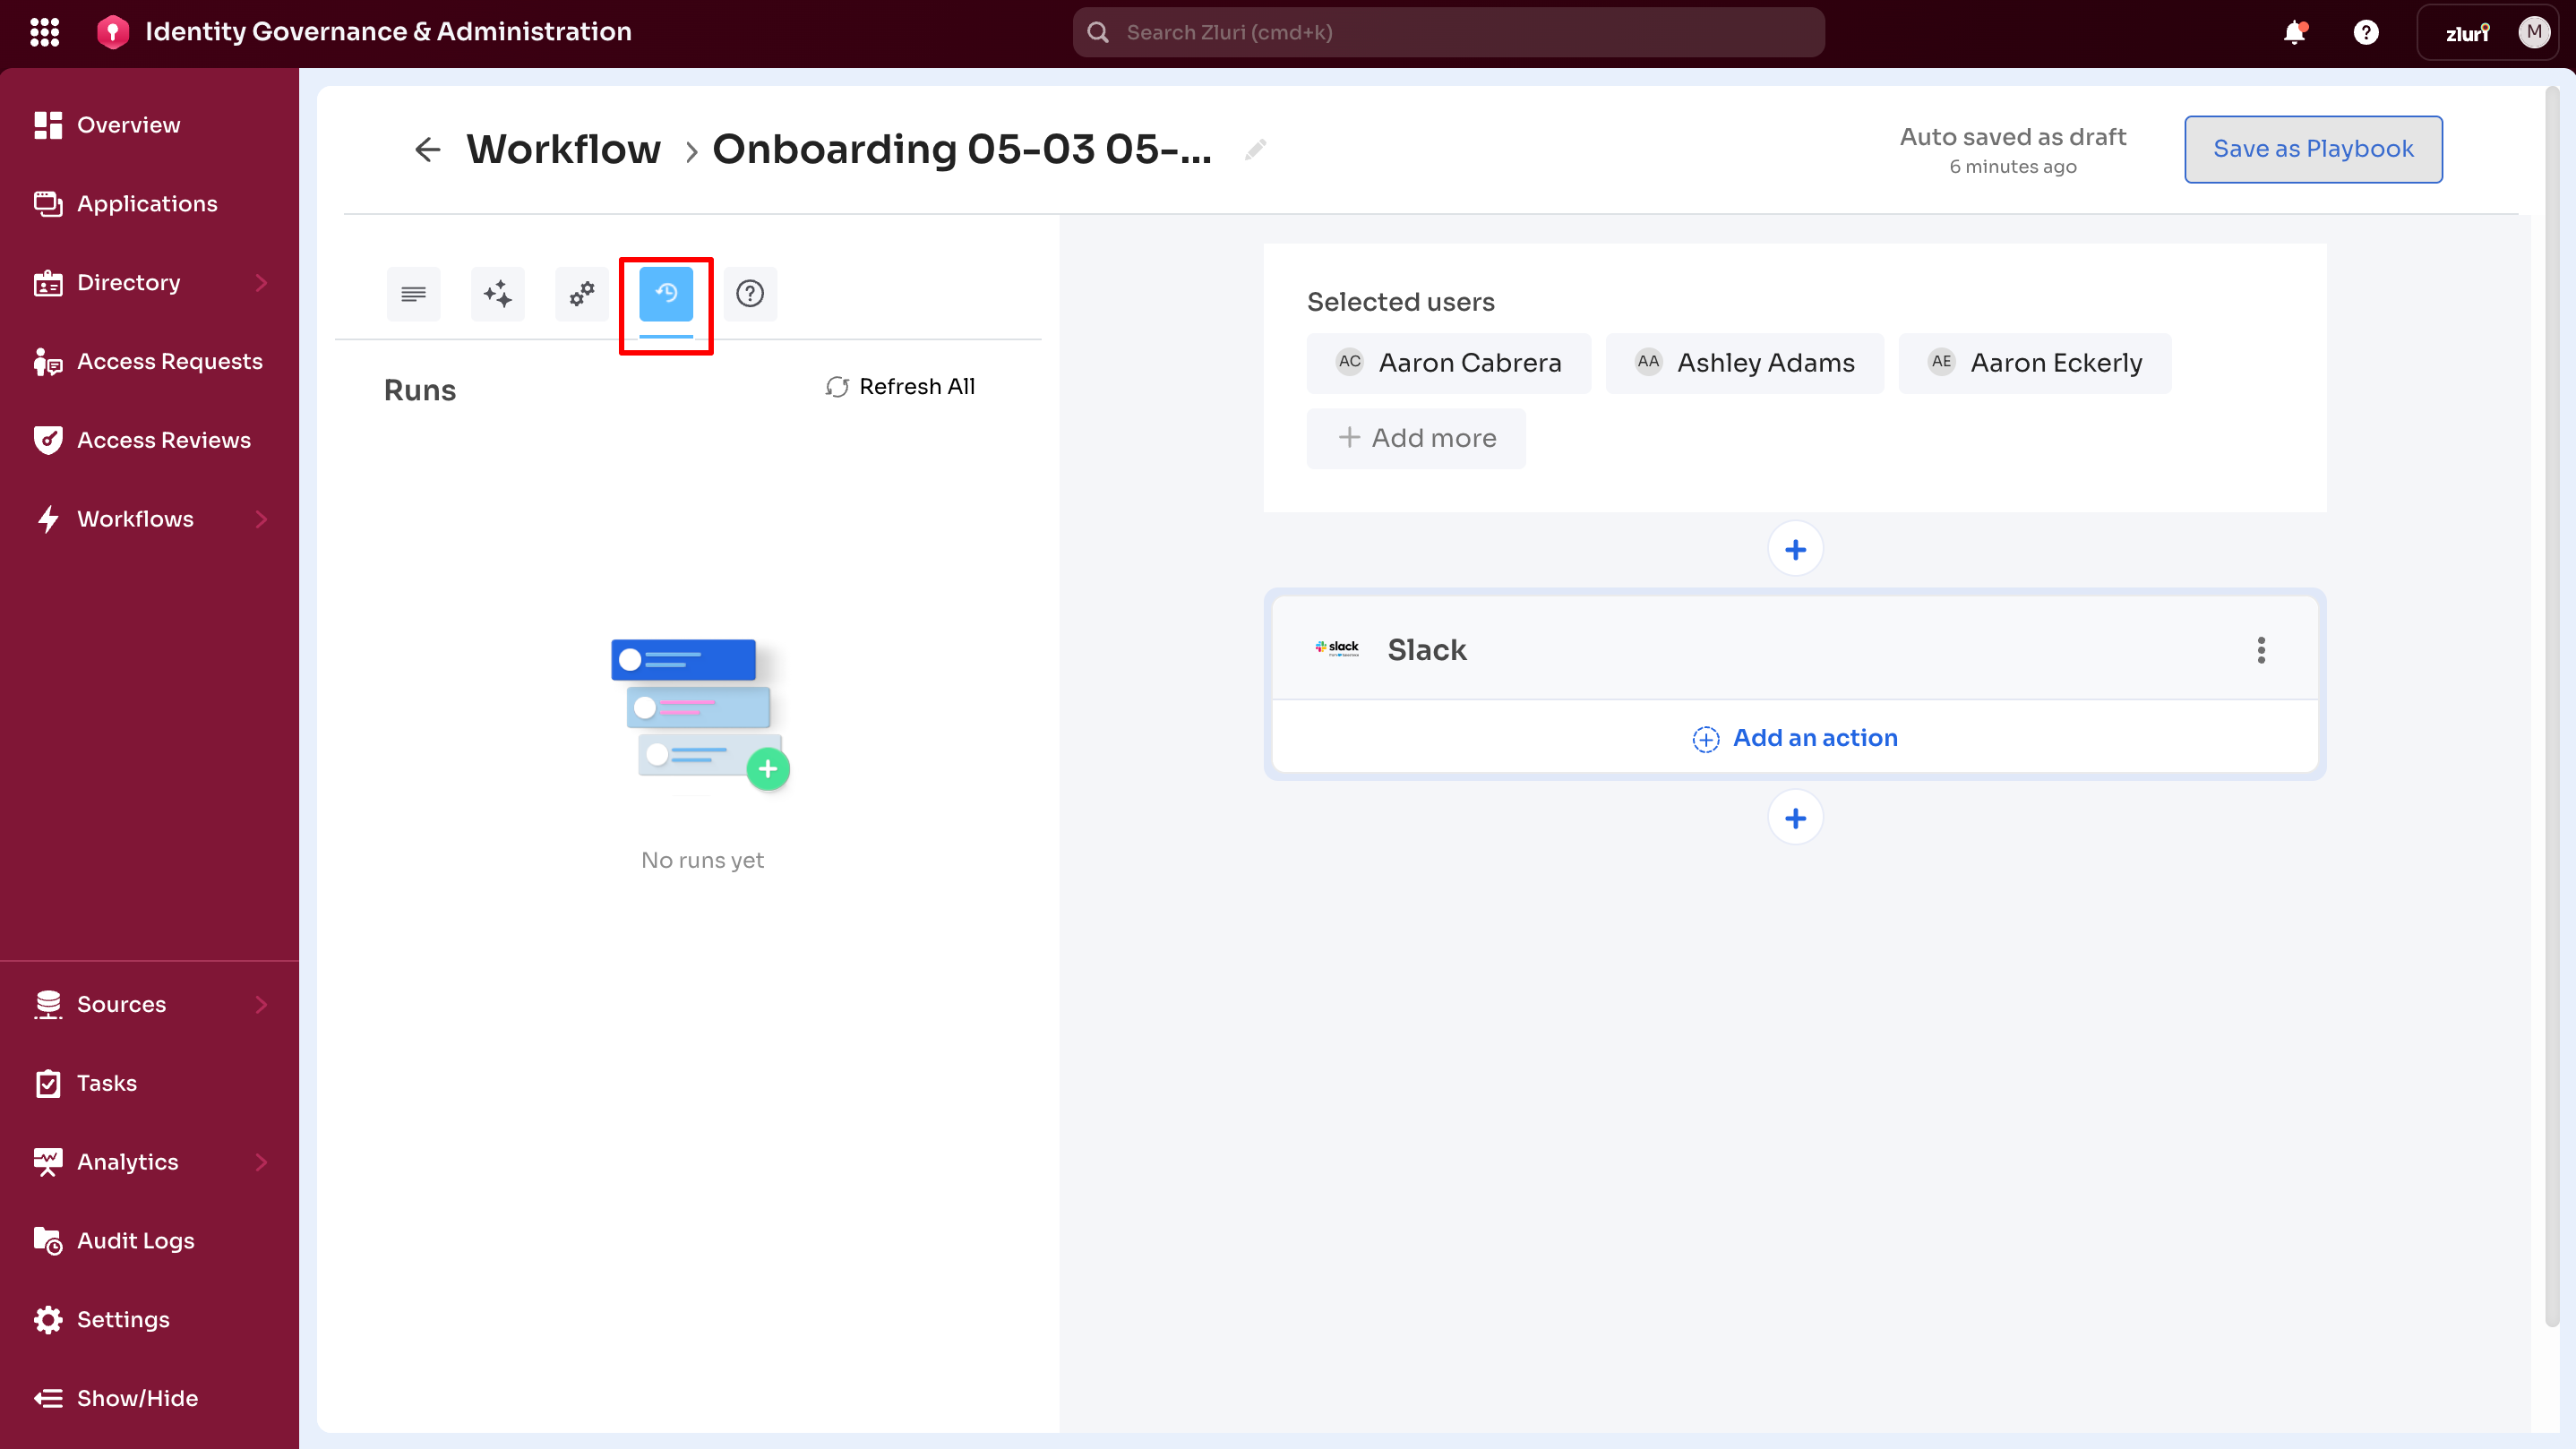
4. Runs Tab
- Shows "No runs yet" by default for new workflows
- Refresh All option - Manually refresh to display recent executions. Use this during extended screen sessions where auto-refresh doesn't trigger.
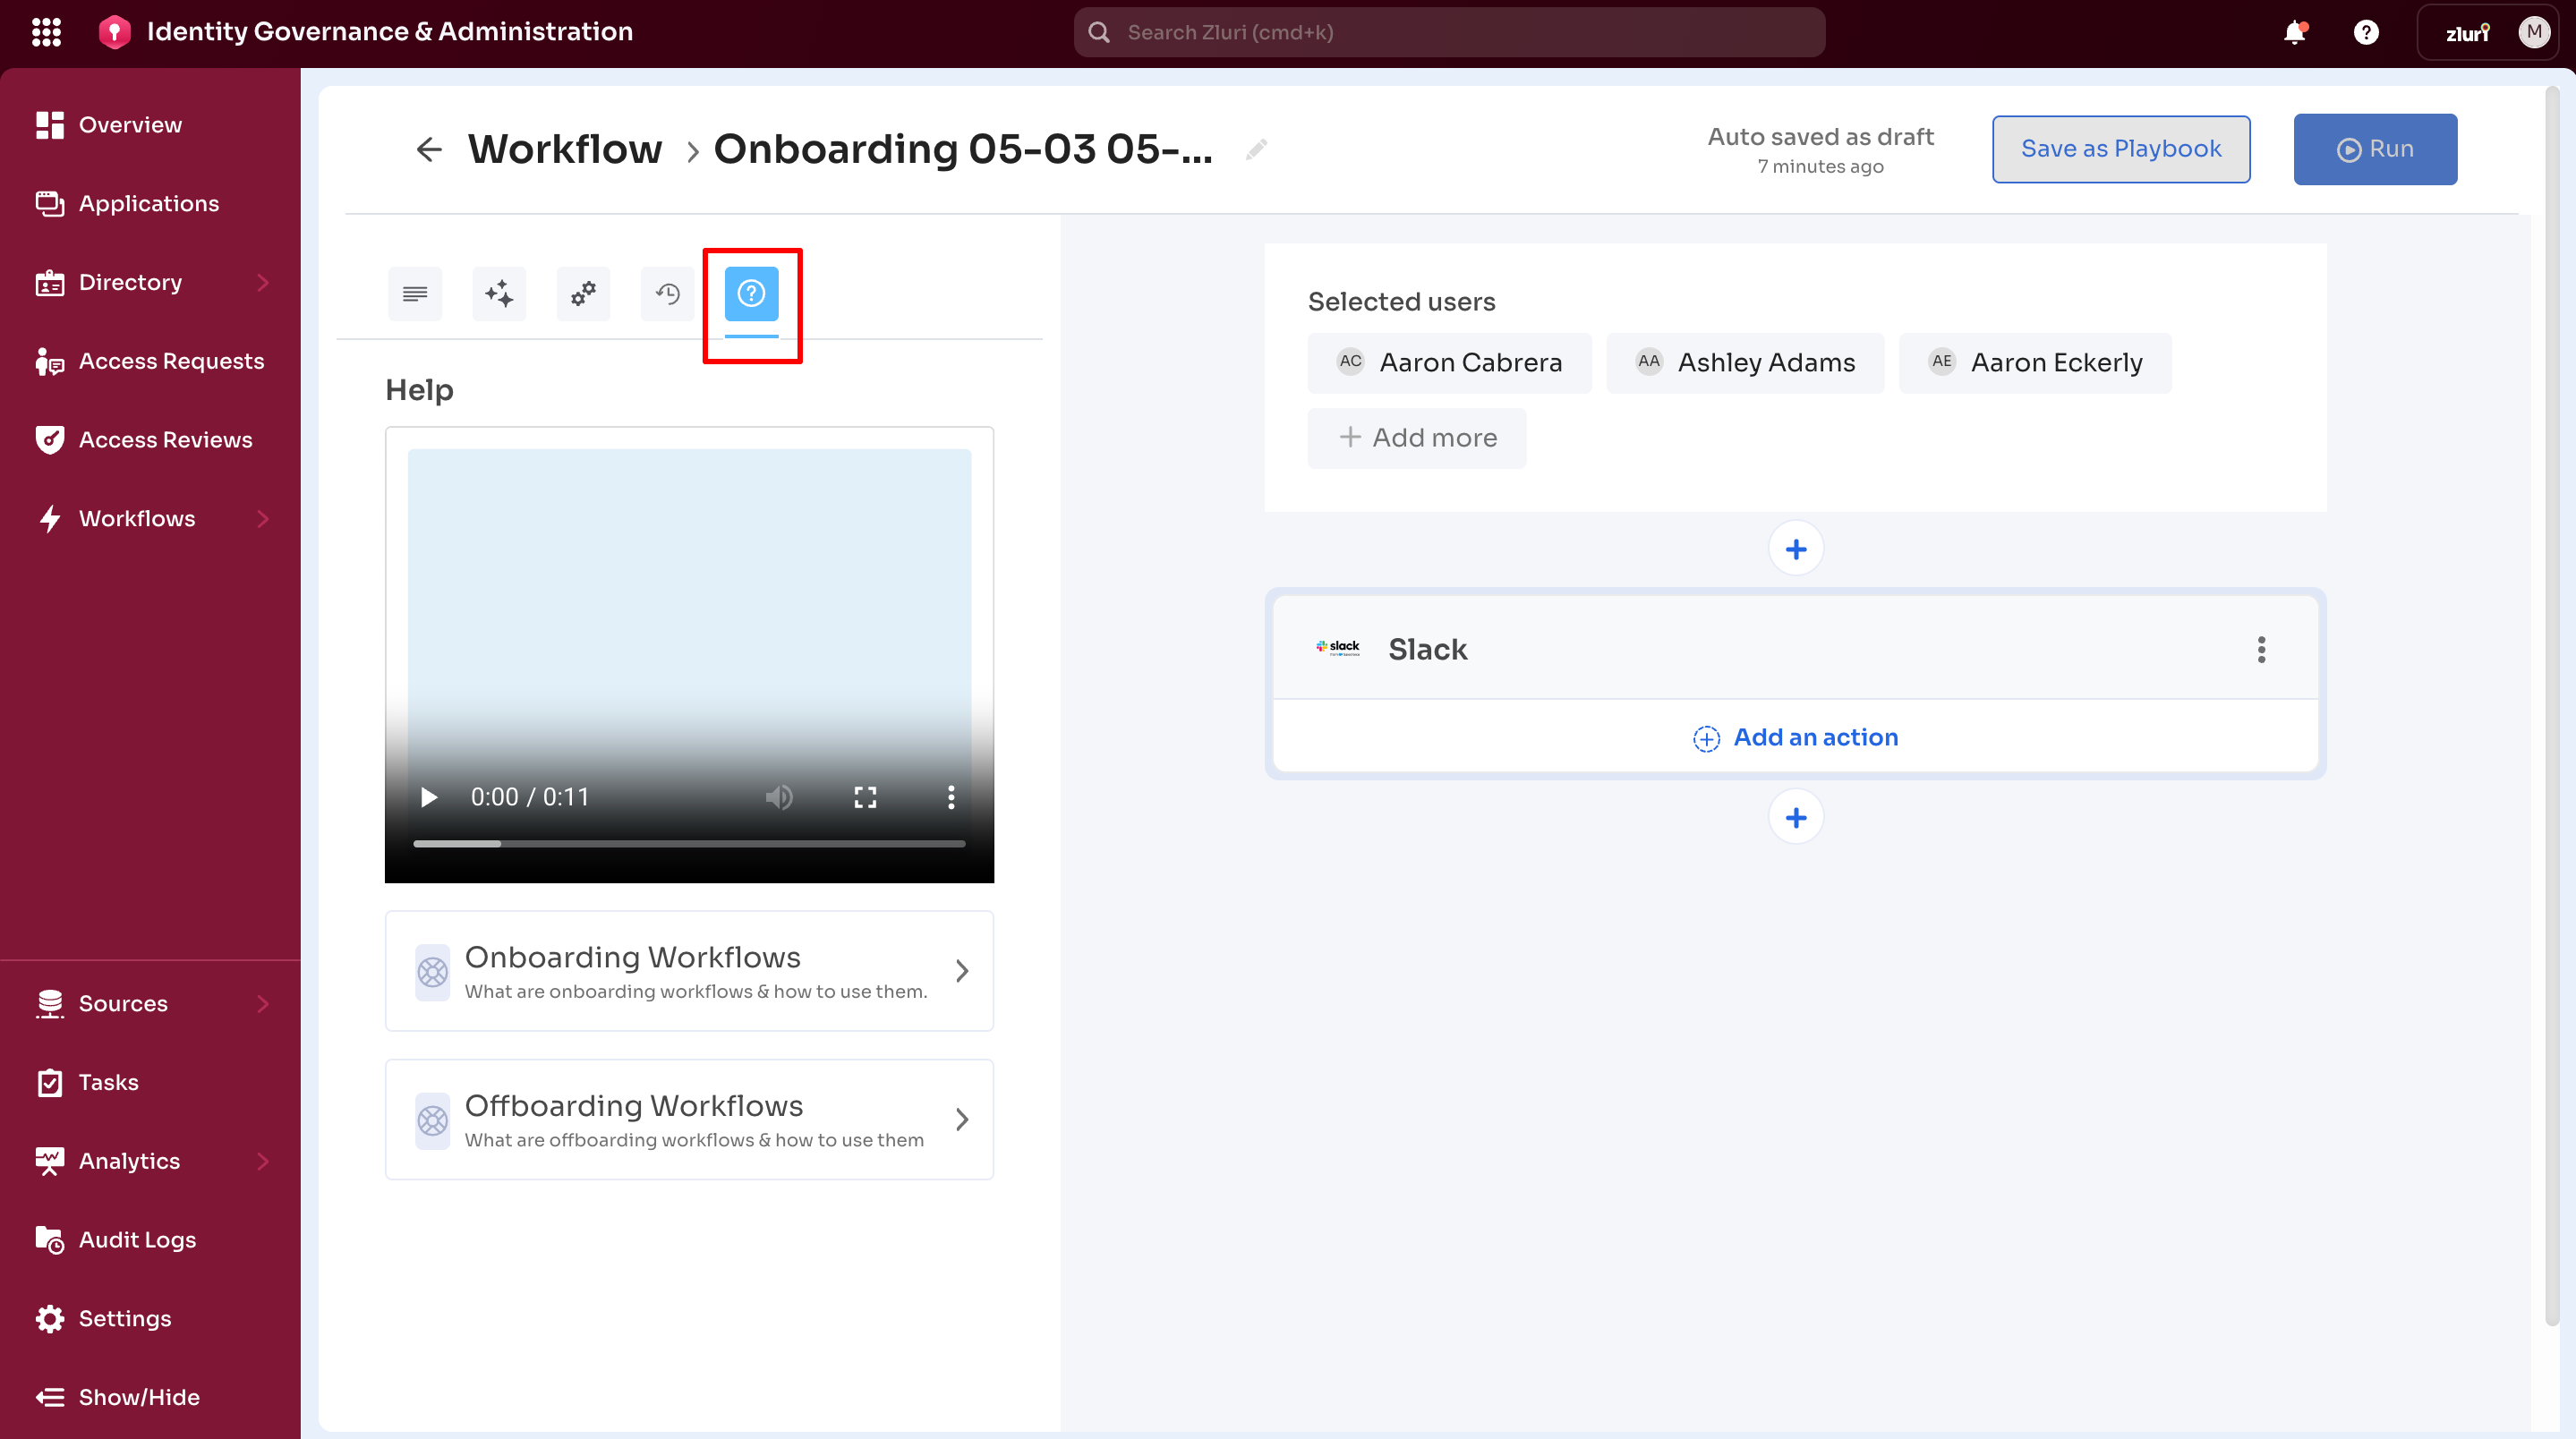
5. Help Tab
- Short help video guide
- Help article link for Onboarding module
- Help article link for Offboarding module
B. Workflow Canvas
The workflow canvas contains three menus for building a workflow.
1. Top Menu
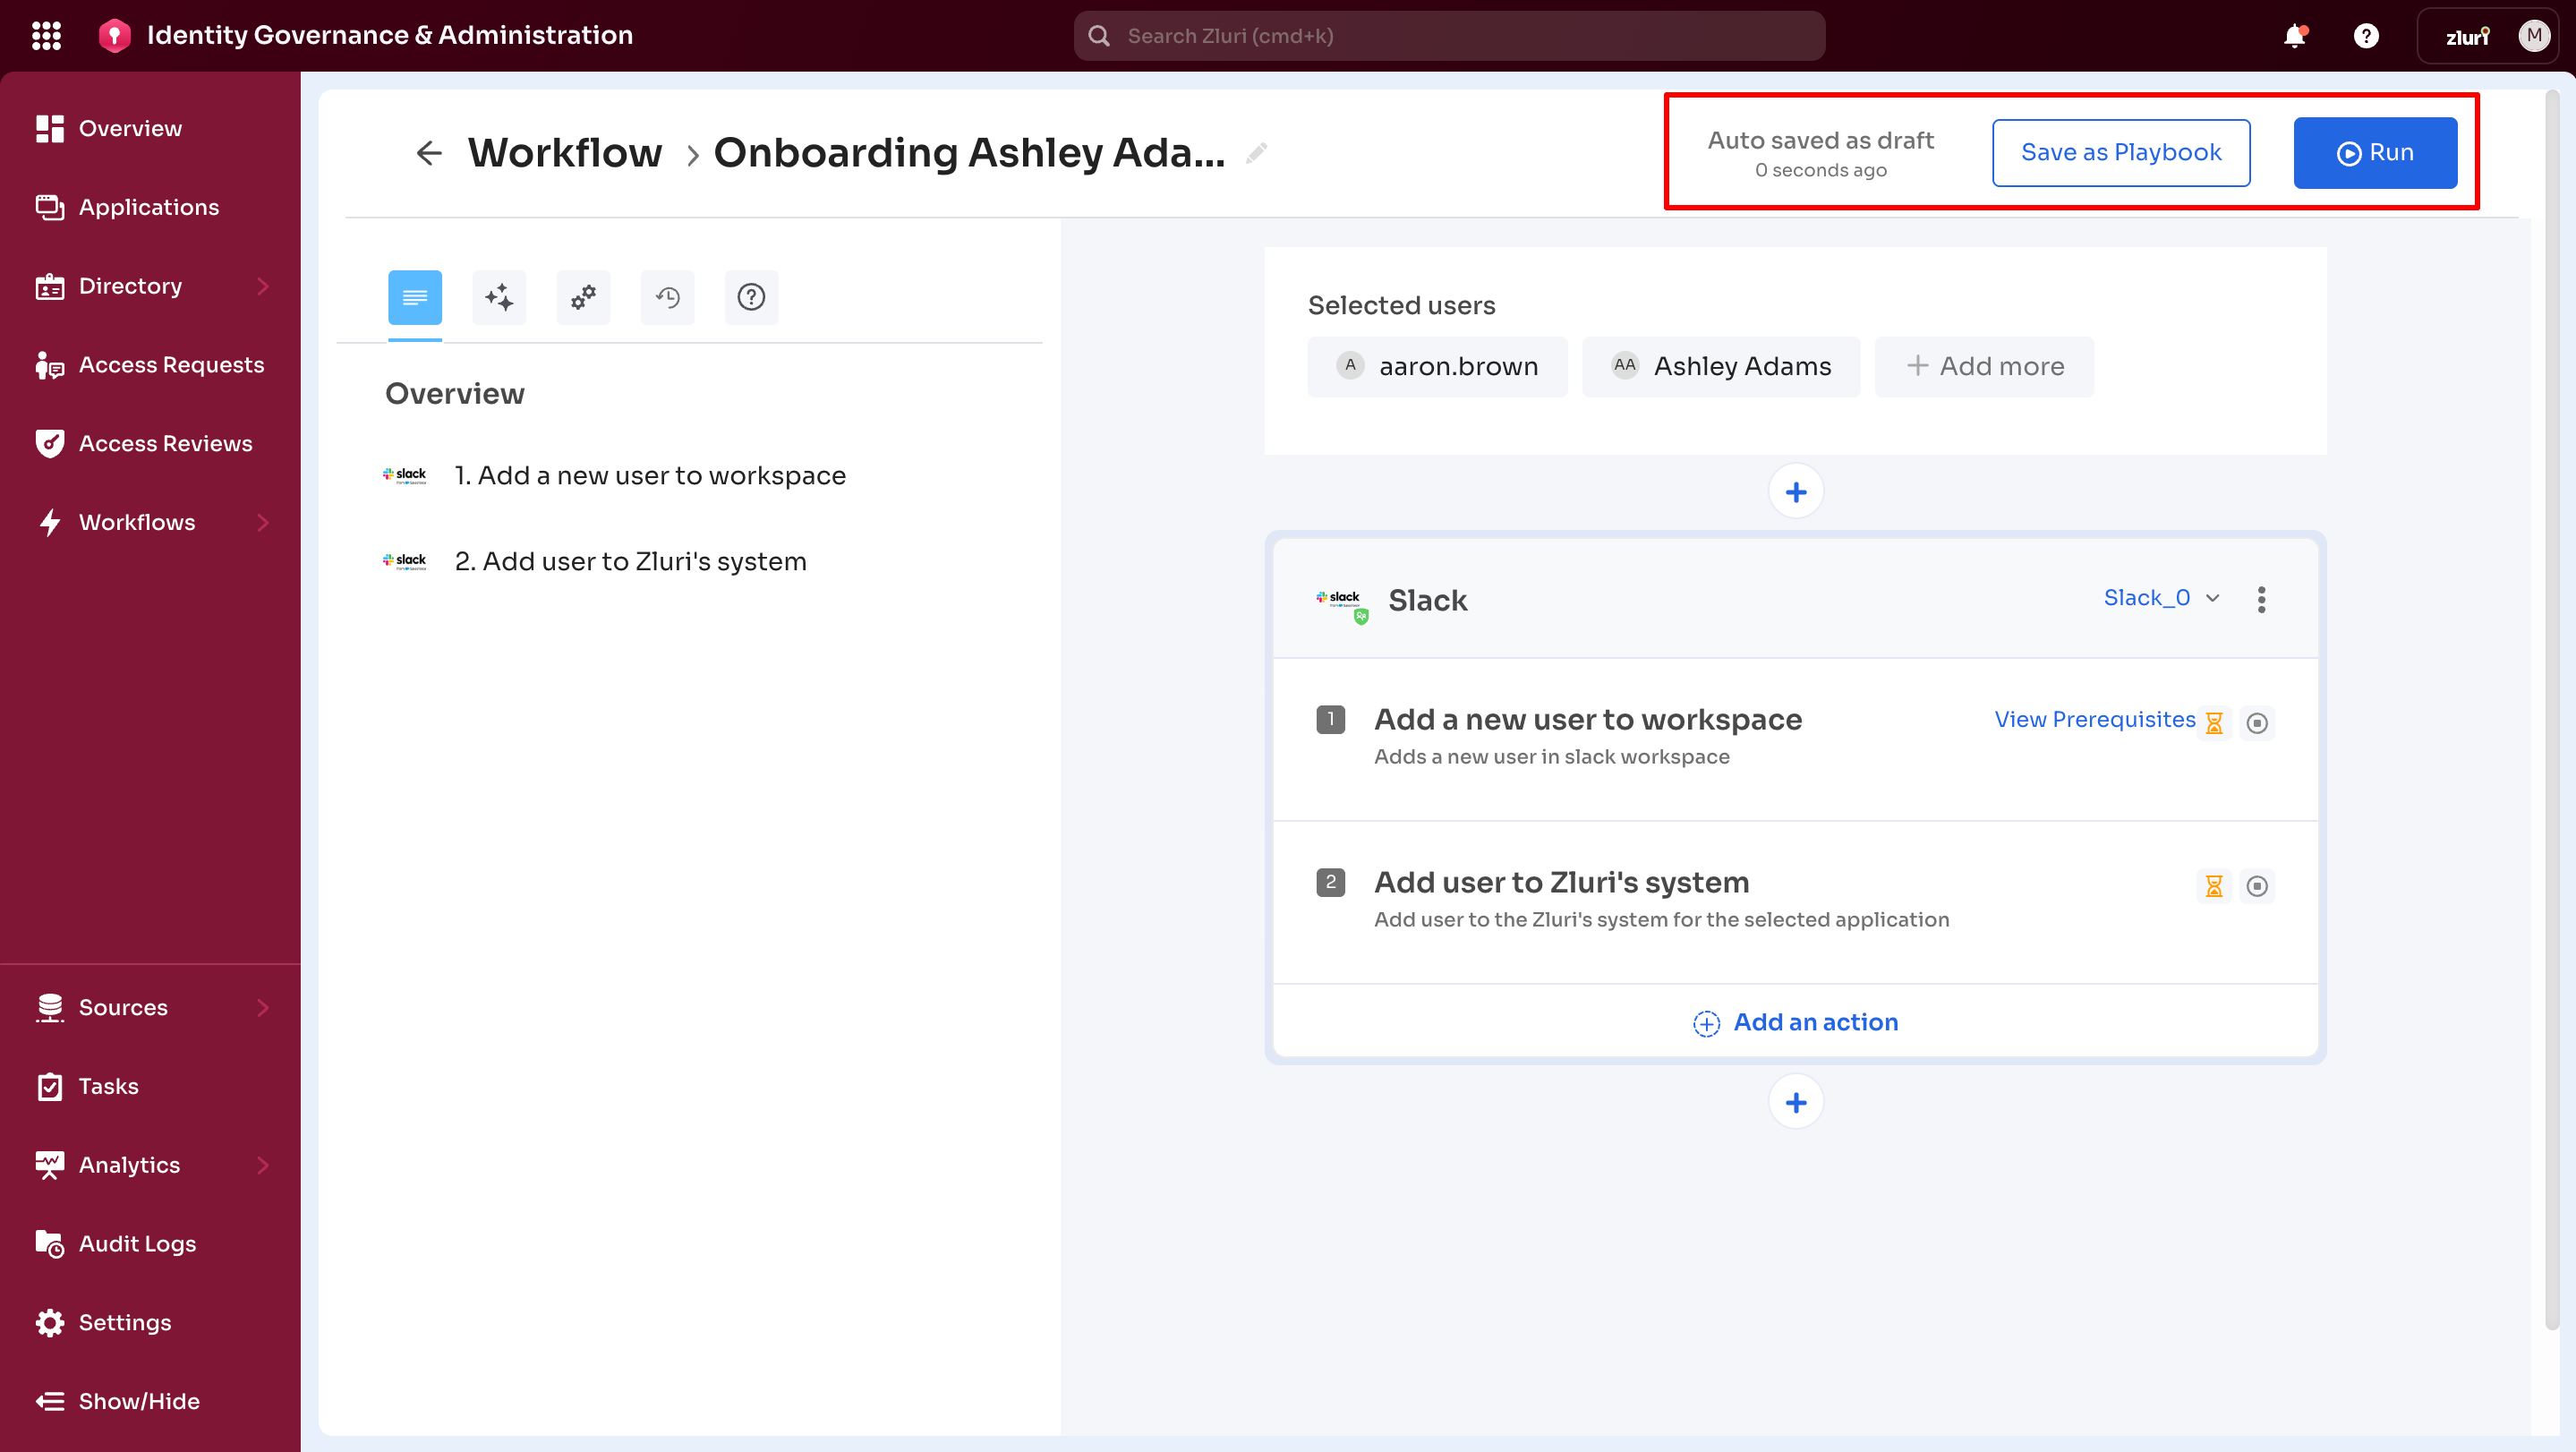
Contains workflow execution controls:
- Auto-saved as Draft - Status message indicating automatic saving
- Save As Playbook - Converts workflow to reusable template
- Run - Executes workflow immediately or schedules for later
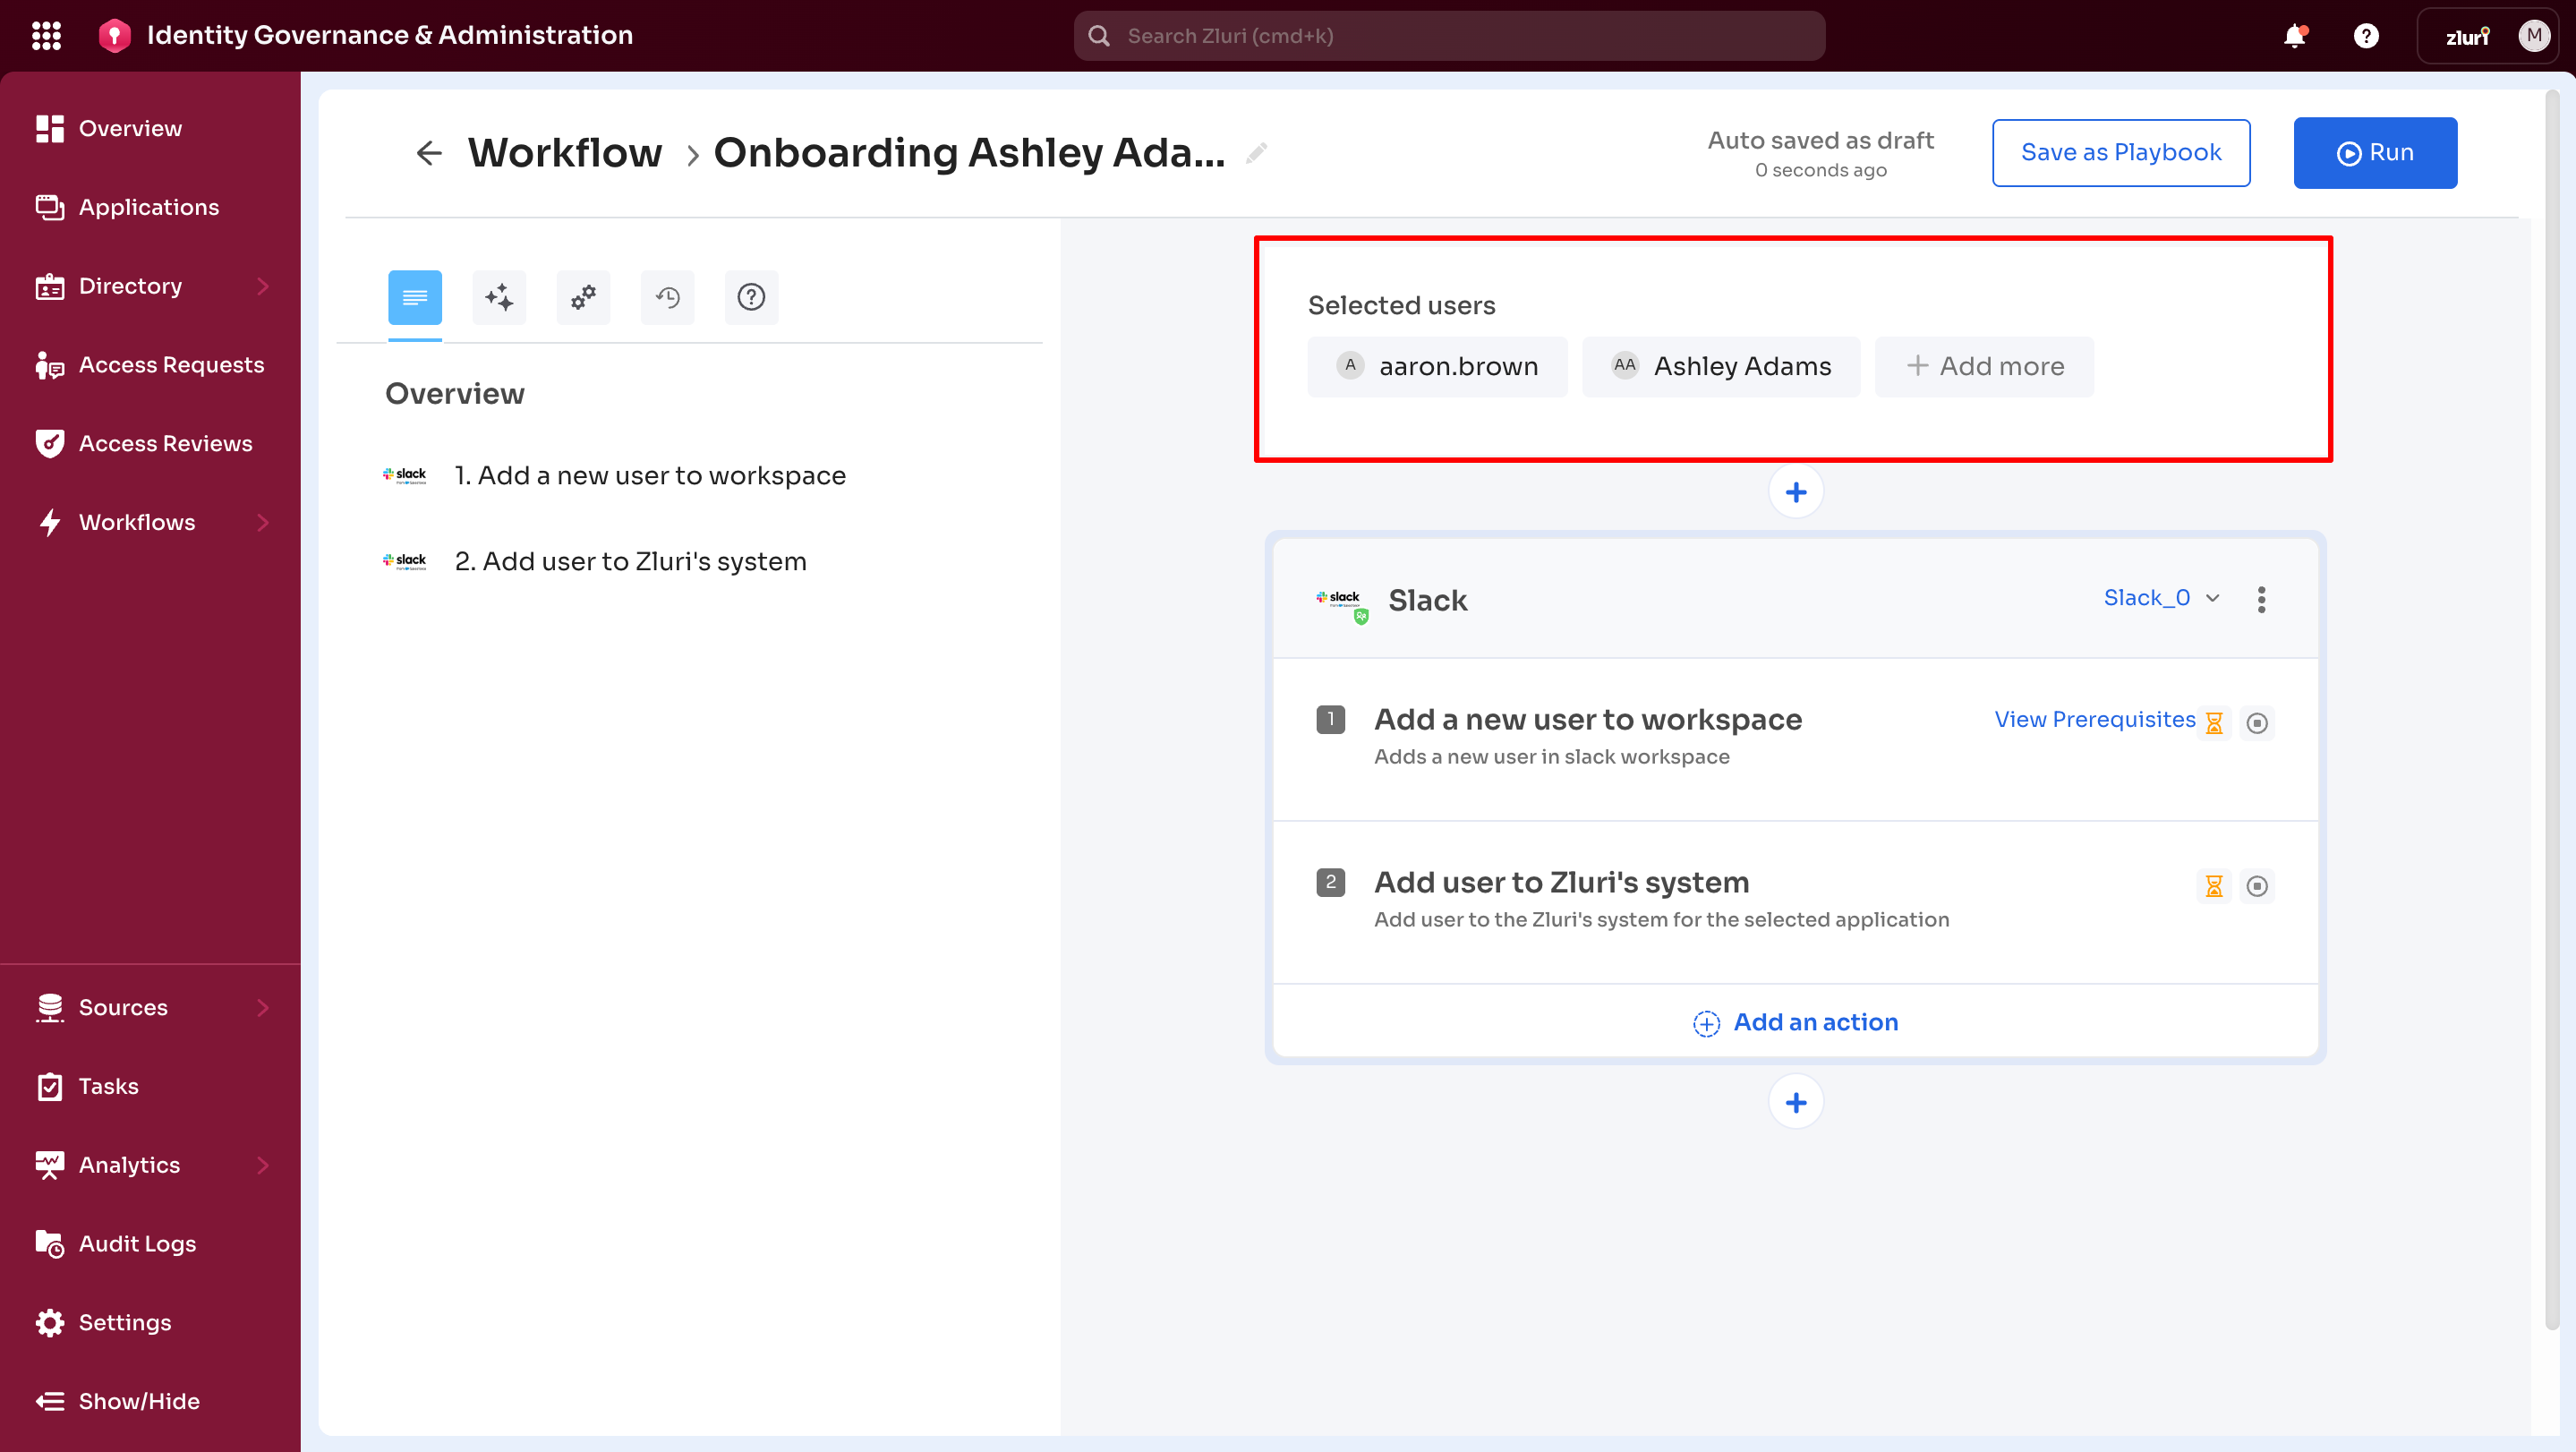
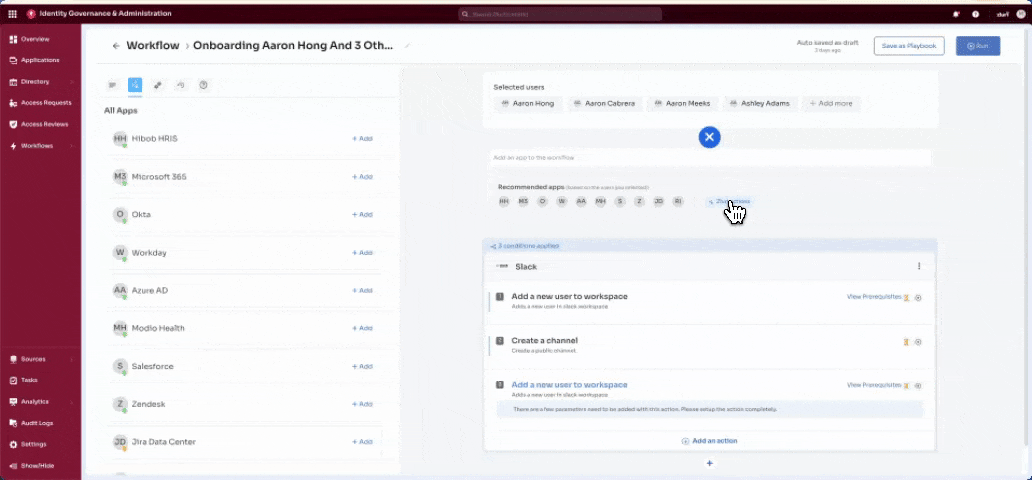
2. User Menu
Displays users selected for this workflow.
- User names appear in the selection area
- + Add More option - Add additional users to the current onboarding workflow
3. Application Menu
Use this section to add application blocks to the workflow. Three methods are available:
a. Search field
Type the application name to find and add it.
Some applications have multiple integration options:
Example: Searching "Okta" returns two options:
- Okta - Integration available (supports automated actions)
- OktaWebOauth - Only manual tasks available
These are different applications with their own integration capabilities. Okta and OktaWebOauth have different sets of available actions.

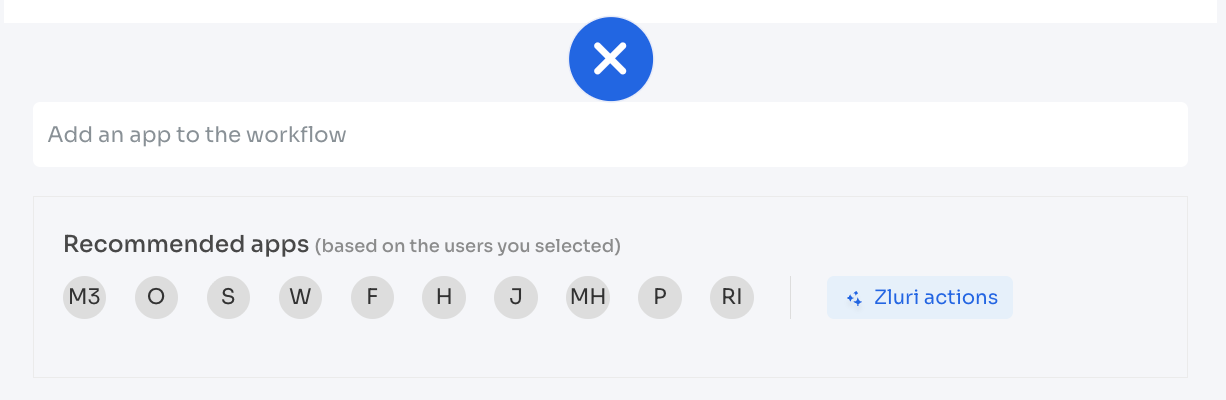
b. Recommended Apps
Pre-suggested applications based on selected users, displayed with app initials (For example, Z for Zendesk, HH for Hibob HRIS).
Select recommended apps to add them to the workflow without typing search terms.
c. Zluri Actions
Creating a New Workflow
Creating a workflow involves six main steps:
Step 1: Start the New Workflow
Navigate to Workflows → Onboarding/Offboarding → Drafts (or Overview), then select + New Workflow.
Learn to start a new workflow →
Step 2: Select Users
Choose one or more users to onboard or offboard, then select Continue. The workflow canvas opens.
Onboarding: Select users who need access provisioning.
Offboarding: Select departing users whose access needs removal.
Step 3: Adding Applications
Add application blocks to the workflow using the + icon.
Onboarding: Add apps via search, recommended apps, or Zluri Actions.
Offboarding: Applications are auto-populated based on the selected user's current access.
Learn to add and manage applications →
Step 4: Configuring Actions
For each application, add and configure actions to define the workflow behaviour.
Onboarding: Configure actions like Add User, Assign License, and Add to Group.
Offboarding: Set actions such as Remove User, Revoke License, and Set Email Forwarding.
Step 5: Setting Conditions
Control when applications and actions execute by setting conditions based on user attributes like role, department, or status.
Step 6: Running Workflows
Once configured, run the workflow immediately, save it as a playbook for reuse, or schedule it for later execution.
Learn about running workflows →
Step 7: Advanced Options
For specialized use cases, workflows support:
- Create Variables – Dynamically fetch user-specific data during execution
- Custom Actions and HTTP Requests – Build tailored integrations for unsupported applications
- Manual Tasks – Convert automated actions to manual steps when needed