Users Marked for Onboarding/Offboarding Tab
Track and manage employees flagged for onboarding or offboarding
Users Marked for Onboarding or Offboarding
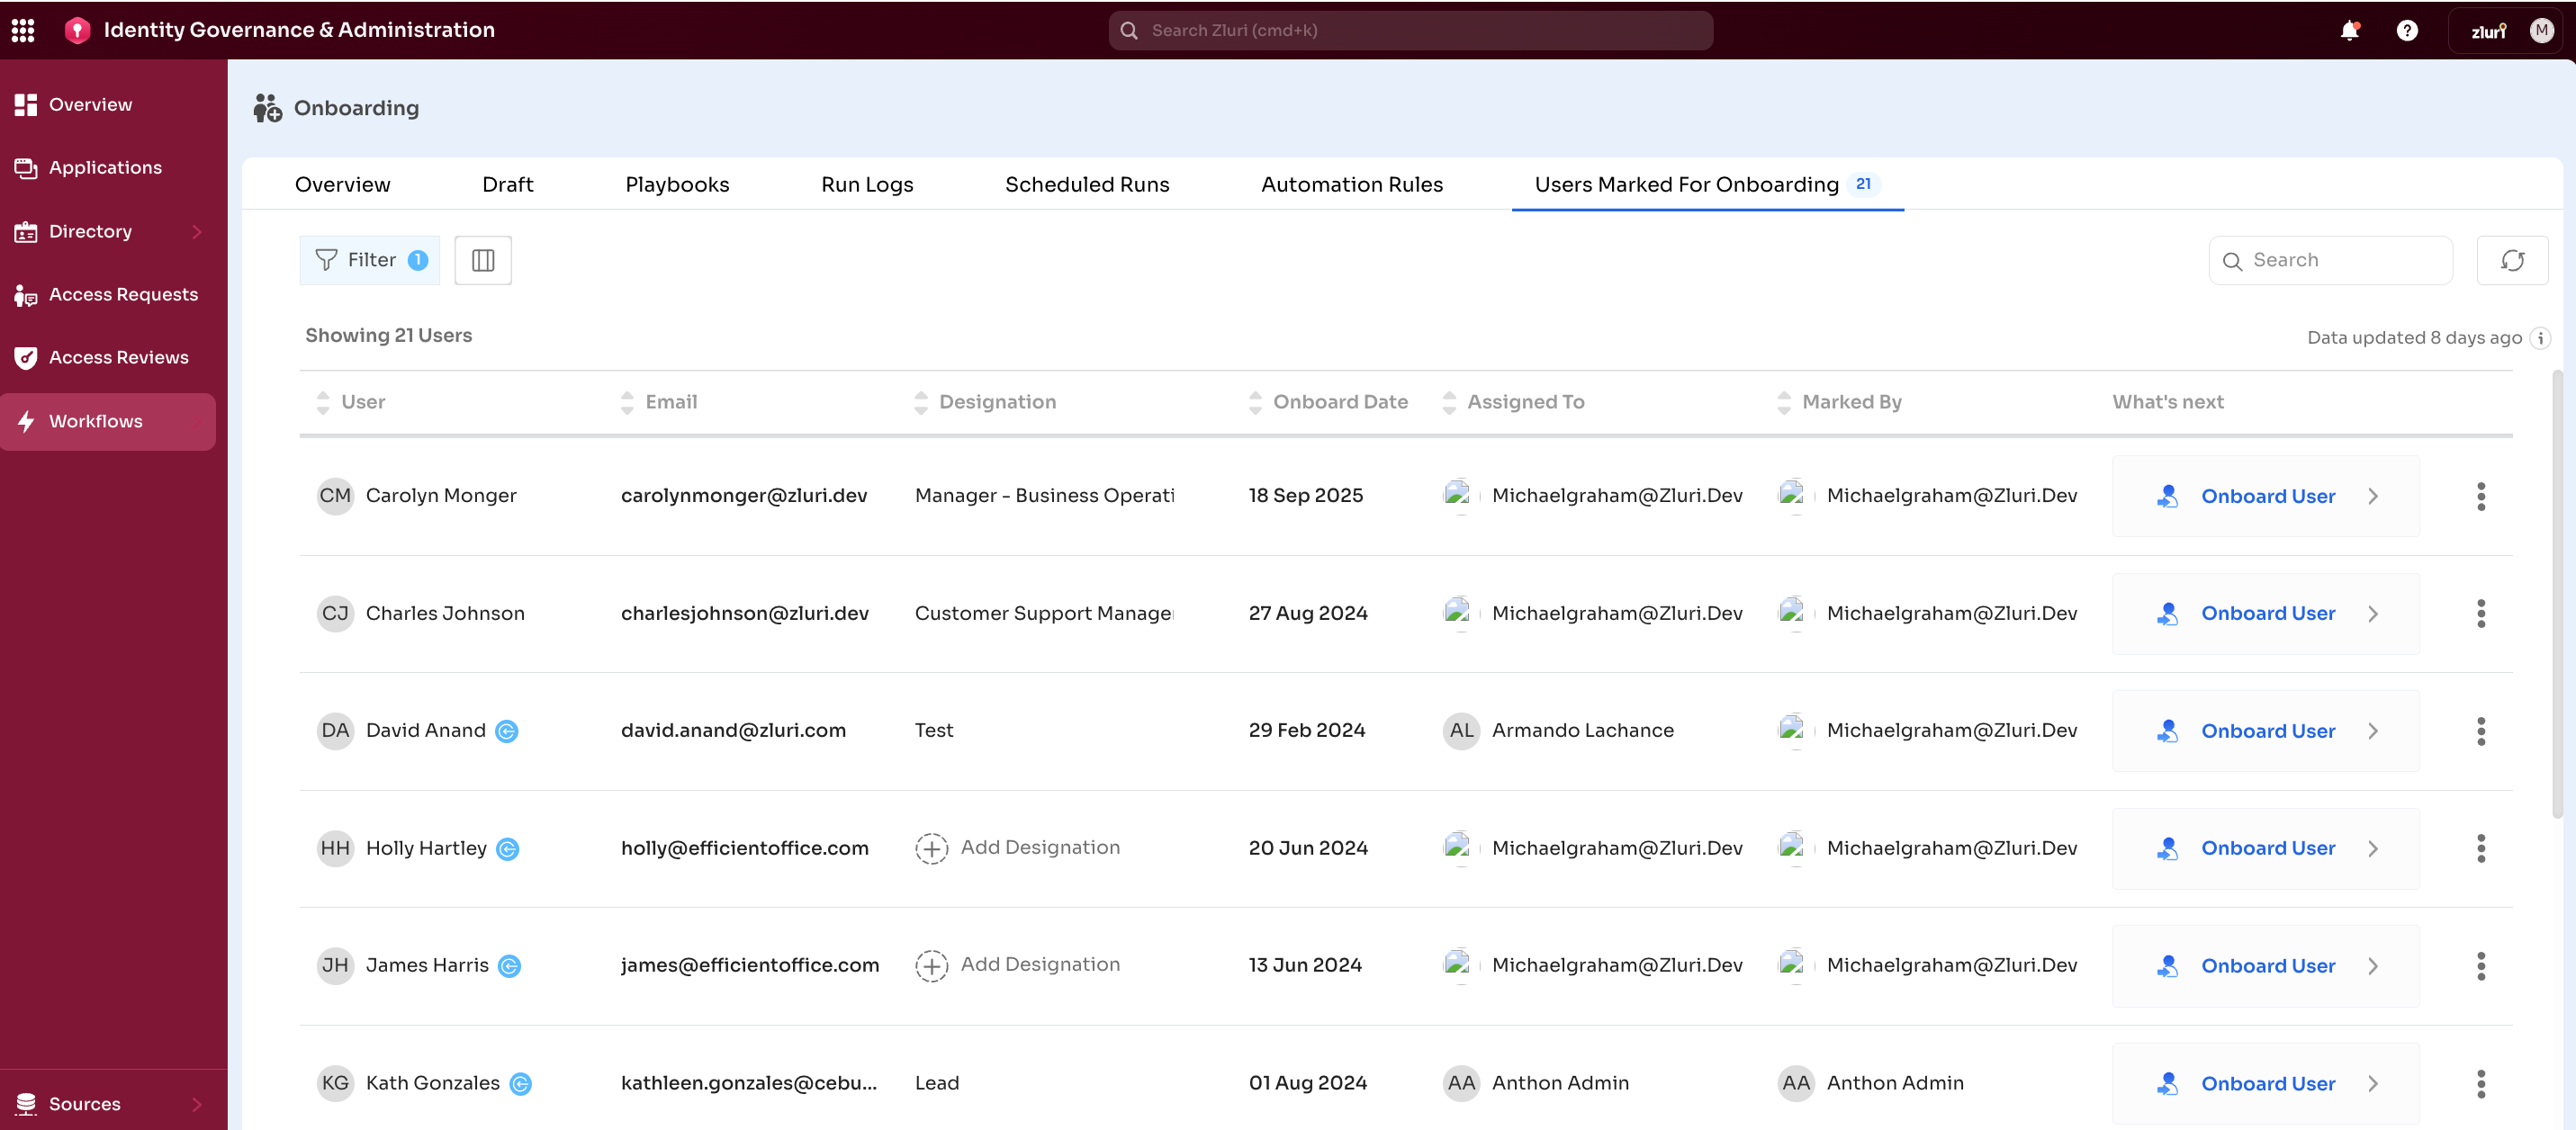
Onboarding: The Users Marked for Onboarding tab shows all employees flagged for onboarding within Zluri.

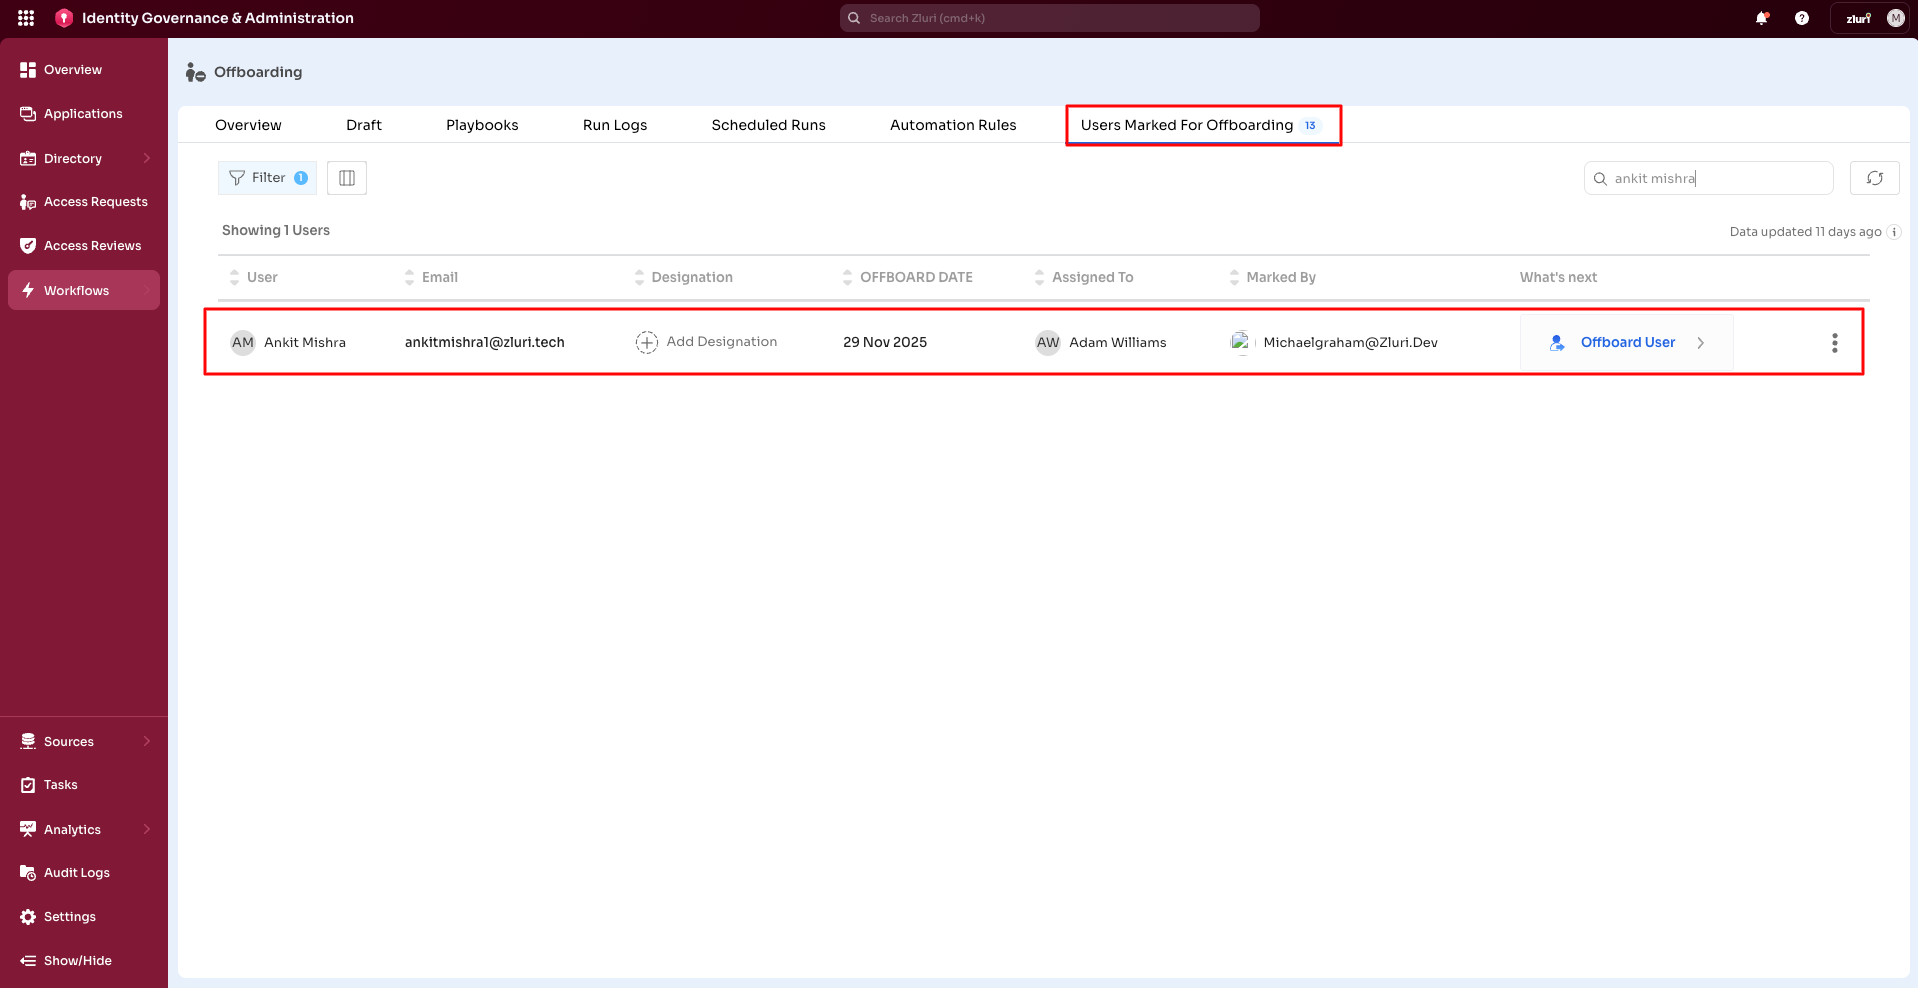
Offboarding: The Users Marked for Offboarding tab centralizes employees flagged for exit.
Note: Details of employees marked for Onboarding or Offboarding also appear in the Scheduled Runs page within the respective section.
Key Benefits
Onboarding:
- Centralized Tracking – View all new hires flagged for onboarding in one location
- Workflow Initiation – Quick access to start onboarding workflows for marked users
- Status Monitoring – Track which users have been processed and which are pending
Offboarding:
- Exit Visibility – Displays all employees marked for exit in a single location
- Workflow Access – Provides direct links to offboarding workflows
- Compliance – Ensures no departing employee is missed
- Risk Prevention – Without clear visibility, IT may overlook users and fail to revoke access
Understanding Marked Status
Onboarding: Marking a user for onboarding indicates the employee is a new hire needing access provisioning. Once marked, automation rules can trigger predefined onboarding playbooks, or administrators can run workflows manually.
Offboarding: Marking a user for offboarding indicates the employee is leaving the organization. Once marked, administrators can:
- Process exits manually or automate them using playbooks
- Trigger predefined offboarding playbooks via automation rules
- Run workflows manually for individual exits
- Mark users as inactive in Zluri after all actions are complete
Marking Users: Step-by-Step
Step 1: Navigate to Directory
Go to IGA → Directory → Users
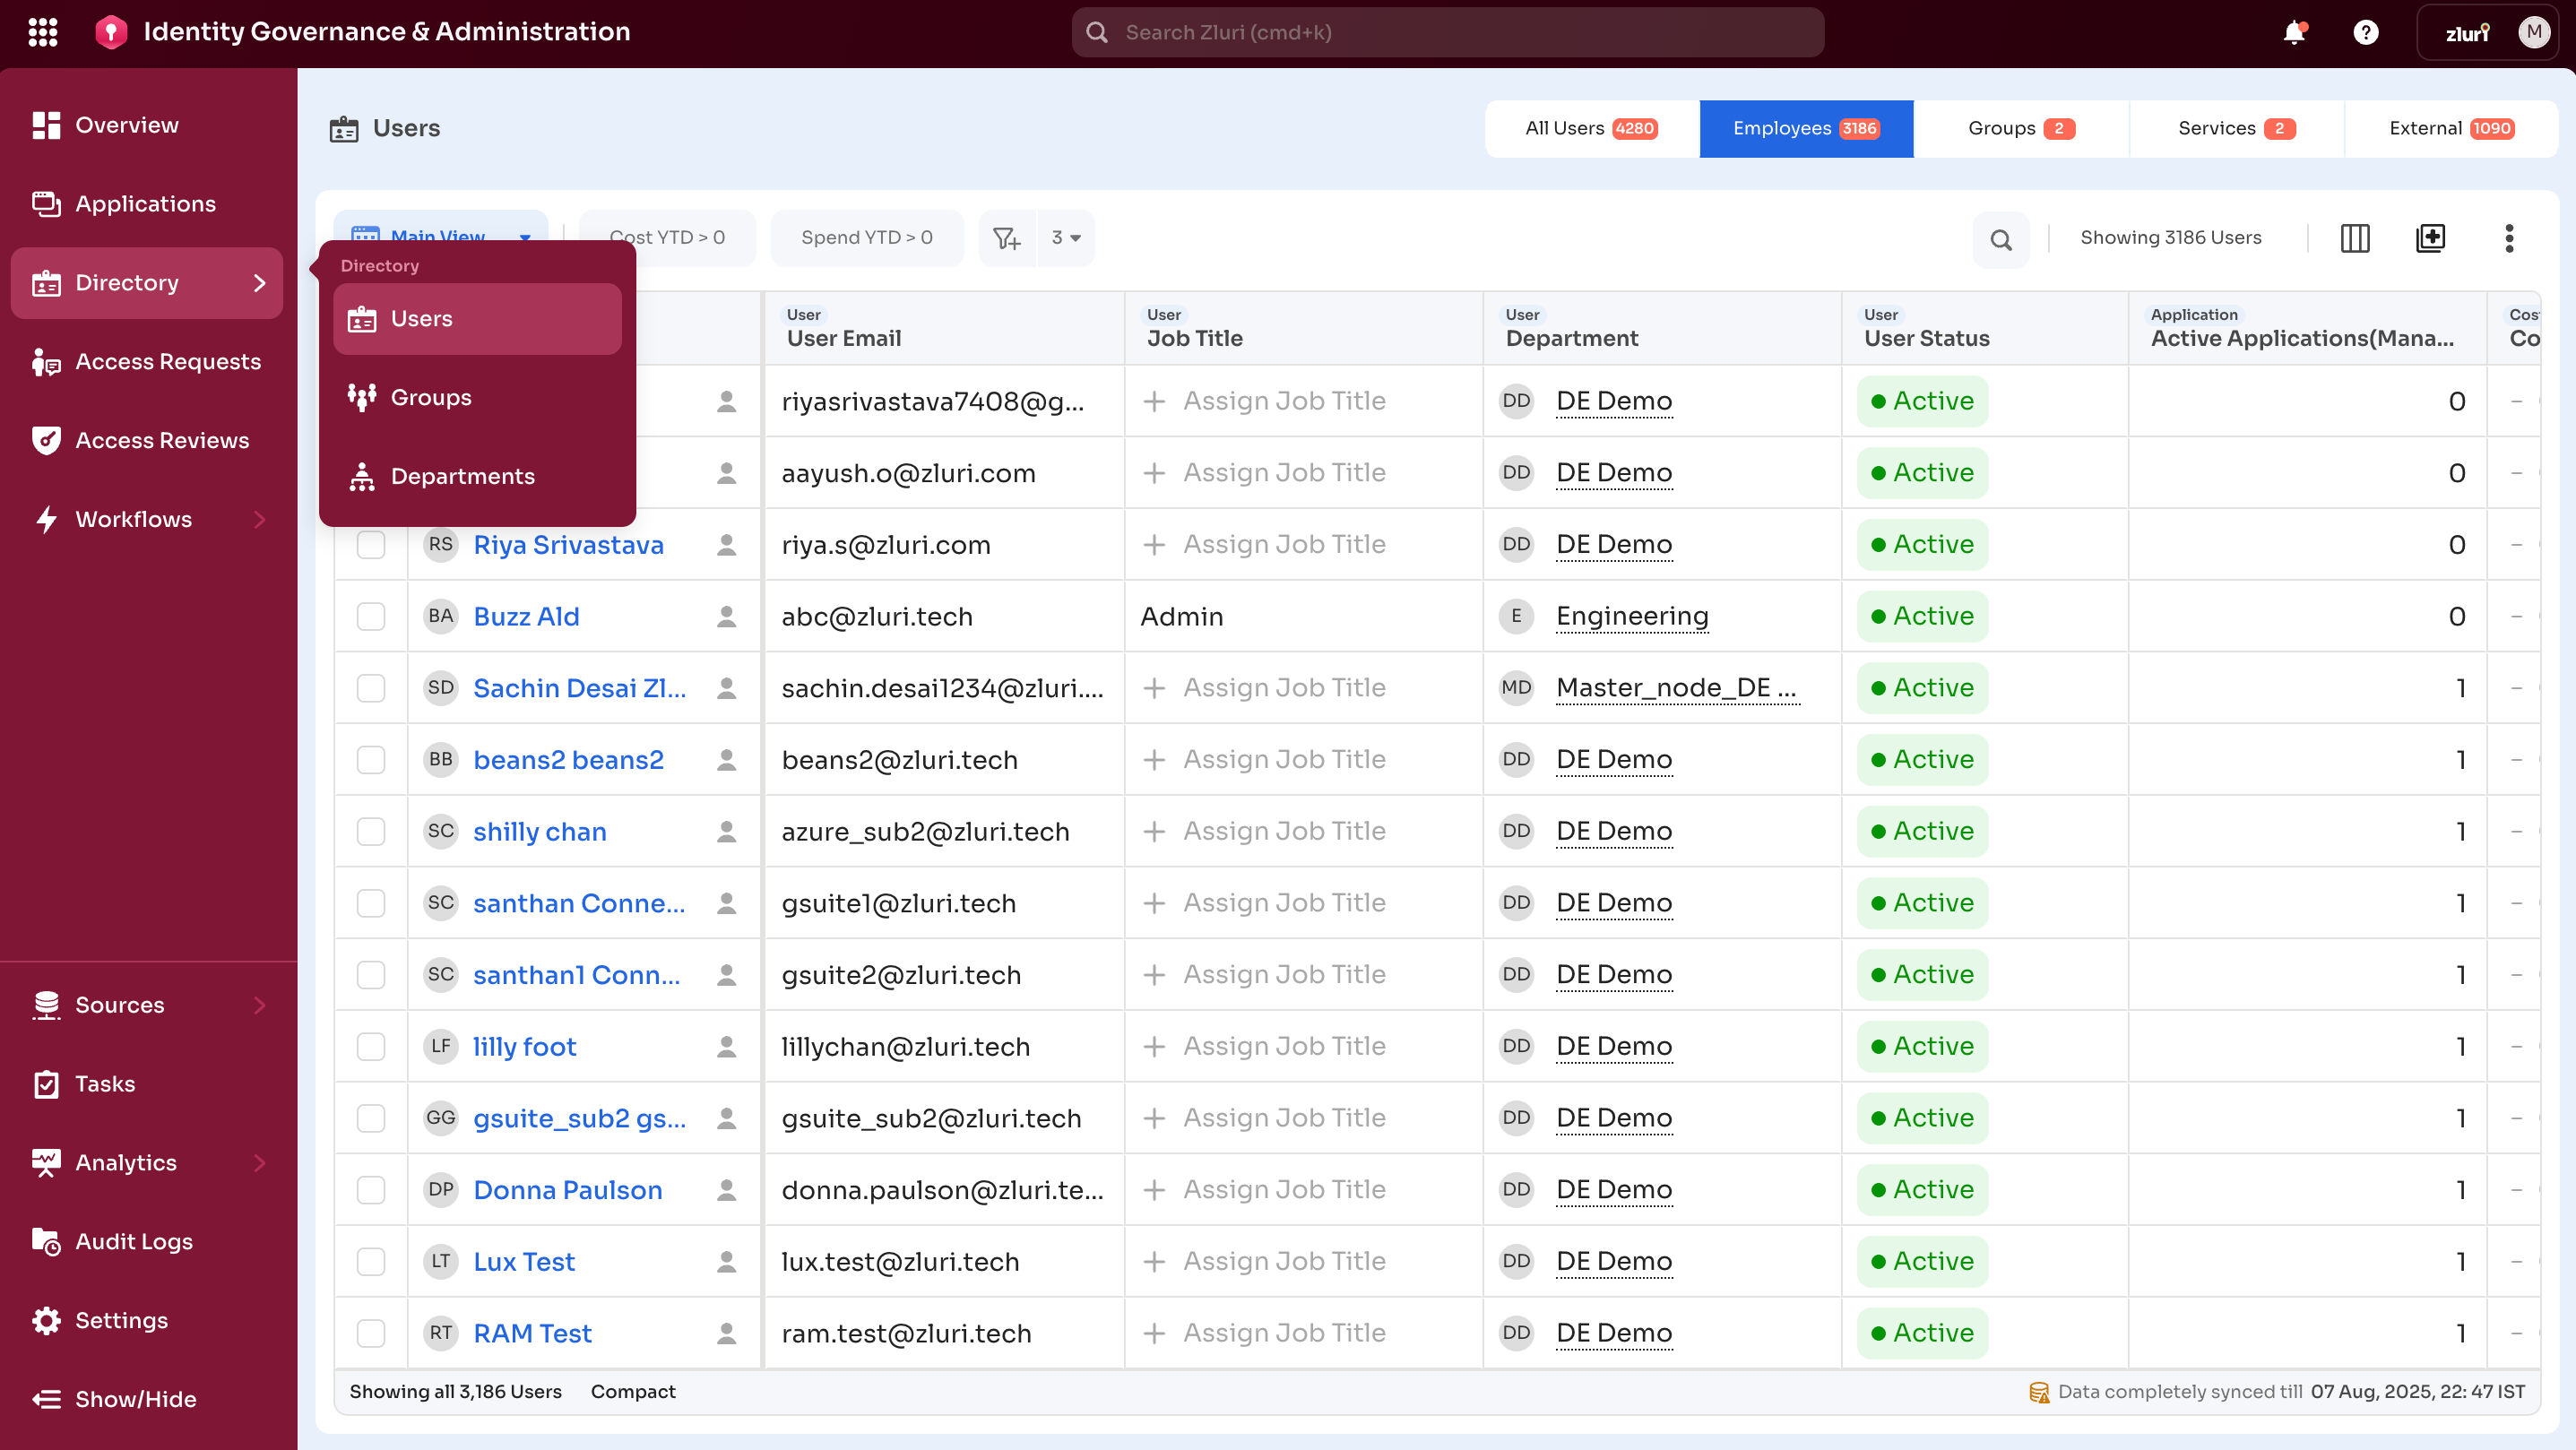
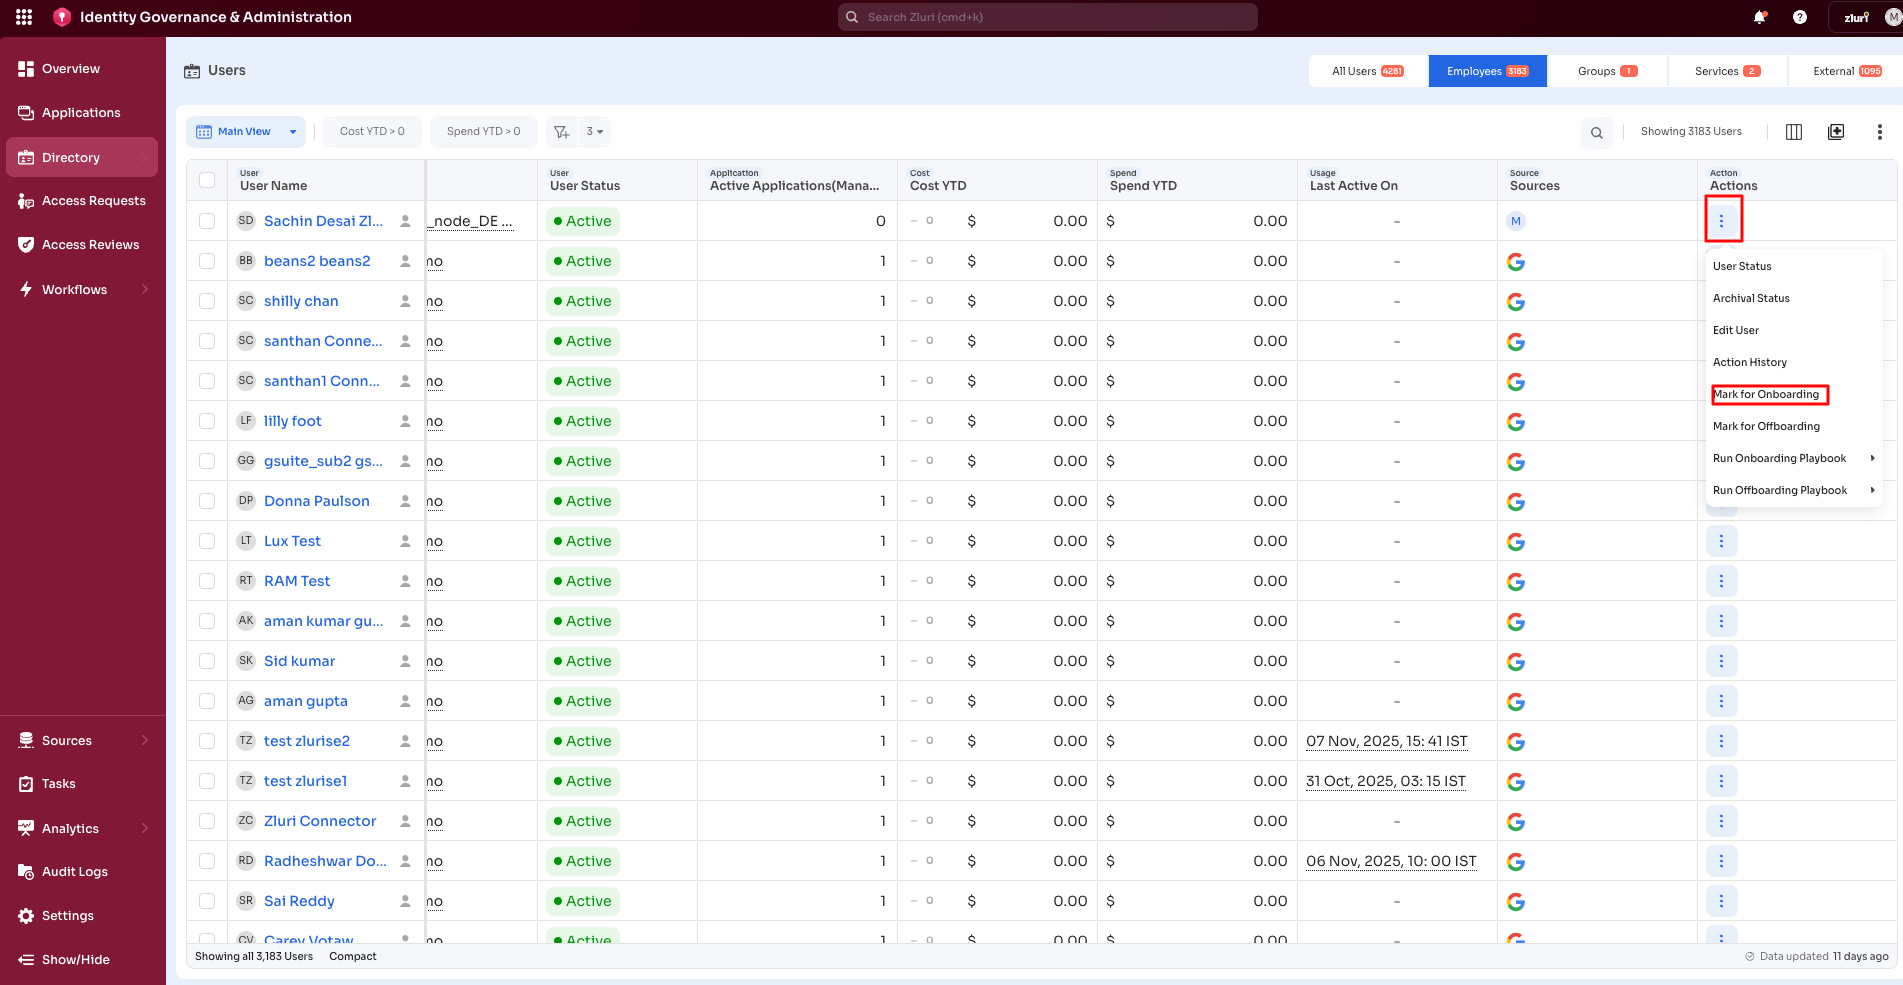
Step 2: Enable the Actions Column
If the Actions column is not visible, select Modify Columns and add Actions.
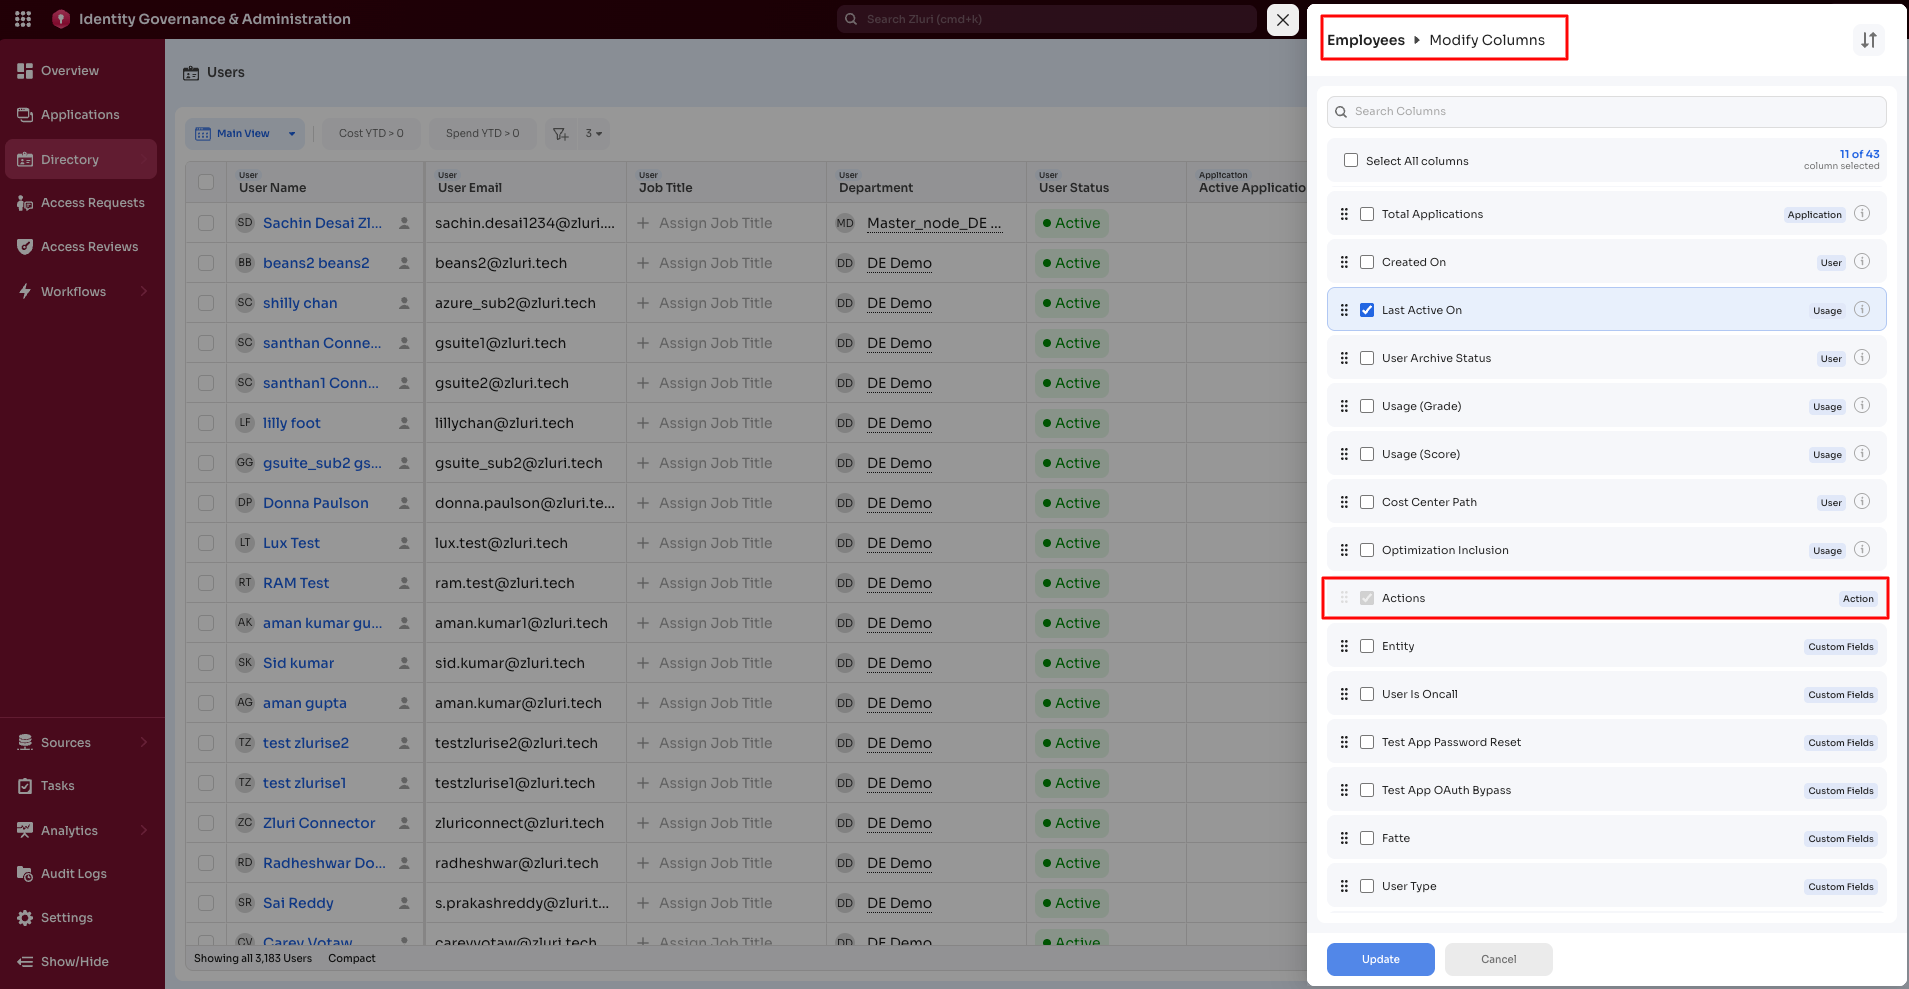
The cells in the Actions column contain a three-vertical-dots menu for each user.
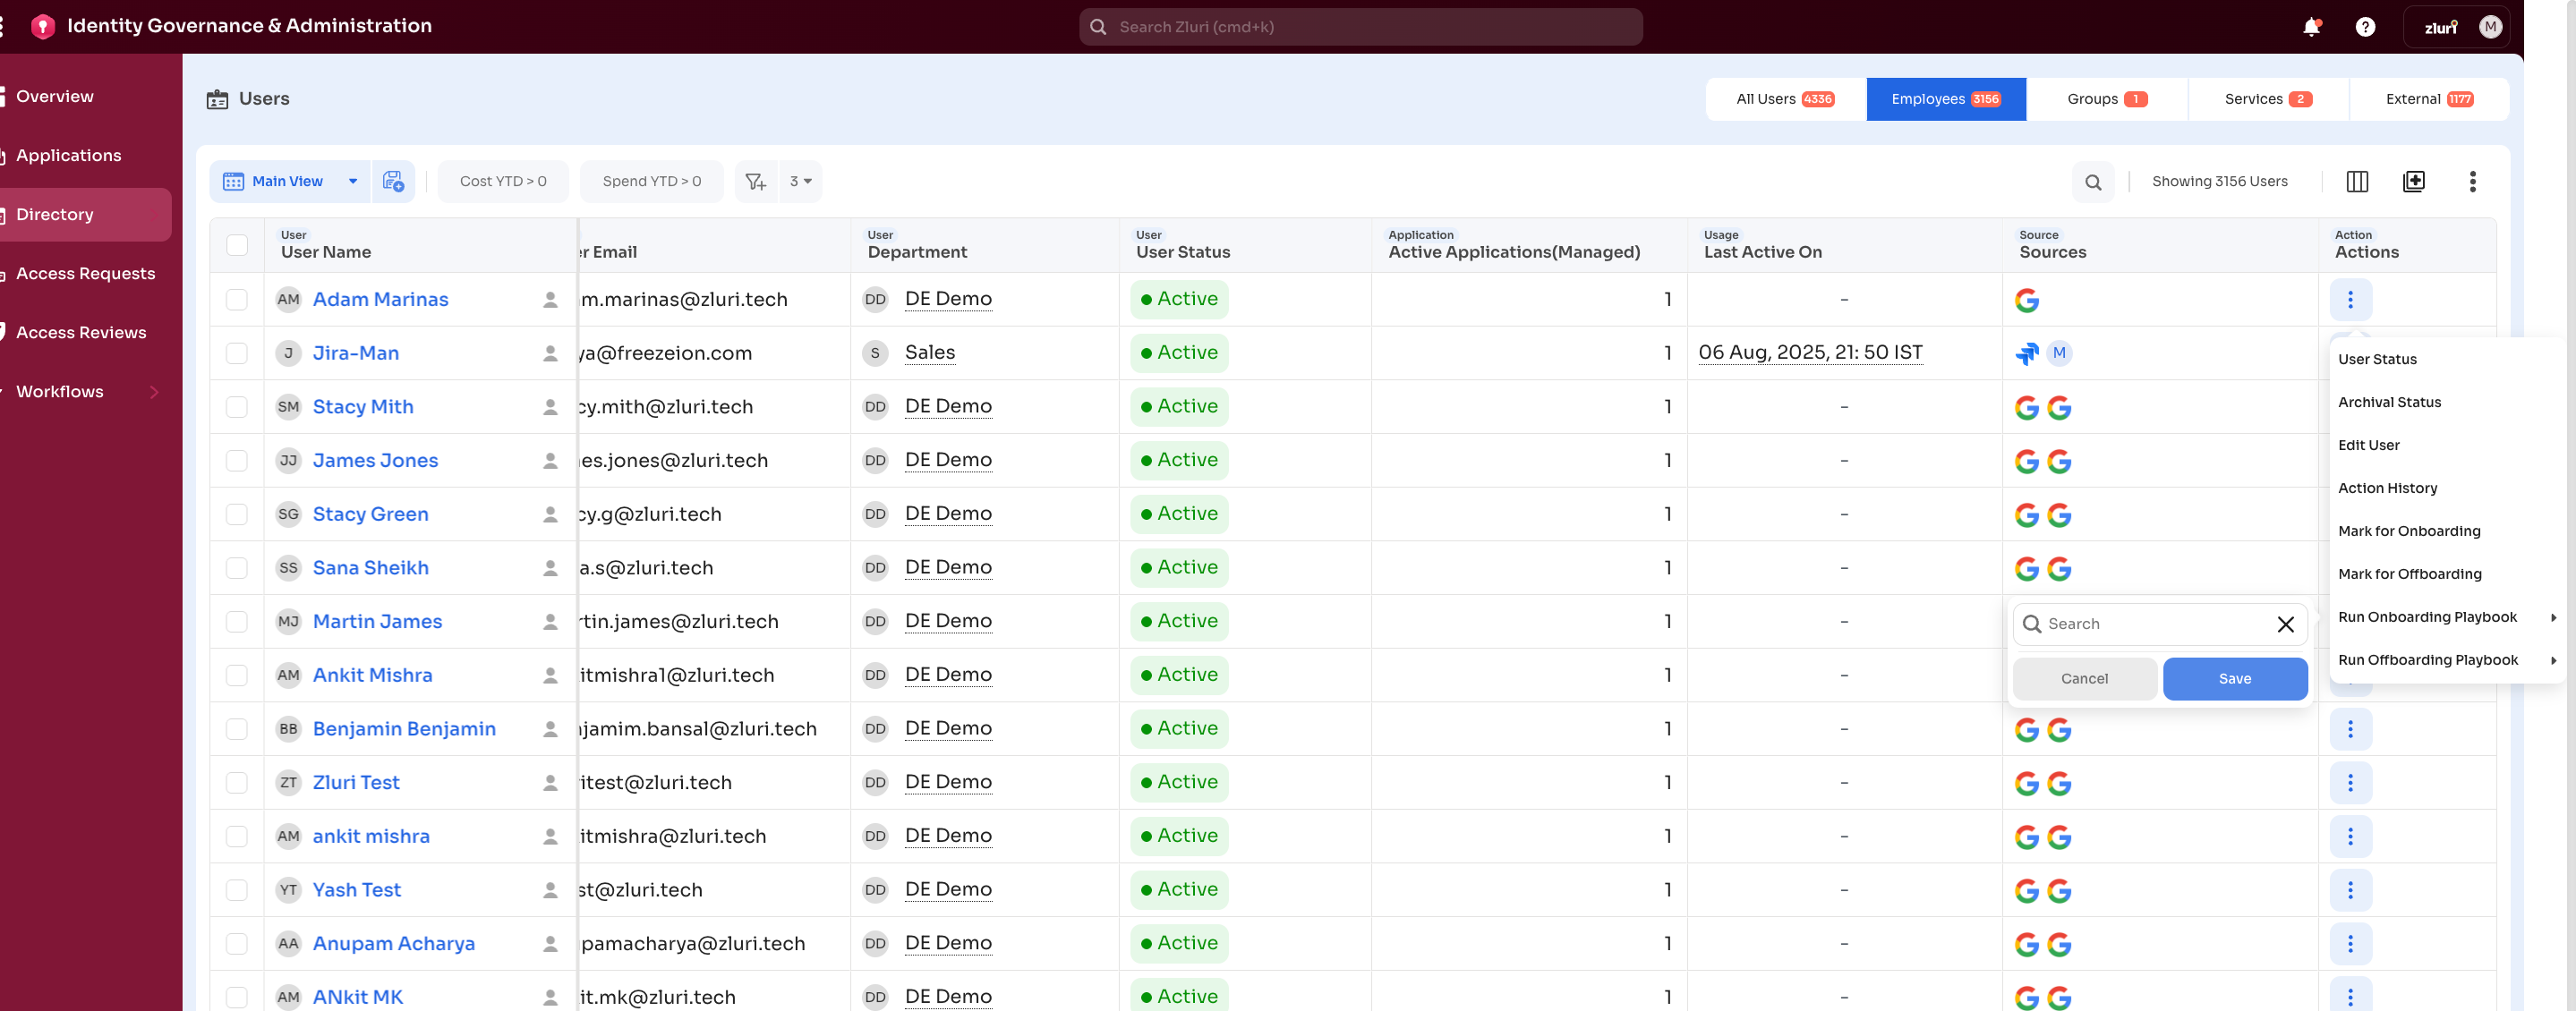
Step 3: Mark User for Onboarding/Offboarding
Onboarding:
- From the user's row, open the 3-dot menu
- Select Mark for Onboarding
Offboarding:
- In the Actions column, select the three-dot menu for the selected user
- Select Mark for Offboarding
Step 4: Configure Scheduling Details
A window will appear asking for details:

Onboarding:
- Assign onboarding to: Choose the onboarding assignee from the search list.
- Set onboarding Date:
- Location: Set location timings, specifying the date and time
- Onboarding Date: Set onboarding date for user
- Onboarding time: Set onboarding time for the user
Note: Onboarding cannot be scheduled for past dates and times.
Offboarding:
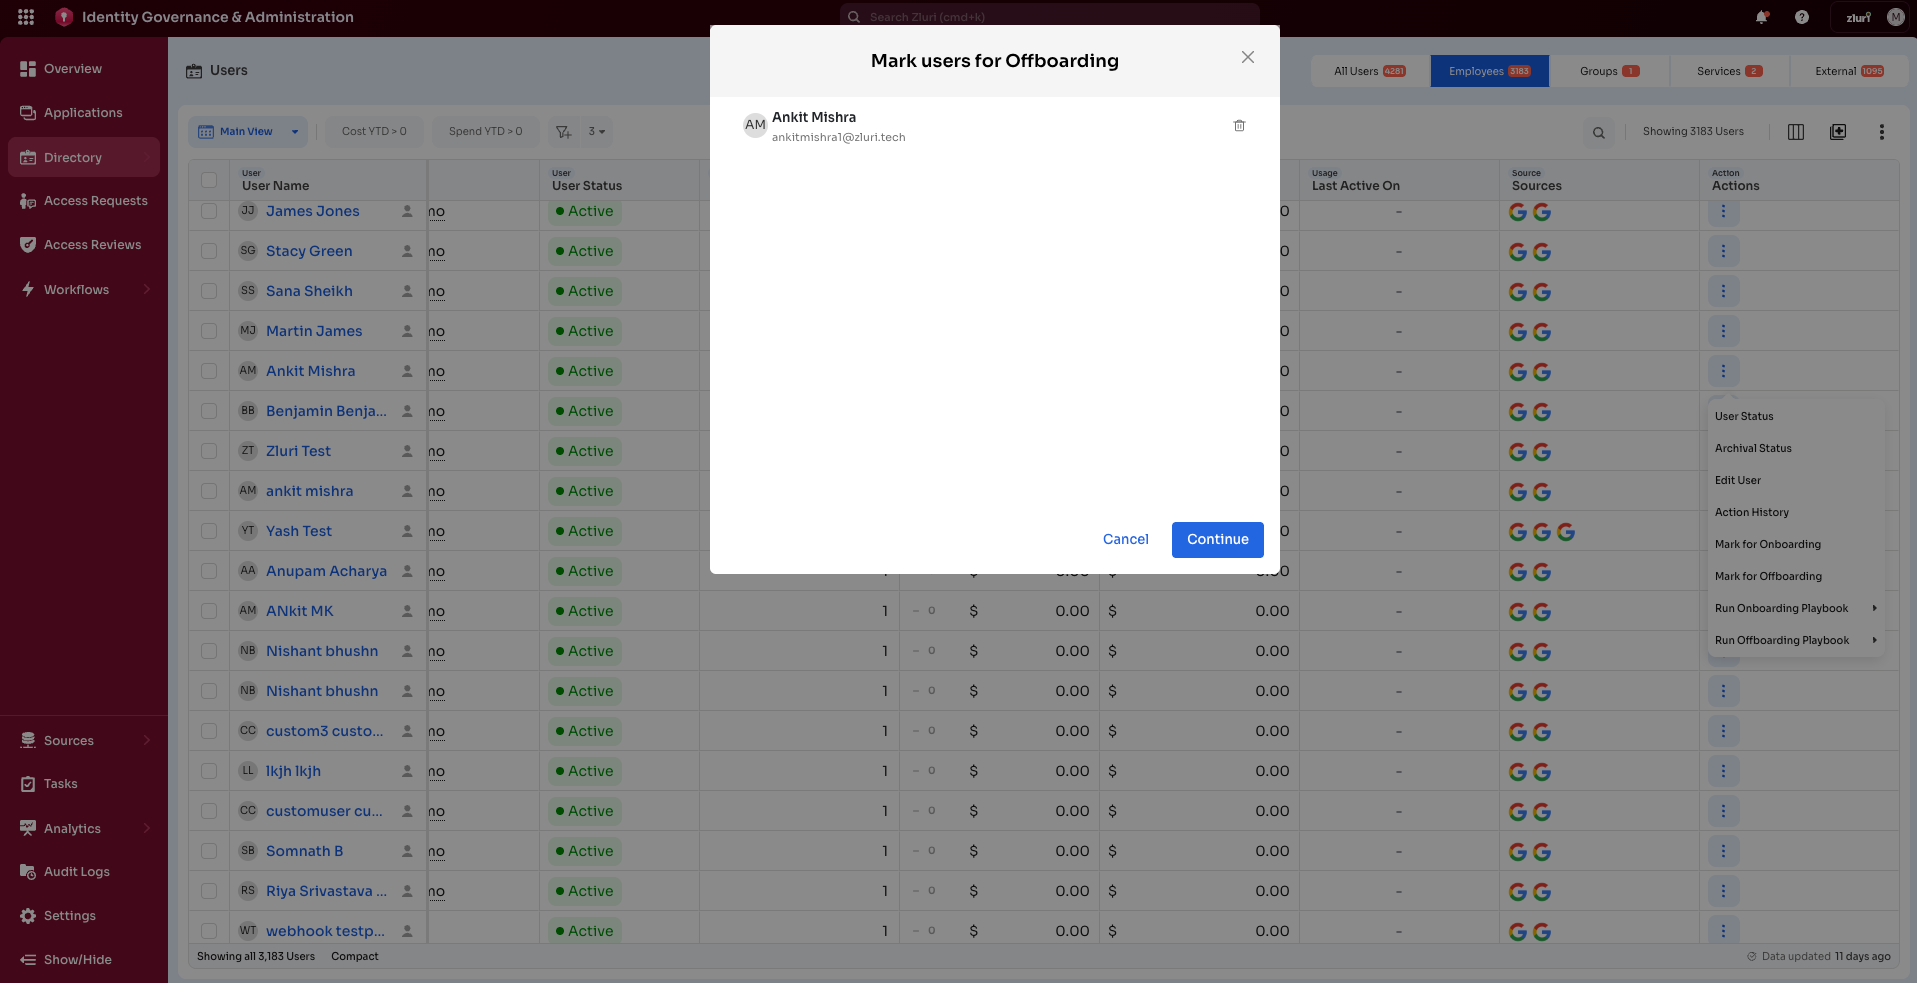
-
Confirm the user is marked for offboarding
Once marked, a confirmation window opens displaying the user's name with a delete. Select Continue to confirm.
-
Schedule offboarding
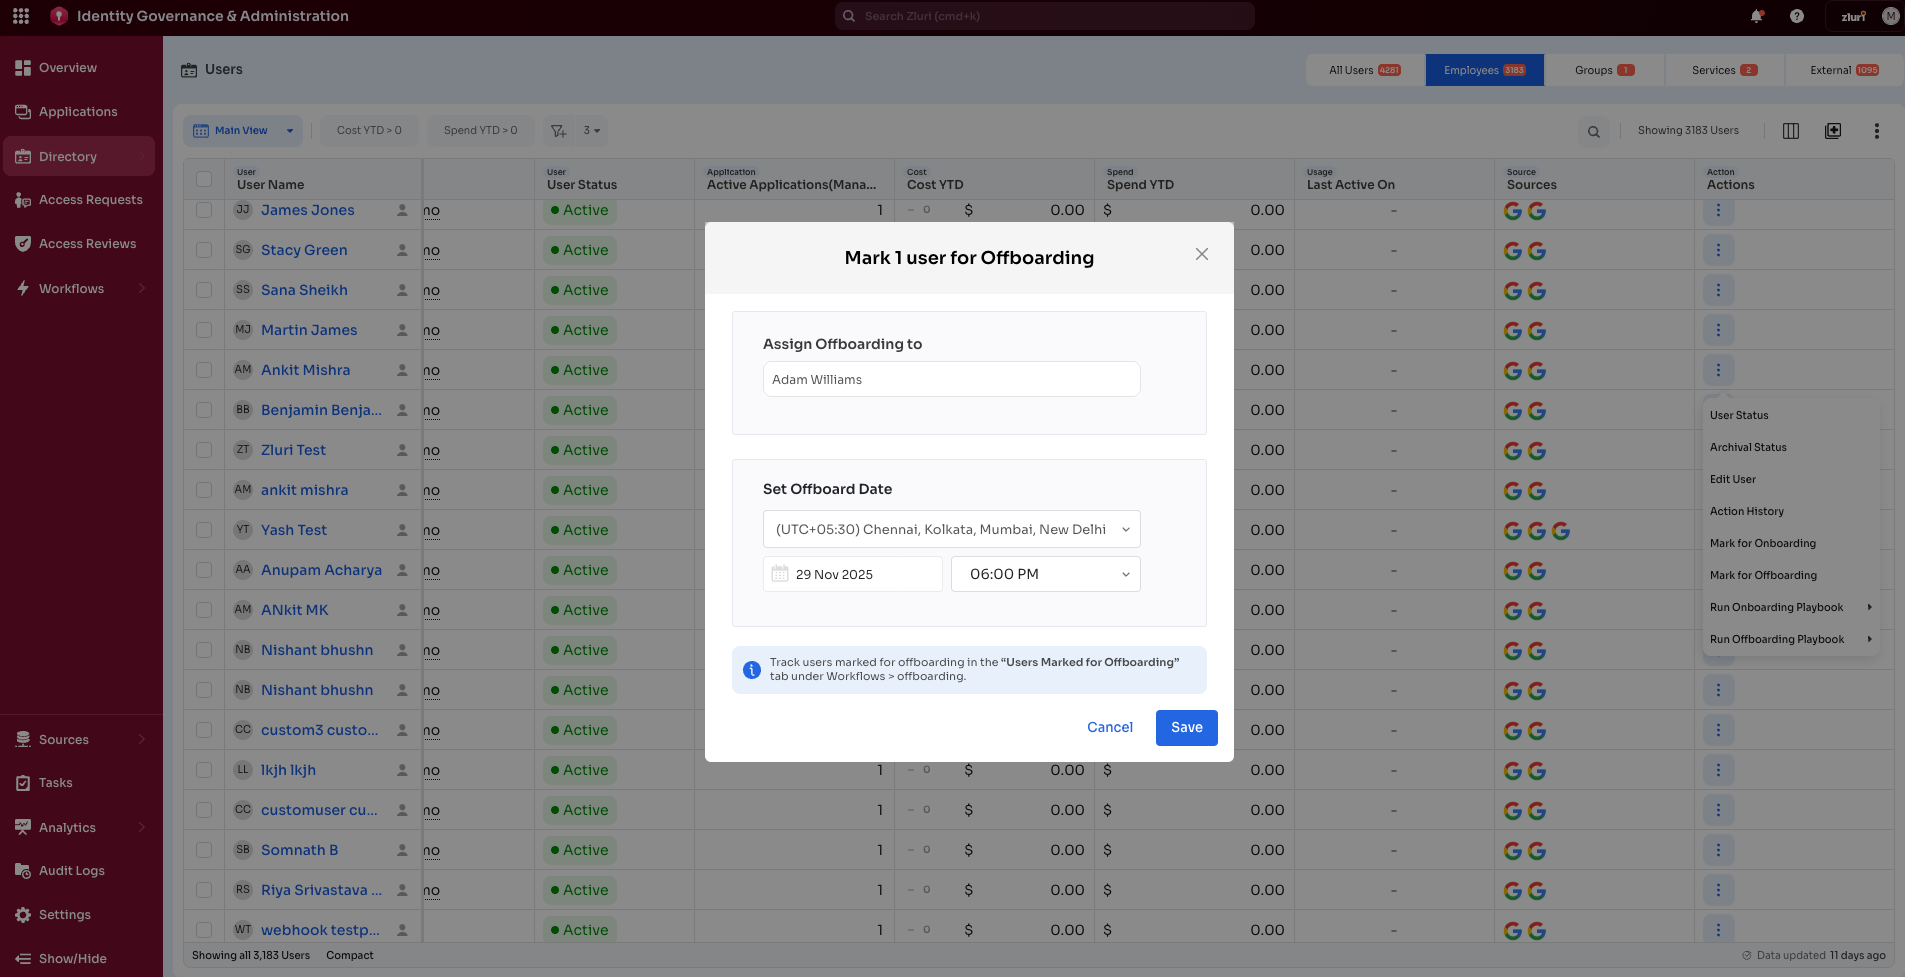
After selecting Continue, the next window has scheduling options:
- Assign Offboarding to → Select the assignee responsible for offboarding the user(s)
- Set Offboard Date → Select the date, time, and location for user offboarding
Step 5: Verify in the Tab
Onboarding:
The employee now appears in the Users Marked for Onboarding table. Refresh the list so the newly marked user appears.
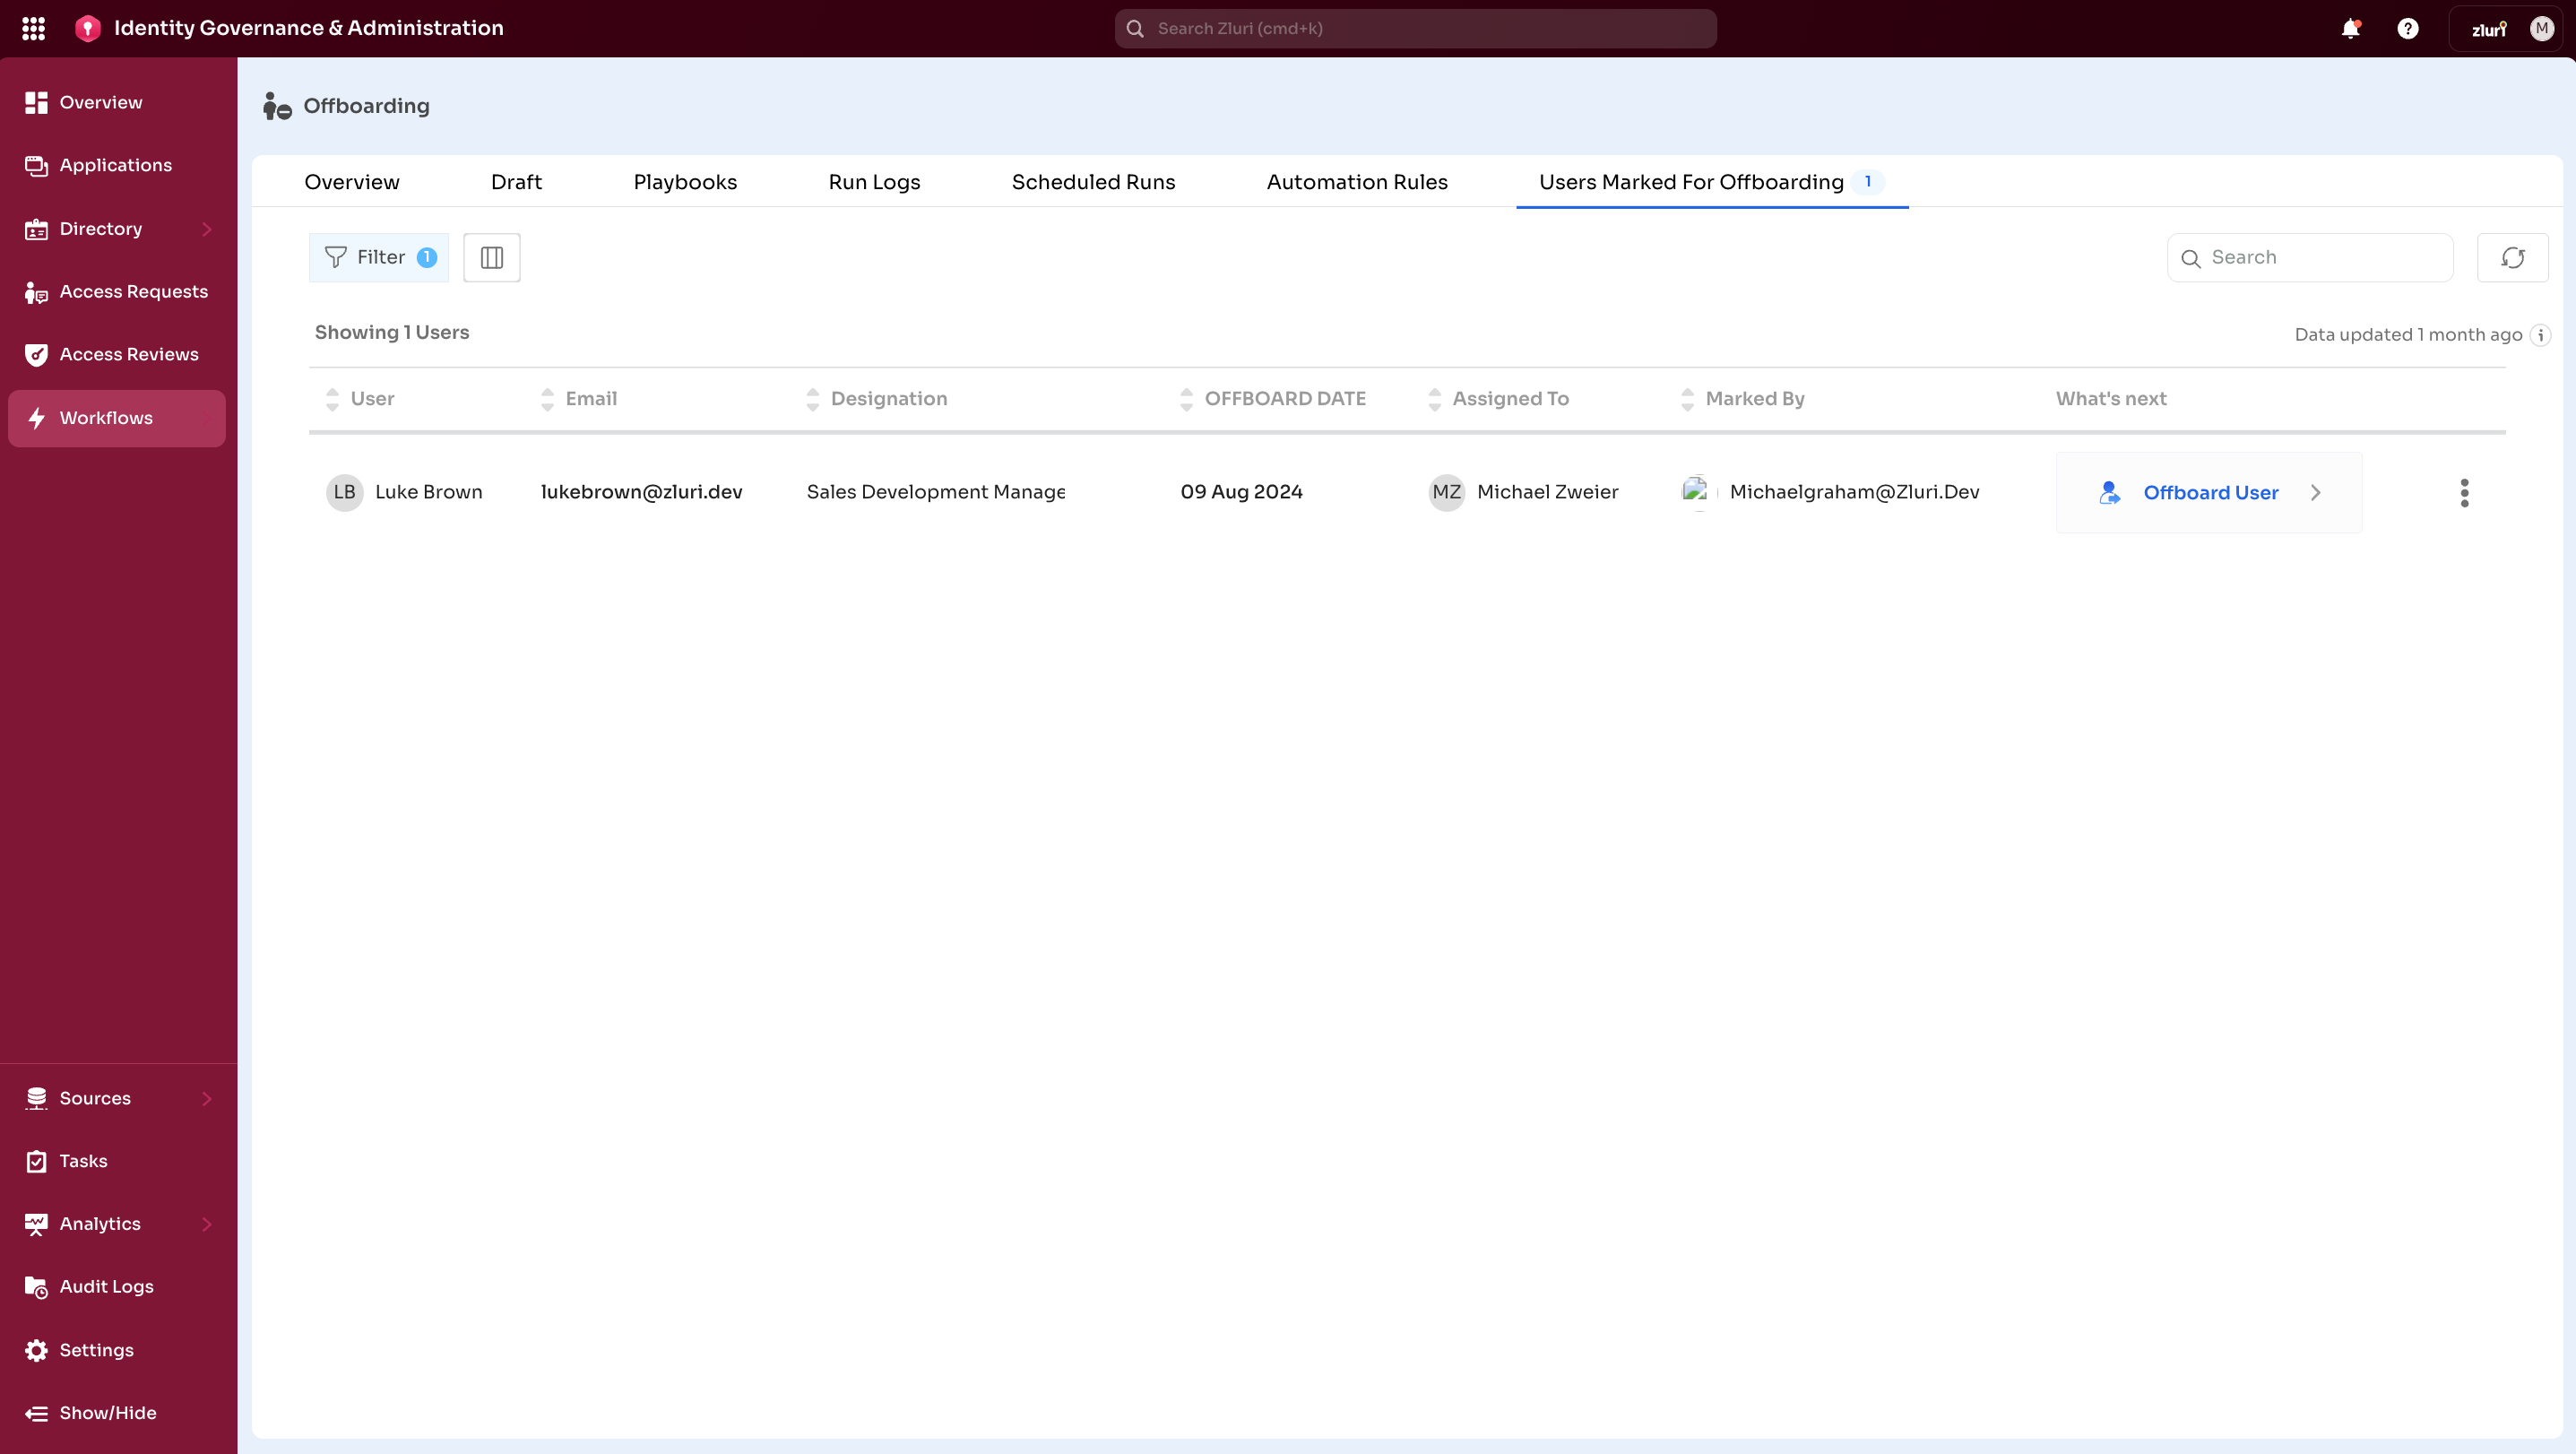
Offboarding:
Track users marked for offboarding in the Users Marked for Offboarding tab under Workflows > Offboarding.
Additional Actions (Offboarding Only)
For every user marked for offboarding, a three-dot vertical icon is displayed in the same row. Select this icon to access the action menu:
Available actions:
- Add App – Redirects to the Applications page under Directory menu where admin can provide access to applications for the user
- Mark as Active – Updates the user's status to 'Active'
- Mark as Inactive – Updates the user's status to 'Inactive'
- Mark as Suspended – Updates the user's status to 'Suspended'
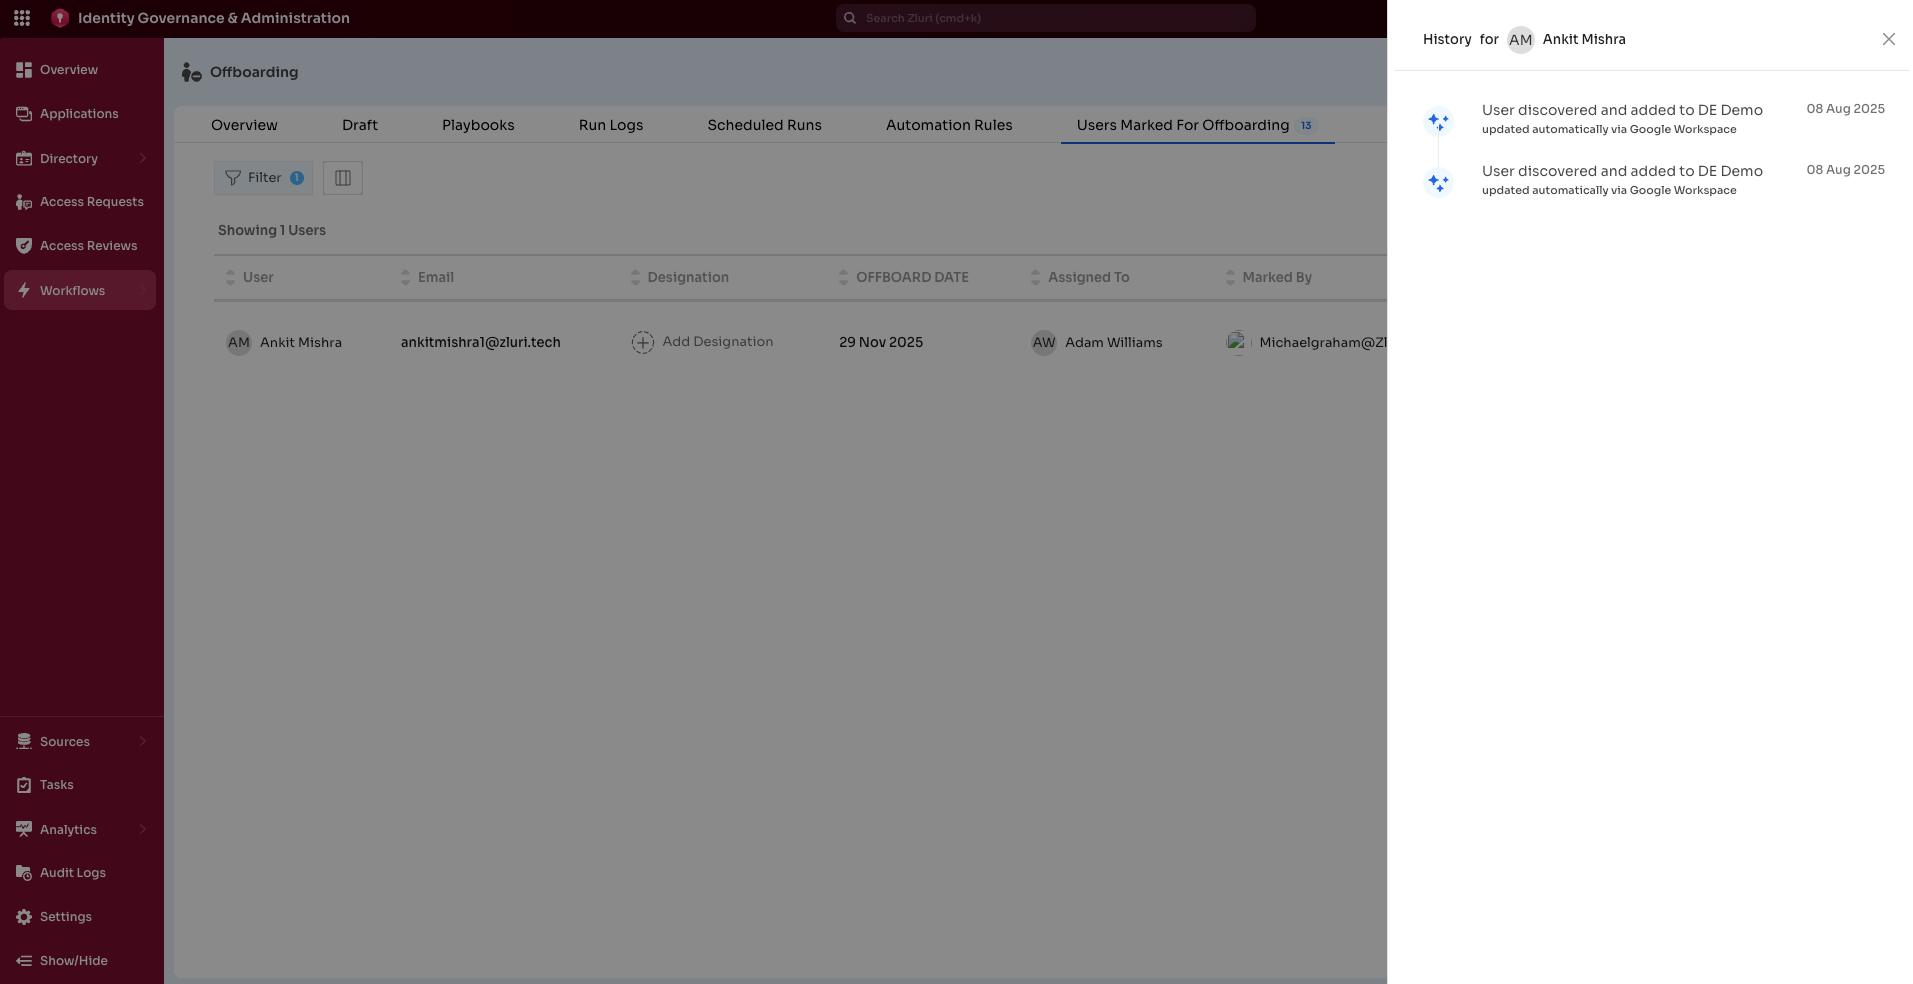
- View Action History – Shows details of all previous actions for this user
- Remove from Offboarding – Removes the user from the offboarding list
Offboarding Processes
There are three primary processes by which a user marked for offboarding can be removed entirely from the system:
1. Manual Workflow Method
- In the What's Next column, select Offboard User
- This opens the workflow builder for the user
- Upon marking an employee for offboarding, Zluri automatically populates their application inventory into the workflow builder page
- Suggested removal actions may include:
- Remove User
- Revoke License
- Deprovision Account
Example: A departing Marketing user may have Slack (Remove User), Zendesk (Revoke License if Sales), and HubSpot (Deprovision) as suggested actions. The administrator reviews and confirms these preconfigured actions before execution.

2. Automation Rules Method
Use predefined automation rules triggering offboarding playbooks for users marked for offboarding.
3. Marking Users Inactive in Zluri
Update user status to inactive after completing all offboarding actions, maintaining accurate user records in the system.