Create a New Playbook
Steps: Create a new Playbook, add and configure applications, actions, conditions
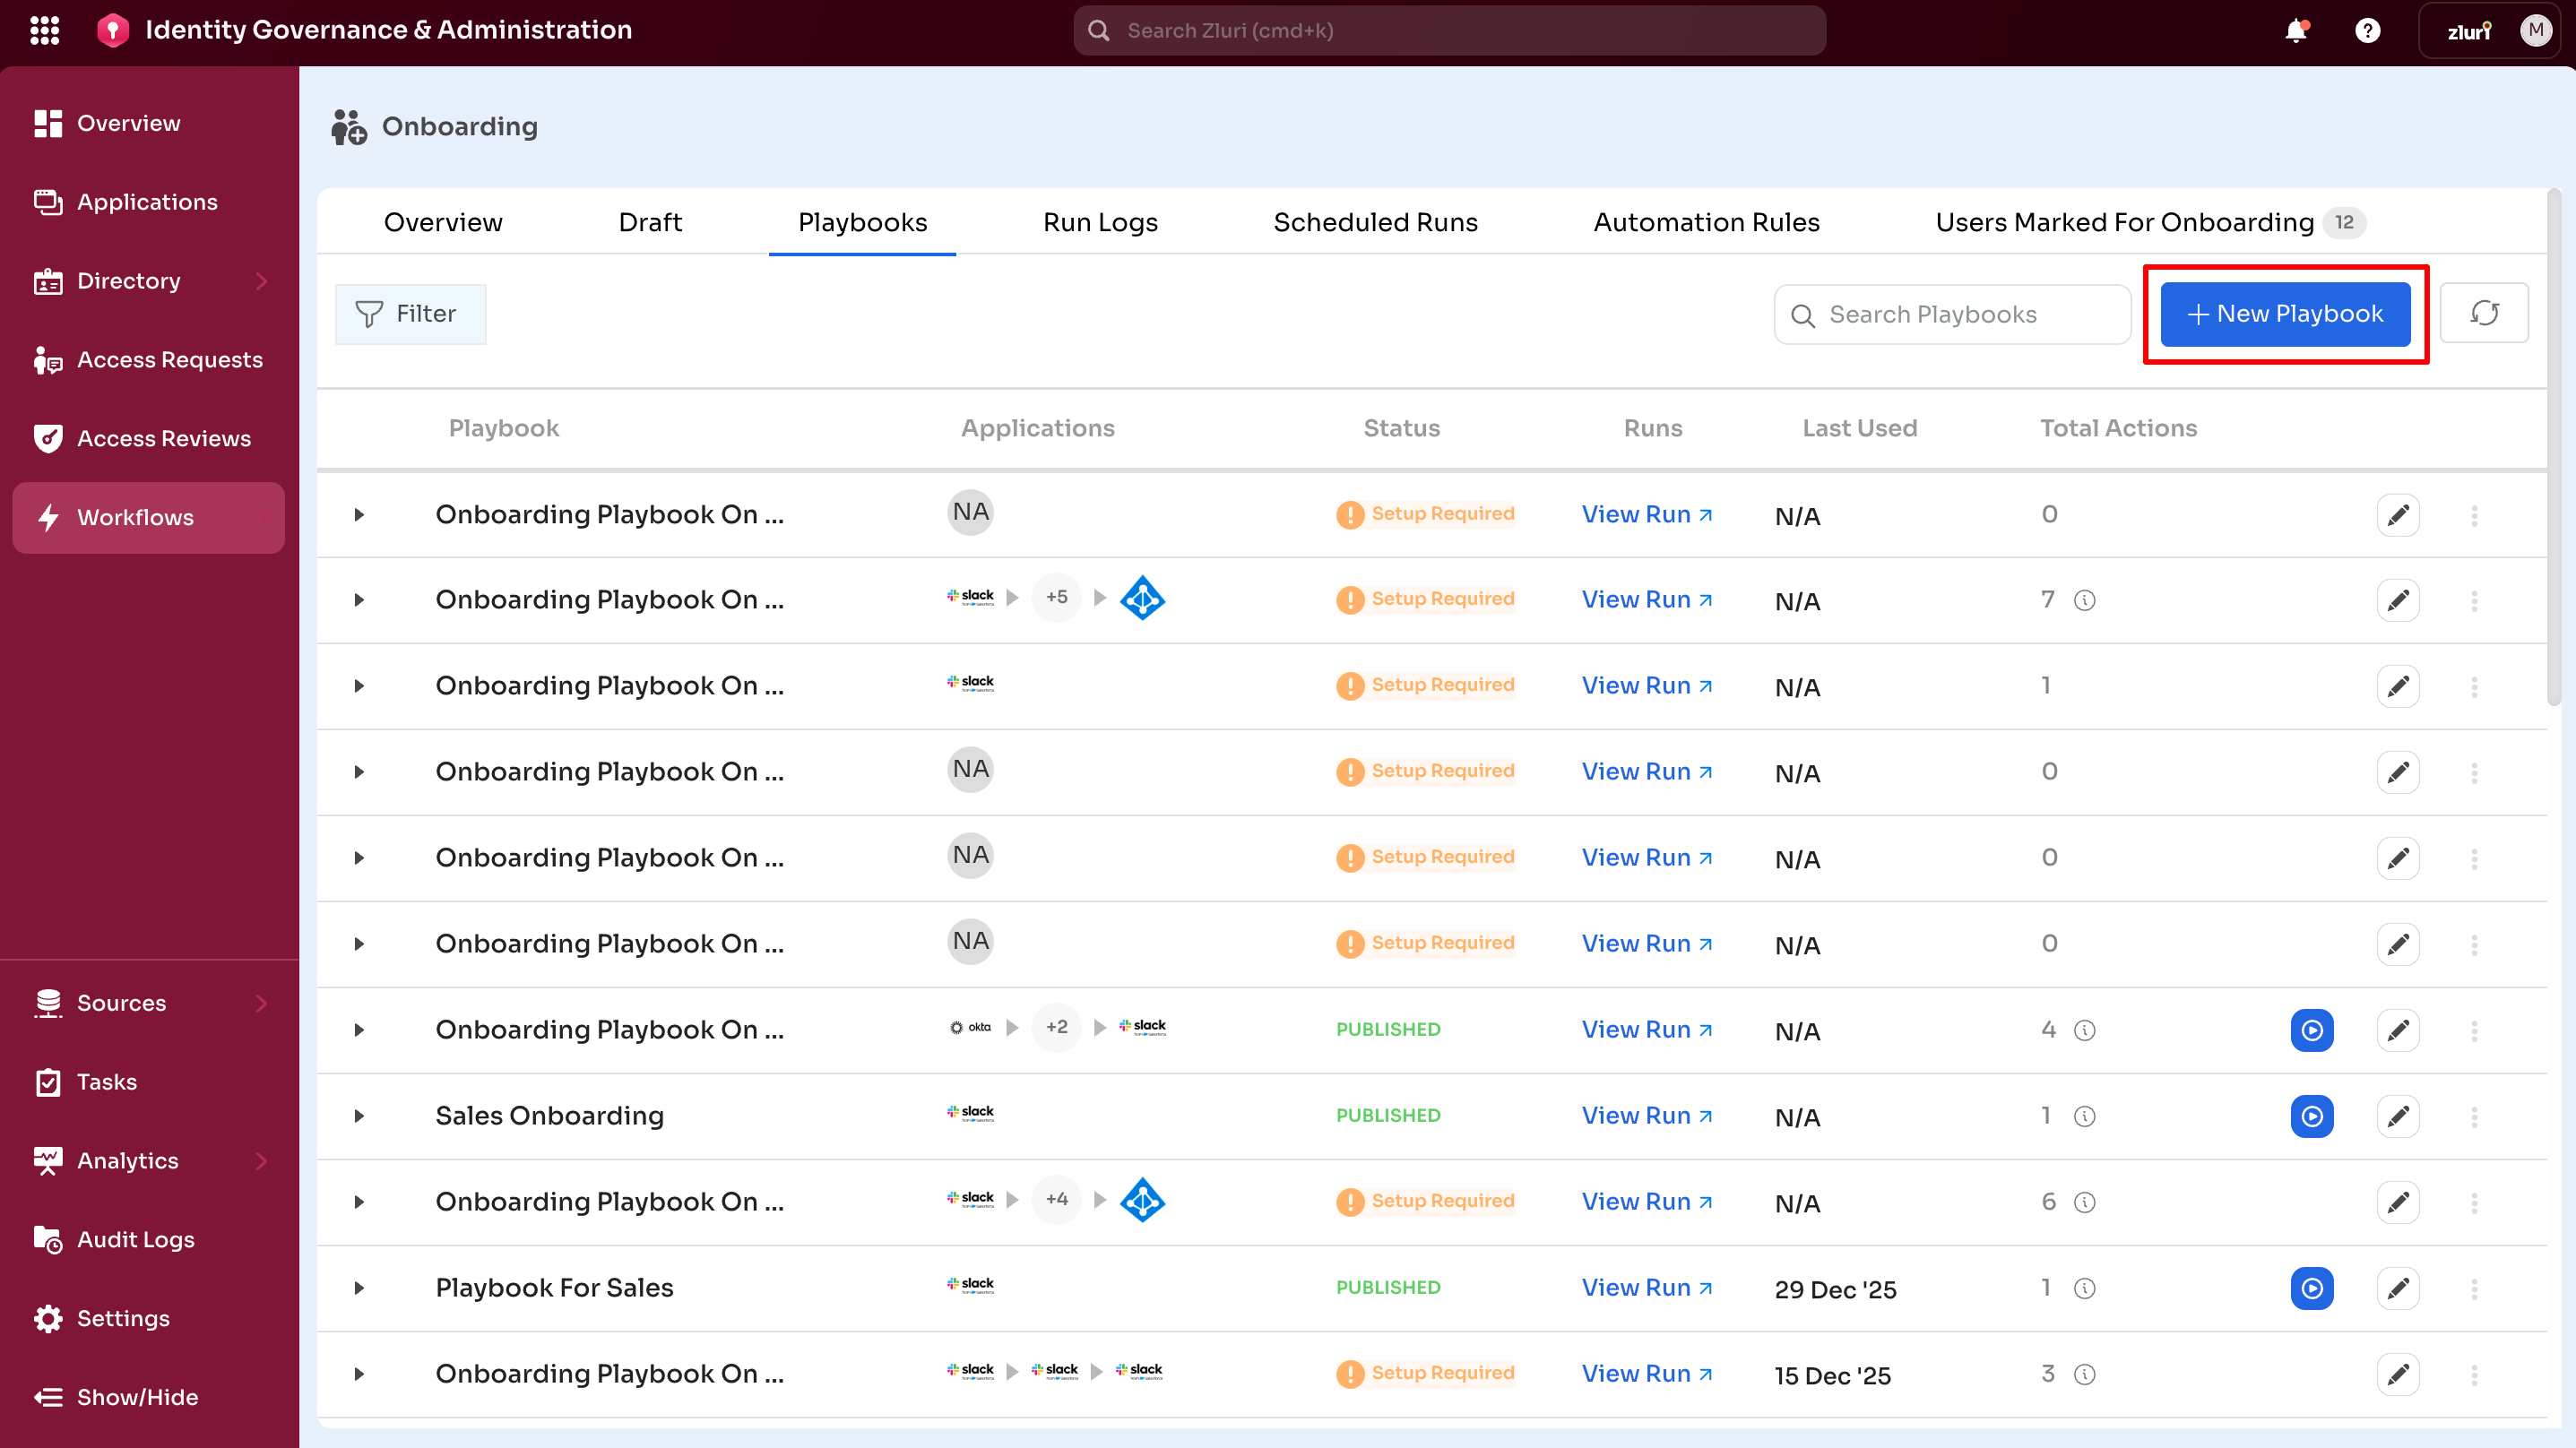
Step 1: Select + New Playbook
From Onboarding
- Navigate to Workflows → Onboarding → Playbooks
- Select + New Playbook
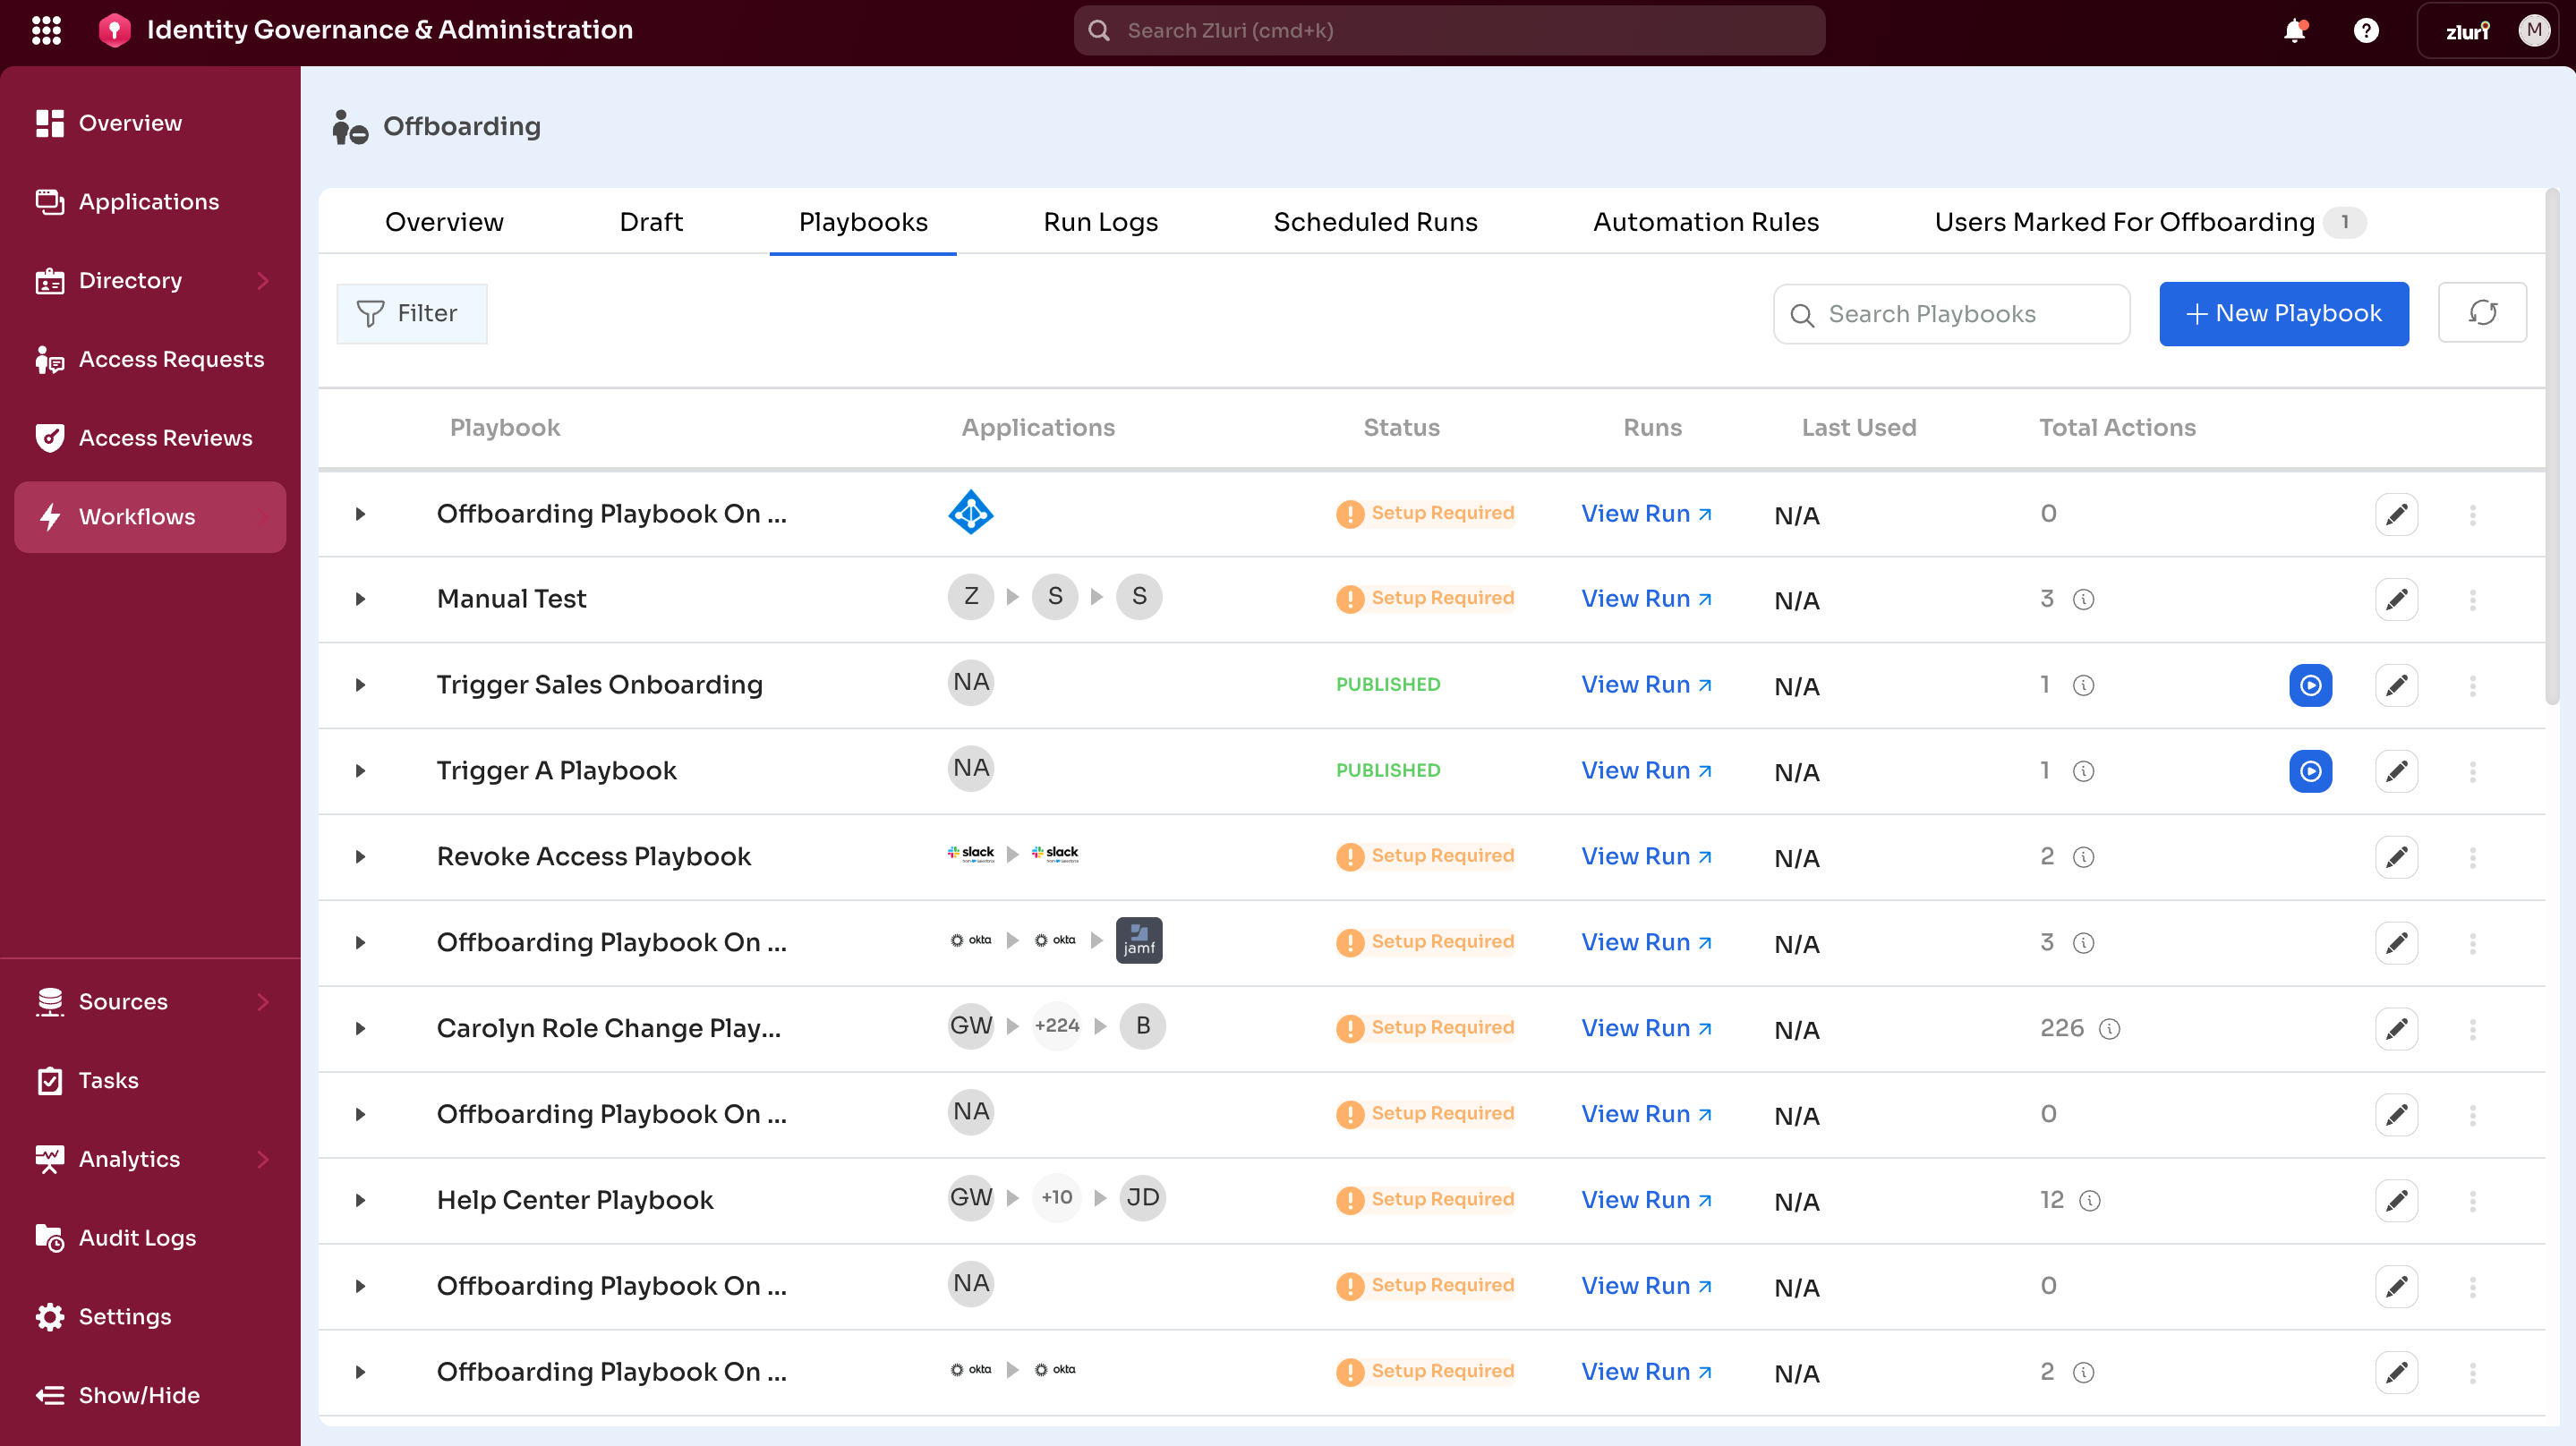
From Offboarding
- Navigate to Workflows → Offboarding → Playbooks
- Select + New Playbook
Step 2: Add Applications
Add applications using the Recommended tab or the + icon on the canvas.
From the Recommended tab (Control Panel)
- Review suggested applications in the control panel
- Select + Add next to the desired apps
- The application appears on the canvas
Applications menu (from Playbook canvas)
- Select the + icon
- Search for applications by typing the name in the search field
- Select from the displayed Most Used Apps
- Add applications using Zluri Actions
Example applications by department
Sales Team
- Salesforce
- HubSpot
- Zoom
- LinkedIn Sales Navigator
Engineering Team
- GitHub
- Jira
- Slack
- AWS
Marketing Team
- Mailchimp
- Figma
- Google Analytics
- Social Media Tools
Note: Add applications to playbooks using the same process as workflows. Application features and functionalities work identically in both Playbooks and Workflows.
Step 3: Configure Actions
For each application added, configure actions to define the onboarding playbook process.
For each action
- Select + Add an action at the bottom of the app block
- Select an action from the Choose Action menu
- Configure action parameters
- Set conditions (optional)
- Assign approvers (if required)
- Add delays (if required)
- Select Save Task
Note: Configuring actions in playbooks is identical to configuring actions in workflows. Features and behavior are the same.
Step 4: Set Conditions
Control execution of applications and actions based on user attributes.

Application-level conditions
Control whether the entire application block runs.
- Example: Run the GitHub block only if Department = Engineering
Action-level conditions
Control whether specific actions execute.
- Example: Invite users to #engineering channel only if Role = Engineer
Available attributes
- User Role
- User Department
- User Location
- User Status
- User Designation
- Employment Type
Use AND/OR operators
Create complex rules:
Note: Setting conditions in playbooks works the same as in workflows.
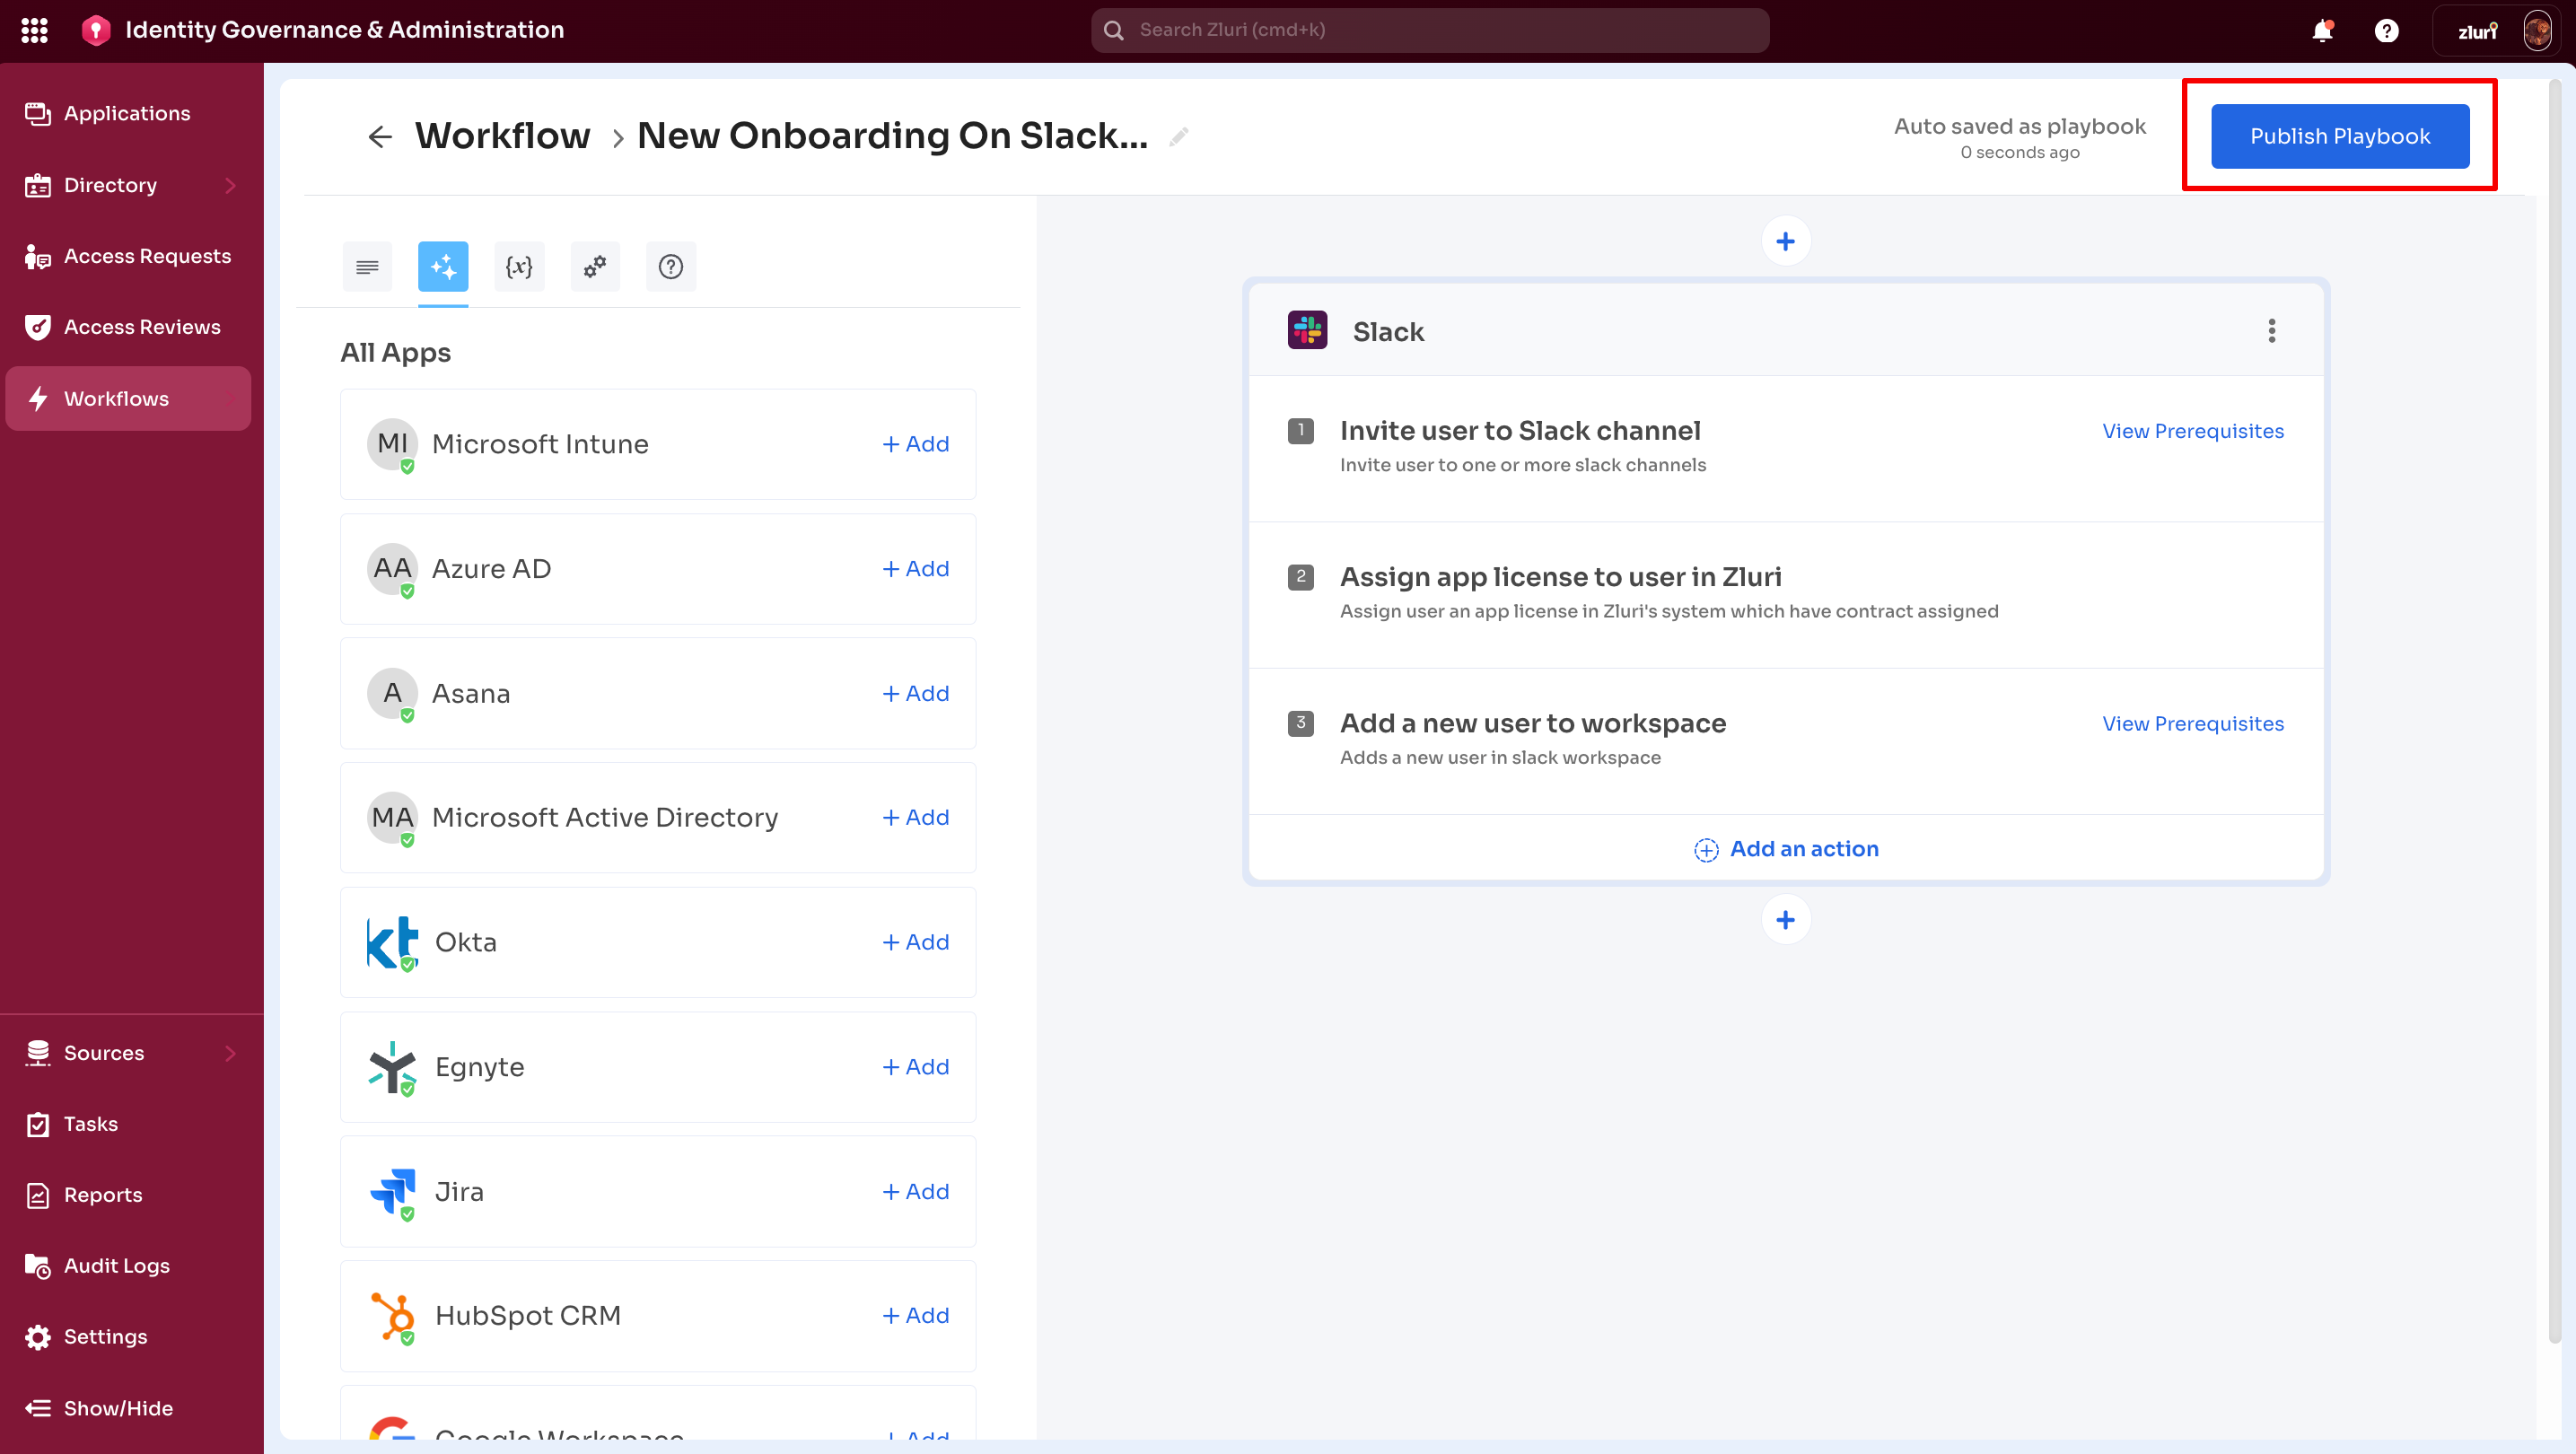
Step 5: Publish and Manage Playbooks
Once all applications, actions, and conditions are configured, publish the playbook.
To publish
- Select Publish Playbook (top-right corner)
Before publishing
- Review all configured actions
- Verify conditions
- Check for incomplete parameters (blue ribbon notes)
If Publish is disabled
Hover over the button to identify missing configurations.

Common issues
- Incomplete action parameters
- Missing required fields
- Unmet prerequisites
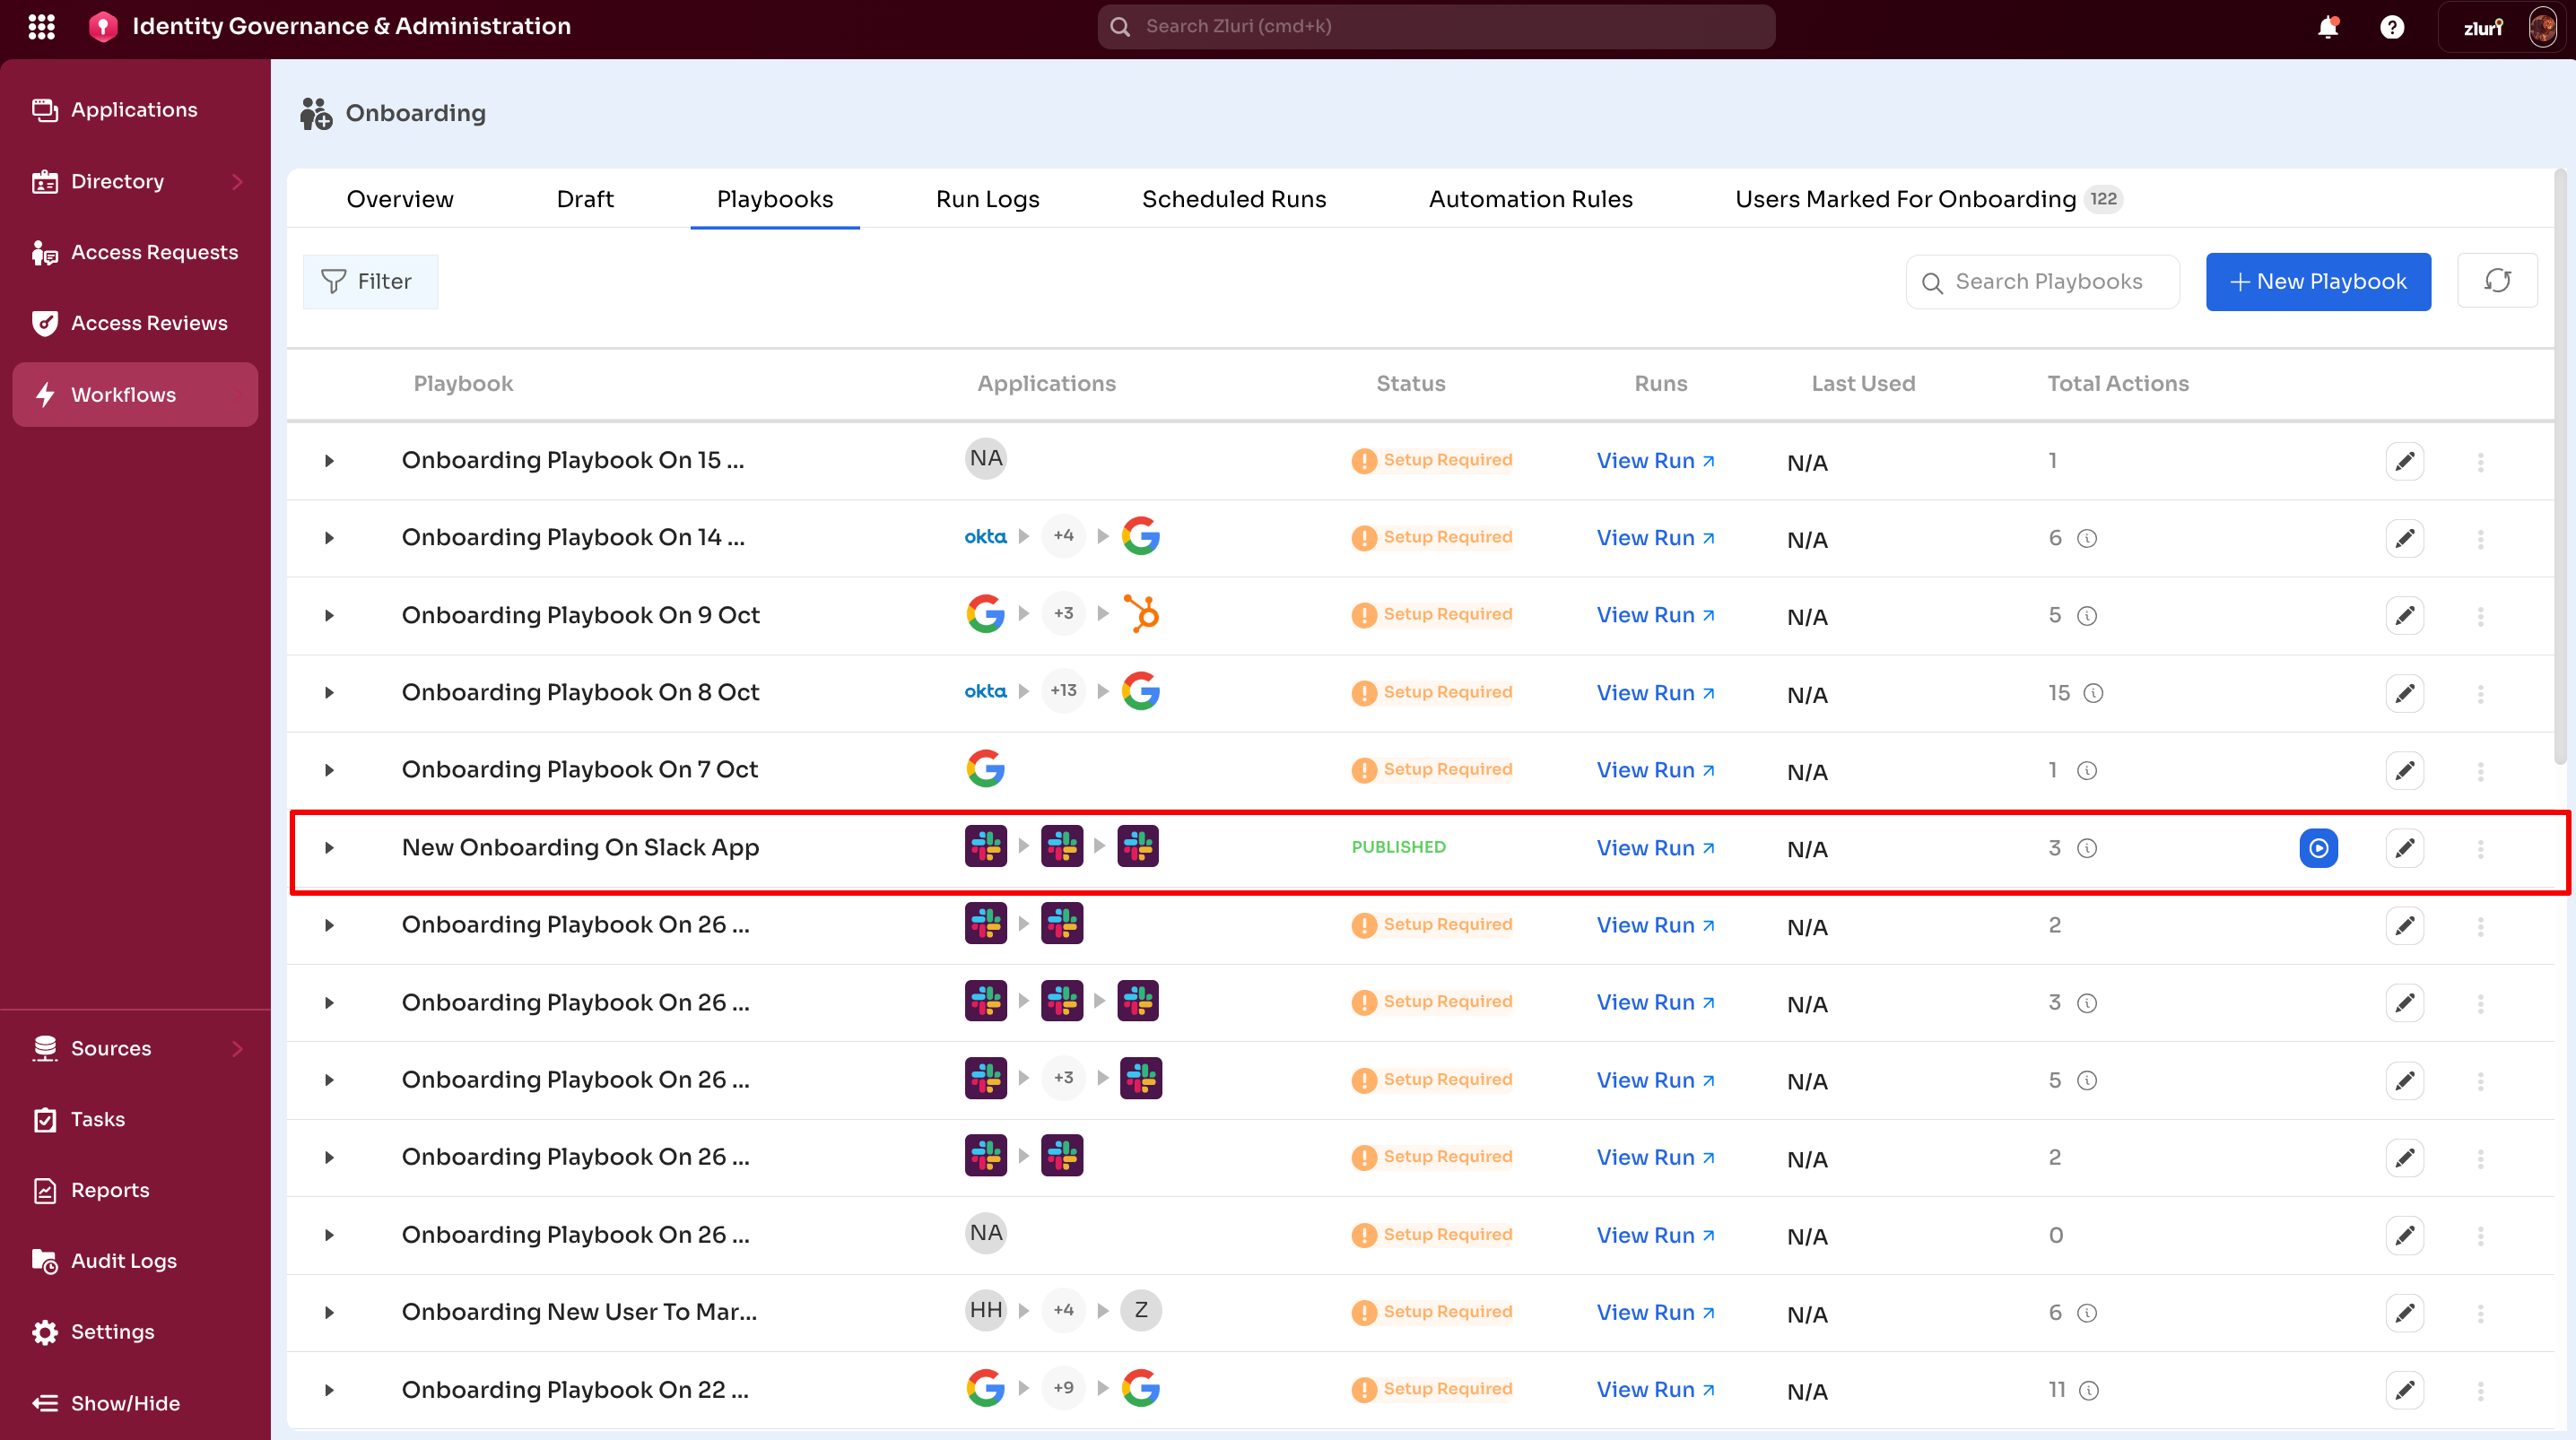
After publishing
- Playbook appears in the Playbooks table with Published status

Managing Published Playbooks
View playbook details
- Select the playbook name from the table

Left section displays
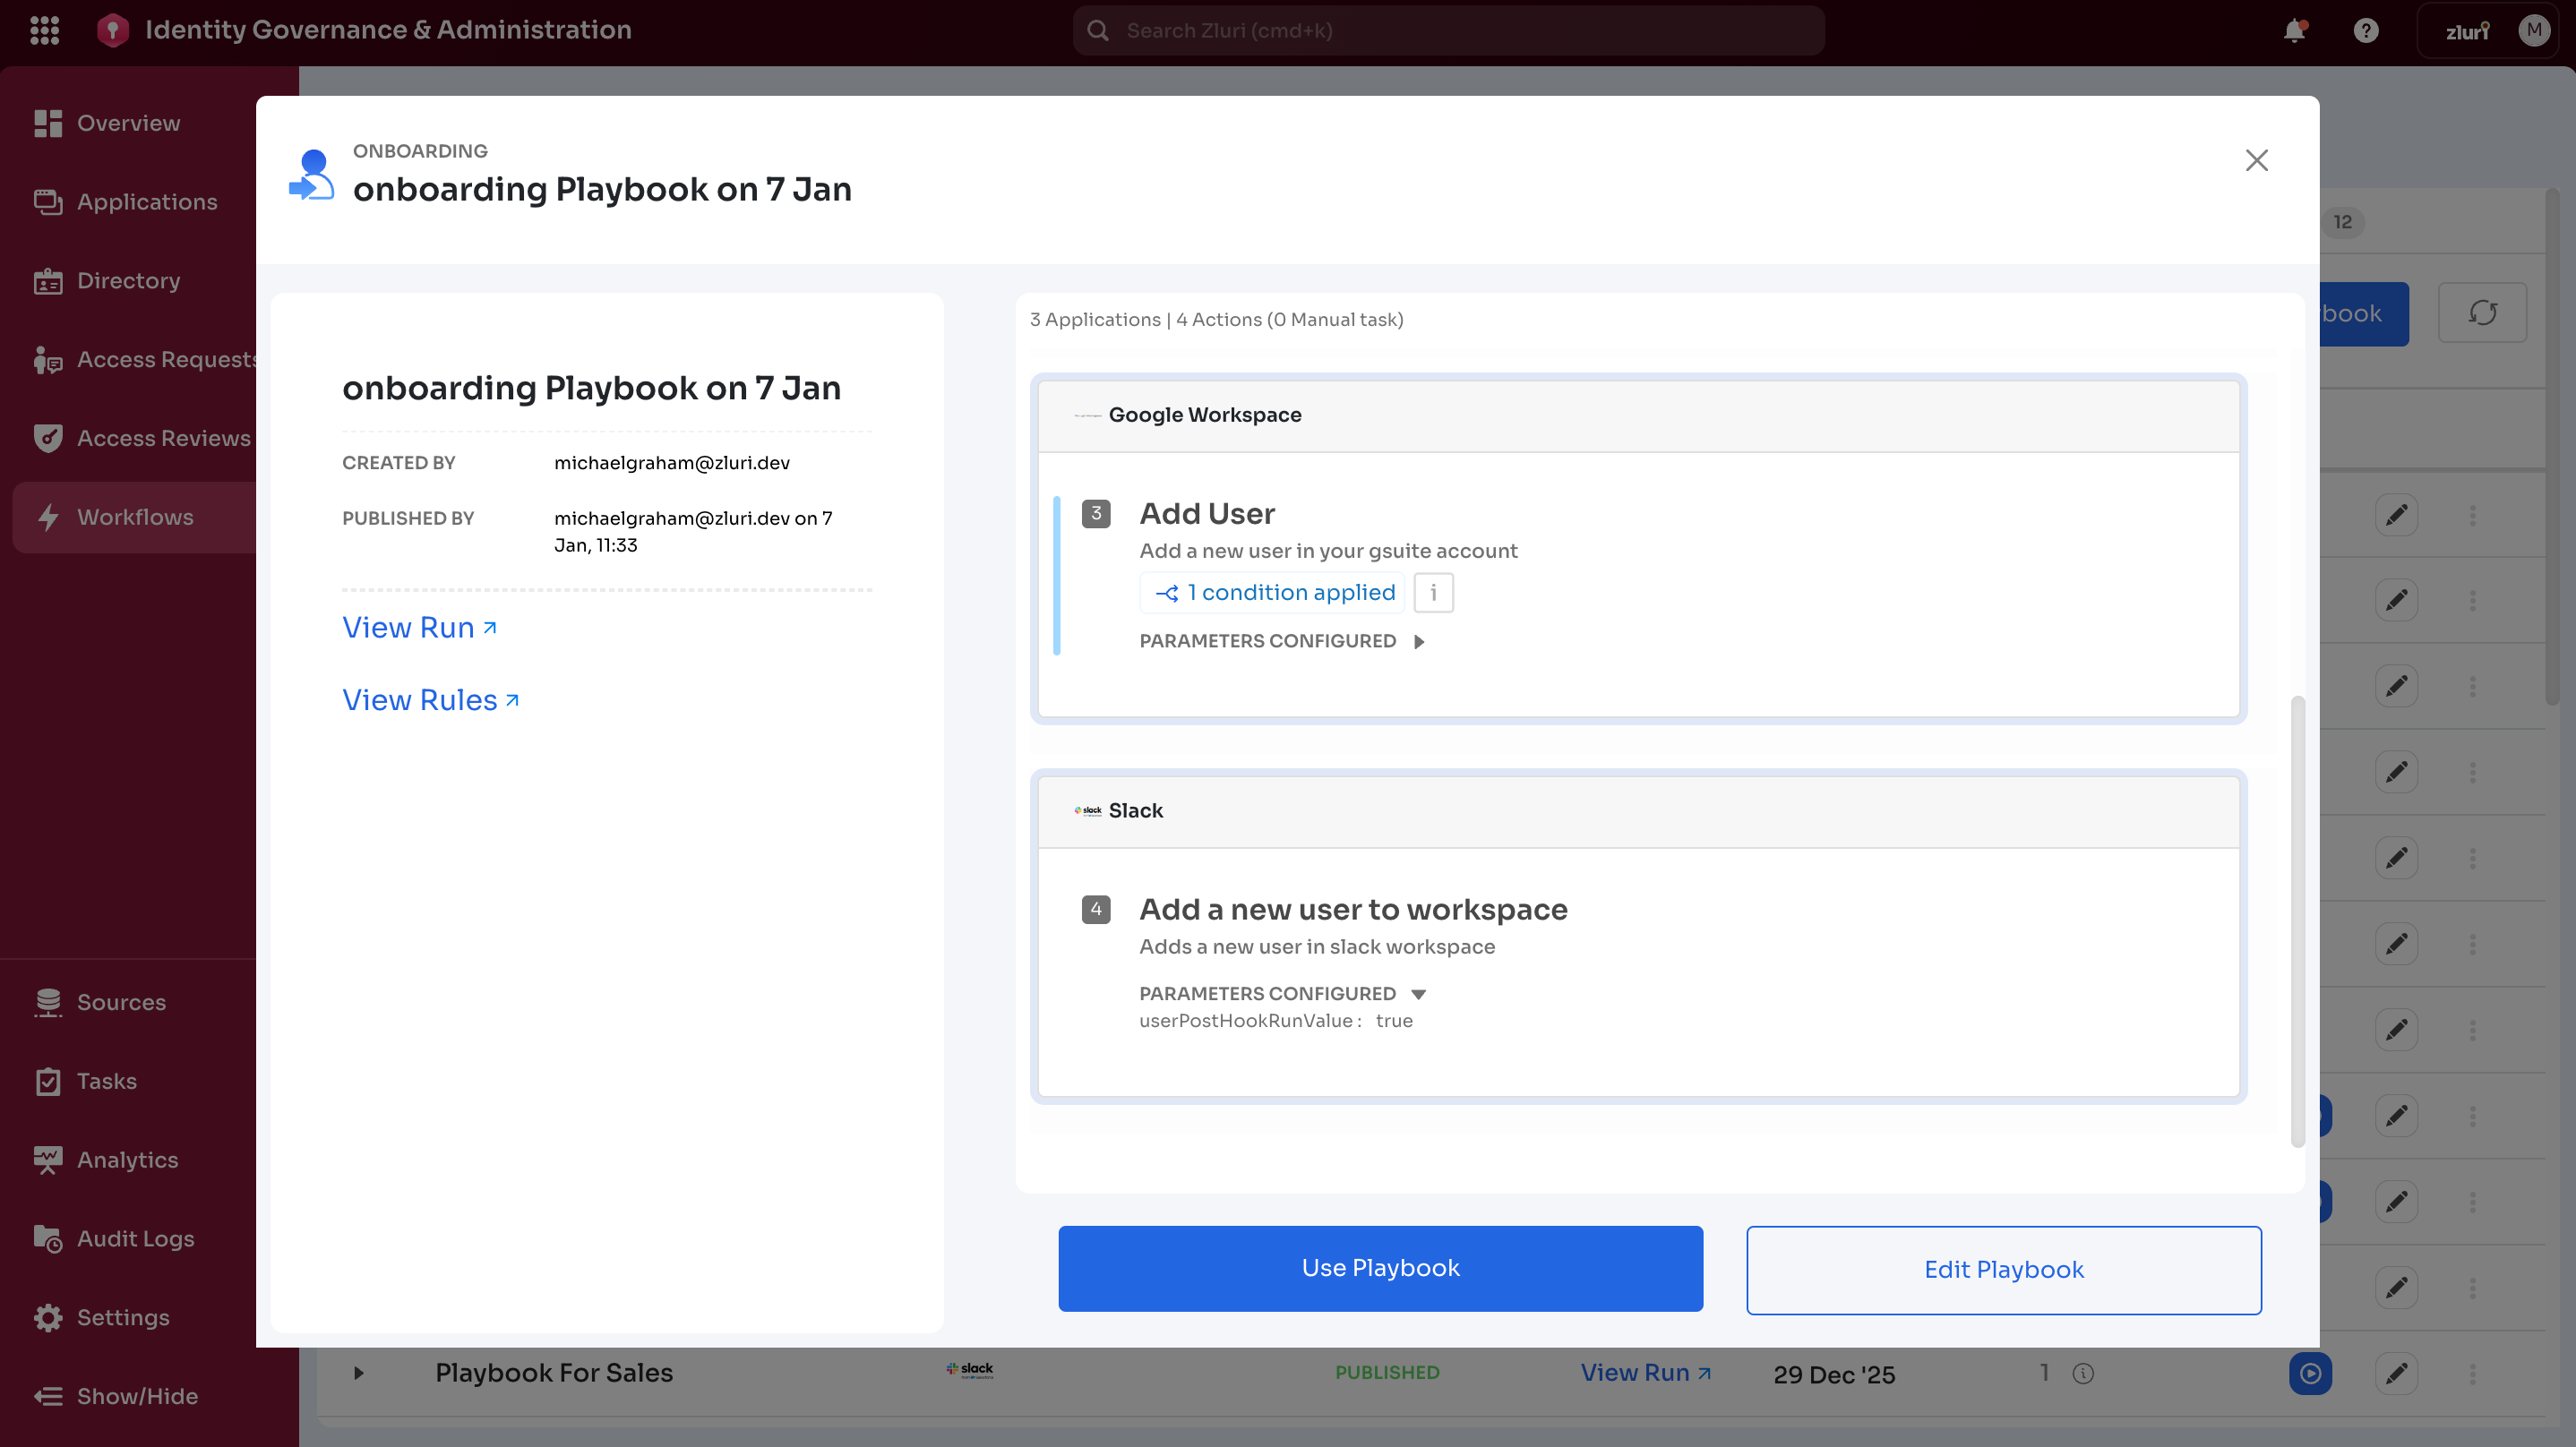
- Playbook Name
- Created By
- Published By (with date and time)
- View Runs (Run Logs)
- View Rules (Automation triggers)
Right section displays
- Total applications, actions, and manual tasks
- Application blocks with actions and conditions
- Use Playbook option
- Edit Playbook option
Edit Published Playbooks
From playbook details
- Select playbook name
- Select Edit Playbook
From playbook table
- Select the pencil icon next to the playbook name
Edit dialog options
- Unpublish and Edit – Modify and republish
- Cancel – Exit without changes
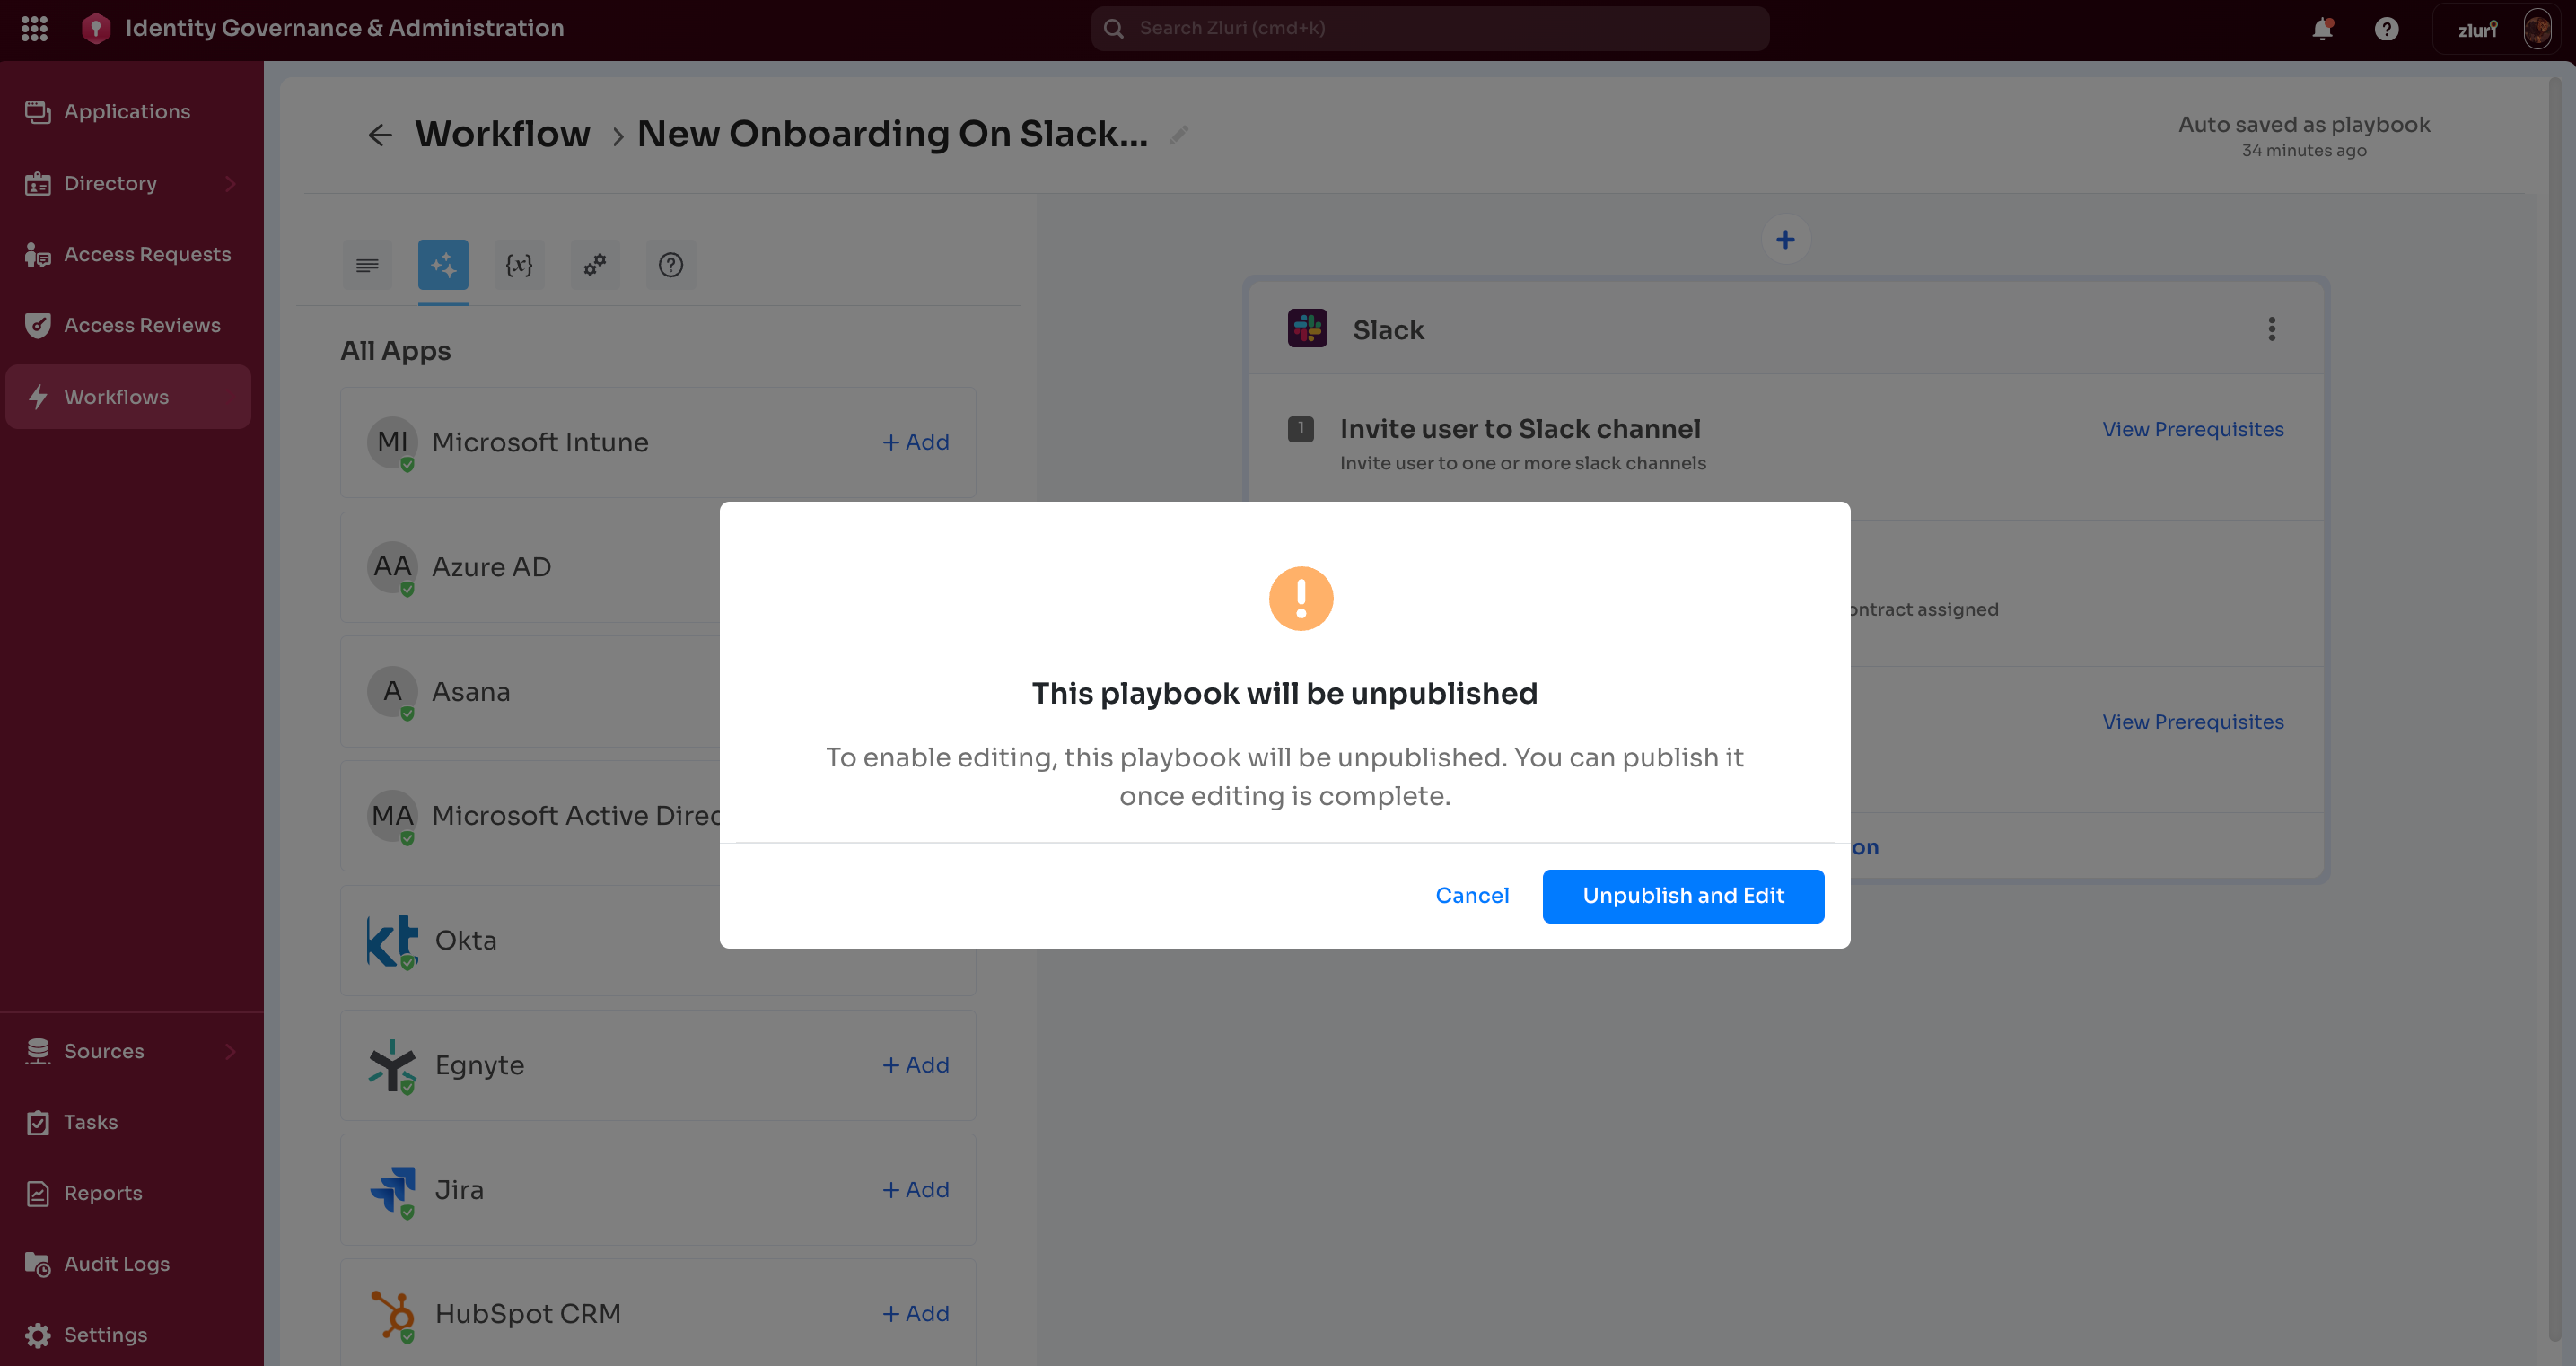
Note: Editing requires unpublishing first. Republish after changes.
Step 6: Run a Playbook
From playbook details
- Select playbook name
- Select Use Playbook
- Select users
- System validates configuration
- Choose execution:
- Run immediately
- Schedule for later (with timezone)
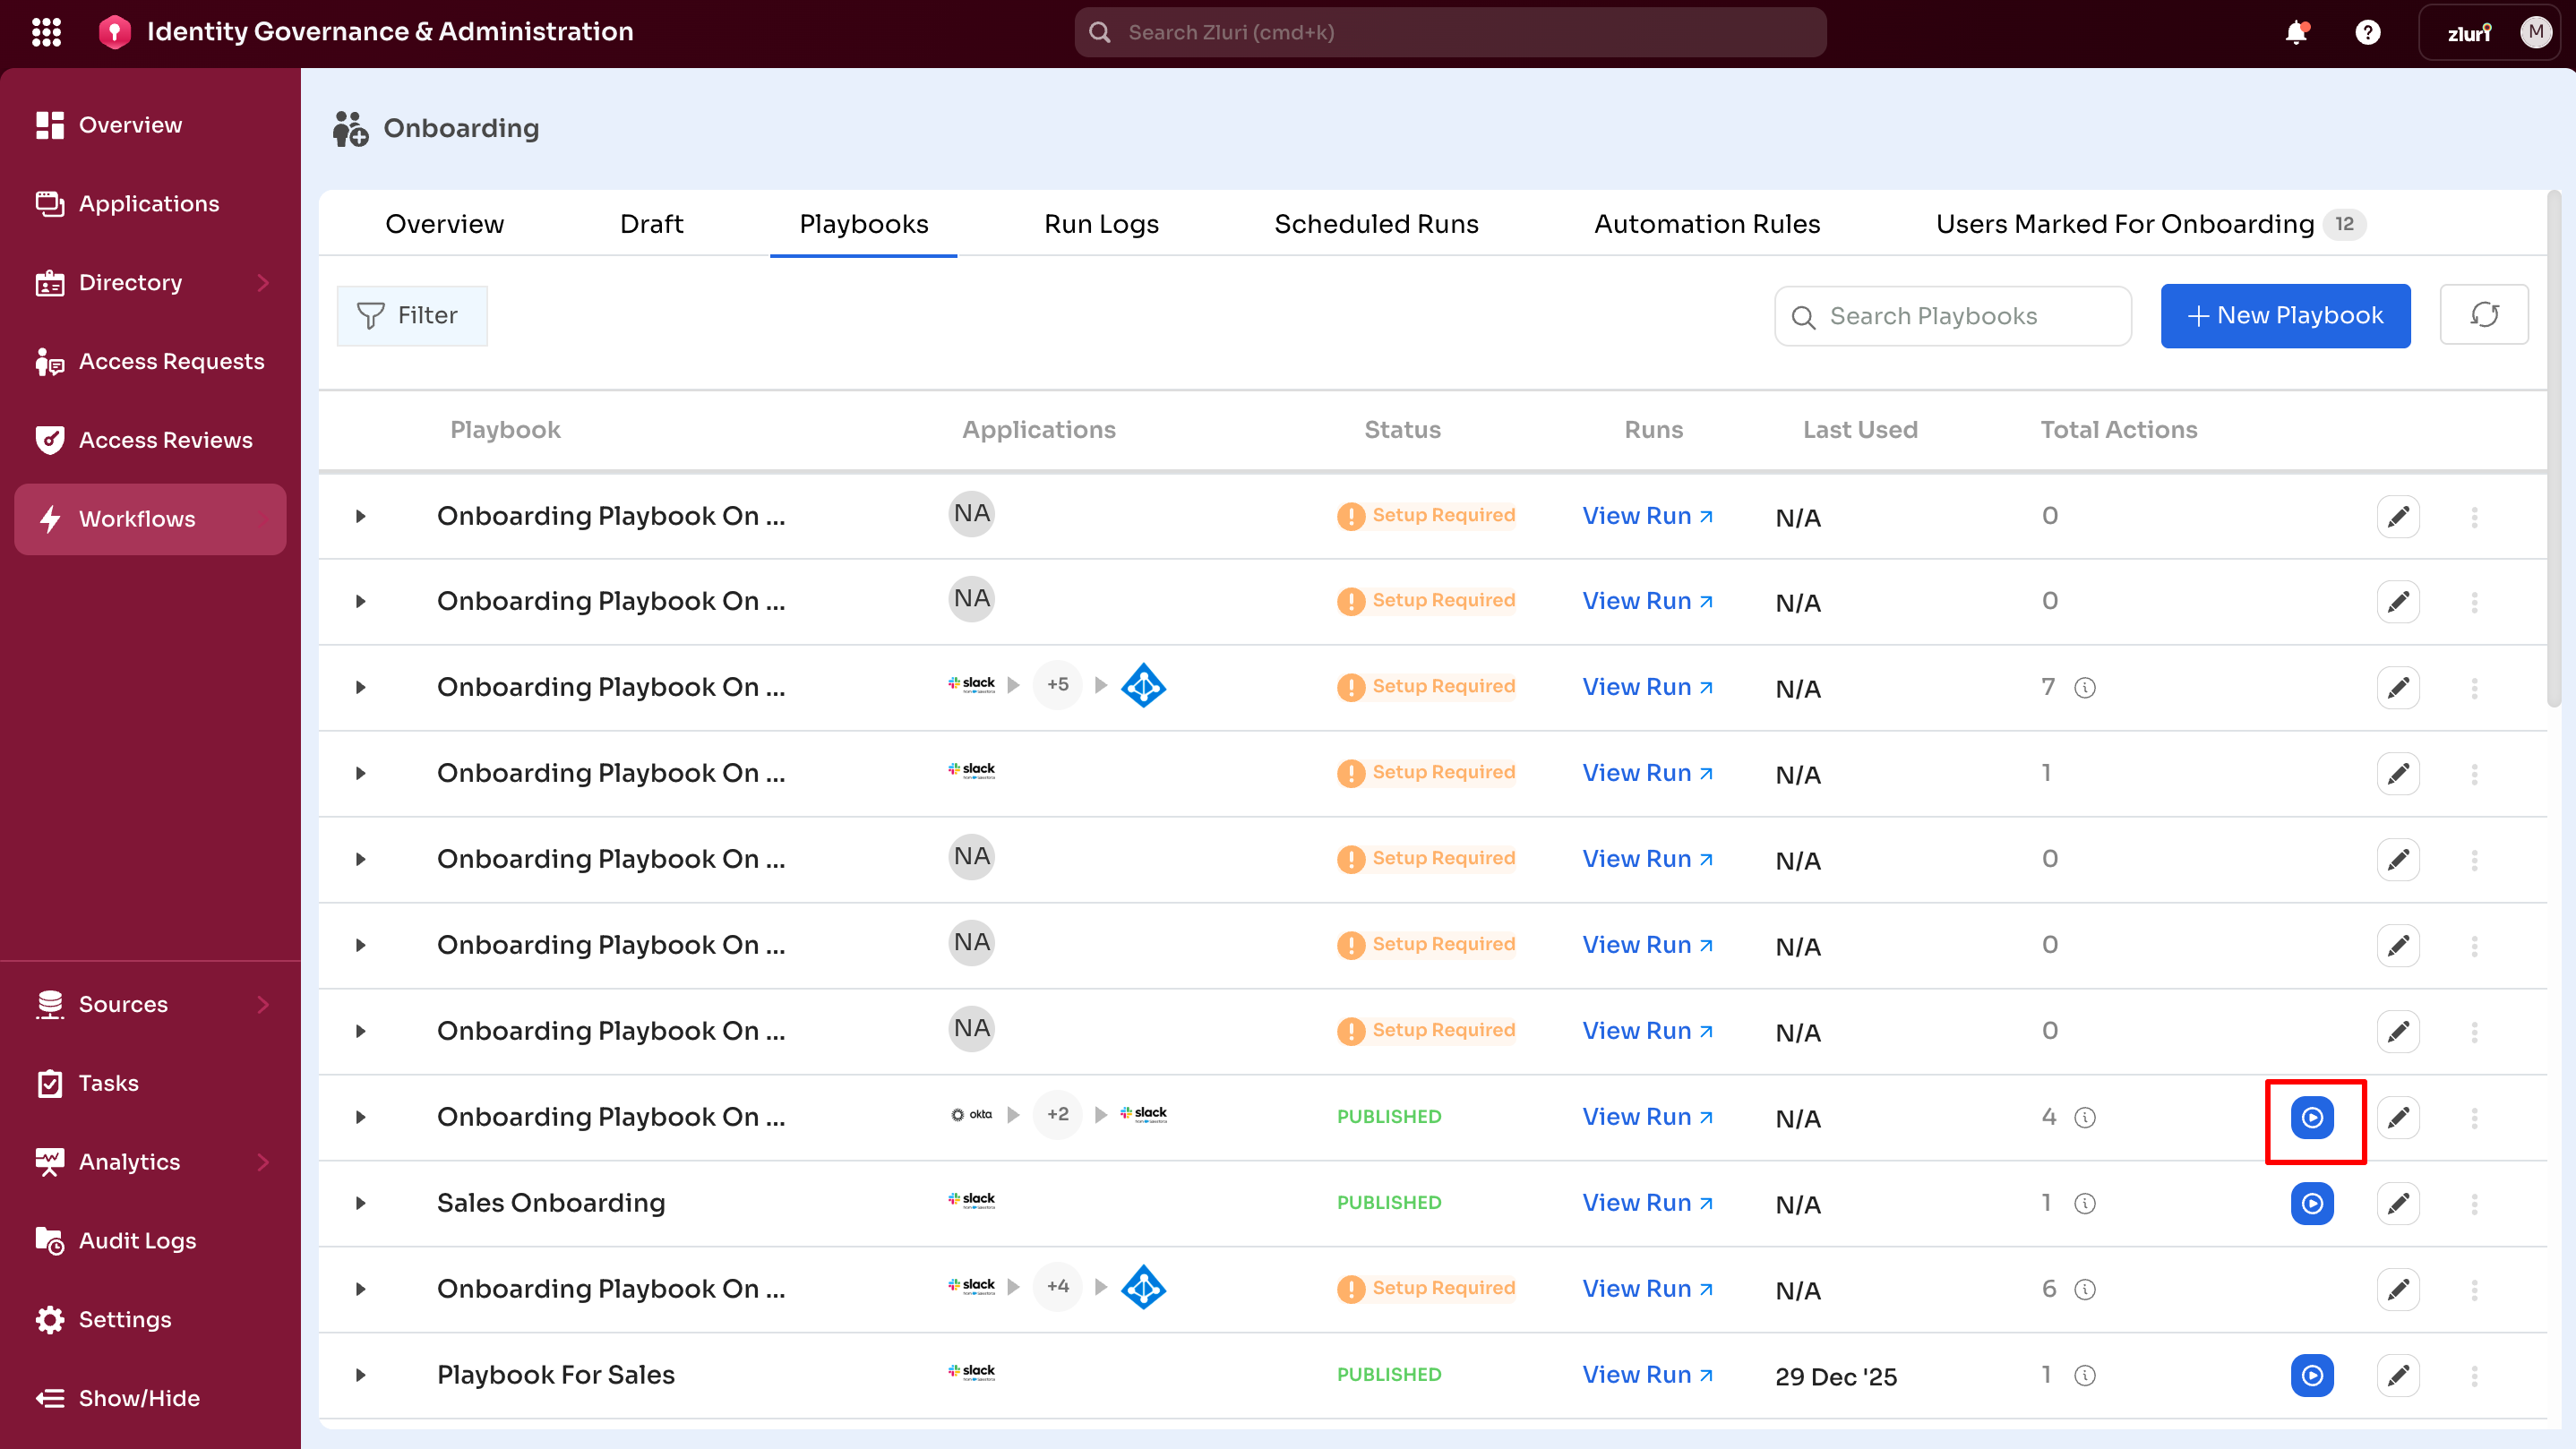
From playbook table
Select Run from the playbook row.
Duplicate a Playbook
Create a copy to reuse or modify.
To duplicate
- Select the three-dot menu
- Select Duplicate
- A copy appears with "(Copy)" in the name
- Edit and publish
Duplicated elements
- Applications and actions
- Conditions and rules
- Settings
- Variables
Delete a Playbook
Permanently remove a playbook.
To delete
- Select the three-dot menu
- Select Delete
- Confirm
Important: Deletion is permanent and cannot be undone. Consider archiving if needed.