Setting Conditions
Control application and action execution using conditions.
Note: While this documentation references onboarding workflows for illustration, the process of setting conditions applies identically to offboarding.
Setting Conditions
Conditions control application and action execution based on user attributes. Zluri provides two types of conditions for granular access control:
- Apply Condition - For a single action within an application block
- Add Condition - For the entire application block in a workflow
Where to Find Condition Options
To address granular access control, the Zluri access management module provides configurable conditions. There are two types of condition features available in Zluri's IGA platform:
A. Apply Condition (Action level)
B. Add Condition (App level)
Let's discuss both types of conditions.
A. Apply Condition
Apply Condition (Action level) - Conditions applied to a single action within an app block.
Key characteristics:
- Applied at the individual action level (placed below each action added)
- Controls whether a specific action executes (For example, adding a user to a particular GitHub repository only if the role is 'Software Engineer')
Admins can create rules by selecting attributes from the 'Search Attributes' field to define conditions.
(Note: These are different from automation rules.)
We'll use the Slack app as an example to explain the Apply Condition feature and its functionality.
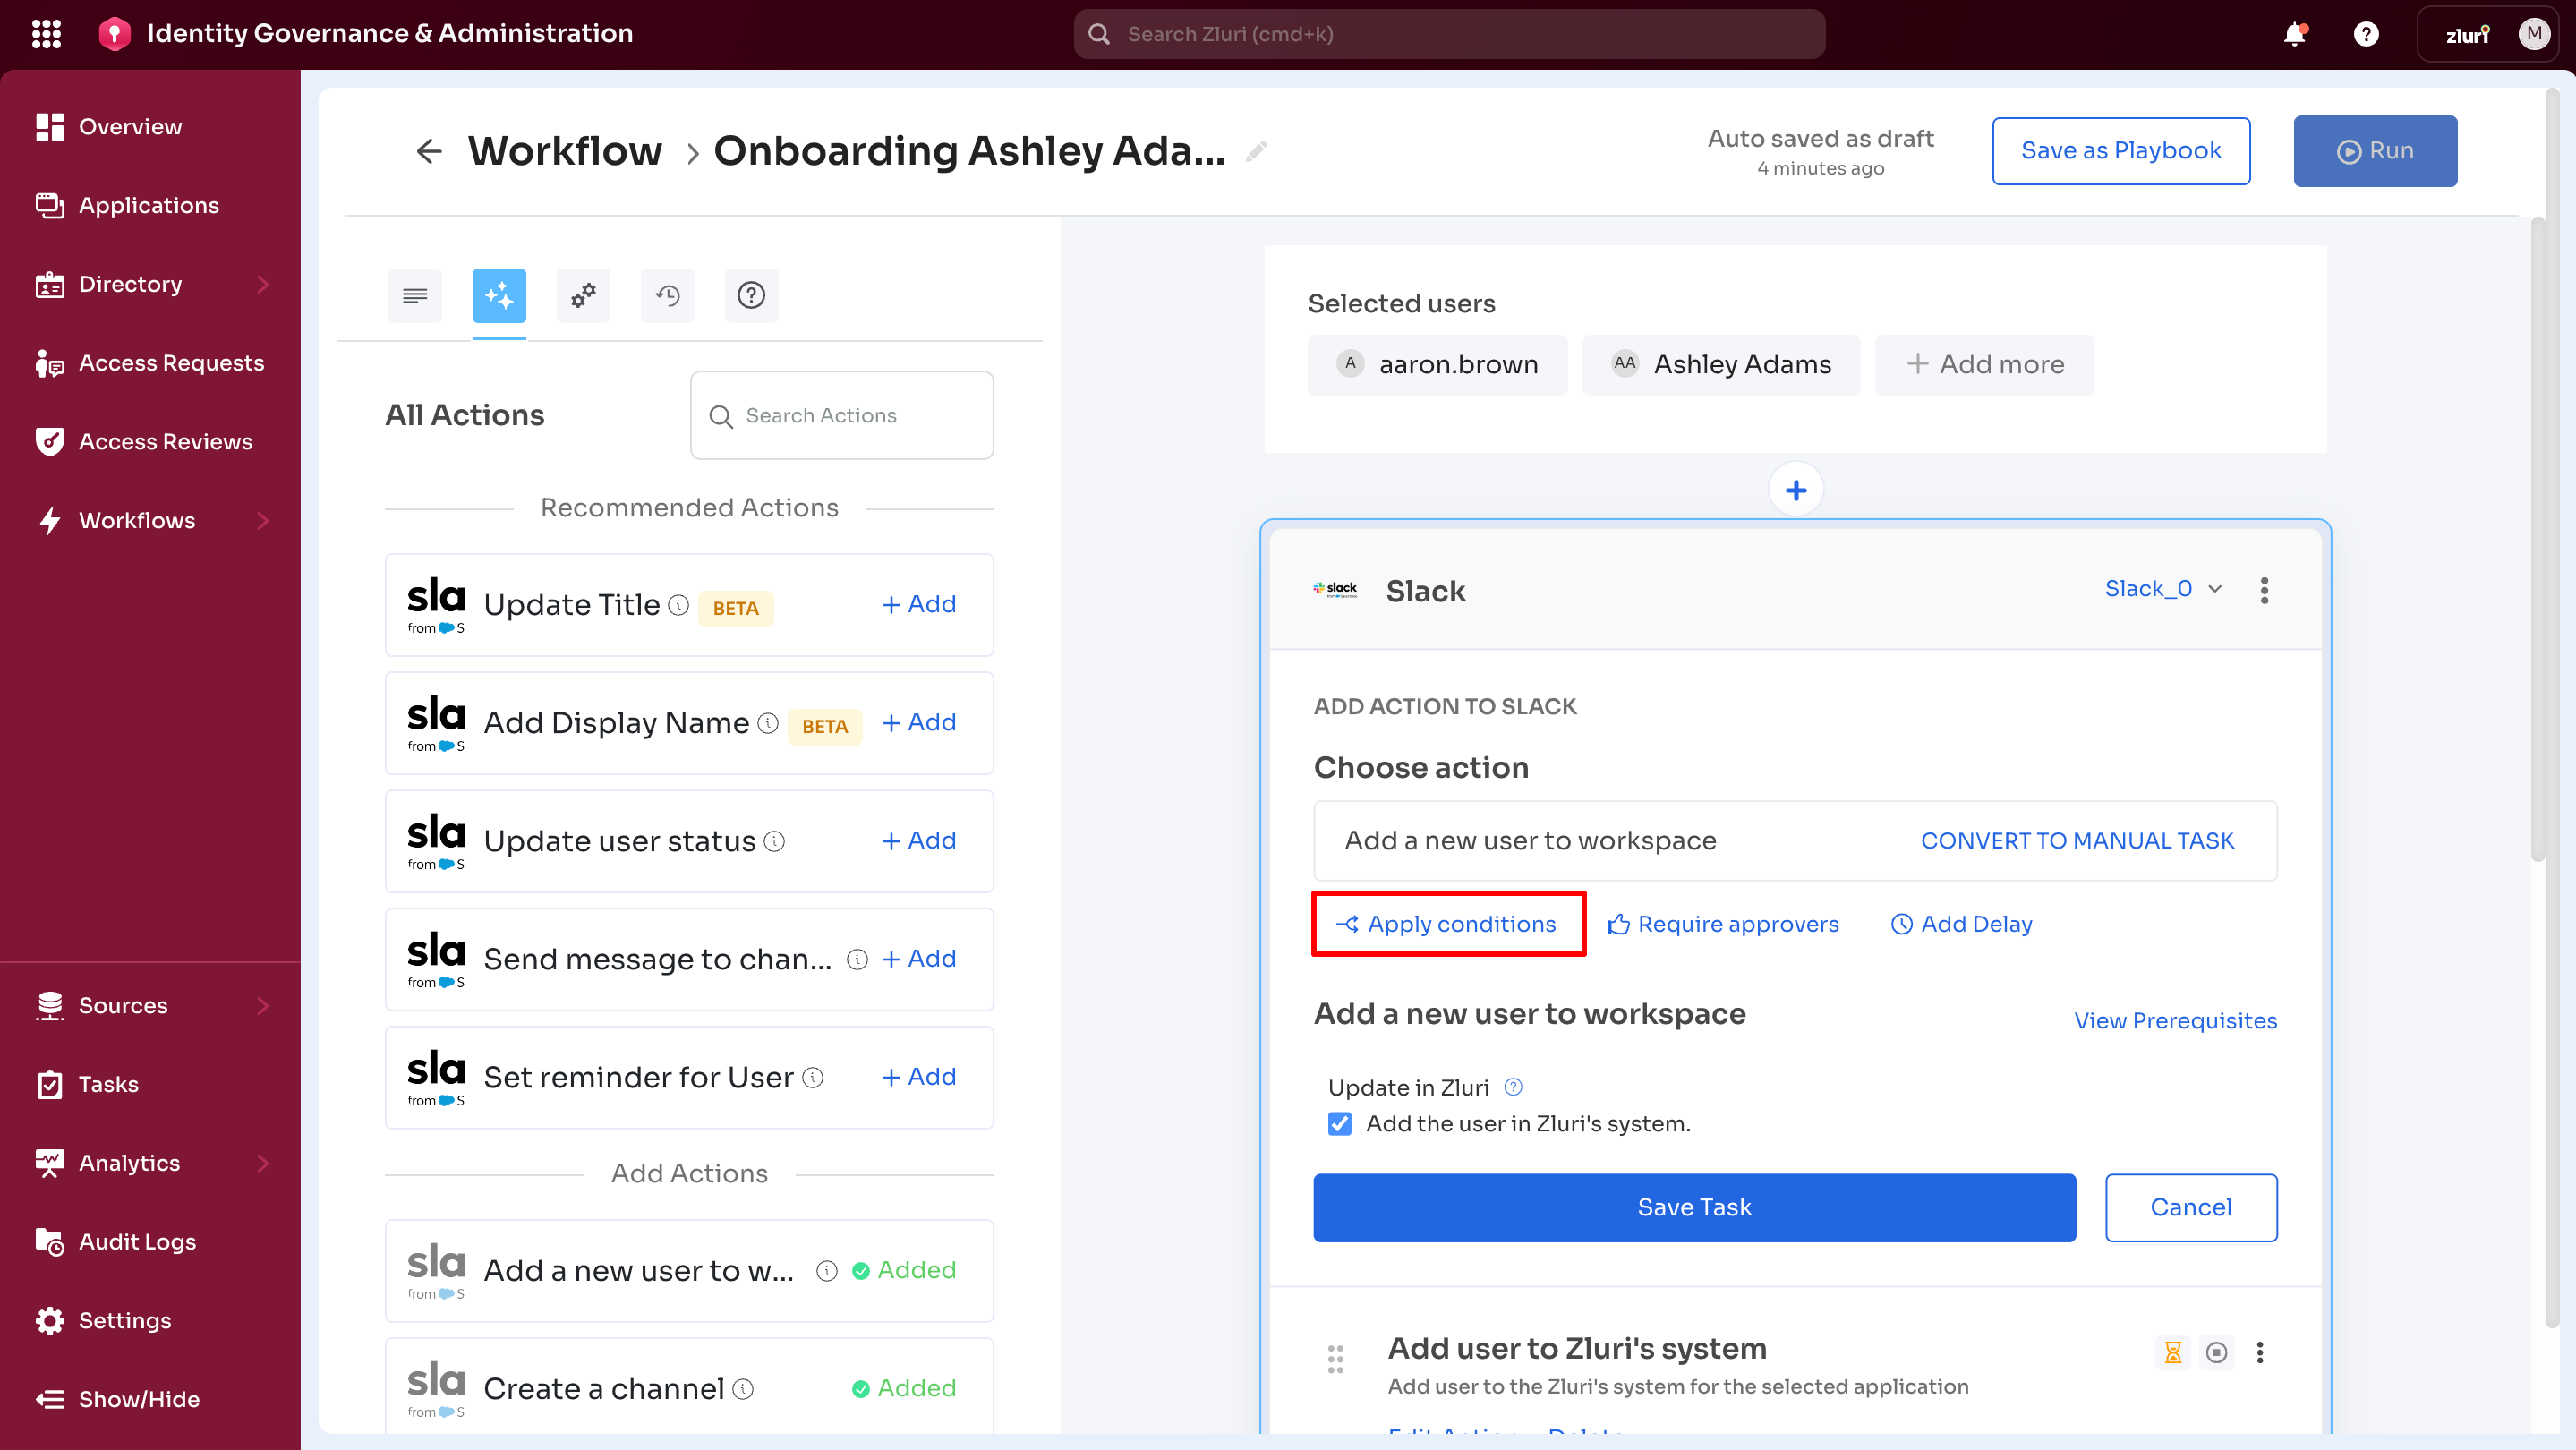
Step 1: Access Apply Condition
Select Apply Condition in the action configuration window where action is selected (For example, "Add a new user to workspace" for Slack).
Step 2: Select the attributes to create the condition
Search attributes field has a list of attributes options to select from, which includes, but is not limited to, the following attribute types and options:
- User Account Type → Select account type from the list.
- User Created at → Select date.
- User's current department → Search entity name from the list.
- User's current designation → Select string type.
- User reporting manager → Search from entity names.
- User Role → Select role name from the list.
- User Status → Select status
- App owner → Search for the entity name, etc.

Step 3: Using Operators ‘AND’ and ‘OR’ for Conditions
After selecting attributes and configuring parameters, use the operators 'AND' and 'OR'. Admin or user may choose 'AND' or 'OR' separately or in combination, depending on the requirements.
-
AND Operator
The AND operator is used for rules requiring multiple conditions to be met simultaneously.Example:
[Attribute = User Role; Operator = equals; Value = Admin]
AND
[Attribute = User Status; Operator = not equals; Value = Suspended]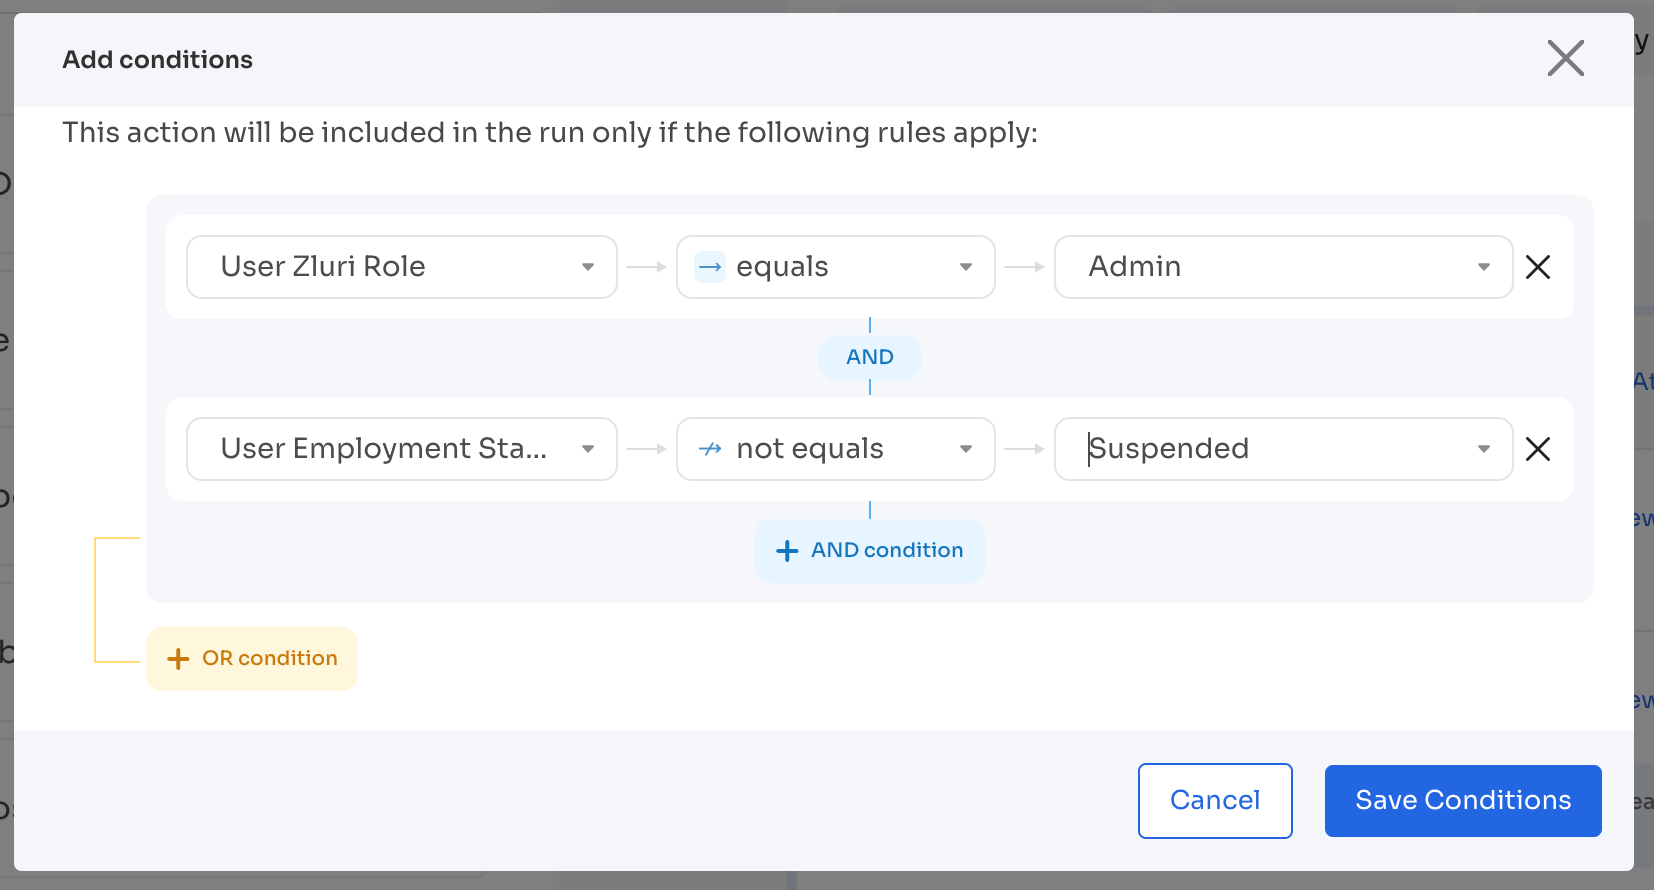
In this case, the rule will trigger only if the user's role is Admin and their status is not Suspended. If either of these conditions is not true (For example, if the user is suspended or not an admin), the rule will not trigger.
-
OR Operator
Use the OR operator for rules requiring any one of multiple conditions to be met for execution.Example:
[Attribute = User Role; Operator = equals; Value = Marketing Manager]
OR
[Attribute = User Role; Operator = equals; Value = Sales Manager]
This rule will trigger if the user is either a Marketing Manager or Sales Manager, and will not require both conditions to be true.
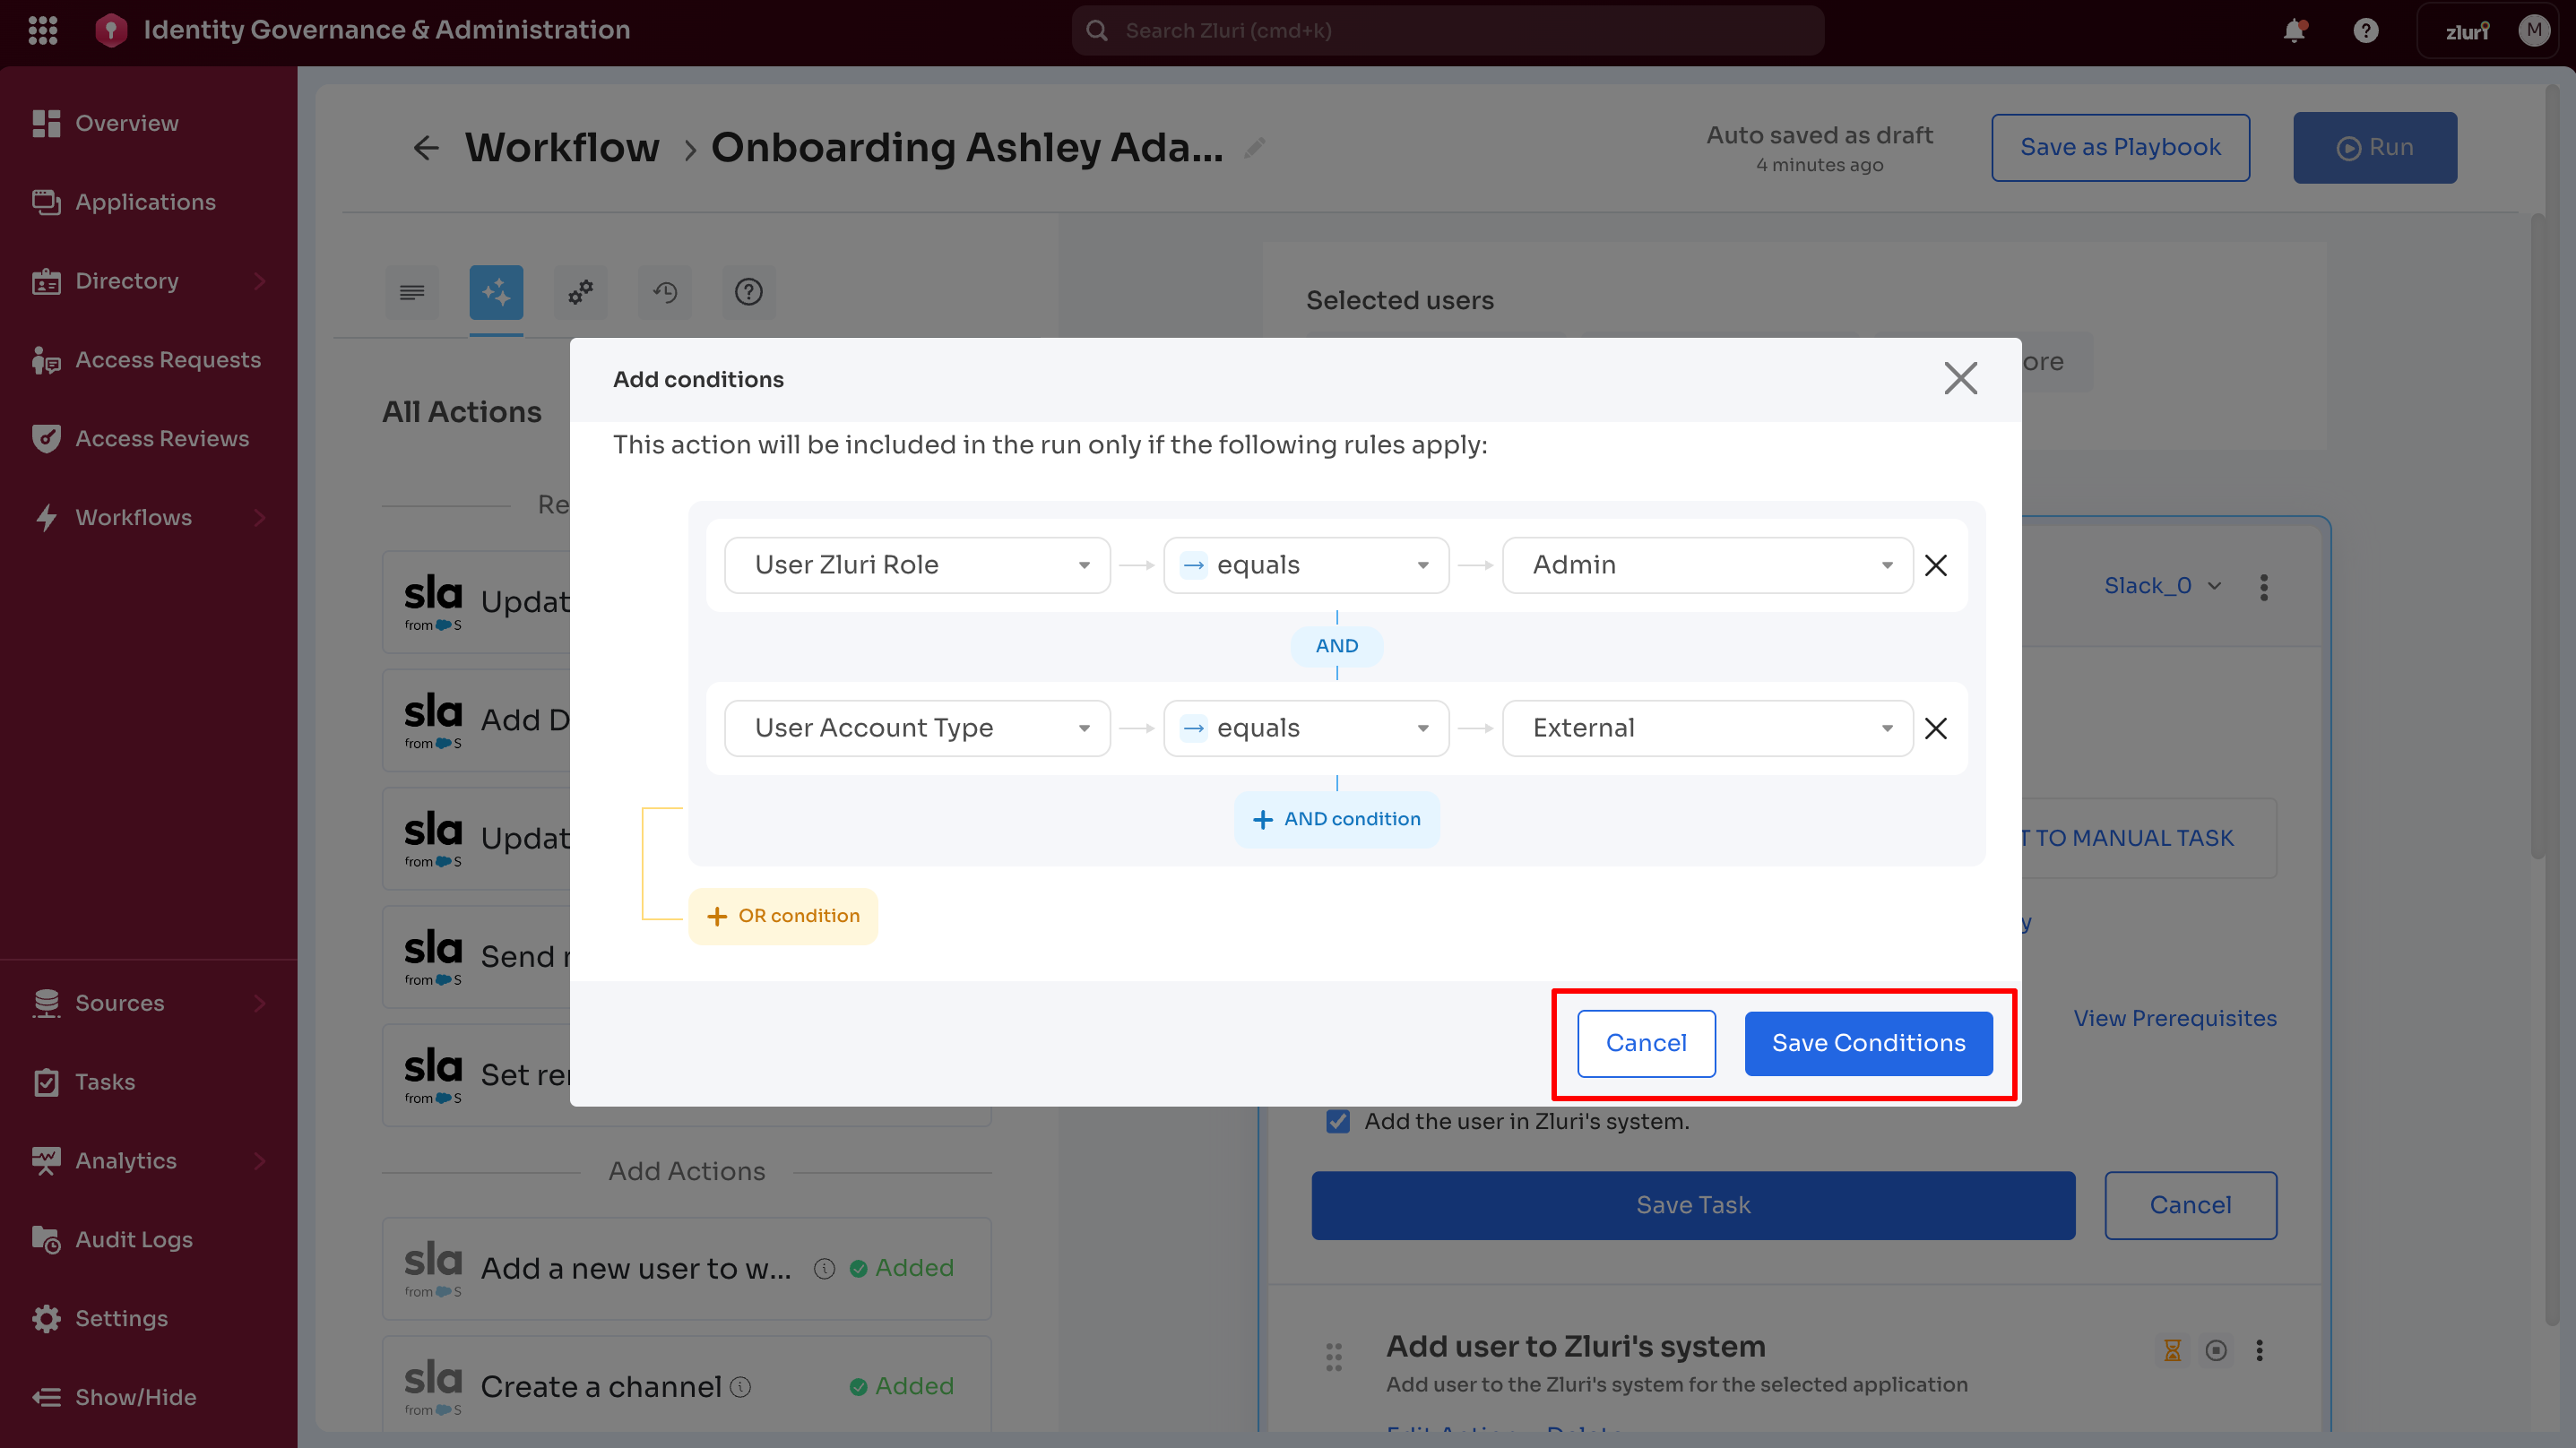
Step 4: Edit Condition Window
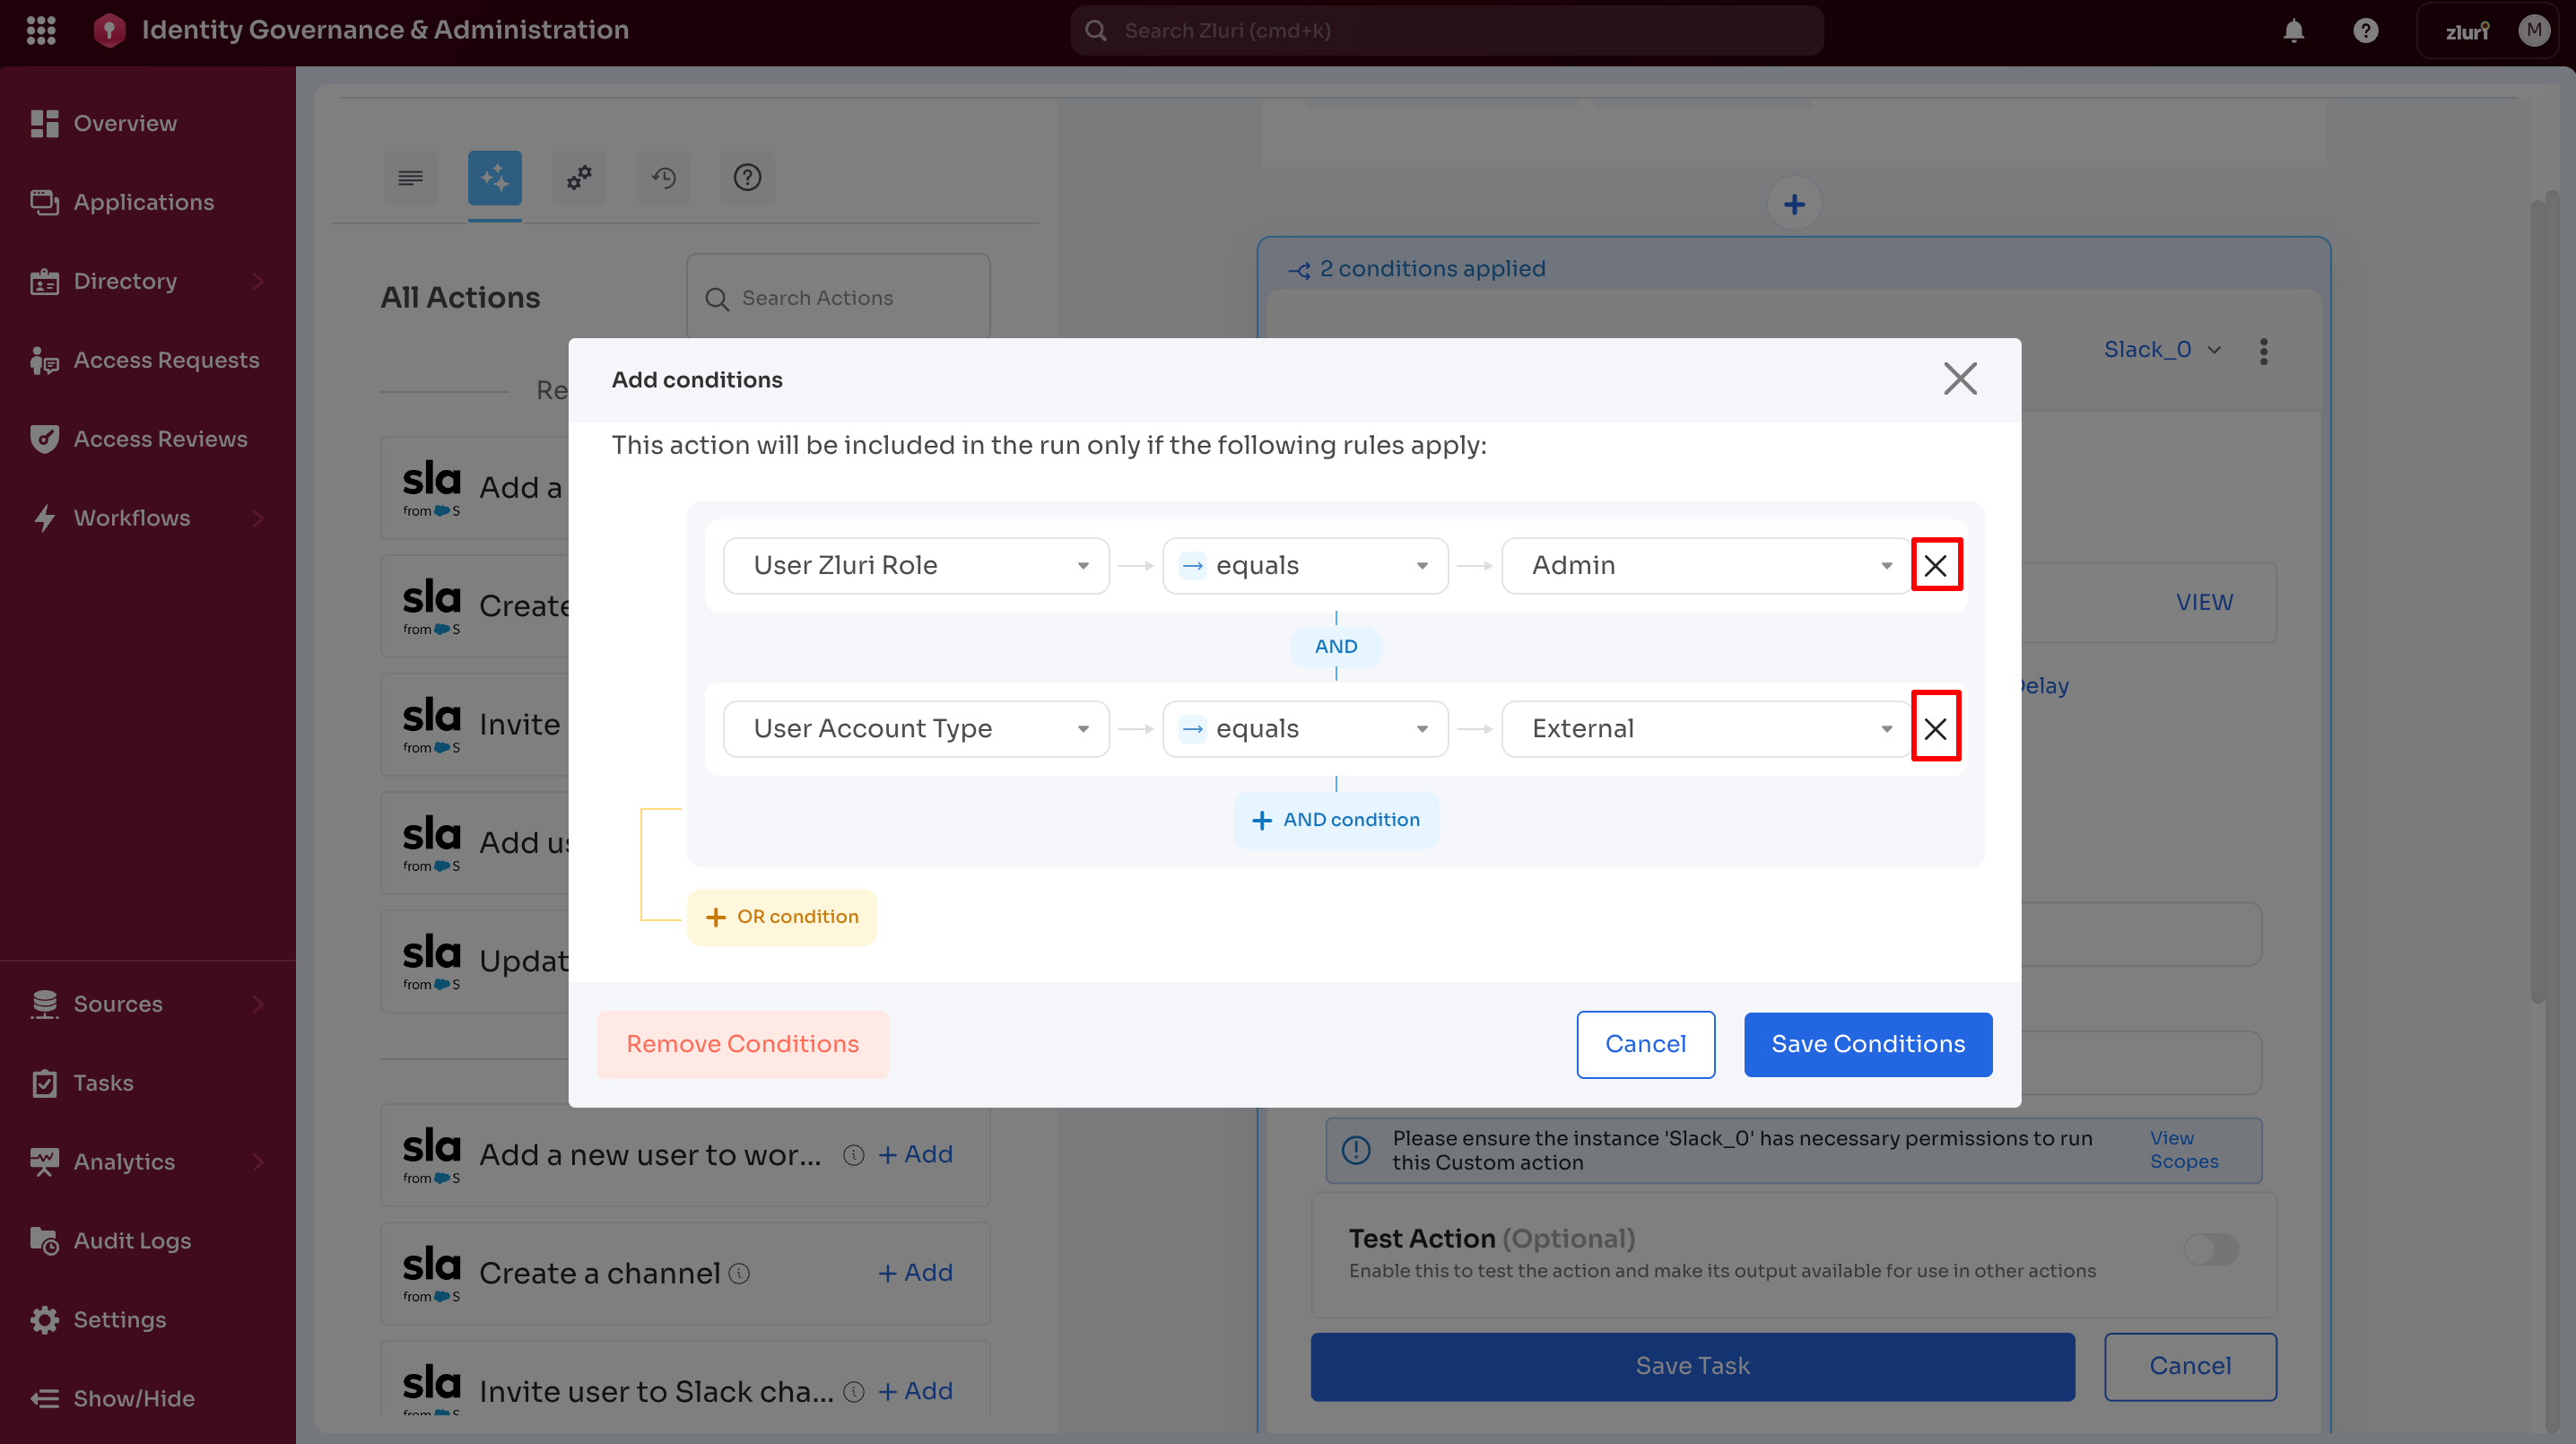
After saving conditions, they appear as "X conditions applied" below the action name. These conditions apply only to the specific action (For example, "Add to Group") within the app block.

To edit conditions:
- Select the Edit Action option
- Select the Conditions blue link
- The Edit Conditions window opens
Available actions:
-
Add more configurations - Configure additional rules
-
Remove individual conditions - Use the X option next to each condition
-
Remove all conditions - Select the Remove Conditions option
-
Save changes - Select Save Conditions to apply all updates for this specific action
-
Cancel changes - Select Cancel to retain the current configuration without changes
Complex Conditions Example
Admin or user can create sophisticated rules using both AND and OR operators. For example, seven conditions can be applied using AND and OR combinations for different attributes.
Remember: All configured conditions are applicable only to one specific action (For example, "Add a new User to workspace") and NOT to the entire Slack application in the workflow.
Refer to the image below, which explains seven conditions are applied using AND and OR combinations for different attributes.
The screenshot below shows the seven conditions configured in the previous section.
Below is a GIF showing the configuration for all seven conditions, using both ‘AND’ and ‘OR’ logical operators applied to the Action.
B. Add Condition [Conditions for complete Application]
Add Condition (App level) - Conditions applied to the complete app block.
Key characteristics:
- Applied at the application block level (option located at the top-right of the app block)
- Controls whether the entire app block runs (For example, only run the GitHub block if Department = Engineering)
Below are the steps for adding a condition to an application (using Slack as an example).
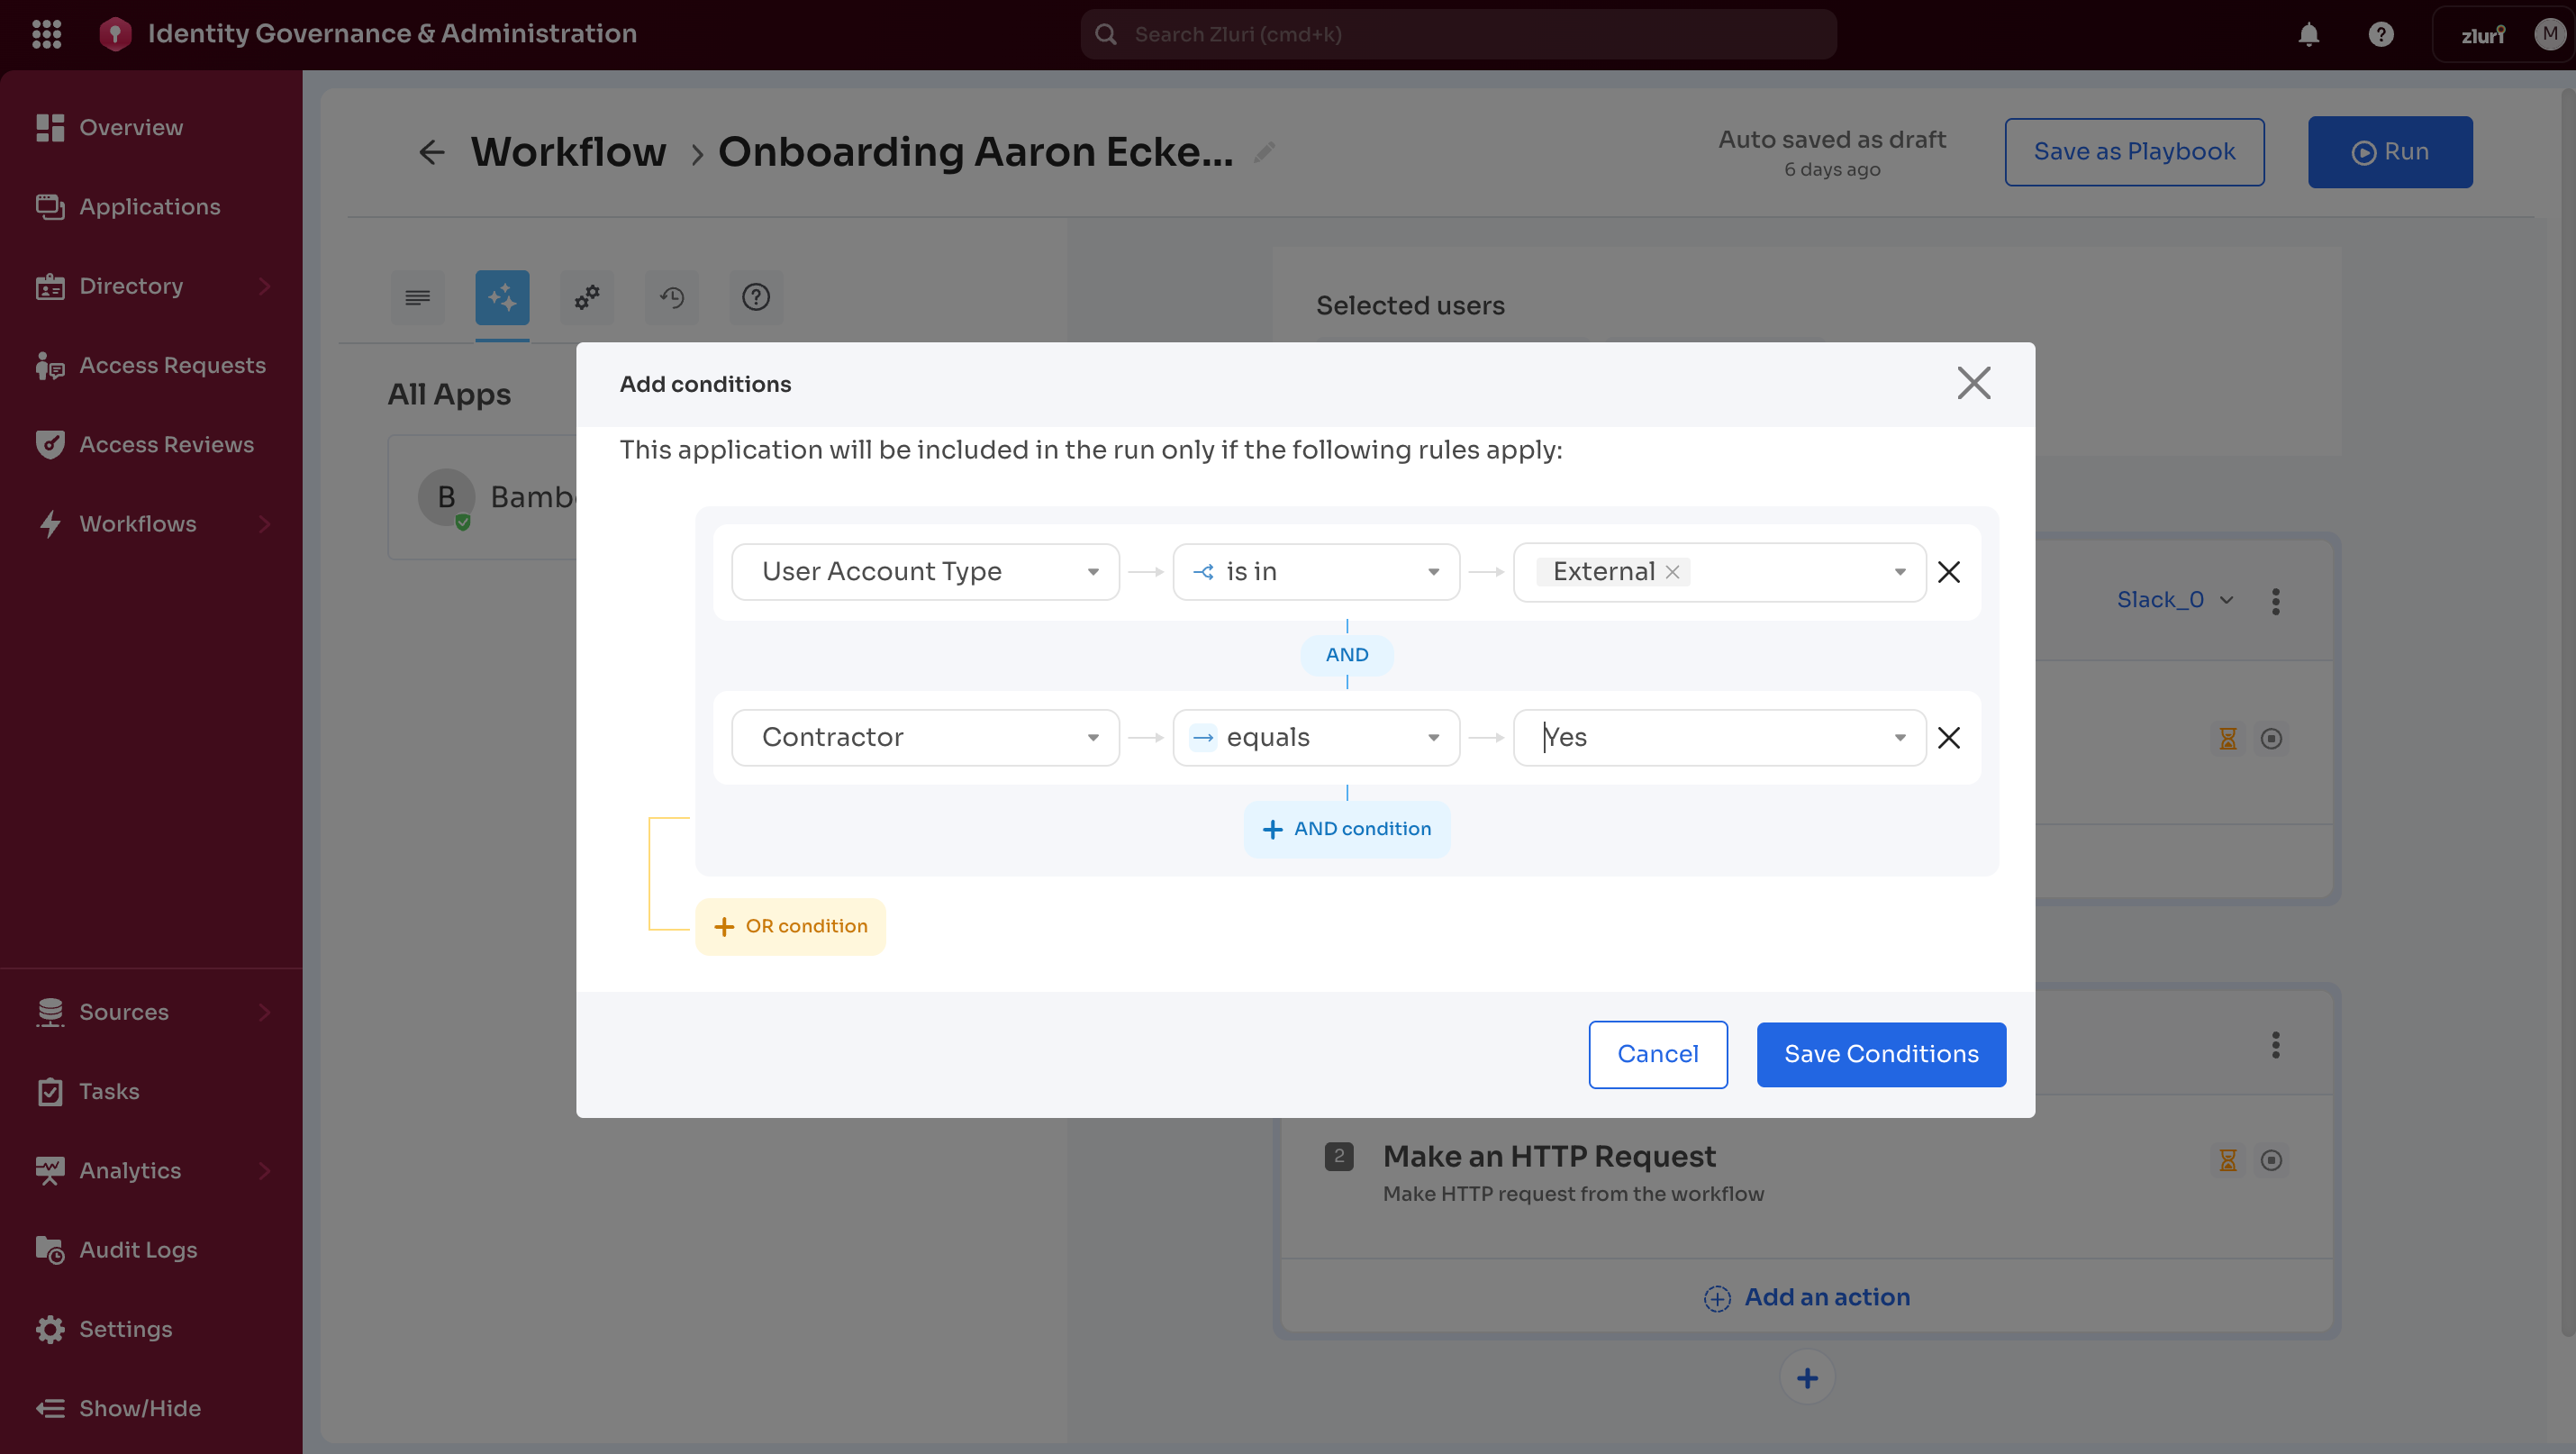
Step 1: Access Add Condition
Select the three dot menu at the top-right of the application block, then select Add Conditions.
The three dot menu has two options:
- Add Conditions - Sets conditions for the entire application
- Remove Application - Removes the complete application block from the workflow

Step 2: Search Attributes
Search Attributes offers various options to select from, similar to the 'Apply Condition' case.
Step 3: Using Operators 'AND' and 'OR' for Conditions
After searching and selecting attributes, use the operators 'AND' and 'OR'. Choose 'AND' or 'OR' separately or in combination, depending on the requirements. This works similarly to the logical operators discussed in the 'Apply Condition' section.
Step 4: Edit Condition Window
After saving, conditions appear as "X conditions applied" at the top of the app block. These conditions apply to the entire application block (For example, the Slack application), and not just to a single action within the app block.
The configured parameters appear upon selecting the 'X conditions applied' text (X = the number of conditions applied). This count changes based on adding or removing conditions for the application block.

To edit conditions:
- Select the Edit Conditions option
- The Edit Conditions window opens
Available actions:
-
Add more configurations - Configure additional rules or use the X cross option next to each condition to remove a specific condition.
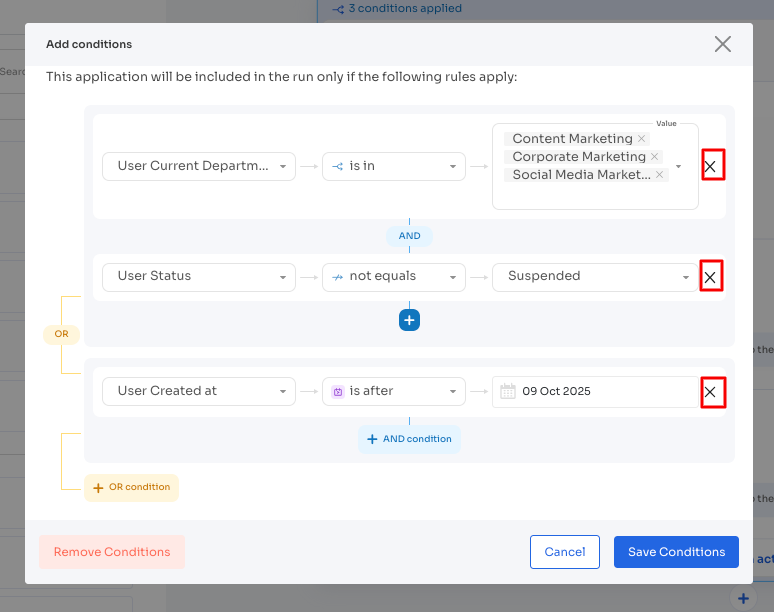
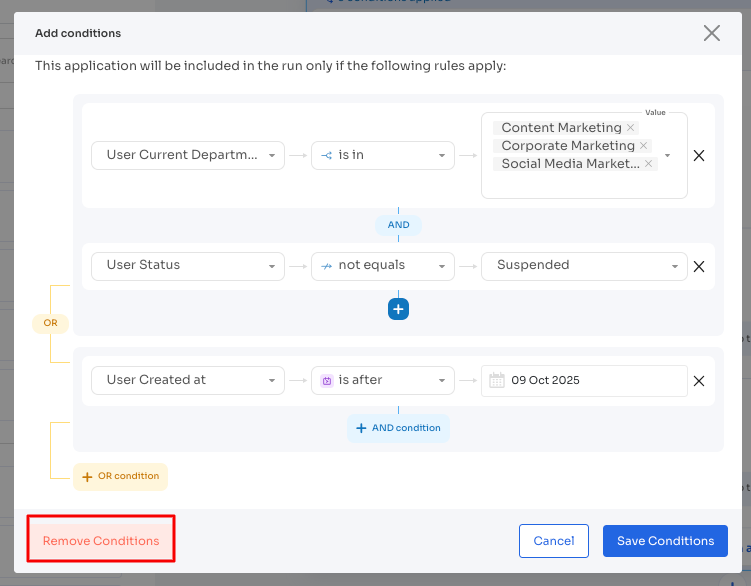
-
Remove all conditions - Select the Remove Conditions option to delete all conditions applied to the application
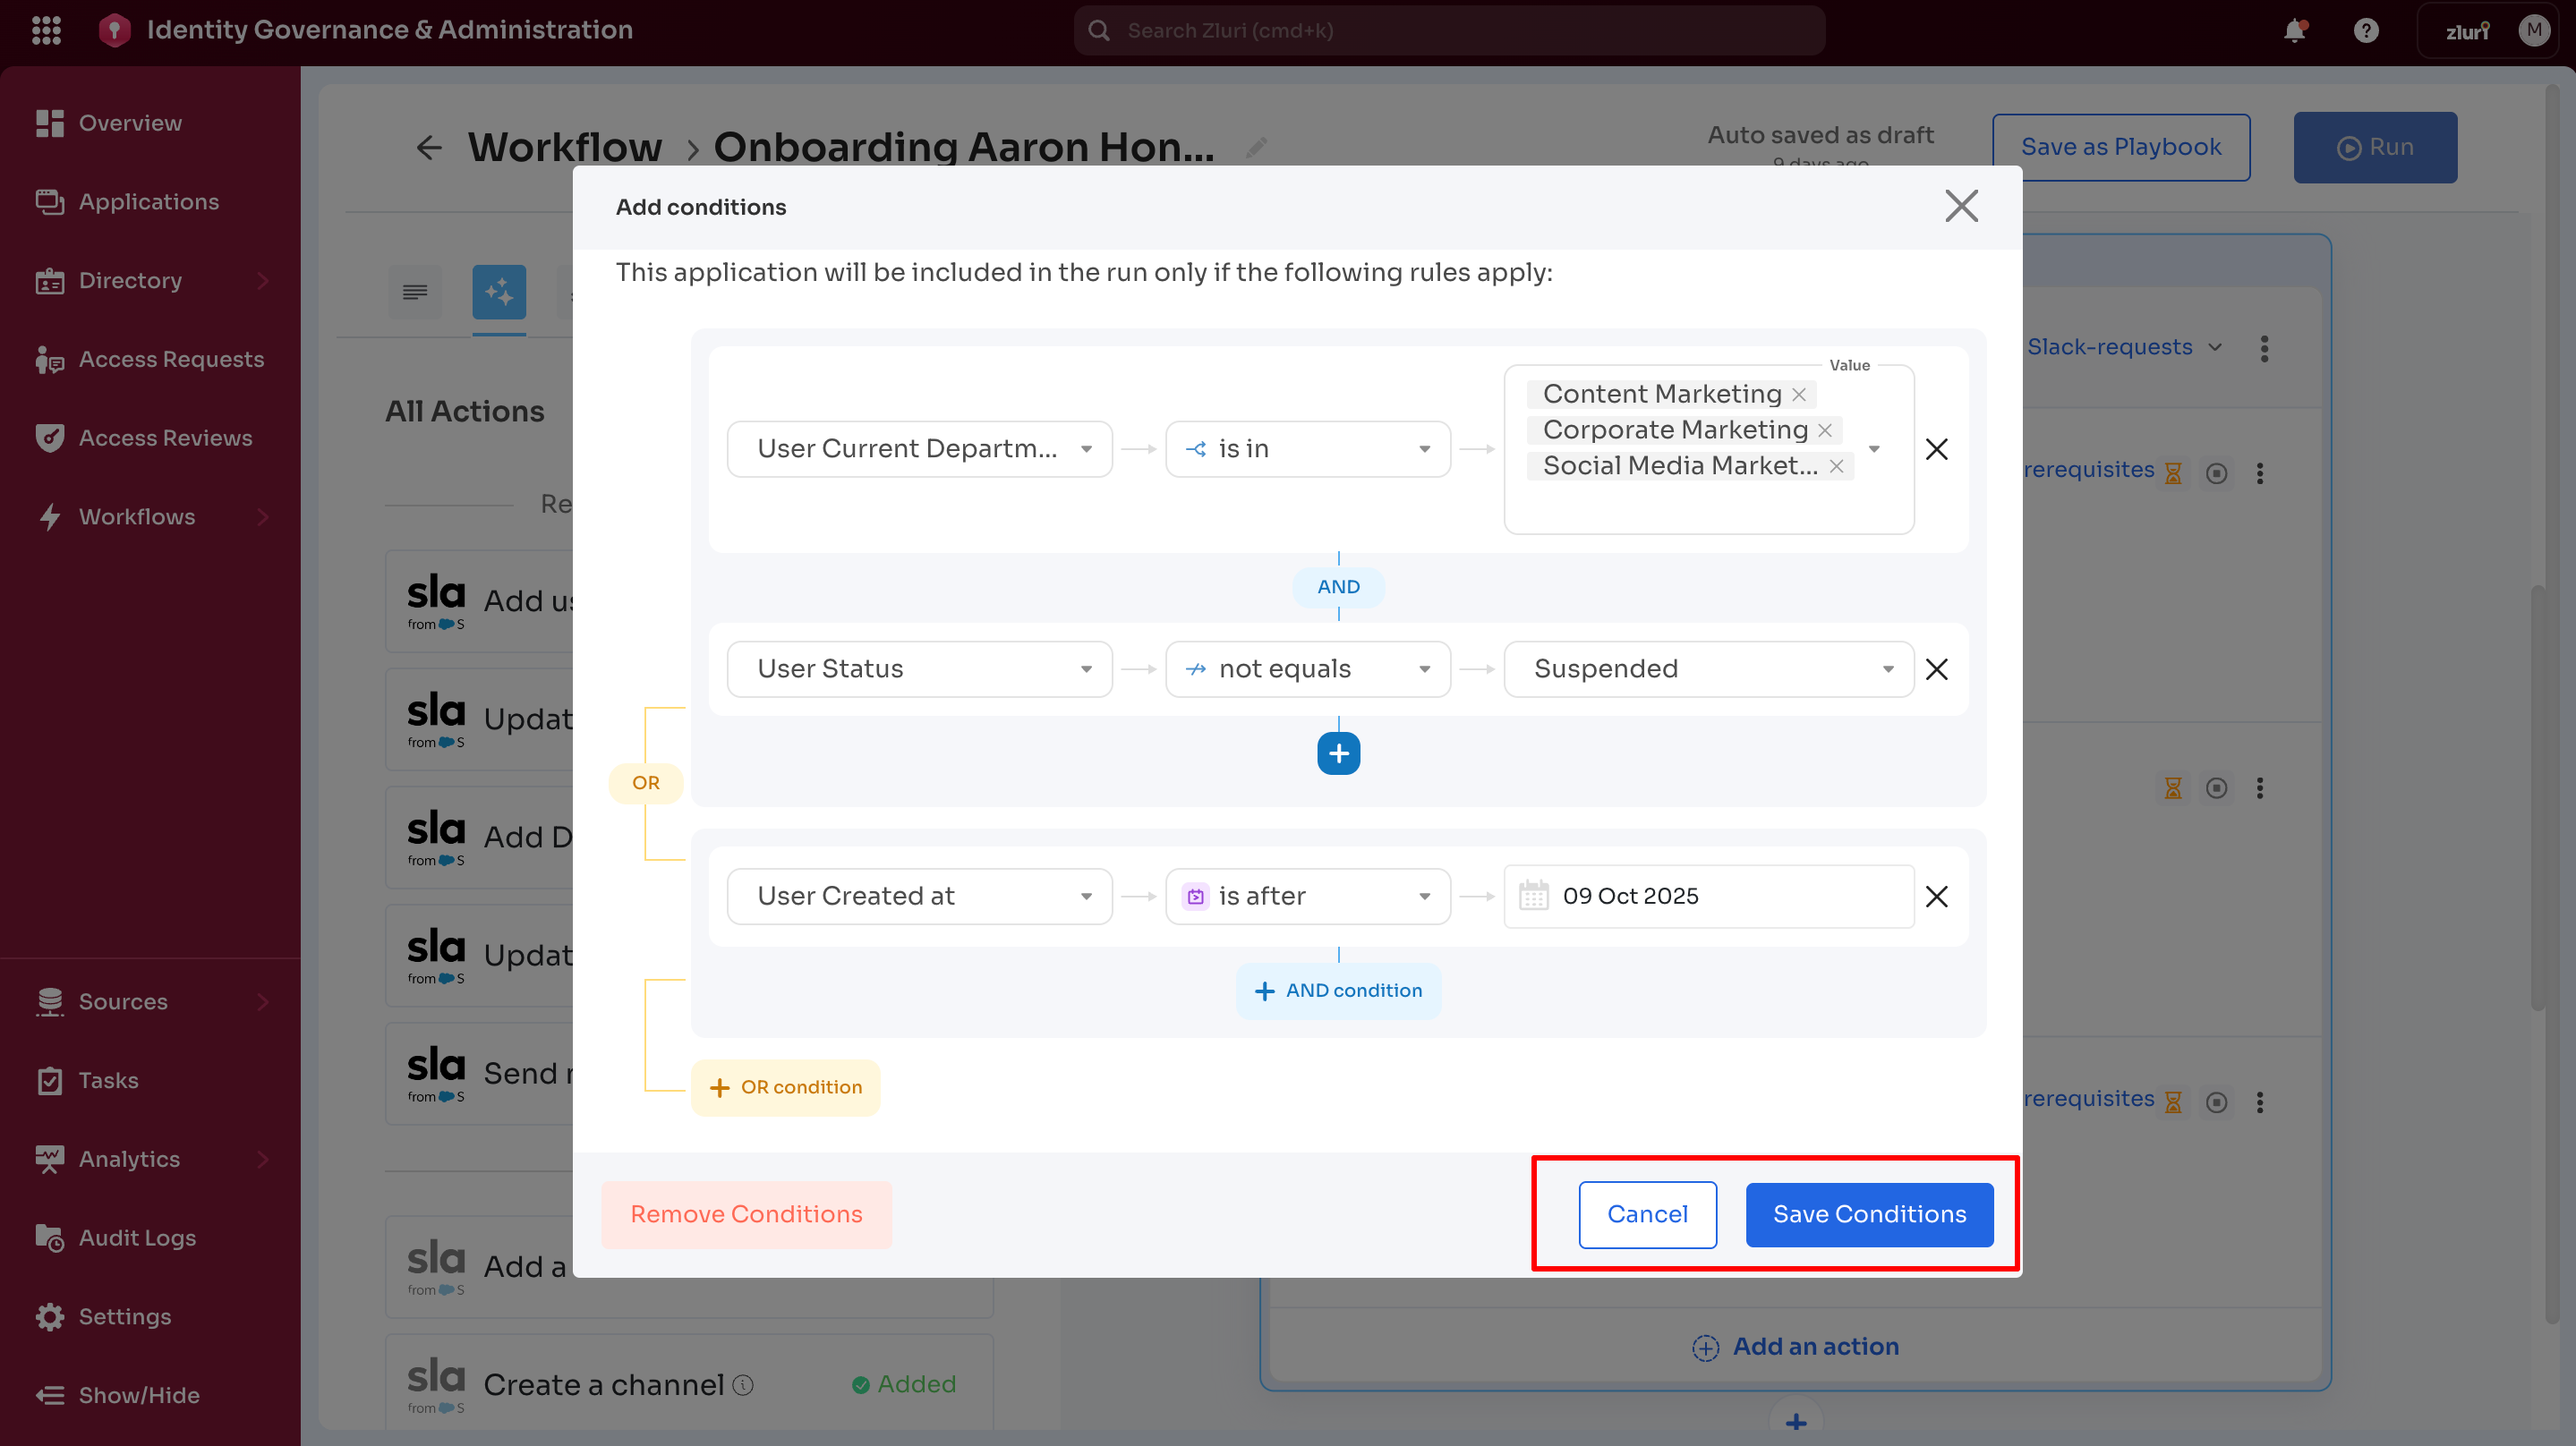
-
Save changes - Select Save Conditions to save all updates for the app block conditions
-
Cancel changes - Select Cancel to retain the current configuration without changes
Understanding Condition Placement: Apply Condition vs. Add Condition
Conditions appear in two distinct locations within the workflow, making it easy to see where they're applied.
App-Level Conditions (via Add Condition)
The conditions count is displayed at the top of the app block. This is configured via the Add Condition option.
Example: "3 conditions applied" - Selecting this blue text link shows the configurations applied to the entire Slack application block.
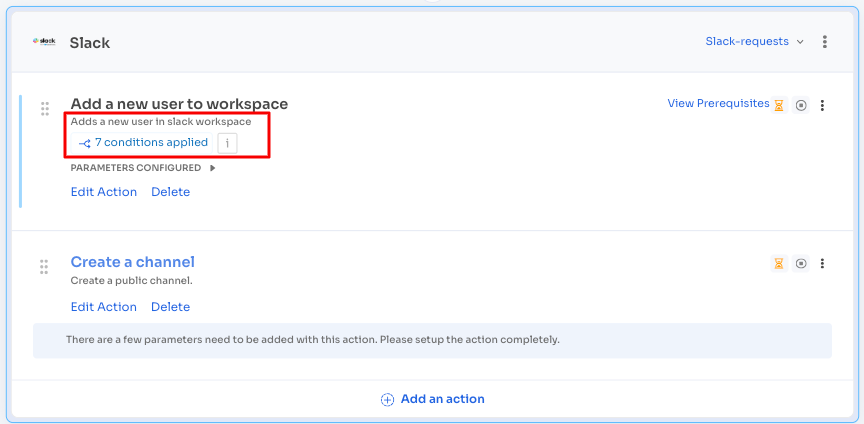
Action-Level Conditions (via Apply Condition)
The conditions count appears beneath the specific action. This type of condition is configured via the Apply Condition option.
Example: "7 conditions applied" - Selecting this blue text link shows the configurations applied to one action named "Add new user to workspace" within the Slack application block.
Note: Admin or user can add conditions to multiple actions within the same app block. For example, admin might add one condition to the "Create a Channel" action - selecting "1 condition applied" shows the details for a specific action. Each action displays its own condition count independently. Follow the example shown below.
Condition Evaluation Logic
During App-Level Conditions Fail
- Entire app block is skipped
- No actions within the app execute
- Workflow continues to next app block
During App-Level Conditions Pass
- Workflow proceeds to evaluate actions
- Each action's conditions are checked
- Actions with passing conditions execute
- Actions with failing conditions are skipped
During Action-Level Conditions Fail
- Only the specific action is skipped
- Other actions in the same app block continue
- App block overall continues execution
Common Condition Scenarios
Scenario 1: Department-Based Access
App-level: Department = Engineering
Actions:
  - Add to GitHub (no additional conditions)
  - Add to Jira (no additional conditions)
  - Add to Slack #engineering (no additional conditions)
Scenario 2: Role-Based Permissions
App-level: None
Actions:
  - Create user account (no conditions)
  - Assign basic license (no conditions)
  - Assign admin license (Role = Admin OR Role = Manager)
Scenario 3: Location and Role Combined
App-level: Location = US OR Location = UK
Actions:
  - Add user (Status = Active)
  - Grant admin access (Role = Admin AND Status = Active)
Next Steps
Once the conditions are configured, learn to execute the workflow.
Learn about running workflows →
Updated 3 months ago