Starting a New Workflow
Begin creating an onboarding or offboarding workflow
Workflows
A workflow in Zluri is a sequence of automated steps used to onboard (provision) or offboard (deprovision) access for users.
Accessing Workflows
- Access to Zluri's Identity Governance & Administration (IGA) platform
- Administrator permissions for Workflows
- If issues occur with Workflows options, contact IT administrator or Customer Success Manager
Note: While this documentation references onboarding workflows for illustration, the process of starting a new workflow applies identically to offboarding.
Step 1: Navigation Steps

- Log in to Zluri
- Navigate to instance URL (For example,
https://app.zluri.com/) - Most organizations use SSO-enabled login
- If issues occur, try updating to the latest Chrome browser or contact the IT support team
- Navigate to instance URL (For example,
- Switch to IGA
- Select the nine dot menu icon (top-left corner)
- Select Identity Governance & Administration (IGA)
- Open Workflows
- In the left navigation panel, select Workflows
- Select Module
- Choose Onboarding for provisioning workflow
- Choose Offboarding for deprovisioning workflow
- Overview tab is the Default landing page
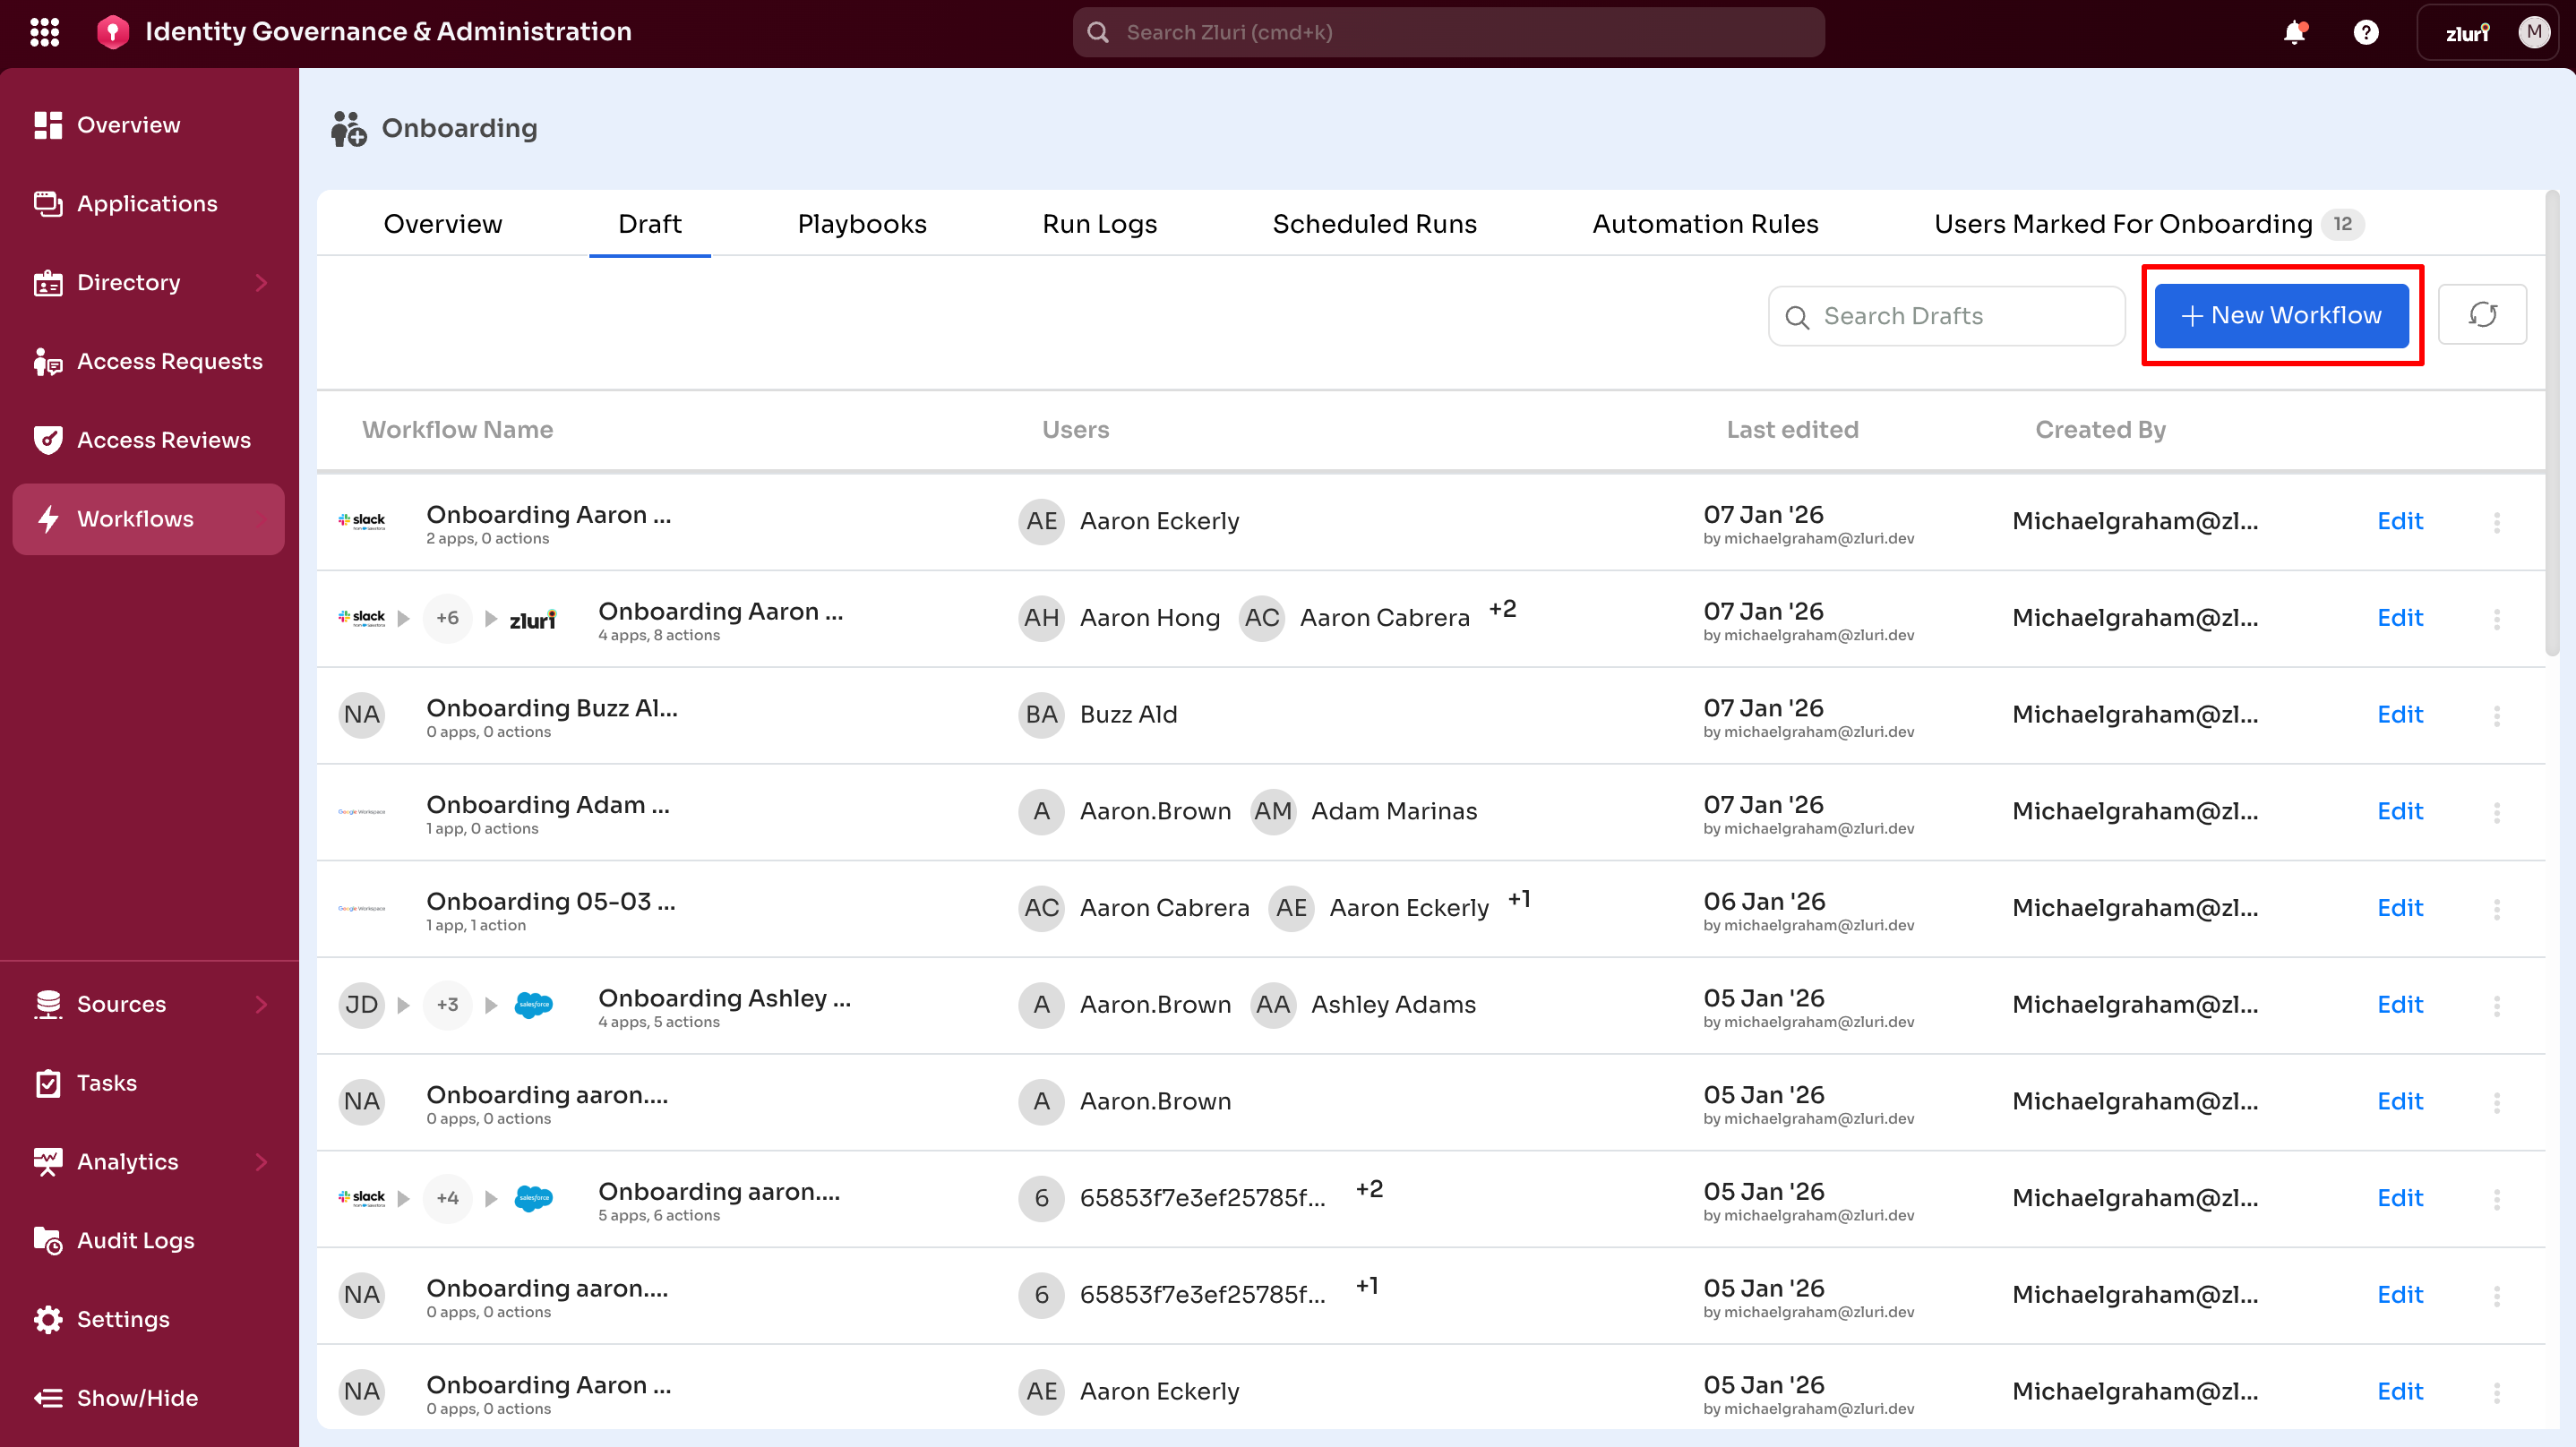
- Start a new workflow from any of the two locations within the Onboarding/Offboarding module: Overview and Draft tab.
- Select + New Workflow option
From the Overview Tab [Default]
From the Drafts Tab
The Drafts tab shows all saved draft workflows, making it convenient to start new workflows while managing existing ones.
- Navigate to Workflows → Onboarding → Drafts
- Select + New Workflow option
Note: Both options open the same workflow builder—they're placed in two locations for convenience.
Step 2: SELECTING USERS FOR WORKFLOWS
Note: While this documentation references onboarding workflows for illustration, the process of user selection applies identically to offboarding.
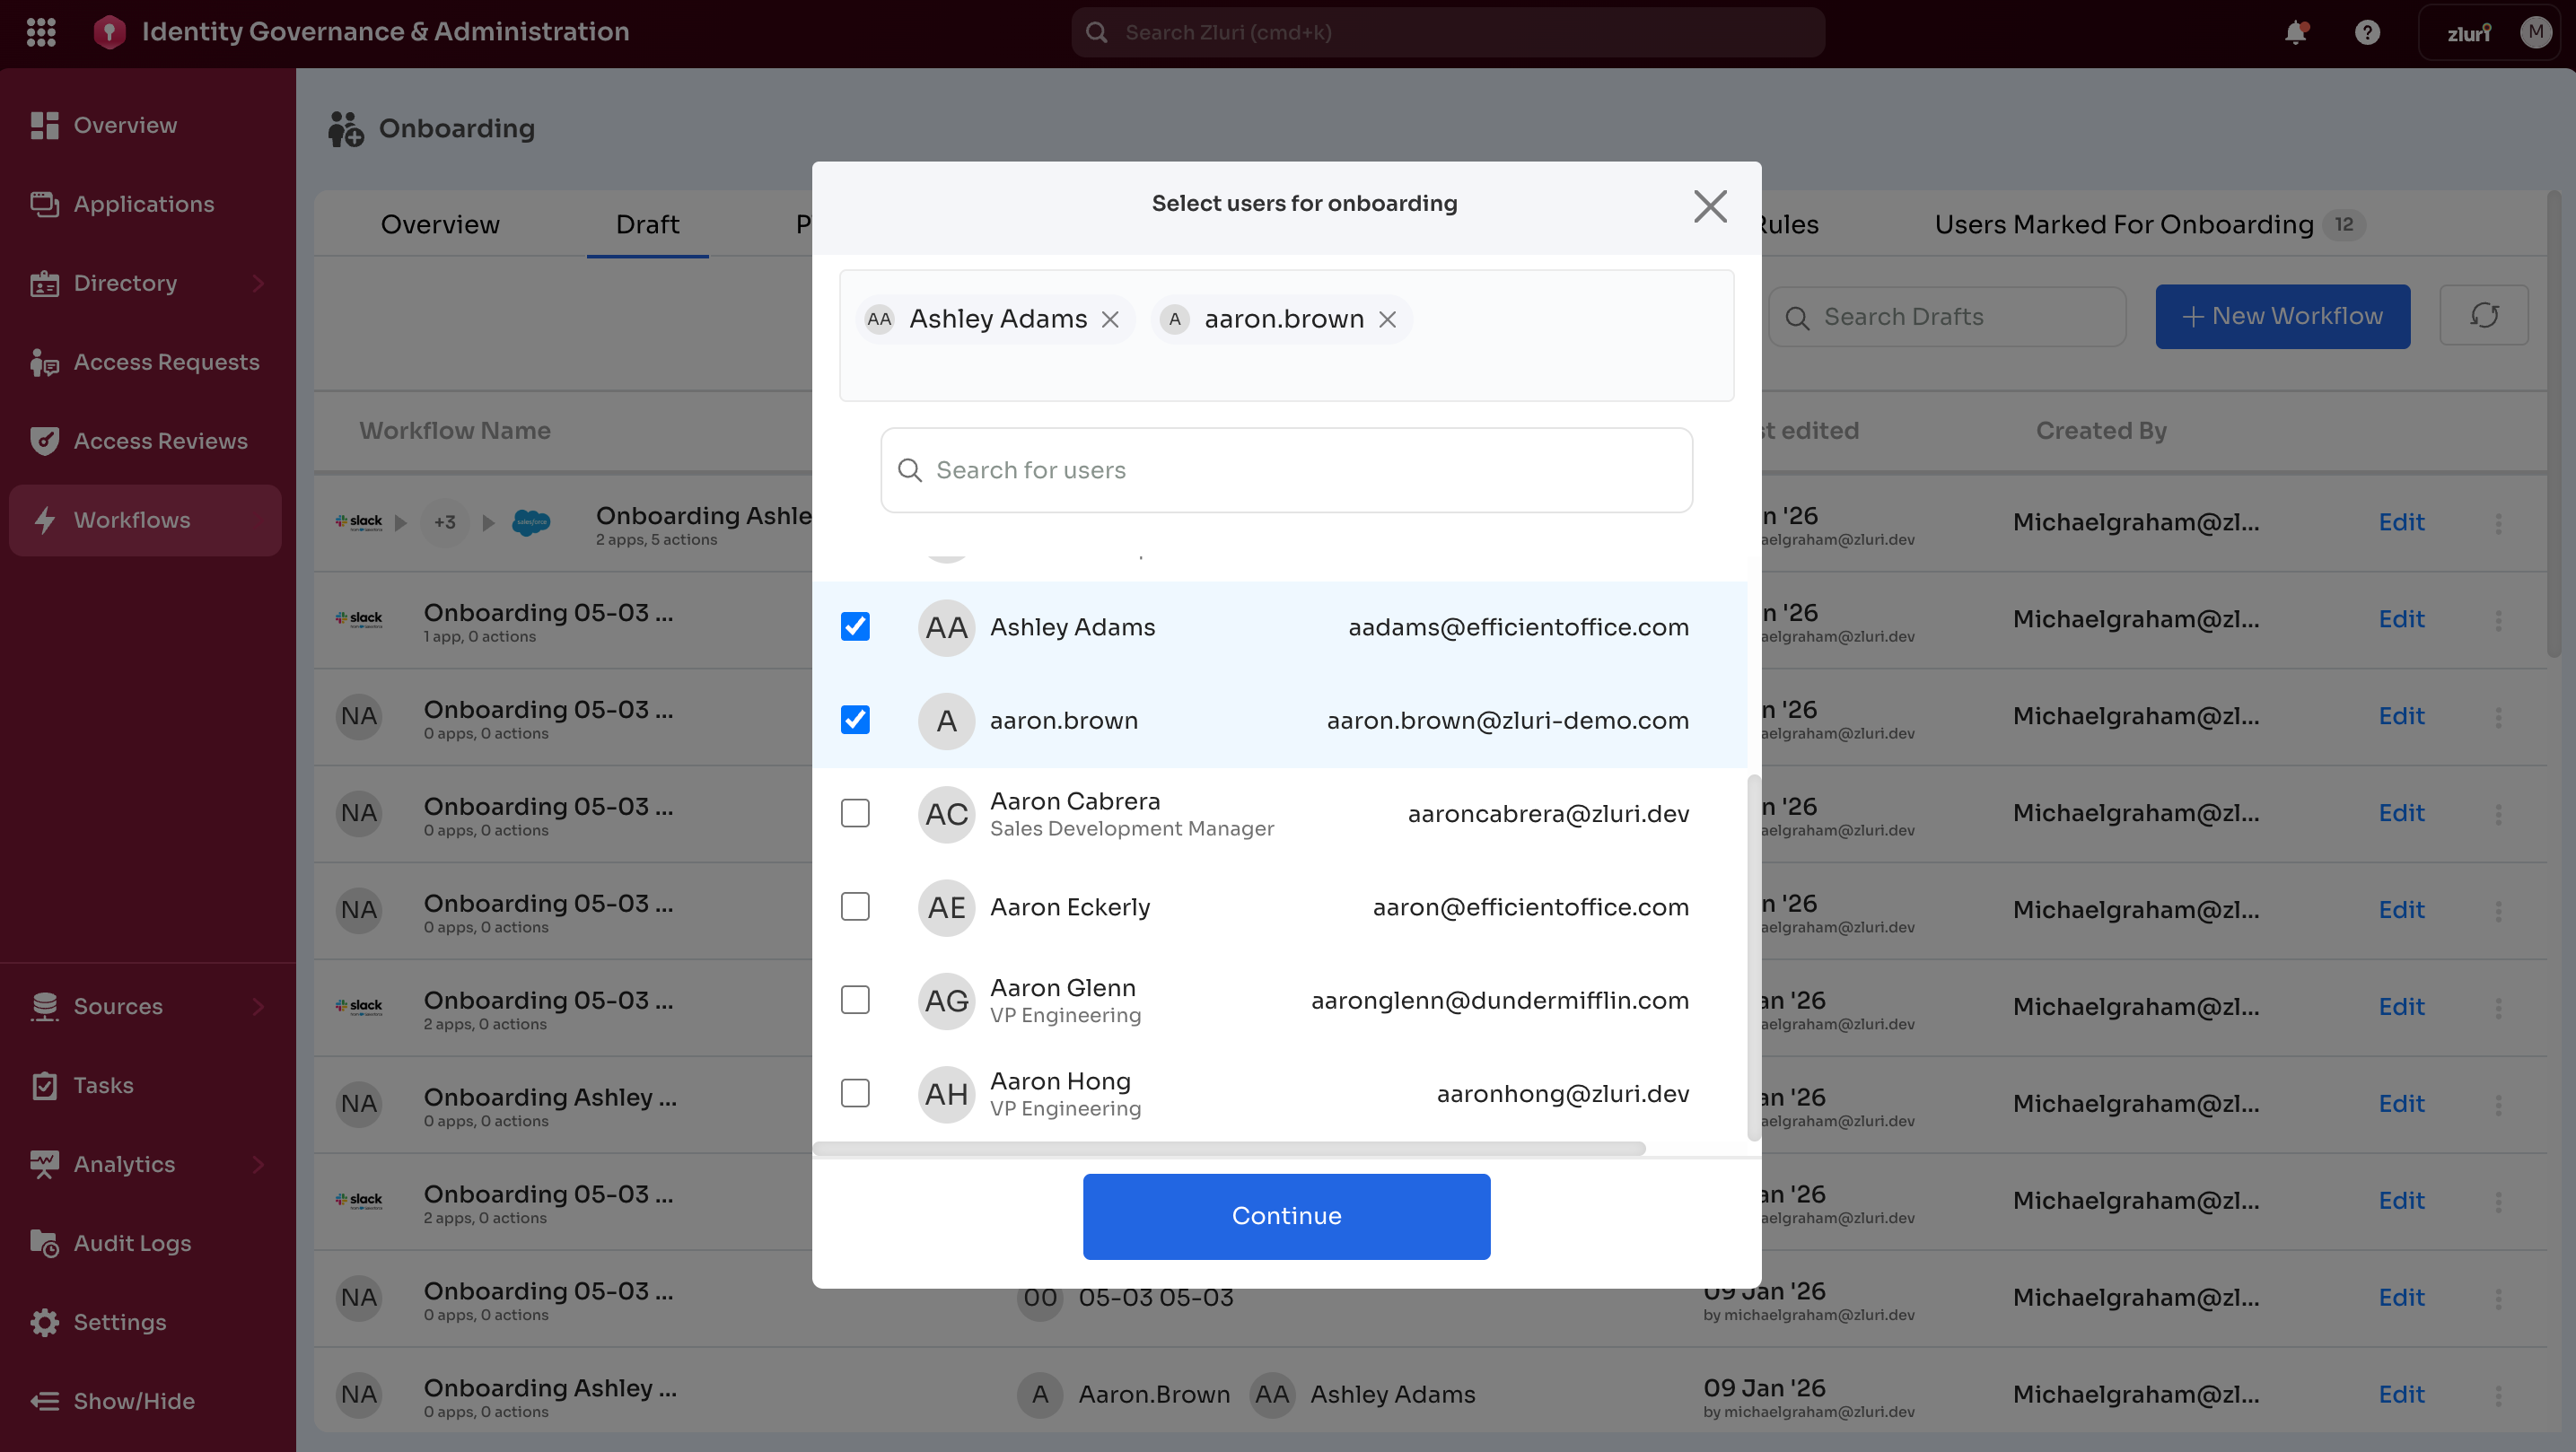
After selecting + New Workflow,the user selection screen appears; select one or more users to onboard or offboard. User selection is required before configuring applications and actions.
User Selection Screen
The screen displays all users in the organization for provisioning or deprovisioning, showing:
- Full name and email address
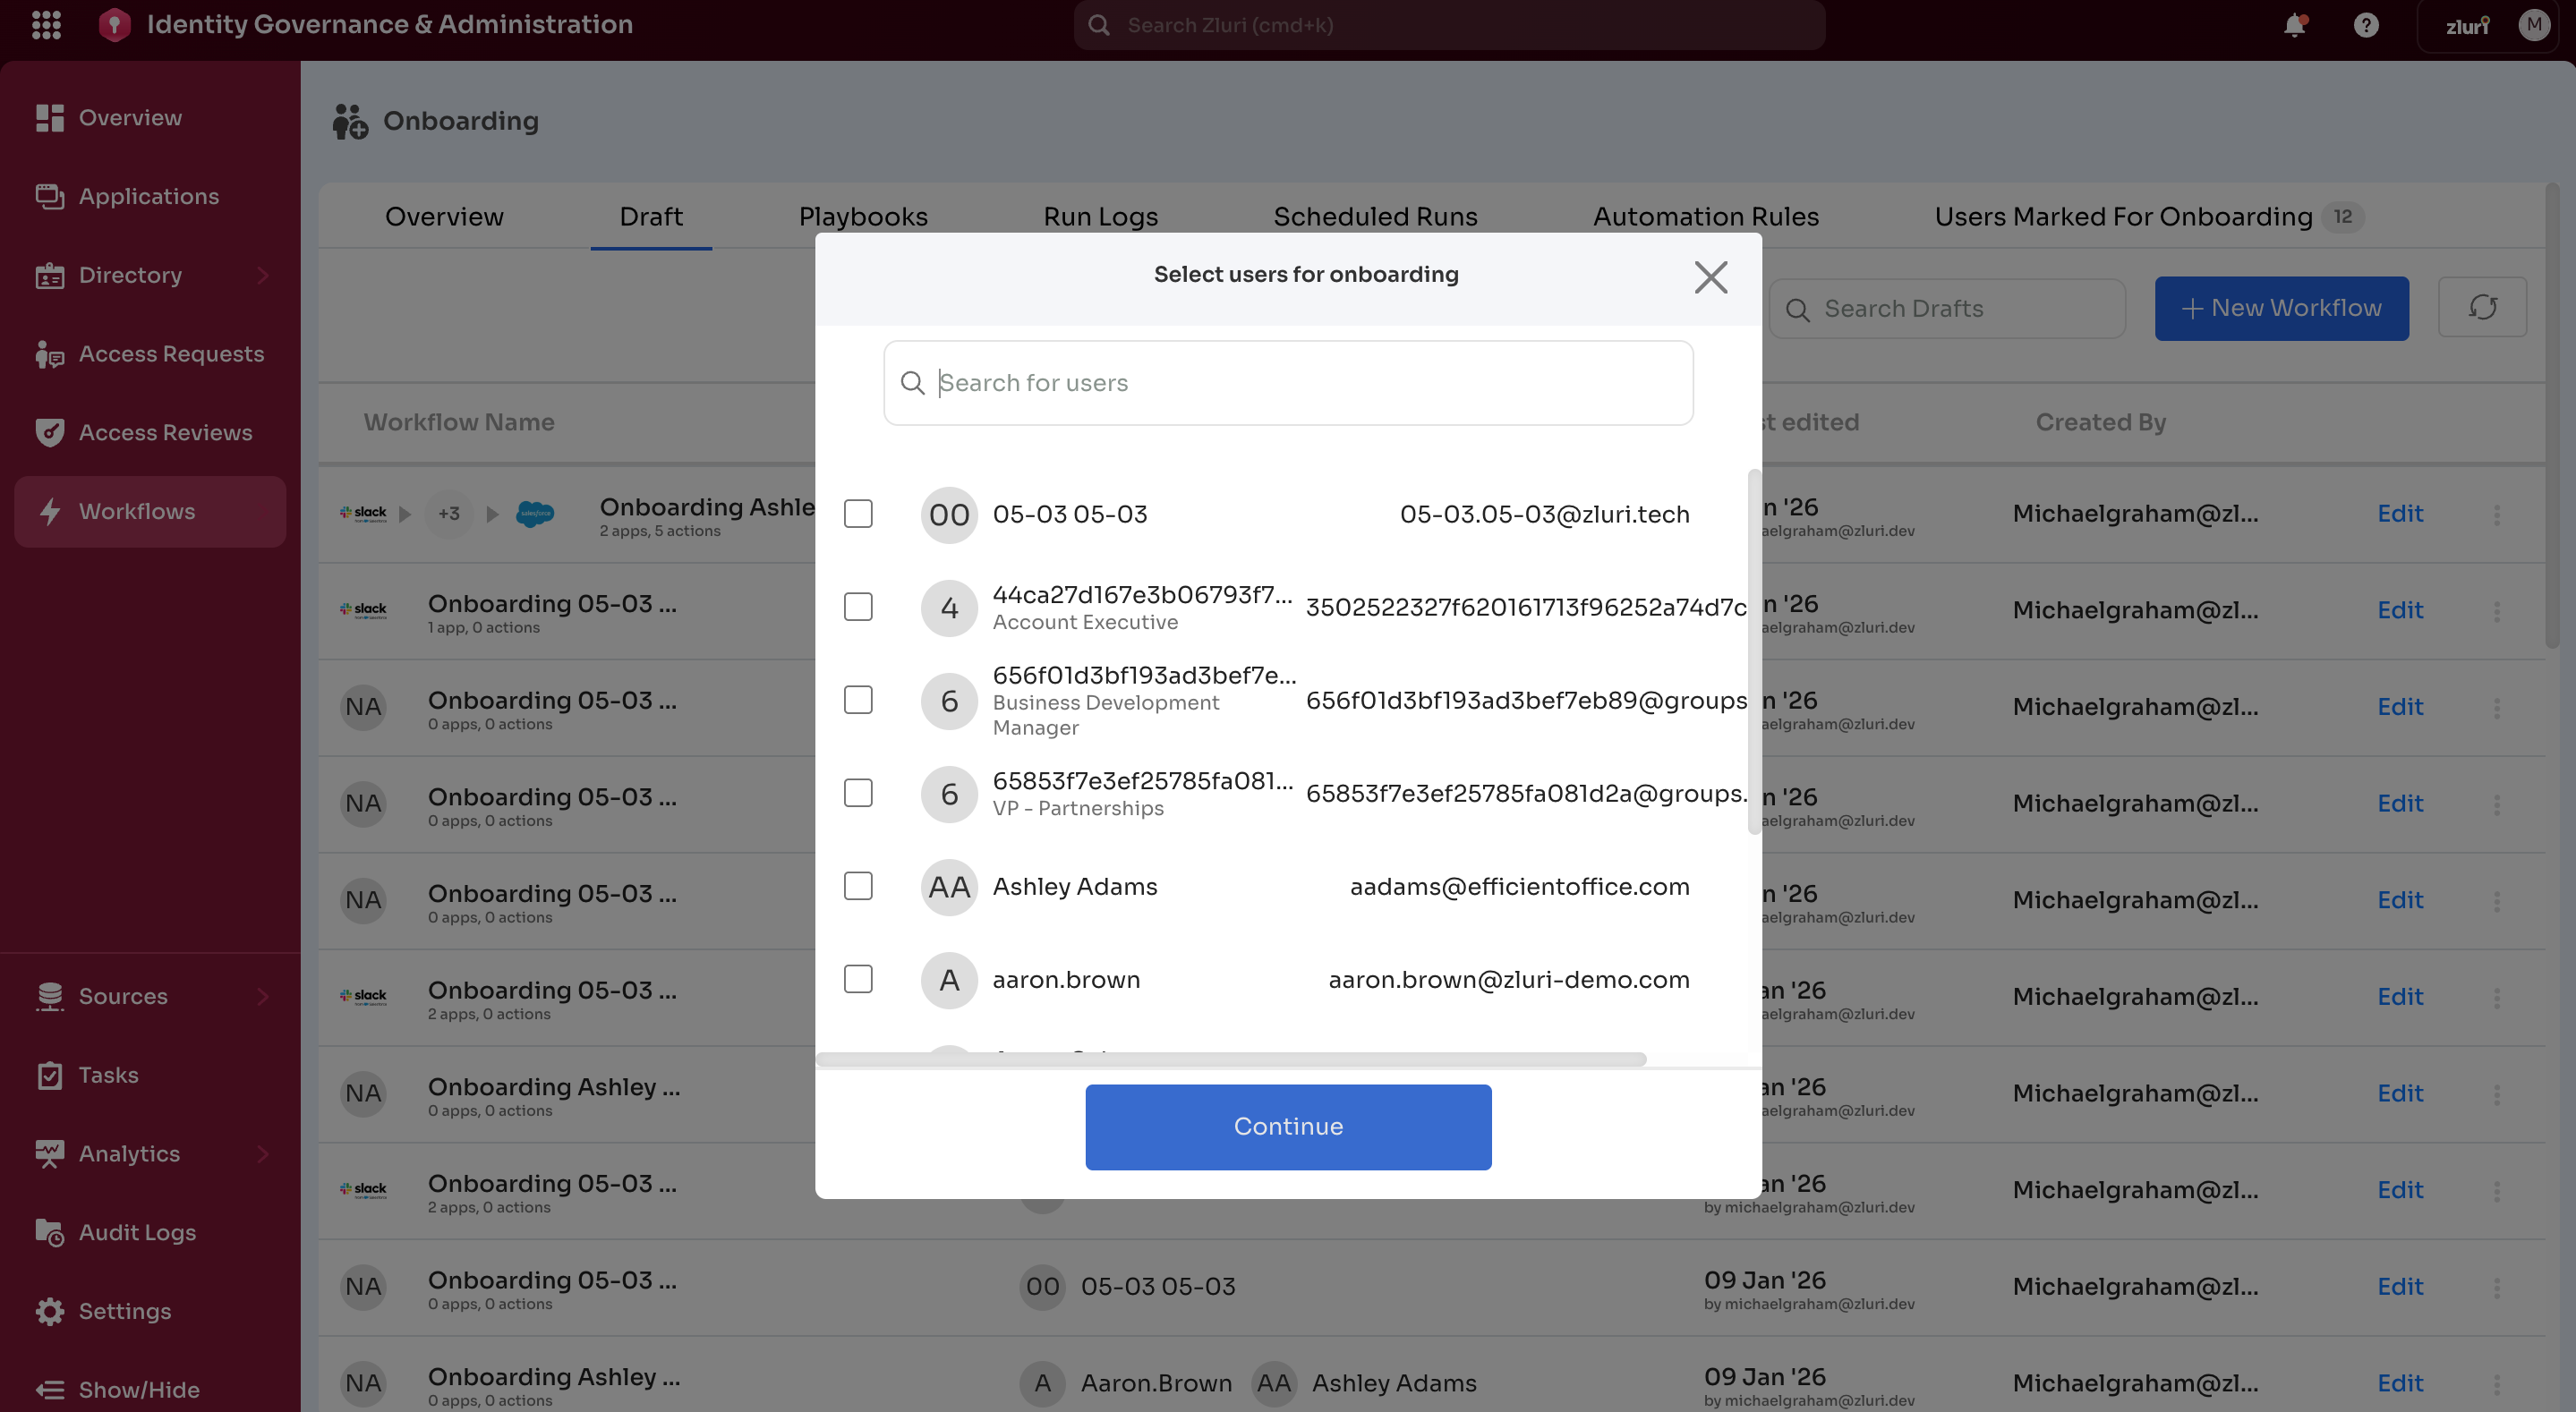
Selecting Users
Make Selection
Single user:
- Select the checkbox next to the user's name
- Select Continue
Example: Onboarding – Aaron Eckerly

Multiple users:
- Select checkboxes next to multiple users
- Select Continue
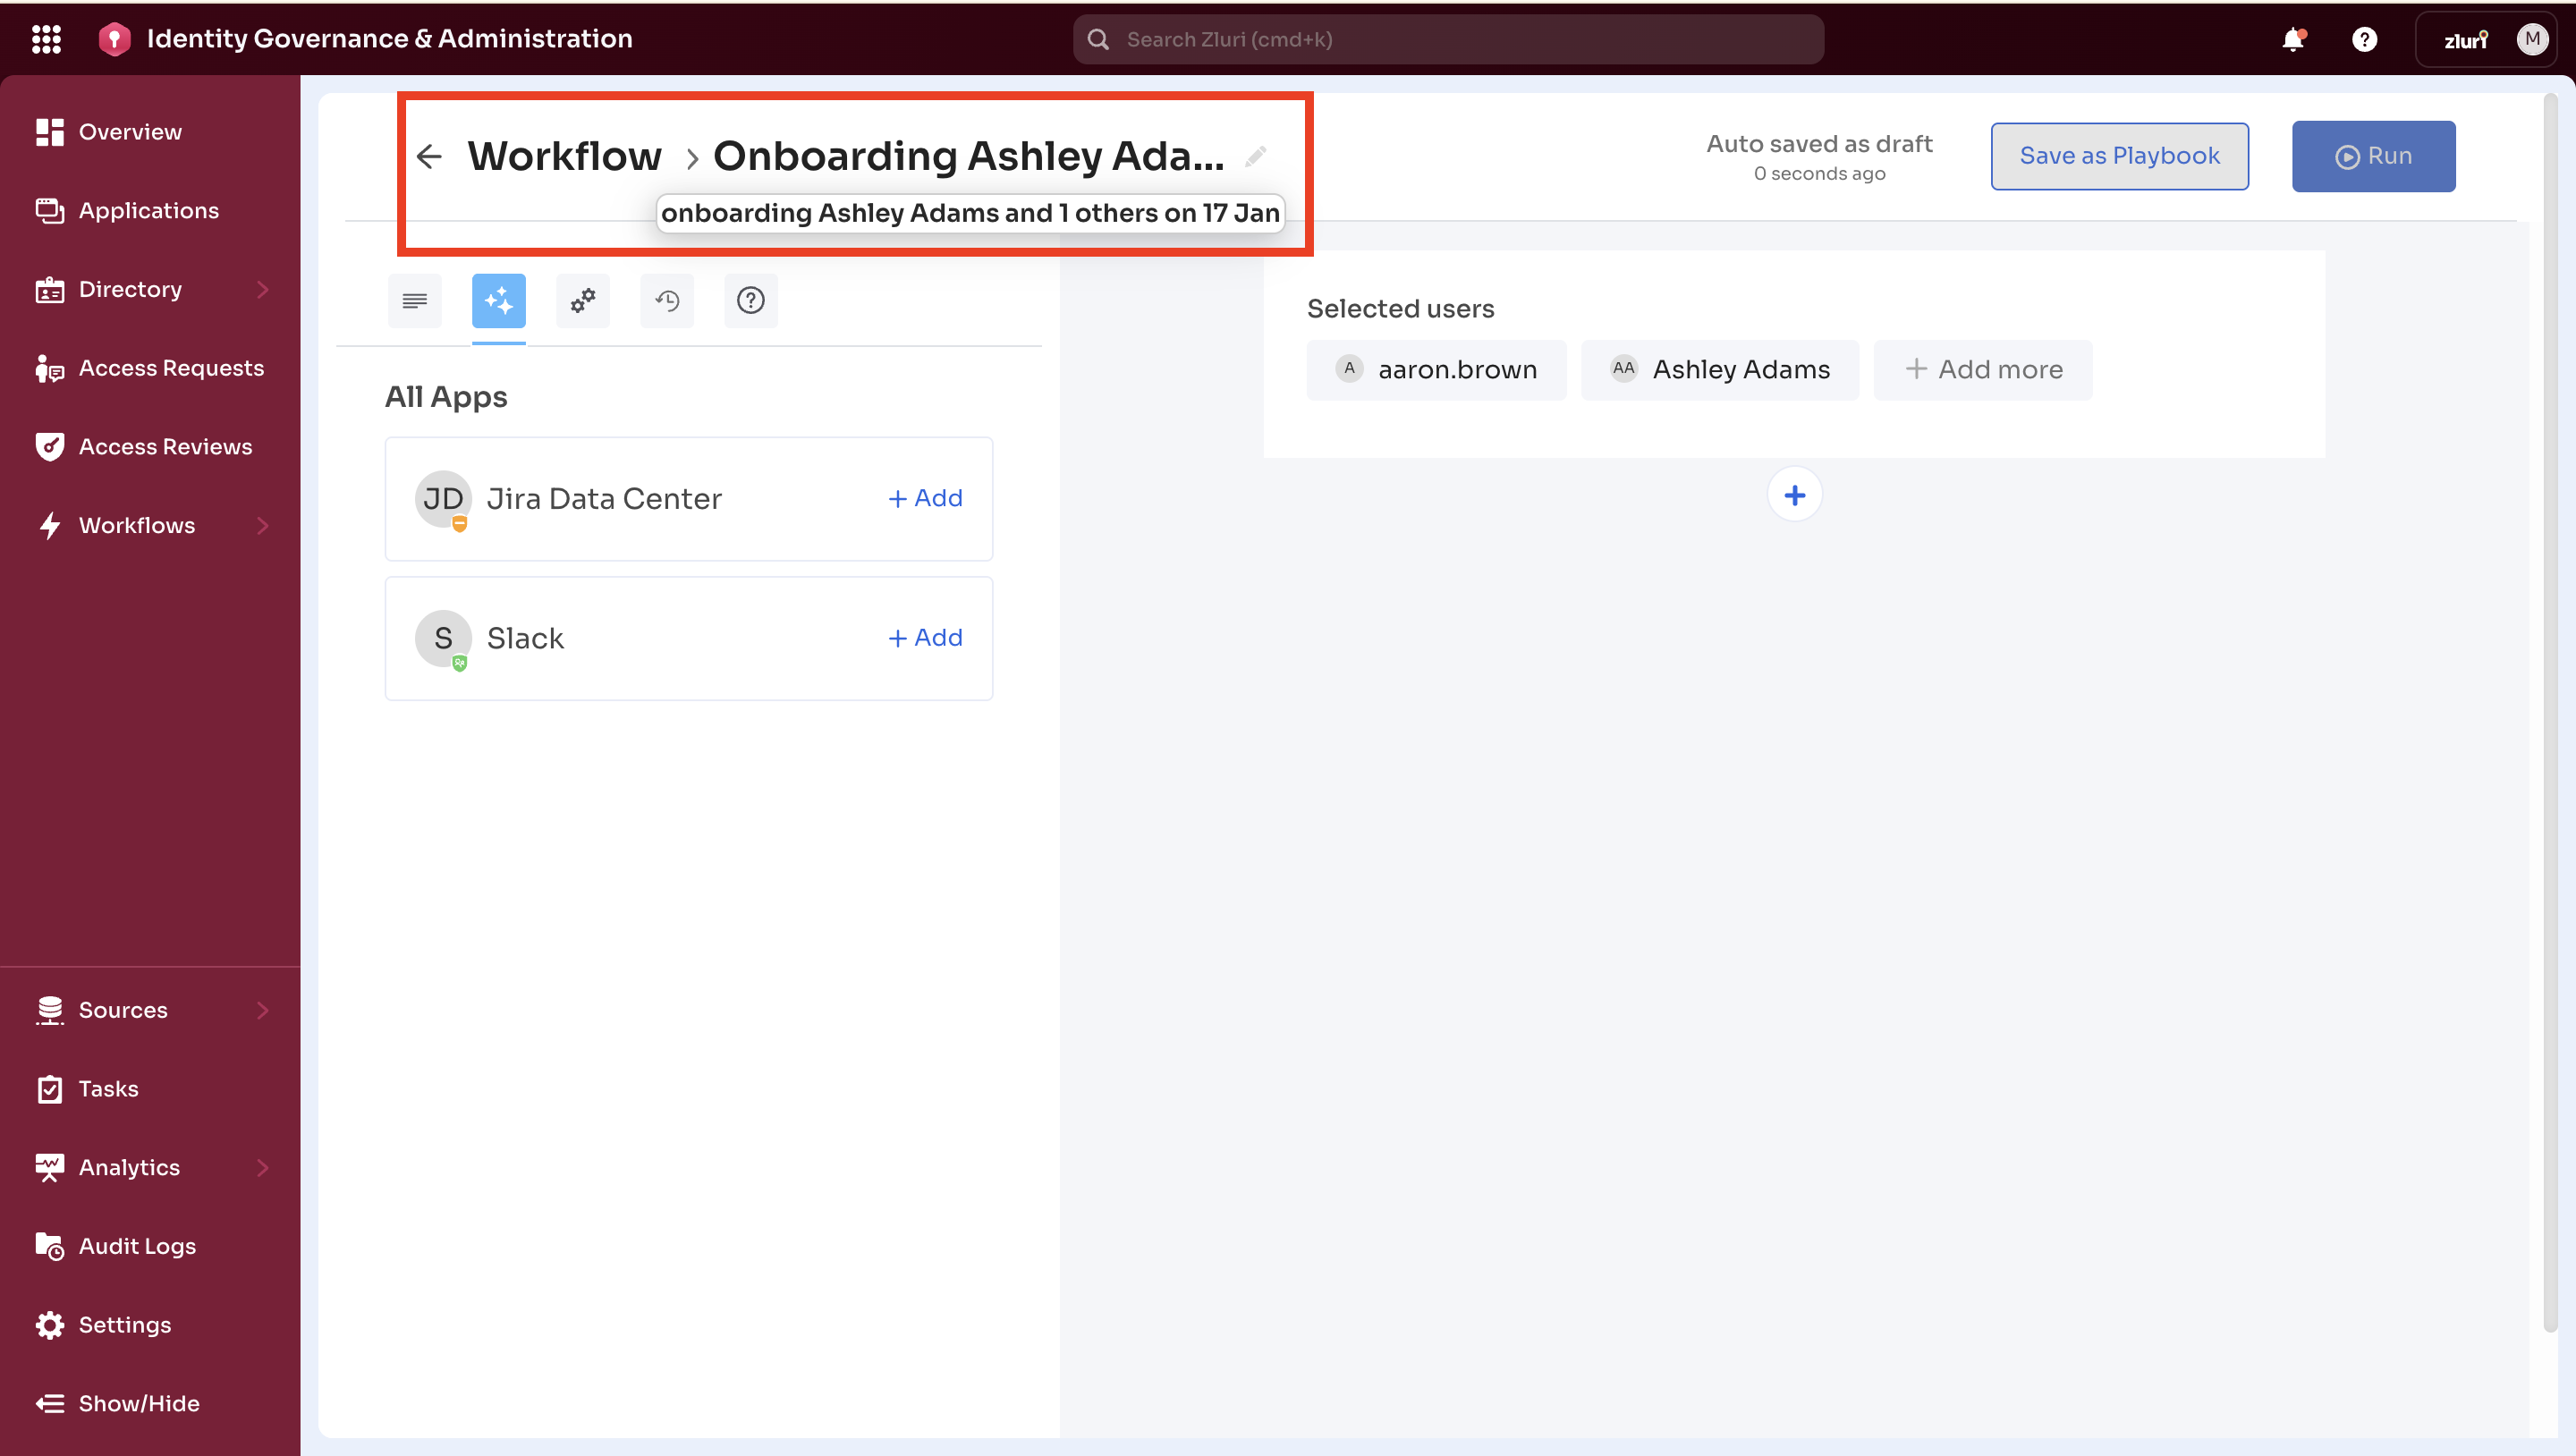
After Selection
Auto-Generated Workflow Name
- Single user: "Onboarding [First Name] [Last Name]"
- Multiple users: "Onboarding [Count] Users"
Change this later in the Settings tab.
Options Gets Enabled
Recommended applications and actions based on selected users' role, department, and location.
User attributes available for action parameters, variables, and conditions:
- Email, name, department, manager
- Variables like
{USER.EMAIL},{USER.FIRST_NAME} - Condition attributes like User Role, Department, Location, Status
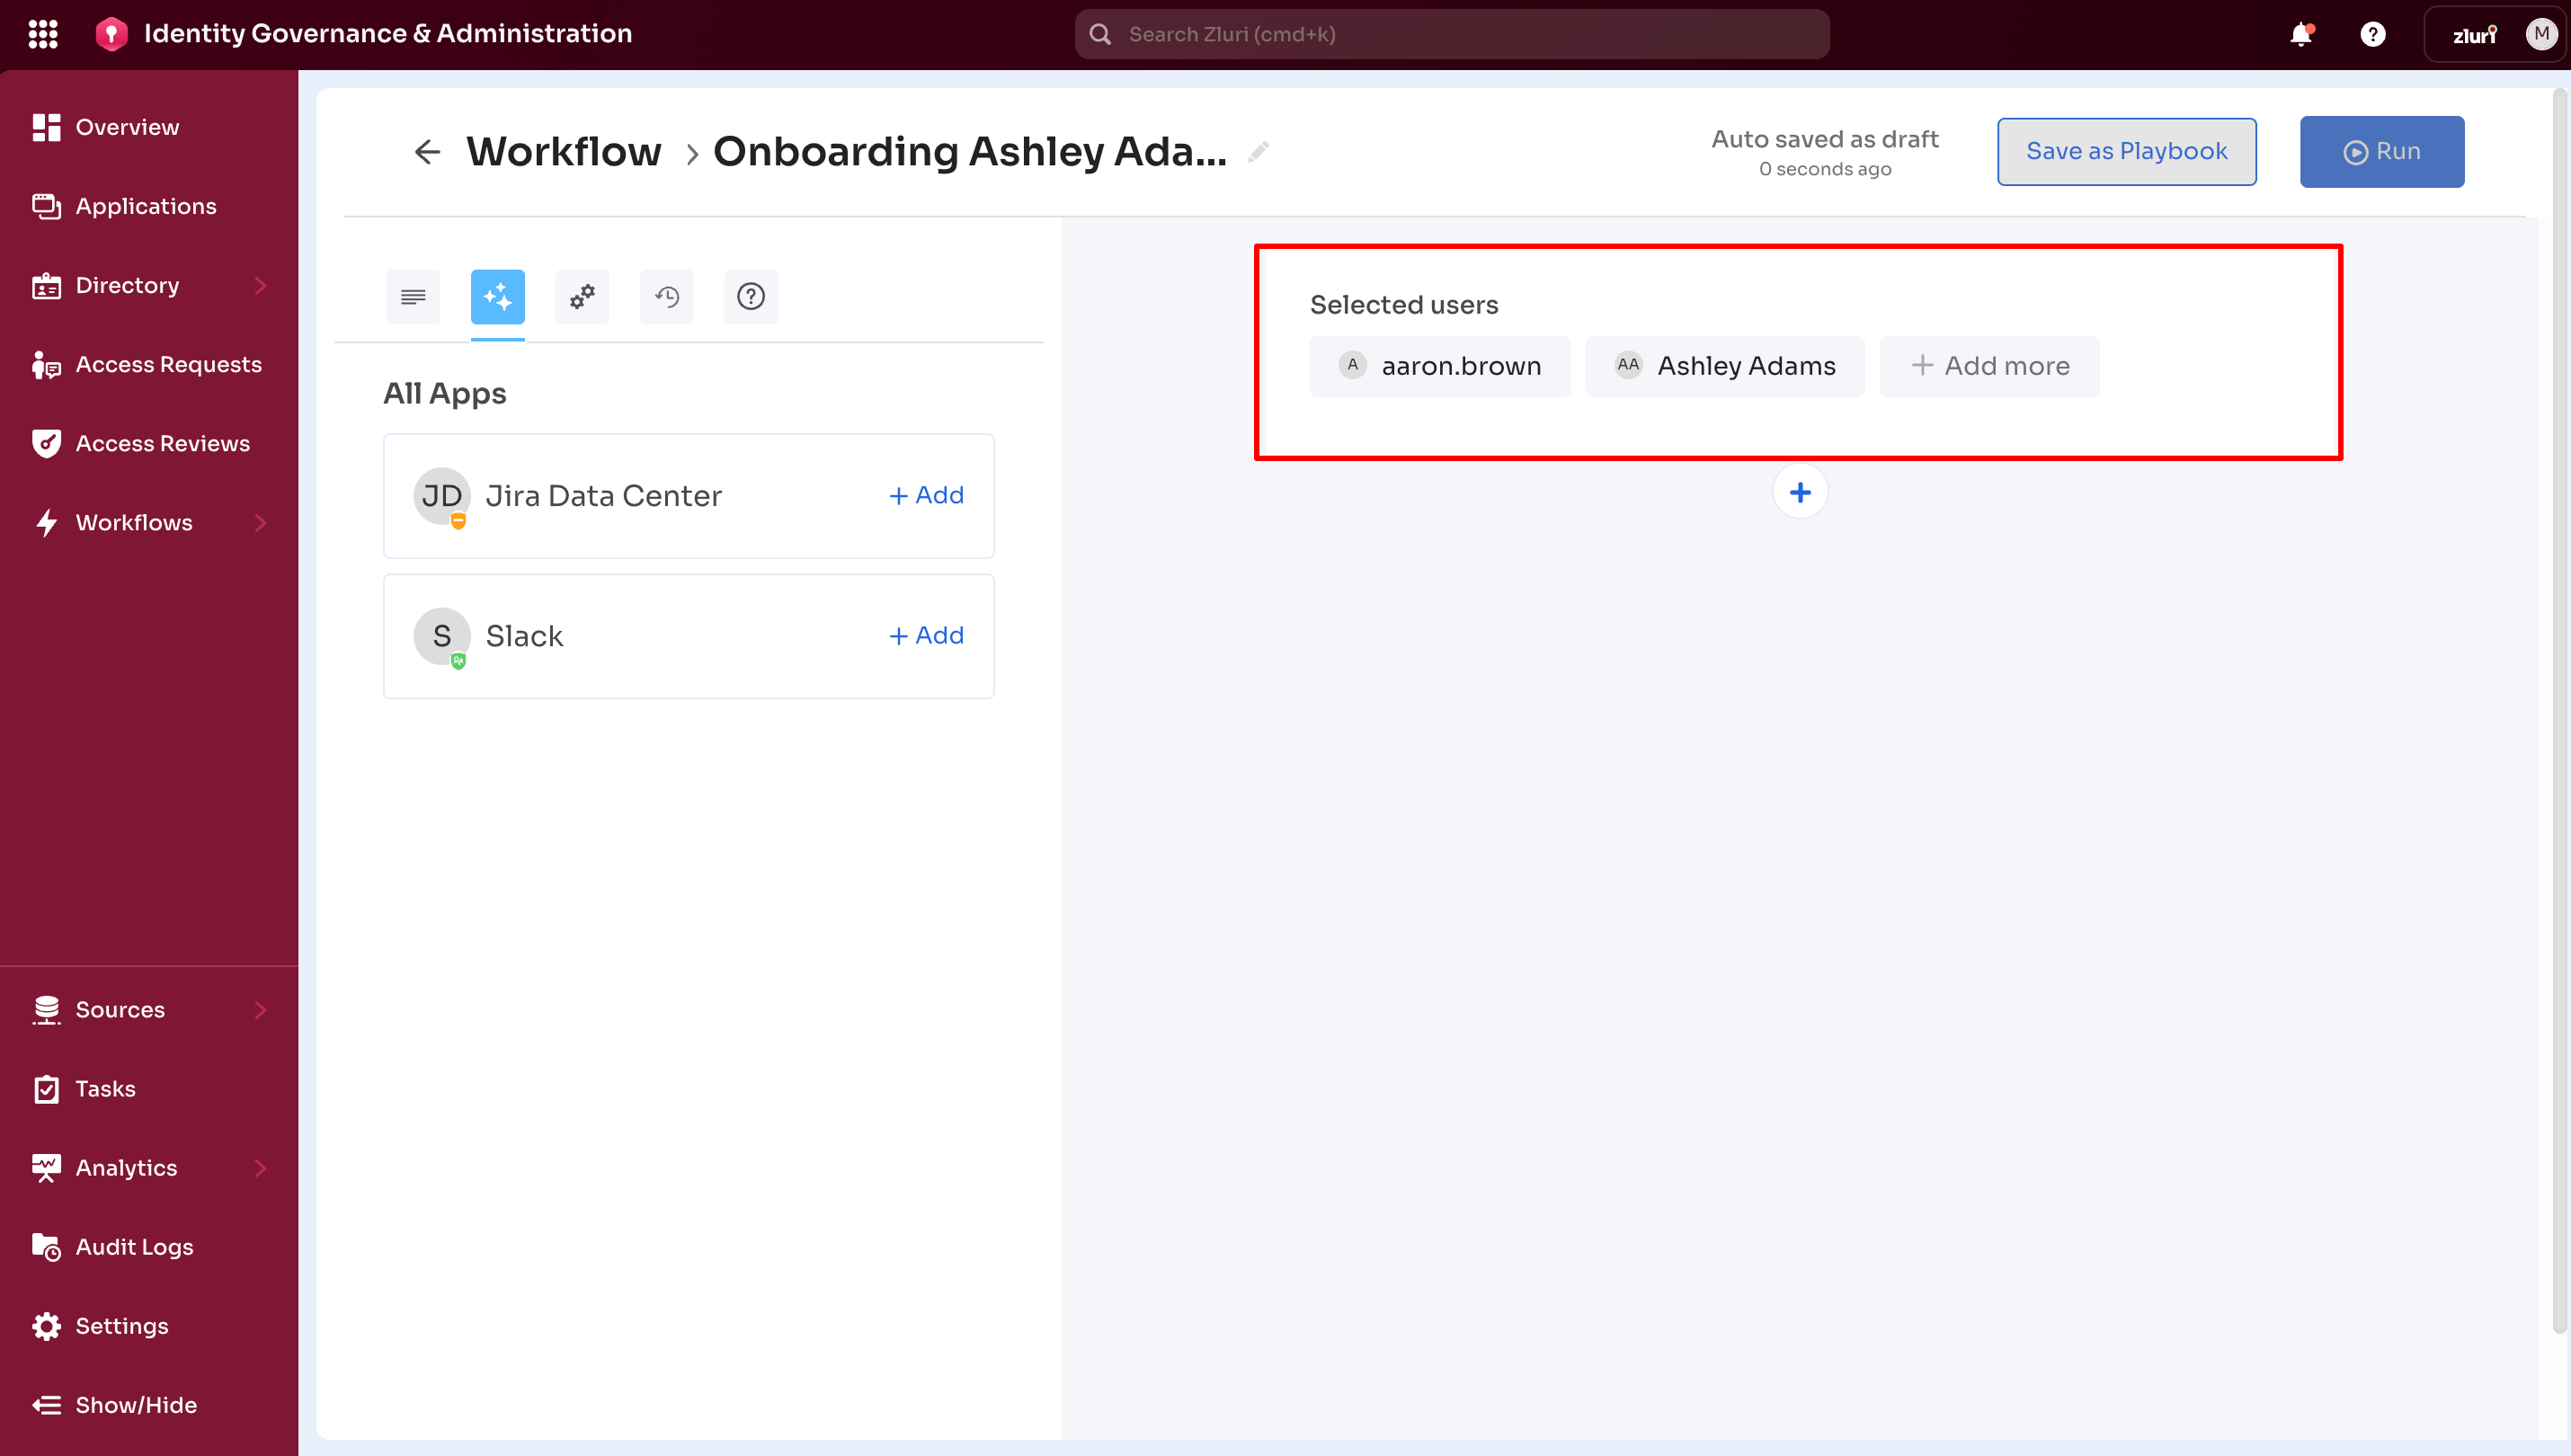
Managing Users in Workflow Builder
After selecting Continue, selected users appear in the user menu at the top of the canvas.
Add more users: Select + Add More → Select additional users → Continue
Remove users: Select the X icon next to a user's name
Note: At least one user must remain selected.
Next Steps
After selecting users, the workflow builder opens, where the next step is to add applications.
Updated 3 months ago