Managing Tasks from the Task Dashboard
Task ID
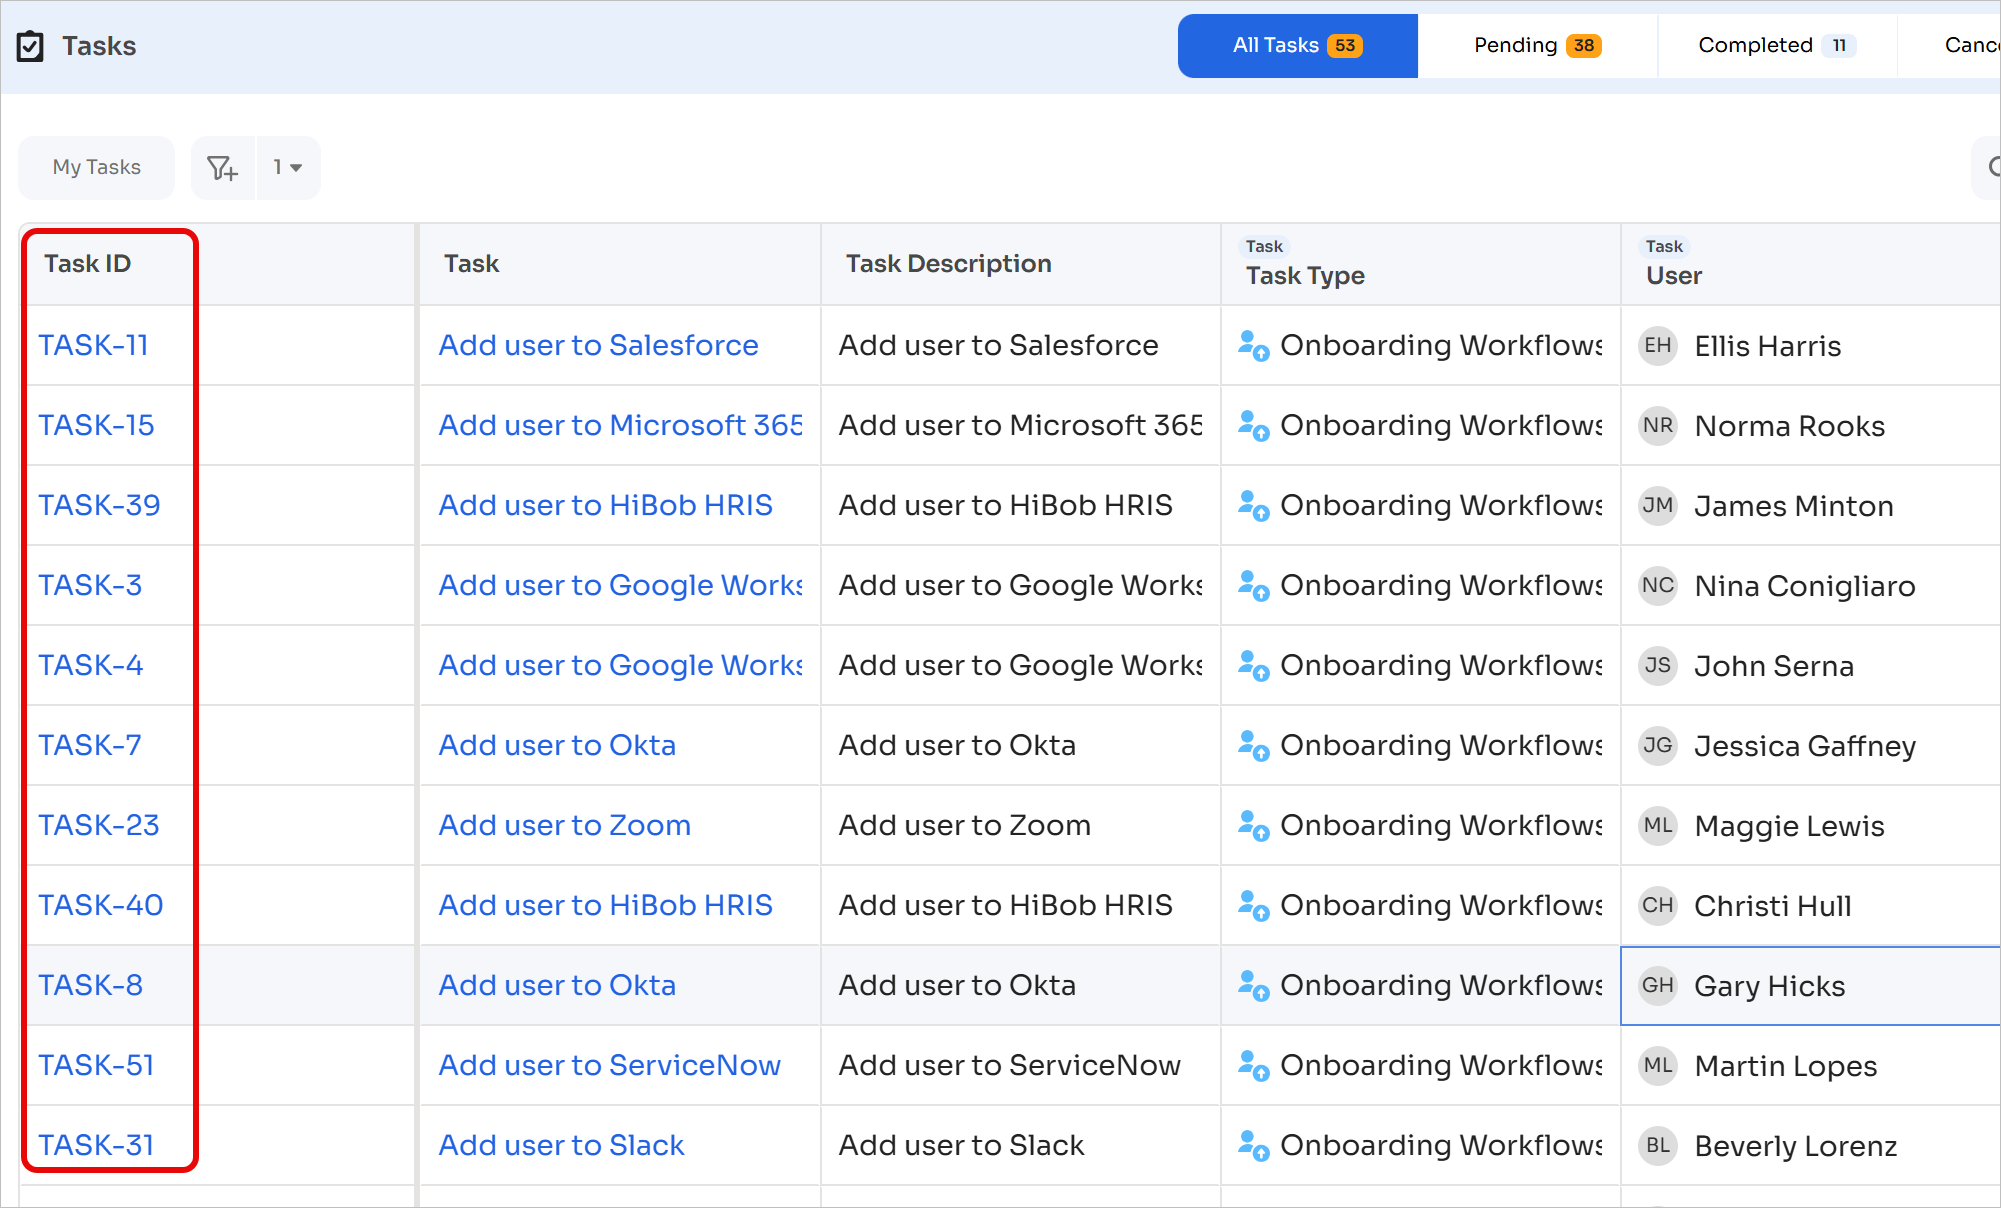
Each task includes a unique task ID (for example, TASK-2341) and an associated task link . Task links support task sharing and collaboration across teams, such as sharing tasks with reporting managers for visibility or escalation. Tasks can also be located using the task ID.
Task IDs provide the following benefits:
System-wide integration
Task IDs appear consistently across the following locations:
- Tasks dashboard table view
- Individual task detail panels
- Workflow run logs and execution tracking
- Employee dashboards
- Email notifications sent to assignees
- Slack notifications
Data integrity
Task IDs remain consistent throughout the task lifecycle:
- Task IDs remain unchanged after assignment, including reassignment scenarios
- Deleted task IDs are not reused, preserving historical uniqueness
- This supports reliable tracking and accurate audit trails
Access control considerations
Anyone with a task link can view and comment on the task, regardless of access permissions. Action execution remains restricted. Exercise caution while sharing task links in Slack channels or multi-recipient emails.
Generating Task ID links
Task links can be generated using the following steps:
- Select a task from the task list (task 11 shown below)
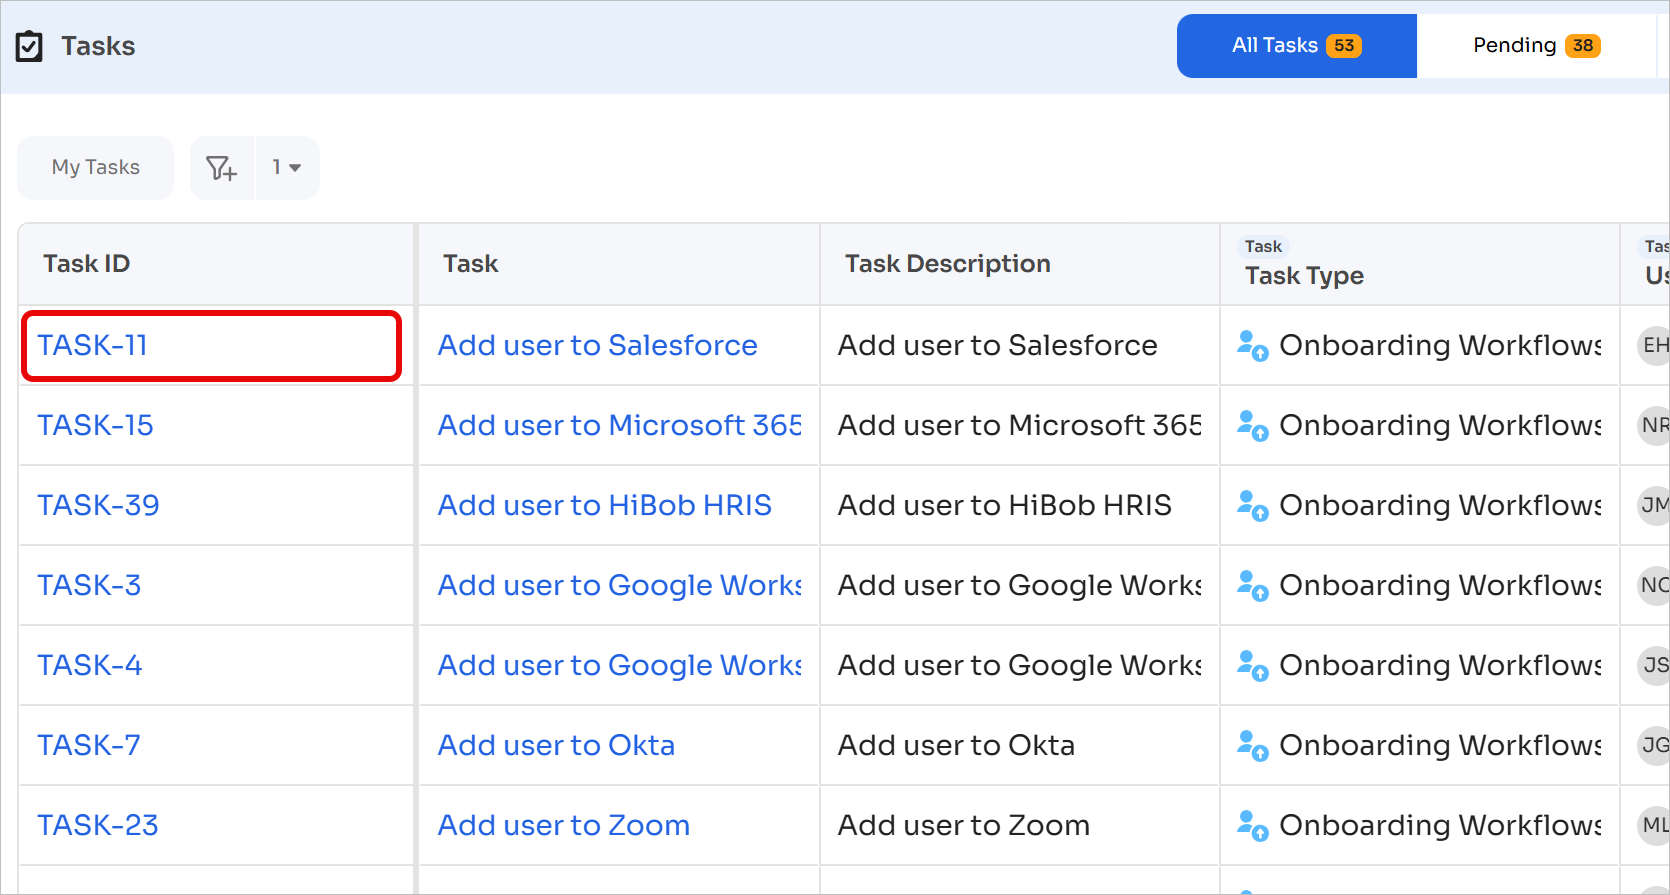
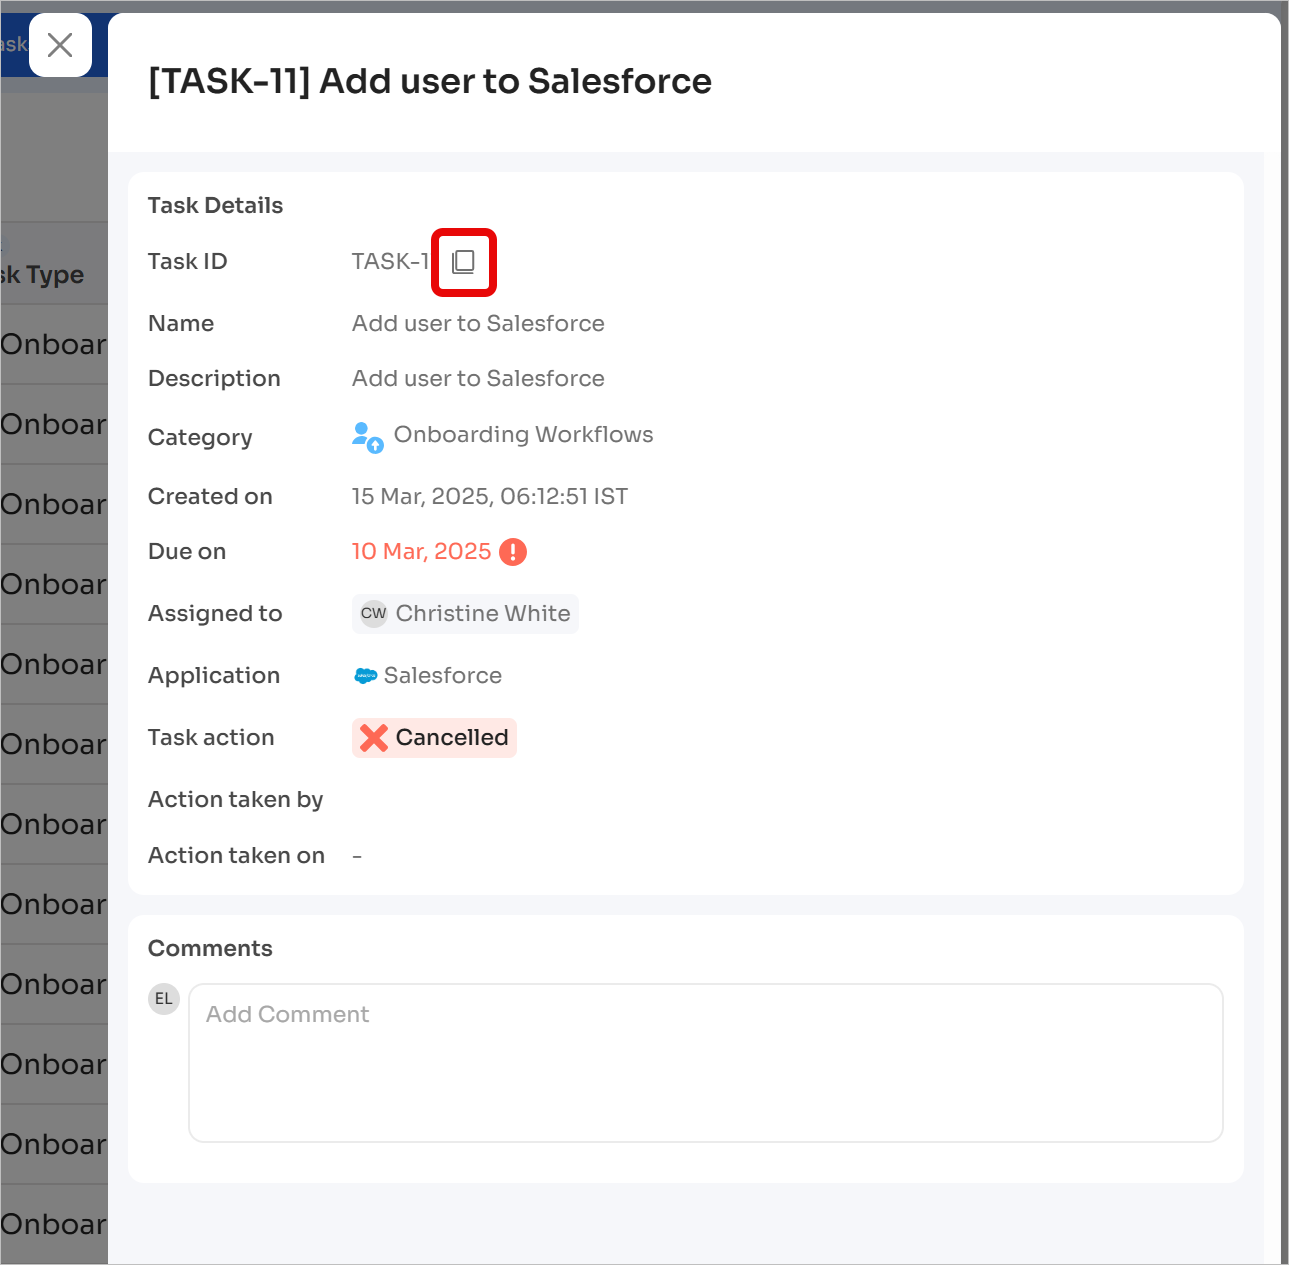
- Select the Copy Task Link icon
Individual Actions
Complete, cancel, and comment on individual tasks
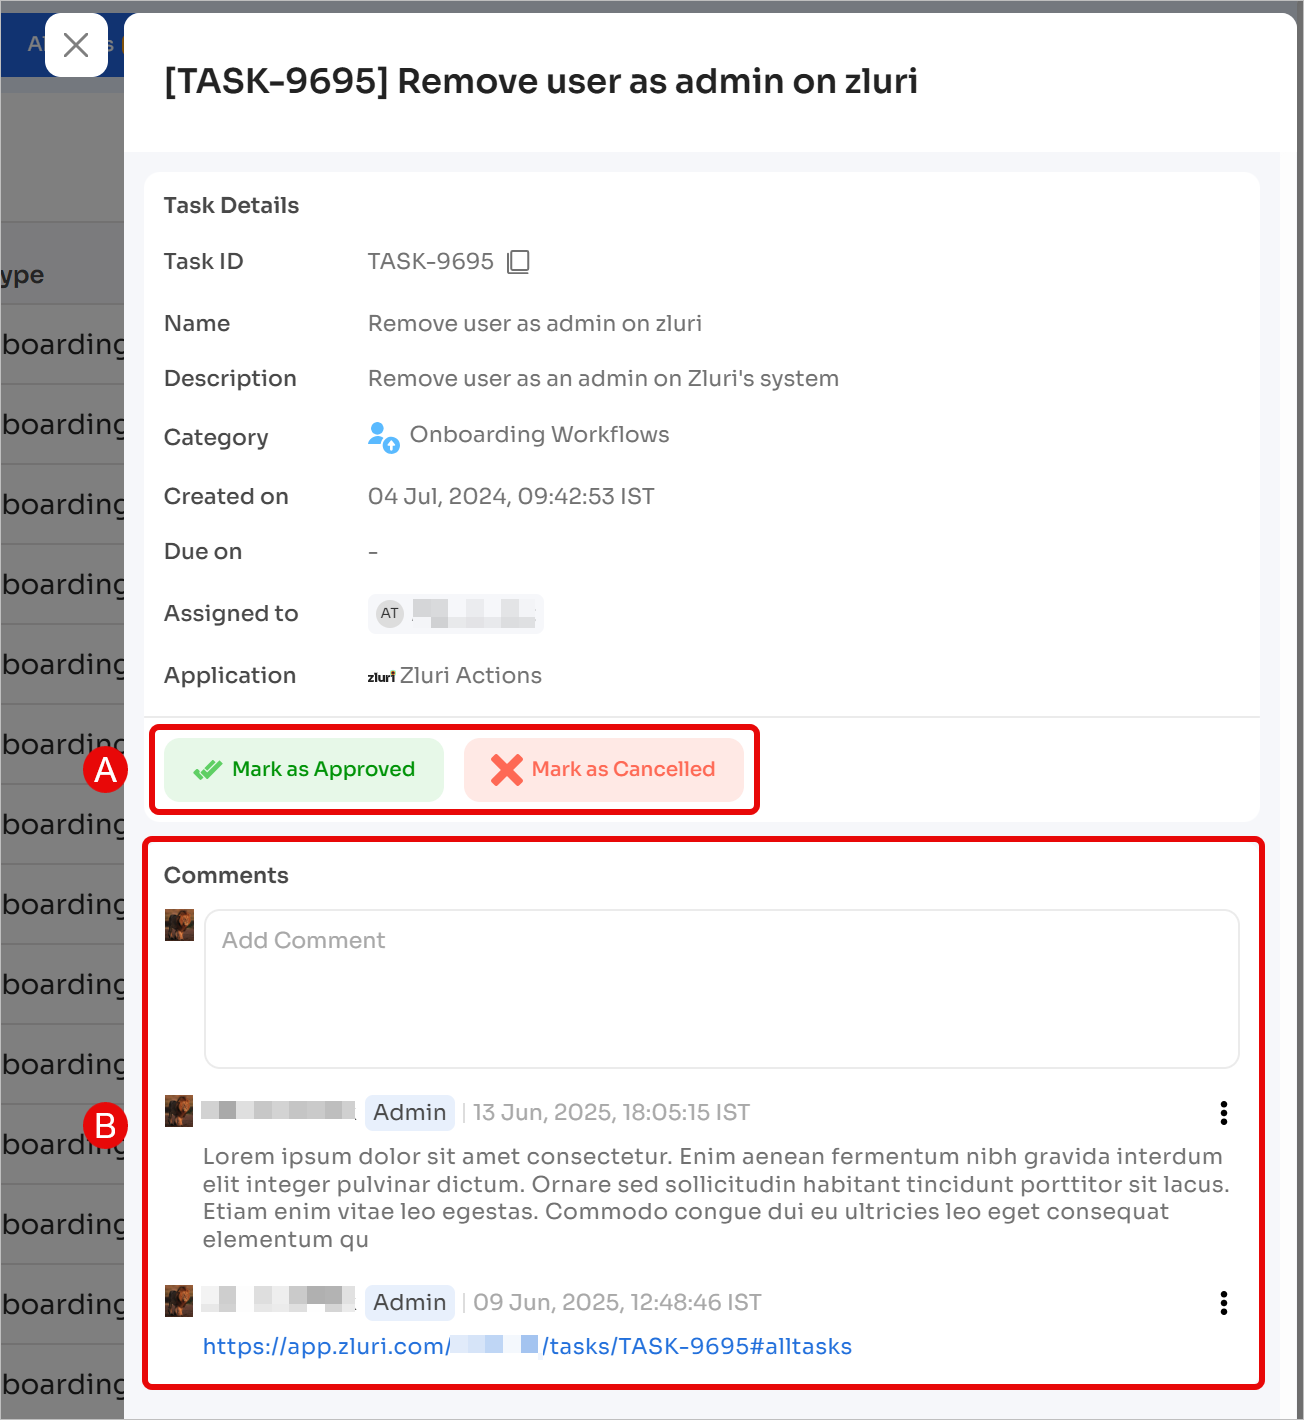
- Open a task to view task details.
- Perform one of the following actions:
- Mark the task as Approved / Completed / Canceled
- View or add comments
- Task history displays the action taken and the user associated with the action.
For approvers, the action label appears as Mark as Approved.For task assignees, the action label appears as Mark as Completed.
Bulk Actions
Approve or cancel tasks in bulk
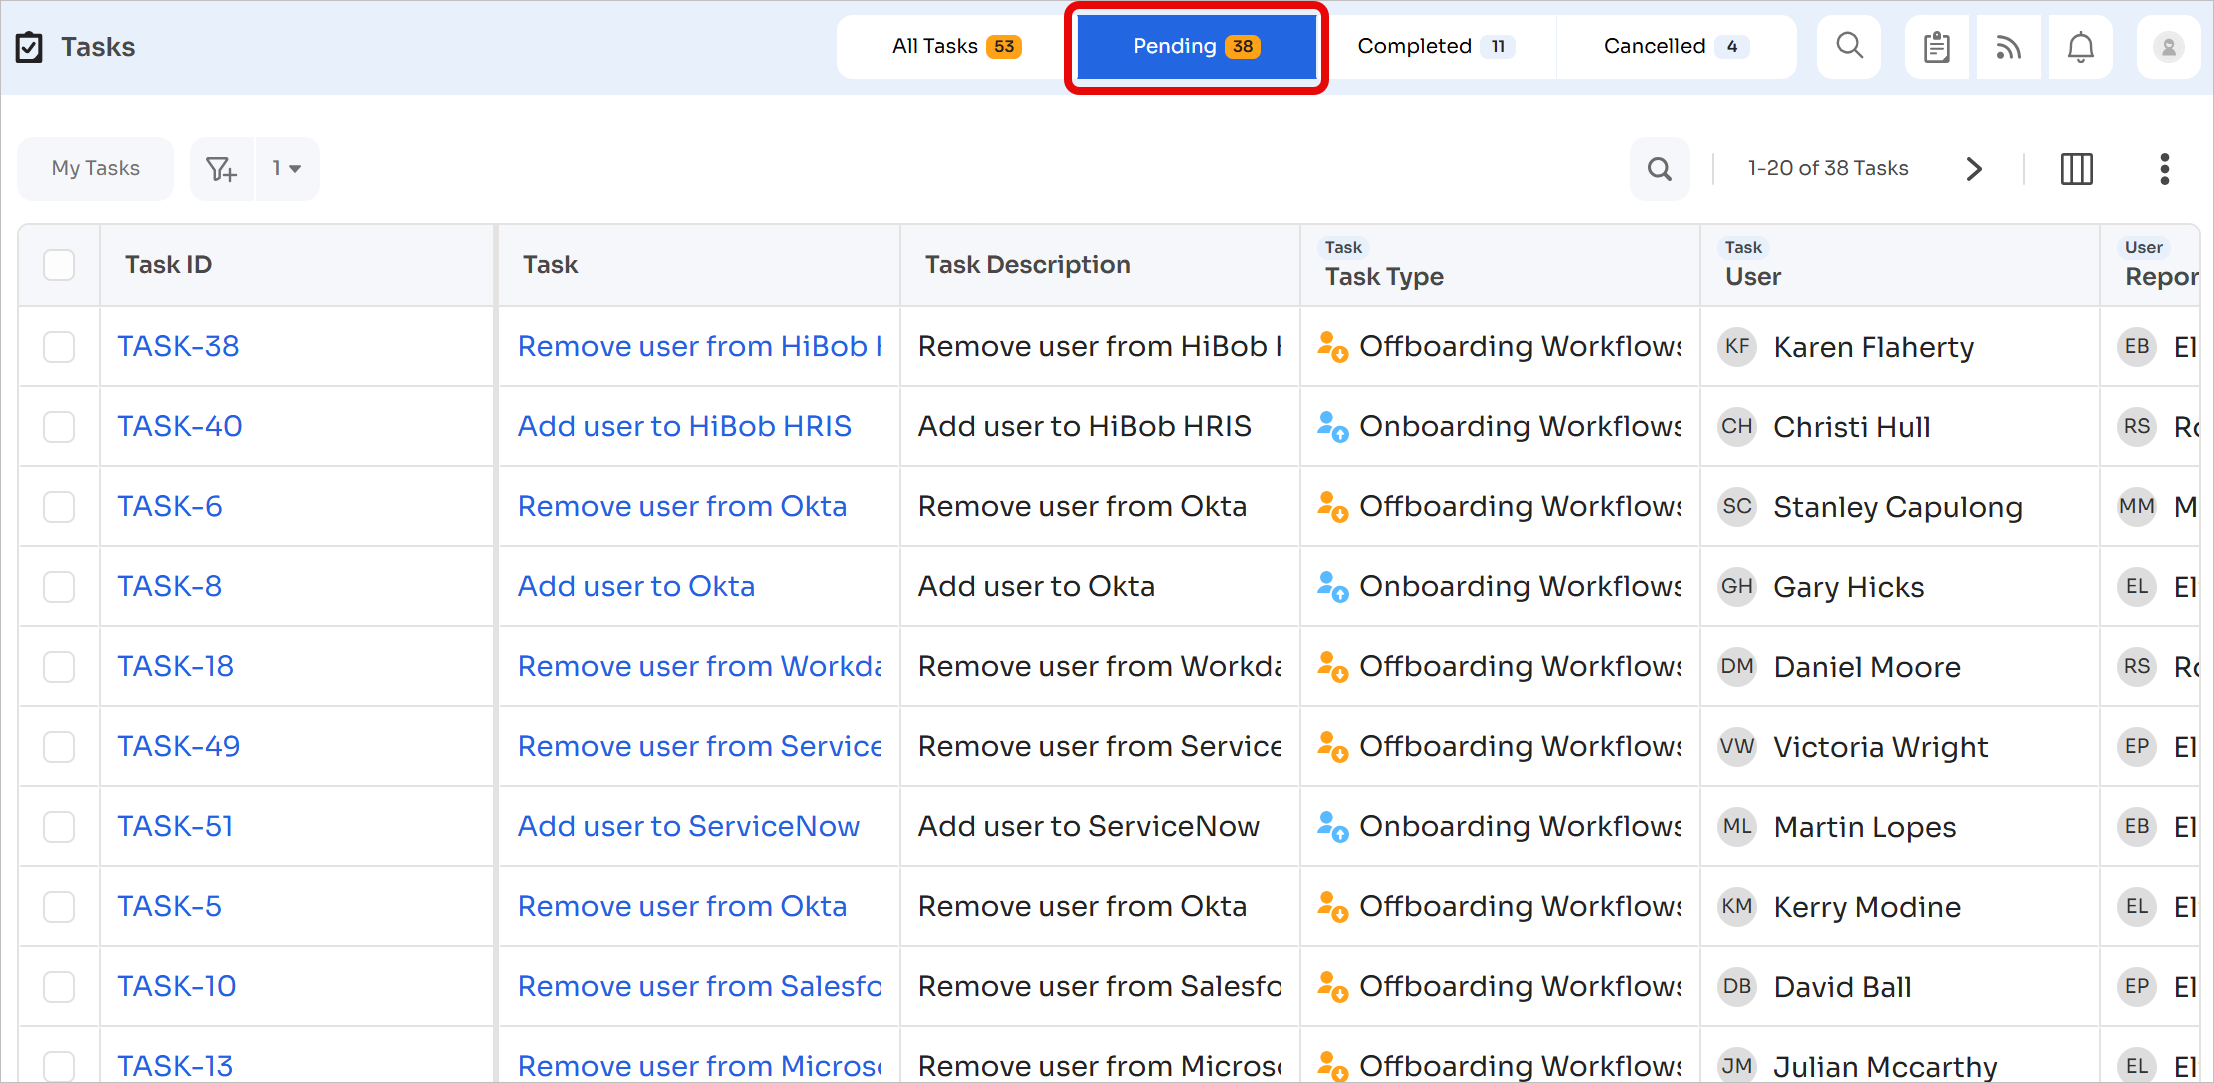
Bulk Edit is available only in the Pending tasks view. Other views contain completed or canceled tasks and do not support bulk actions.
-
Open the Pending tasks tab
-
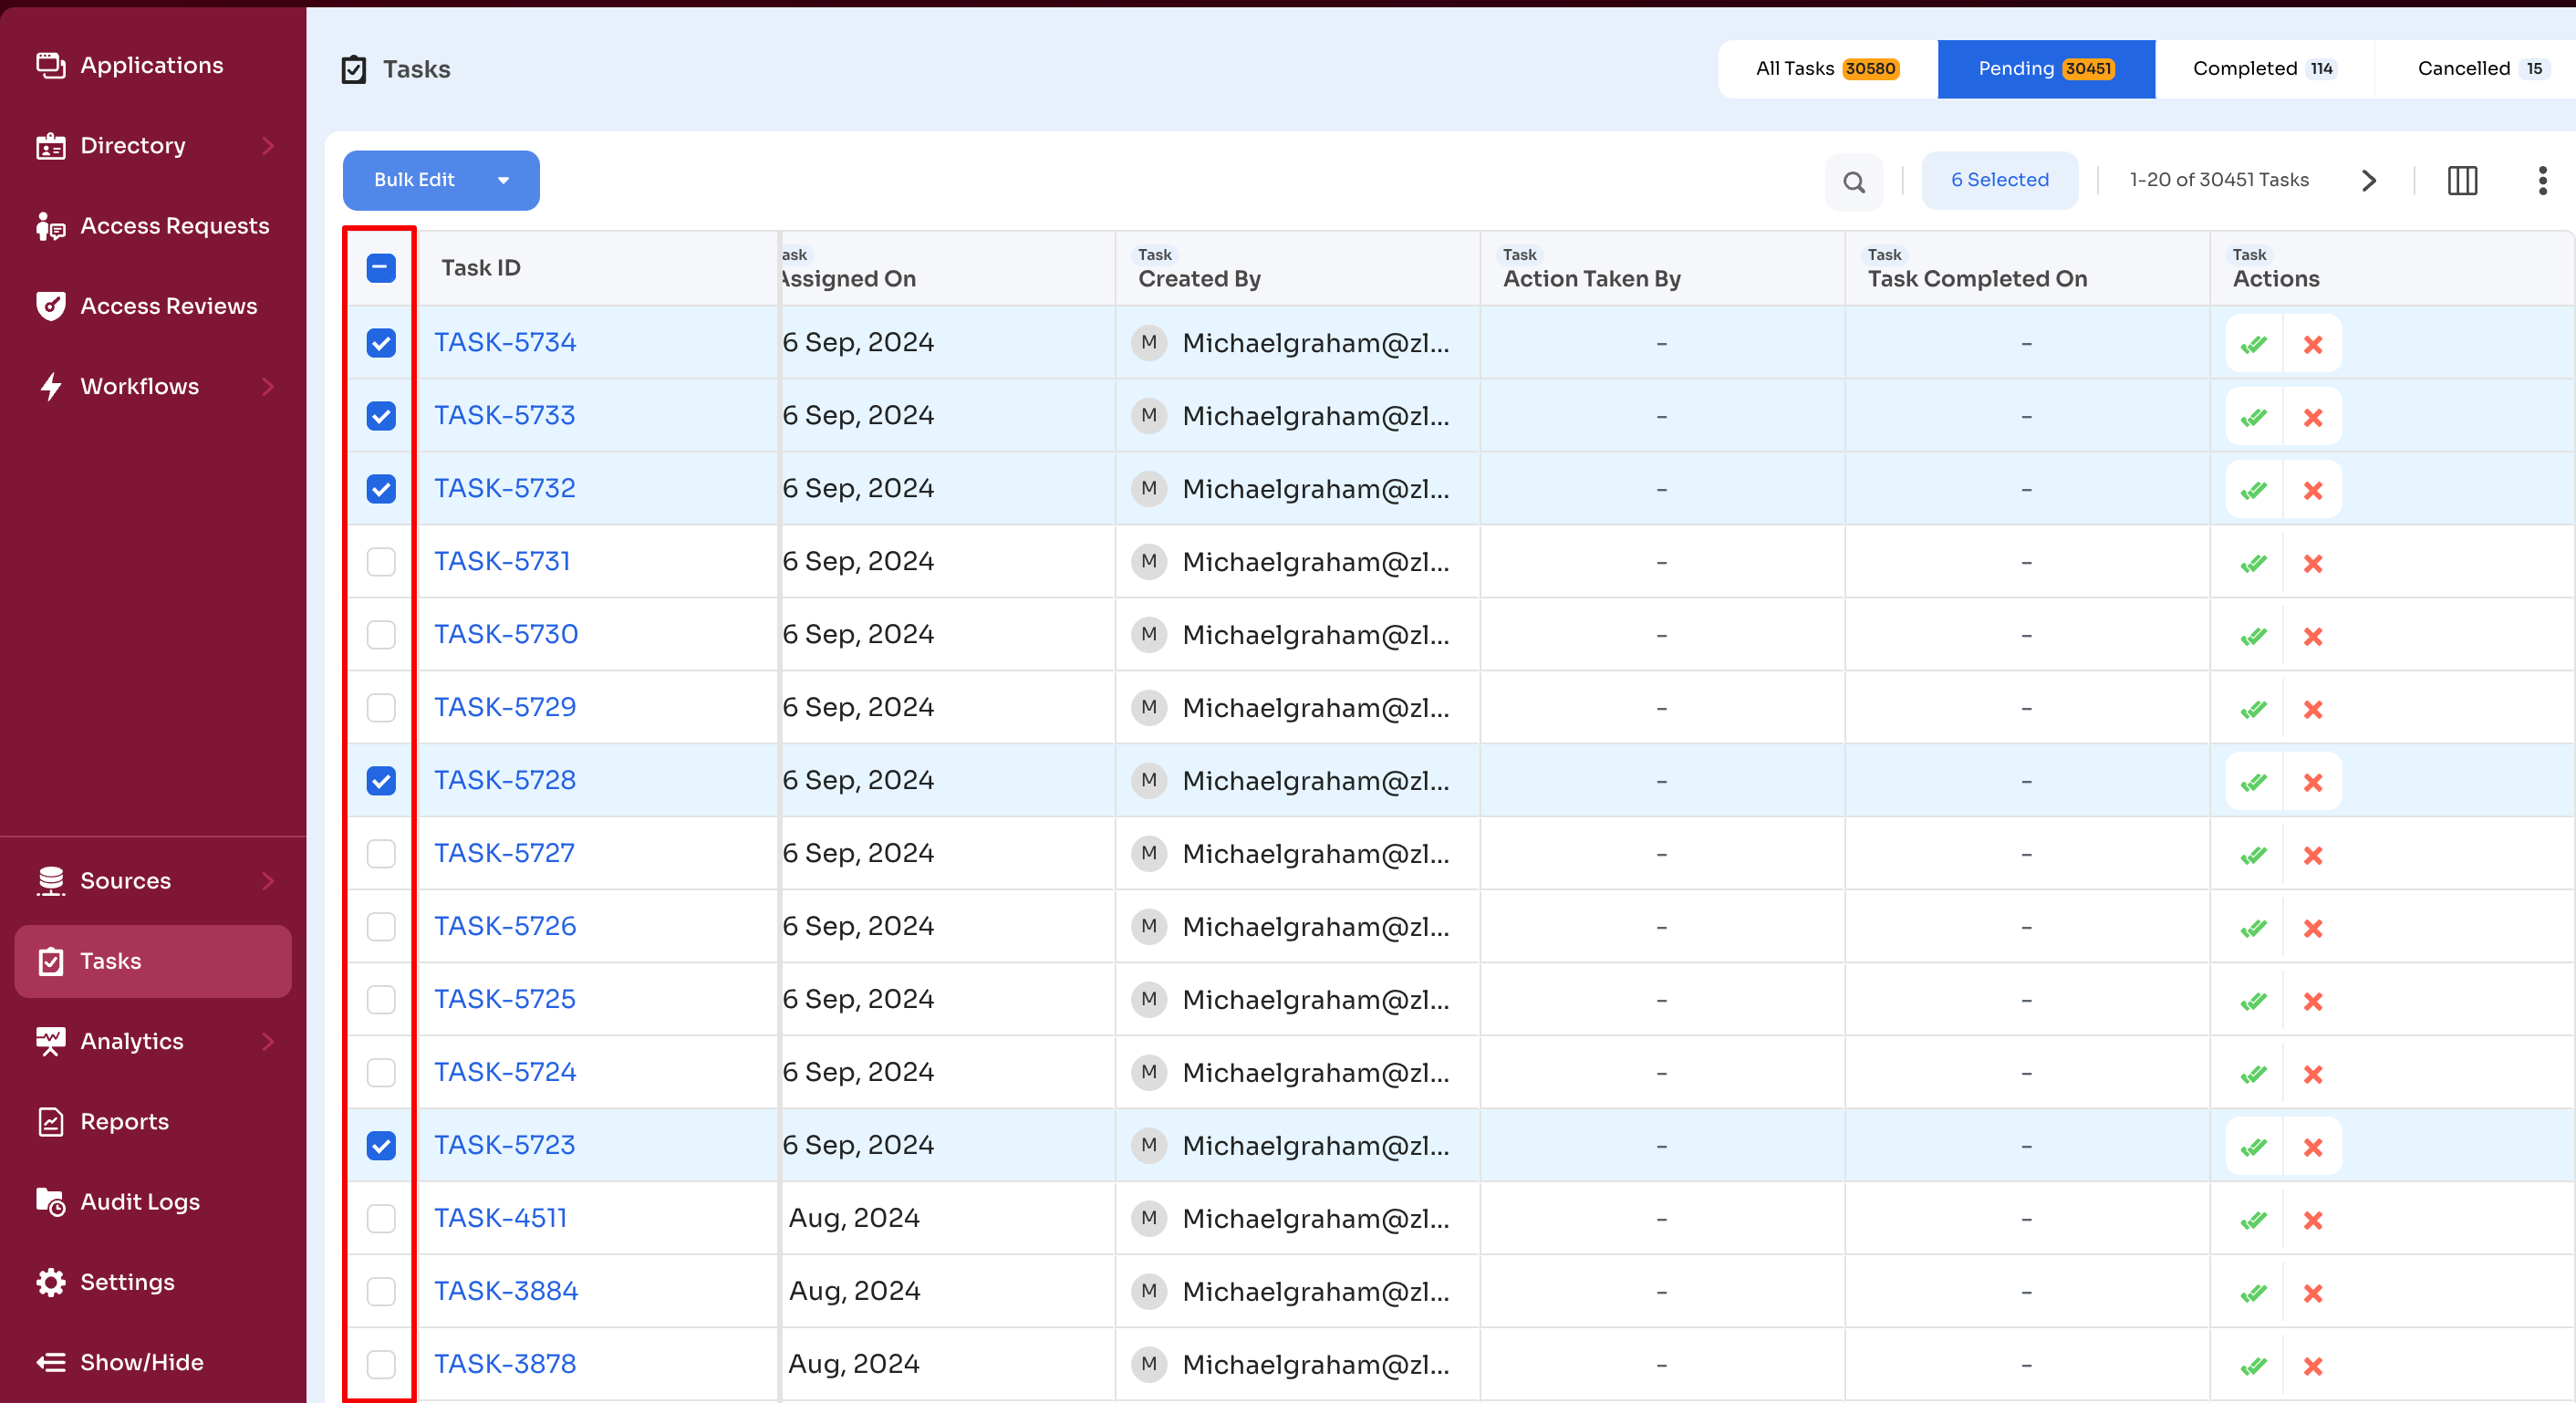
Select multiple tasks using the checkboxes
-
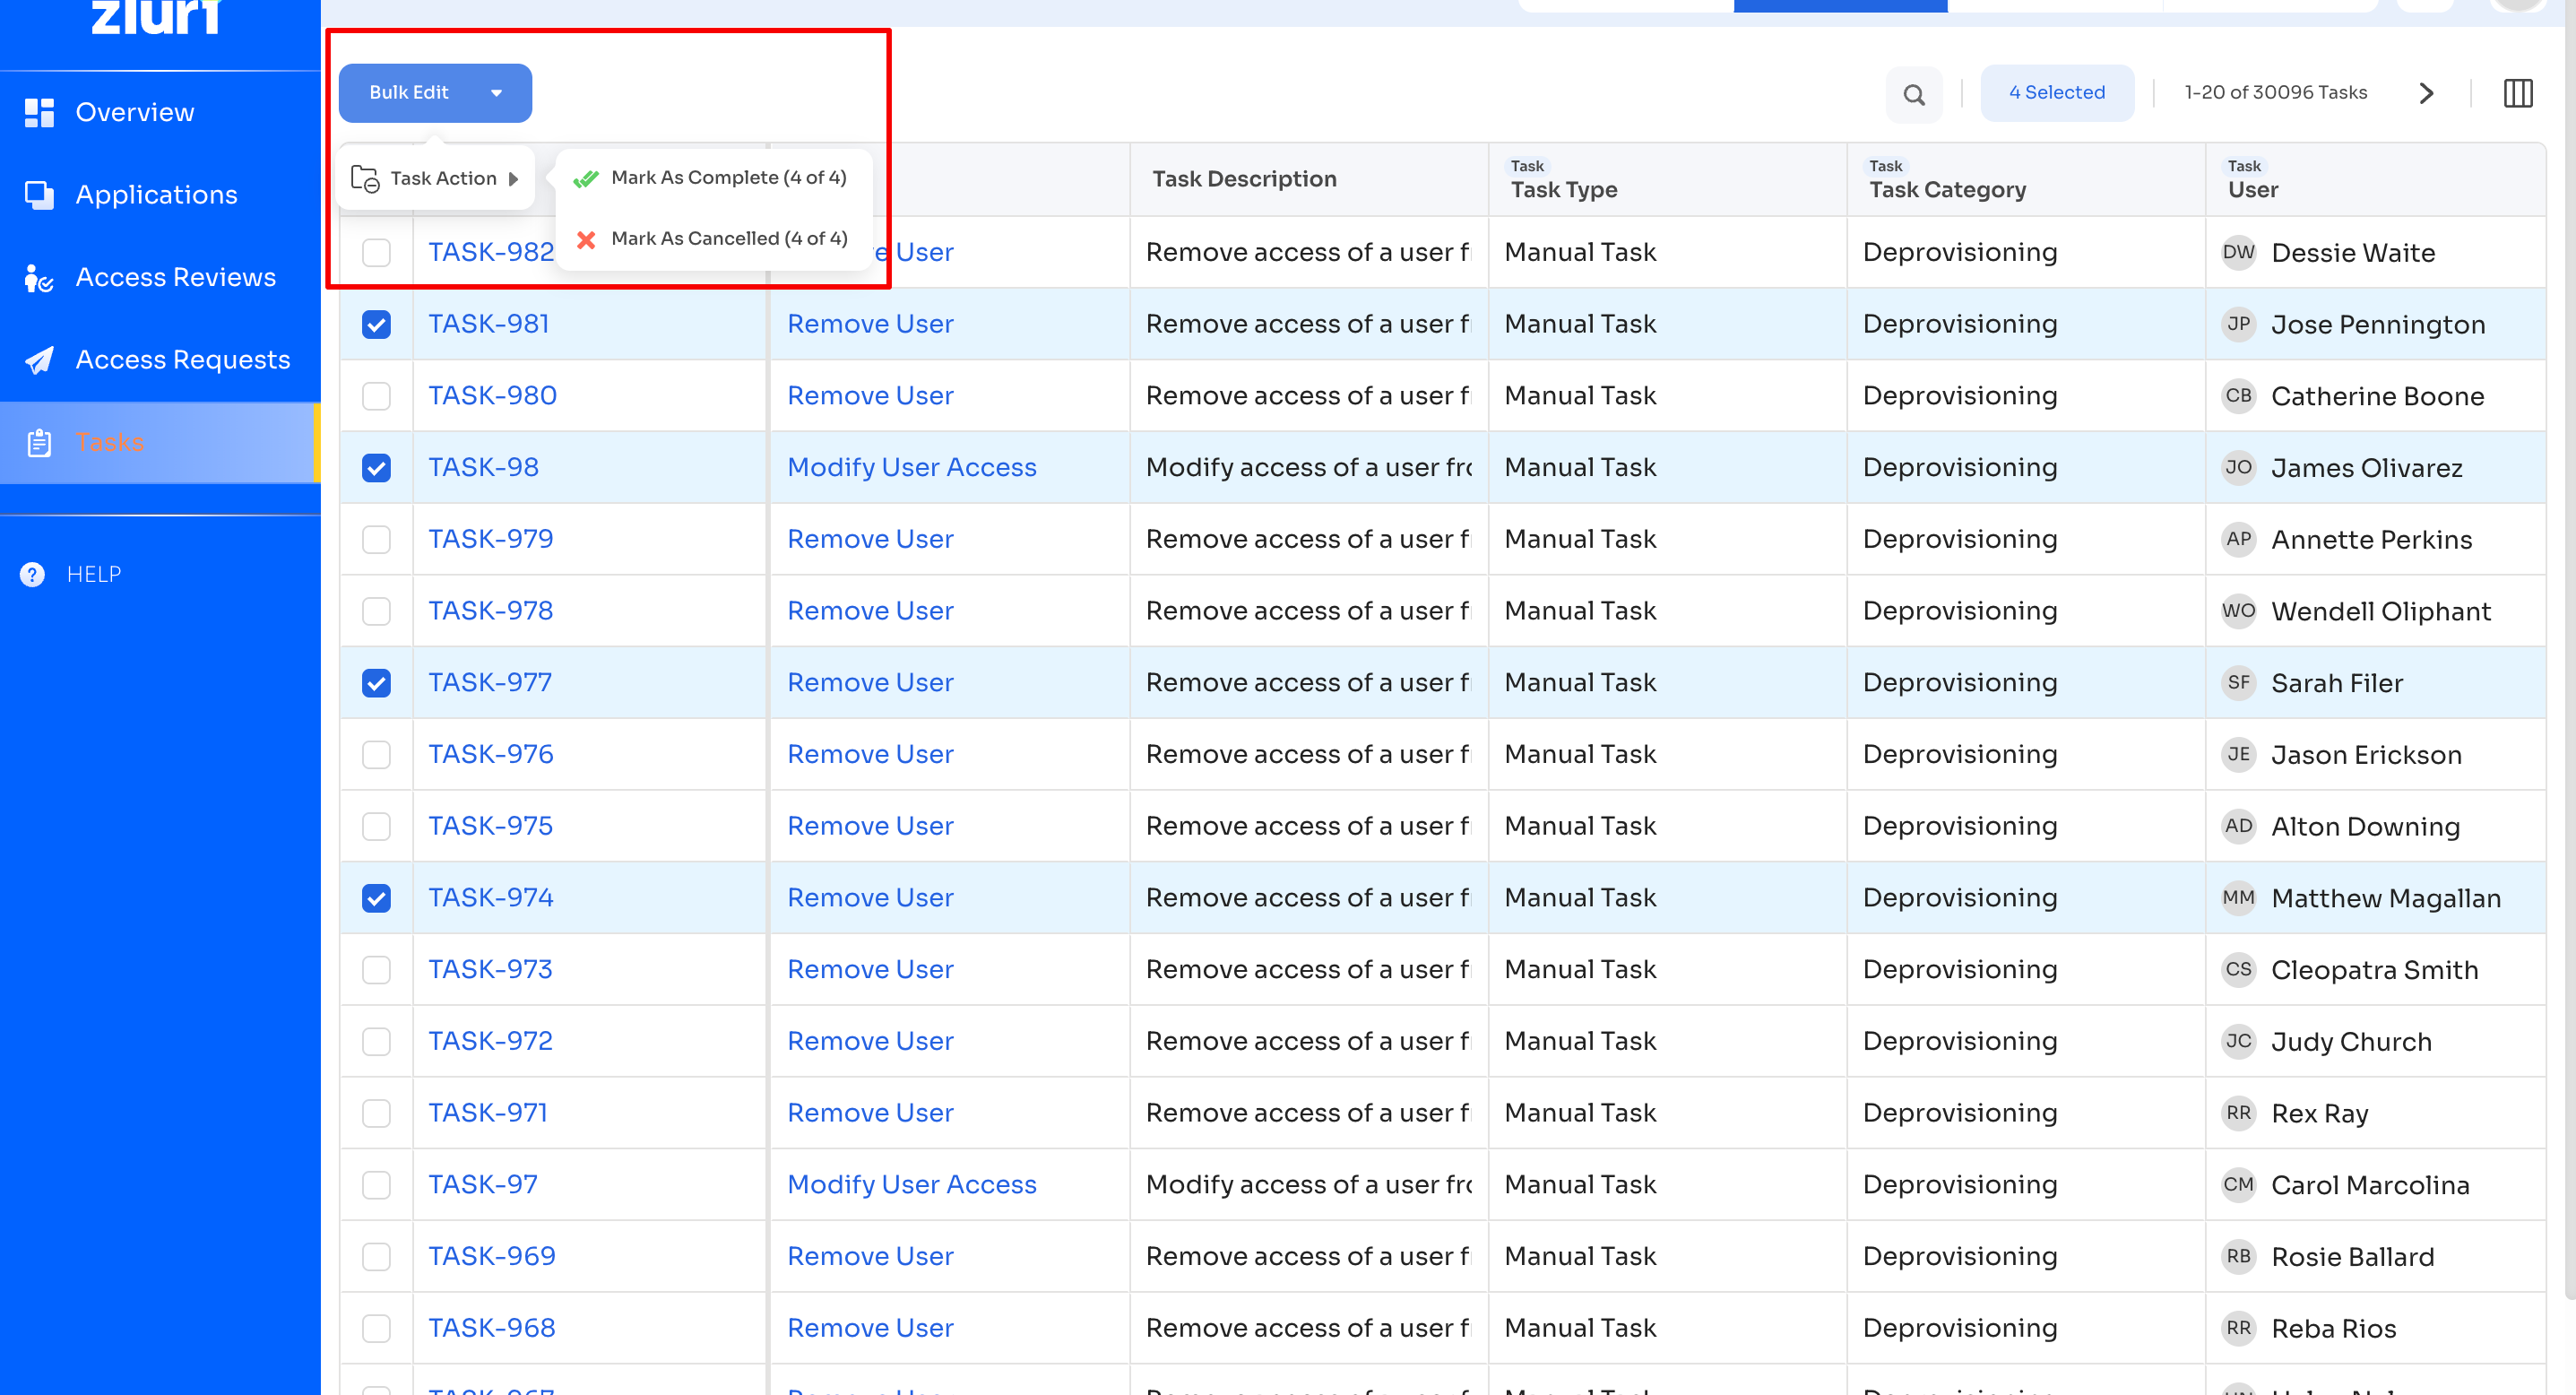
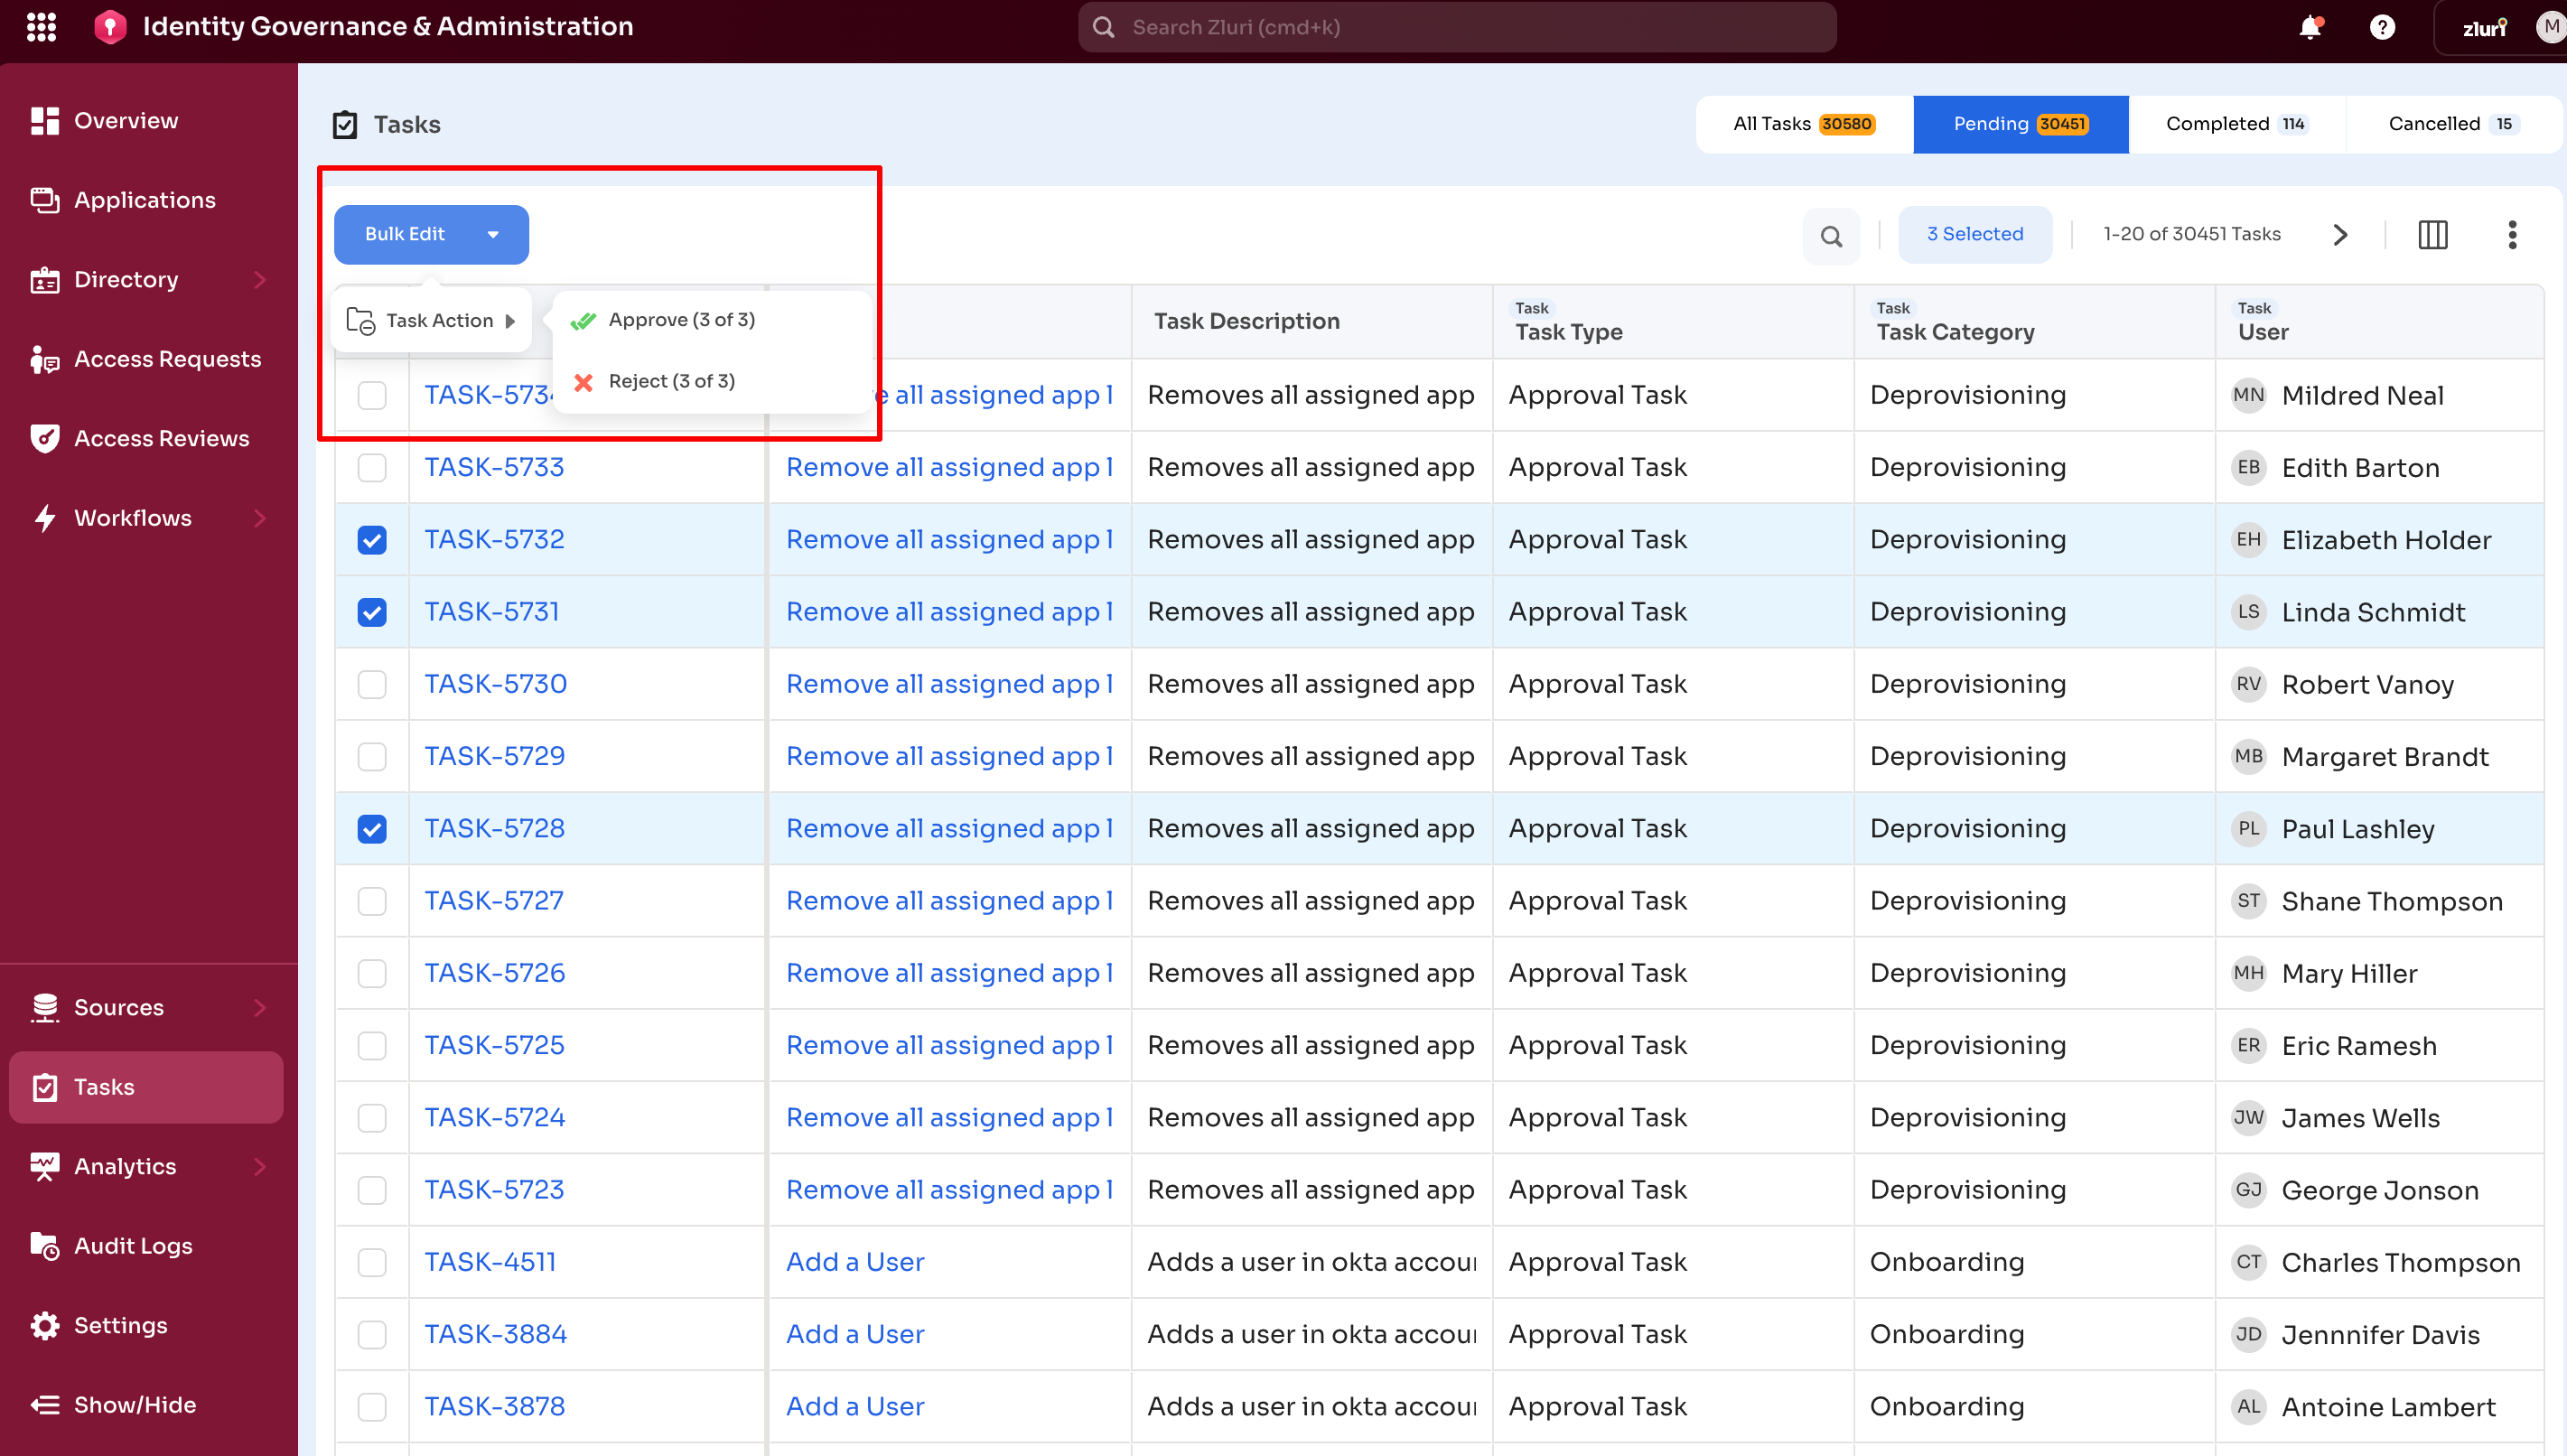
Select Bulk Edit → Task Action, then choose an action based on the view:
-
Mark as Complete or Mark as Canceled: Employee View
-
Approve or Reject: Admin View
-
Reassign a Task
Manual tasks support reassignment from both the dashboard and the task details view.
From the Task Dashboard
-
Open
Admin View → Tasksand select the edit icon in the Assigned To column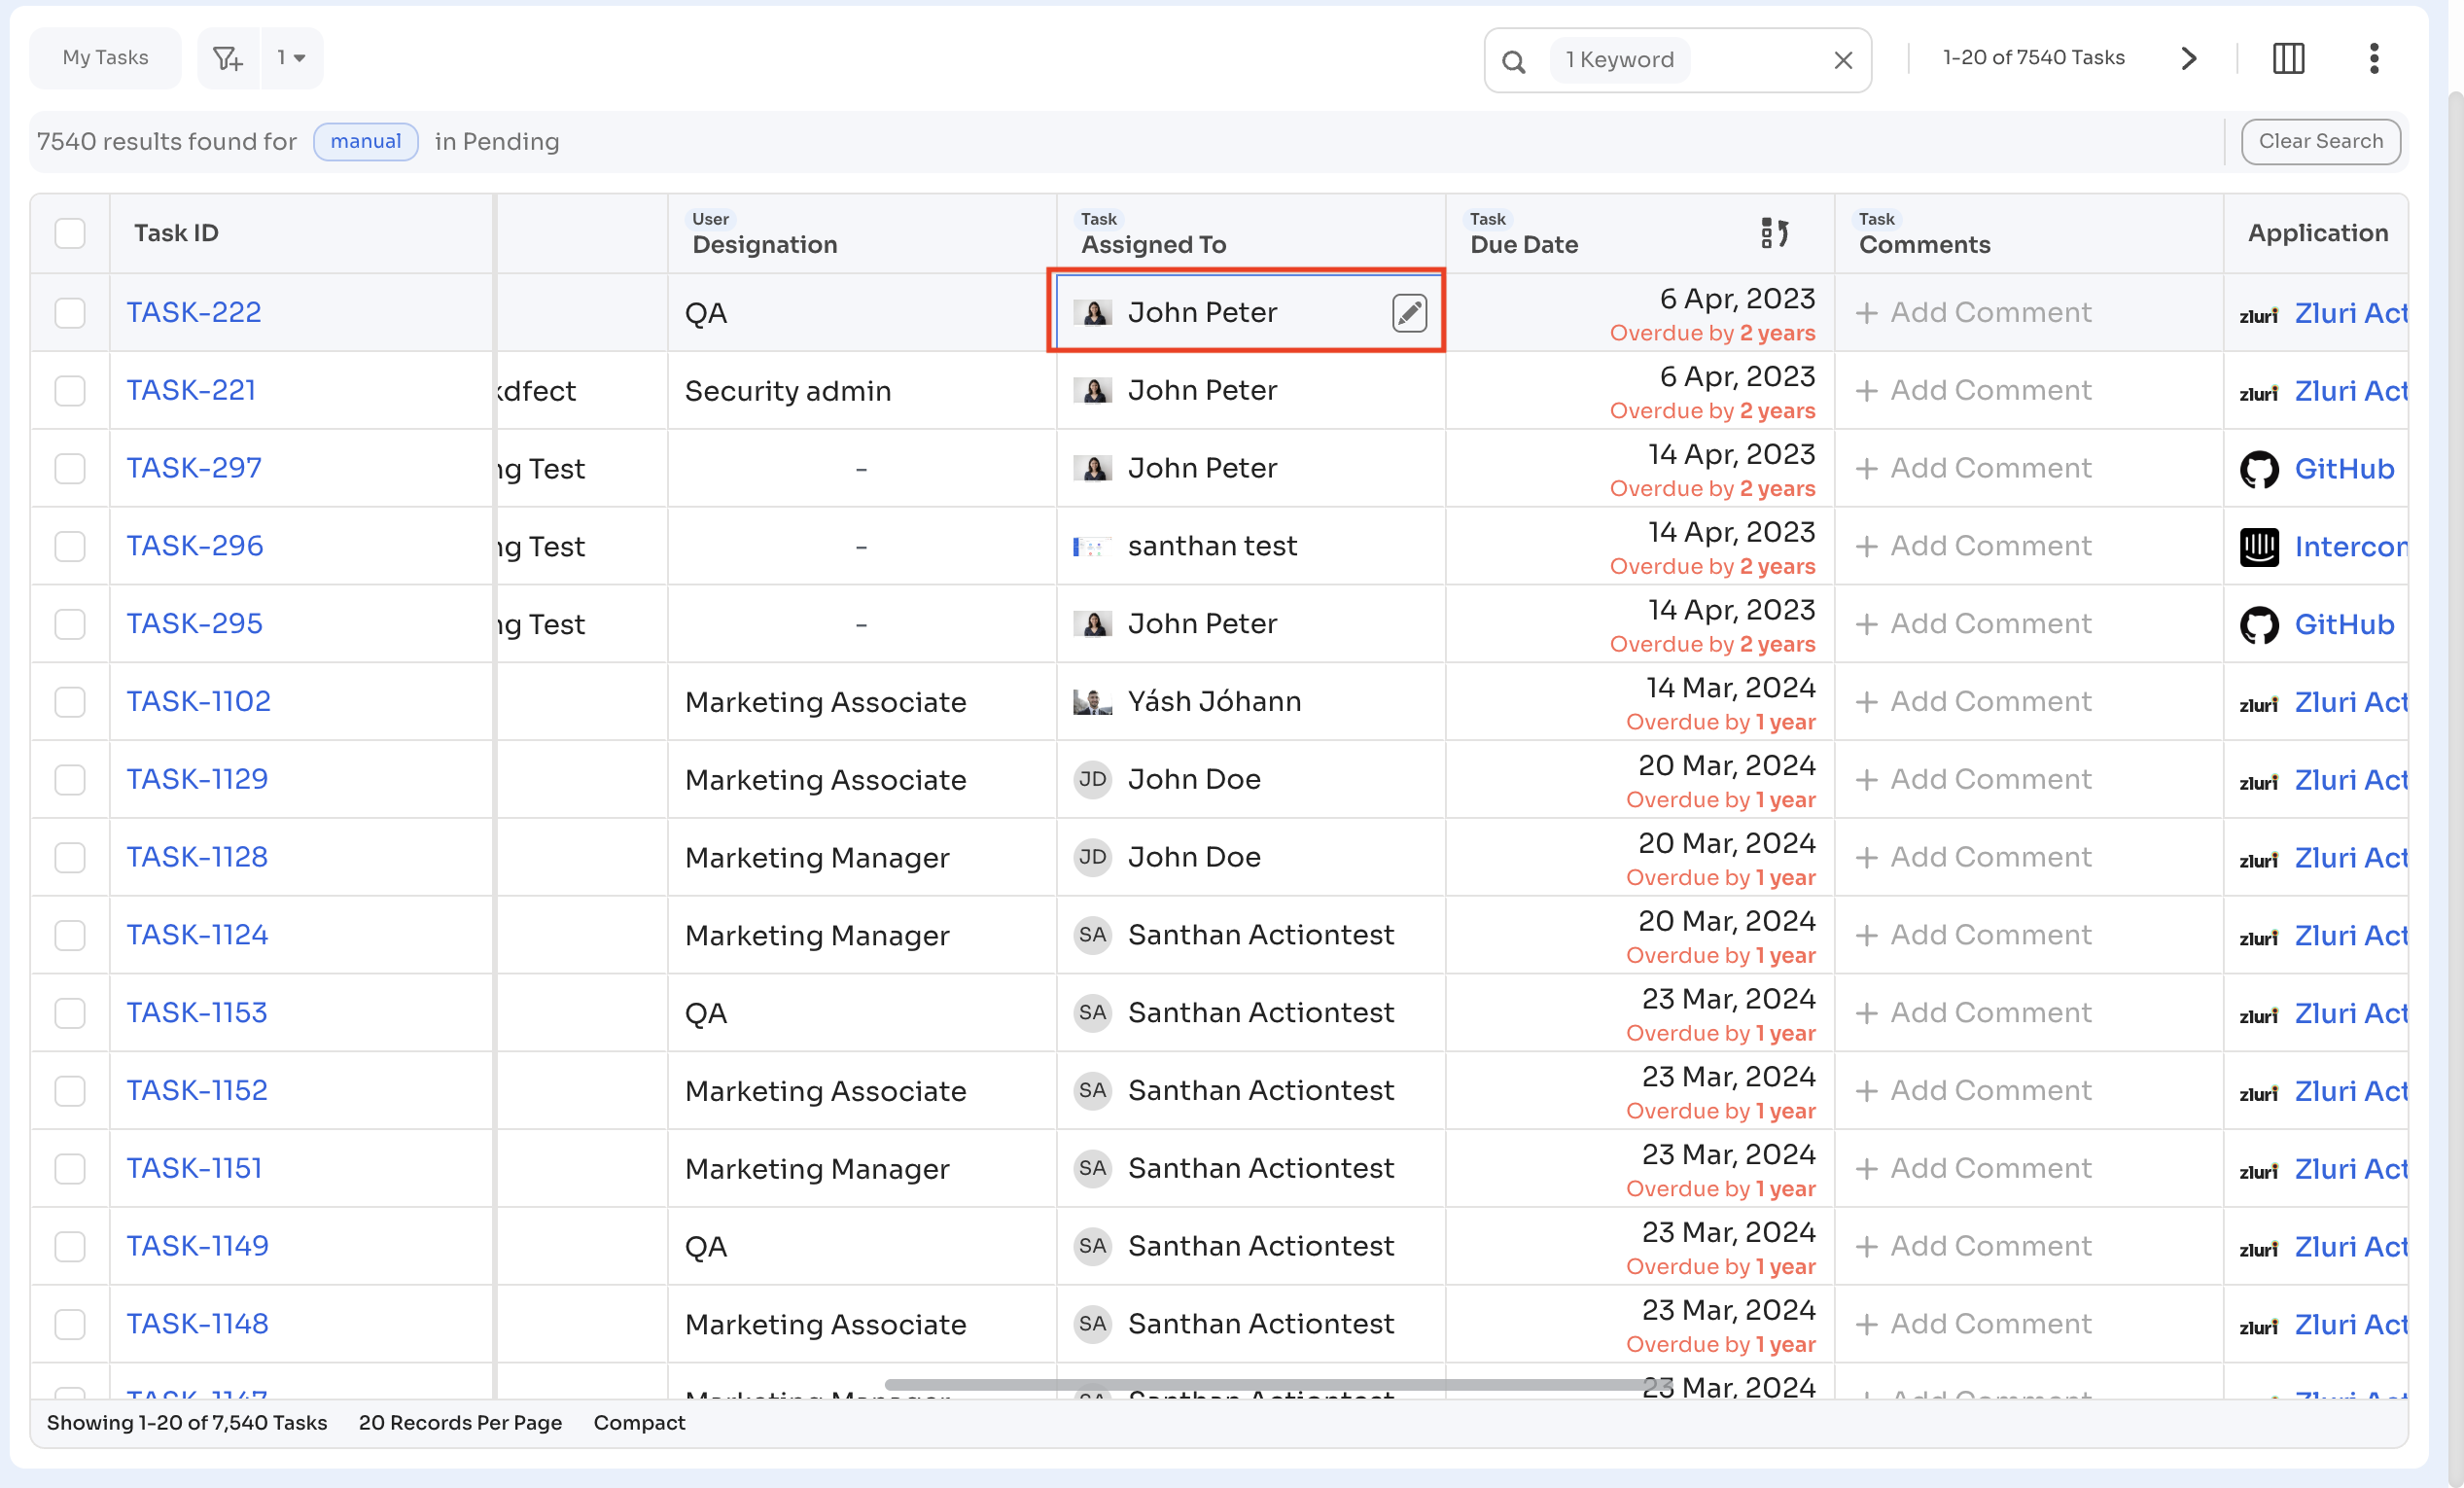
-
Select a new user or role → Save
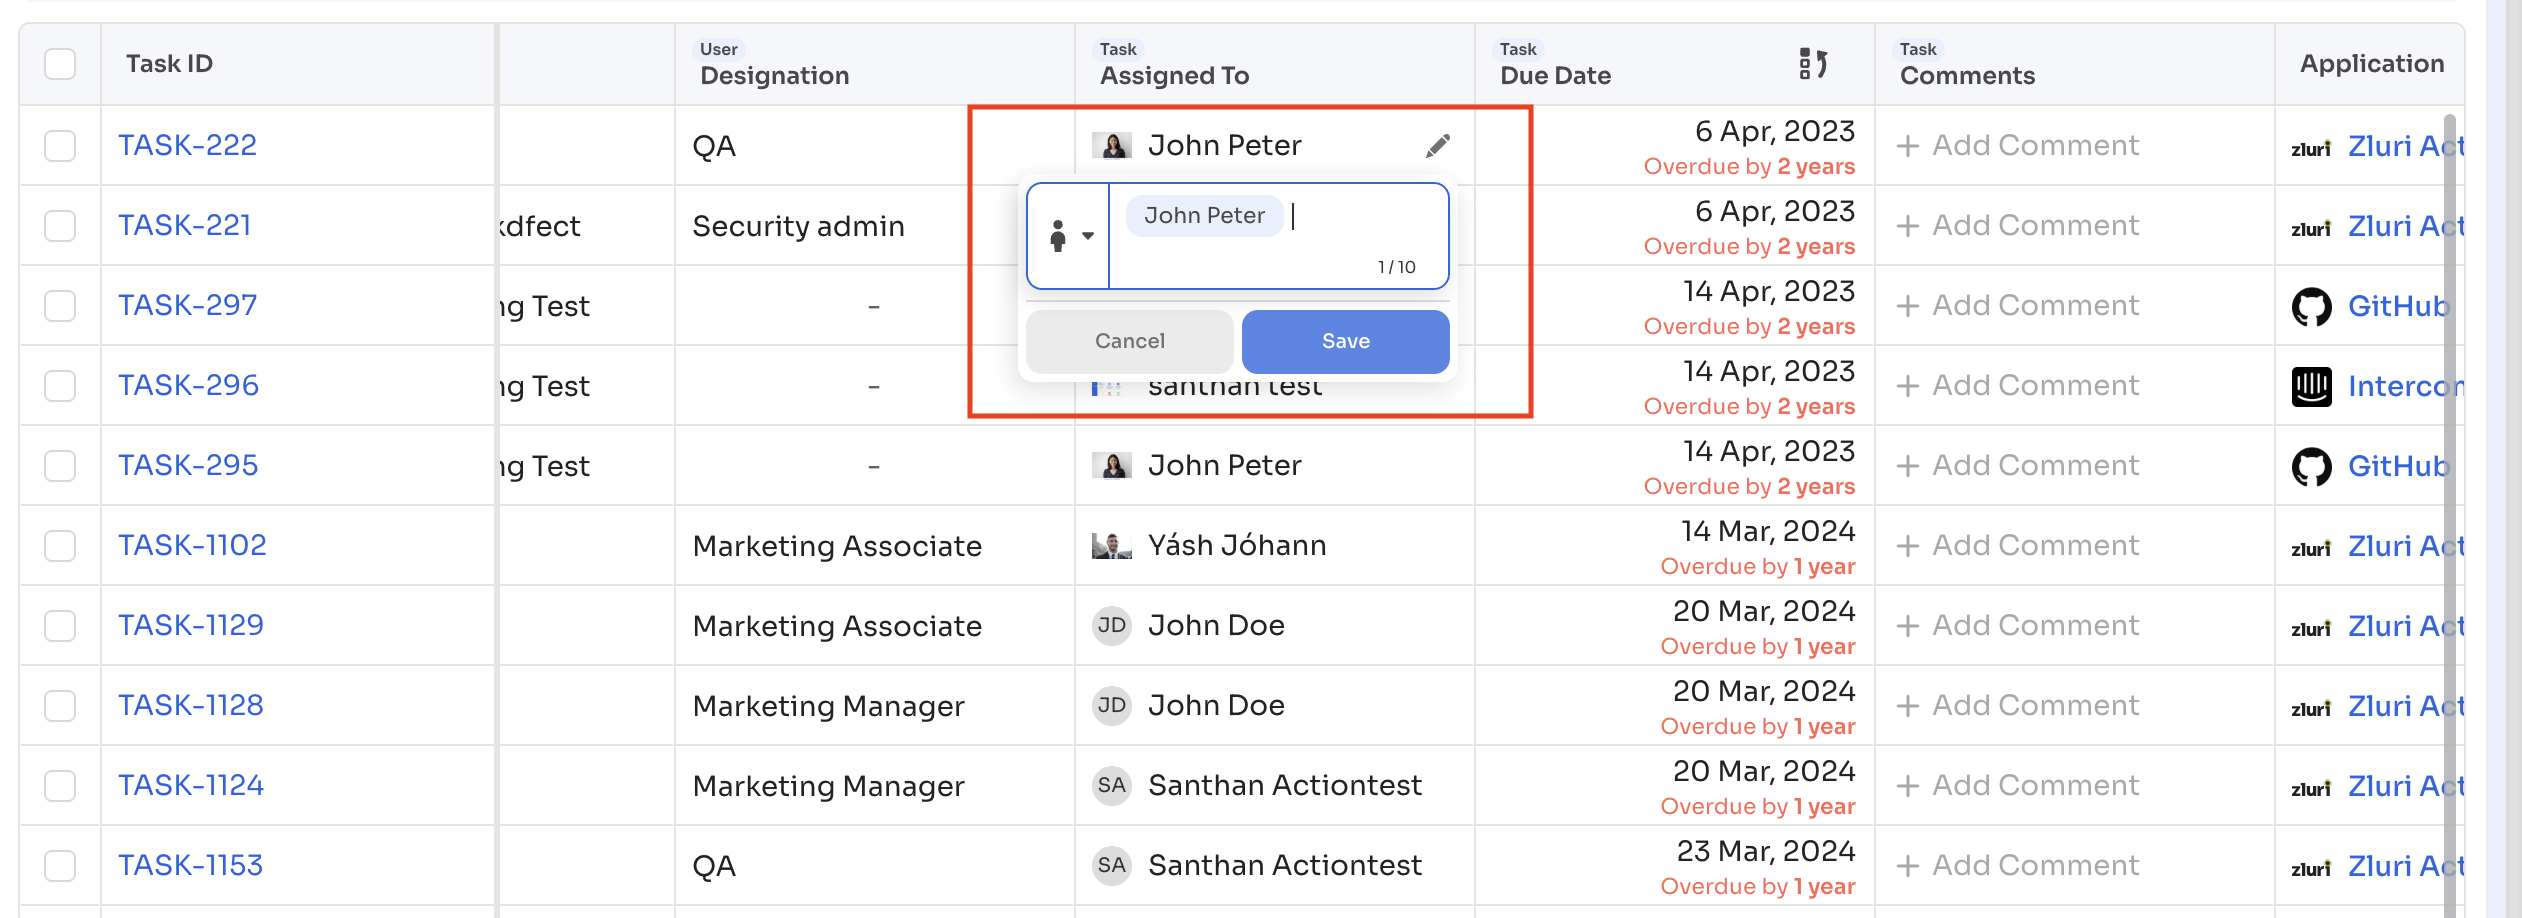
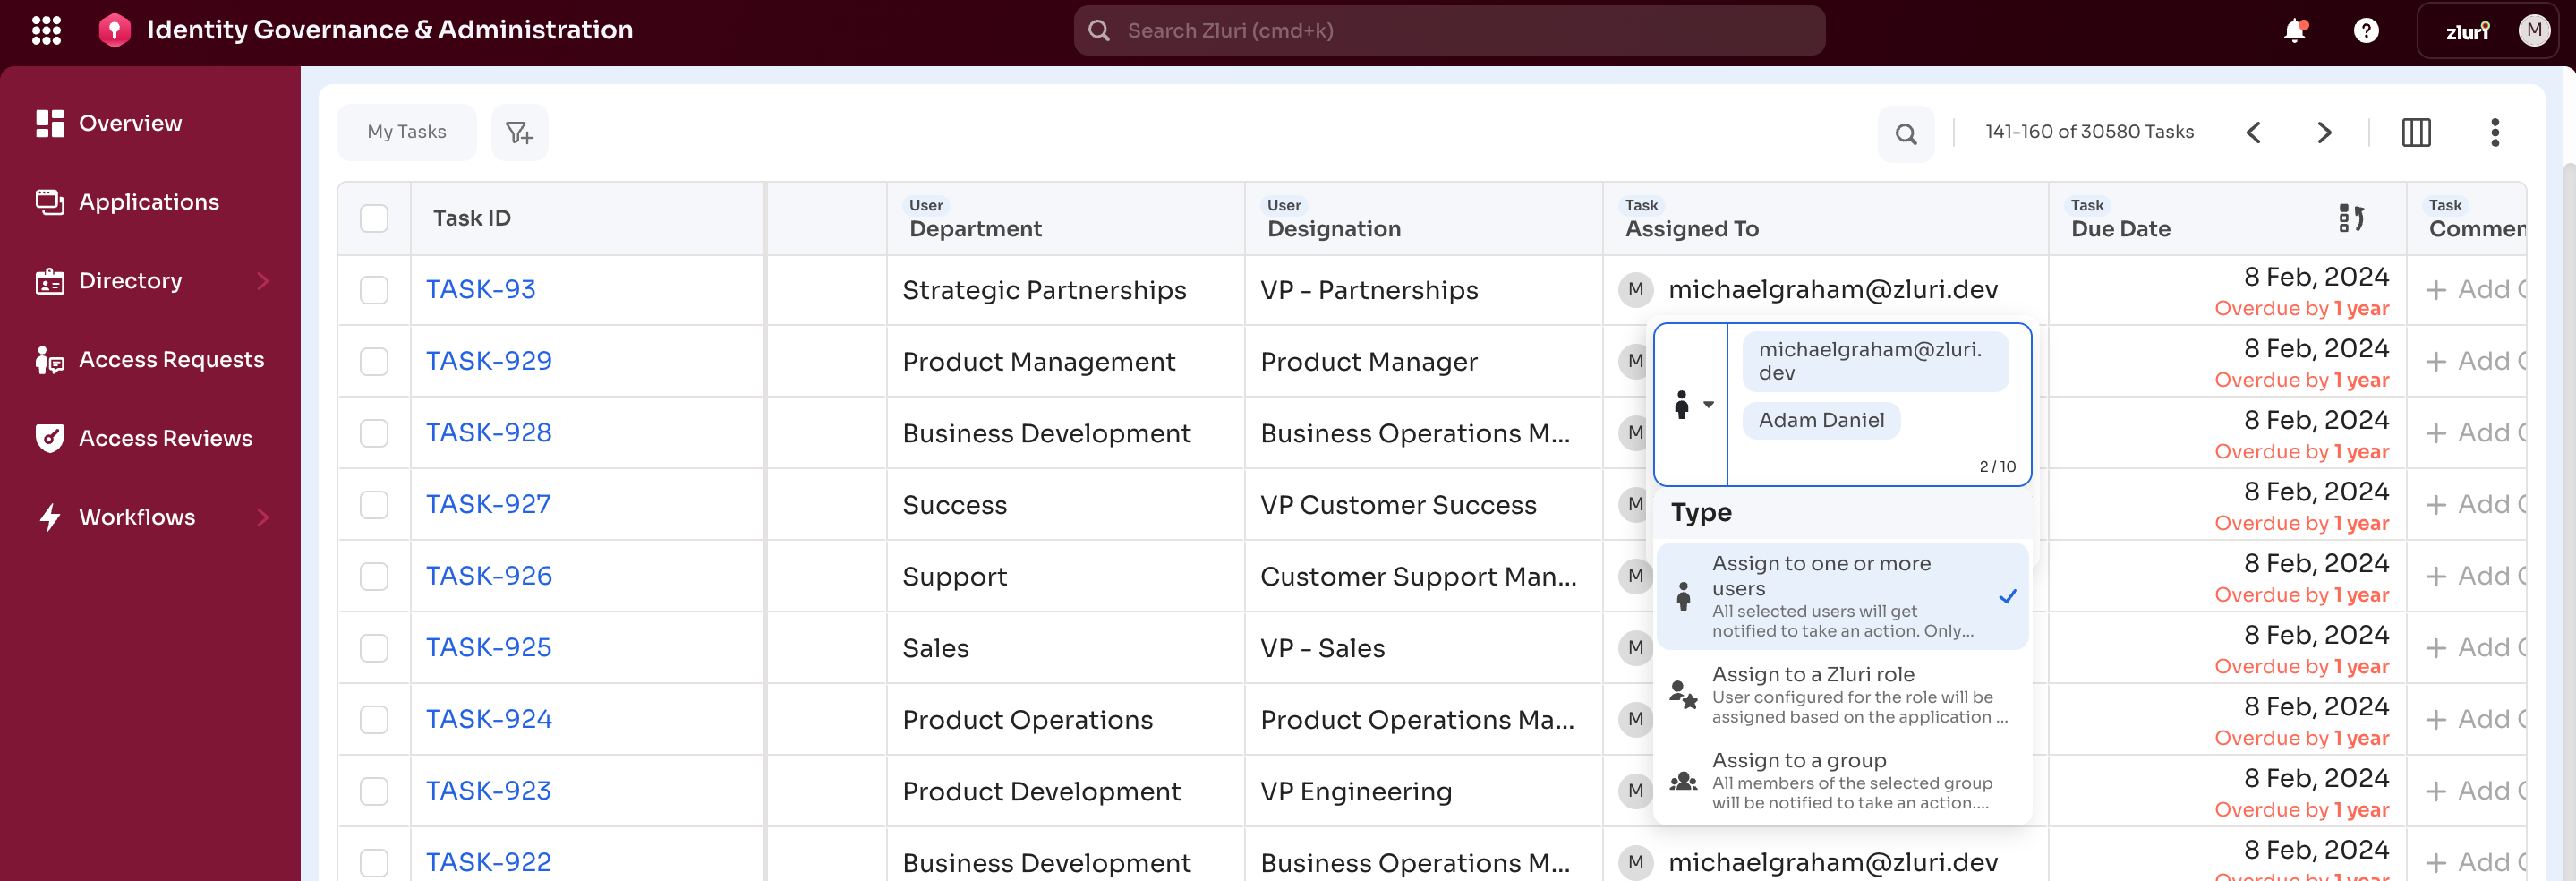
-
Update the User Type to Individual, Zluri role, or Group
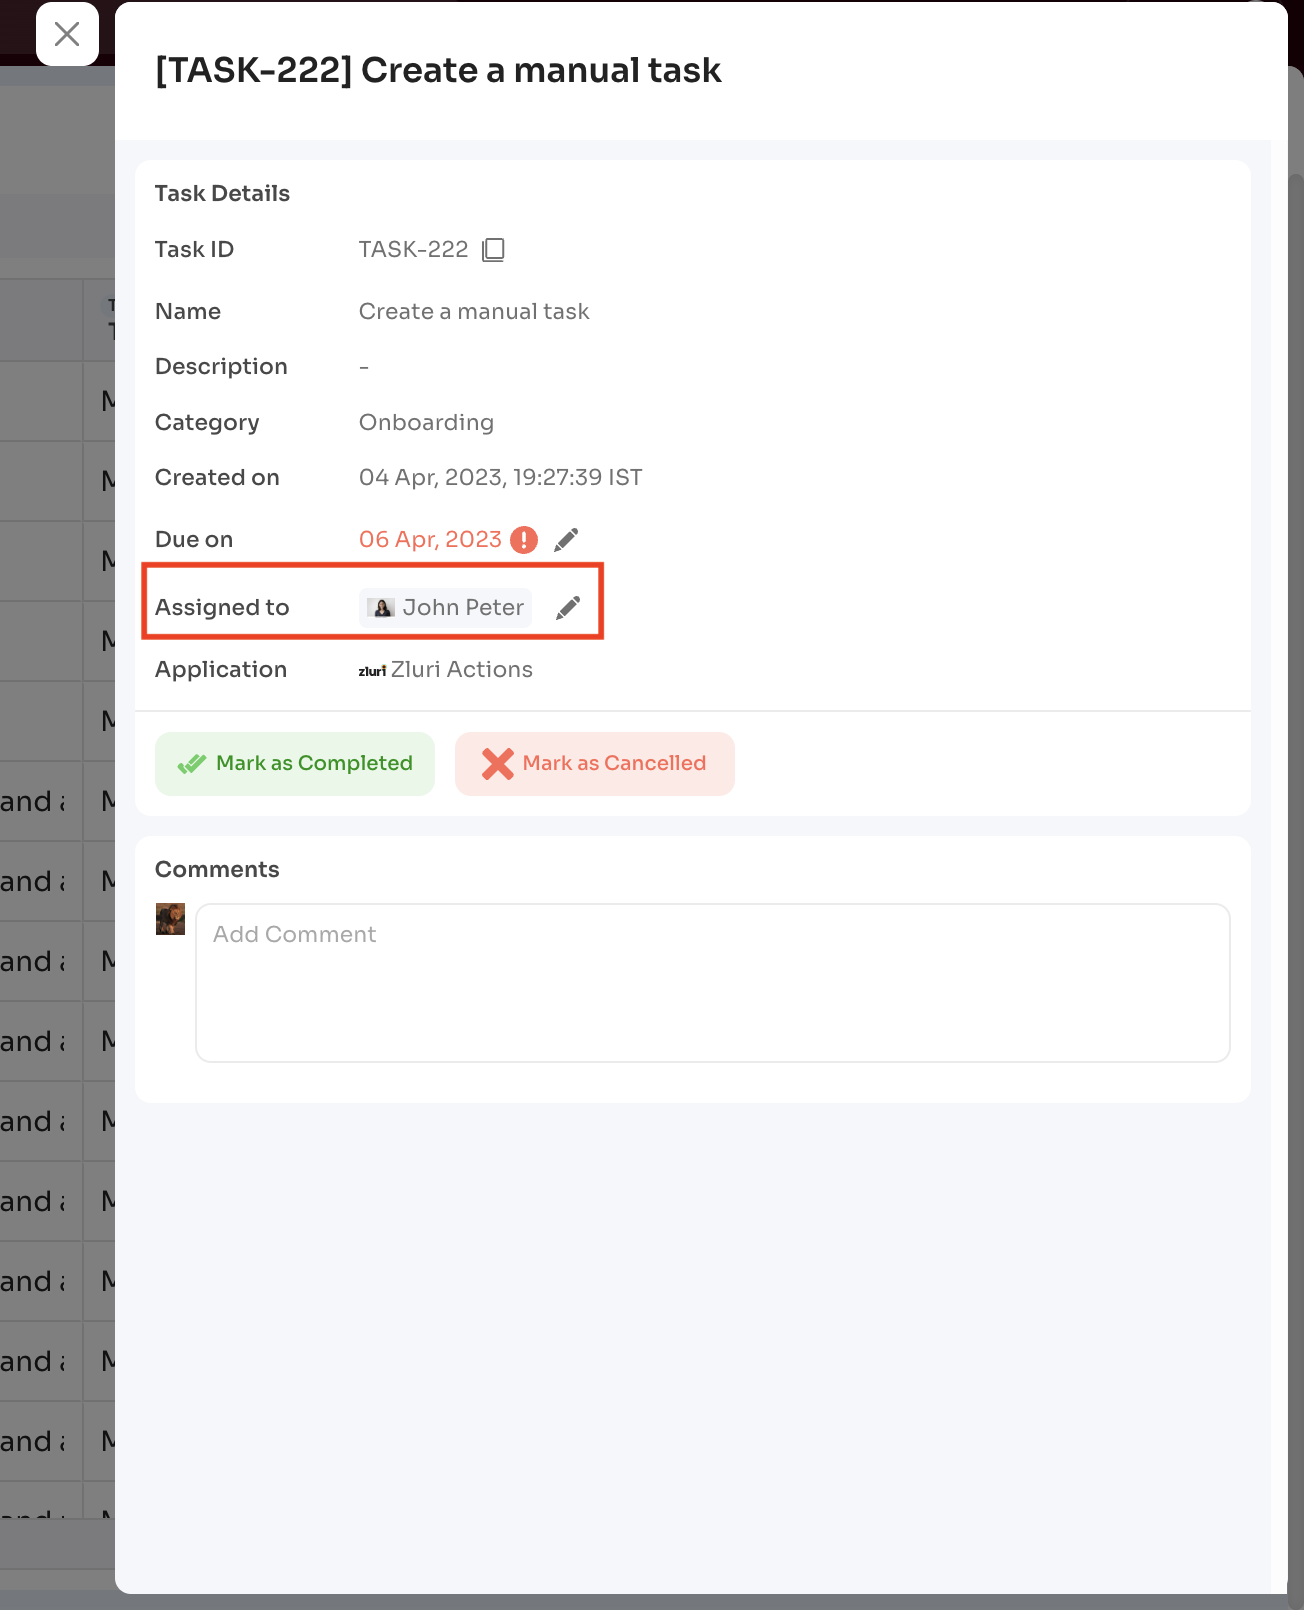
From the Task Details Page
-
Open the task
-
Under Assigned To, select edit
-
Select a new assignee → Save
Notes
- Jira-created tasks support reassignment only to a single user or role
- Notifications are sent automatically to the new assignee
Update a Task’s Due Date
Task due dates can be updated from both the Task dashboard and the Task details page.
Note: Due date updates and reassignment are available only for tasks with Overdue status.
From the Task Dashboard
-
Open
Admin View → Tasks -
Select the edit icon in the Due Date column

-
Select a new date → Apply

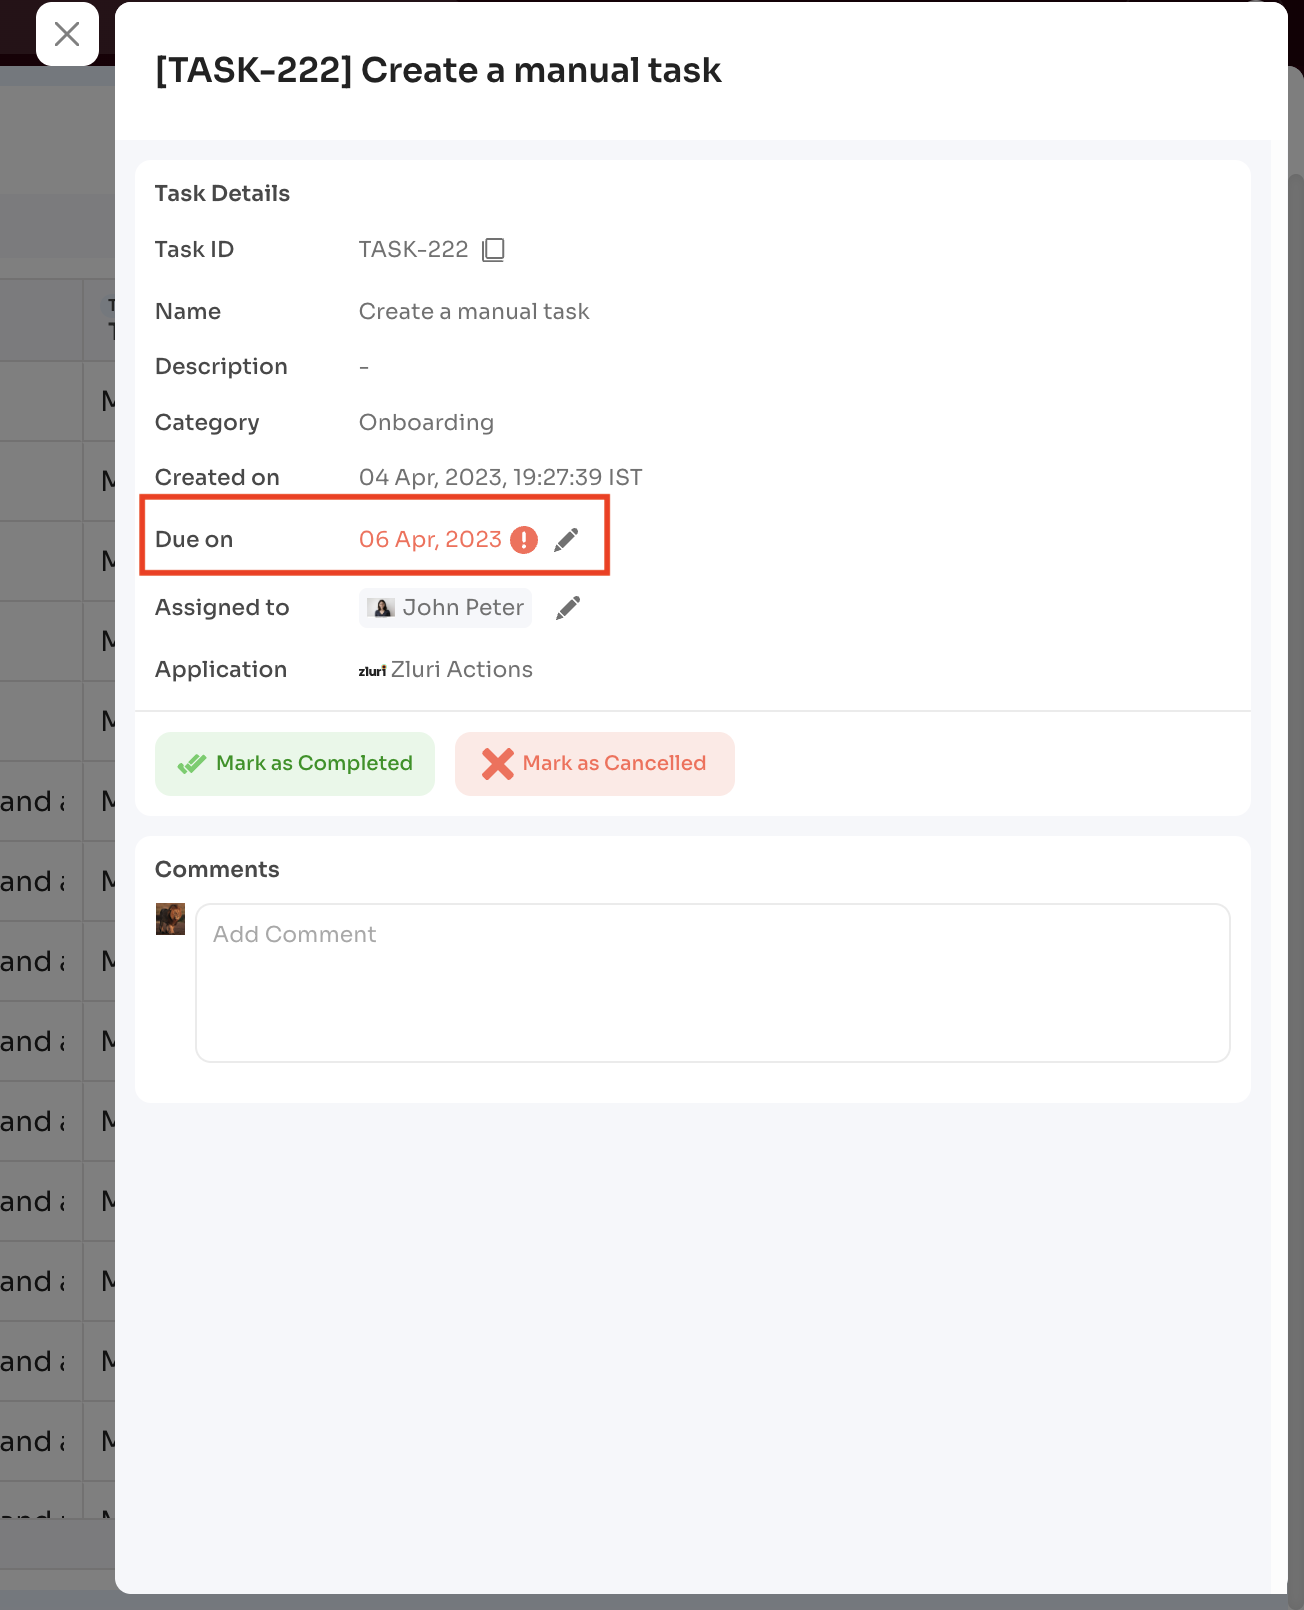
From the Task Details Page
-
Open the task
-
Under Due Date, select edit
-
Select a new date → Save
Notes
- Due date updates and reassignment apply only to overdue tasks
- Notifications include both previous and updated due dates
Updated 3 months ago