Manual Tasks and Task Dashboard
Learn about manual tasks in a workflow and task dashboard
Manual task
A Manual task is an action not fully automated and requires human intervention for completion. Manual tasks are assigned to designated task owners.
Manual tasks vs automated tasks
Workflows support two action types:
-
Automated actions
Execute automatically through direct integrations with Zluri.
-
Manual tasks
Used where automated execution is unavailable or manual oversight is required for security and compliance. Tasks are assigned to a task owner and marked complete after execution. Notifications are sent through Slack, Email, or Jira.
Next, the Manual Task tag is explained in detail.
Manual Task tag assignment
Actions added to App Blocks may display a Manual Task tag or run without one. Both cases are described below.
1. Manual Task tag present
If the Manual Task tag appears (see image below), the action requires manual execution. A task owner receives notifications through Slack, Email, or Jira and completes the task.
Manual tasks appear in the Task Dashboard, where completion status is tracked.
Example: The action Invite User to GitHub displays a blue Manual Task tag. The tag indicates manual execution by a task owner.

**[i]**Manual task assignment details are covered in the Manual Task Assignment guide.
2. Manual Task tag absent
If the Manual Task tag does not appear (see image below), the action supports automated execution.

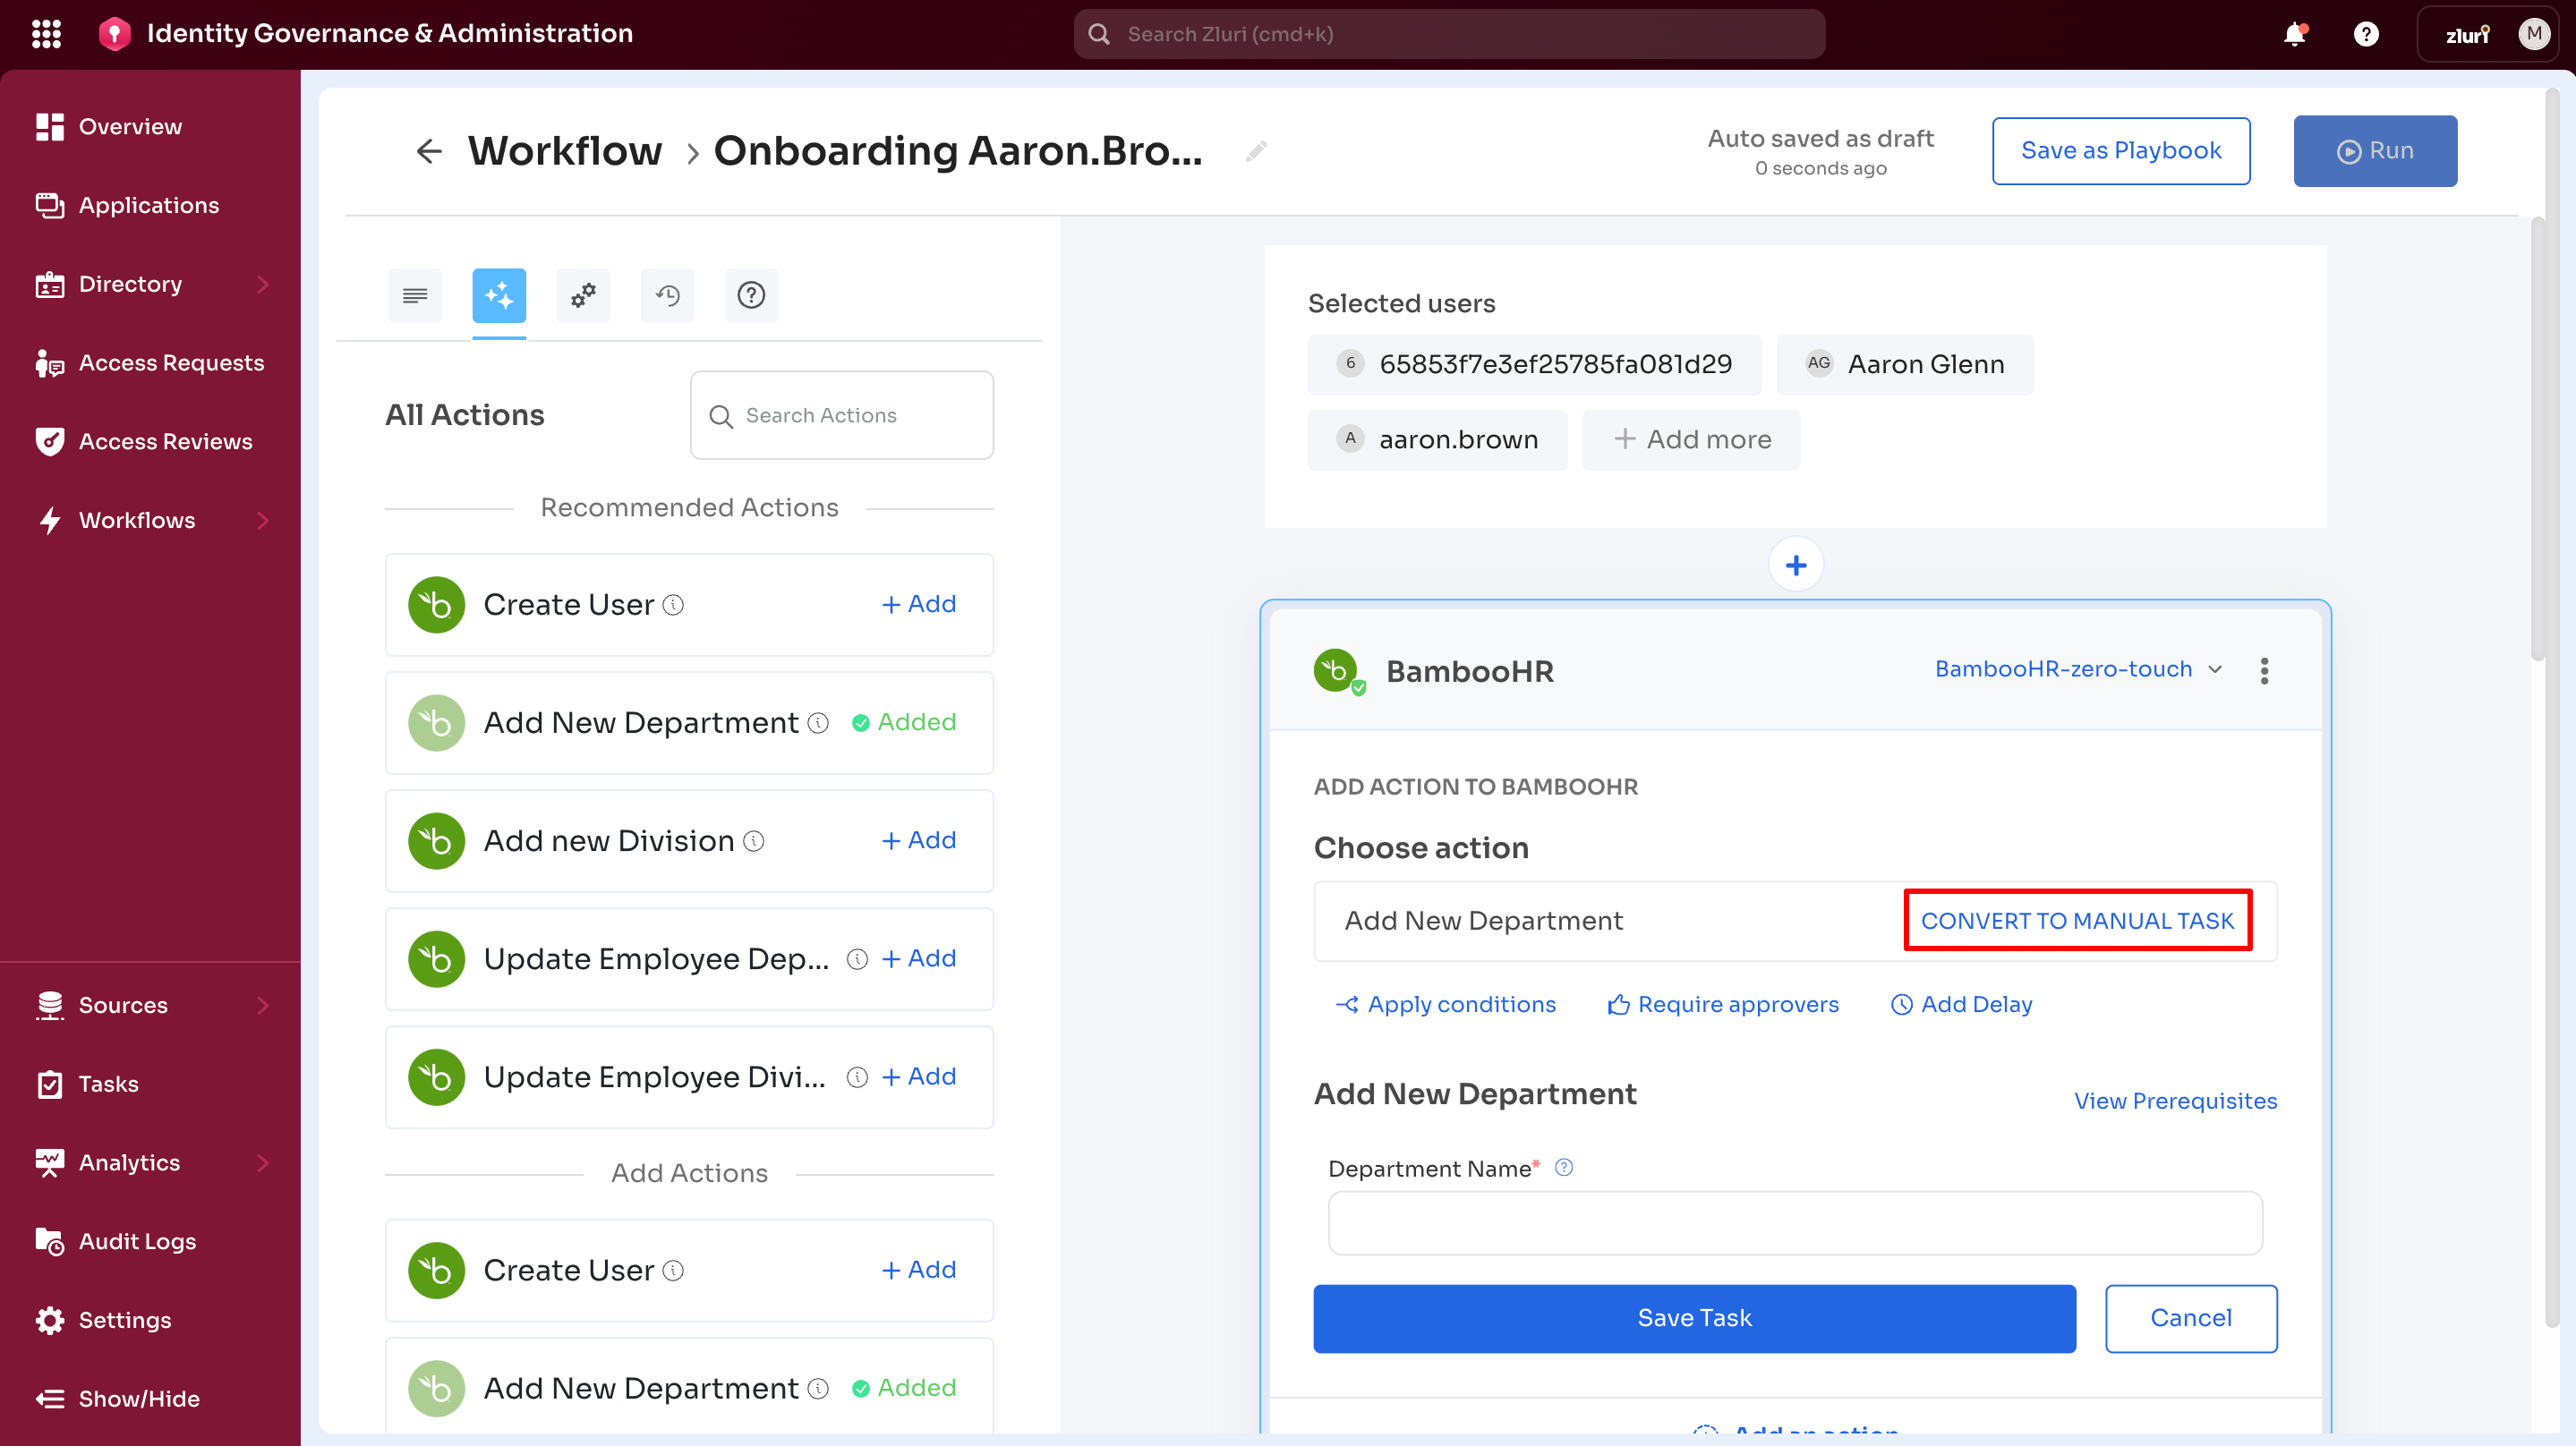
Convert to Manual Task feature
The Convert to Manual Task control converts an automated action into a manual task.
The image below shows the Manual Task tag after conversion.
Example scenario:
-
A workflow includes the BambooHR app block.
-
The application is integrated with Zluri and labeled BambooHR Zero-Touch (top-right corner).
-
The workflow includes an automated action named Add New Department.
-
For security or governance requirements, the action can be converted into a manual task through Convert to Manual Task.
Edit Task vs Edit Action
The image above illustrates both edit options.
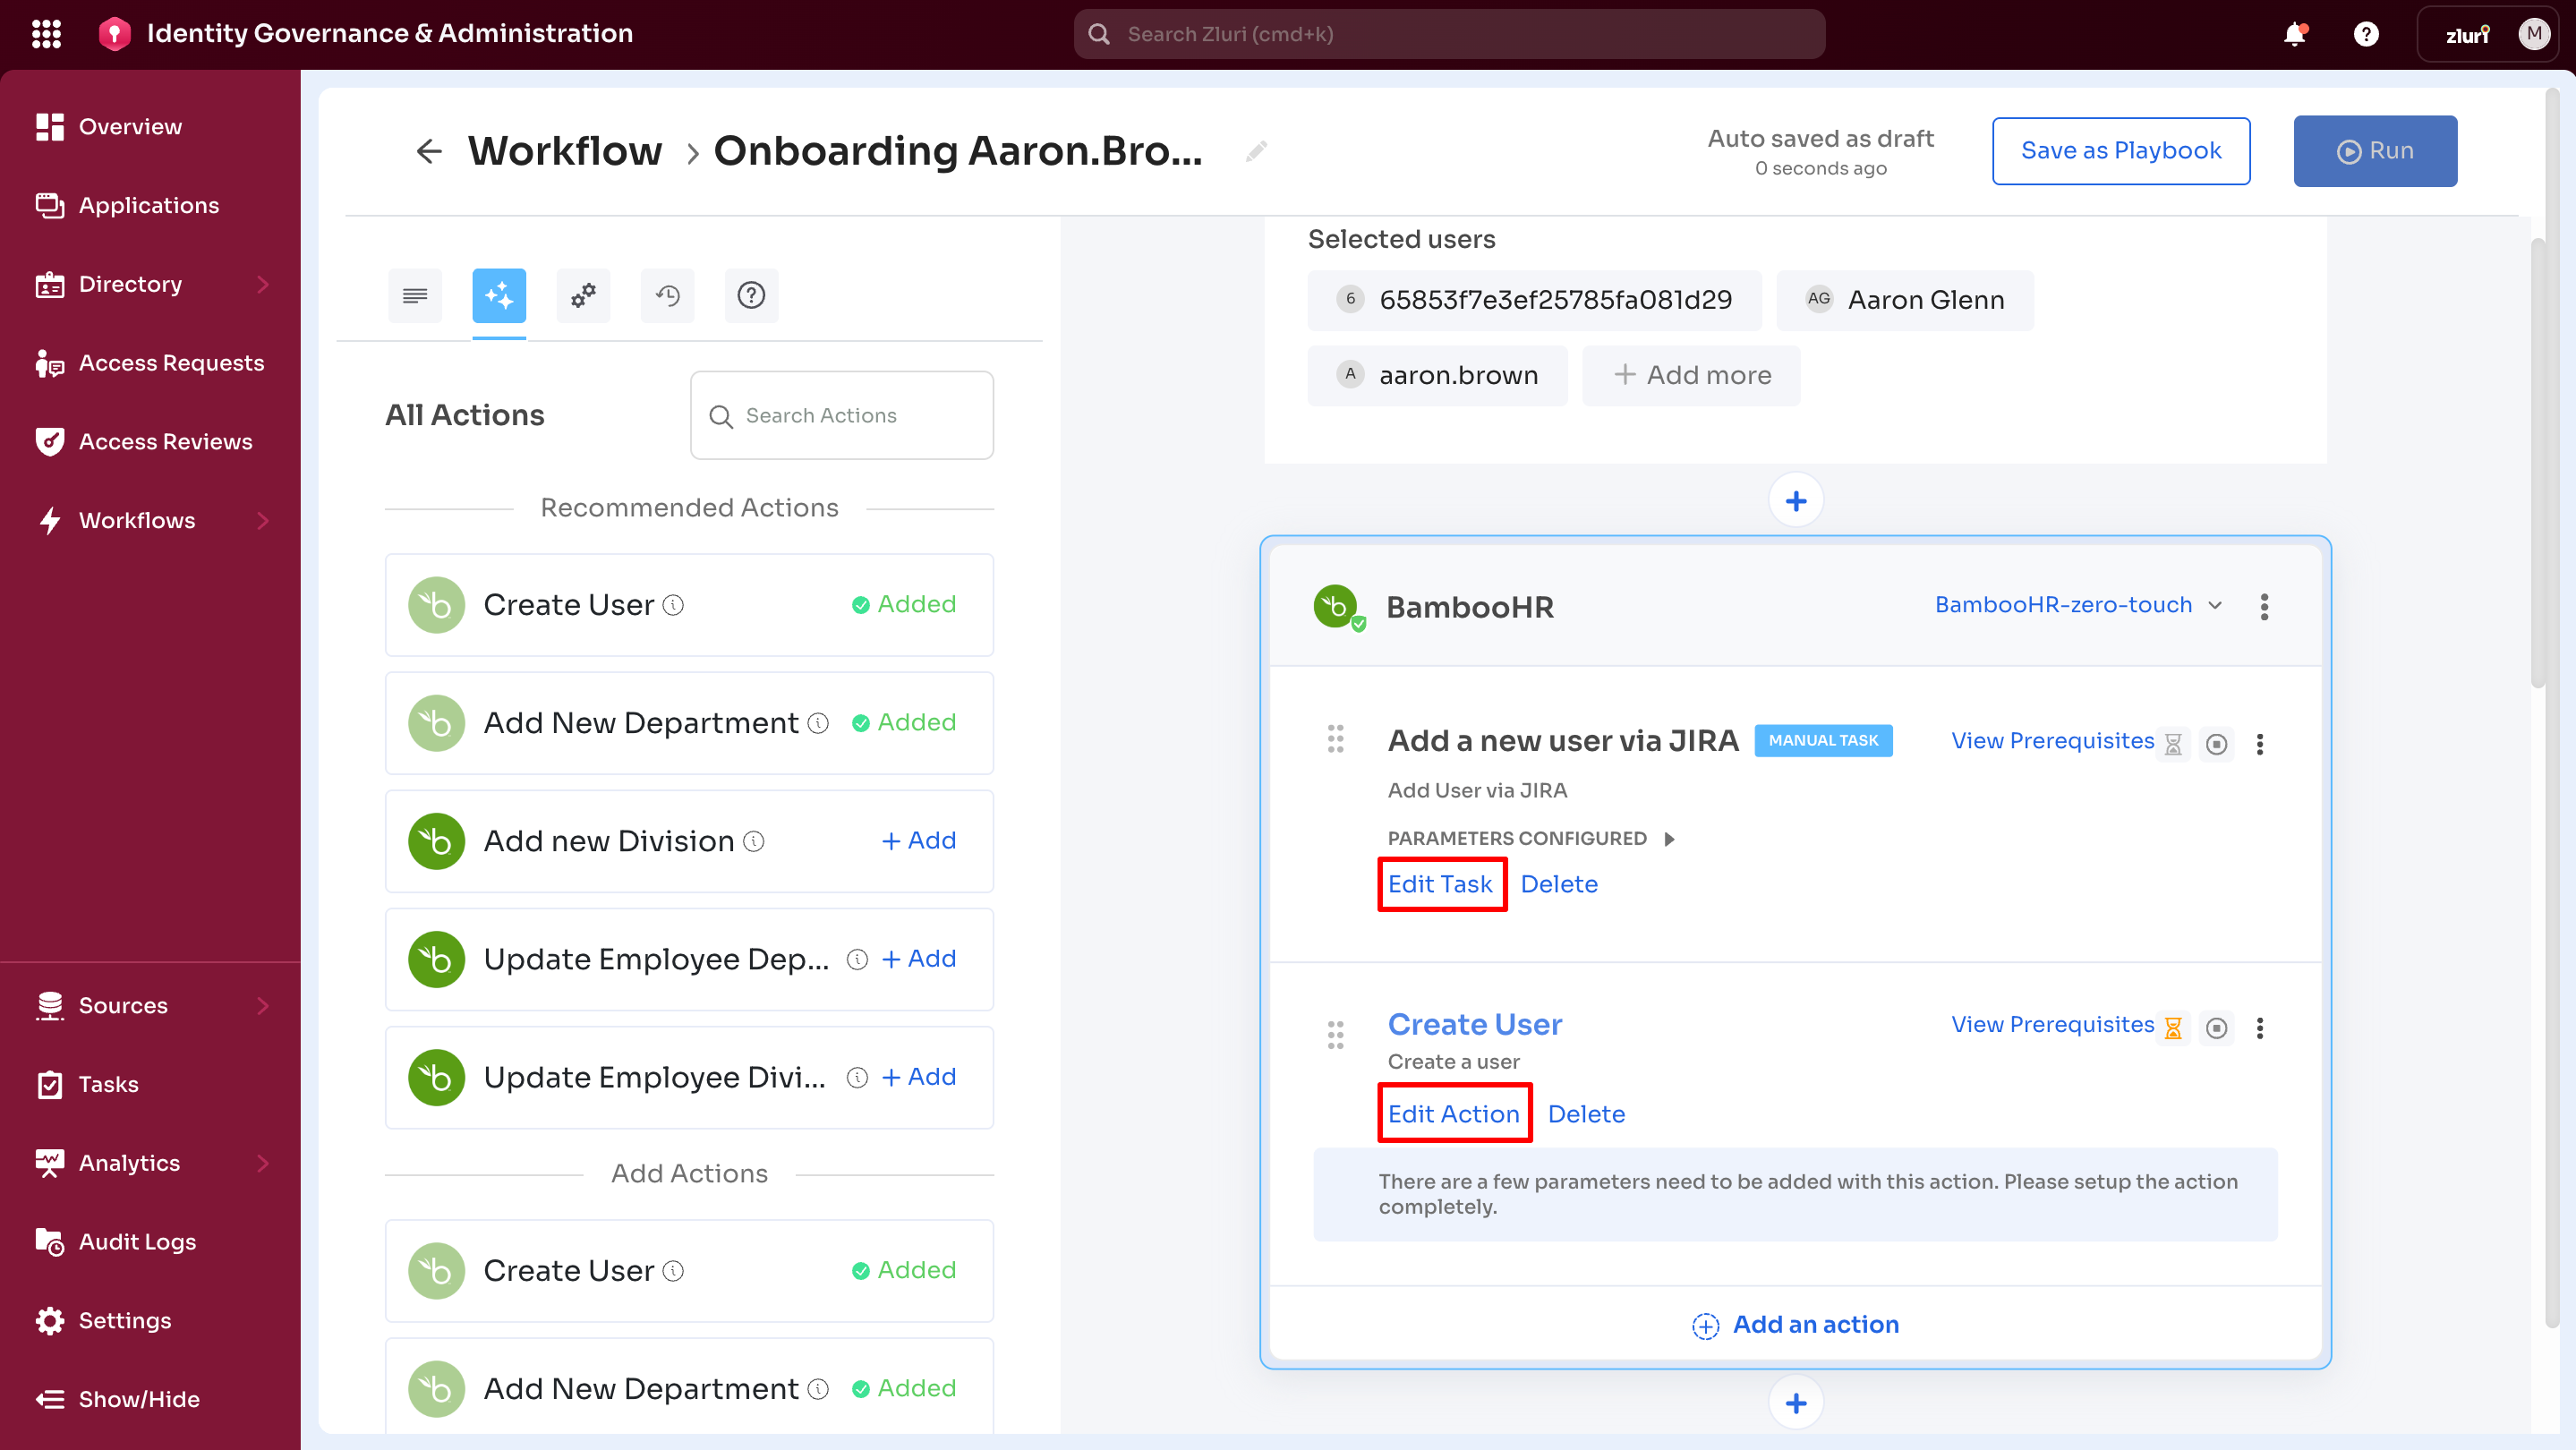
-
Edit Action
Appears for automated actions.
Example: Create User. No manual task labeling.
-
Edit Task
Appears for manual tasks.
Example: Add a new user via JIRA labeled as a manual task.
-
For manual tasks, selecting Edit Task opens the Manual Task form.
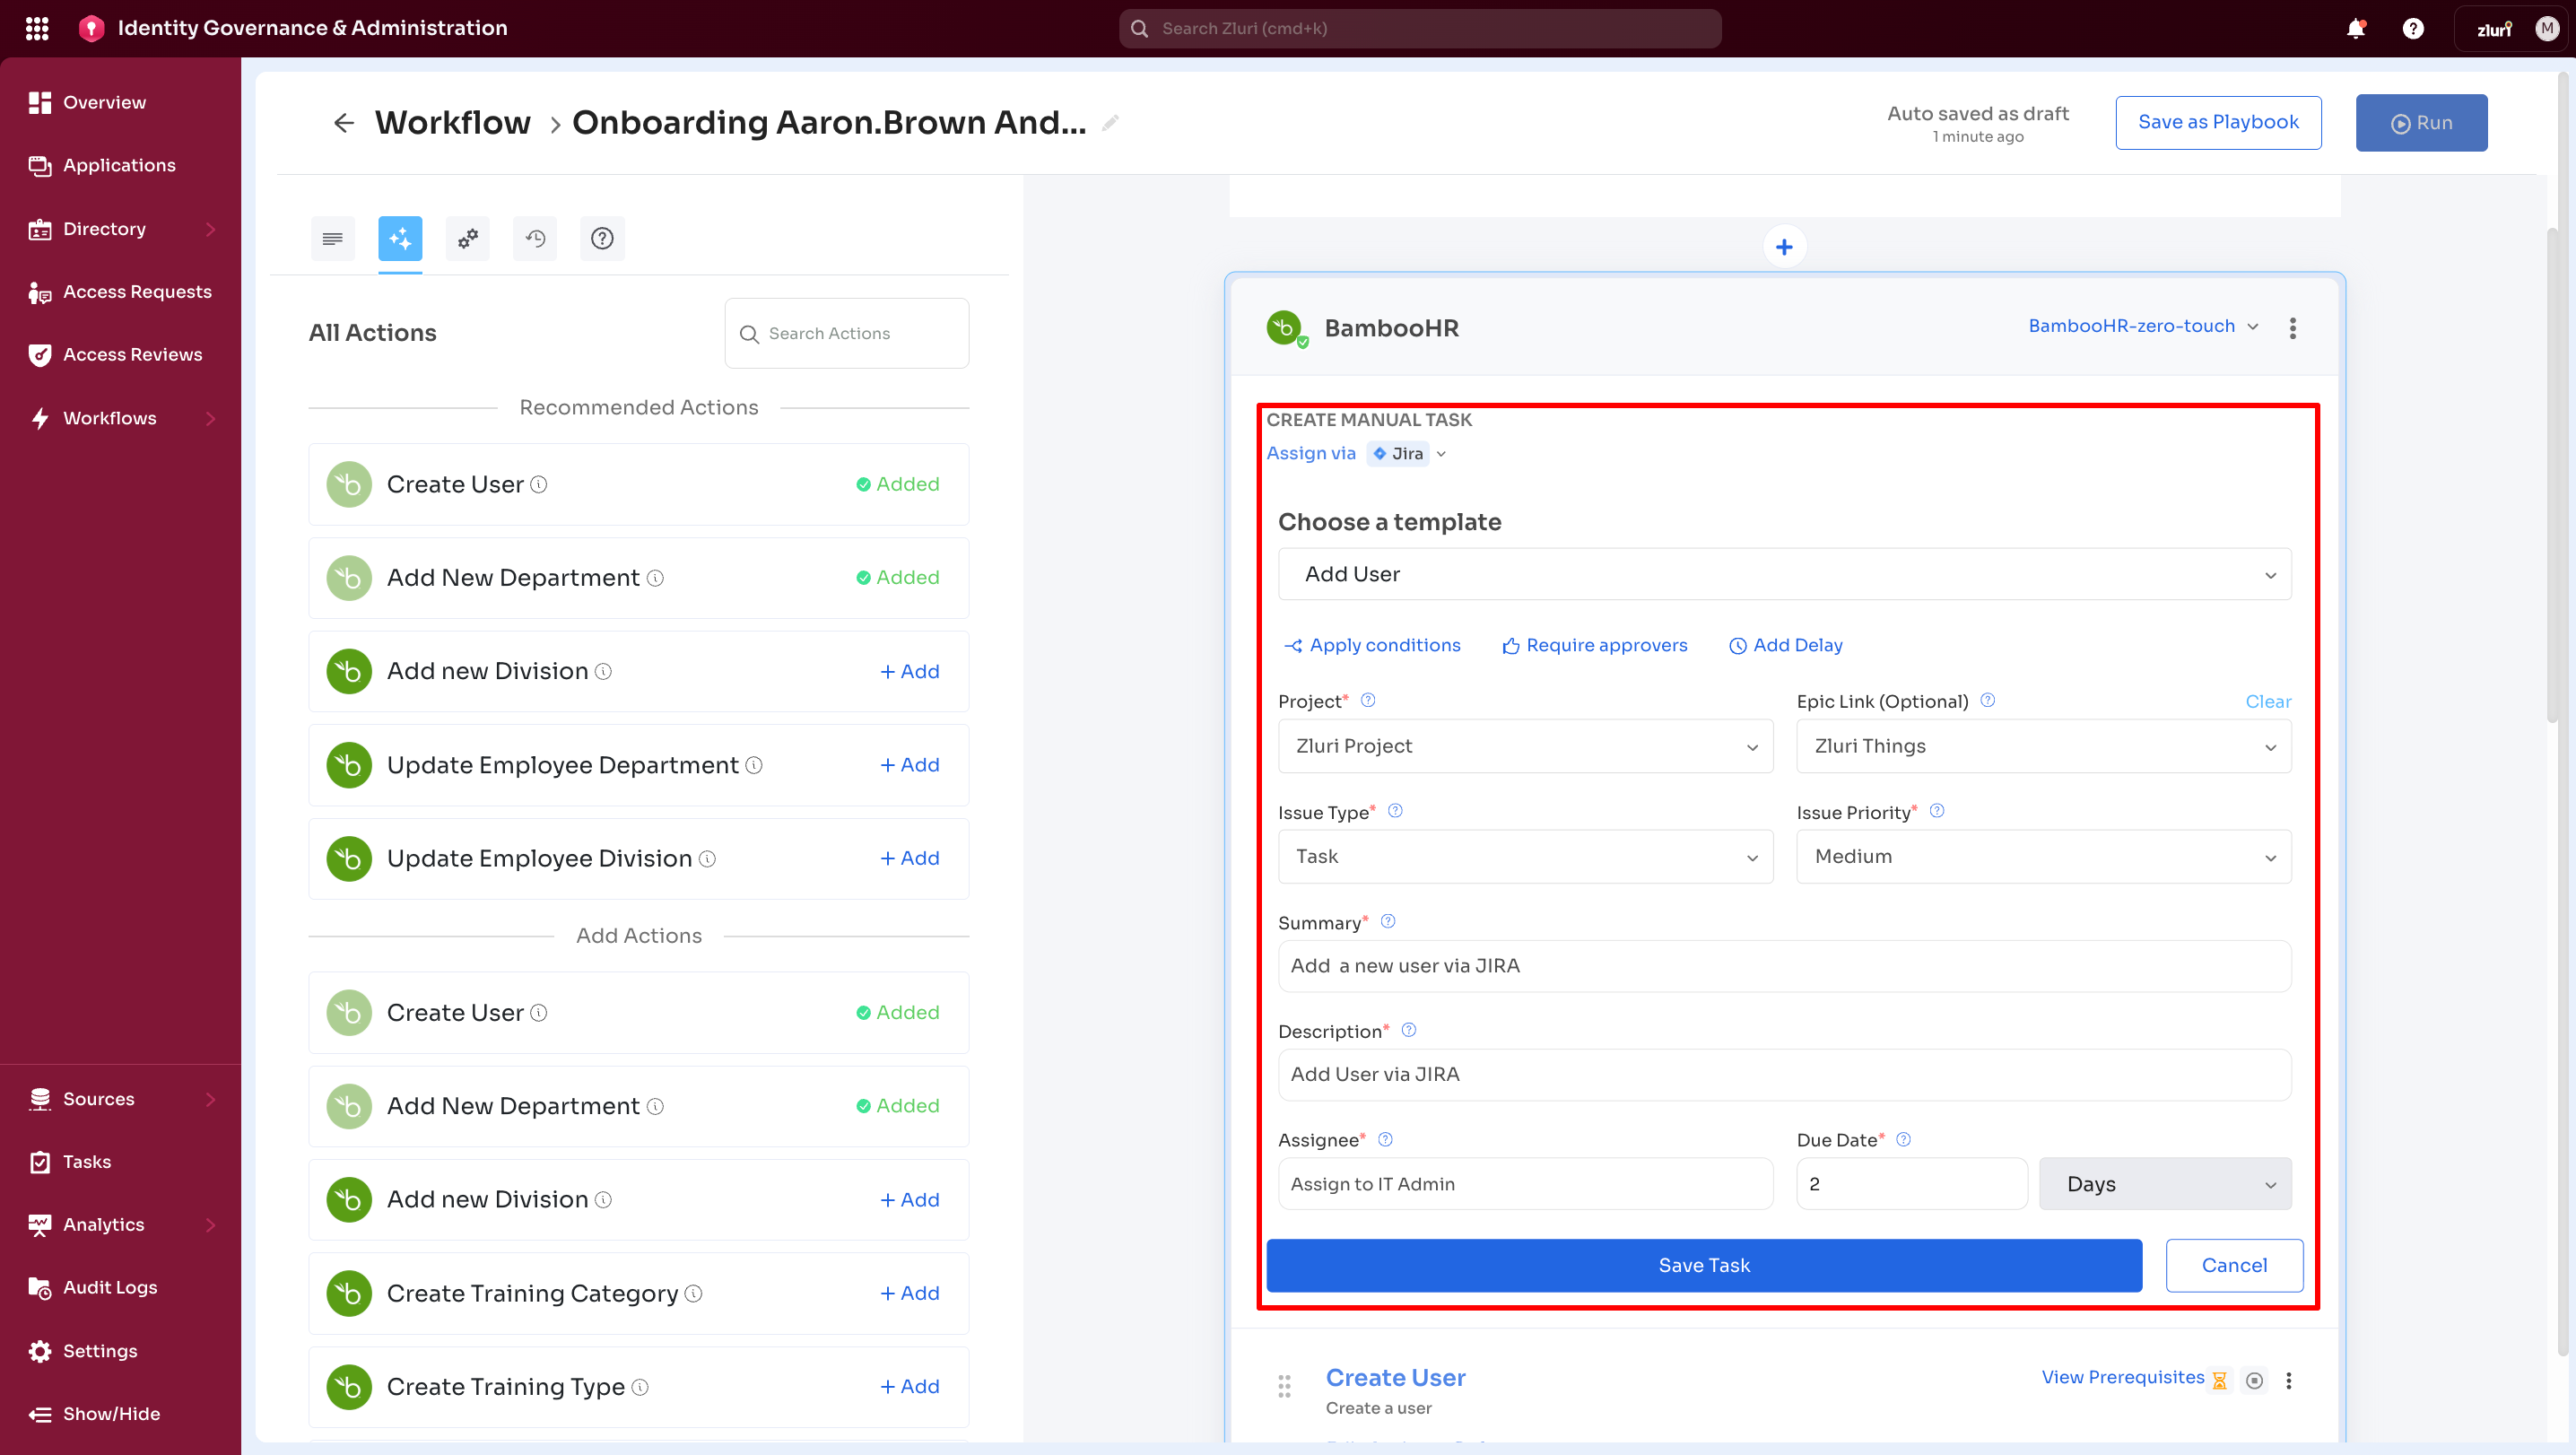
-
Selecting Edit Task displays twelve configurable fields.
Manual Task form fields
The image highlights twelve Manual Task fields, described below.
Notify Via
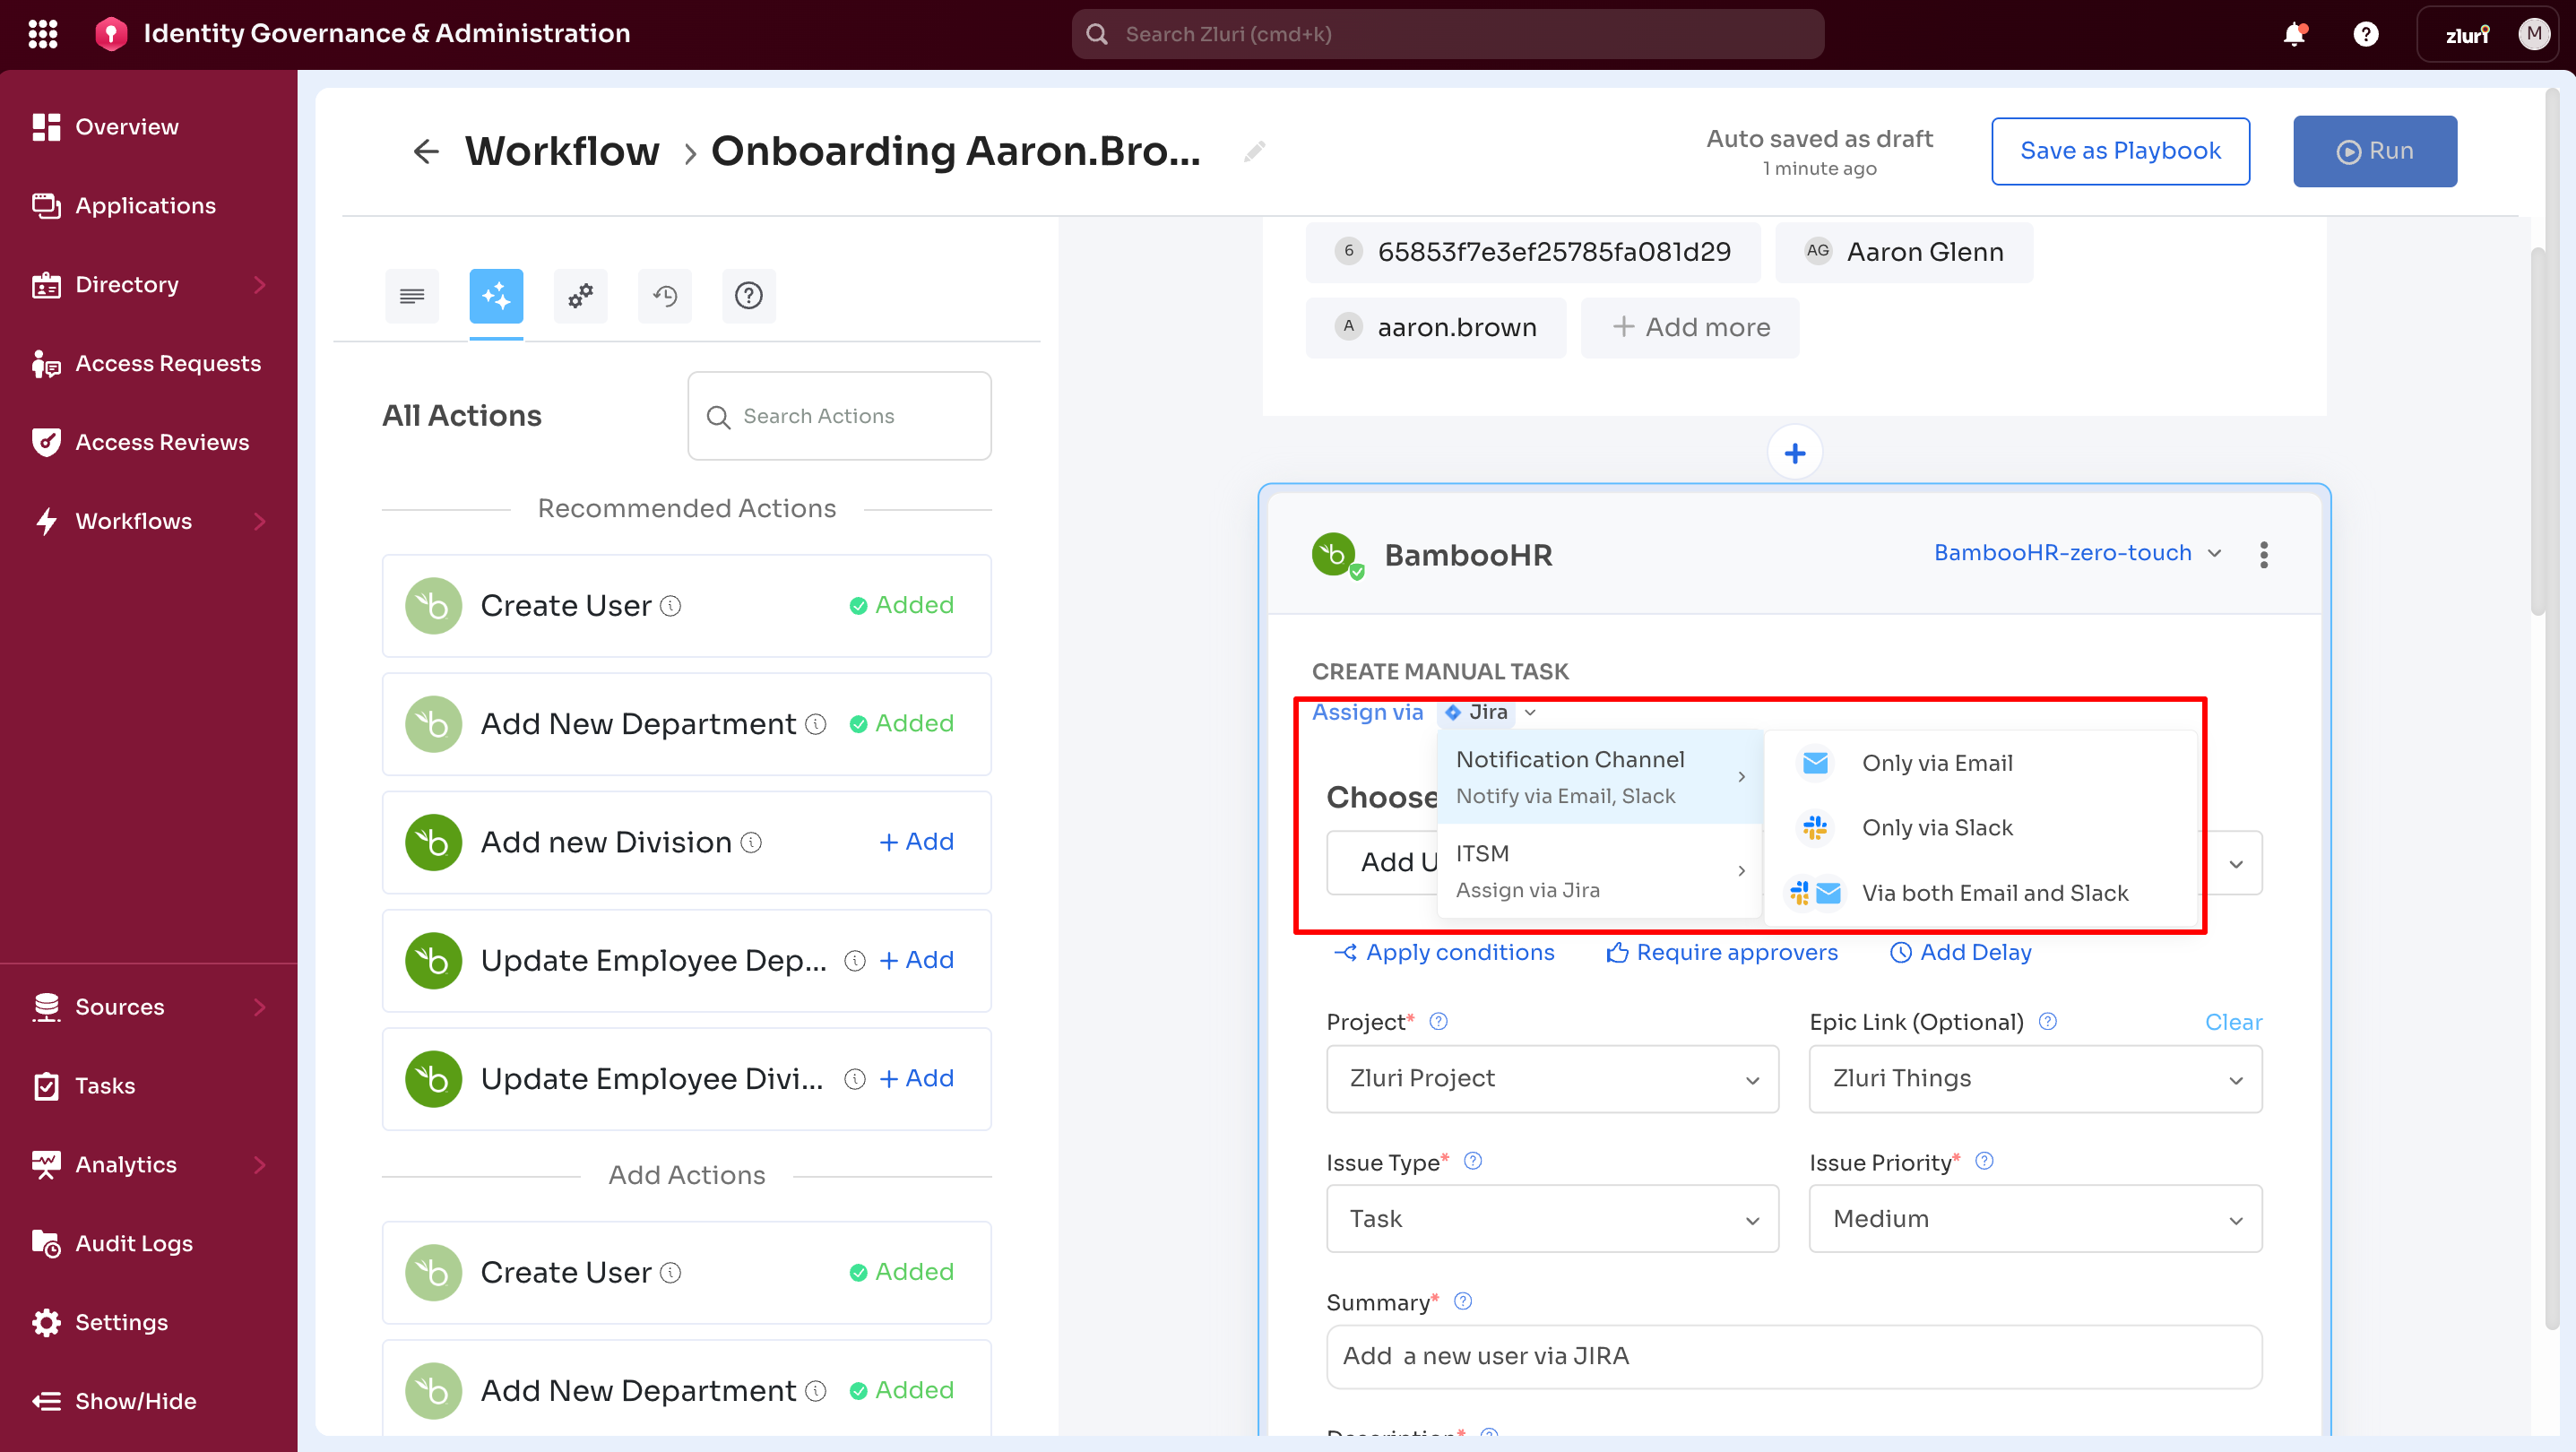
- Available for all Manual Tasks.
- Defines notification channels for task assignment.
Available channels:
- Notification channels
- Only Email
- Only Slack
- Email and Slack
- ITSM
- Assign via Jira. Zluri creates a ticket in the integrated Jira system.
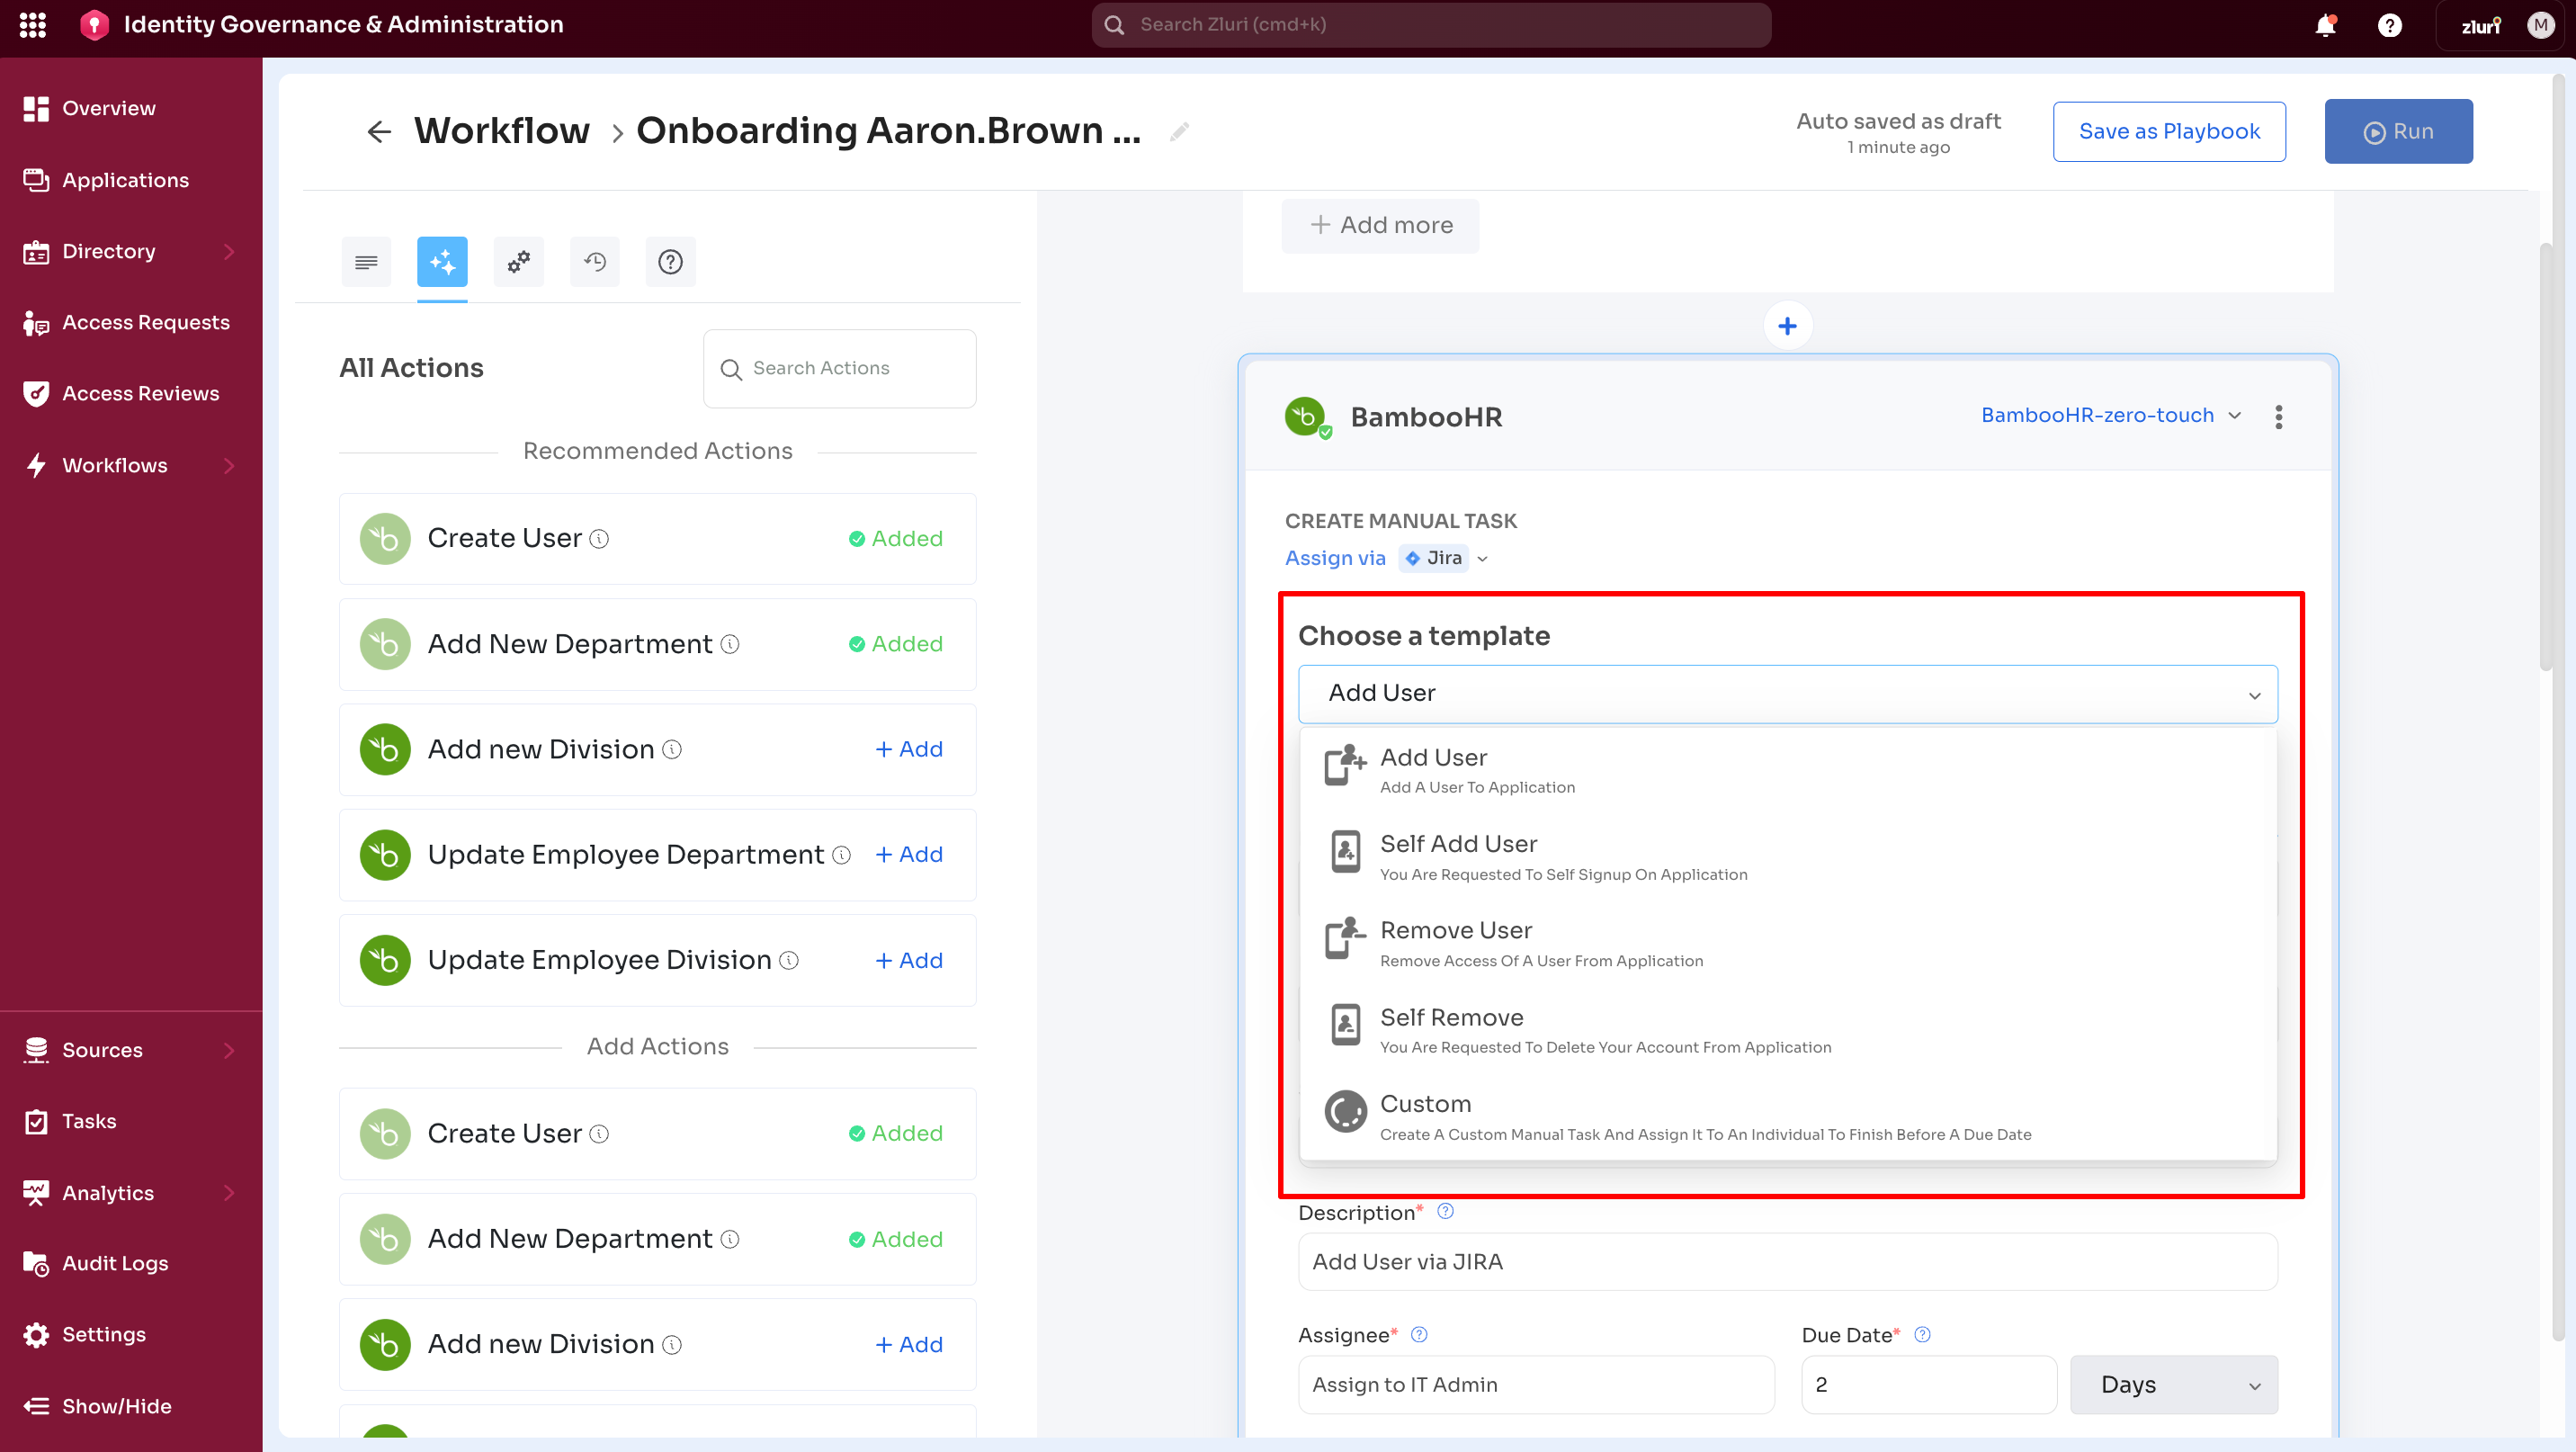
Choose a Template
Available templates:
-
Add User. Adds a user to the application.
-
Self-Add User. Requests user self-signup on the application.
-
Remove User. Removes user access from the application.
-
Self-Remove. Requests user account deletion on the application.
-
Custom. Creates a custom manual task with due date and instructions. Supports more complex tasks.
Apply Conditions
- Rule configuration for individual actions in an App Block.
- Differs from Add Conditions, which applies one condition to the entire App Block.
- Enables granular control of action execution.
Reference: Add Conditions vs Apply Conditions
Require Approvers
- Assigns approvers for actions requiring approval before execution.
Add Delay
- Configures execution delay in weeks, days, hours, or minutes.
- Supports sequencing of actions within a playbook.
Title
- Sets the manual task title.
- Replaces the original action title in the App Block after save.
Description
- Adds task context and instructions for the assignee.
Assignee
- Assigns the task owner responsible for completion.
Due In
- Defines the deadline for task completion.
Add a field (Optional)
- Adds one optional field: Message.
- Message adds additional context for the assignee.
Save Task
- Saves manual task configuration.
Cancel
- Discards entered details and exits the form.
Task Dashboard
All manual tasks appear in the Task Dashboard.
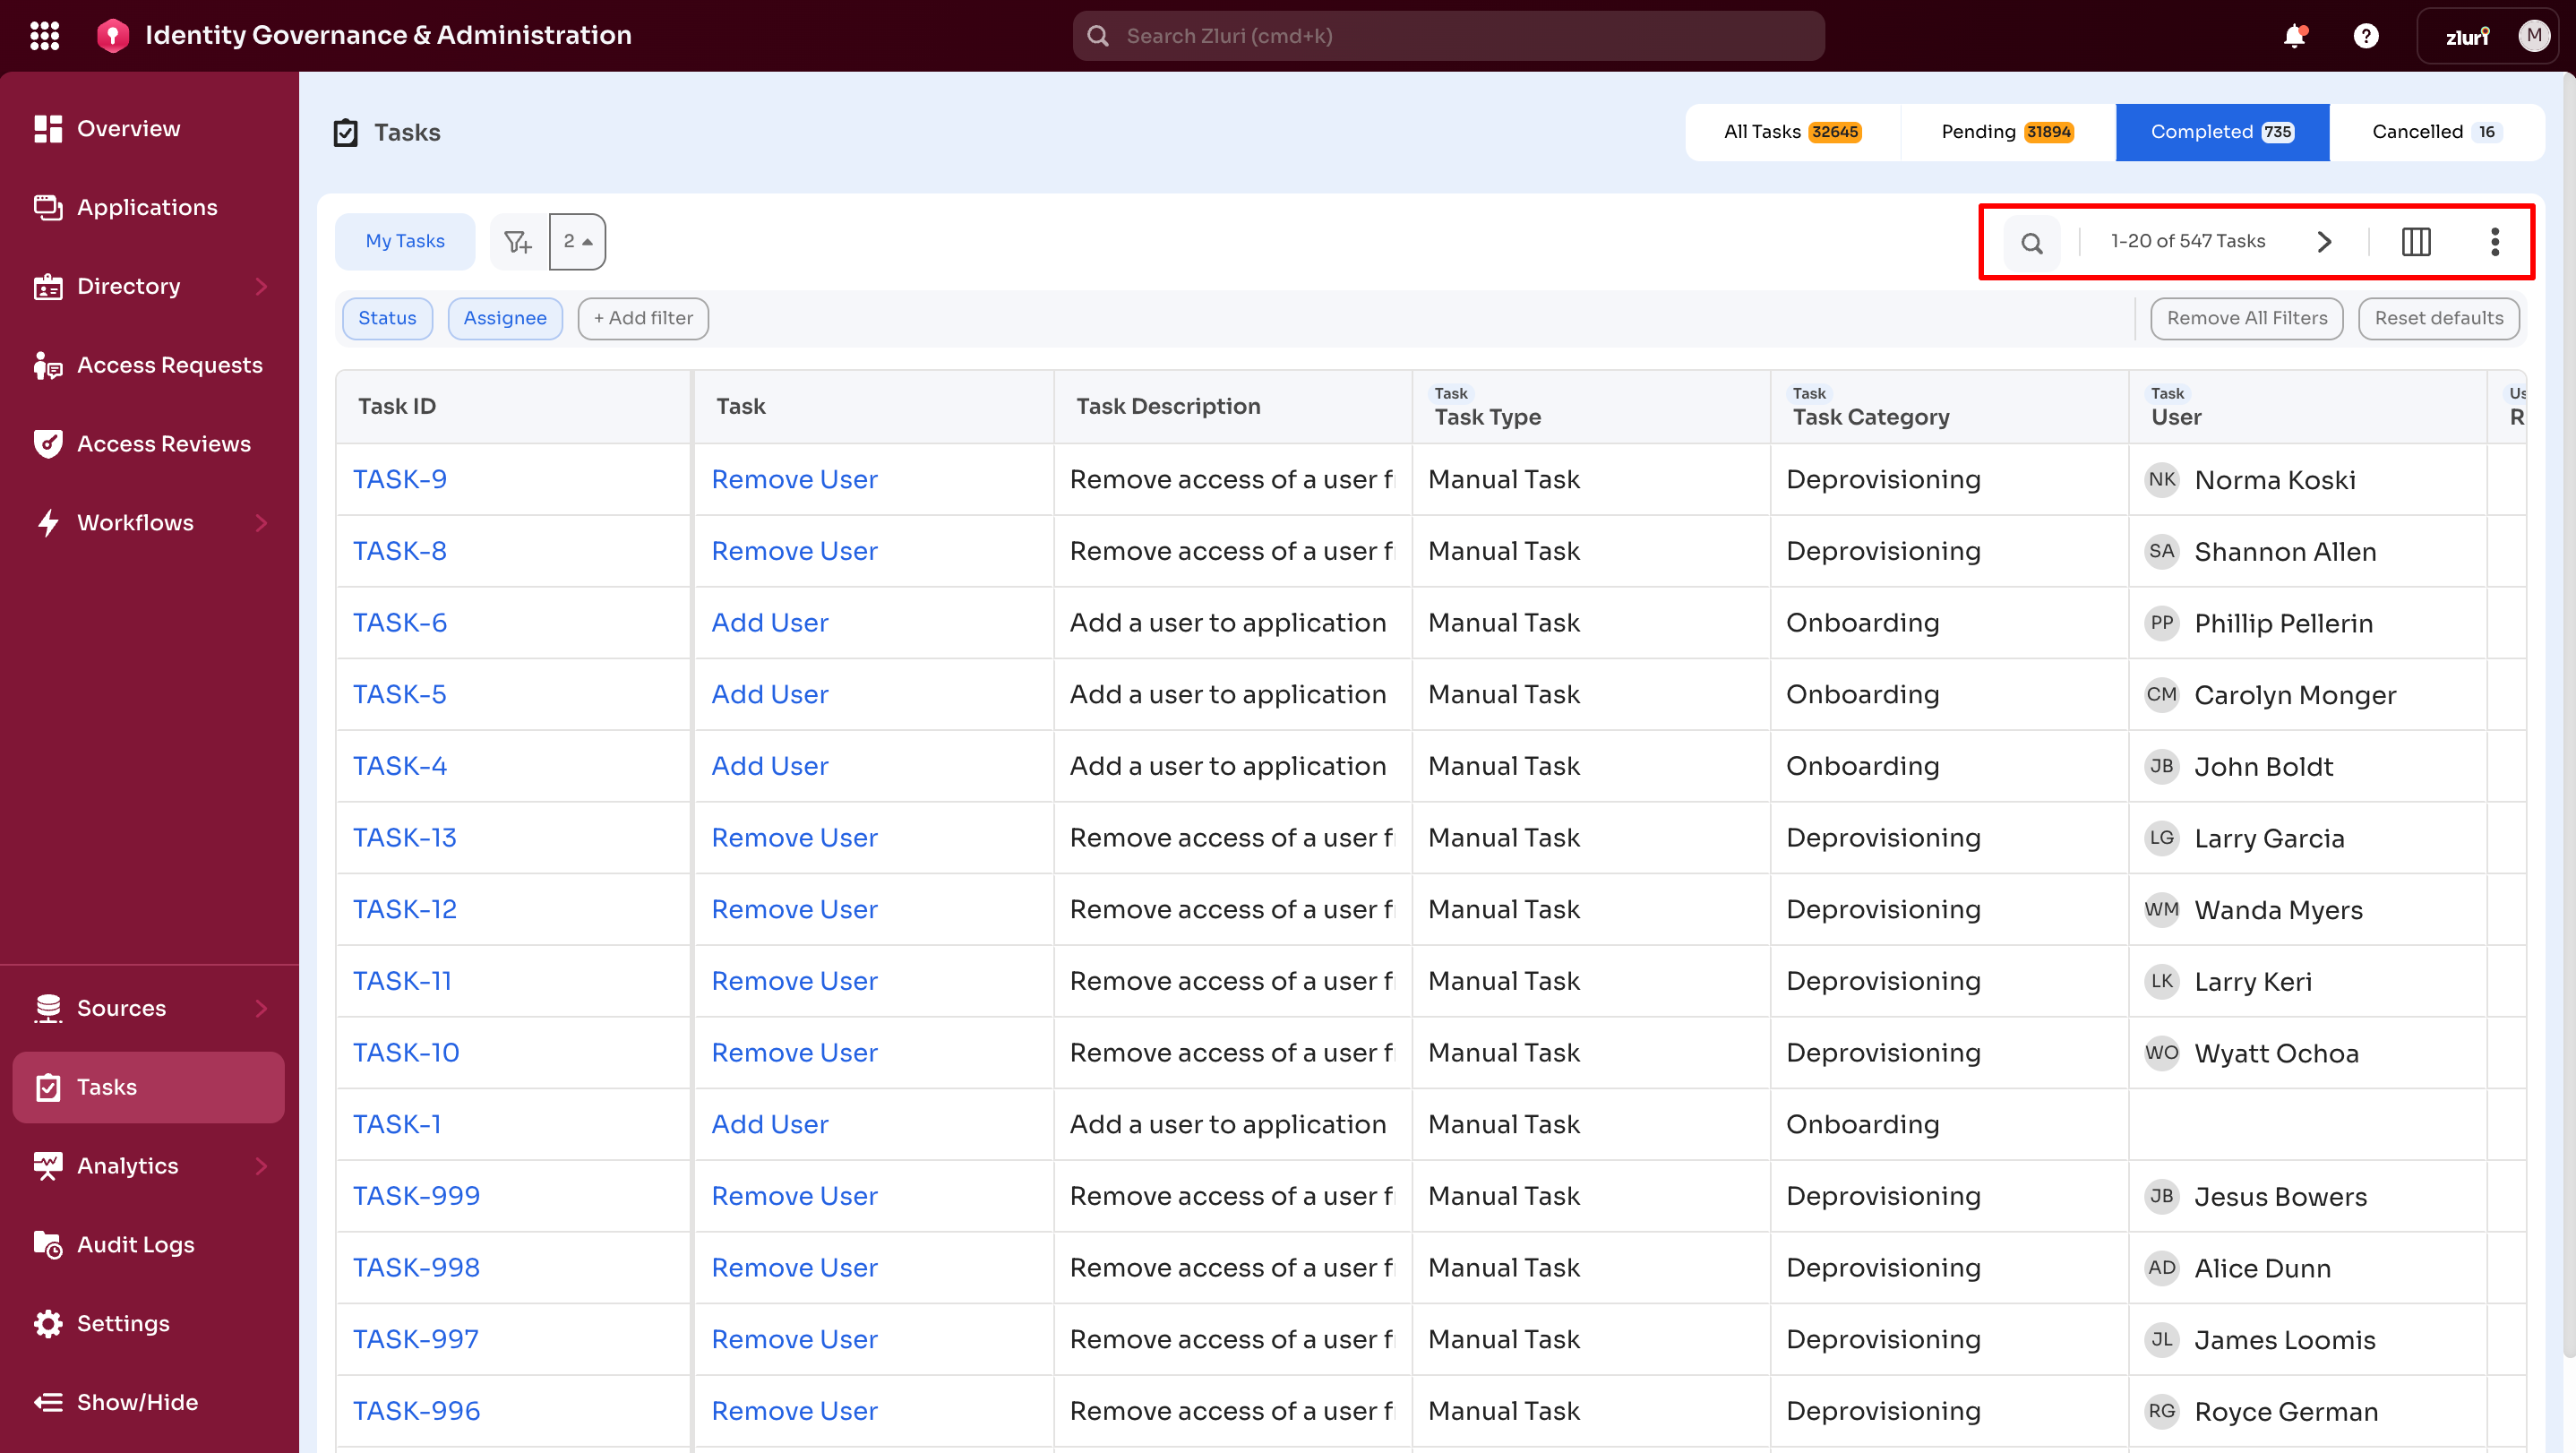
The image below shows the default Task dashboard layout in the Admin View of the platform (layout may vary based on screen width).
Each feature and function of the Task dashboard is explained in detail below.
-
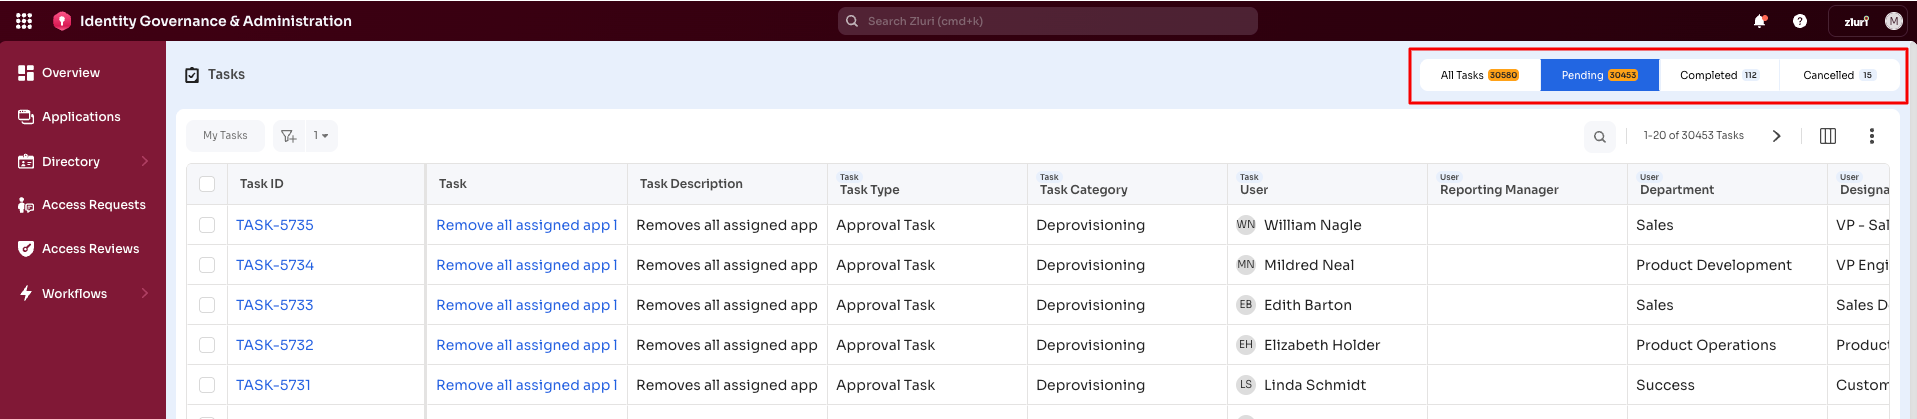
Task Status (4 Tabs):
The Task status tabs appear in the top-right corner of the Task dashboard (refer to the image below).- All Tasks: Displays all tasks, regardless of status.
- Pending: Displays tasks currently marked as Pending.
- Completed: Displays tasks marked as Completed.
- Canceled: Displays tasks marked as Canceled.
-
Task list columns:
Columns display details associated with created tasks. The default columns include:
Application, Action Taken By, Actions, Assigned On, Assigned To, Comments, Created By, Department, Designation, Due Date, Reporting Manager, Task, Task Completed On, Task Description, Task ID, Task Type, User
If application-level custom fields are configured, they do not appear in the column list by default. Column visibility and order can be customized.Column customization supports the following actions:
-
Reset column order to default or sort alphabetically

-
Search columns by name
-
Select or deselect columns
-
Task Dashboard → Filtering options
1. My Tasks filter
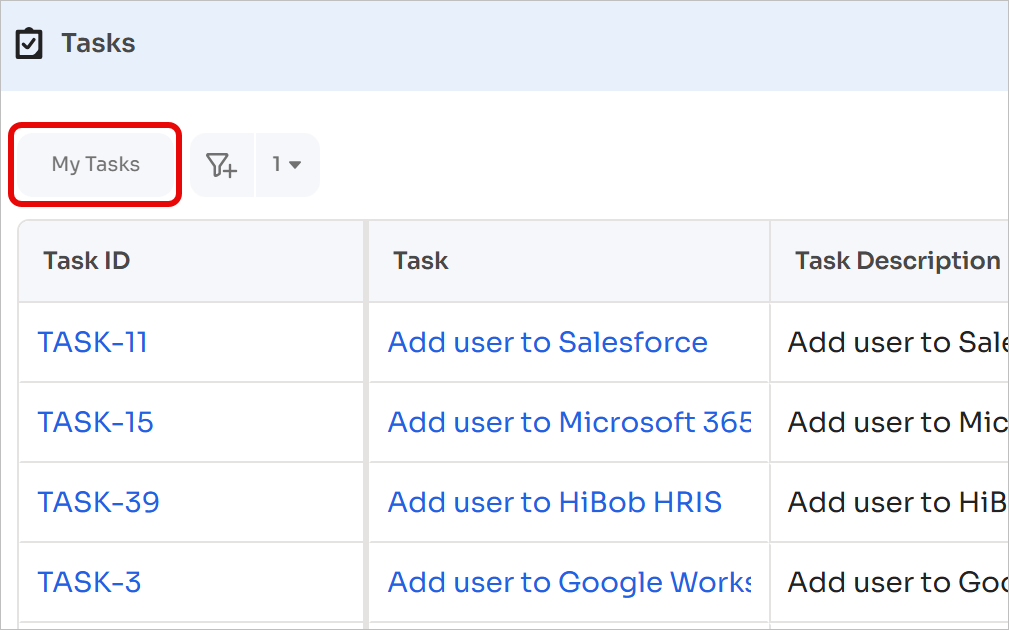
Apply Quick Filter → My Tasks:
Apply this filter to display only tasks assigned to the logged-in user.
2. Advanced filtering options
Configure filters:
In addition to the My Tasks quick filter, advanced filters help refine task results. Select the Configure Filters icon to access advanced filtering options.
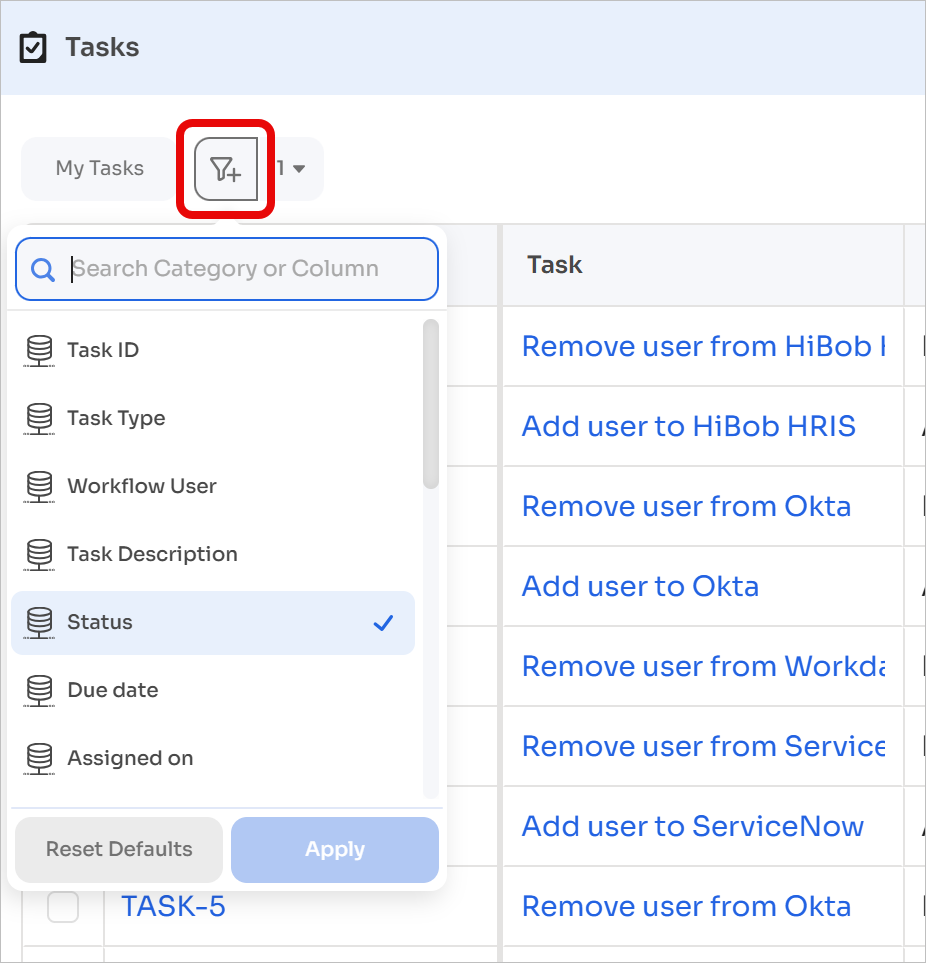
The filter panel provides the following options:
- Search by category or column
- Filter tasks based on selected criteria
- Reset active filters
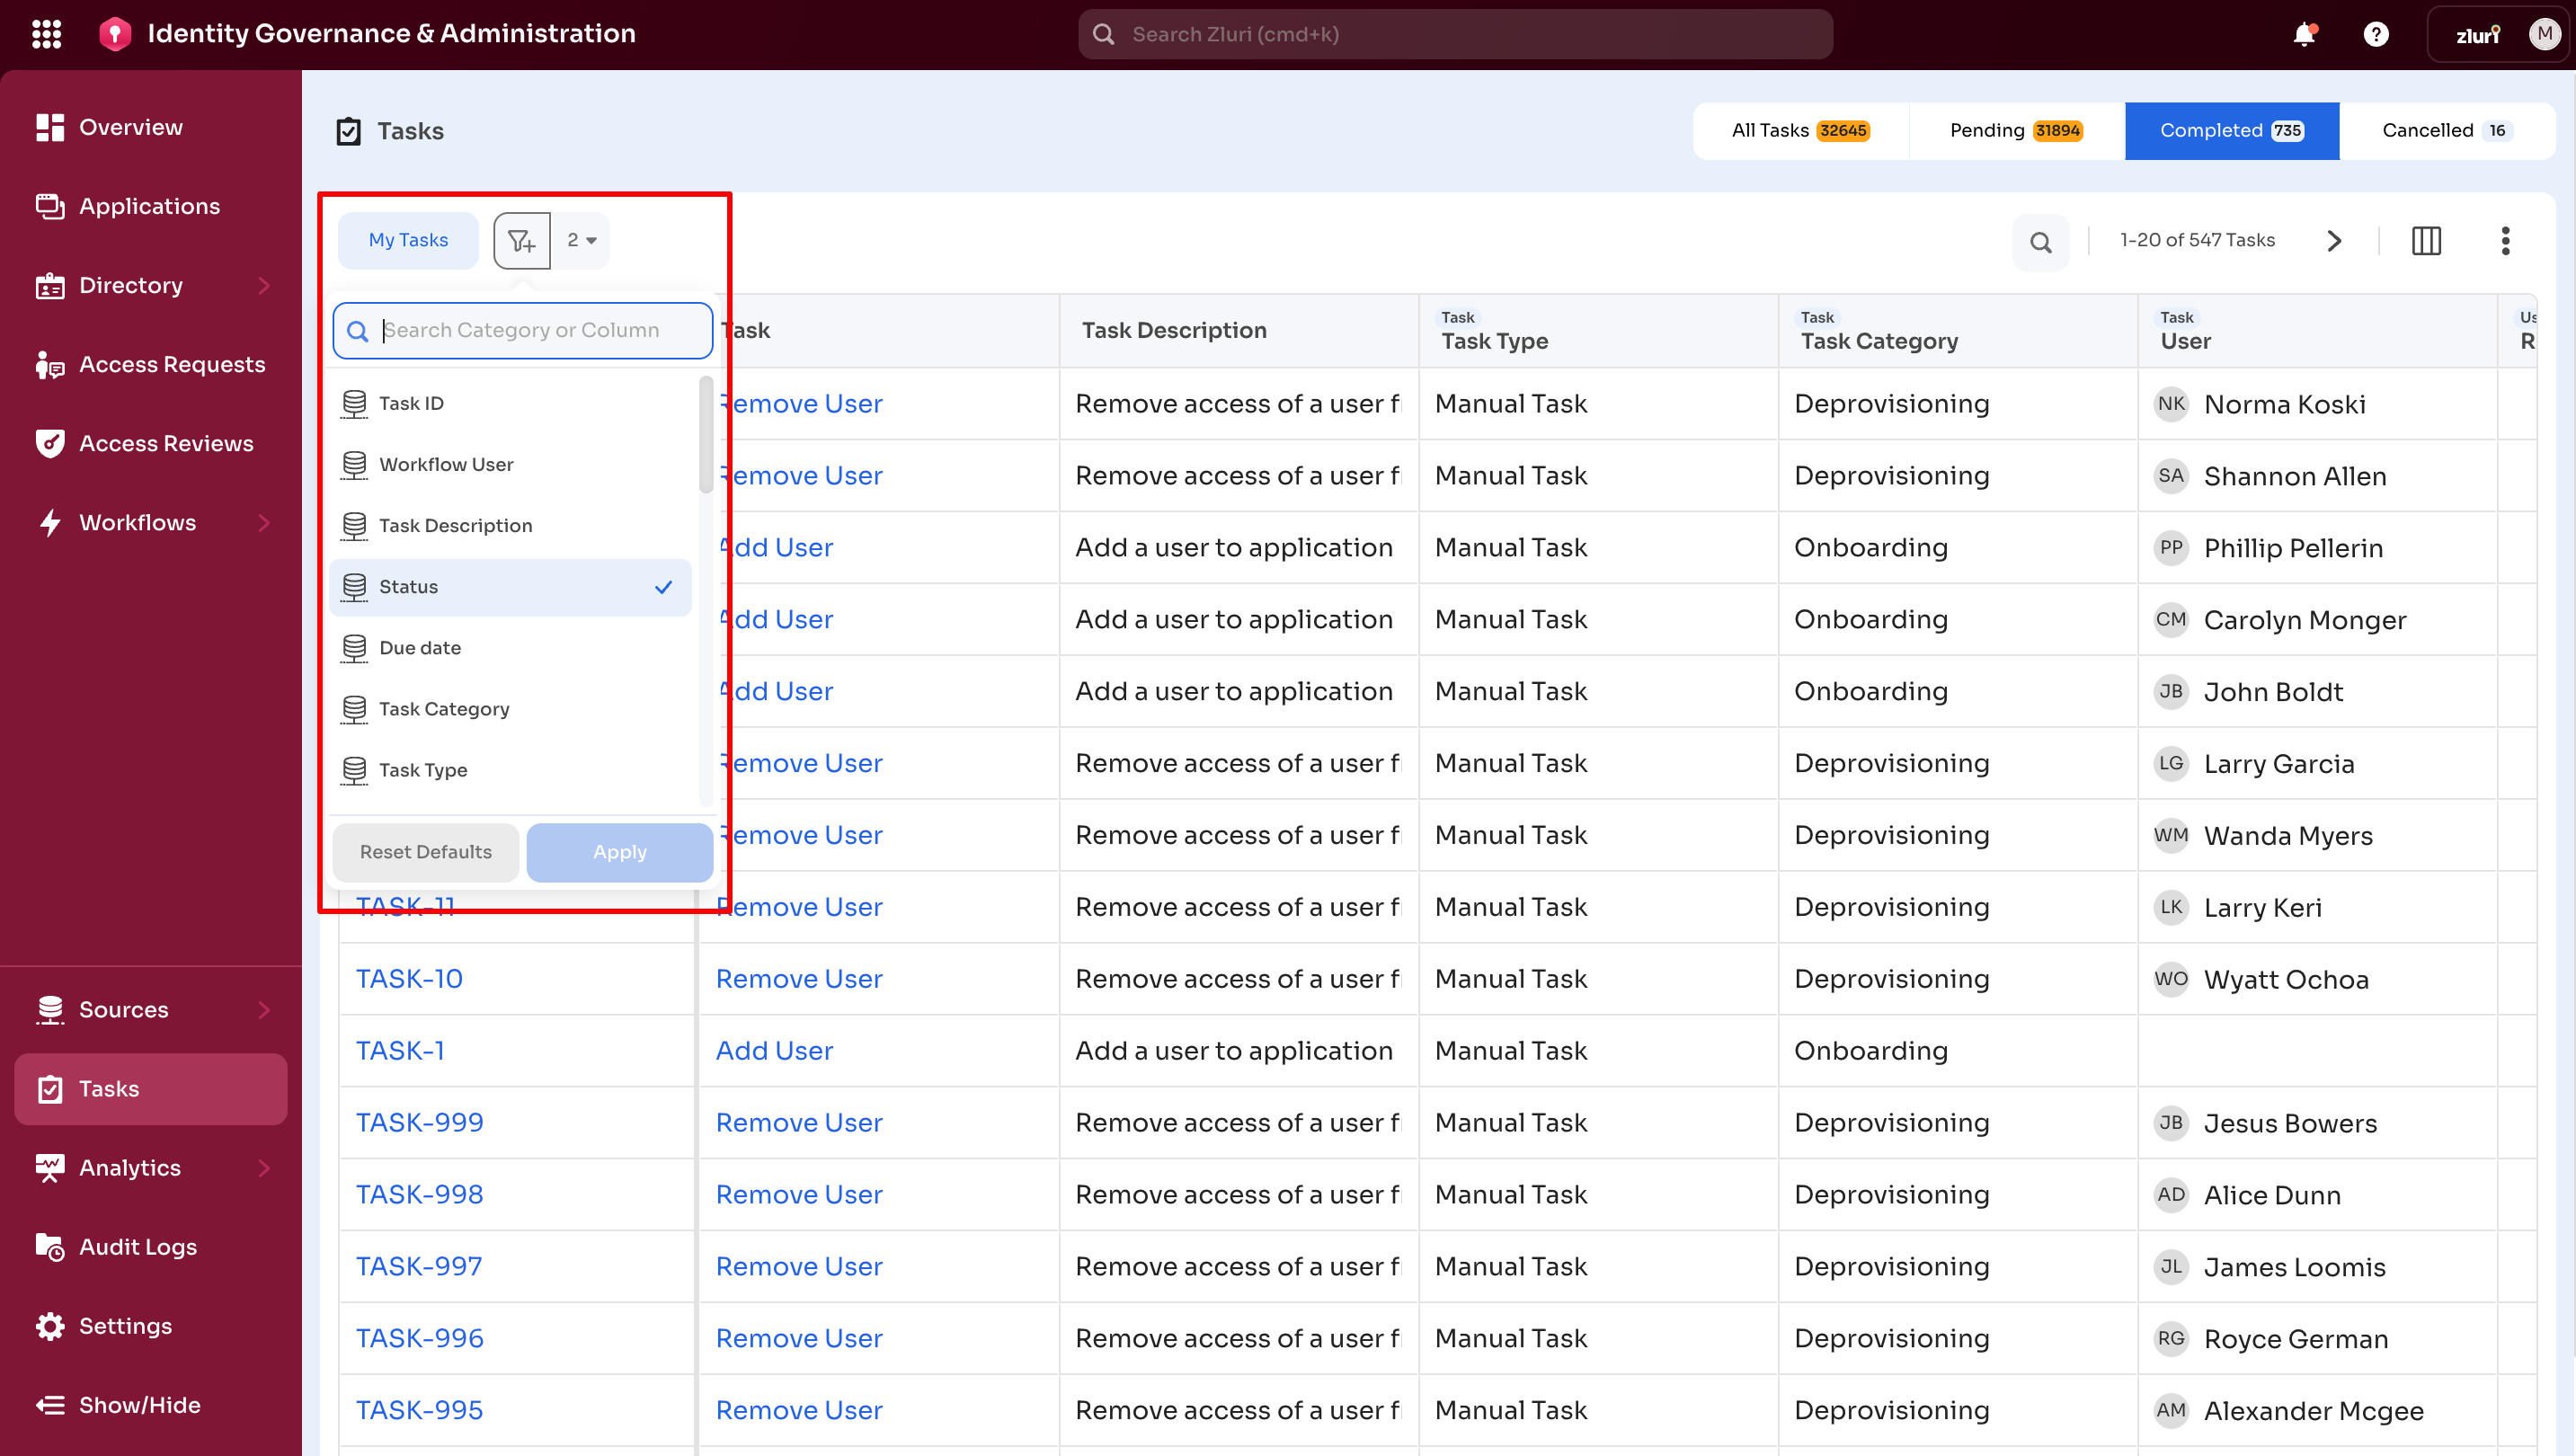
Refer to the image below for filter configuration and refinement.
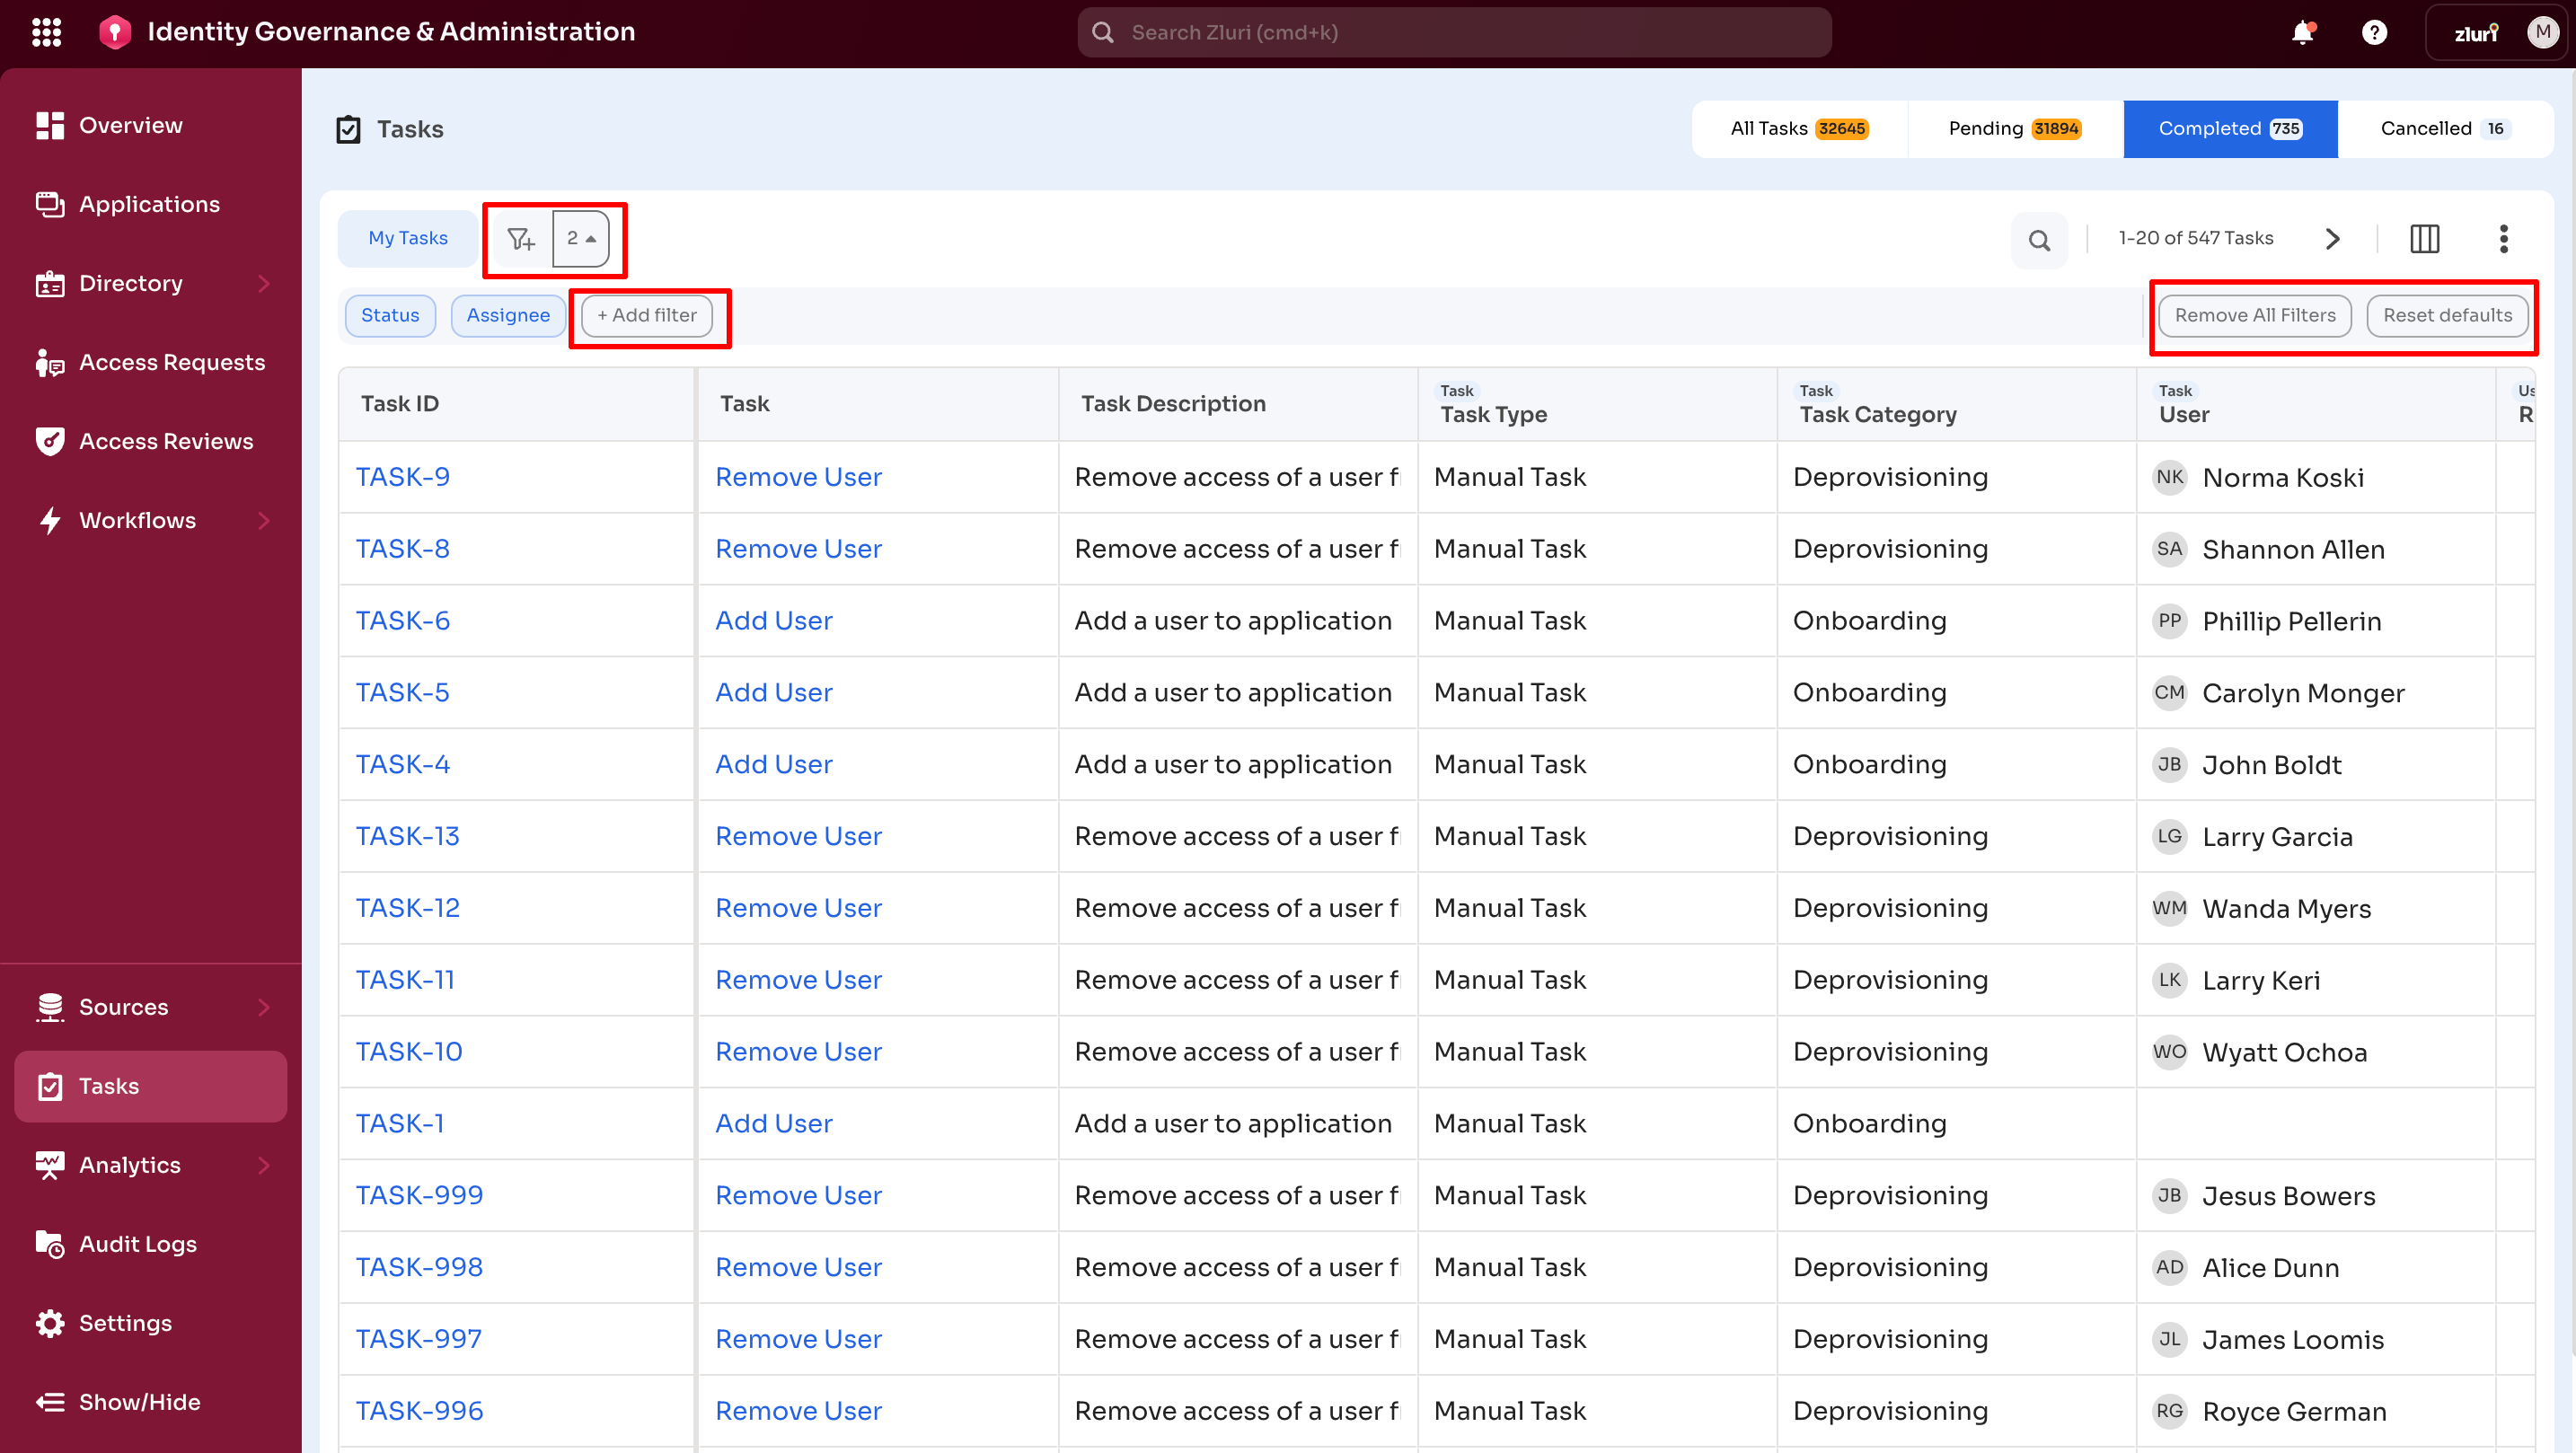
After applying filters, additional controls appear.
-
All Filter Names: Displays active filters. Hovering over a filter shows its conditions.
Example:
- Task Category = Provisioning
- Status = Pending
-
Add Filter: Adds additional filters
-
Remove All Filters: Clears all applied filters
-
Reset Defaults: Restores default filter settings
Customizing the Task Dashboard interface
Top-right menu:
Provides additional dashboard actions.
-
Search Task:
Enter a task-related keyword and press Enter to refine results.
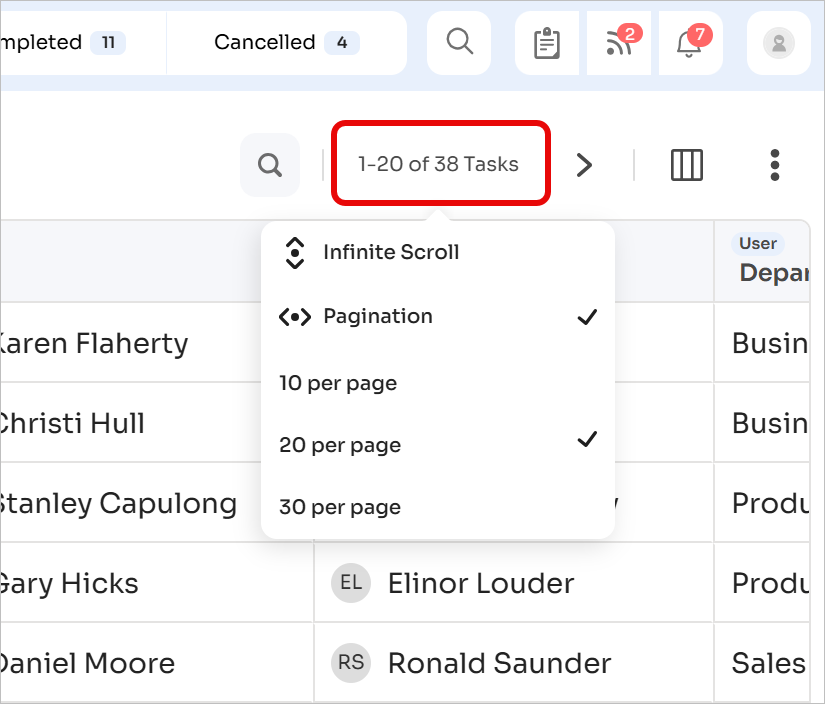
-
Pagination Configuration:
Switch between Infinite Scroll and Pagination. Pagination supports 10, 20, or 30 tasks per page.
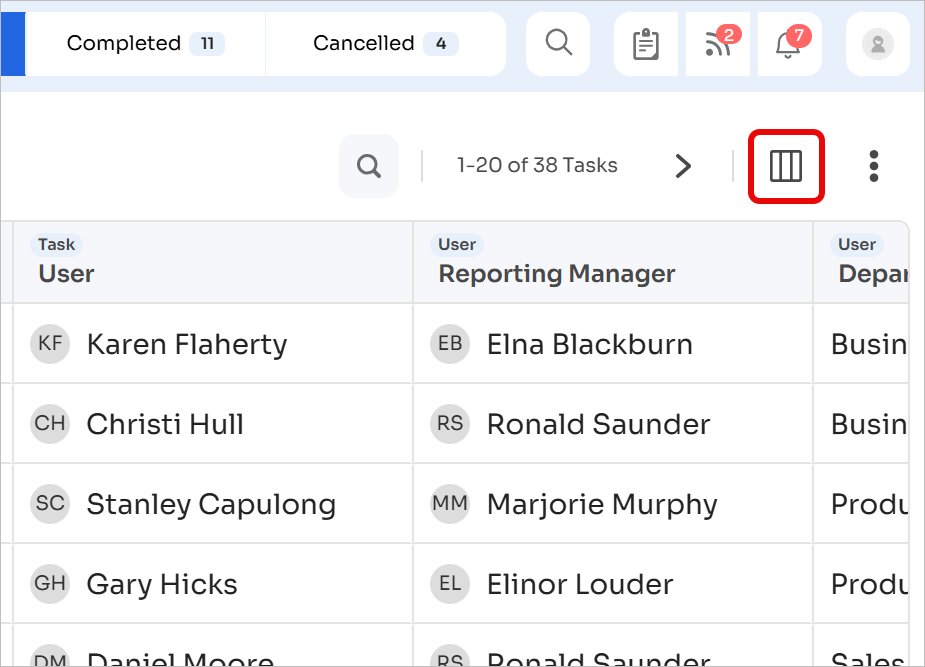
-
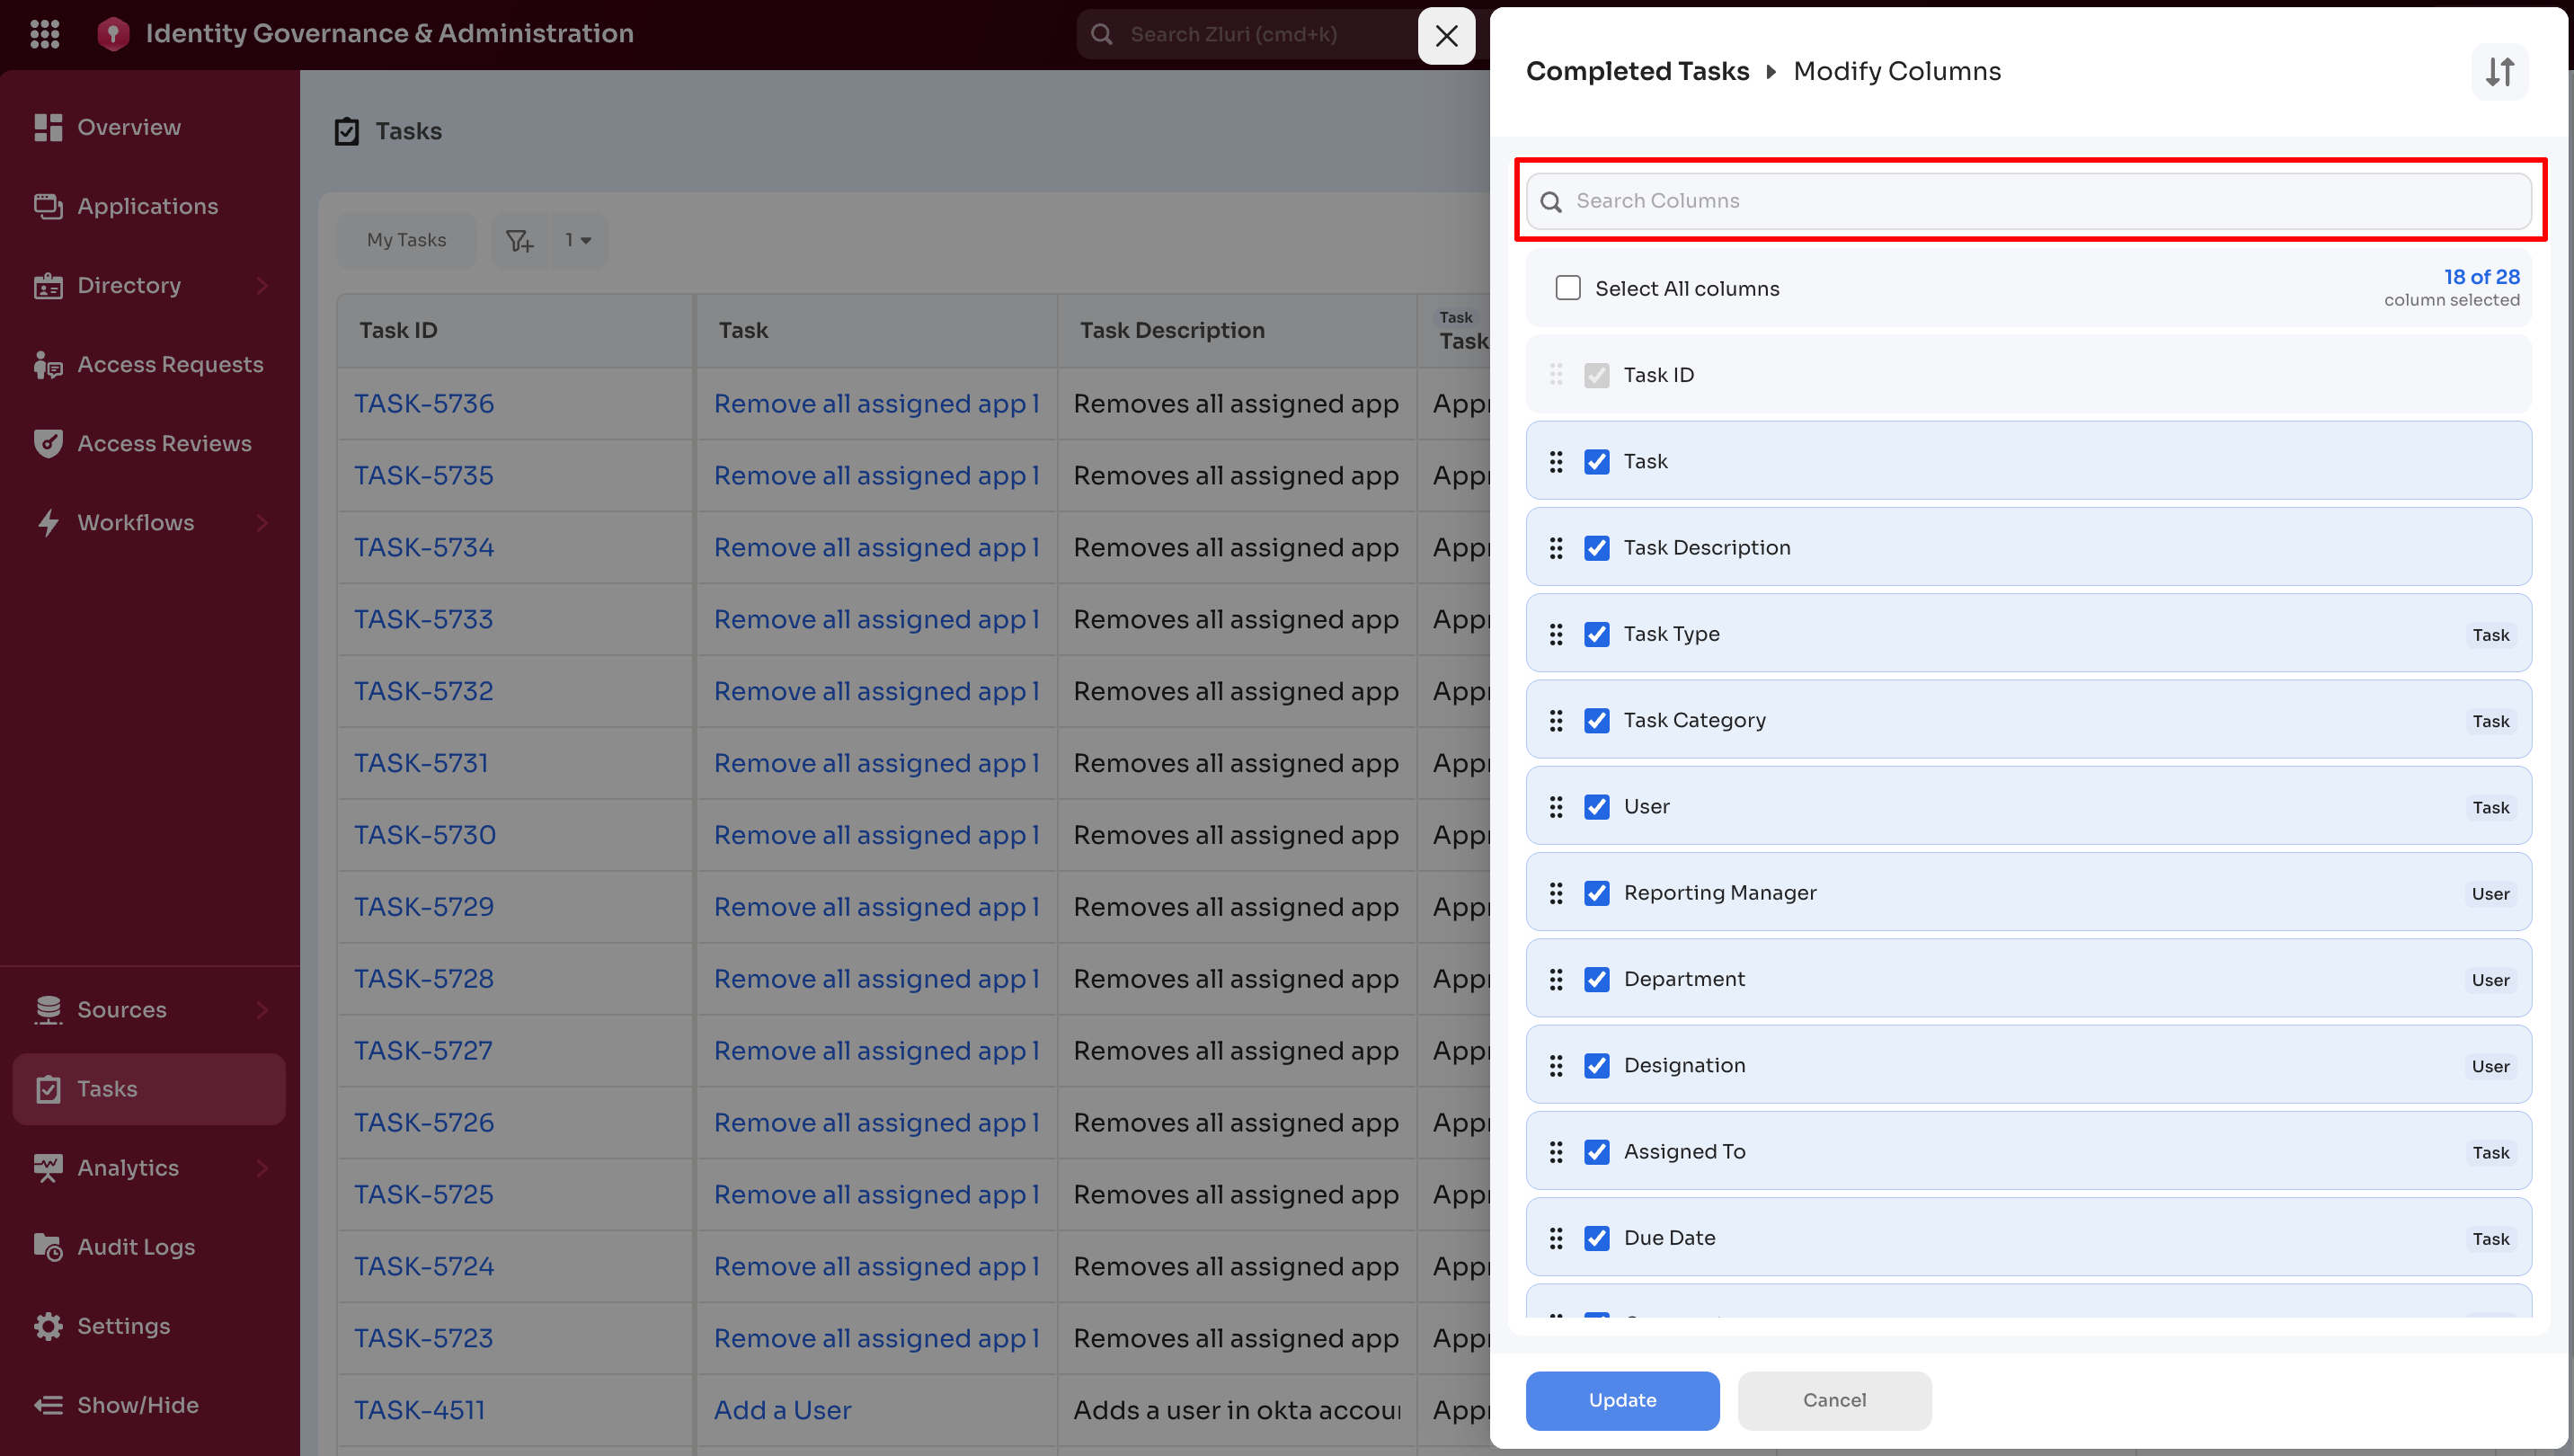
Modify Columns:
Select the Modify Columns icon to manage column visibility and order.
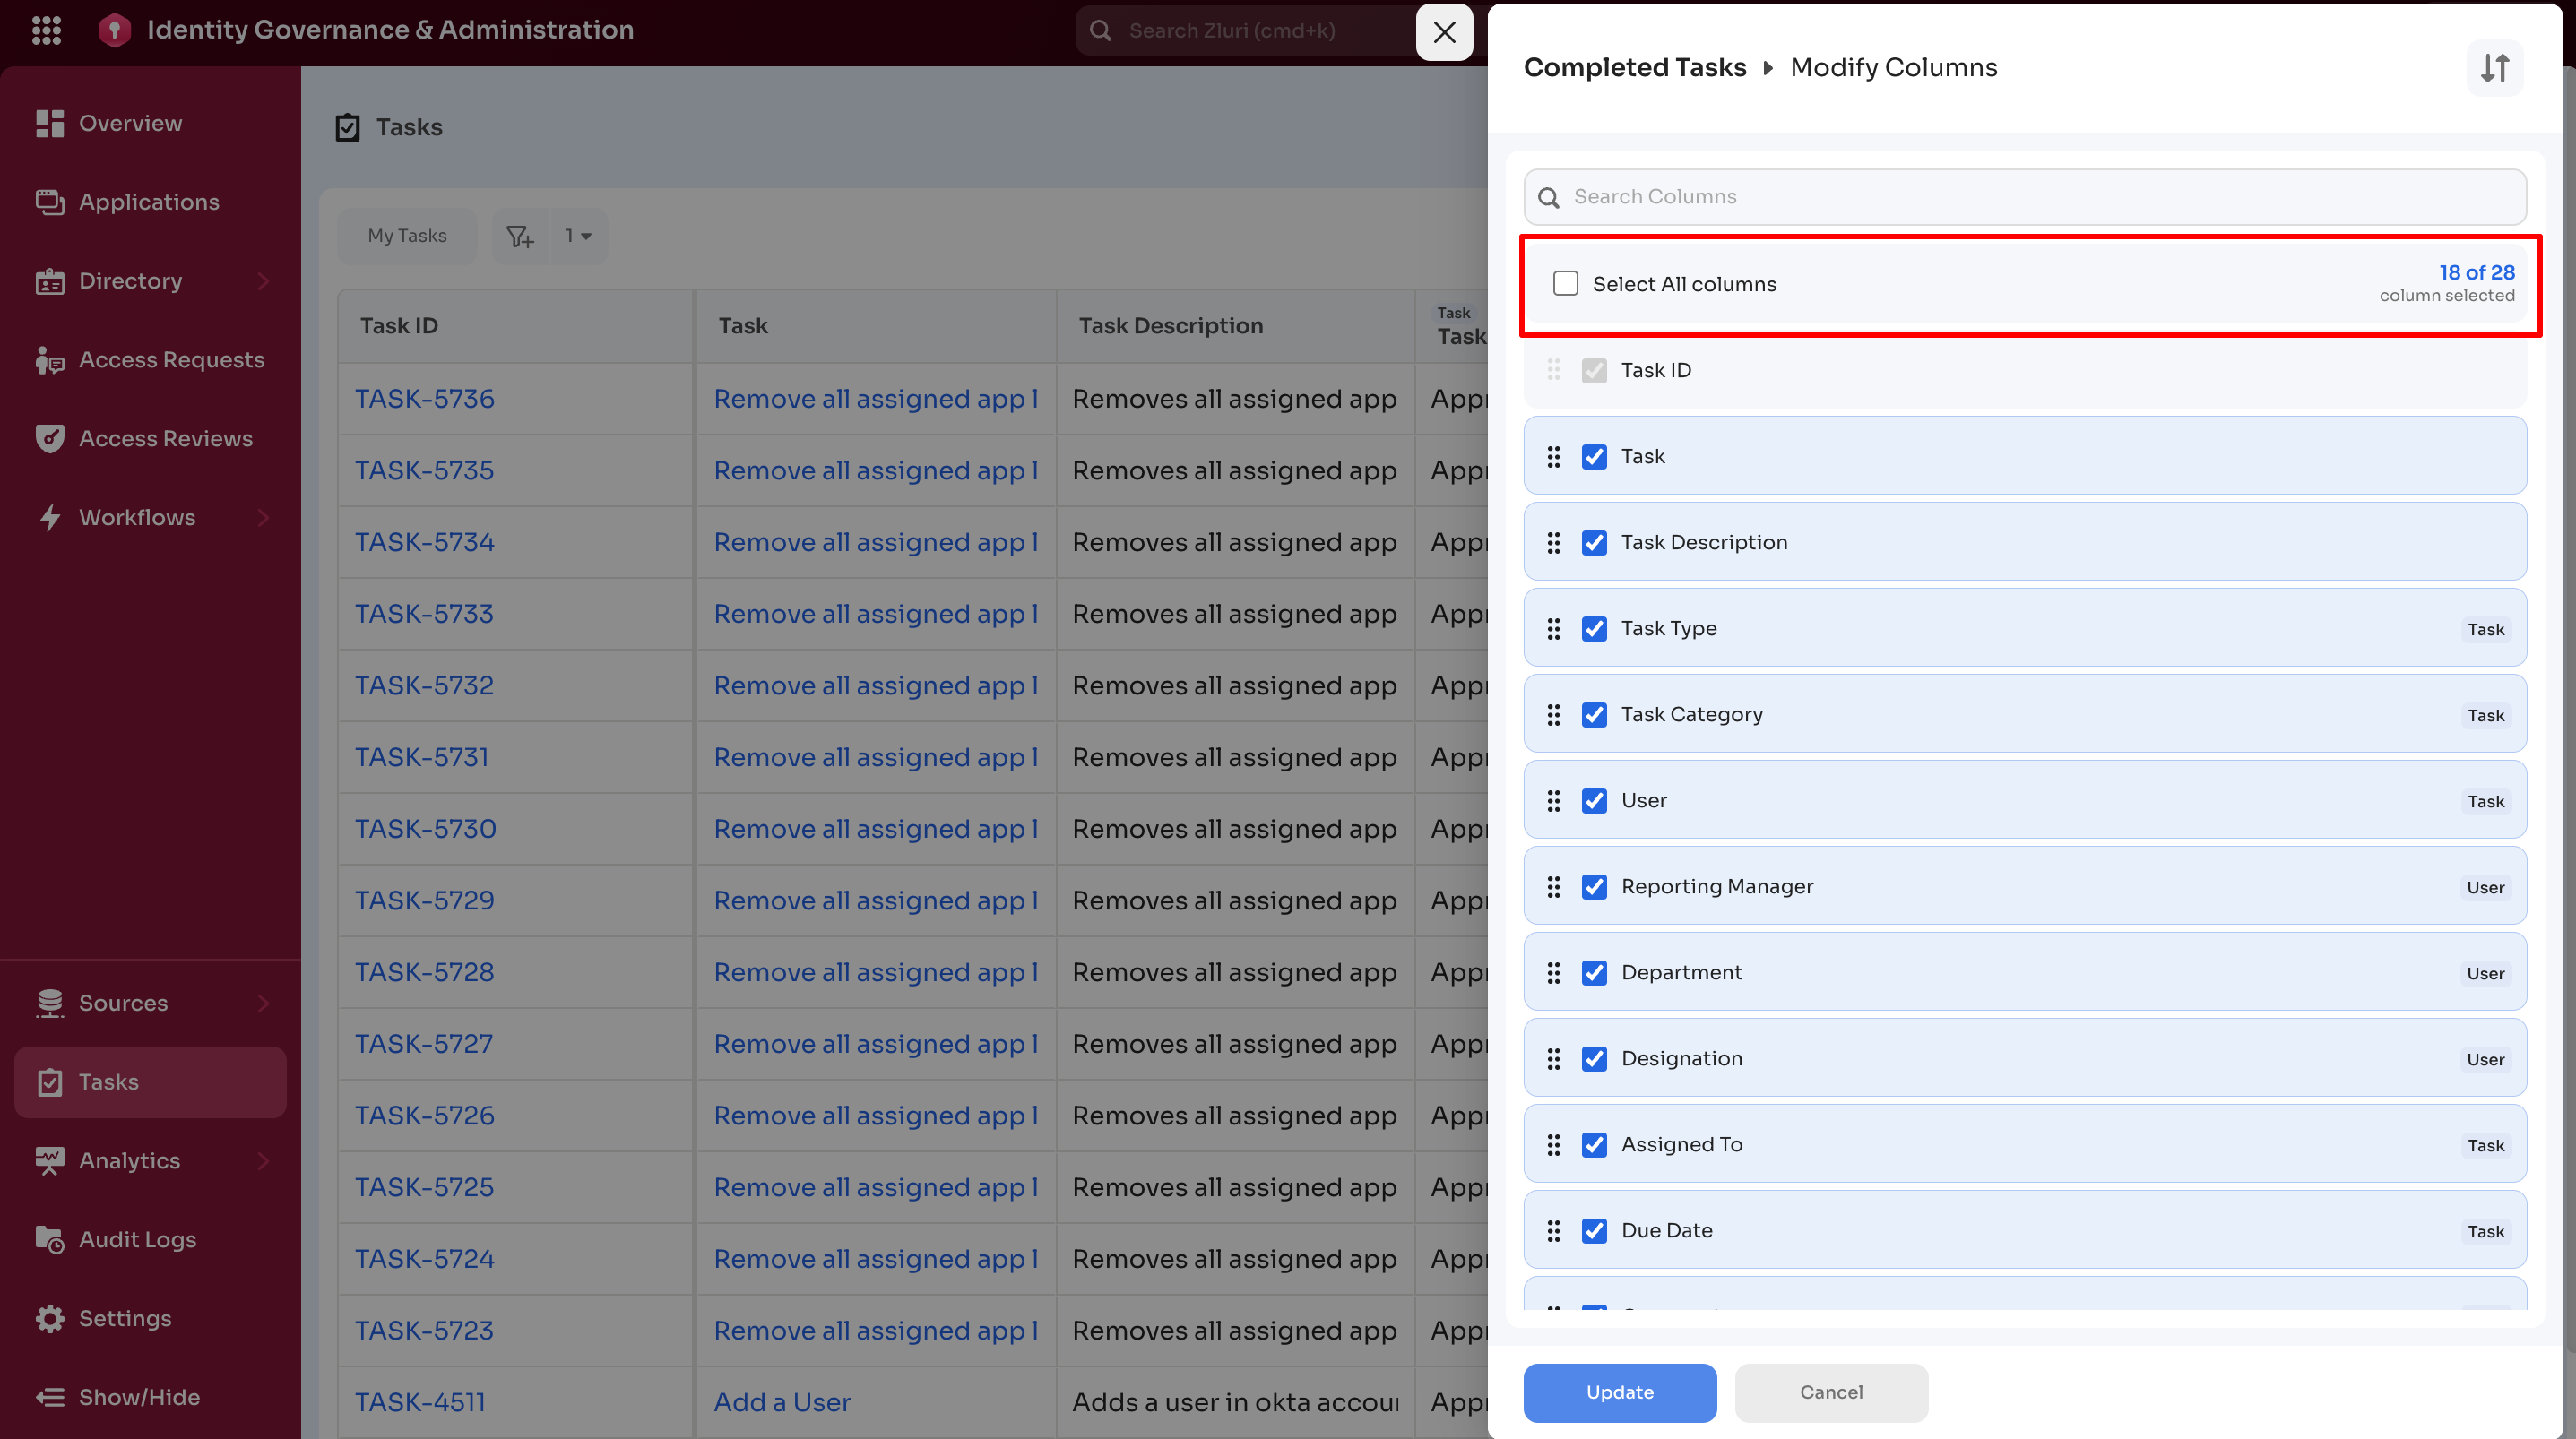
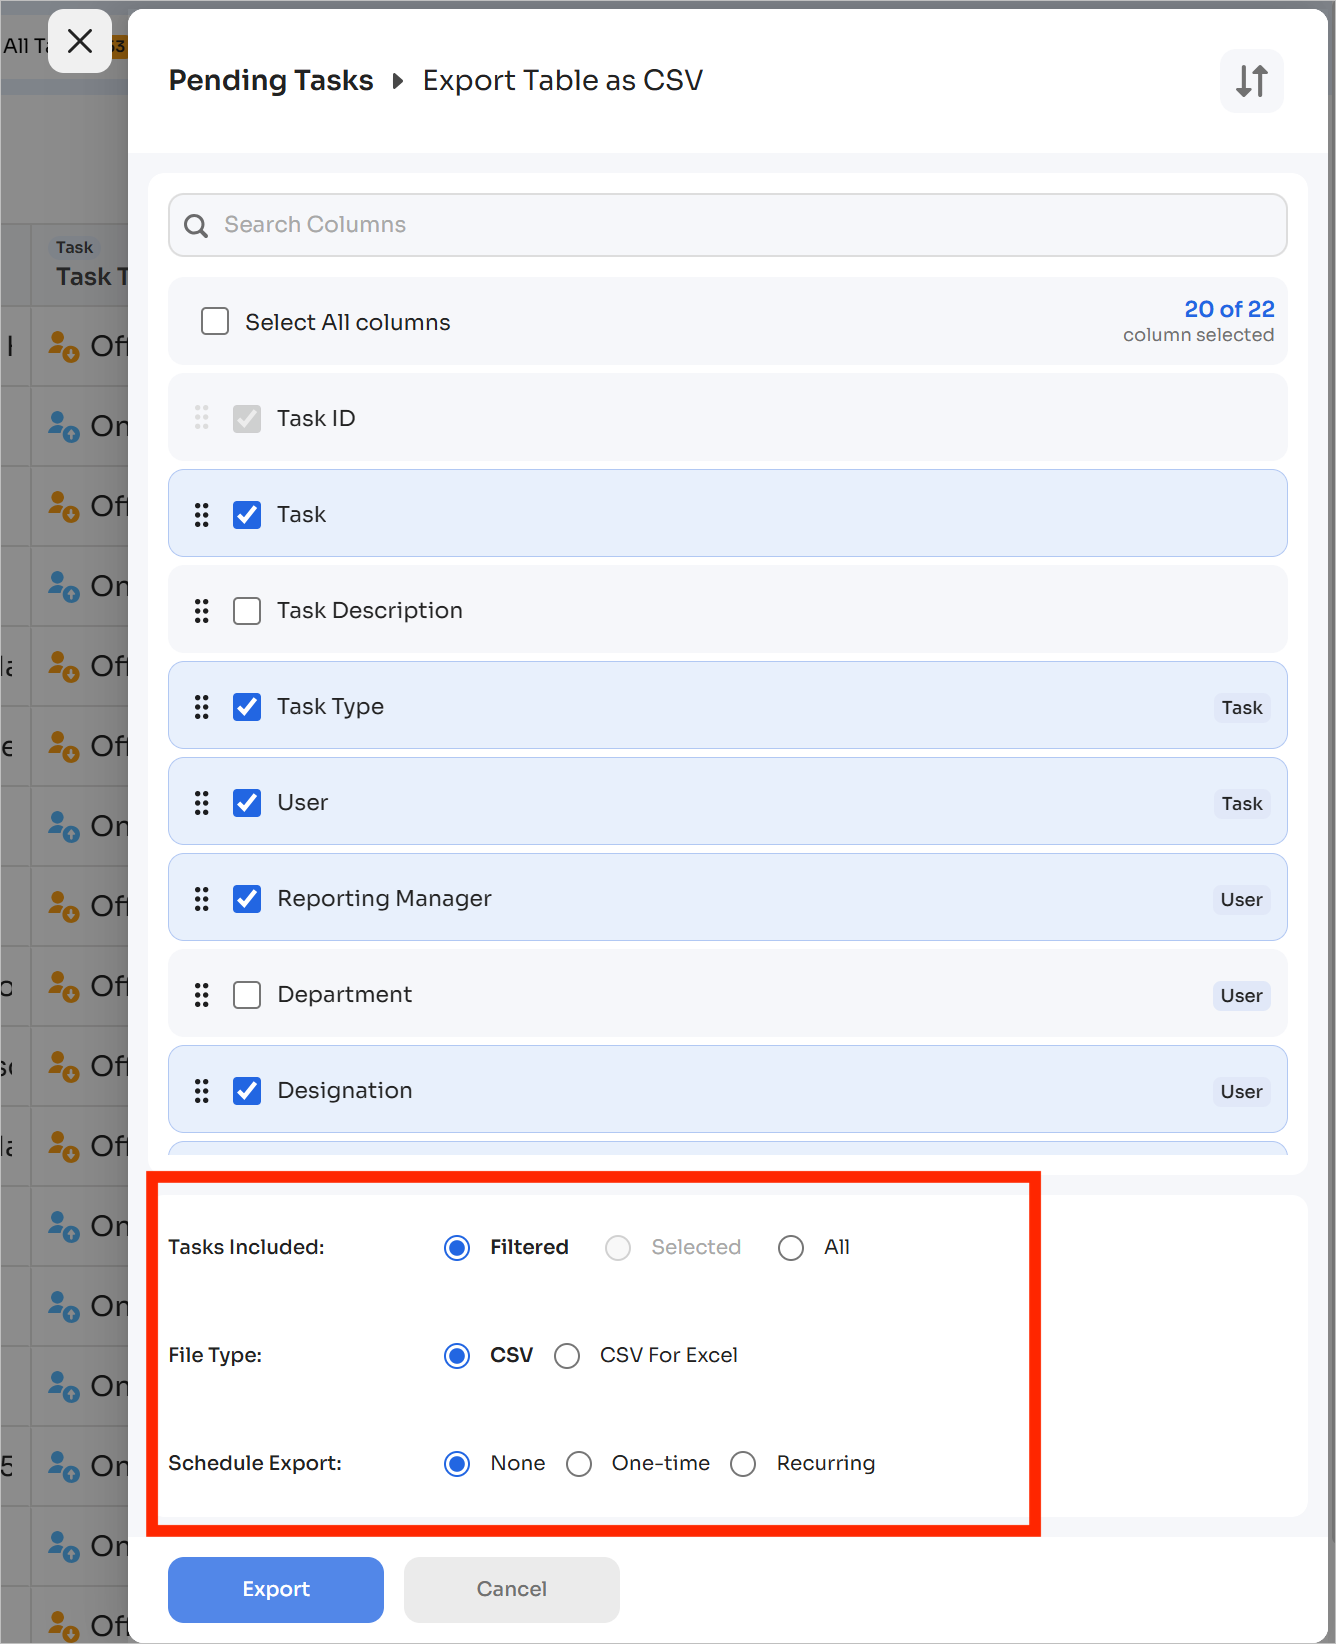
The side panel shown below opens after selecting Modify Columns.
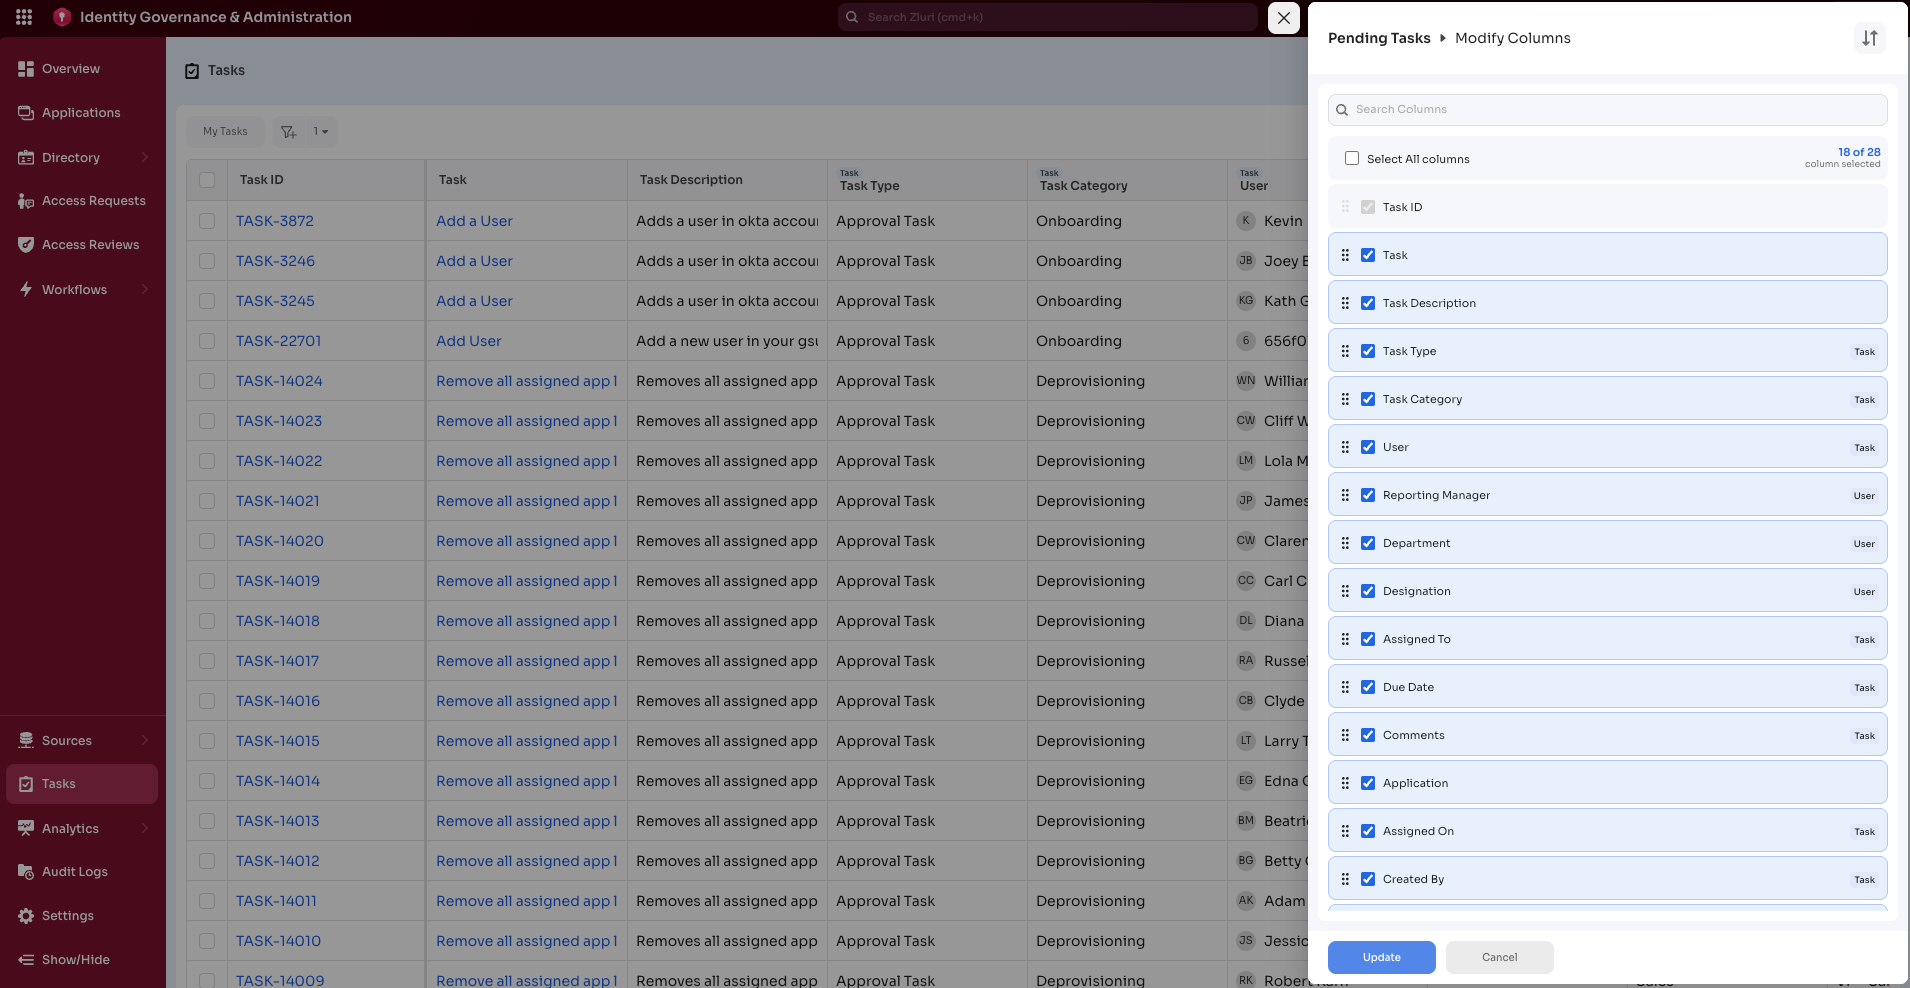
Columns can be selected, deselected, or reordered. Select Update to save changes.
The Task ID column cannot be removed or reordered.
Additional column options include:
-
Sort: Reset to default order or sort alphabetically
-
Search Columns: Search by column name
-
Select/Deselect All: Bulk selection control
-
Three-dot menu:
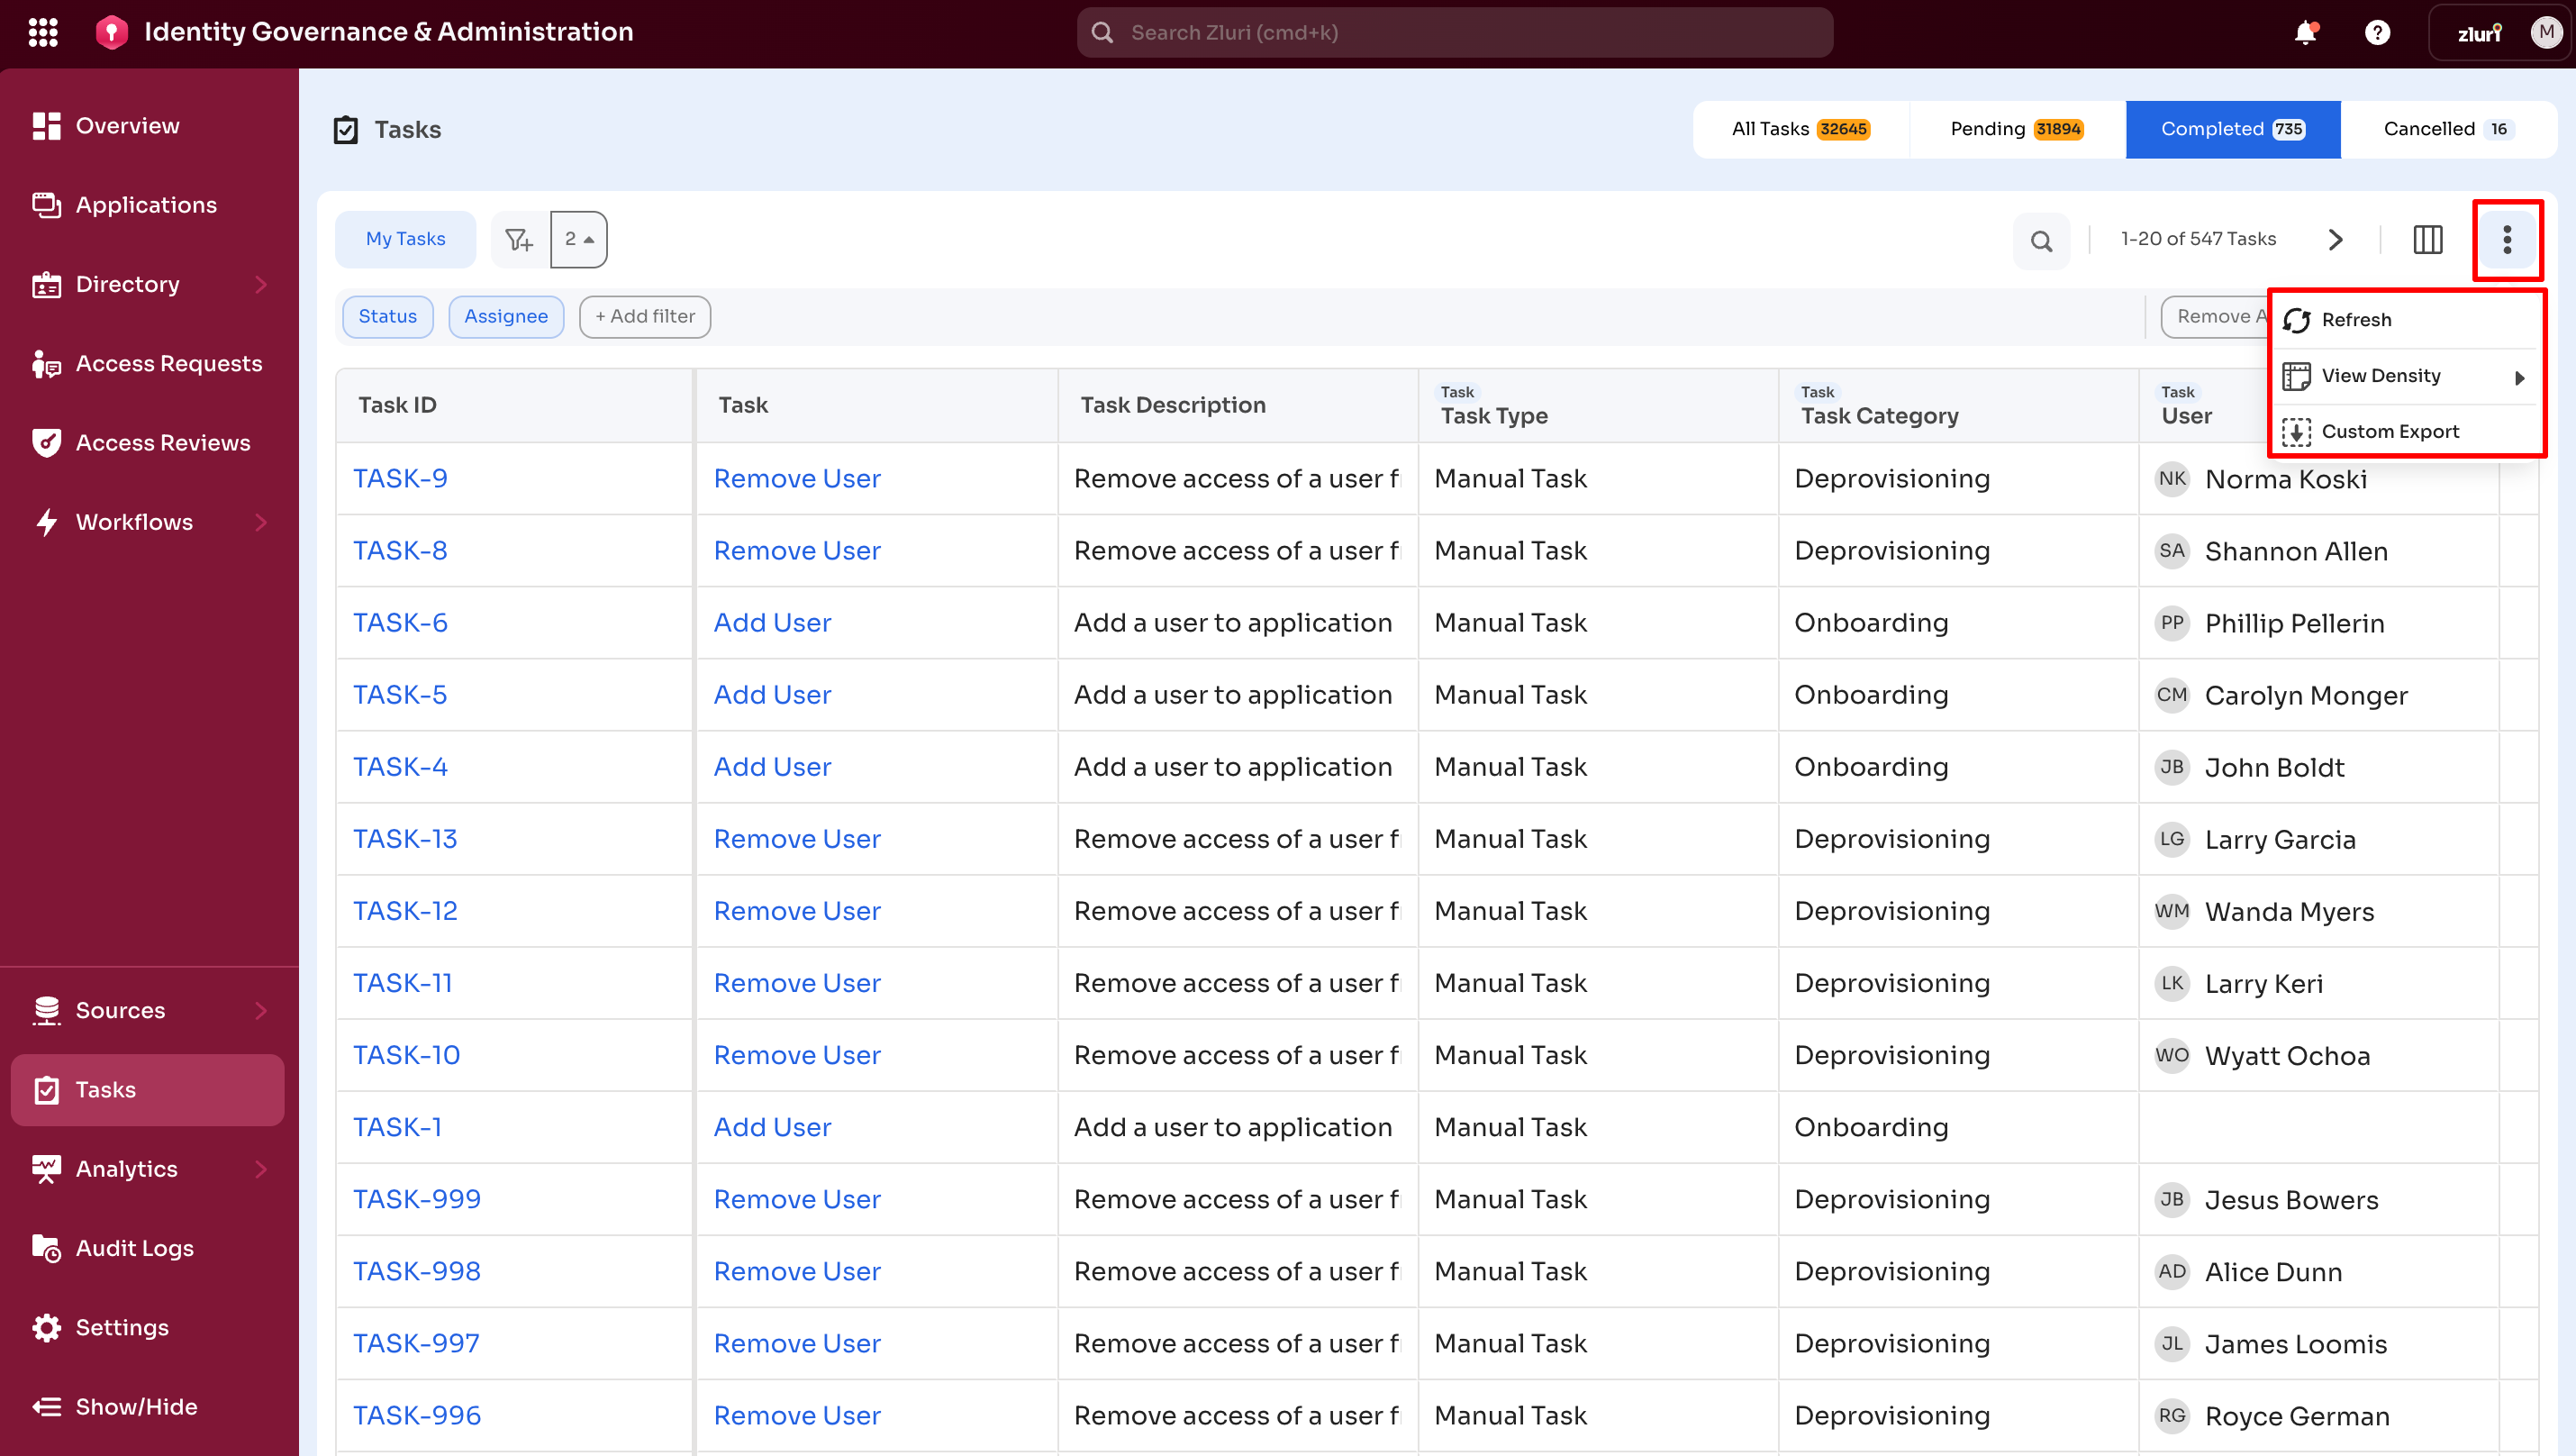
-
Refresh: Reloads the dashboard
-
View Density:
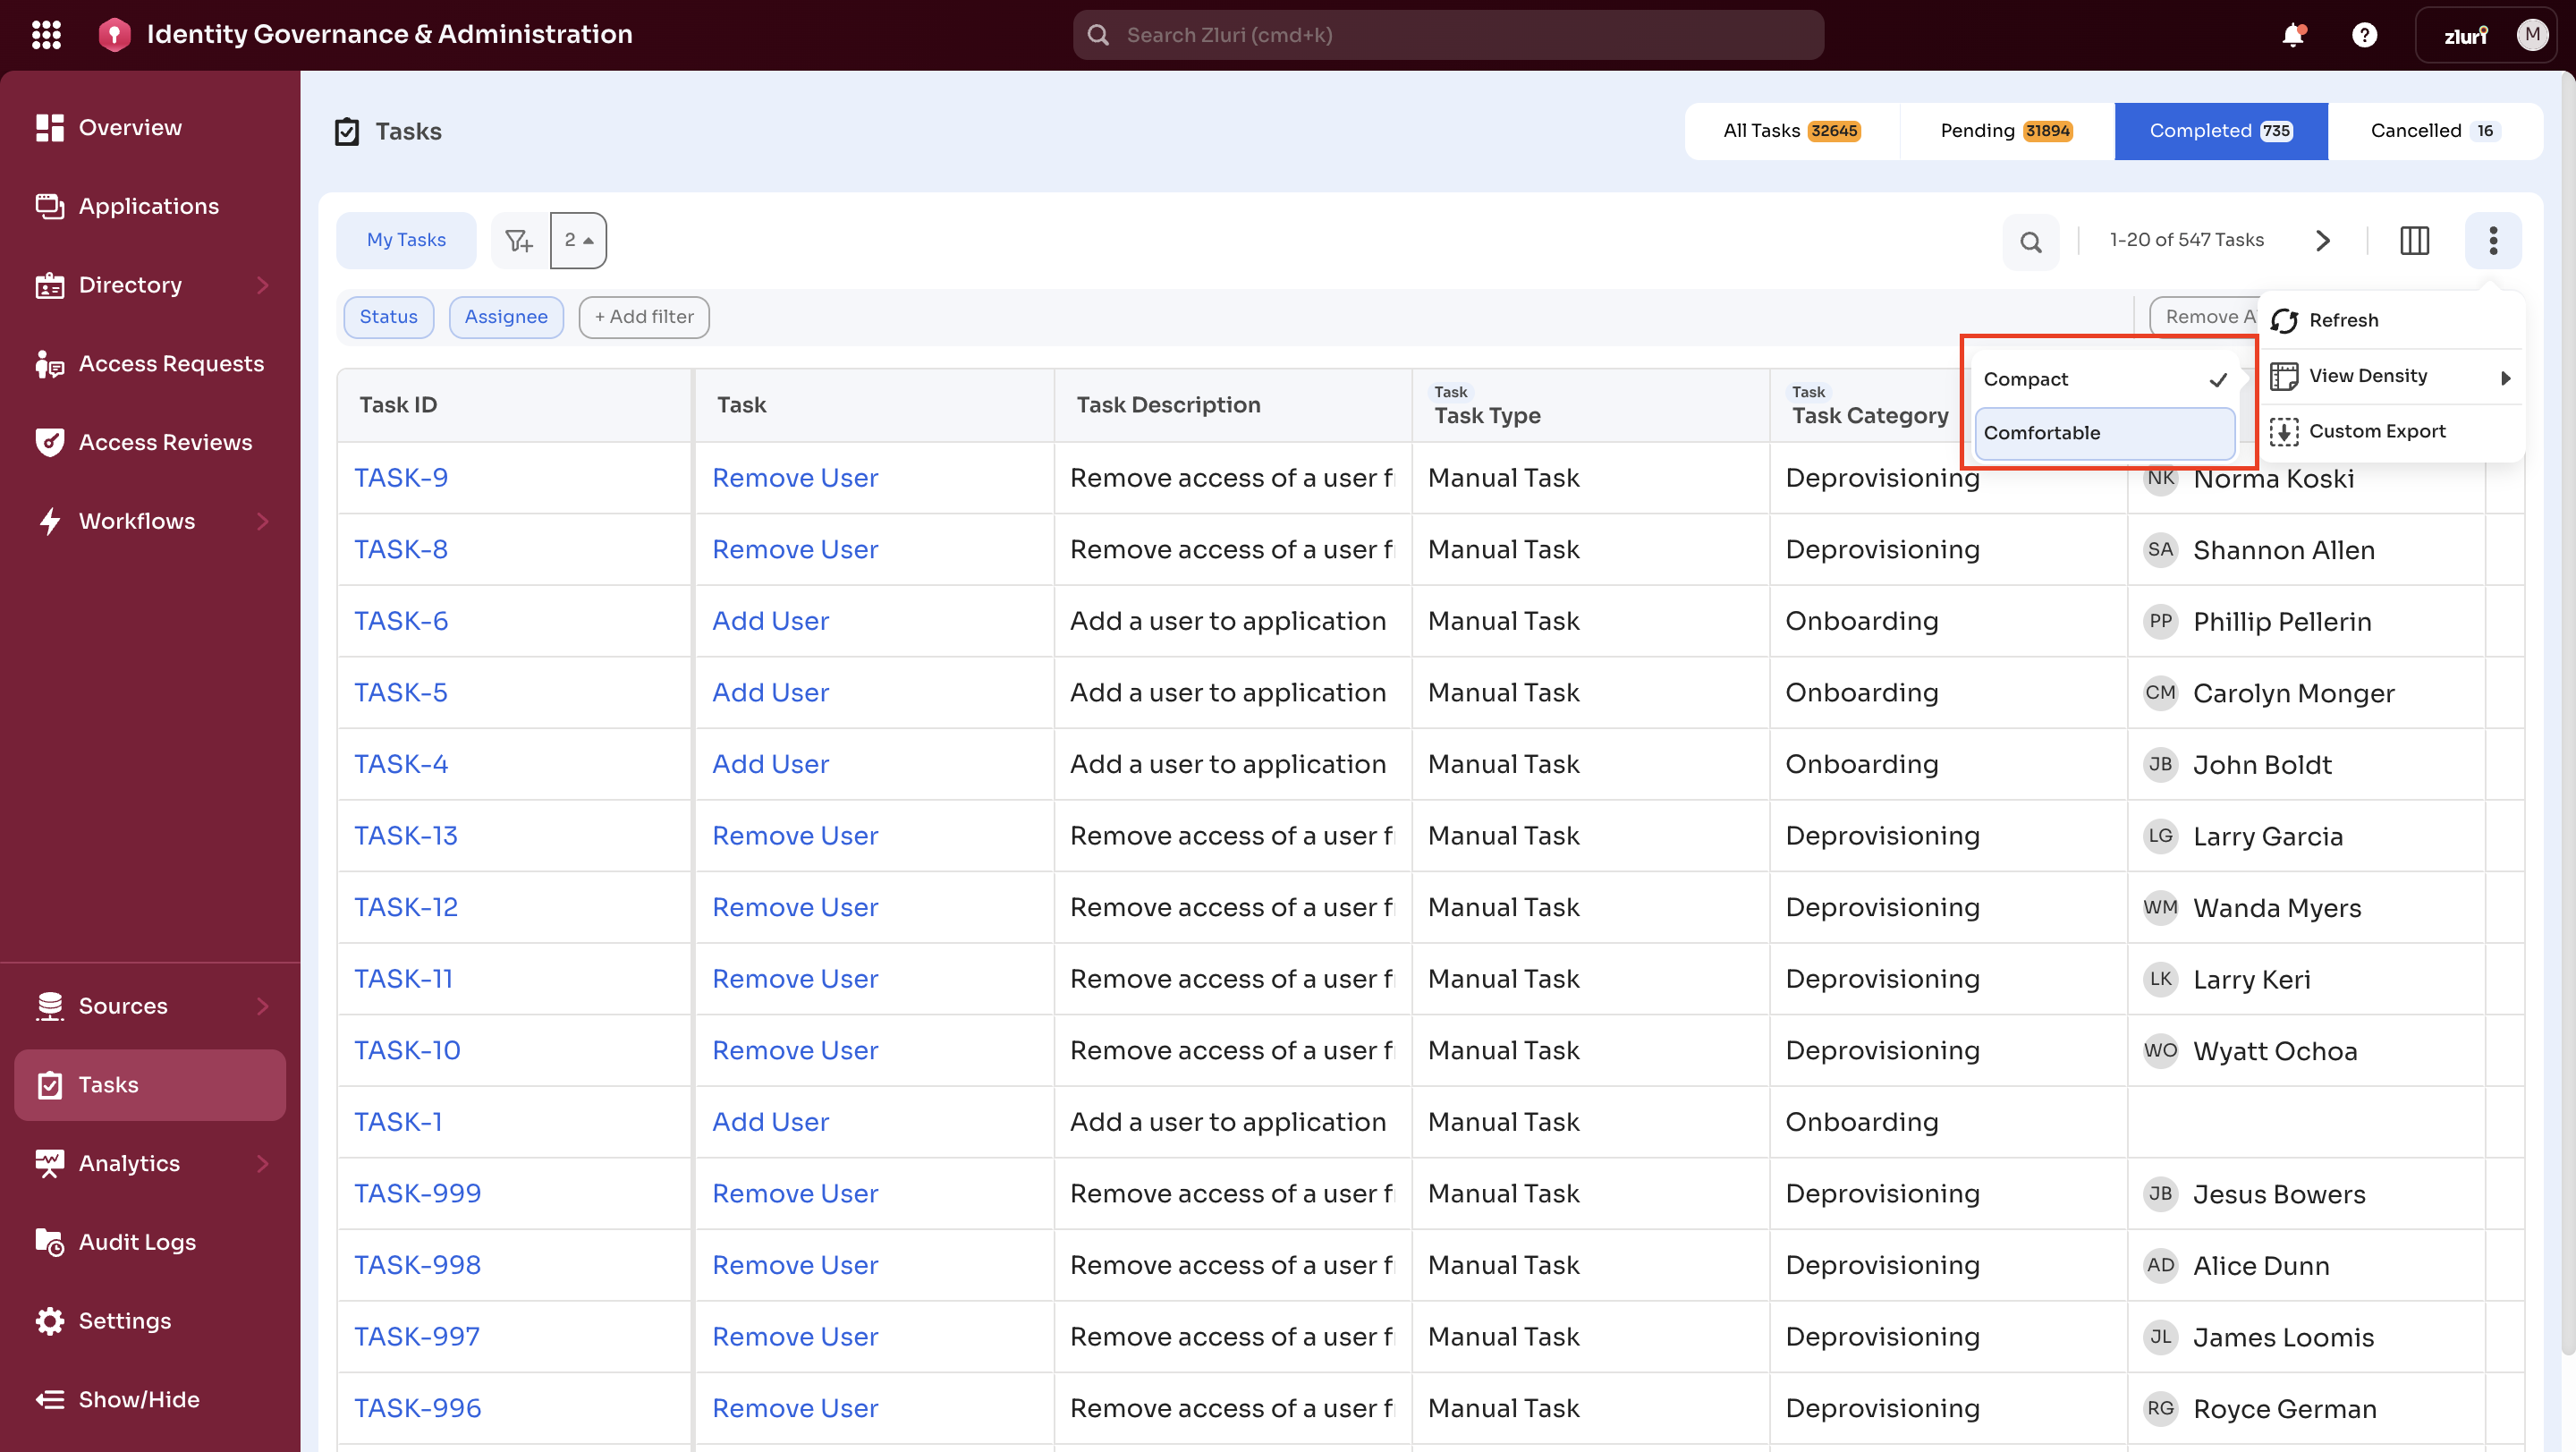
- Compact: Condensed layout
- Comfortable: Expanded layout
-
Custom Export: Exports task data as CSV or Excel-formatted CSV.
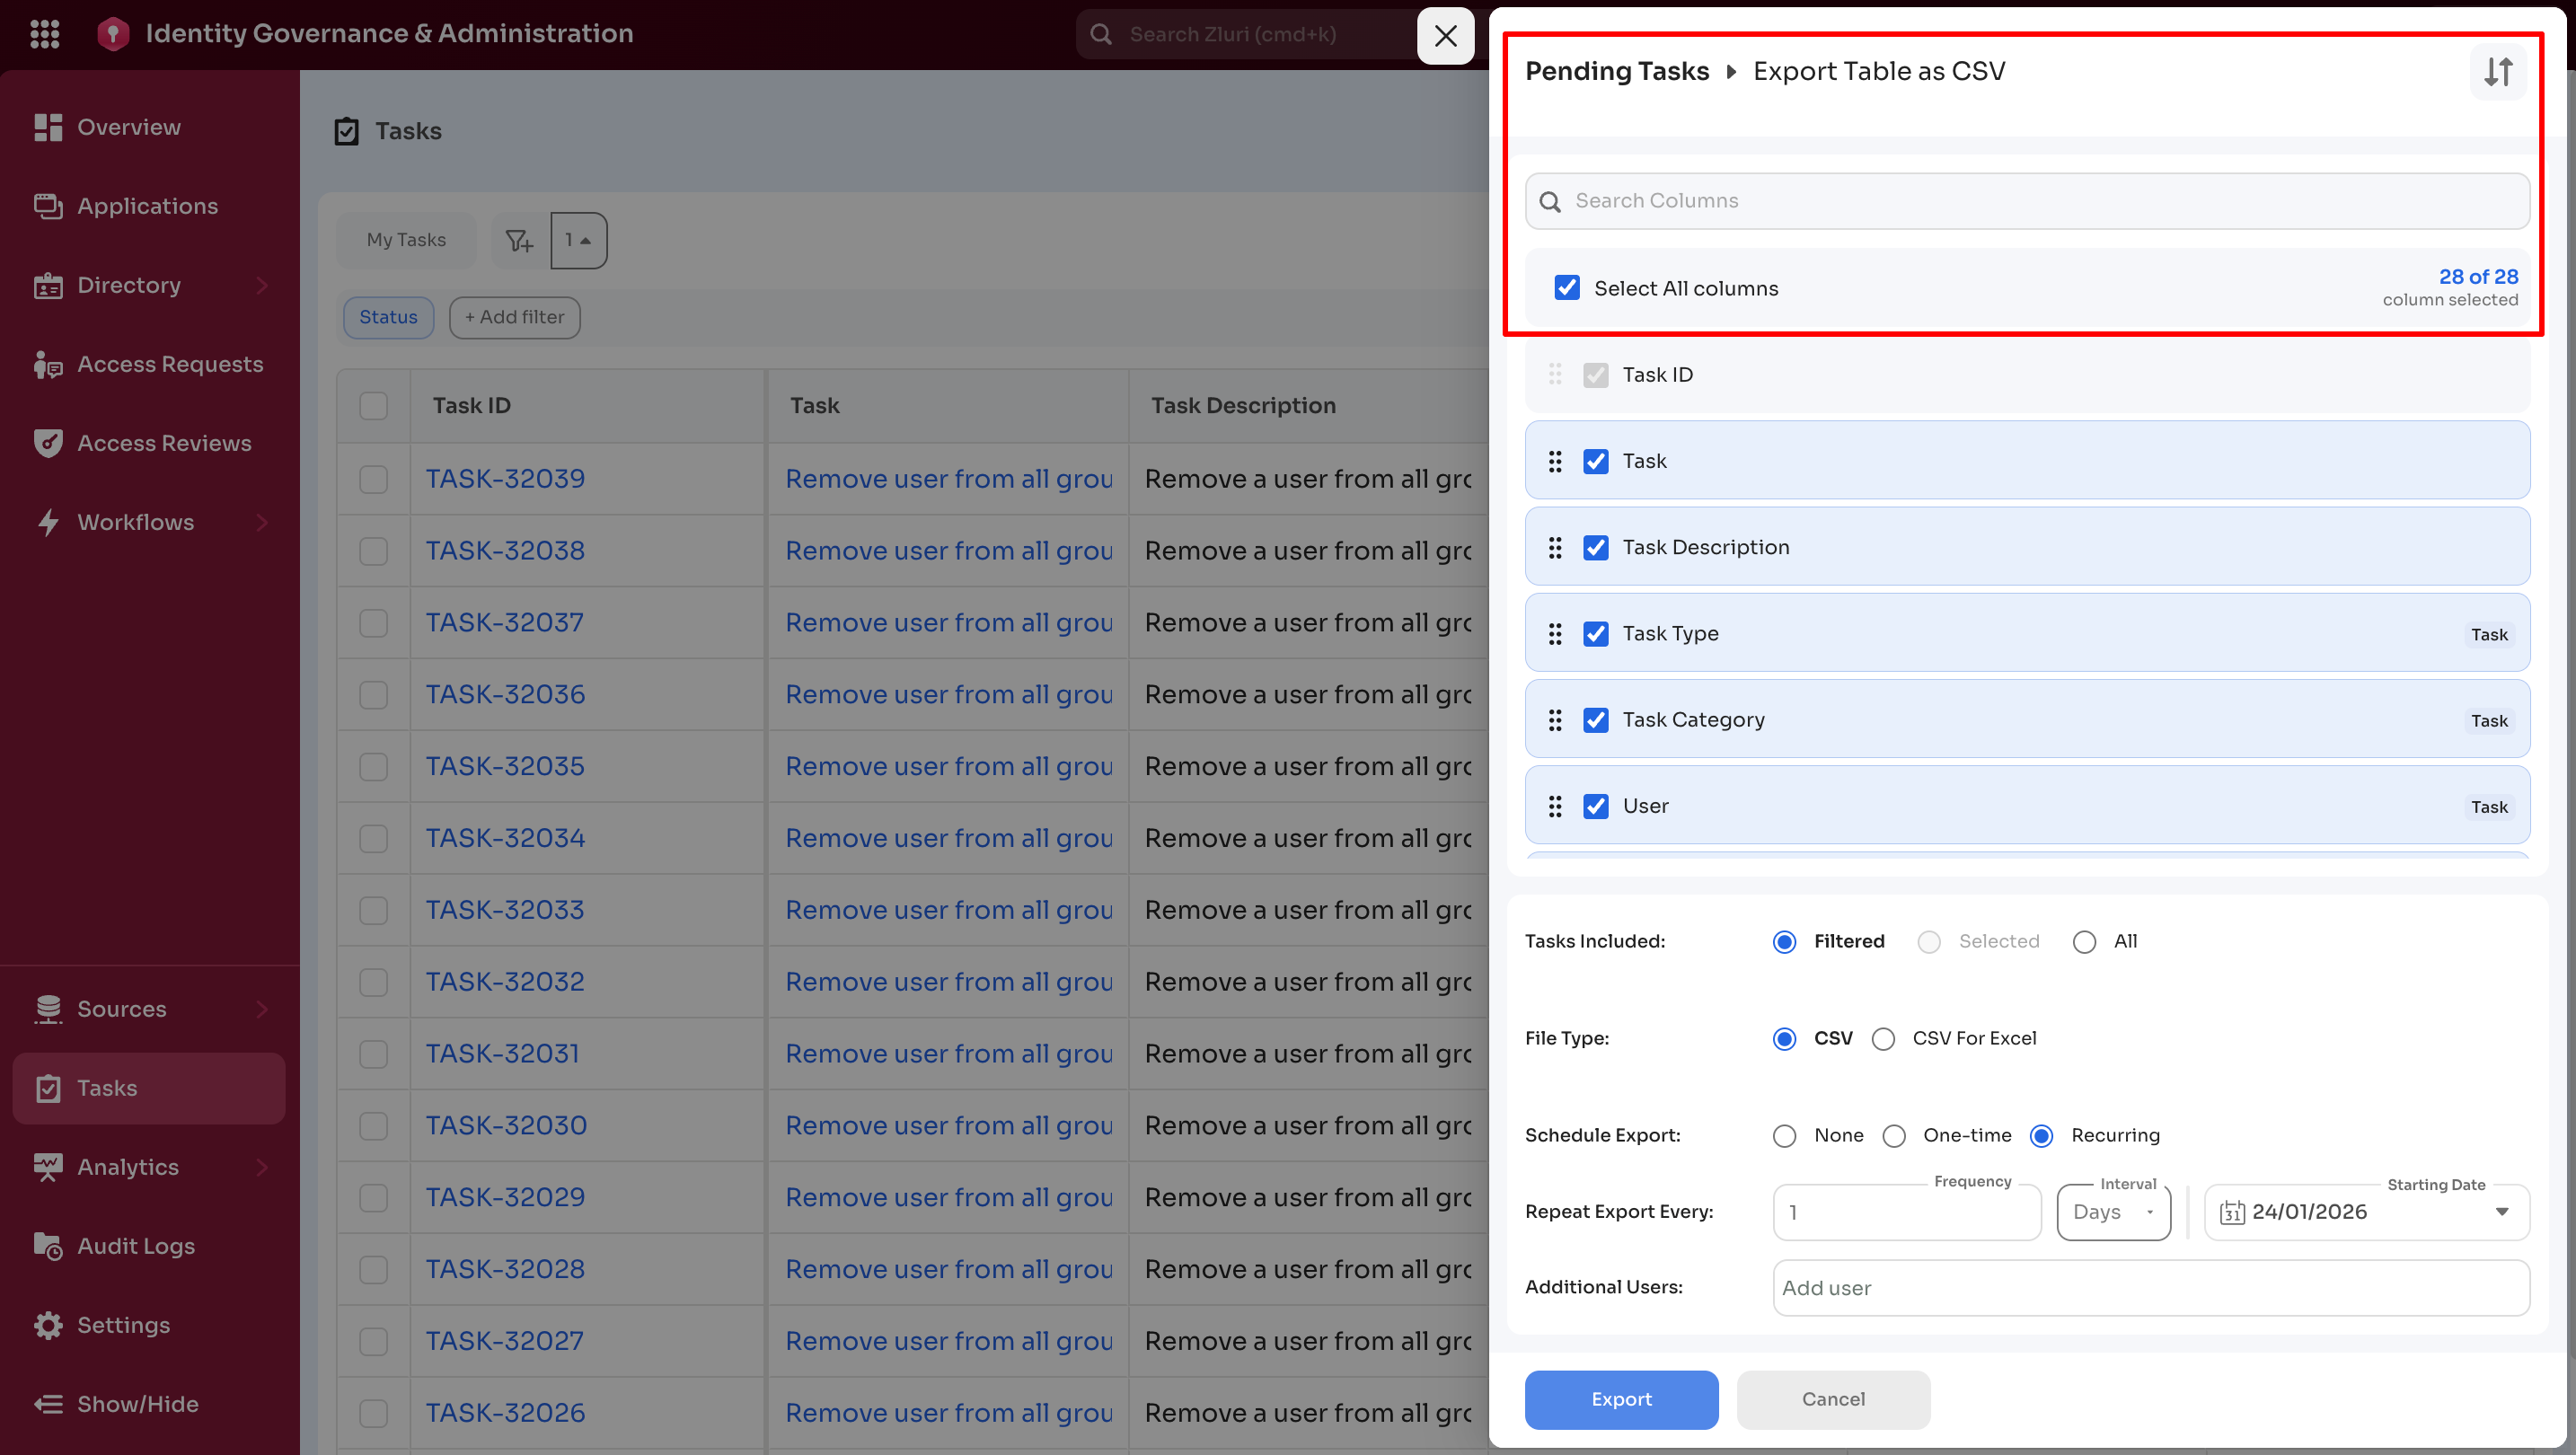
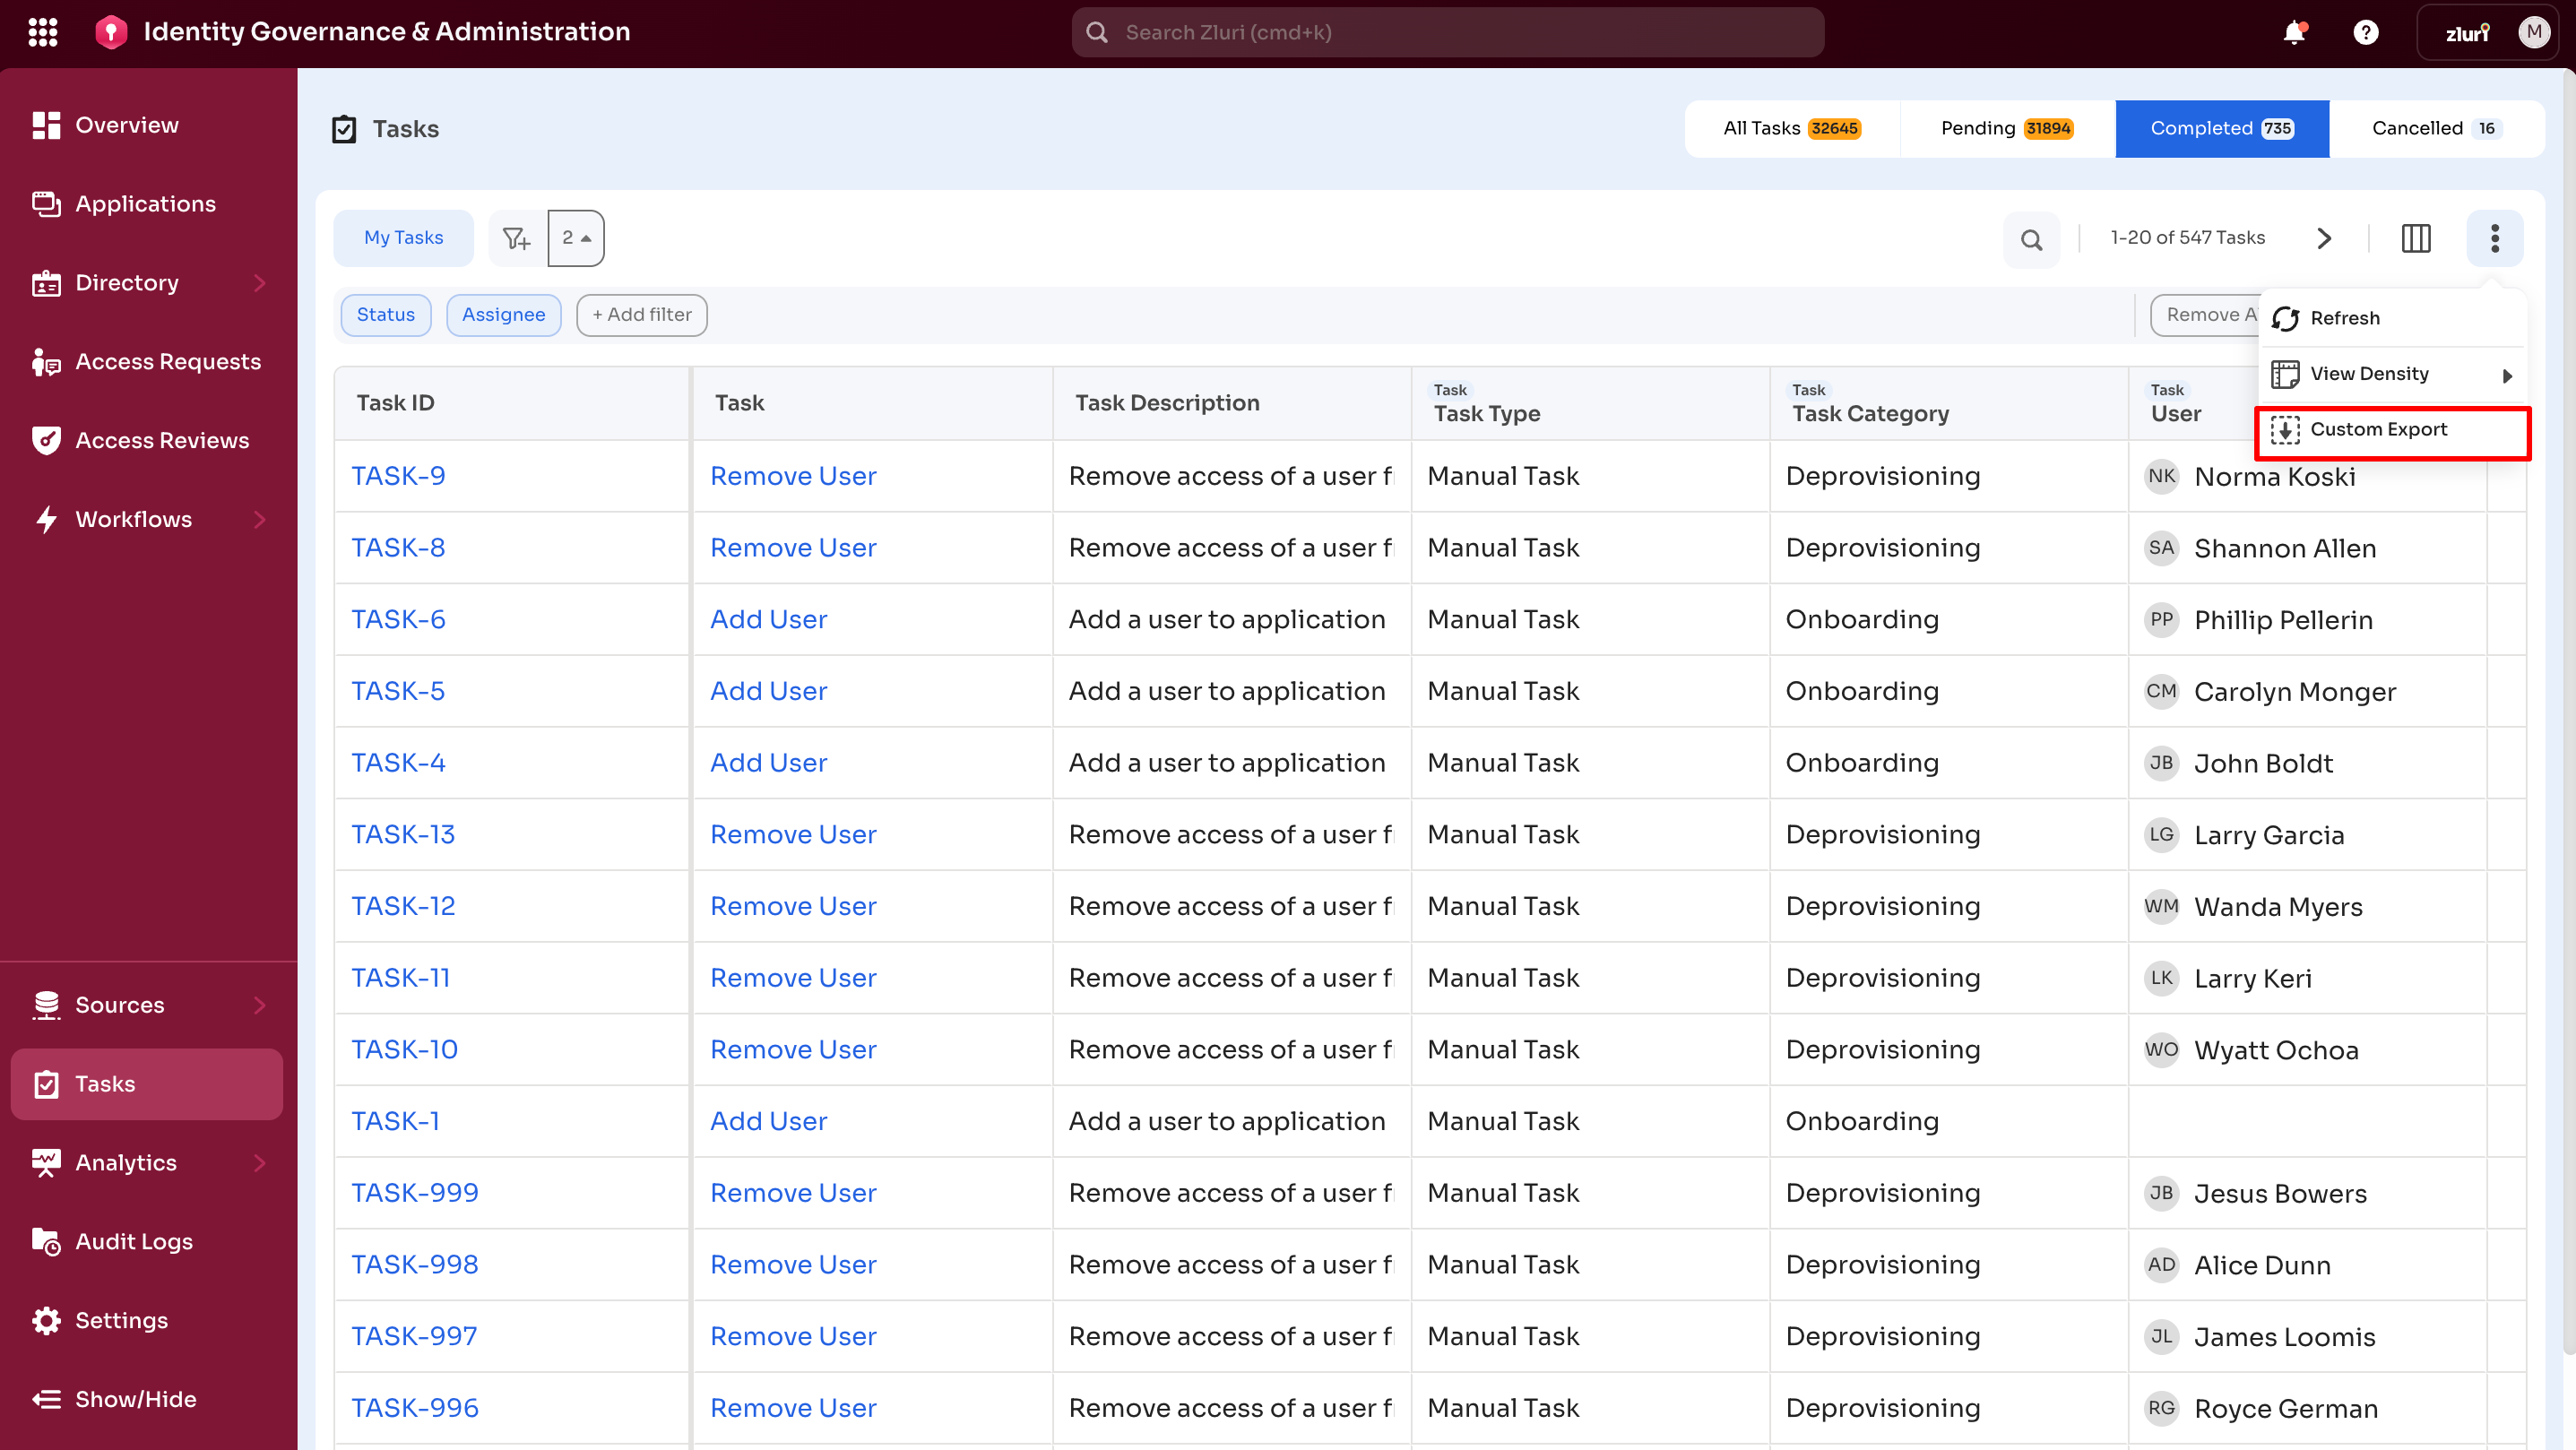
Custom Exports
Custom Export enables task data export in CSV or Excel-compatible formats.
Steps
-
Select the three-dot menu in the top-right corner
-
Select Custom Export
-
Select tasks, file type, and scheduling options as needed. Columns can be individually selected.
-
Select Export to proceed.
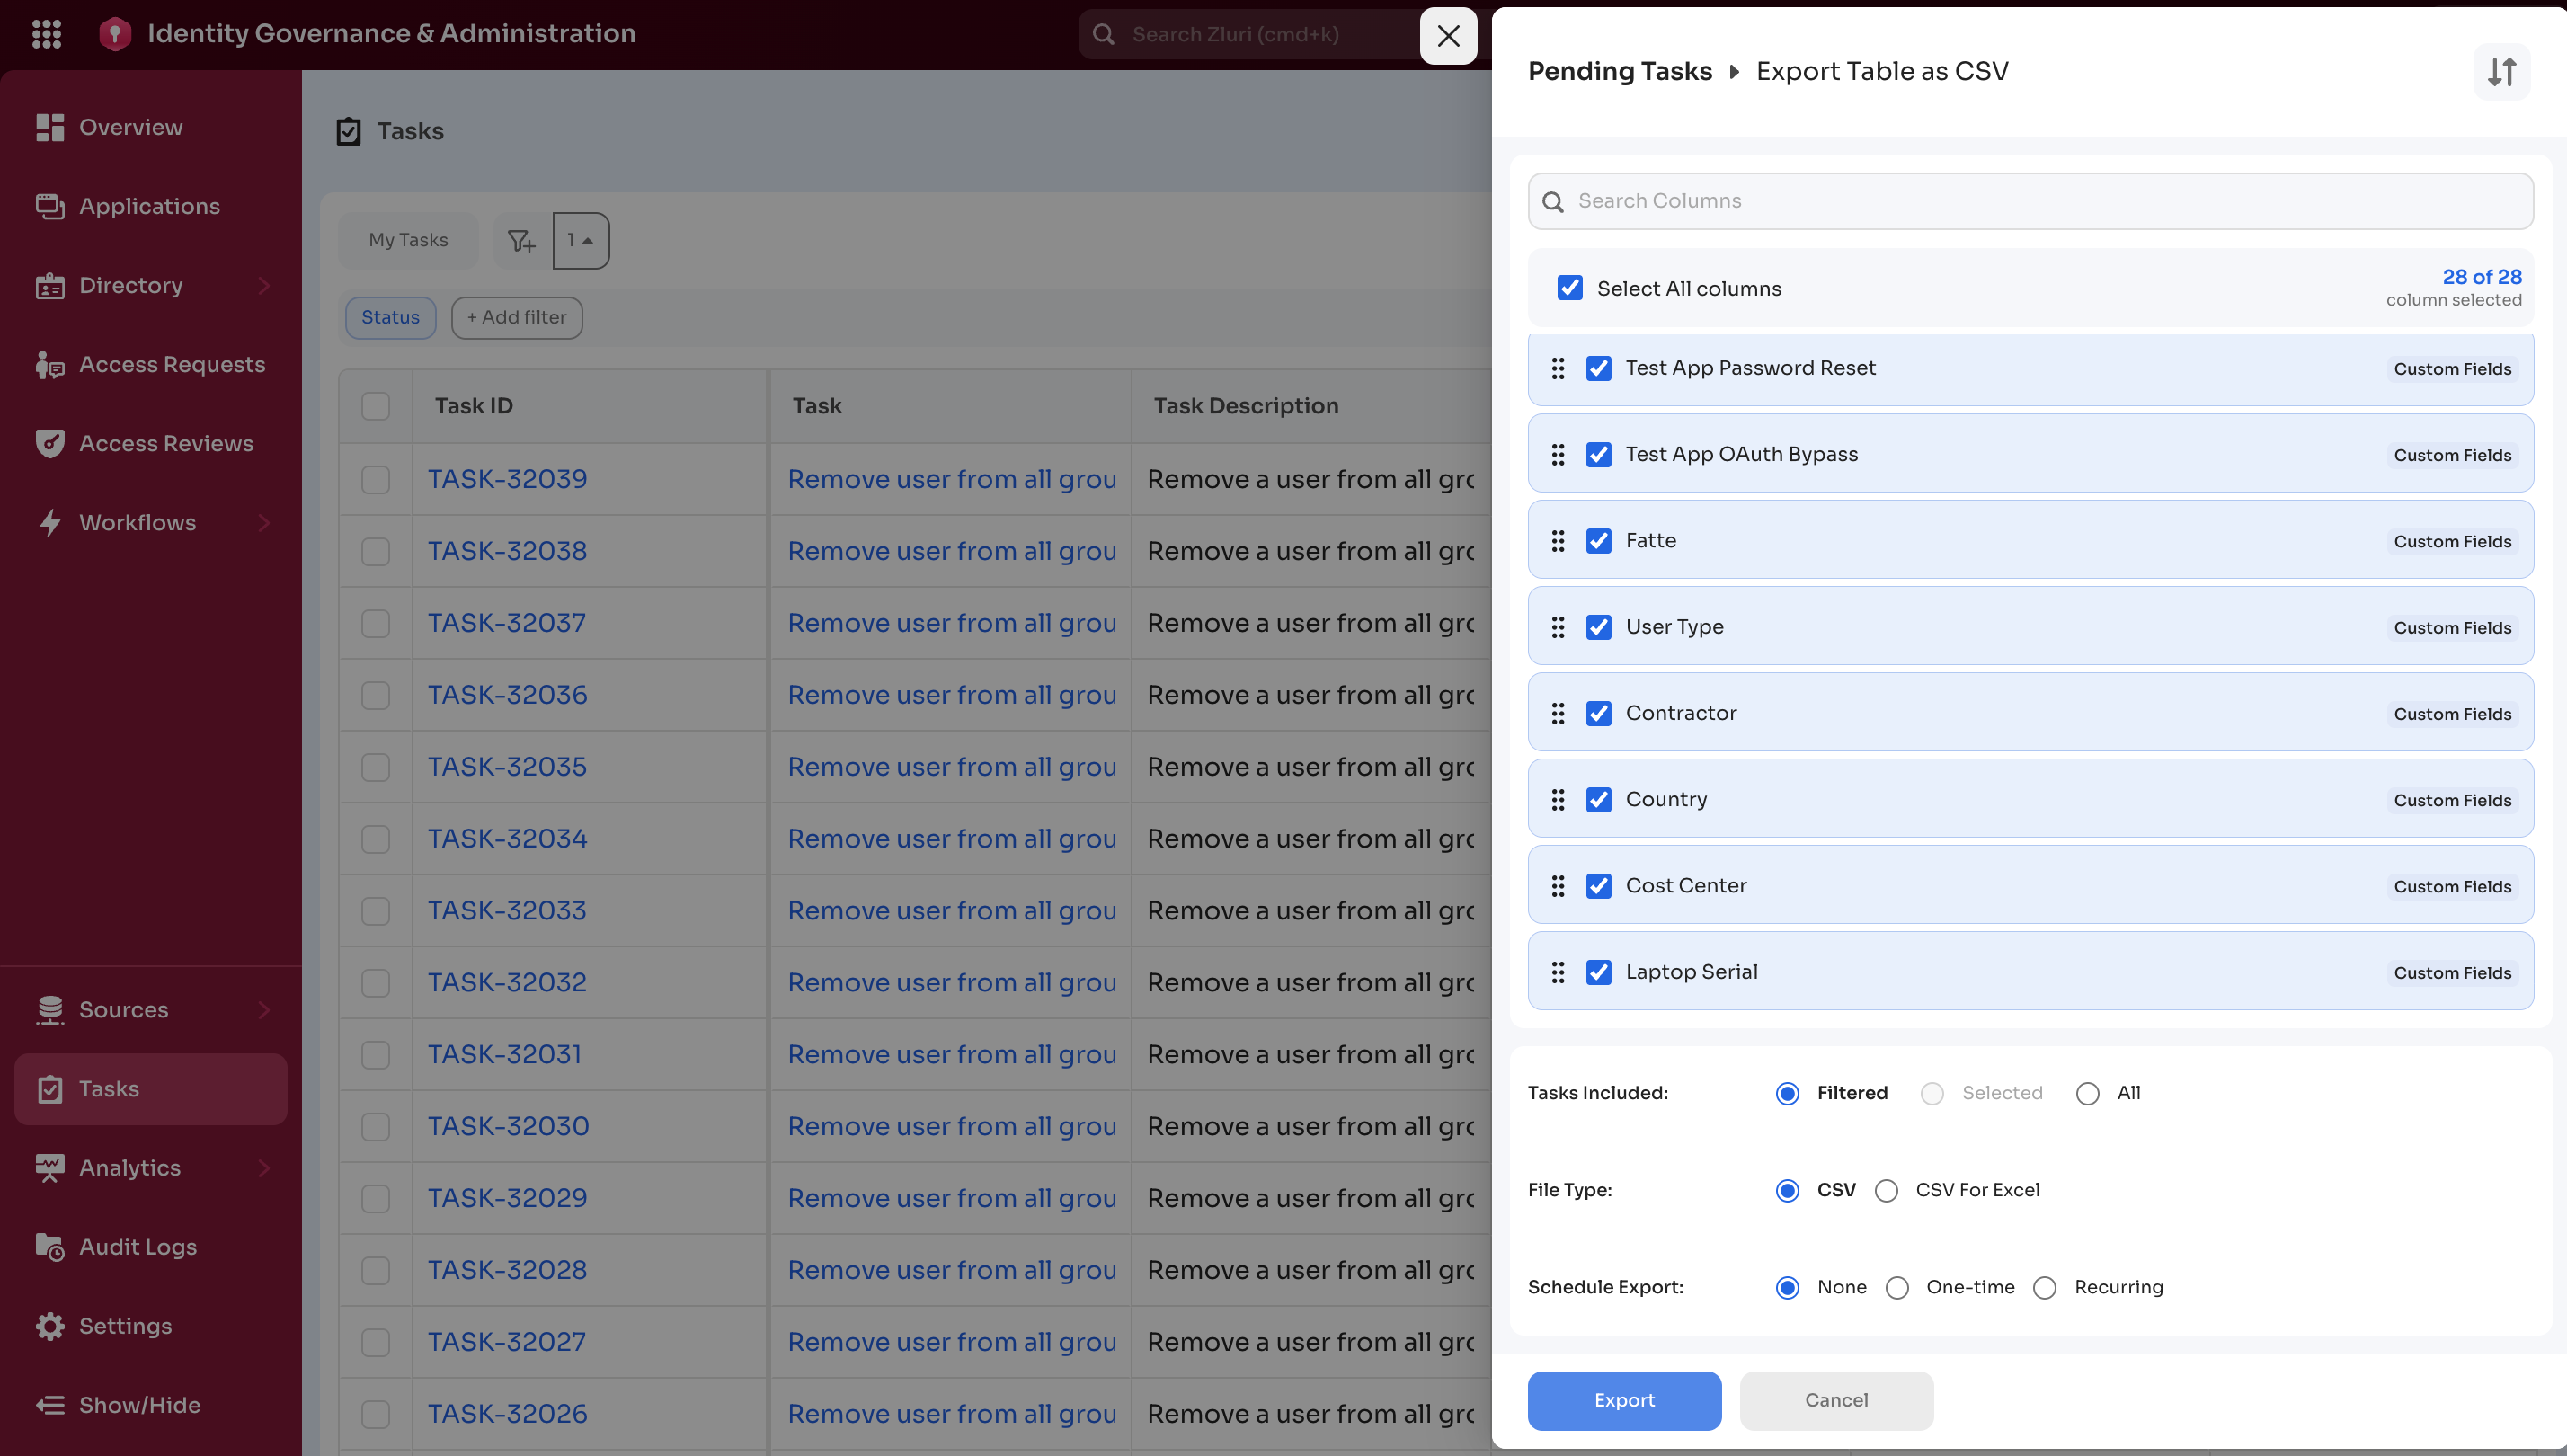
Export configuration options
-
Tasks Included
-
Filtered: Exports tasks matching current filters
-
Selected: Exports manually selected tasks
(Disabled while filters are active)
-
All: Exports all tasks
-
-
File Type
- CSV
- CSV for Excel
-
Schedule Export
-
None: Immediate export
-
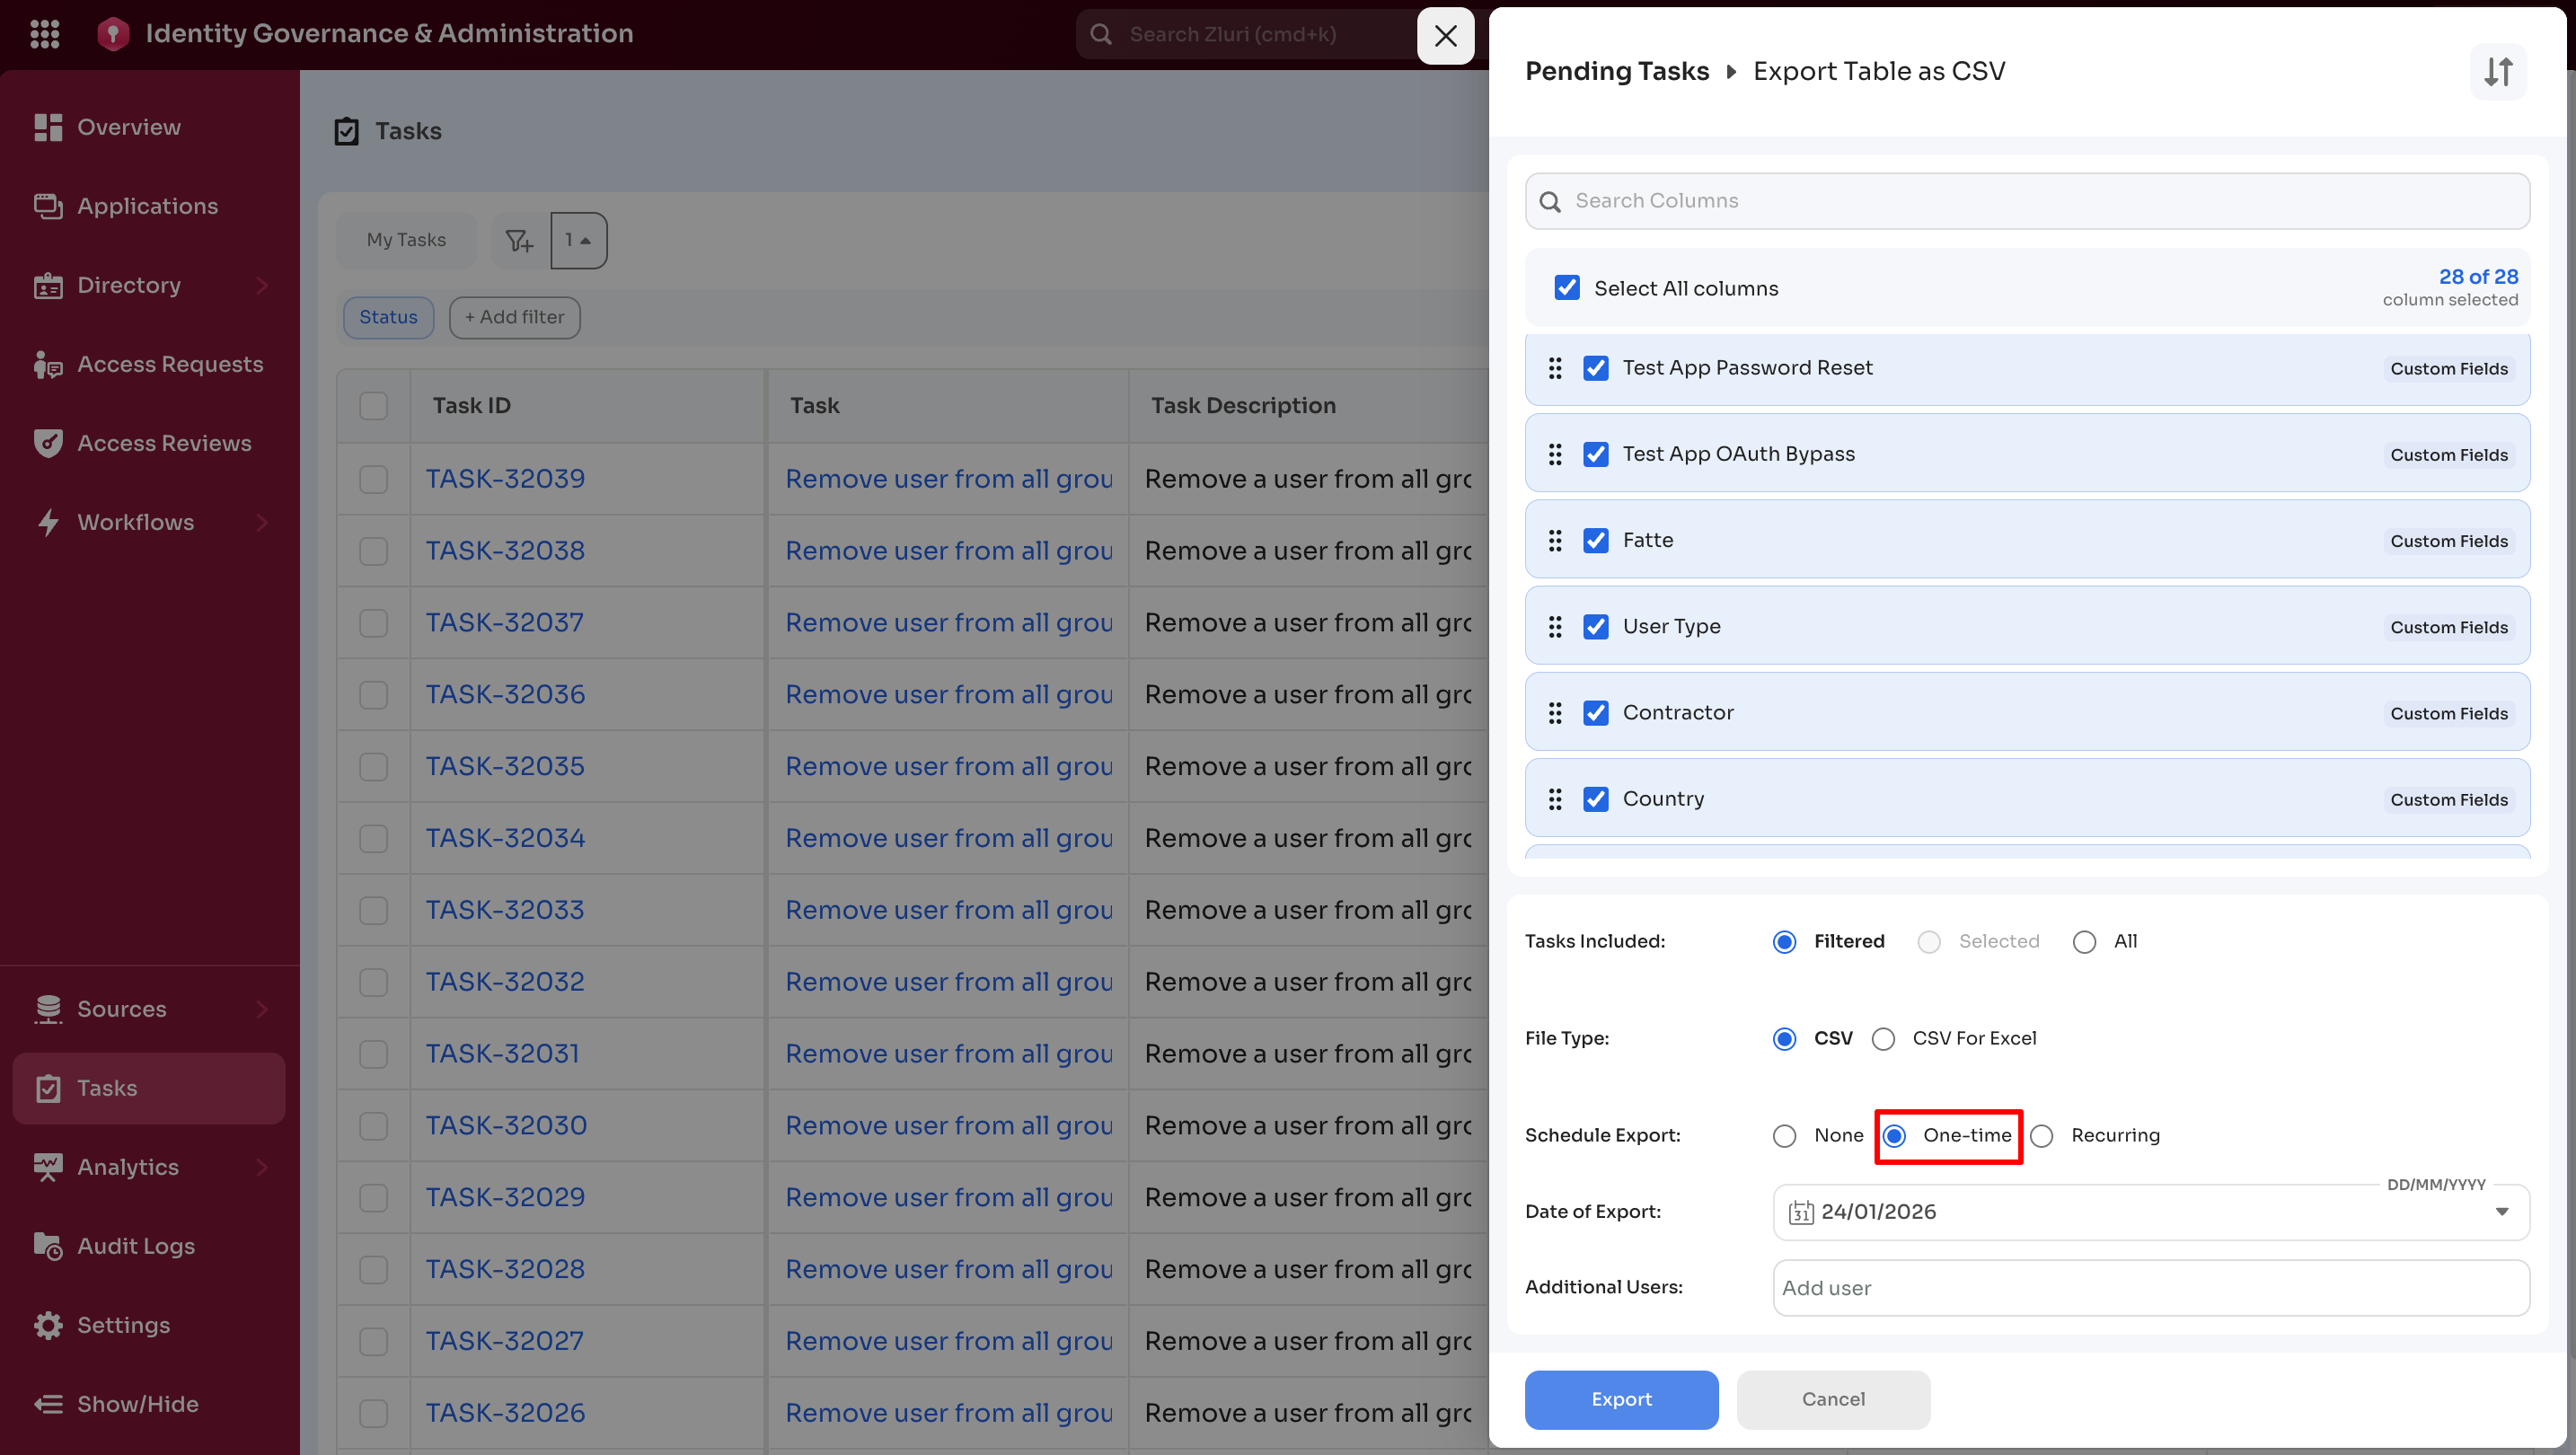
One-time: Download your custom export with one-time scheduling applied. Once you choose this option, you will have the option to schedule your export.
- Date of Export: ****Select the date to schedule your export in the format DD/MM/YYYY.
- Additional Users: Search for more users who will get this custom export on the scheduled date.
-
Recurring: Automated exports on a defined schedule (daily, weekly, monthly, etc.).
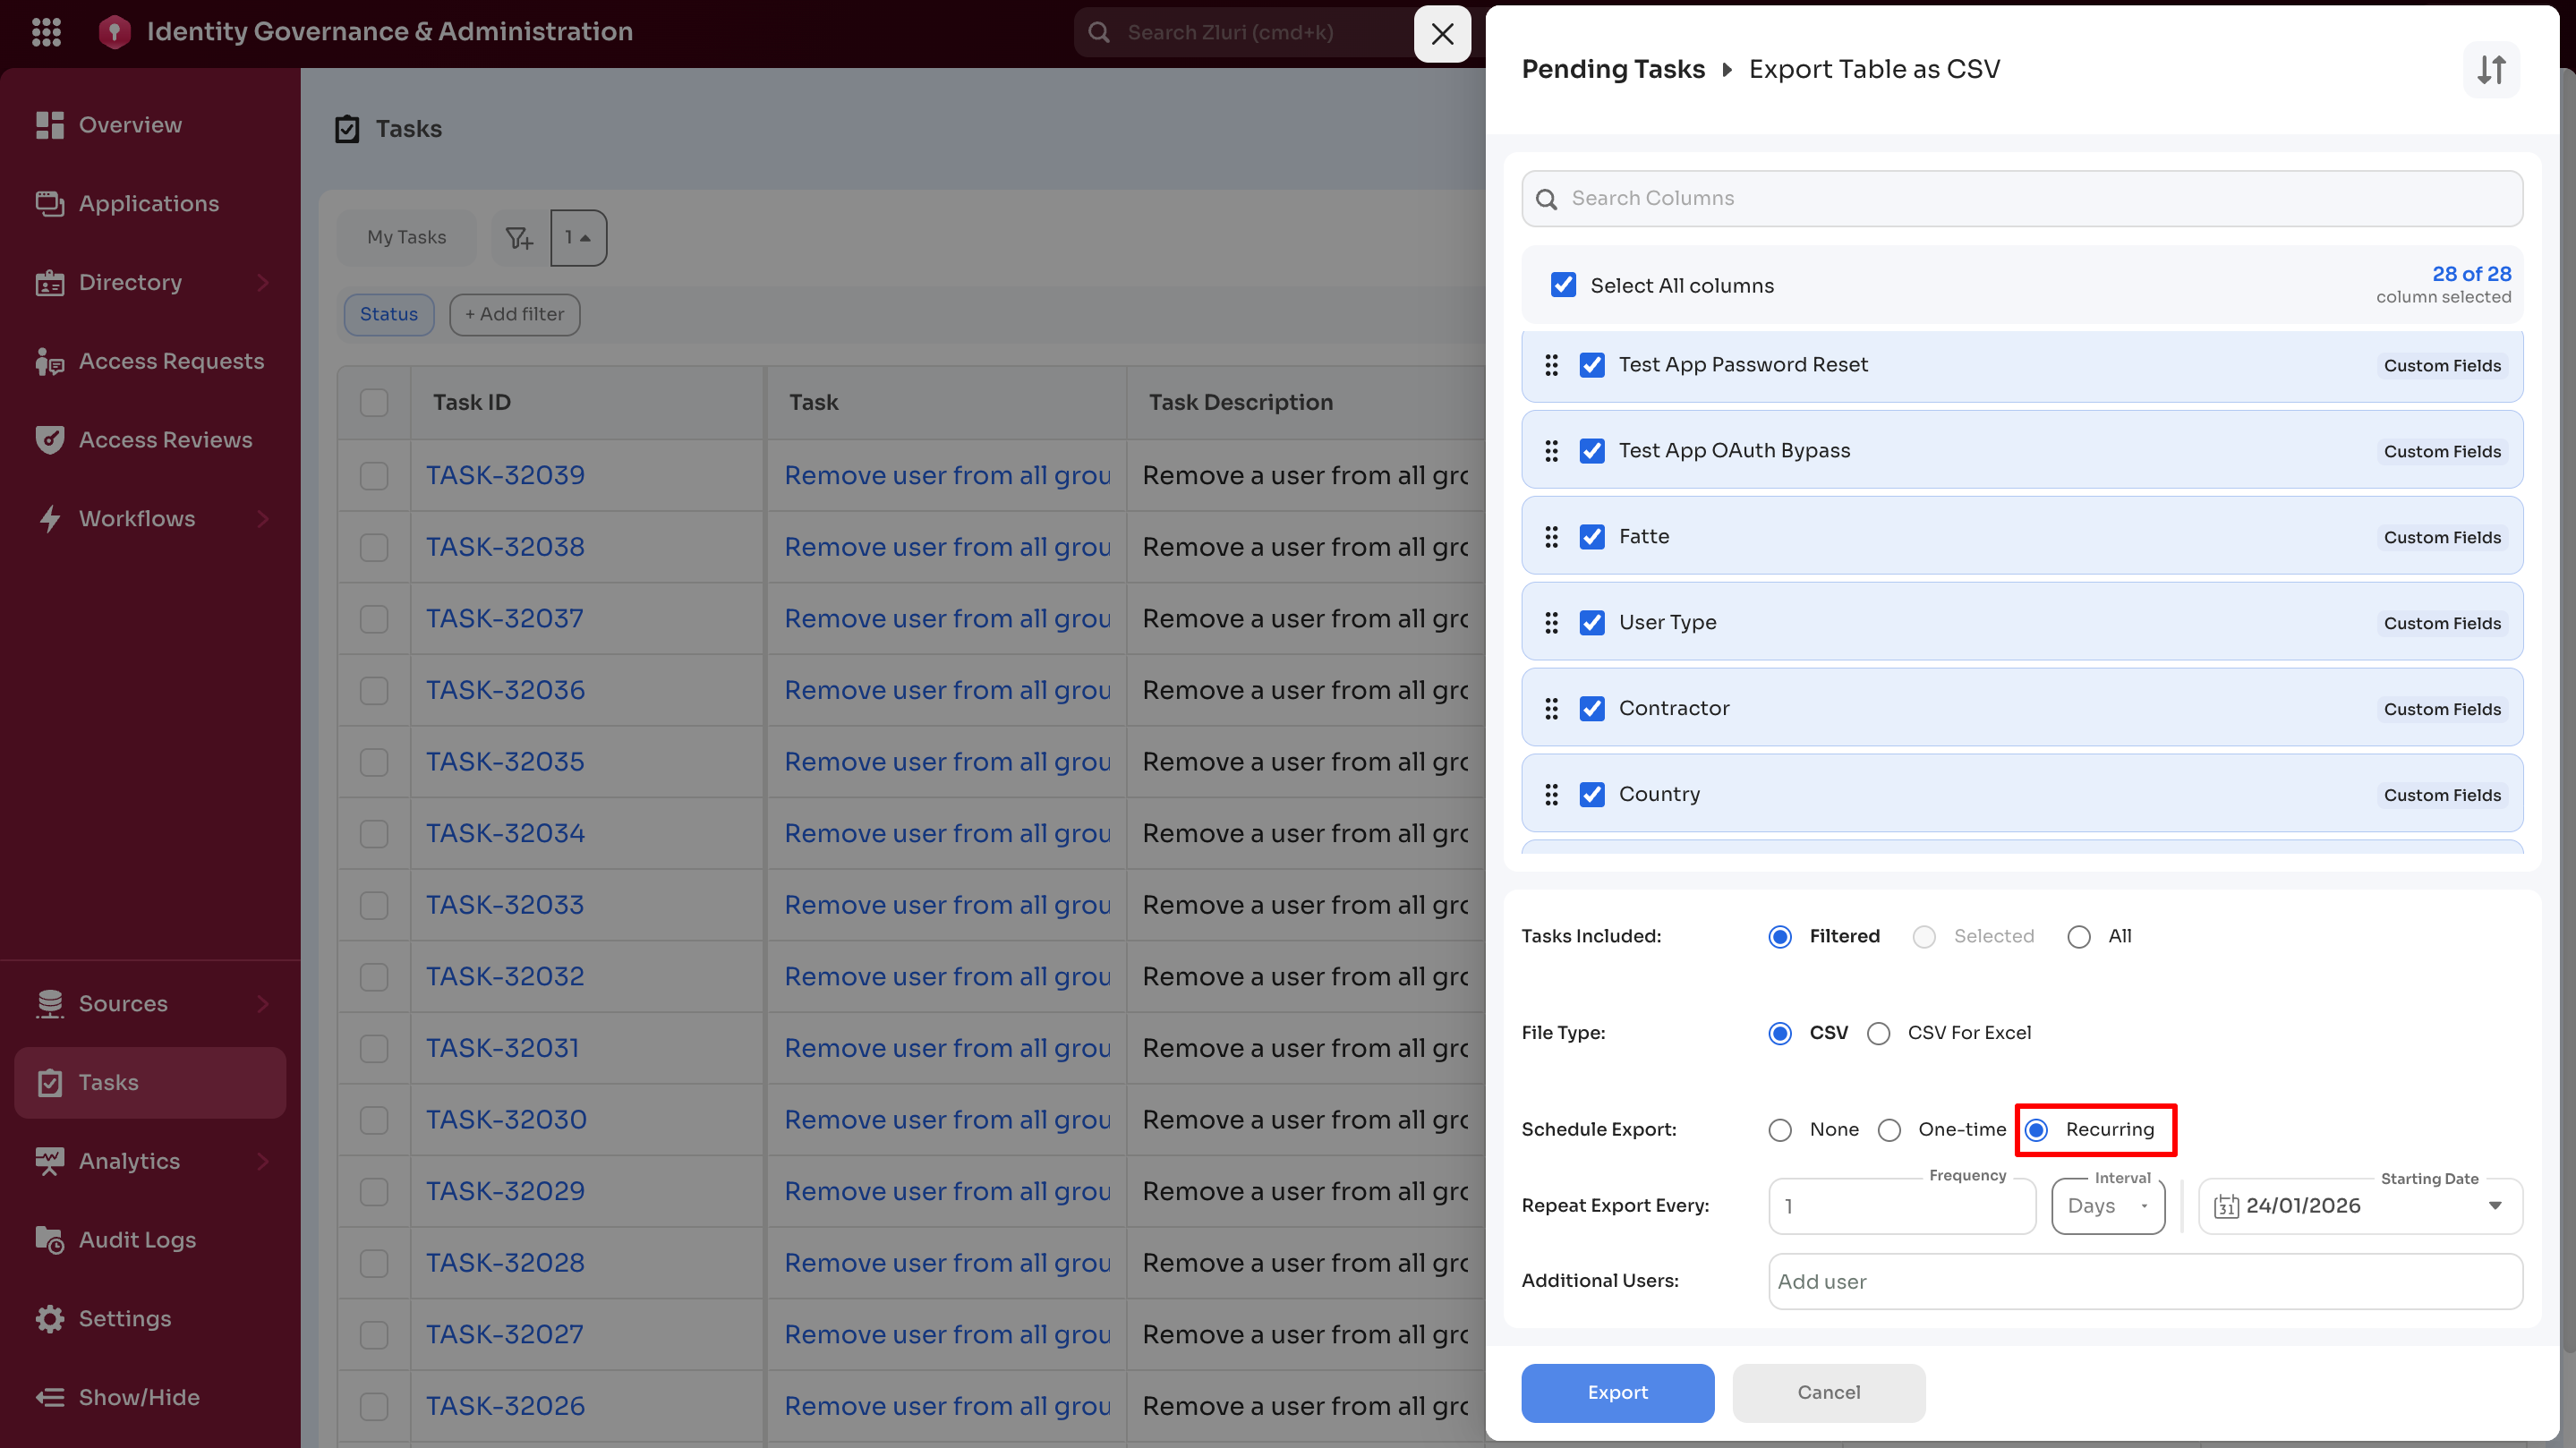
Scheduling options include frequency, interval, start date, and additional recipients.
Repeat Export Every:
-
Frequency: Specify the interval multiplier (For example, every 2 weeks, every 3 months)
-
Interval: Select the time unit:
-
Days: Daily or multi-day intervals
-
Weeks: Weekly intervals
-
Months: Monthly intervals
-
Years: Annual intervals
- Starting Date: Set when the recurring export schedule begins
Additional Users: Add other users to receive the export on the scheduled date.
Export: Saves the configuration and initiates the first download.
Cancel Button: This button is used to cancel the custom export operation.
-
Next
Updated 3 months ago