
Connect Salesforce (Client-Credential Flow)
Connect Salesforce (Client-Credential Flow) to Zluri
Zluri has two Salesforce connectors. This Form Based connector authenticates using the OAuth 2.0 Client Credentials flow (server-to-server). You create your own Connected App, enable the Client Credentials Flow, and assign a Run-As user. No Salesforce username, password, or security token is required.
There are two versions of Salesforce, Classic and Lightning Experience, and the steps to create the OAuth application differ slightly. Both are described below. The Run-As user step (after the app is created) is the same for both.
Prerequisites
- Administrator access to the Salesforce org with permission to create and manage Connected Apps.
Salesforce Lightning
-
Sign in to the Salesforce account.
-
Select Setup.
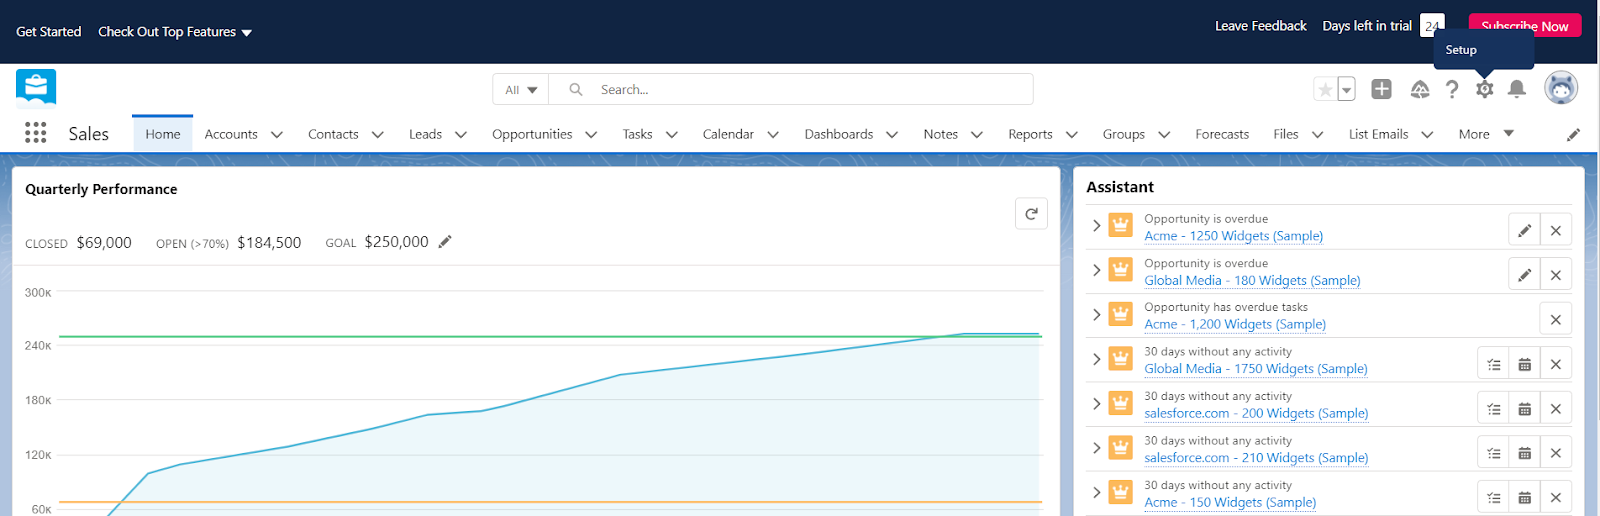
-
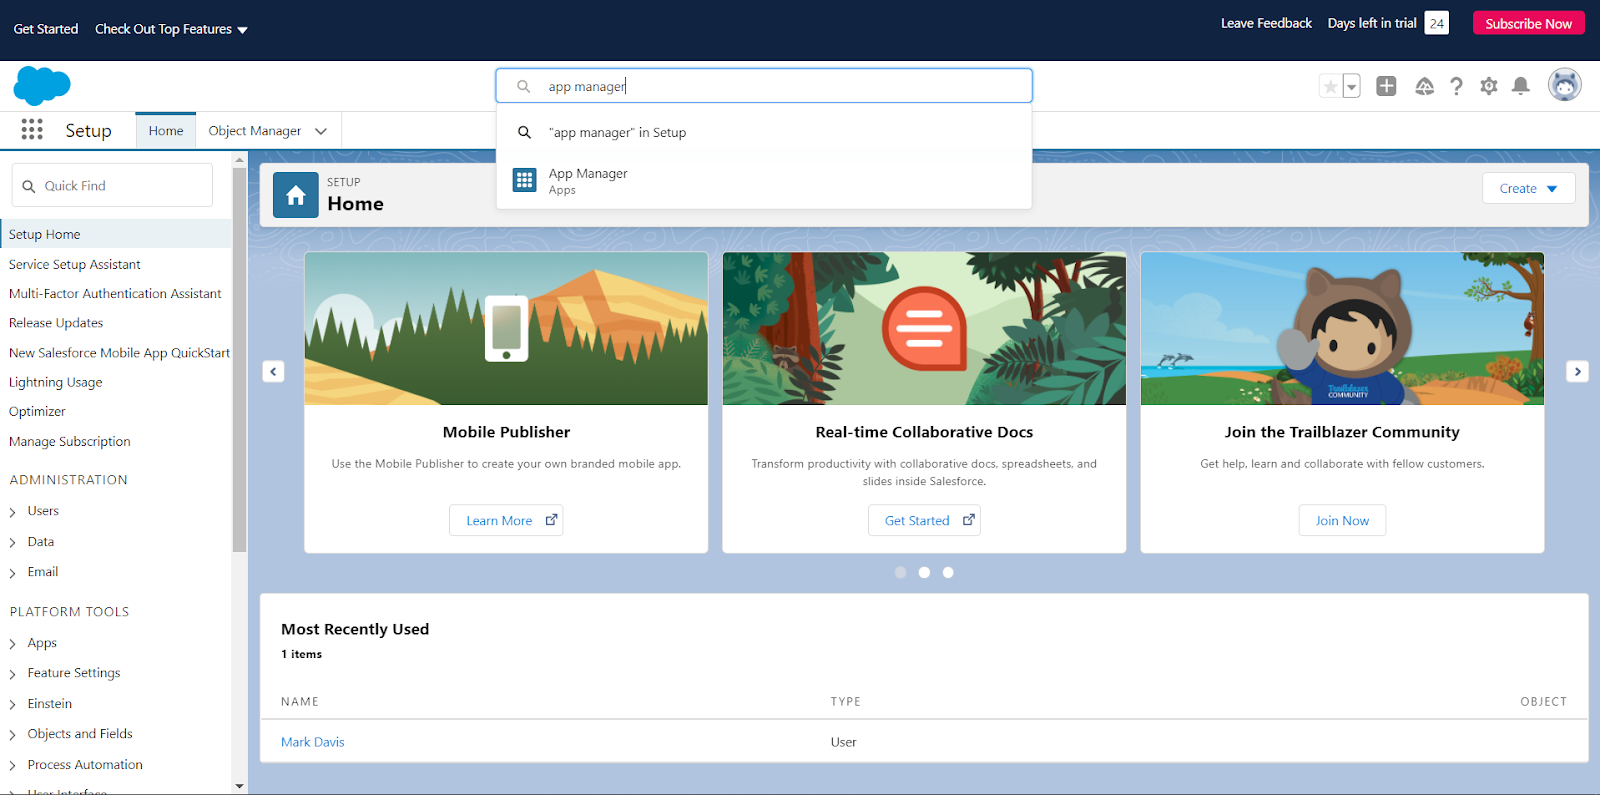
In the Search Setup box at the top of the screen, type App Manager.
-
Select App Manager.
-
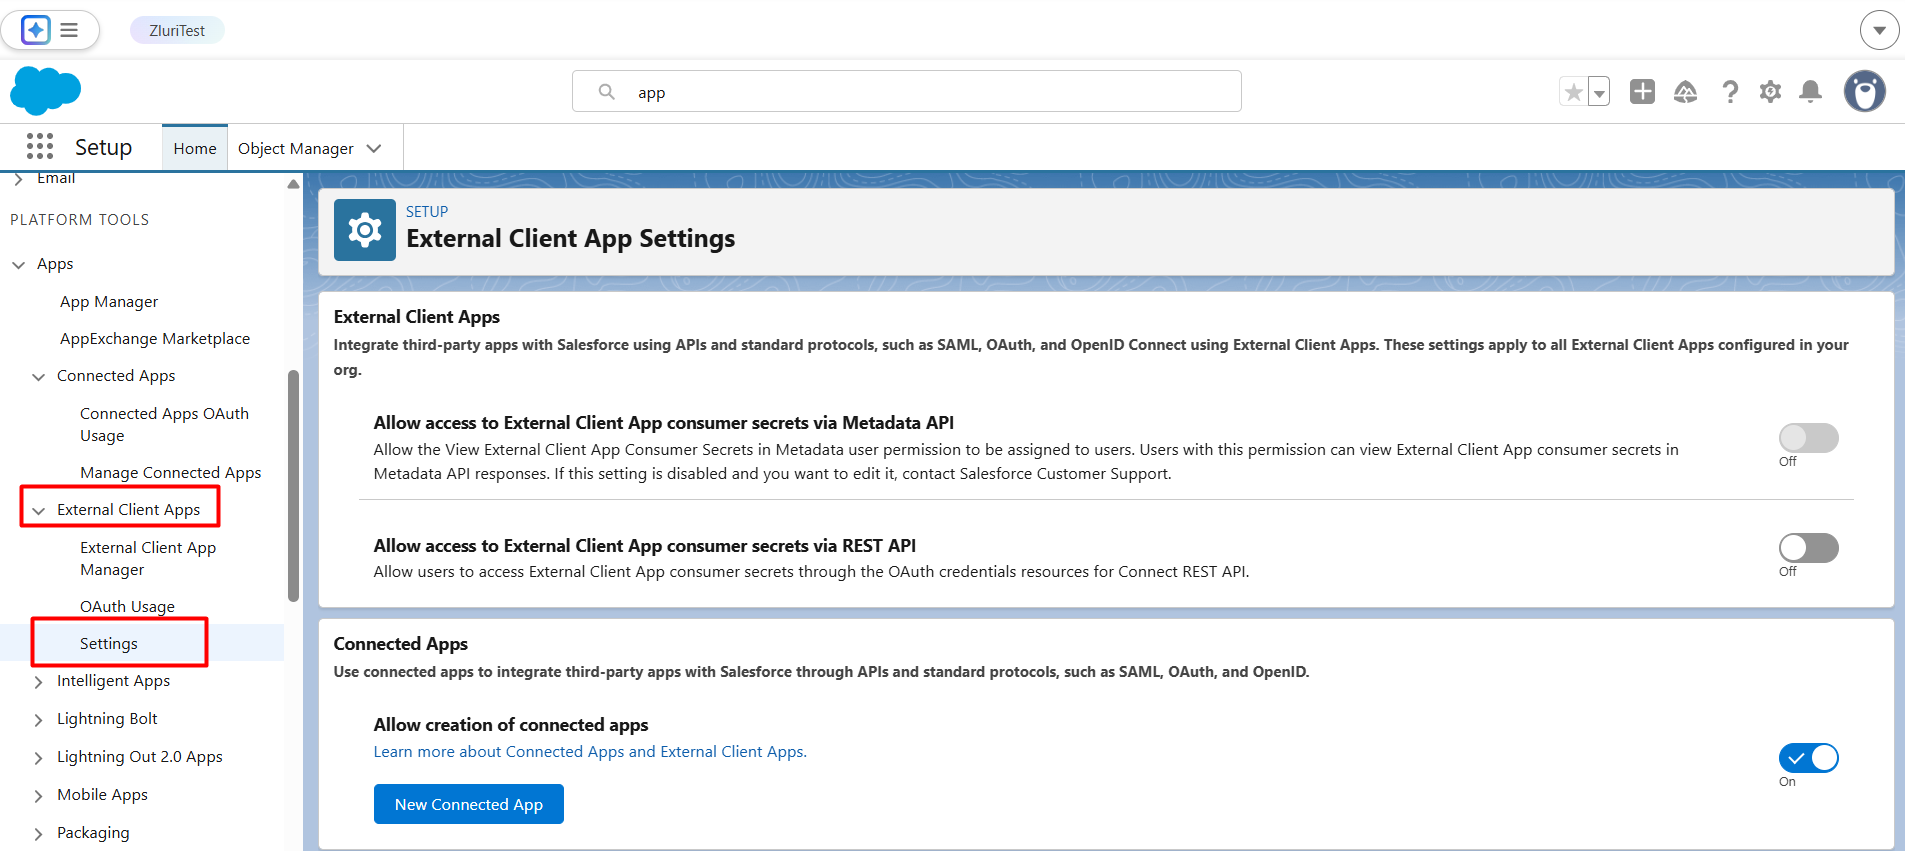
Select New Connected App under External Client Apps > Settings.
-
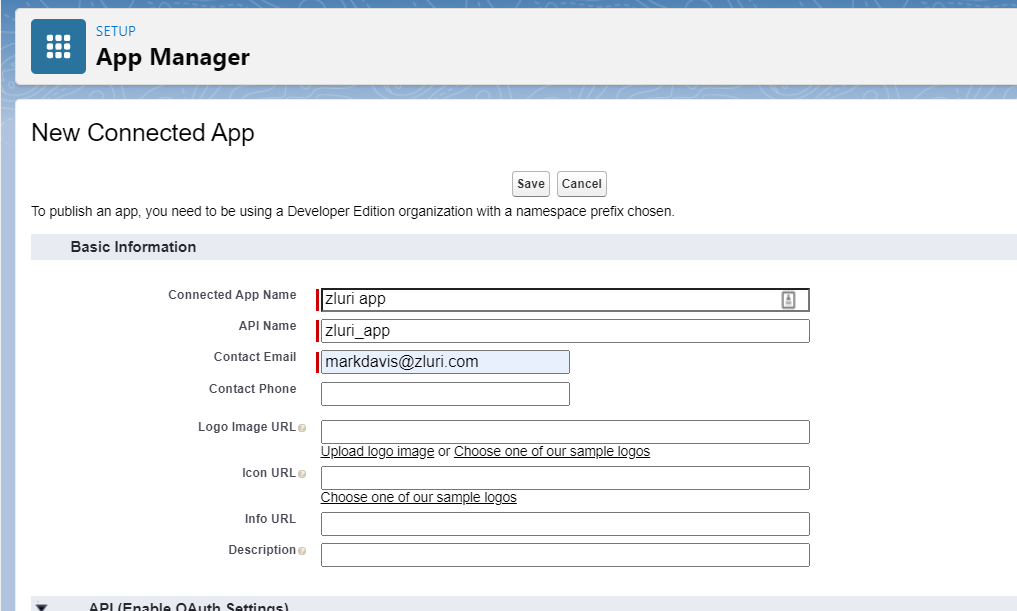
A new screen appears for creating the connected app.
-
Provide a suitable Name, API Name, and Contact Email.
-
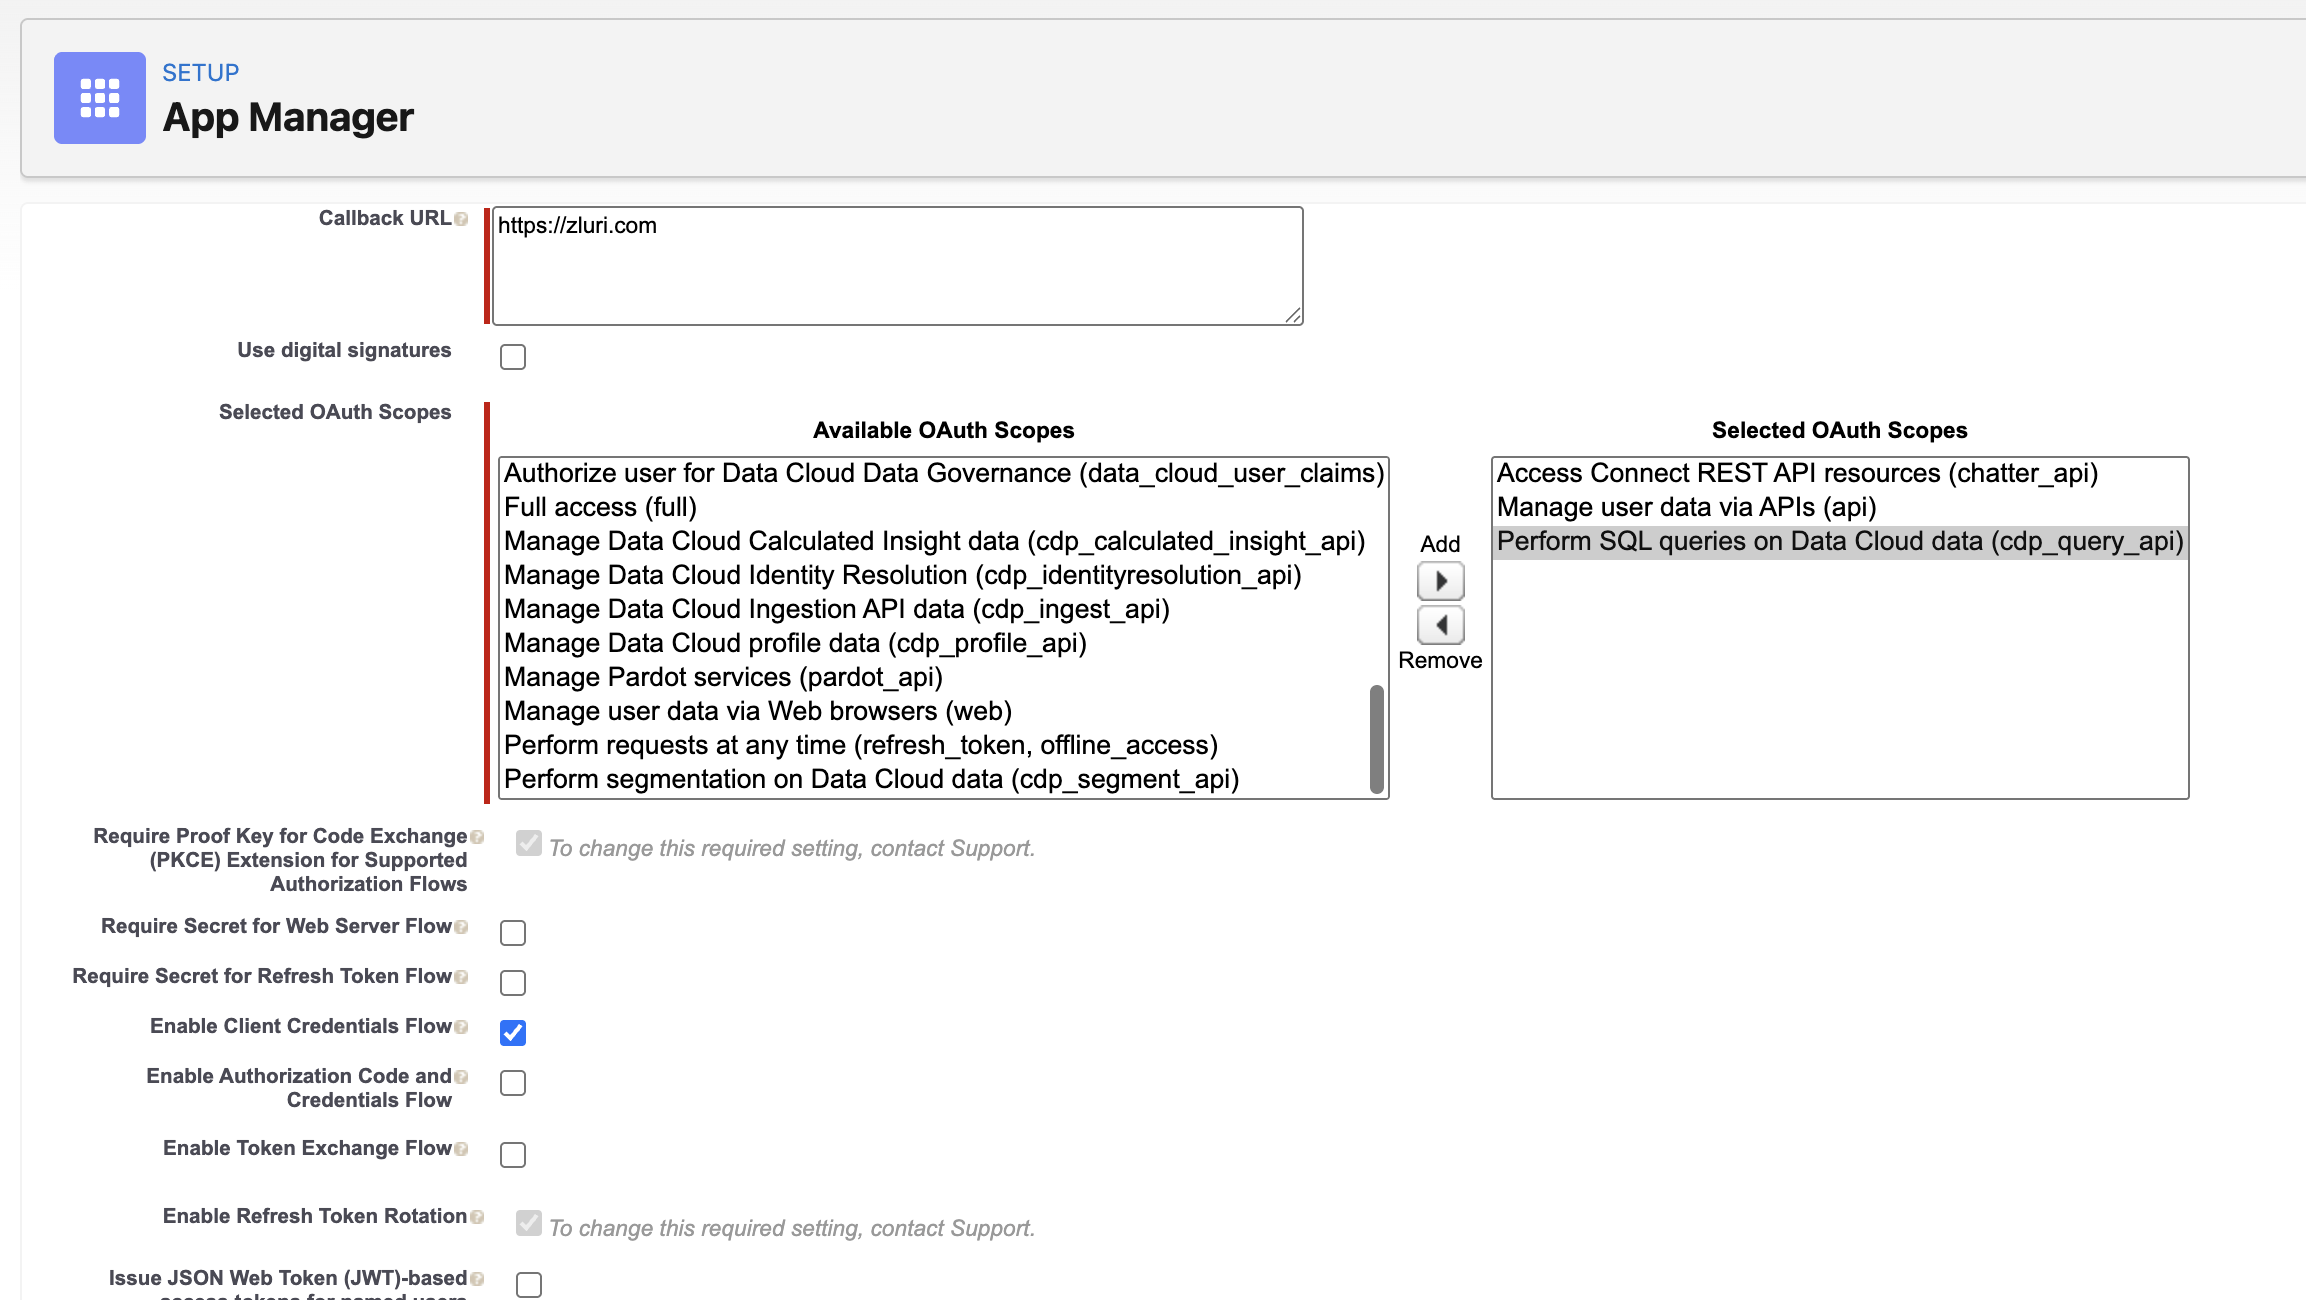
Select the Enable OAuth Settings checkbox.
-
Add the following callback URL: https://zluri.com
-
In Selected OAuth Scopes, add the following scopes:
- Manage user data via APIs (api)
- Access Connect REST API resources (chatter_api)
- Perform SQL queries on Data Cloud data (cdp_query_api)
-
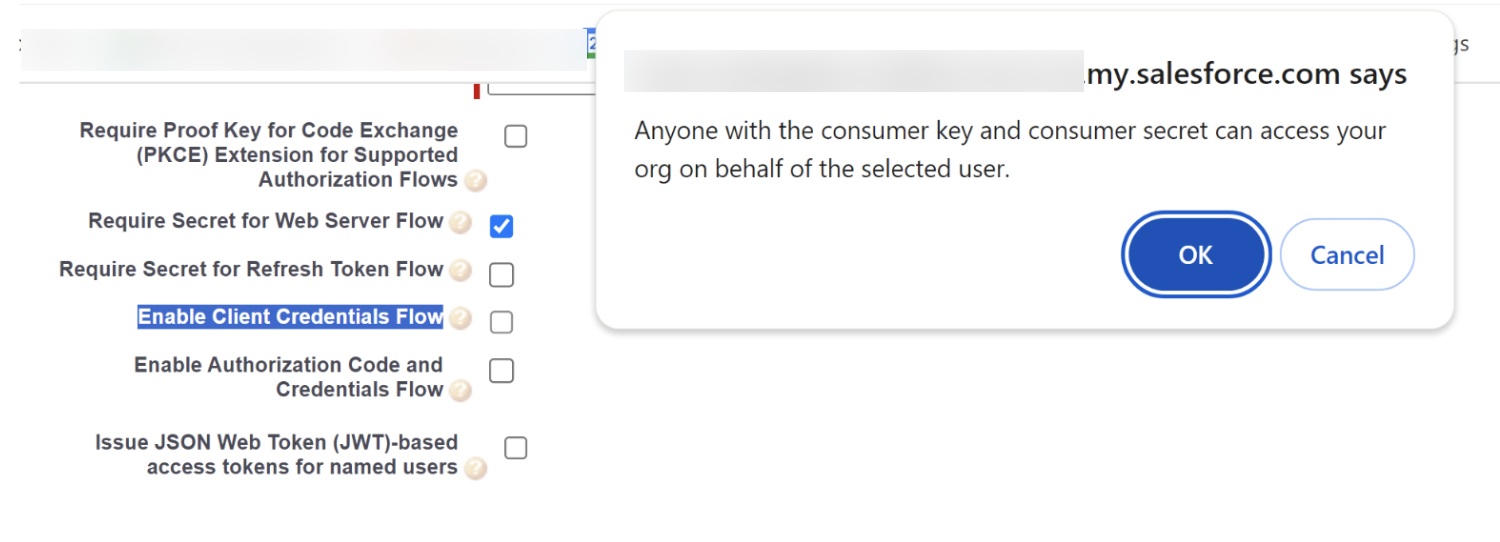
Select Enable Client Credentials Flow and accept the alert that appears.
-
Scroll to the bottom and select Save, then select Continue.

Assign the Run-As user (required for Client Credentials Flow)
-
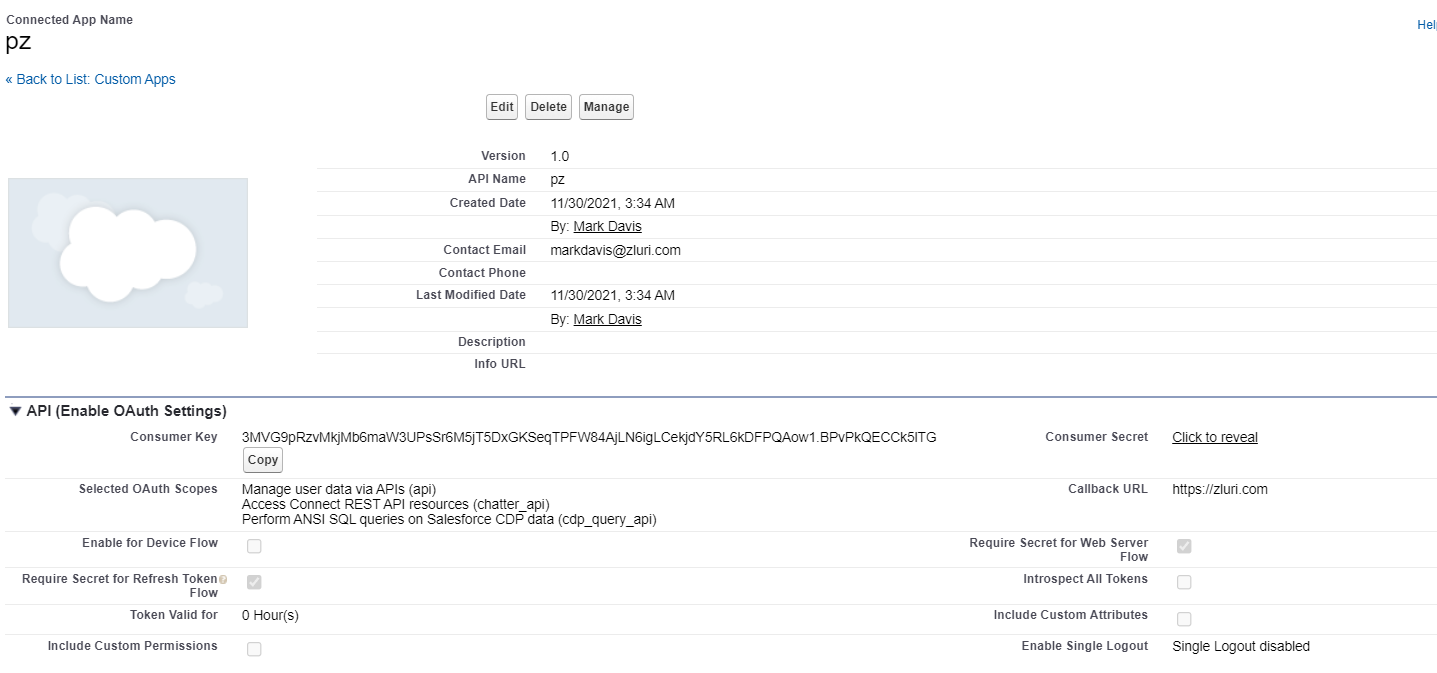
Open the Connected App's detail page, select Manage, then select Edit Policies.
-
In the Client Credentials Flow section, use the Run As lookup field to select the integration user in the org, then select Save.
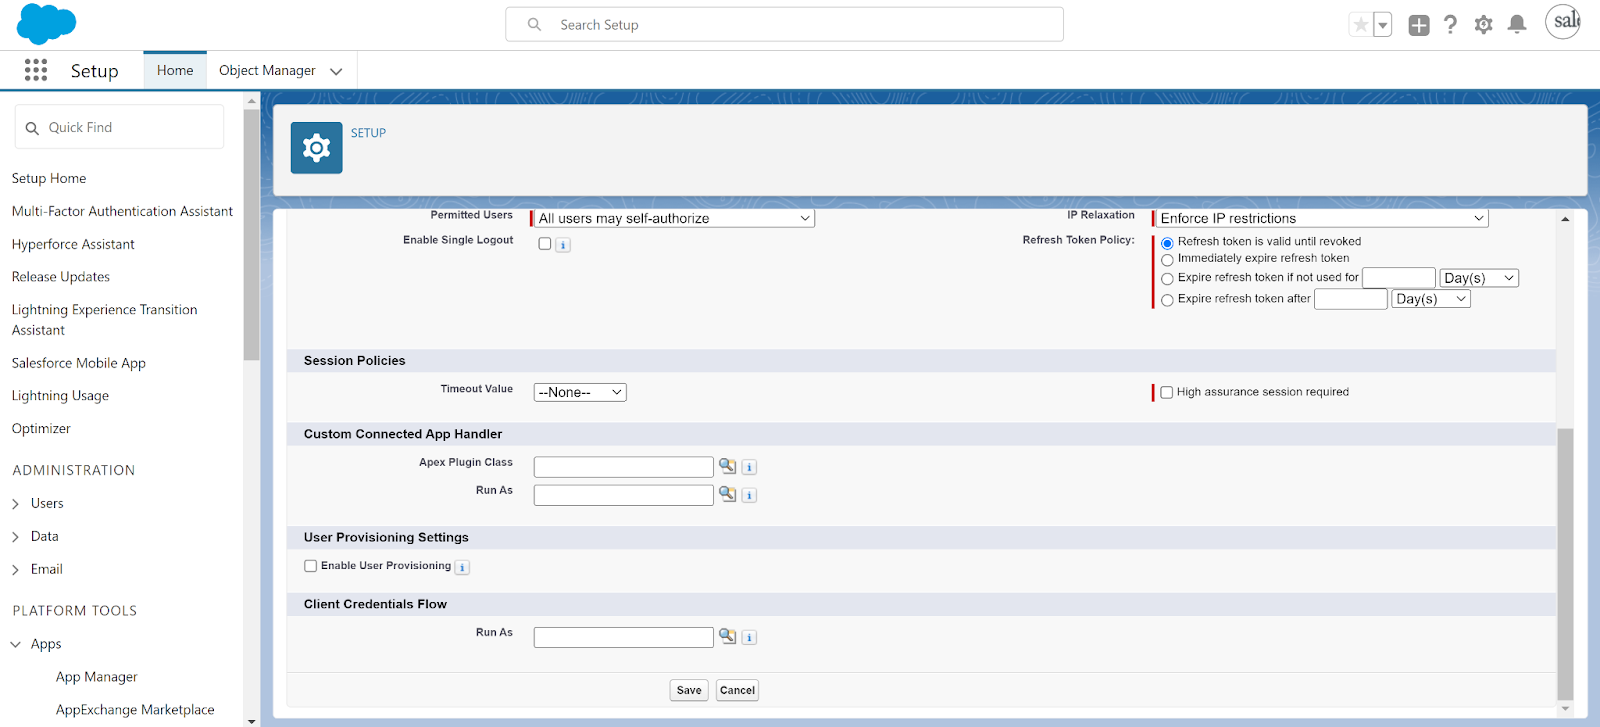
The Run-As user's permissions govern what Zluri can read. Assign a least-privilege user with read access to Users, LoginHistory, Permission Set Licenses, and (if syncing roles) Permission Sets. Use it only for this integration, never for interactive UI logins.
Salesforce Classic
-
Sign in to the Salesforce account.
-
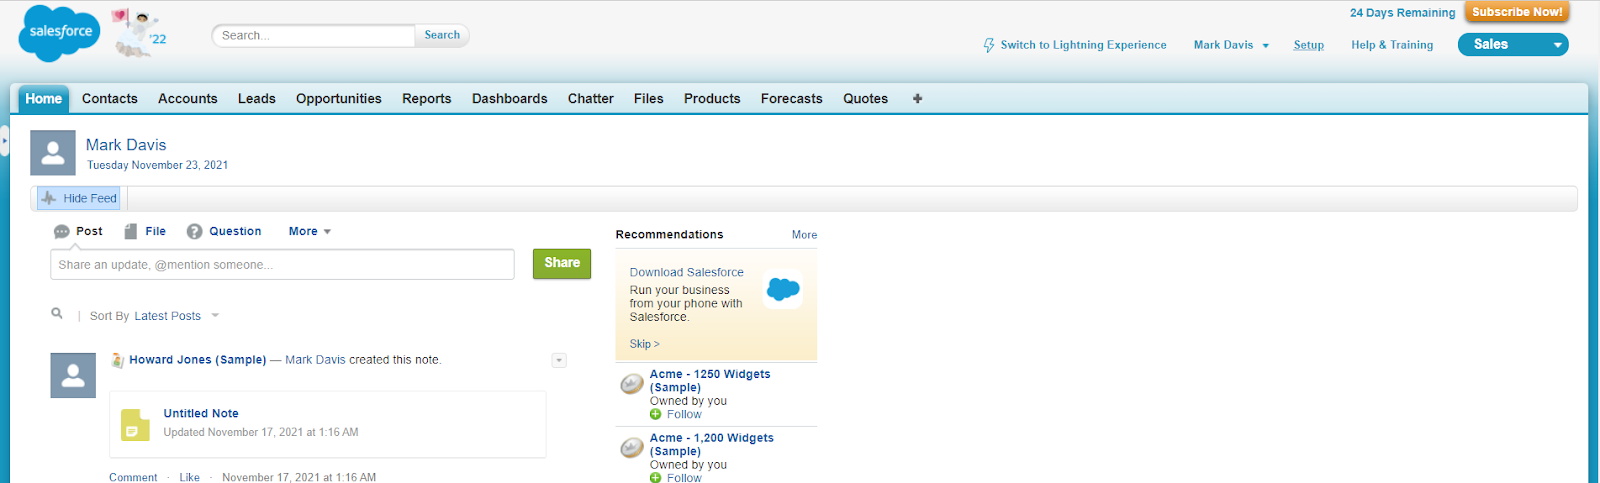
Select Setup.
-
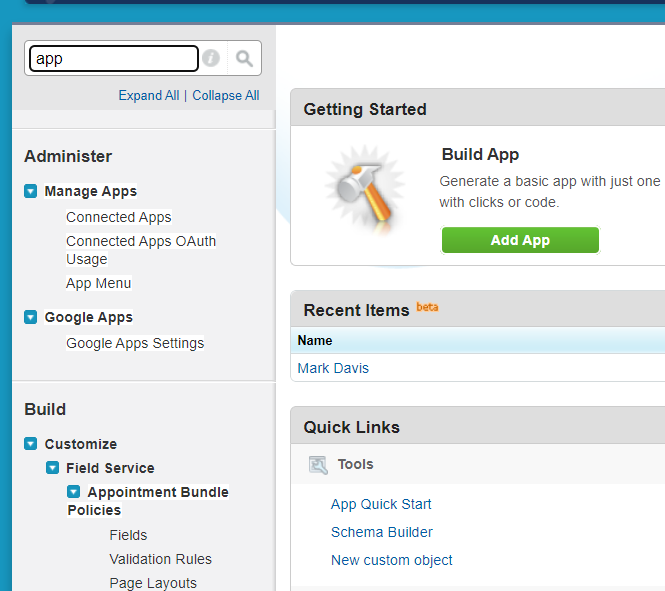
In the Quick Find / Search box on the left, type app, then under the Create section select Apps.
-
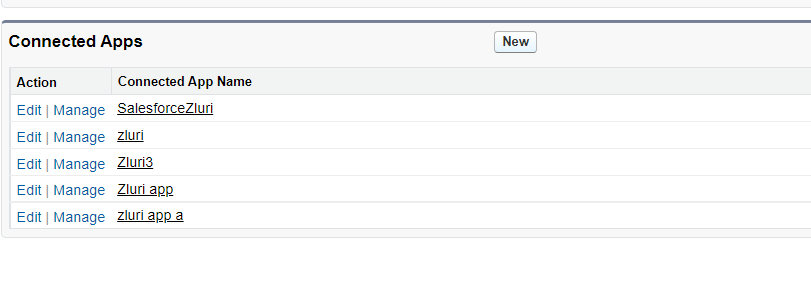
In the Connected Apps section, select New.
-
Provide a suitable Name, API Name, and Contact Email.
-
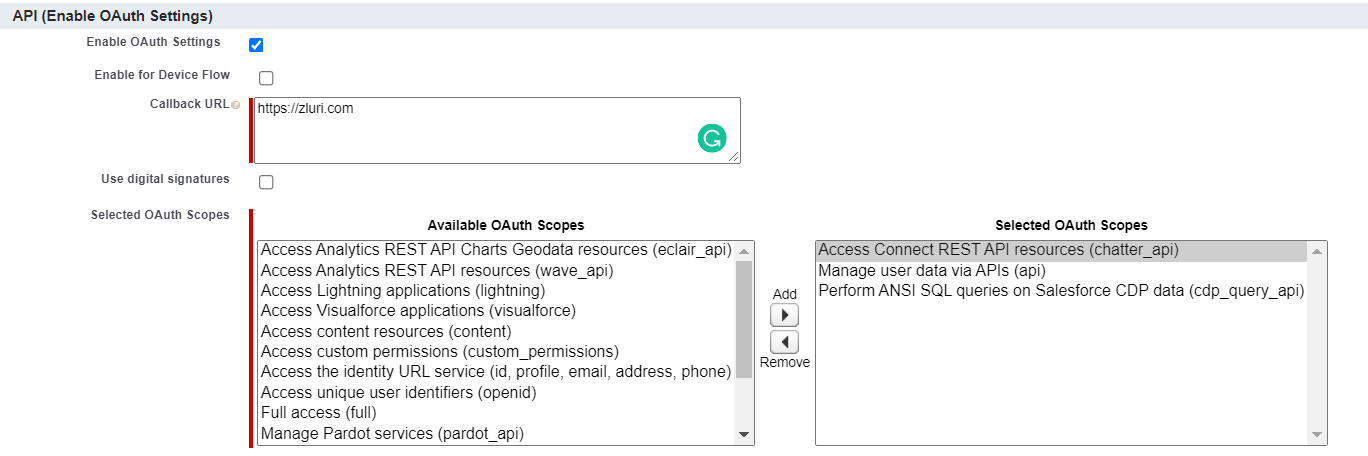
Select the Enable OAuth Settings checkbox.
-
Add the callback URL: https://zluri.com
-
In Selected OAuth Scopes, add the following scopes:
- Manage user data via APIs (api)
- Access Connect REST API resources (chatter_api)
- Perform SQL queries on Data Cloud data (cdp_query_api)
-
Select Enable Client Credentials Flow and accept the alert that appears.
-
Scroll to the bottom, select Save, then select Continue.
Assign the Run-As user (required for Client Credentials Flow)
-
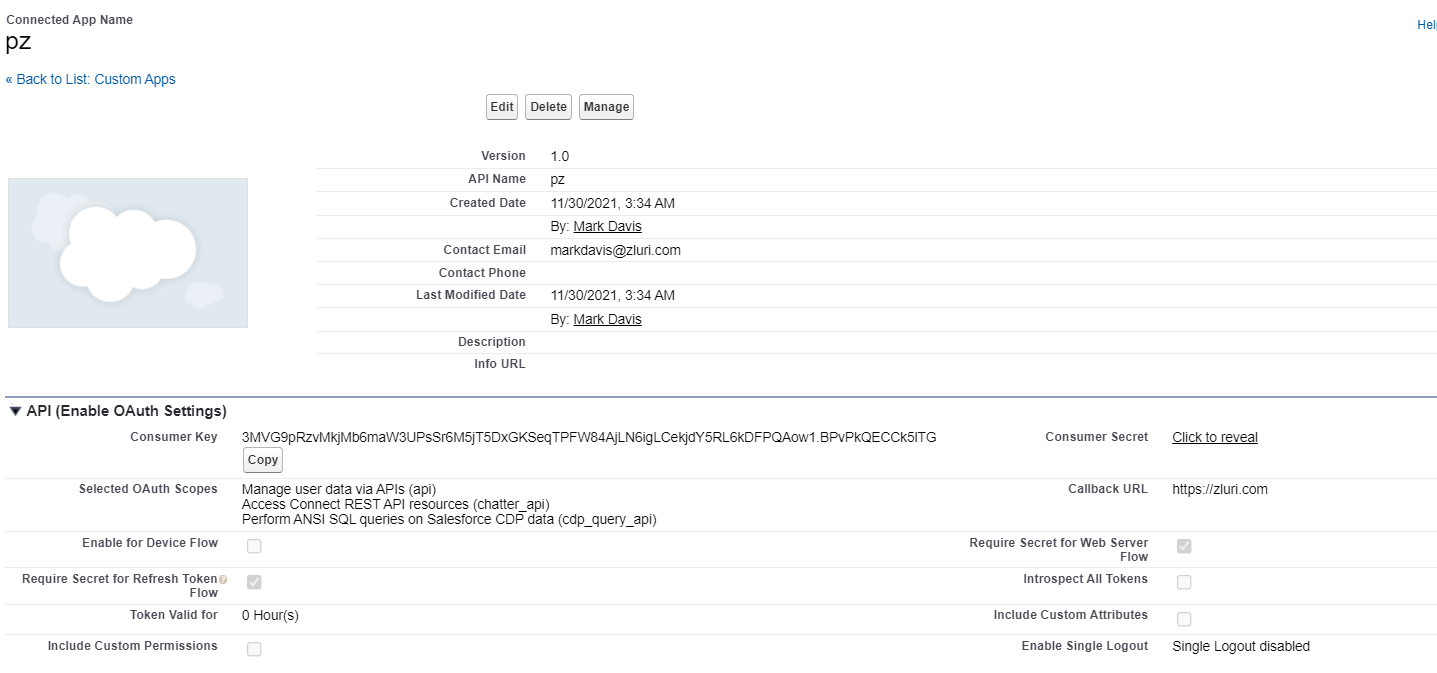
Open the Connected App's detail page, select Manage, then select Edit Policies.
-
In the Client Credentials Flow section, use the Run As lookup field to select the integration user in the org, then select Save.
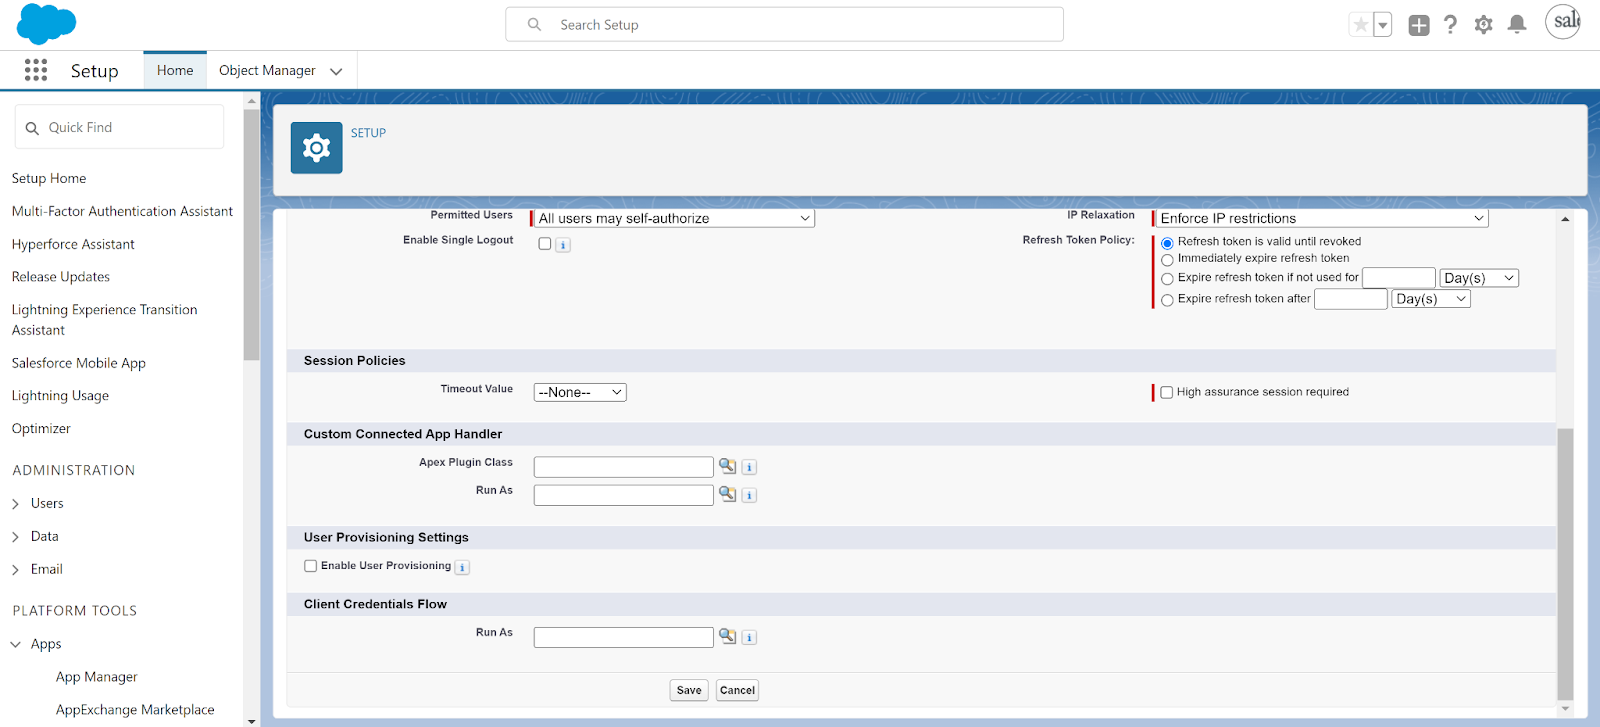
The Run-As user's permissions govern what Zluri can read. Assign a least-privilege user with read access to Users, LoginHistory, Permission Set Licenses, and (if syncing roles) Permission Sets. Use it only for this integration, never for interactive UI logins.
Get your credentials and connect
-
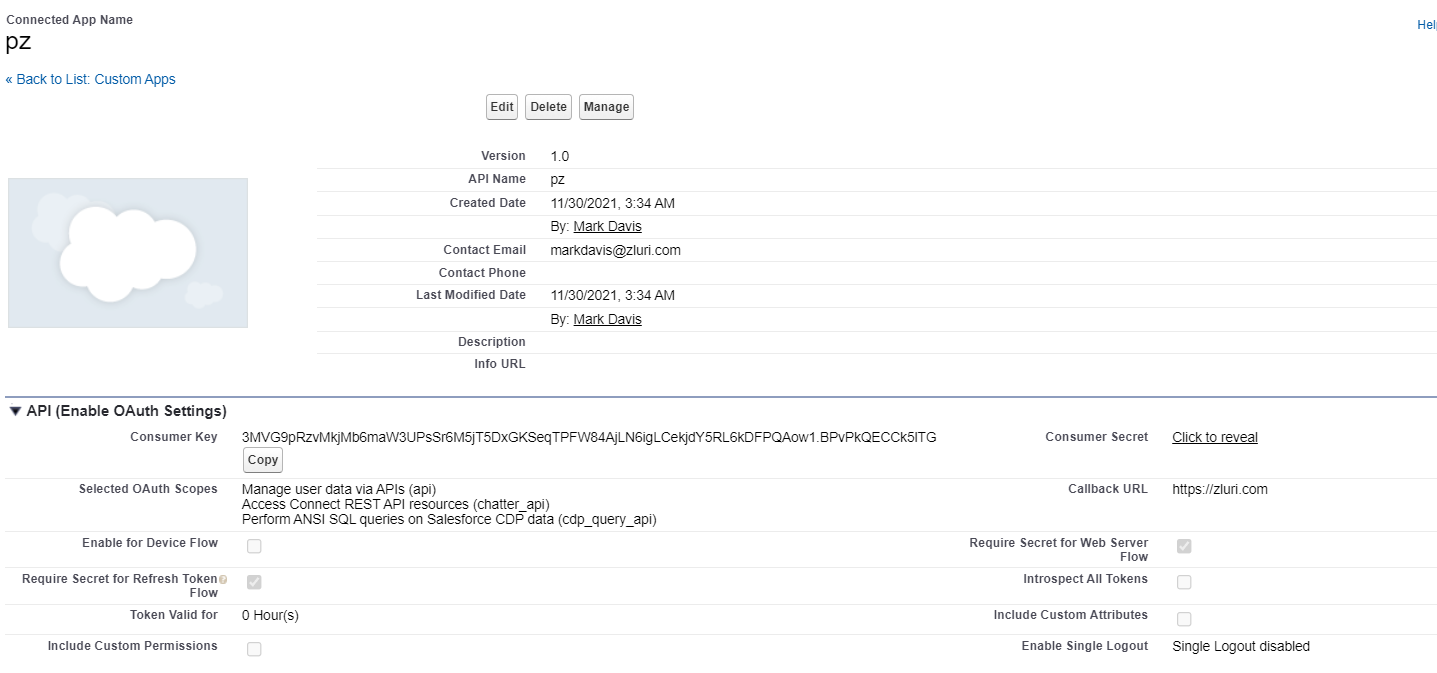
On the Connected App details page, locate the Consumer Key and Consumer Secret.
-
In Zluri, enter these values to connect:
- Consumer Key: from the Connected App.
- Consumer Secret: from the Connected App.
- Sub-Domain: the Salesforce My Domain label (for example, for
https://zluri.my.salesforce.comthe sub-domain iszluri). - License Types (optional): a comma-separated list to filter users by license type.
Reference
For more details on the Client Credentials Flow, refer to the official Salesforce documentation.
Got questions? Feel free to submit a ticket or contact us directly at [email protected].
Updated 2 months ago