
Applications table
Applications table
The Applications table lists every application in the workspace and lets administrators search, filter, and act on them from one view.
Accessing the table
Select Applications in the left navigation. The table opens on the Managed tab by default.
Status tabs
Applications are grouped into tabs based on status. Each tab shows a live count.
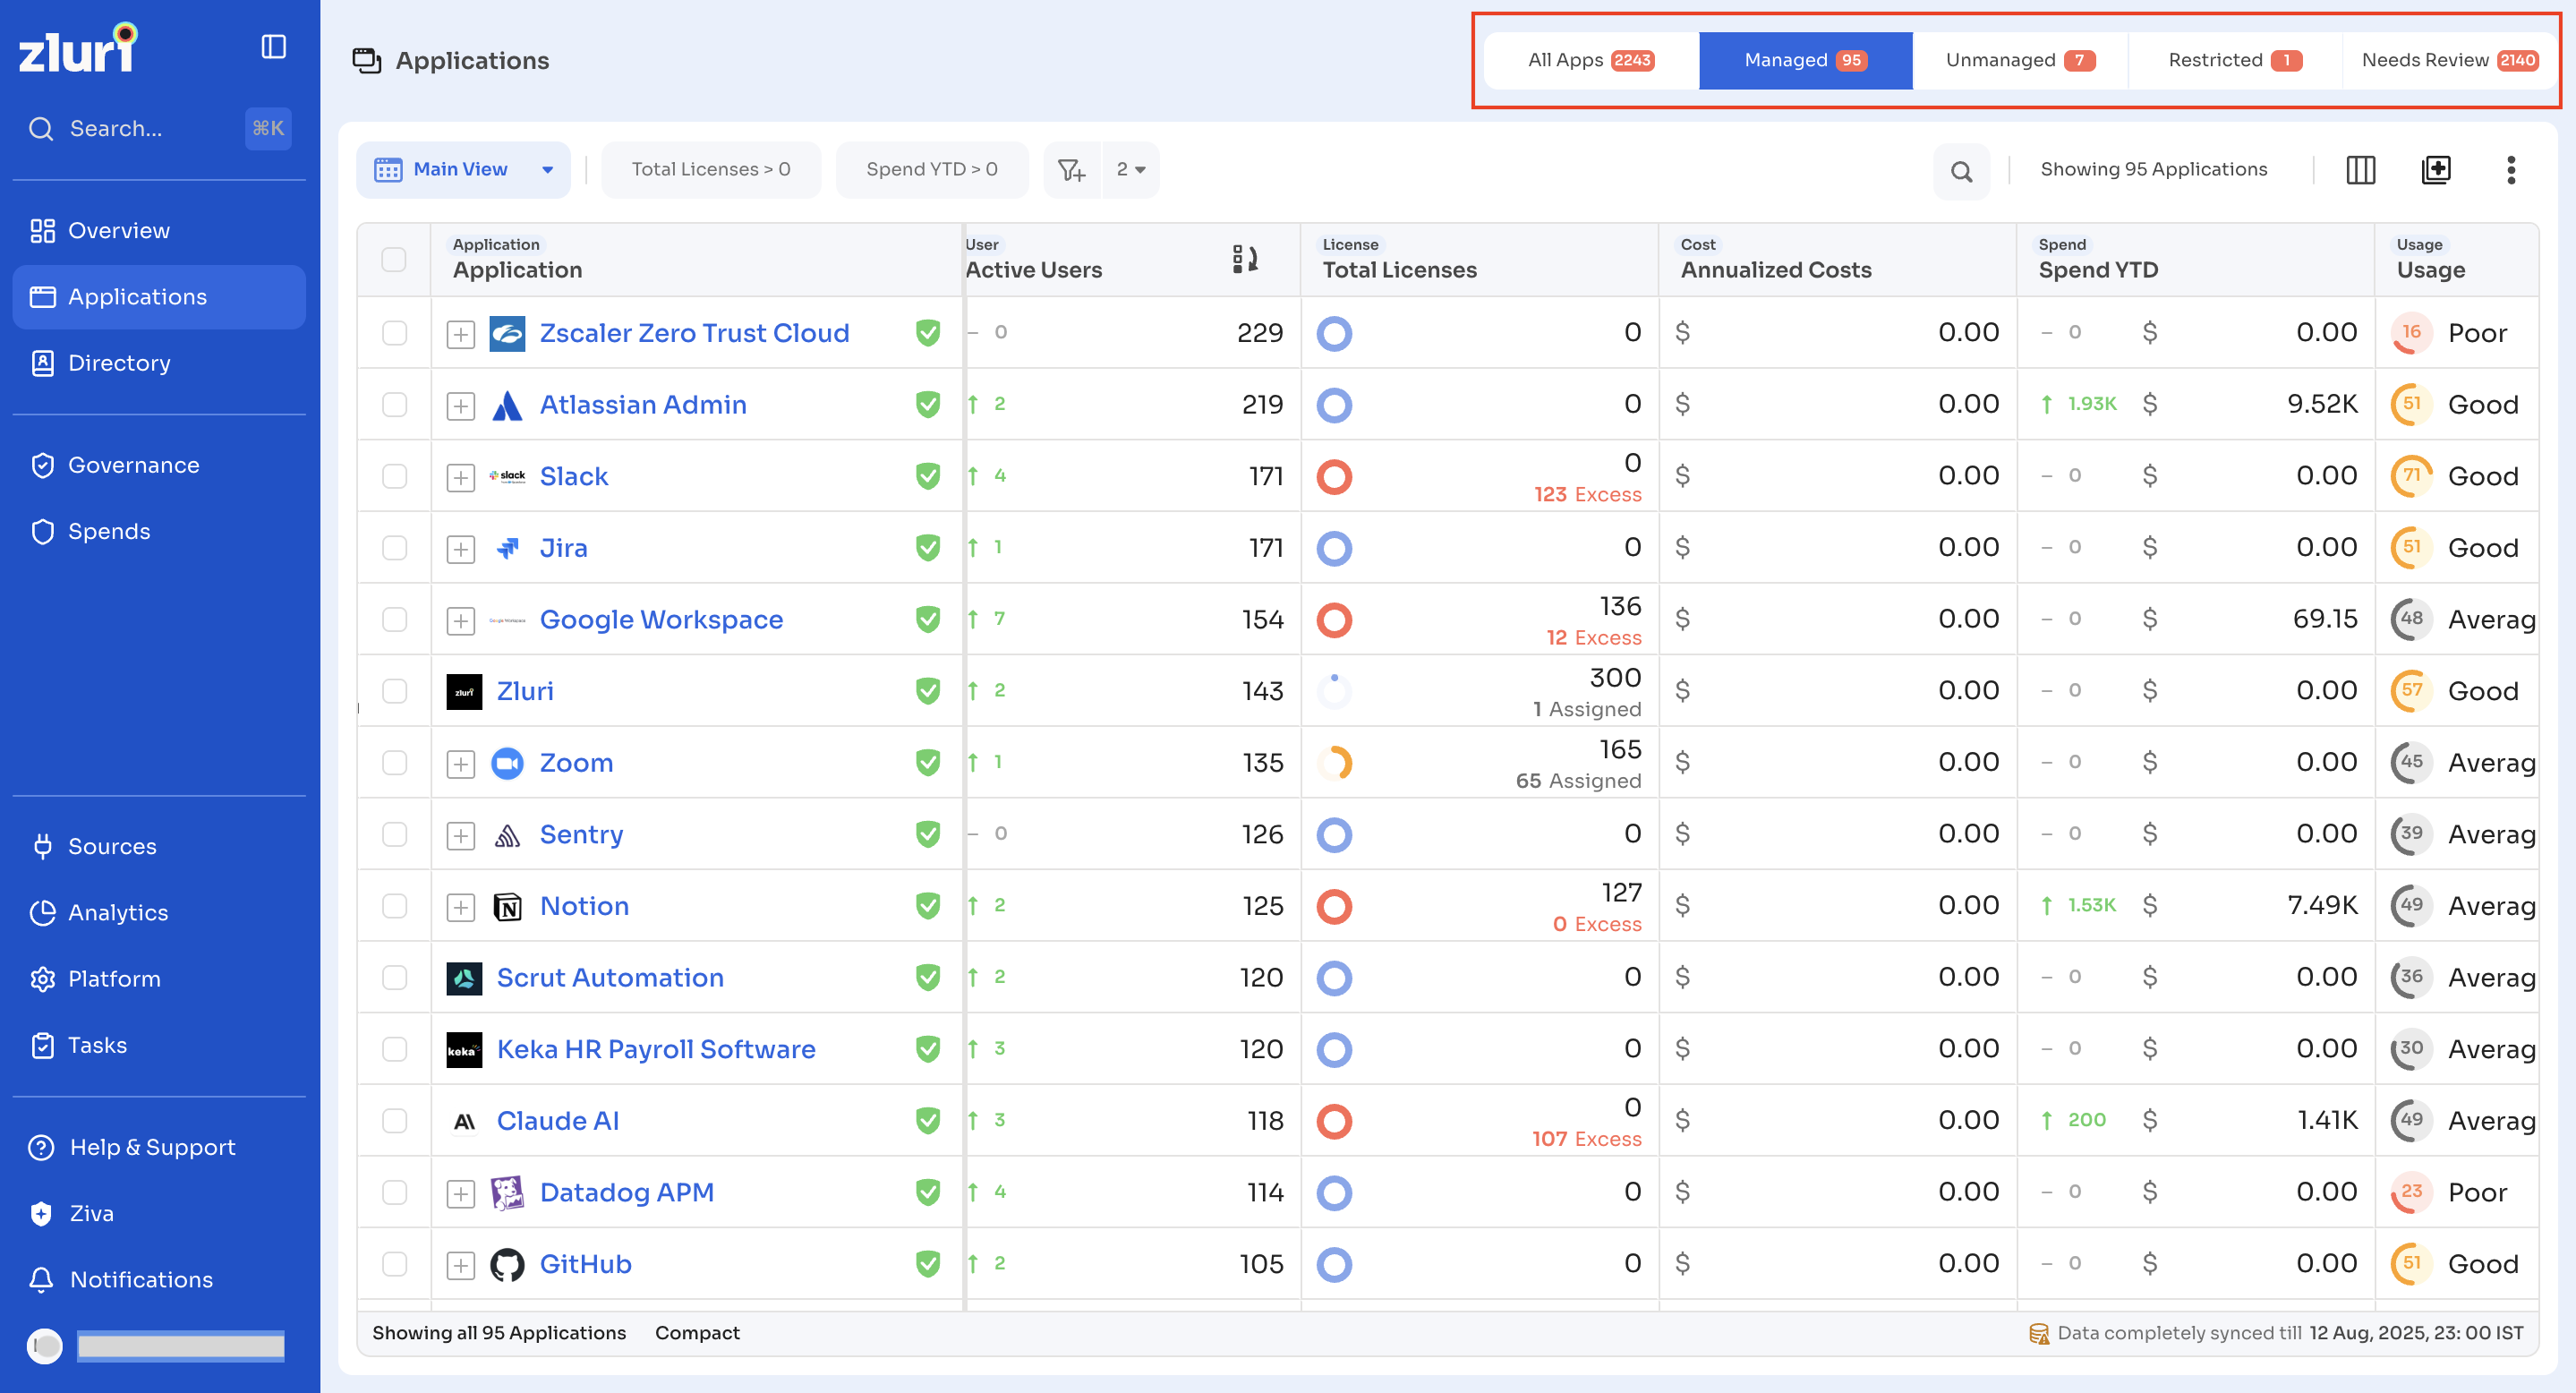
| Tab | Description |
|---|---|
| All Apps | Every application discovered or added in the workspace |
| Managed | Applications actively managed with an assigned owner |
| Unmanaged | Applications discovered but not yet assigned or governed |
| Restricted | Applications blocked or flagged by policy |
| Needs Review | Applications flagged for administrator attention |
Table columns
The default view displays these columns: Application, Category, Owner, Active Users, Total Licenses, Annualized Costs, Spend YTD, and Usage.
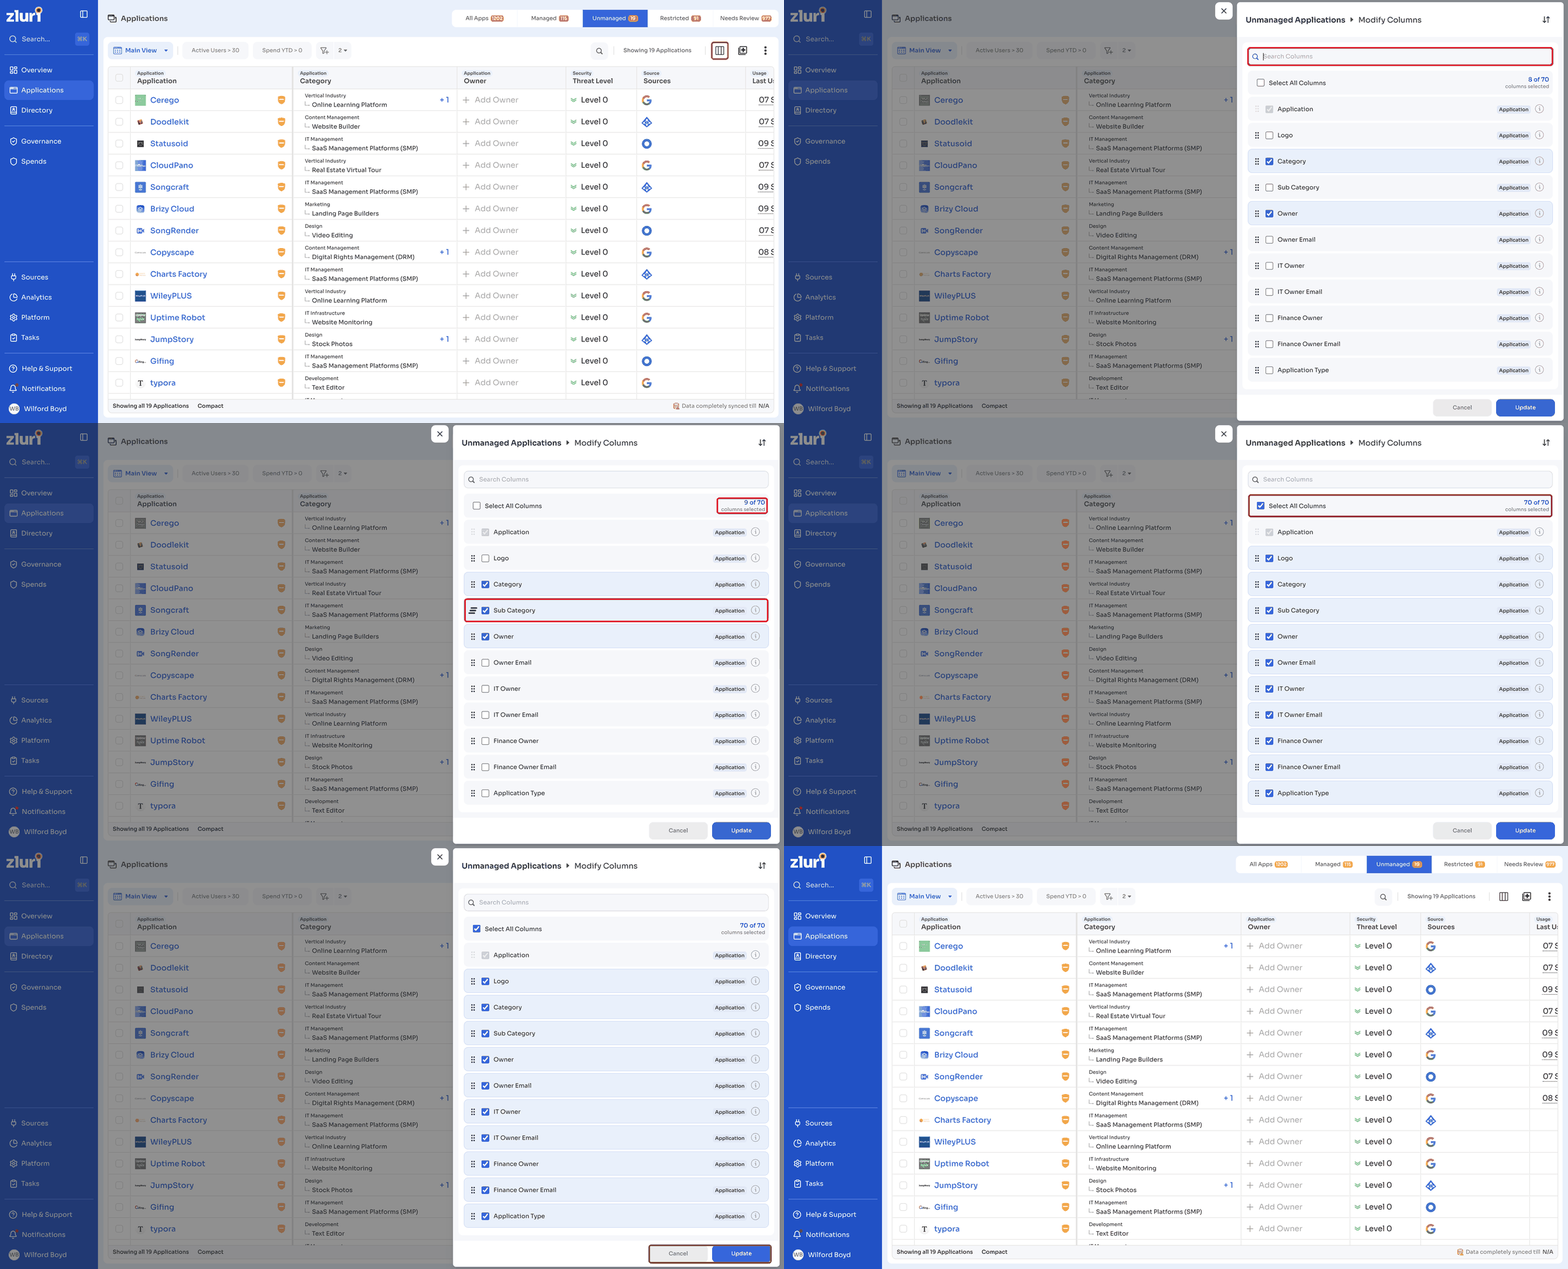
To change what appears in the table:
- Select the Modify Columns icon at the top right of the table.
- Use Search Columns to find a specific column.
- Select Select All Columns to show every available column, or select individual checkboxes to add specific ones.
- Drag a column using the handle icon to reorder it. The panel shows how many columns are currently selected, for example 11 of 70 columns selected.
- Select Update to save changes, or Cancel to discard them.
Views
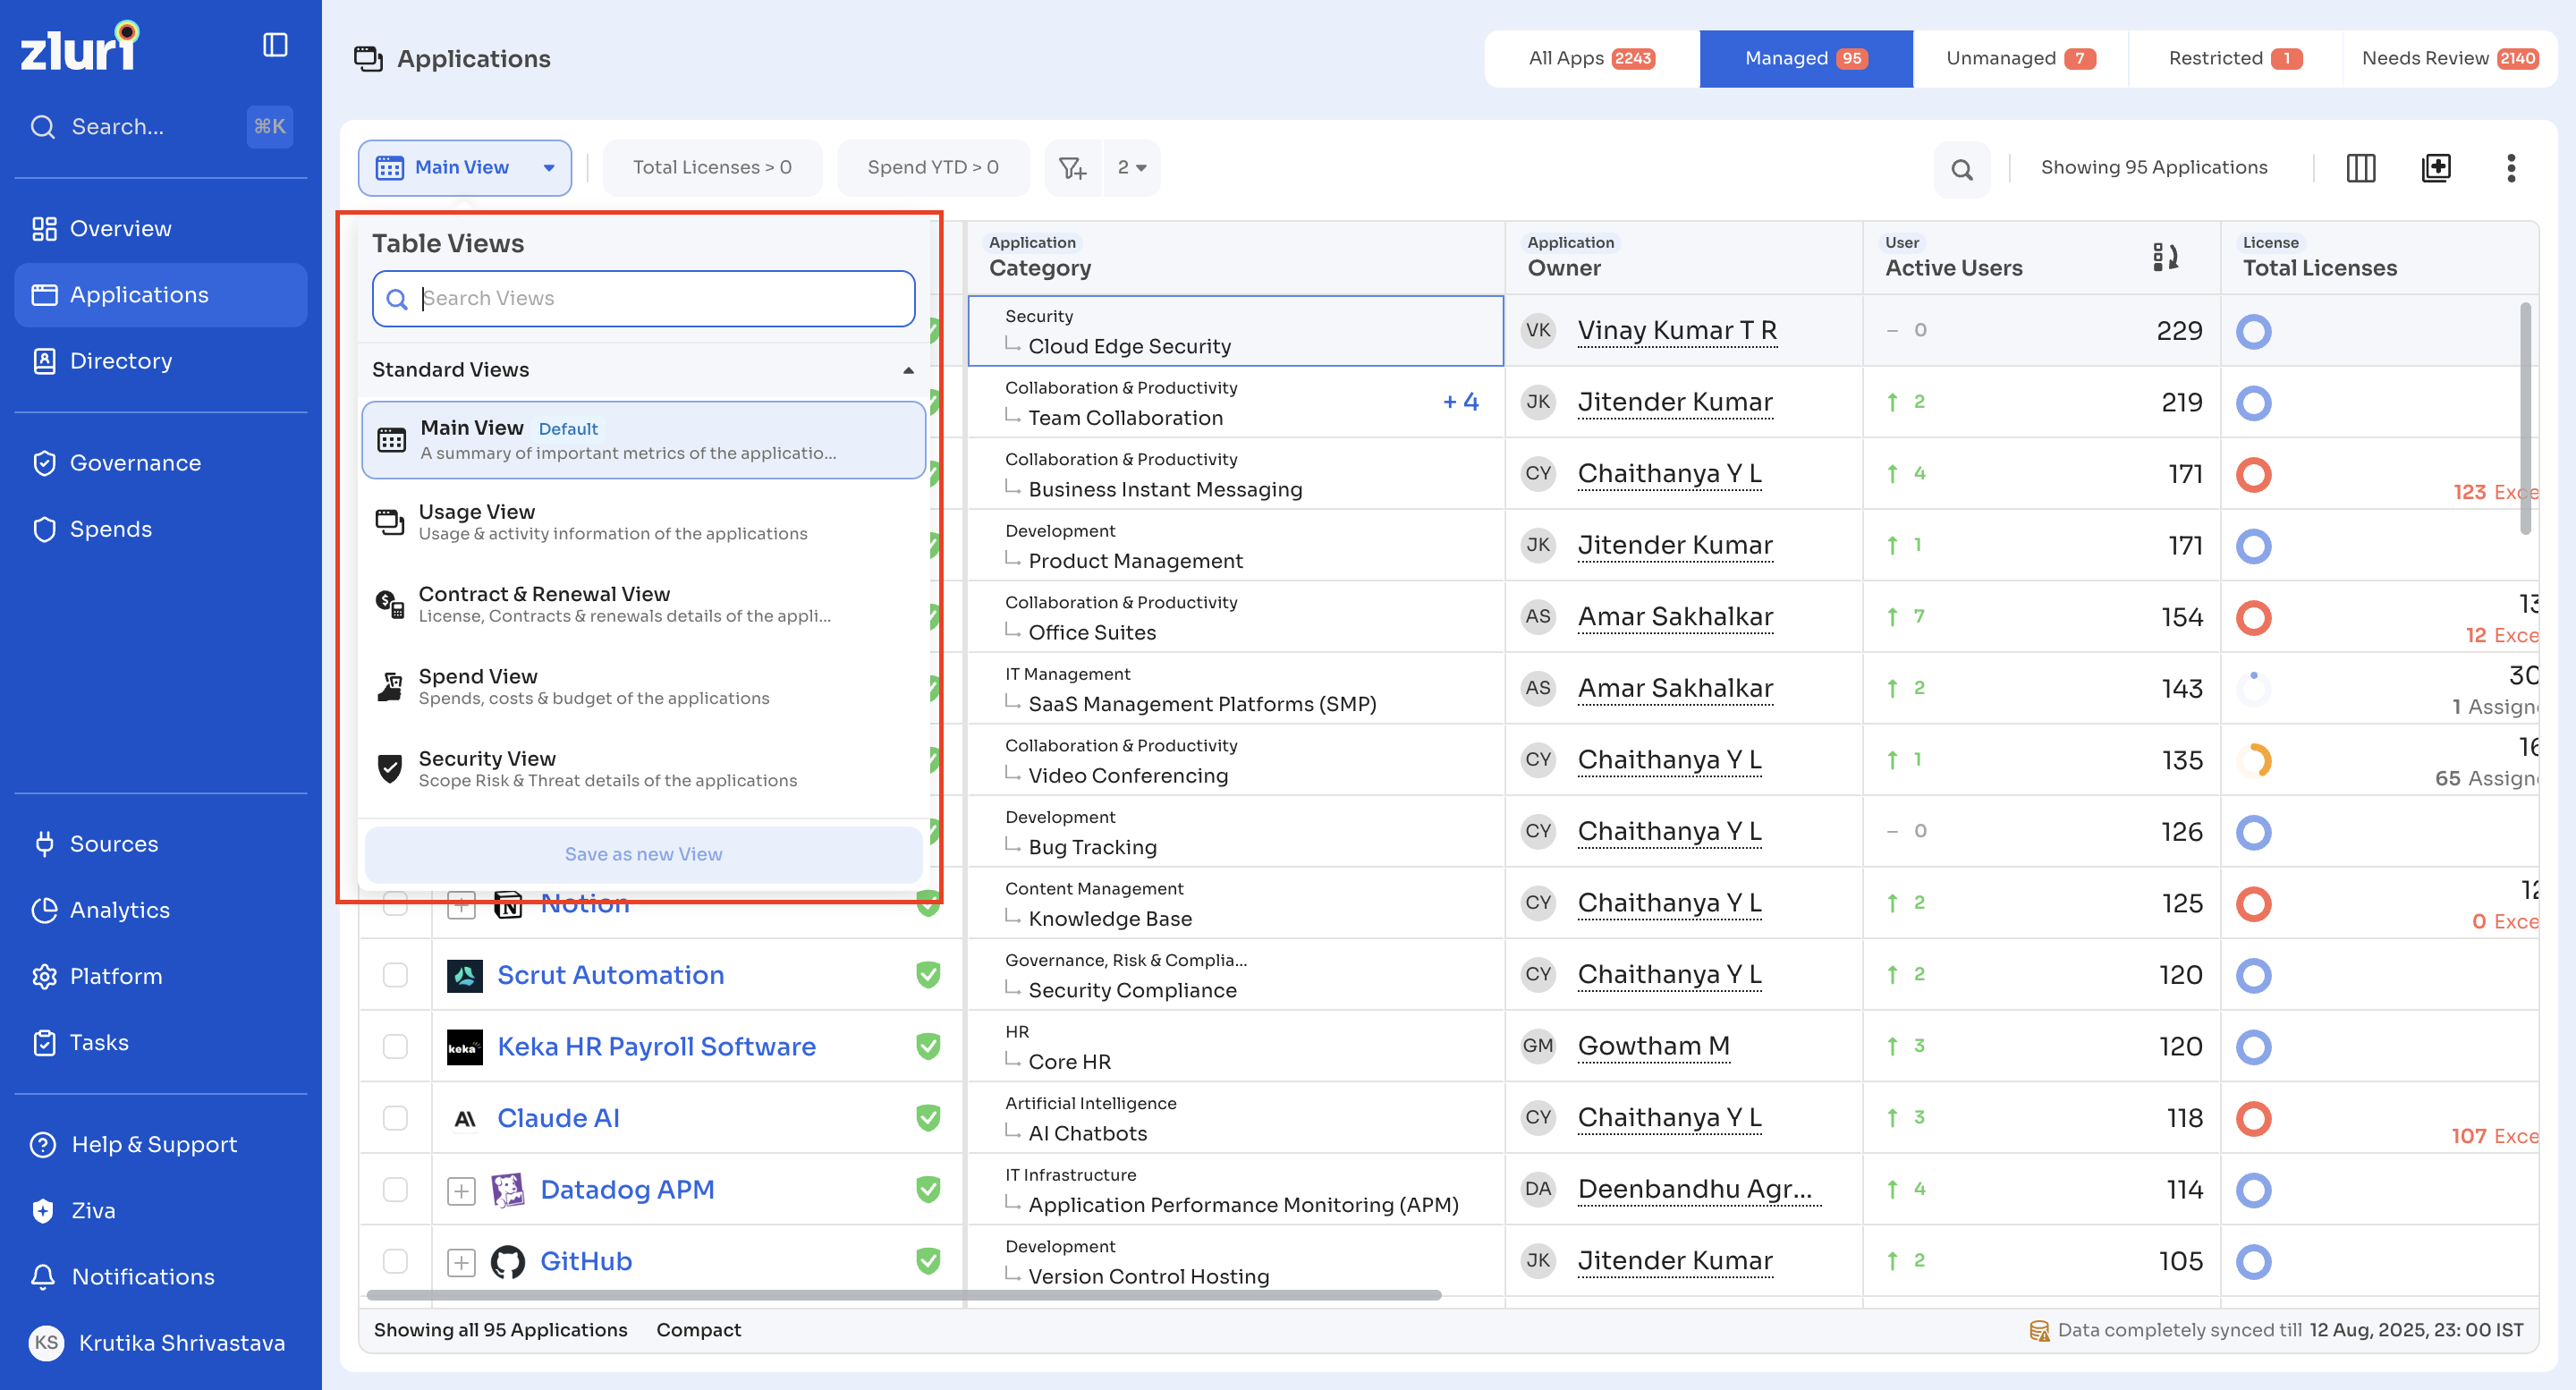
Views control which columns and layout appear in the table. Select the Main View dropdown at the top of the table to switch views or create a new one.
Standard views
| View | Description |
|---|---|
| Main View | A summary of important metrics of the application (default) |
| Usage View | Usage and activity information of the applications |
| Contract & Renewal View | License, contract, and renewal details of the applications |
| Spend View | Spends, costs, and budget of the applications |
| Security View | Scope, risk, and threat details of the applications |
Use Search Views to find a view by name.
Select Save as new View to save the current column and filter configuration as a custom view.
Filters
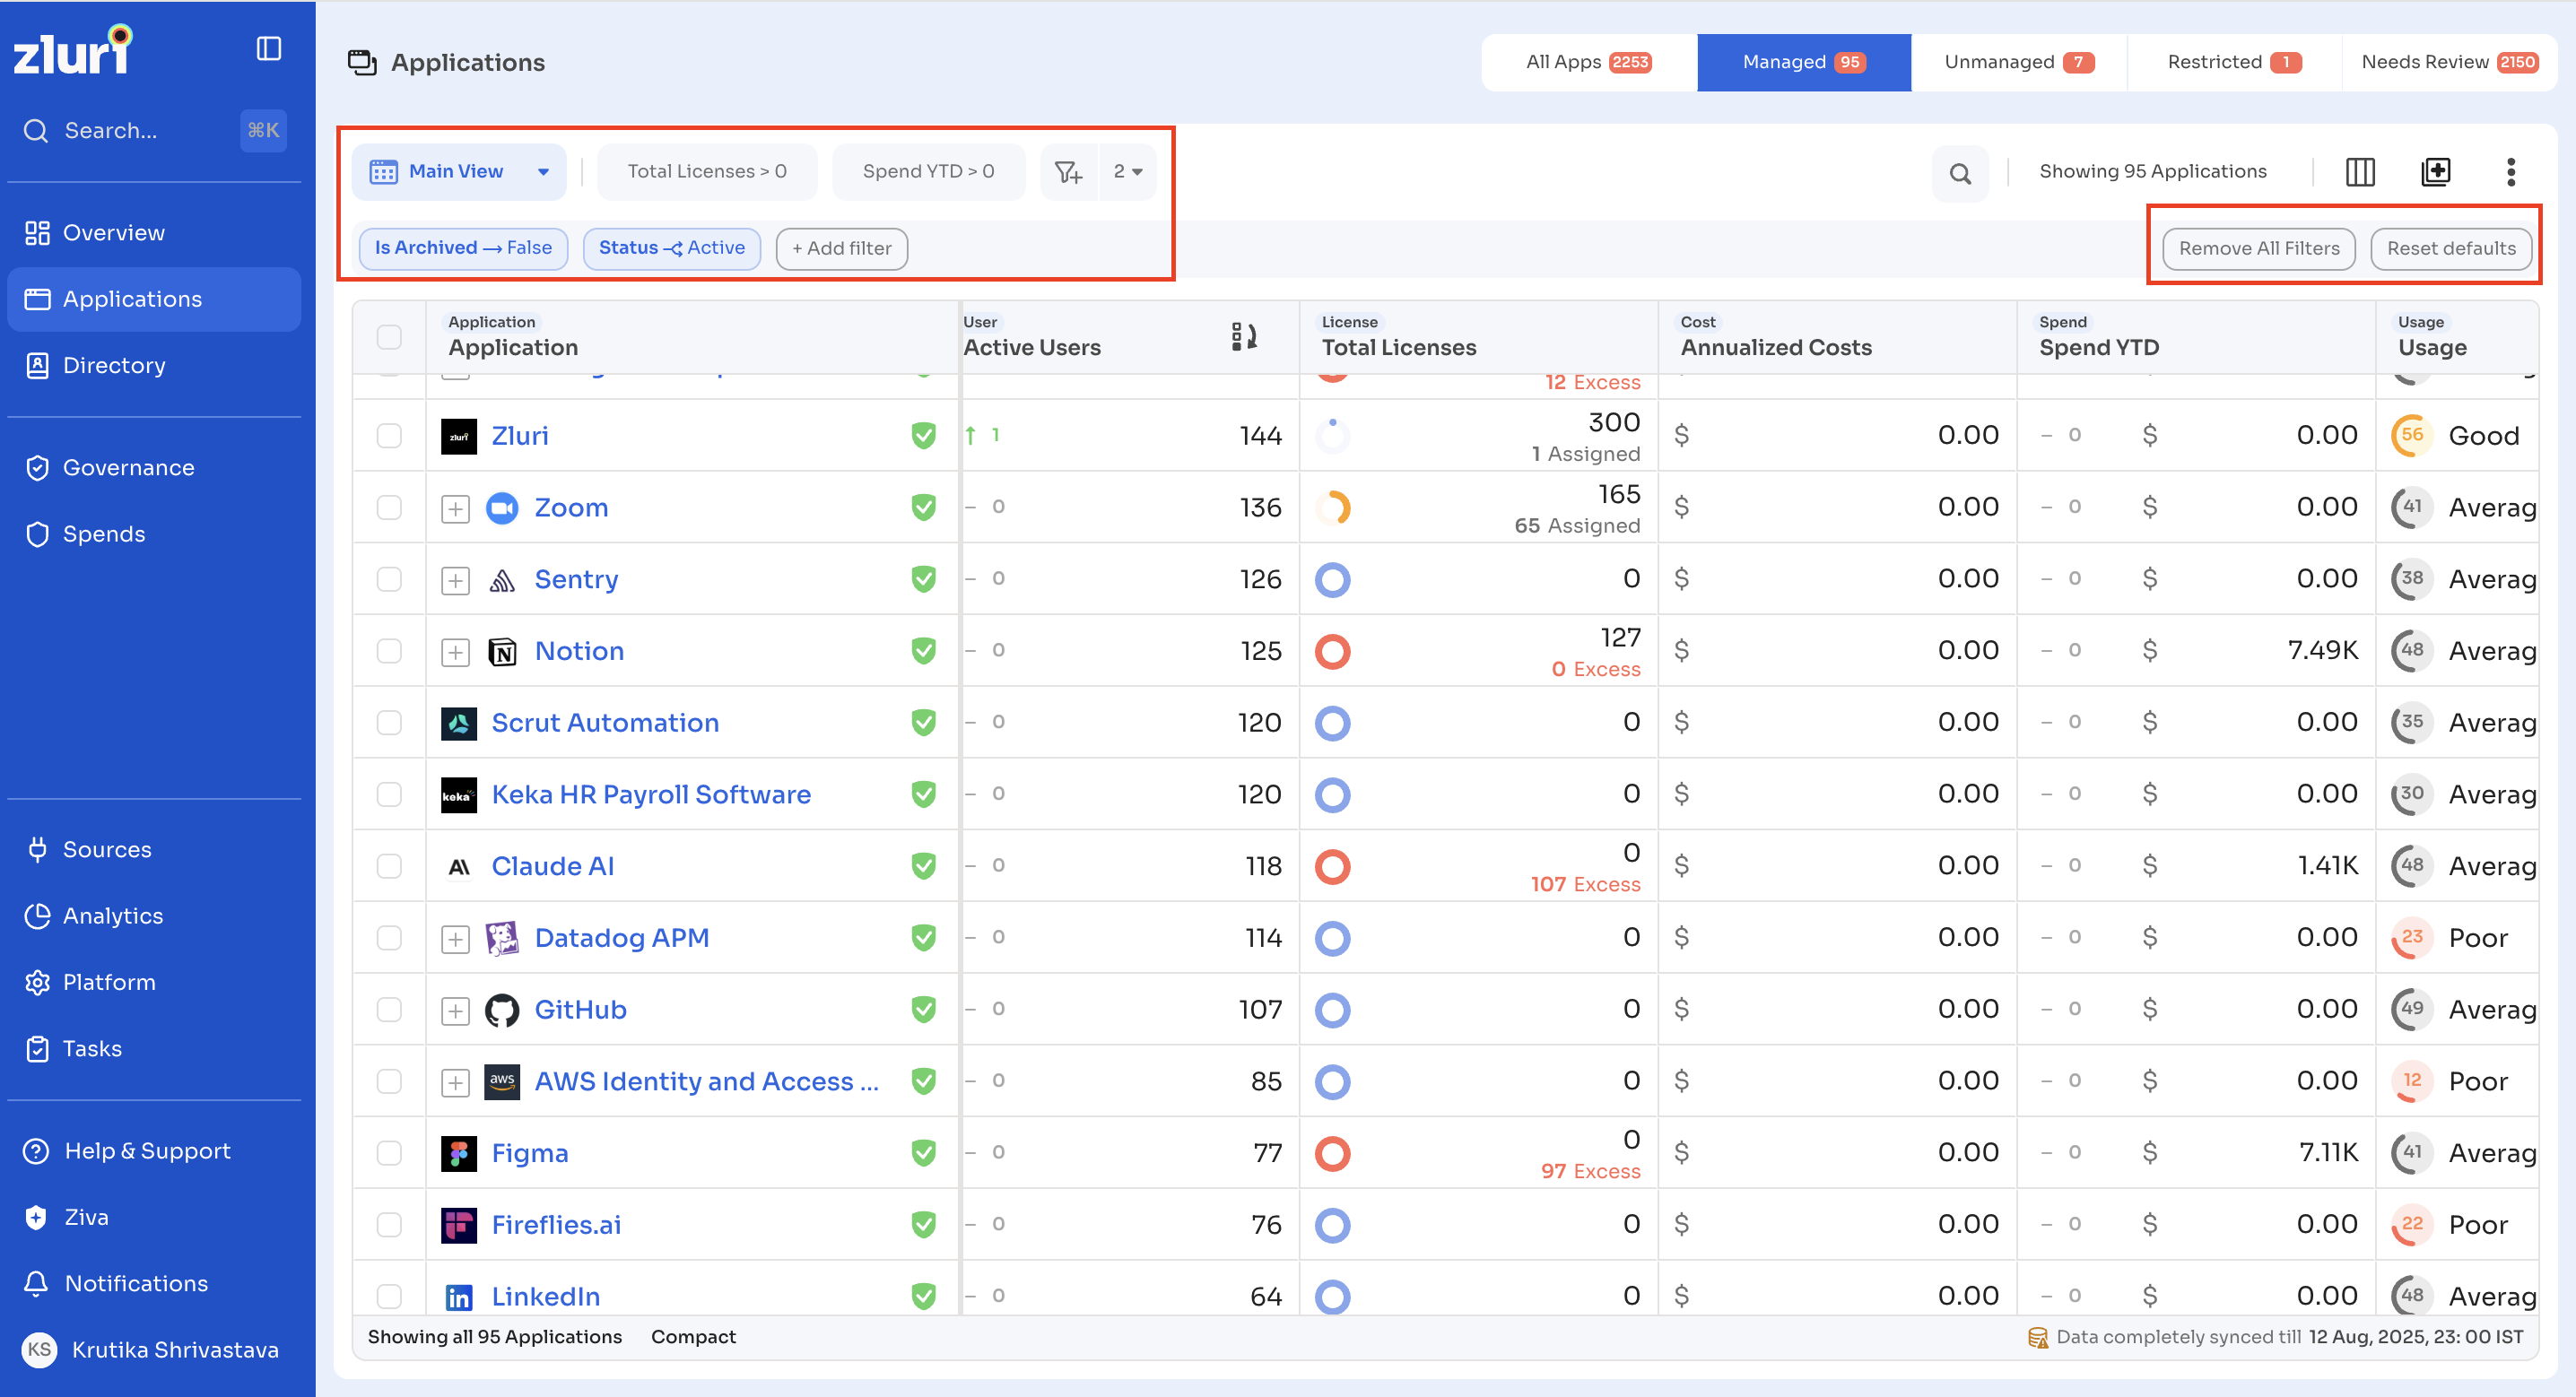
Two default filters apply to the table: Is Archived → False and Status → Active.
Select + Add filter to add another condition.
Select Remove All Filters to clear every applied filter, or Reset defaults to restore the default filter set.
A badge next to the filter icon shows the number of active filters.
Search
Select the search icon to find applications by name within the current tab and active filters.
Selecting applications and bulk actions
Select the checkbox on any row to select an application. Select the checkbox in the header row to select every application currently shown.
With one or more applications selected, the toolbar switches to bulk action mode.
- Bulk Edit: update a field across all selected applications directly in the table.
- Bulk Update: upload a CSV to apply structured updates across selected applications.
Select Clear Selection to deselect all applications.
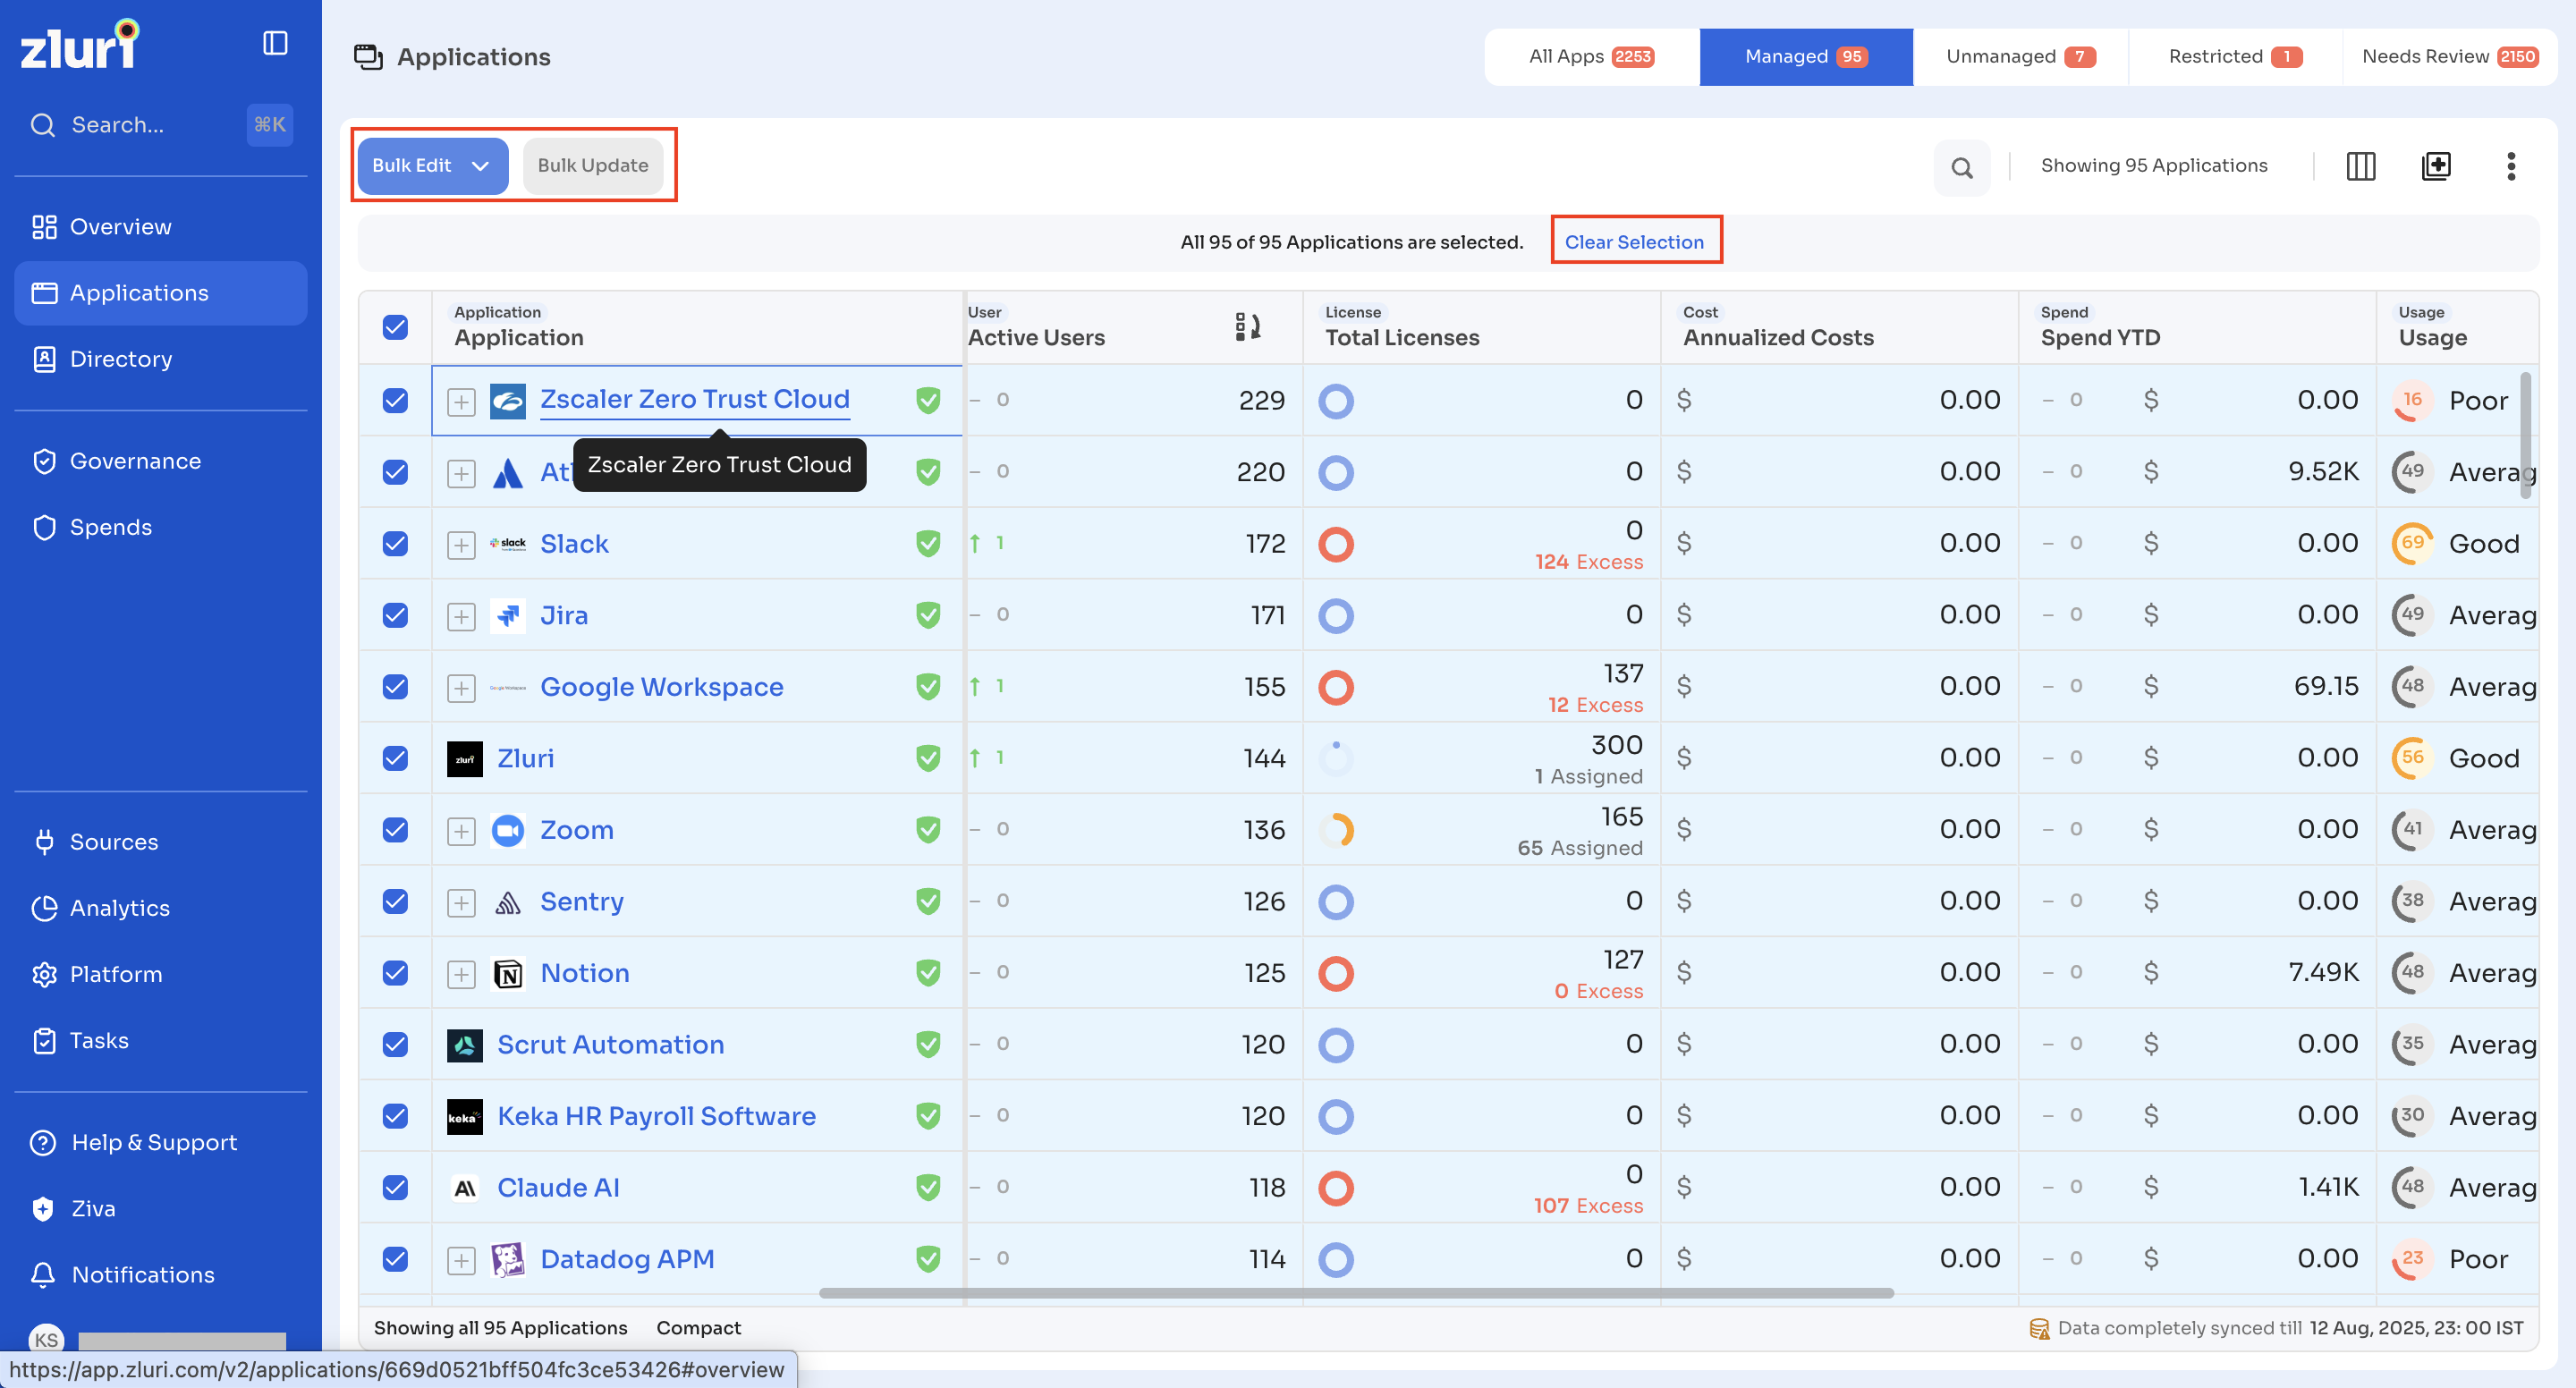
Table actions menu
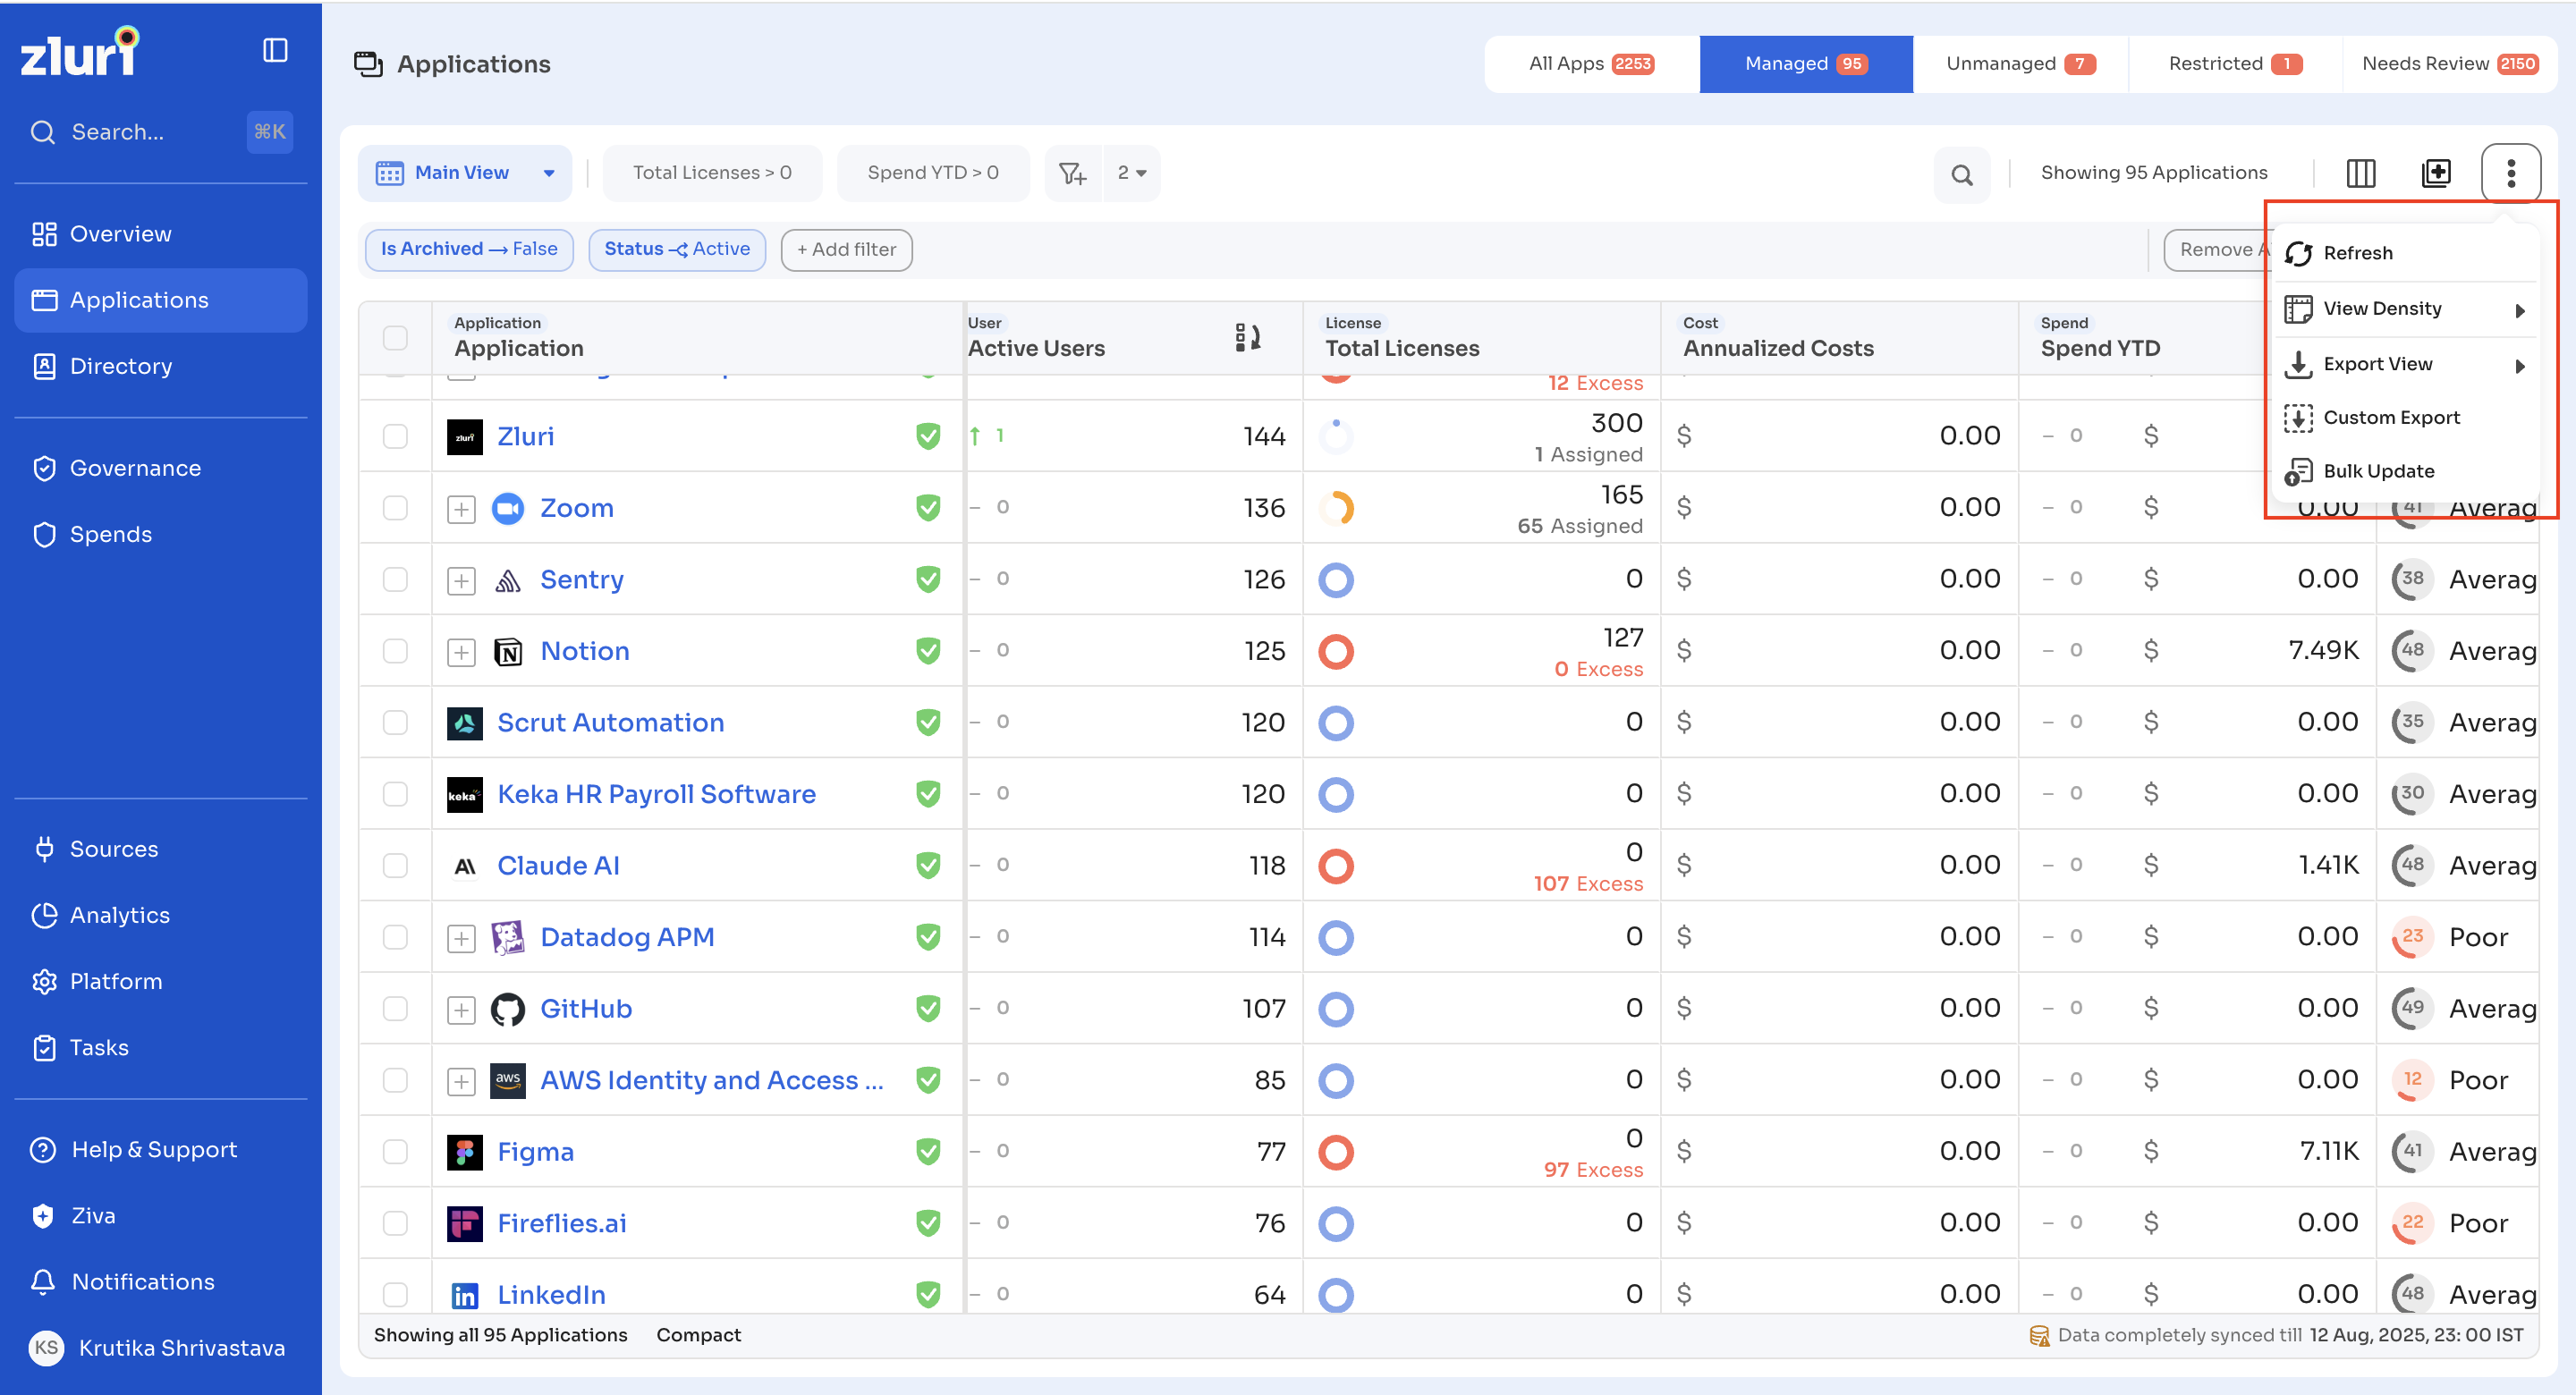
Select the three-dot menu at the top right of the table for the following options:
- Refresh: reload the latest data in the current view.
- View Density: choose between Compact and Comfortable row spacing.
- Export View: export the data currently visible in the table.
- Custom Export: choose specific fields to include in an export, independent of the visible columns.
- Bulk Update: apply structured updates using a CSV.
Density and sync status
Toggle Compact or Comfortable at the bottom left of the table to adjust row spacing.
The bottom right of the table shows when data was last synced, for example Data completely synced till 12 Aug, 2025, 23:00 IST.
Updated 4 days ago