
Working with Identities and Accounts
This is available as an Early Access Module
This document covers everything you do in the Identities module: browsing each inventory, reading an identity's accounts, applications and entitlements, assigning owners, acting on accounts, and editing identity details.
For what the module is and how it classifies identities, see Identities module overview.
View human identities
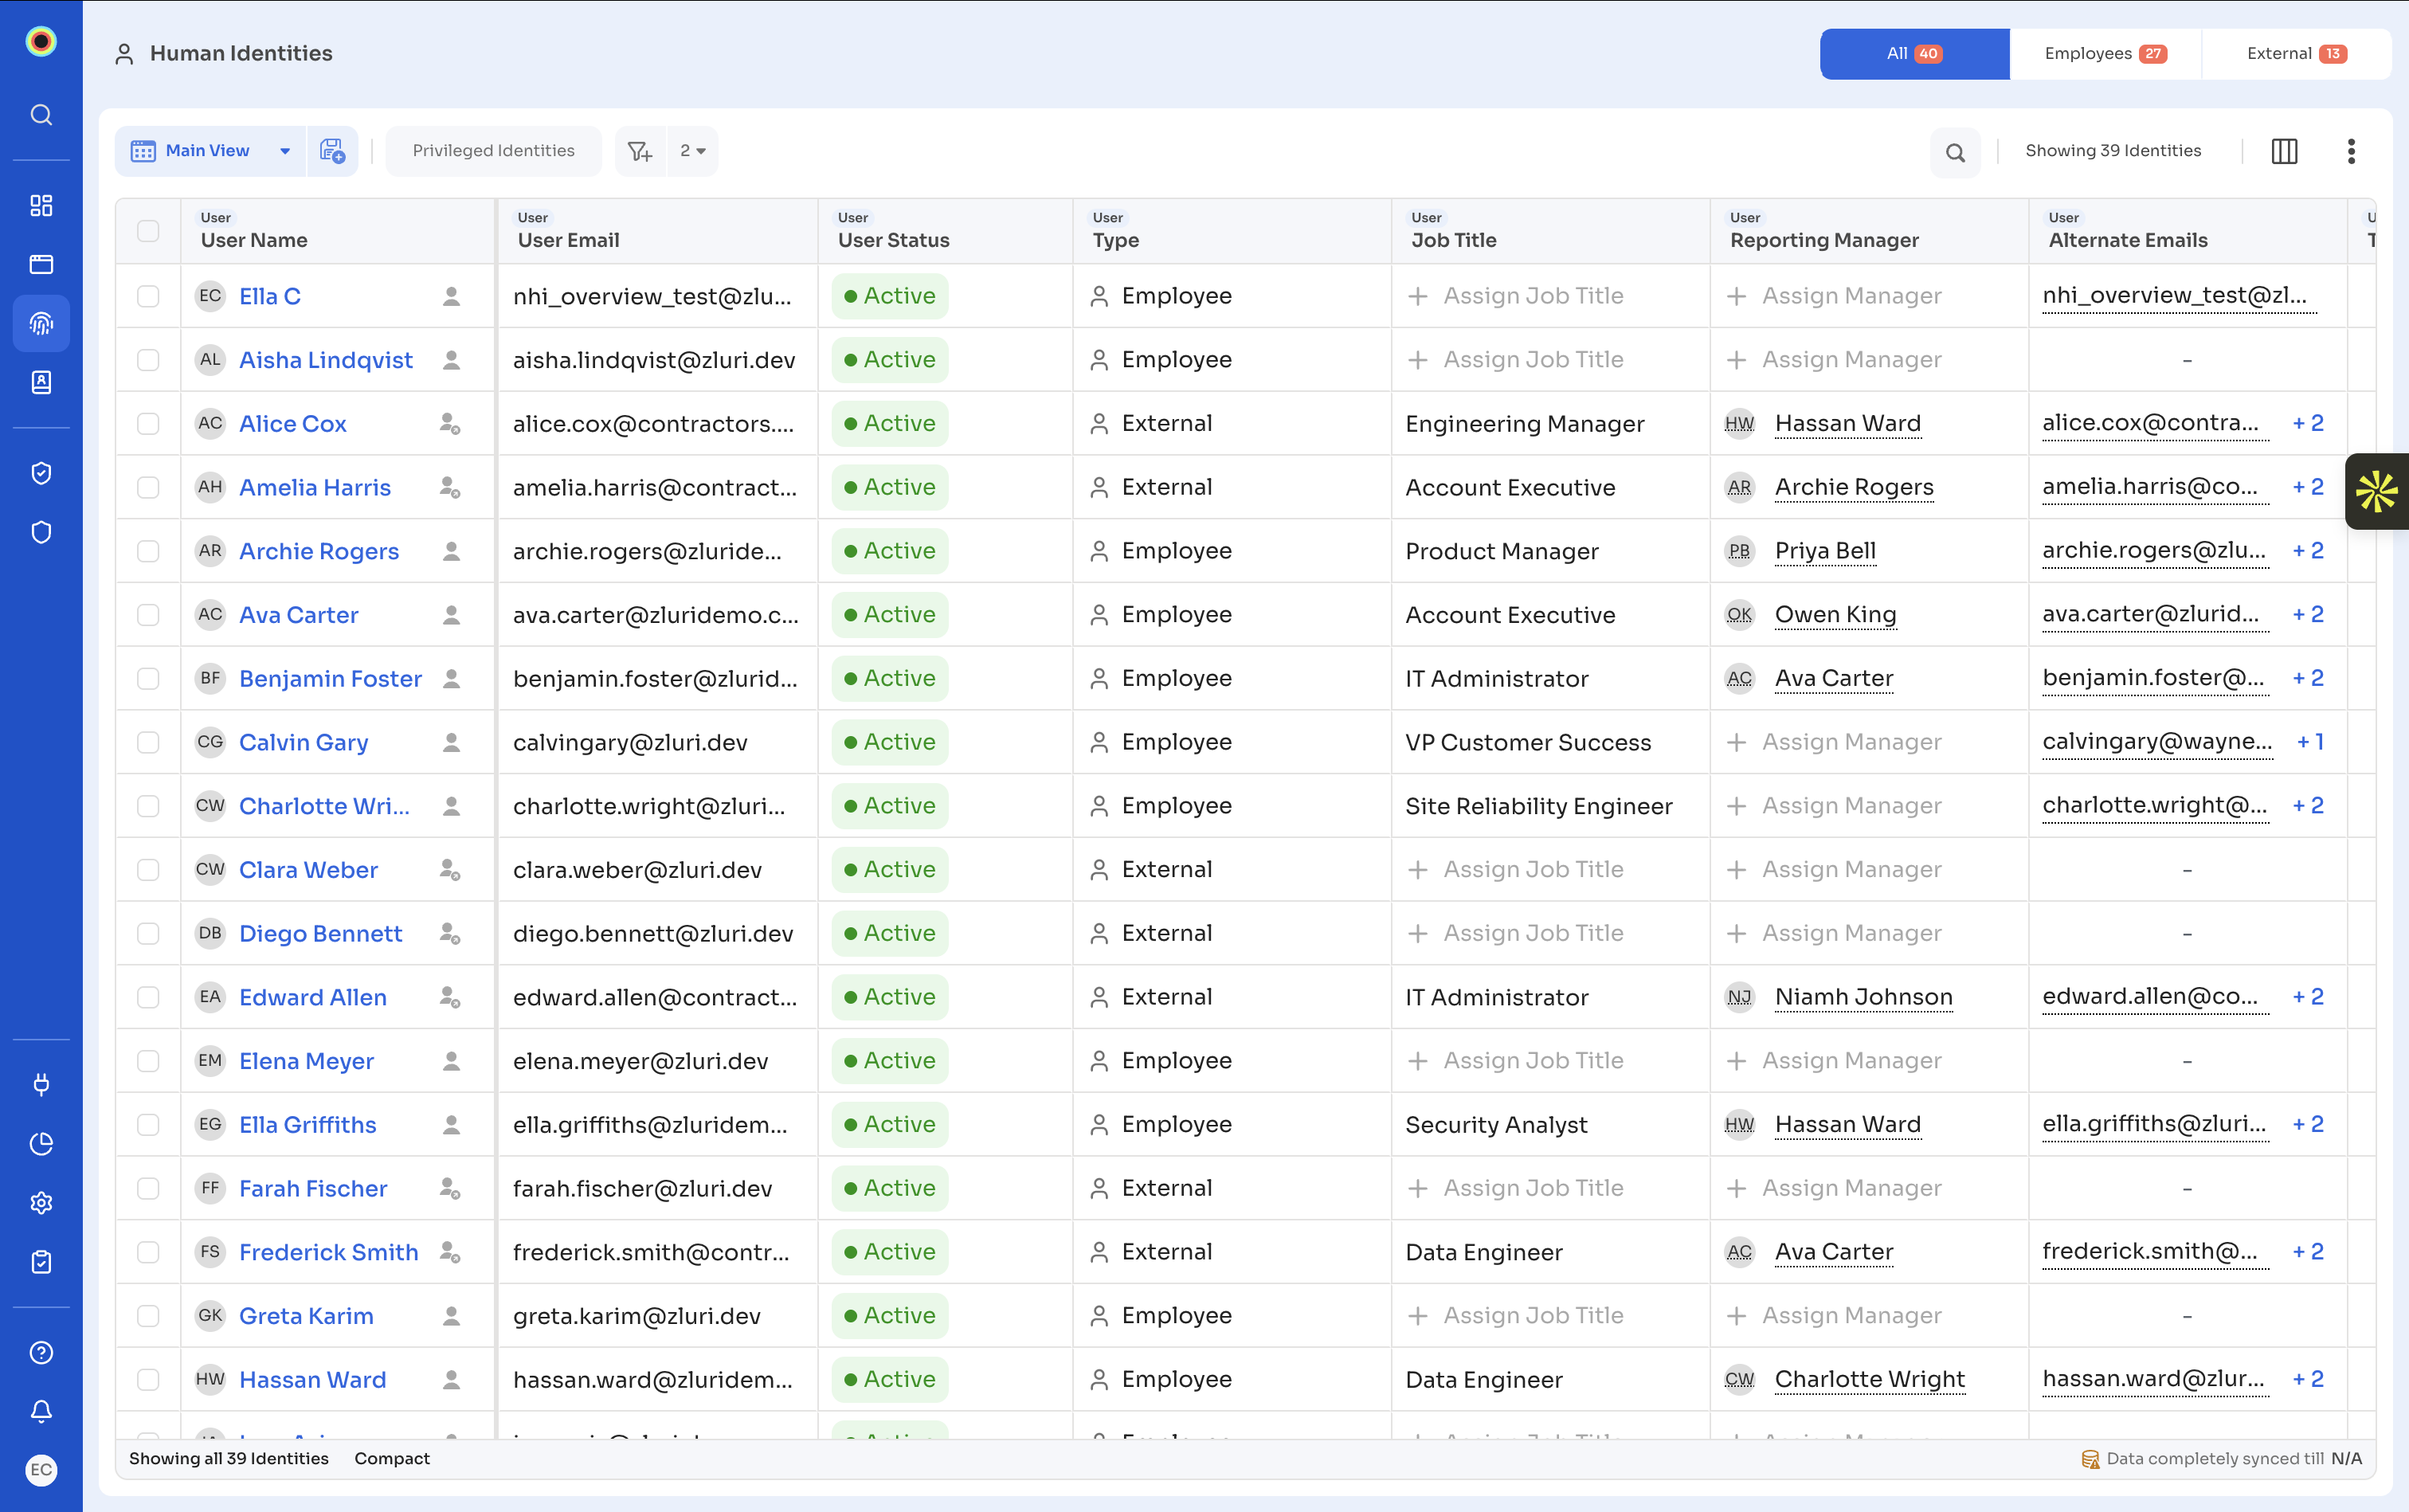
Navigate to Identities > Human to open the Human Identities page. Three tabs across the top split the inventory: All, Employees, and External. Employees are the people on your payroll or in your primary directory. External identities are contractors, partners, and anyone else outside the organization who holds access.
Steps
- Navigate to Identities > Human.
- Select the All, Employees, or External tab.
- Select Privileged Identities to narrow the table to identities holding at least one privileged role or permission.
- Select the column manager icon to open Modify Columns, then select the columns you want and select Update.
- Select an identity name to open its detail view.
View non-human identities
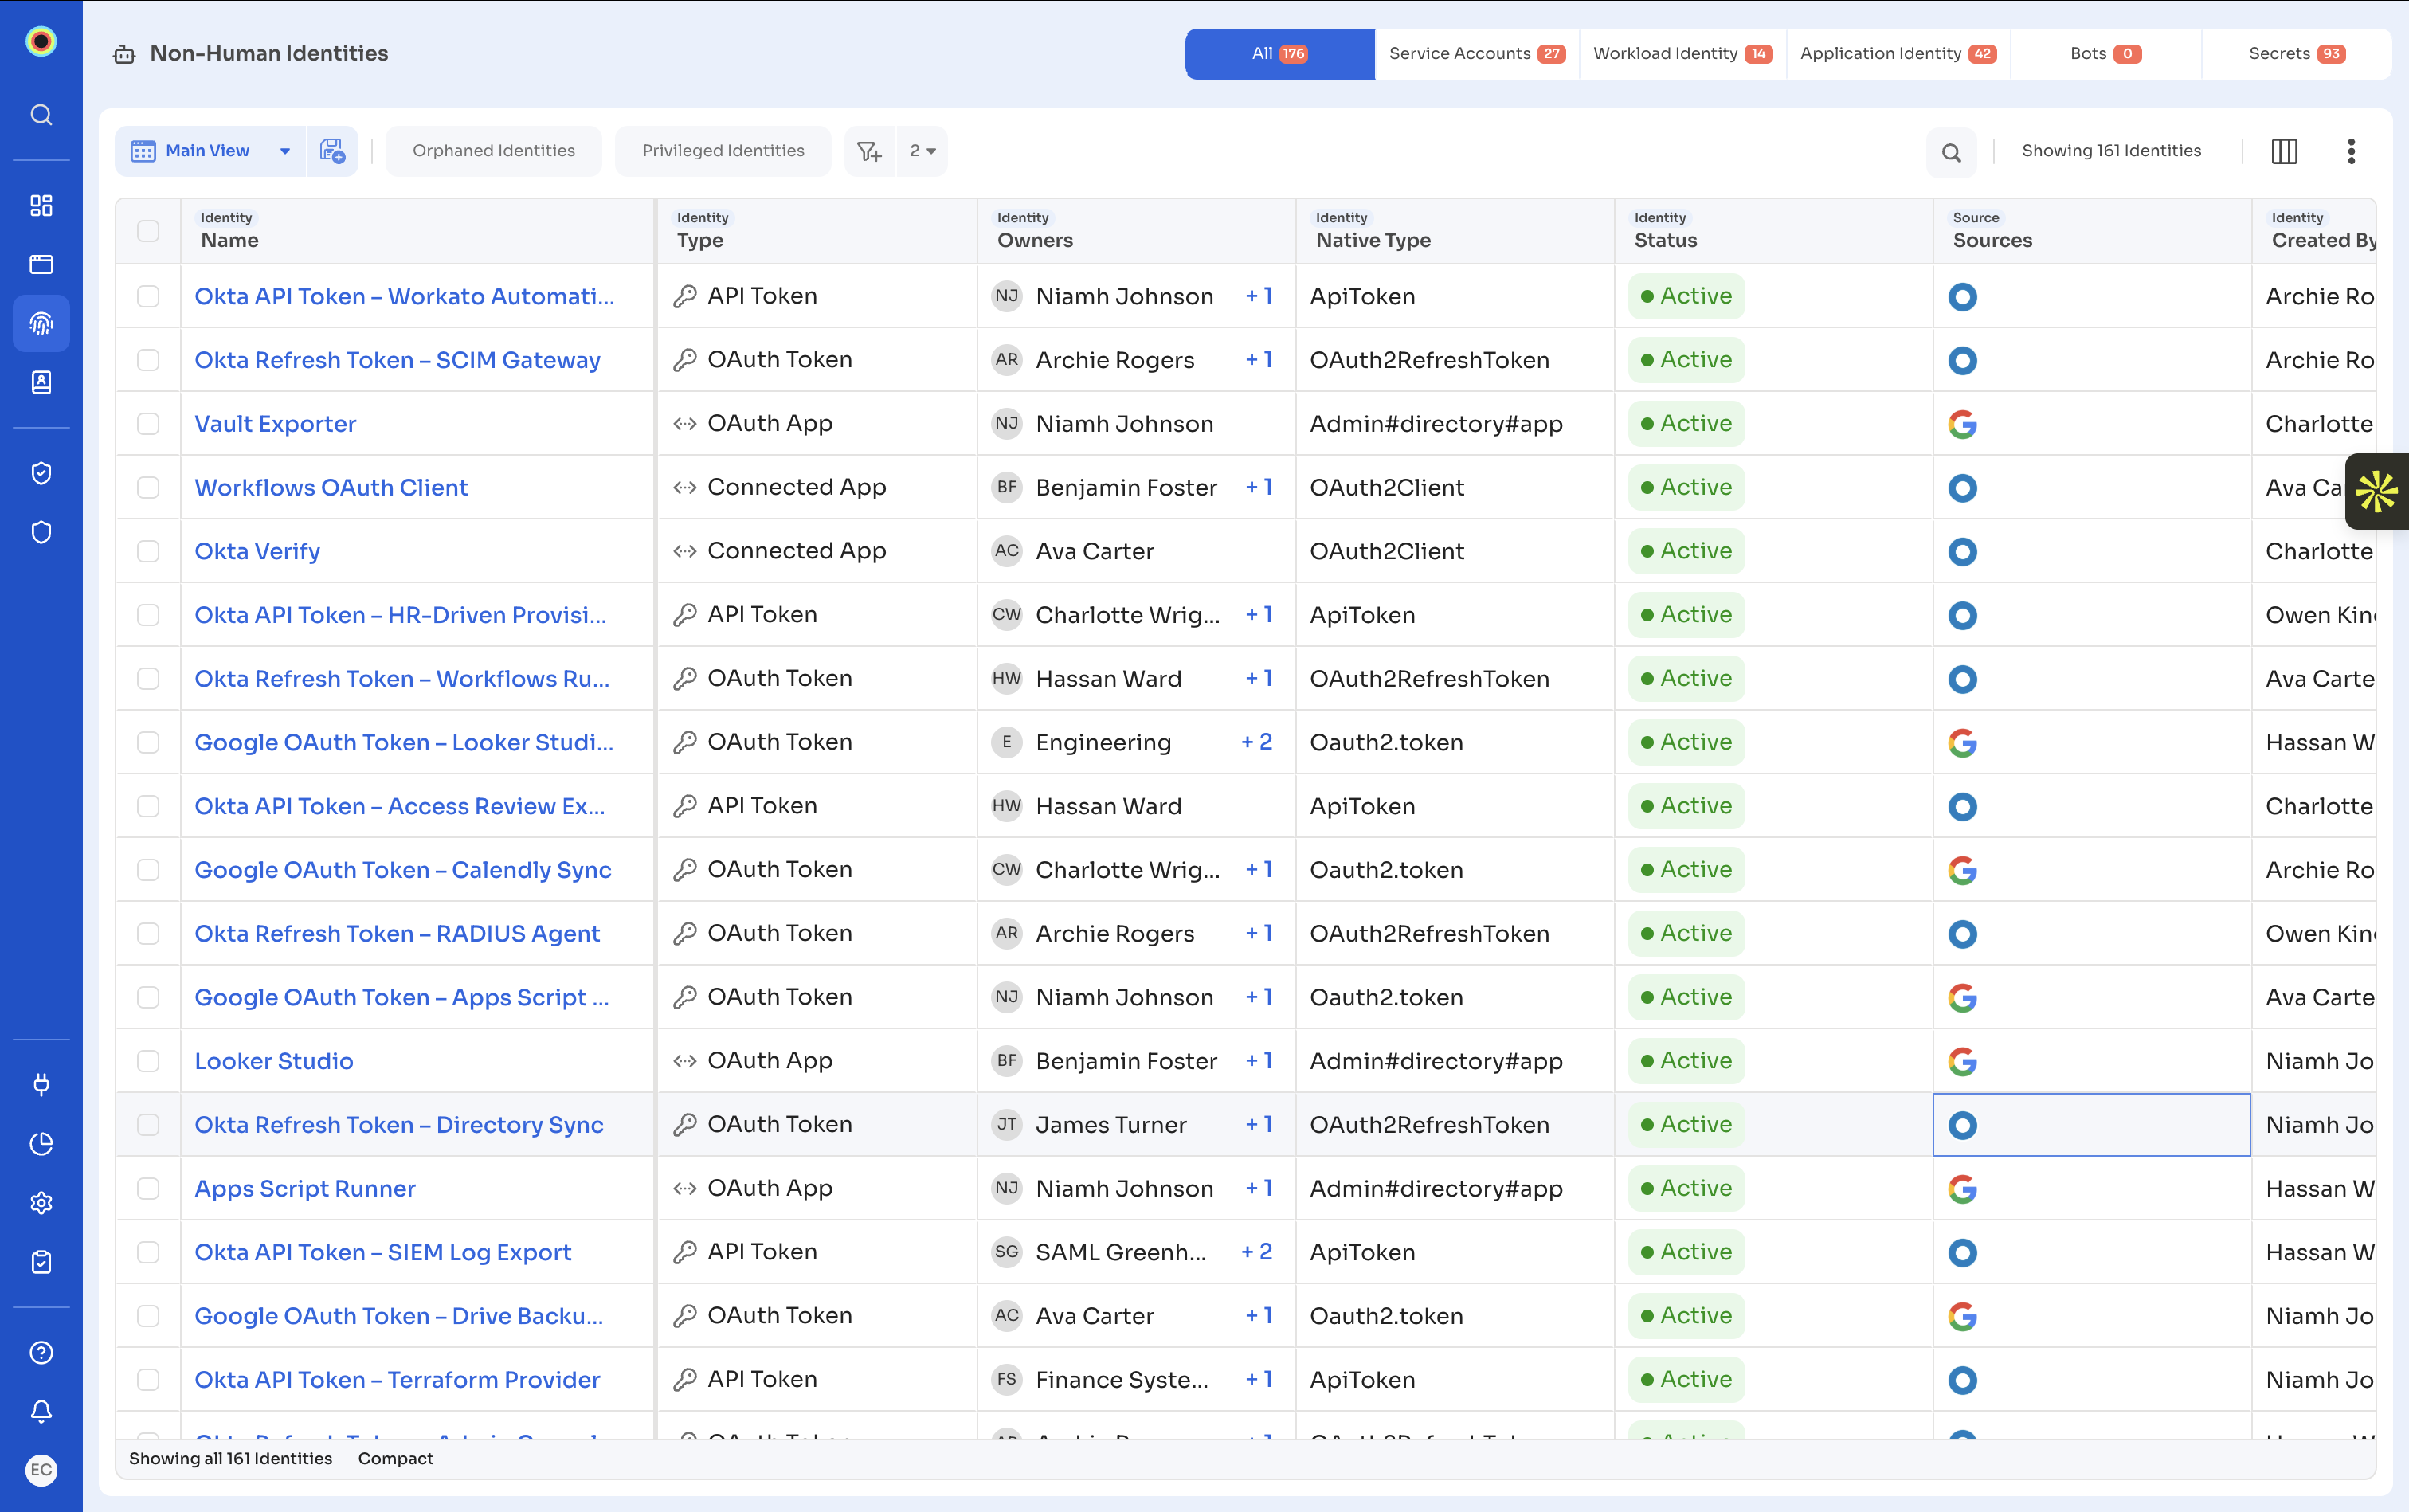
Navigate to Identities > Non Human to open the Non-Human Identities page. Six tabs split the inventory: All, Service Accounts, Workload Identity, Application Identity, Bots, and Secrets. Each tab shows a count of the identities it holds.
Steps
- Navigate to Identities > Non Human.
- Select the bucket tab you want to review.
- Select Orphaned Identities to narrow the table to identities with no valid owner.
- Select Privileged Identities to narrow the table to identities holding at least one privileged role or permission.
- Select the column manager icon to open Modify Columns, then select the columns you want and select Update.
- Select an identity name to open its detail view.
The Secrets tab carries three columns the other buckets do not: Expiry Date, Last Rotation Date, and Next Rotation Due Date.
Review unclassified identities
Navigate to Identities > Unclassified to open the Unclassified Identities page. This page holds identities Zluri discovered from a connected source but could not match to any type it defines. Assigning the correct type moves the identity into the Human or Non Human inventory.
Steps
- Navigate to Identities > Unclassified.
- Select an identity name to open its detail view.
- Select the More actions menu in the top right, then select Change Type.
- Select the type that fits the identity.
You can also reclassify without opening the identity. Select the Type cell in the table, select the edit icon, then choose a new type in the Modify Identity Type dialog.
To reclassify several identities at once, select their checkboxes, then select Bulk Edit > Identity Type.
Open an identity's detail view
Select any identity name in a table to open its detail view. The left rail shows the identity's key attributes and four tabs: Overview, Accounts, Applications, and Entitlements. Each tab carries a count. The right panel holds Identity Details, Owners, Description, and Discovery.
Steps
- Select an identity name in any identity table.
- Read the right panel for the identity's name, native ID, type, native type, status.
- Read the Owners section for the people or groups accountable for this identity.
- Read the Discovery section for the sources the identity came from, the date Zluri discovered it, the date it was created in the source, and the identity that created it.
- Select Accounts, Applications, or Entitlements to go deeper.
What the Overview tab shows
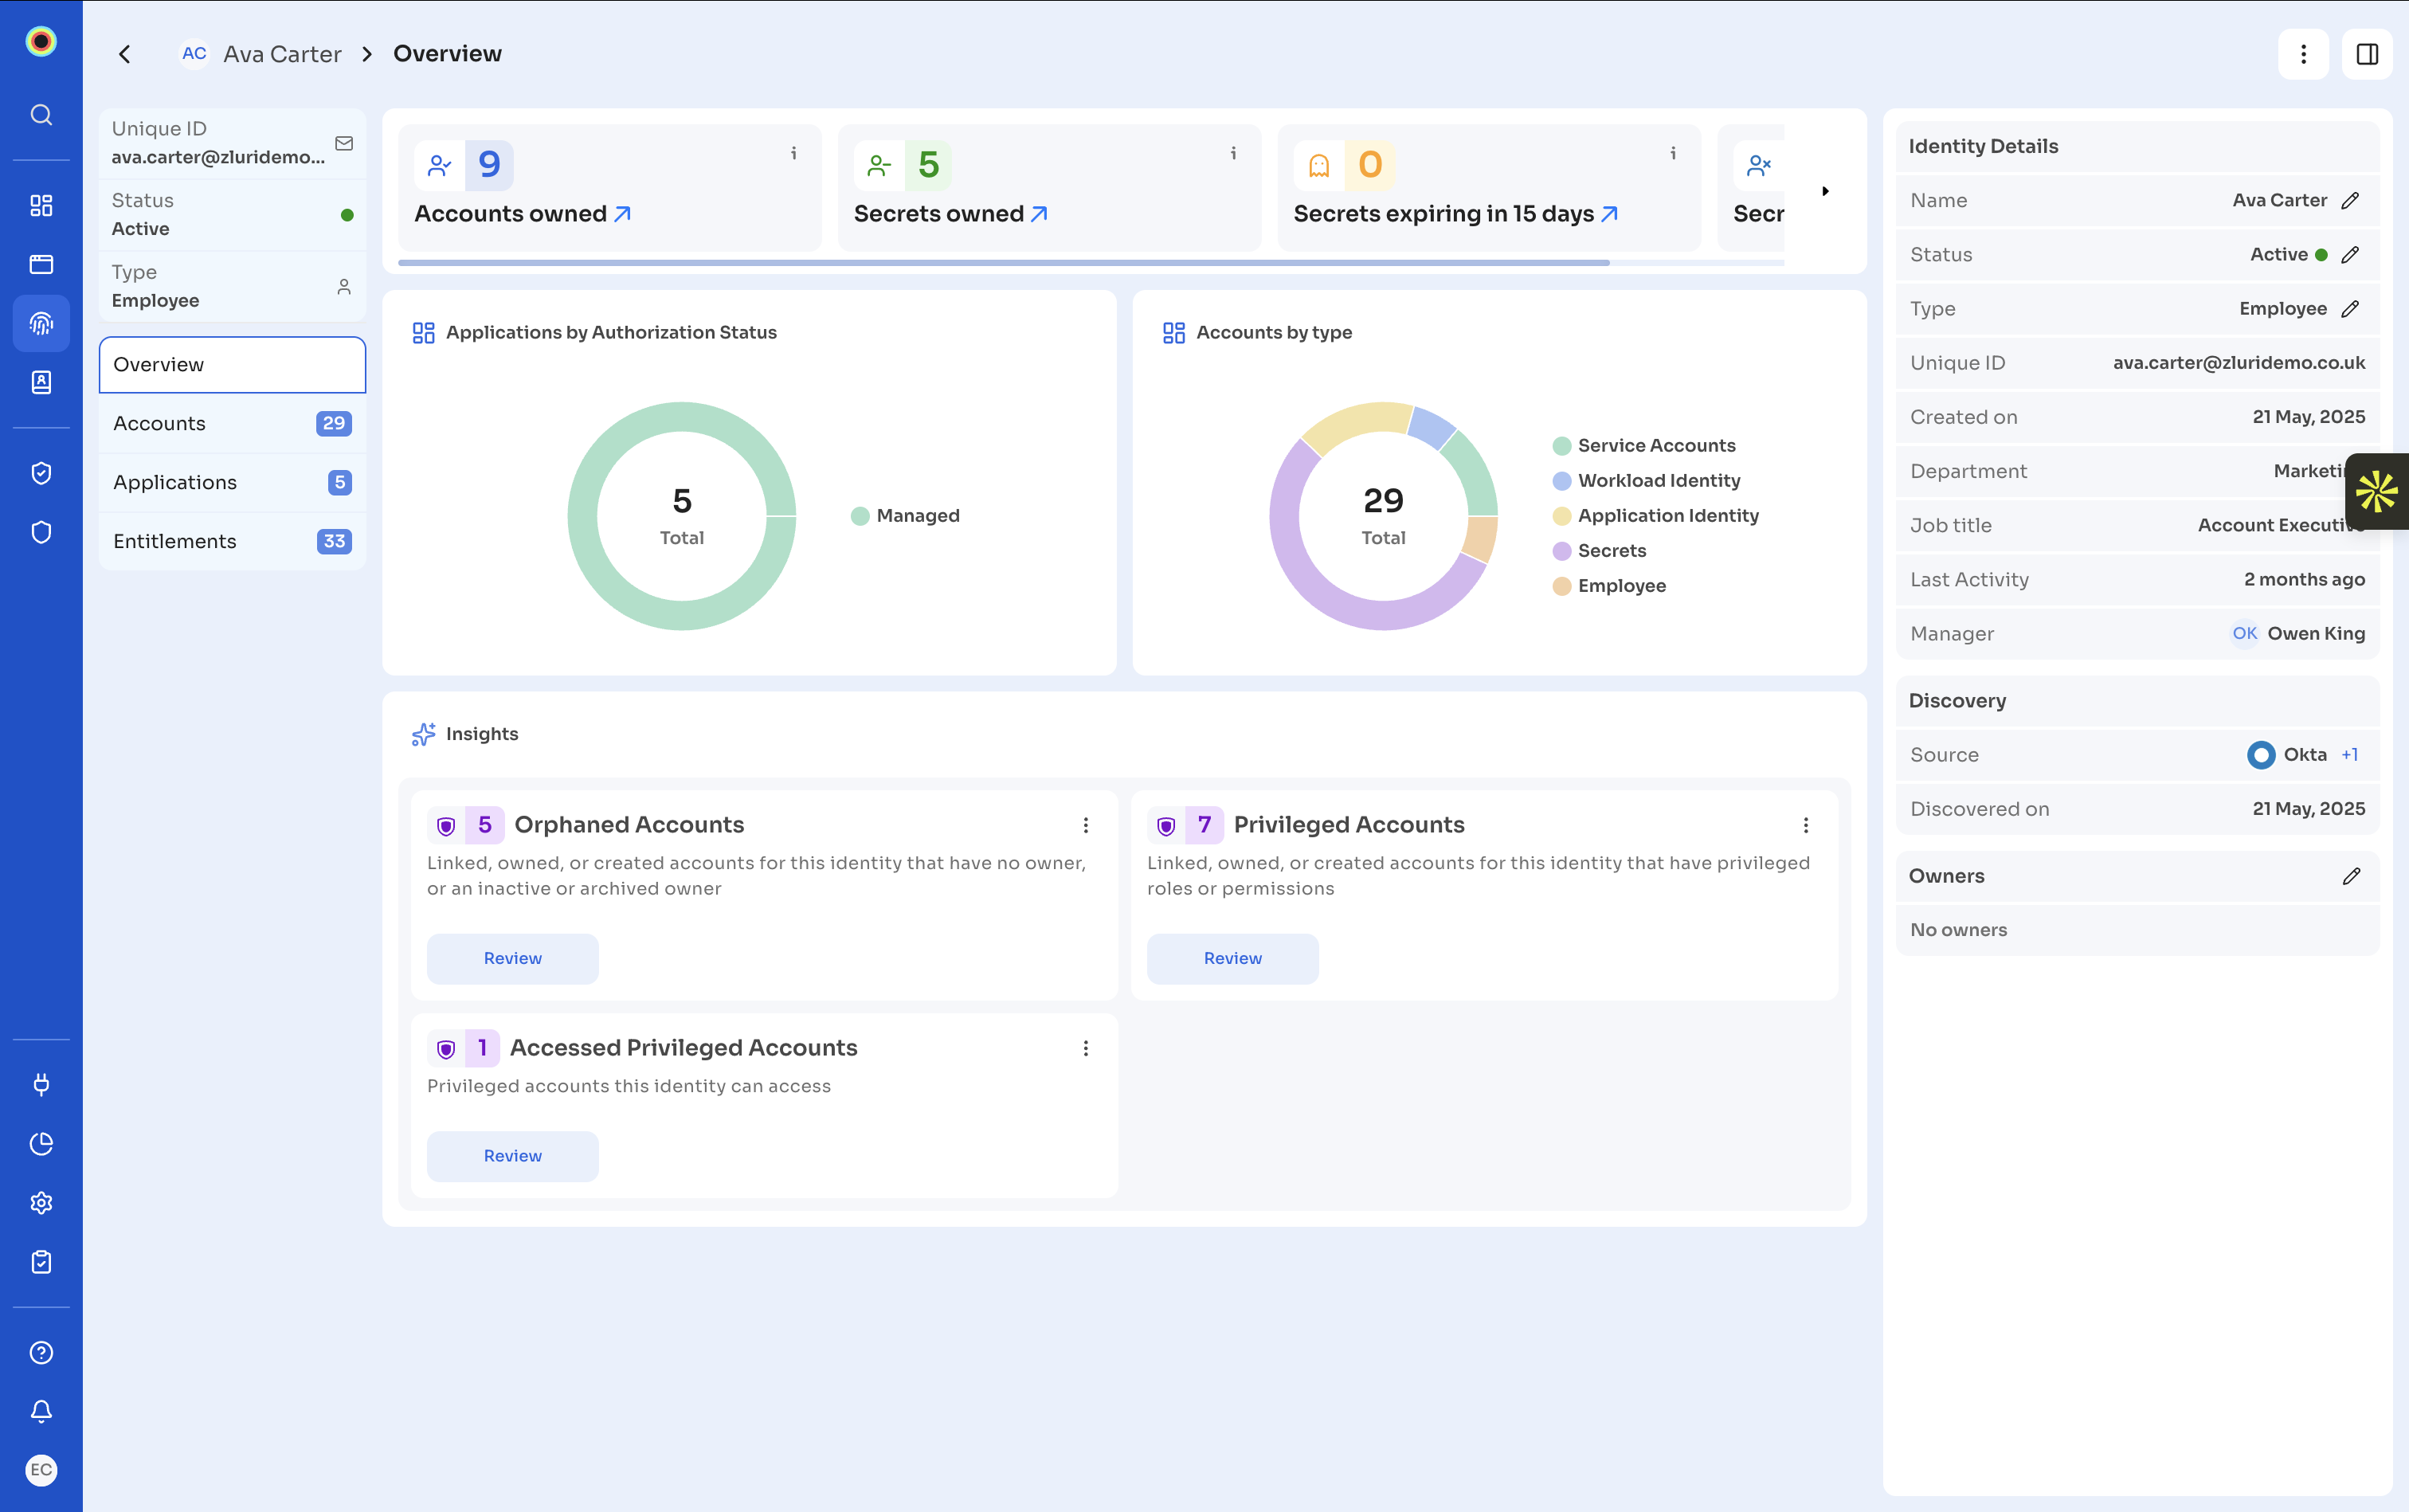
Every identity's Overview tab shows an Applications by Authorization Status chart, an Accounts by type chart, and an Insights section.
A human identity shows all of that, plus a strip of four metric cards above the charts: Accounts owned, Secrets owned, Secrets expiring in 15 days, and Secrets with no expiry. Select the arrow on any card to open the matching list.
Insight cards
Insight cards surface conditions on this identity that are worth acting on. Each card carries a count, a short description of what the count covers, and a Review button that opens the records behind it.
Zluri only shows a card when its count is greater than zero, so the set of cards differs from one identity to the next.
Review an identity's accounts
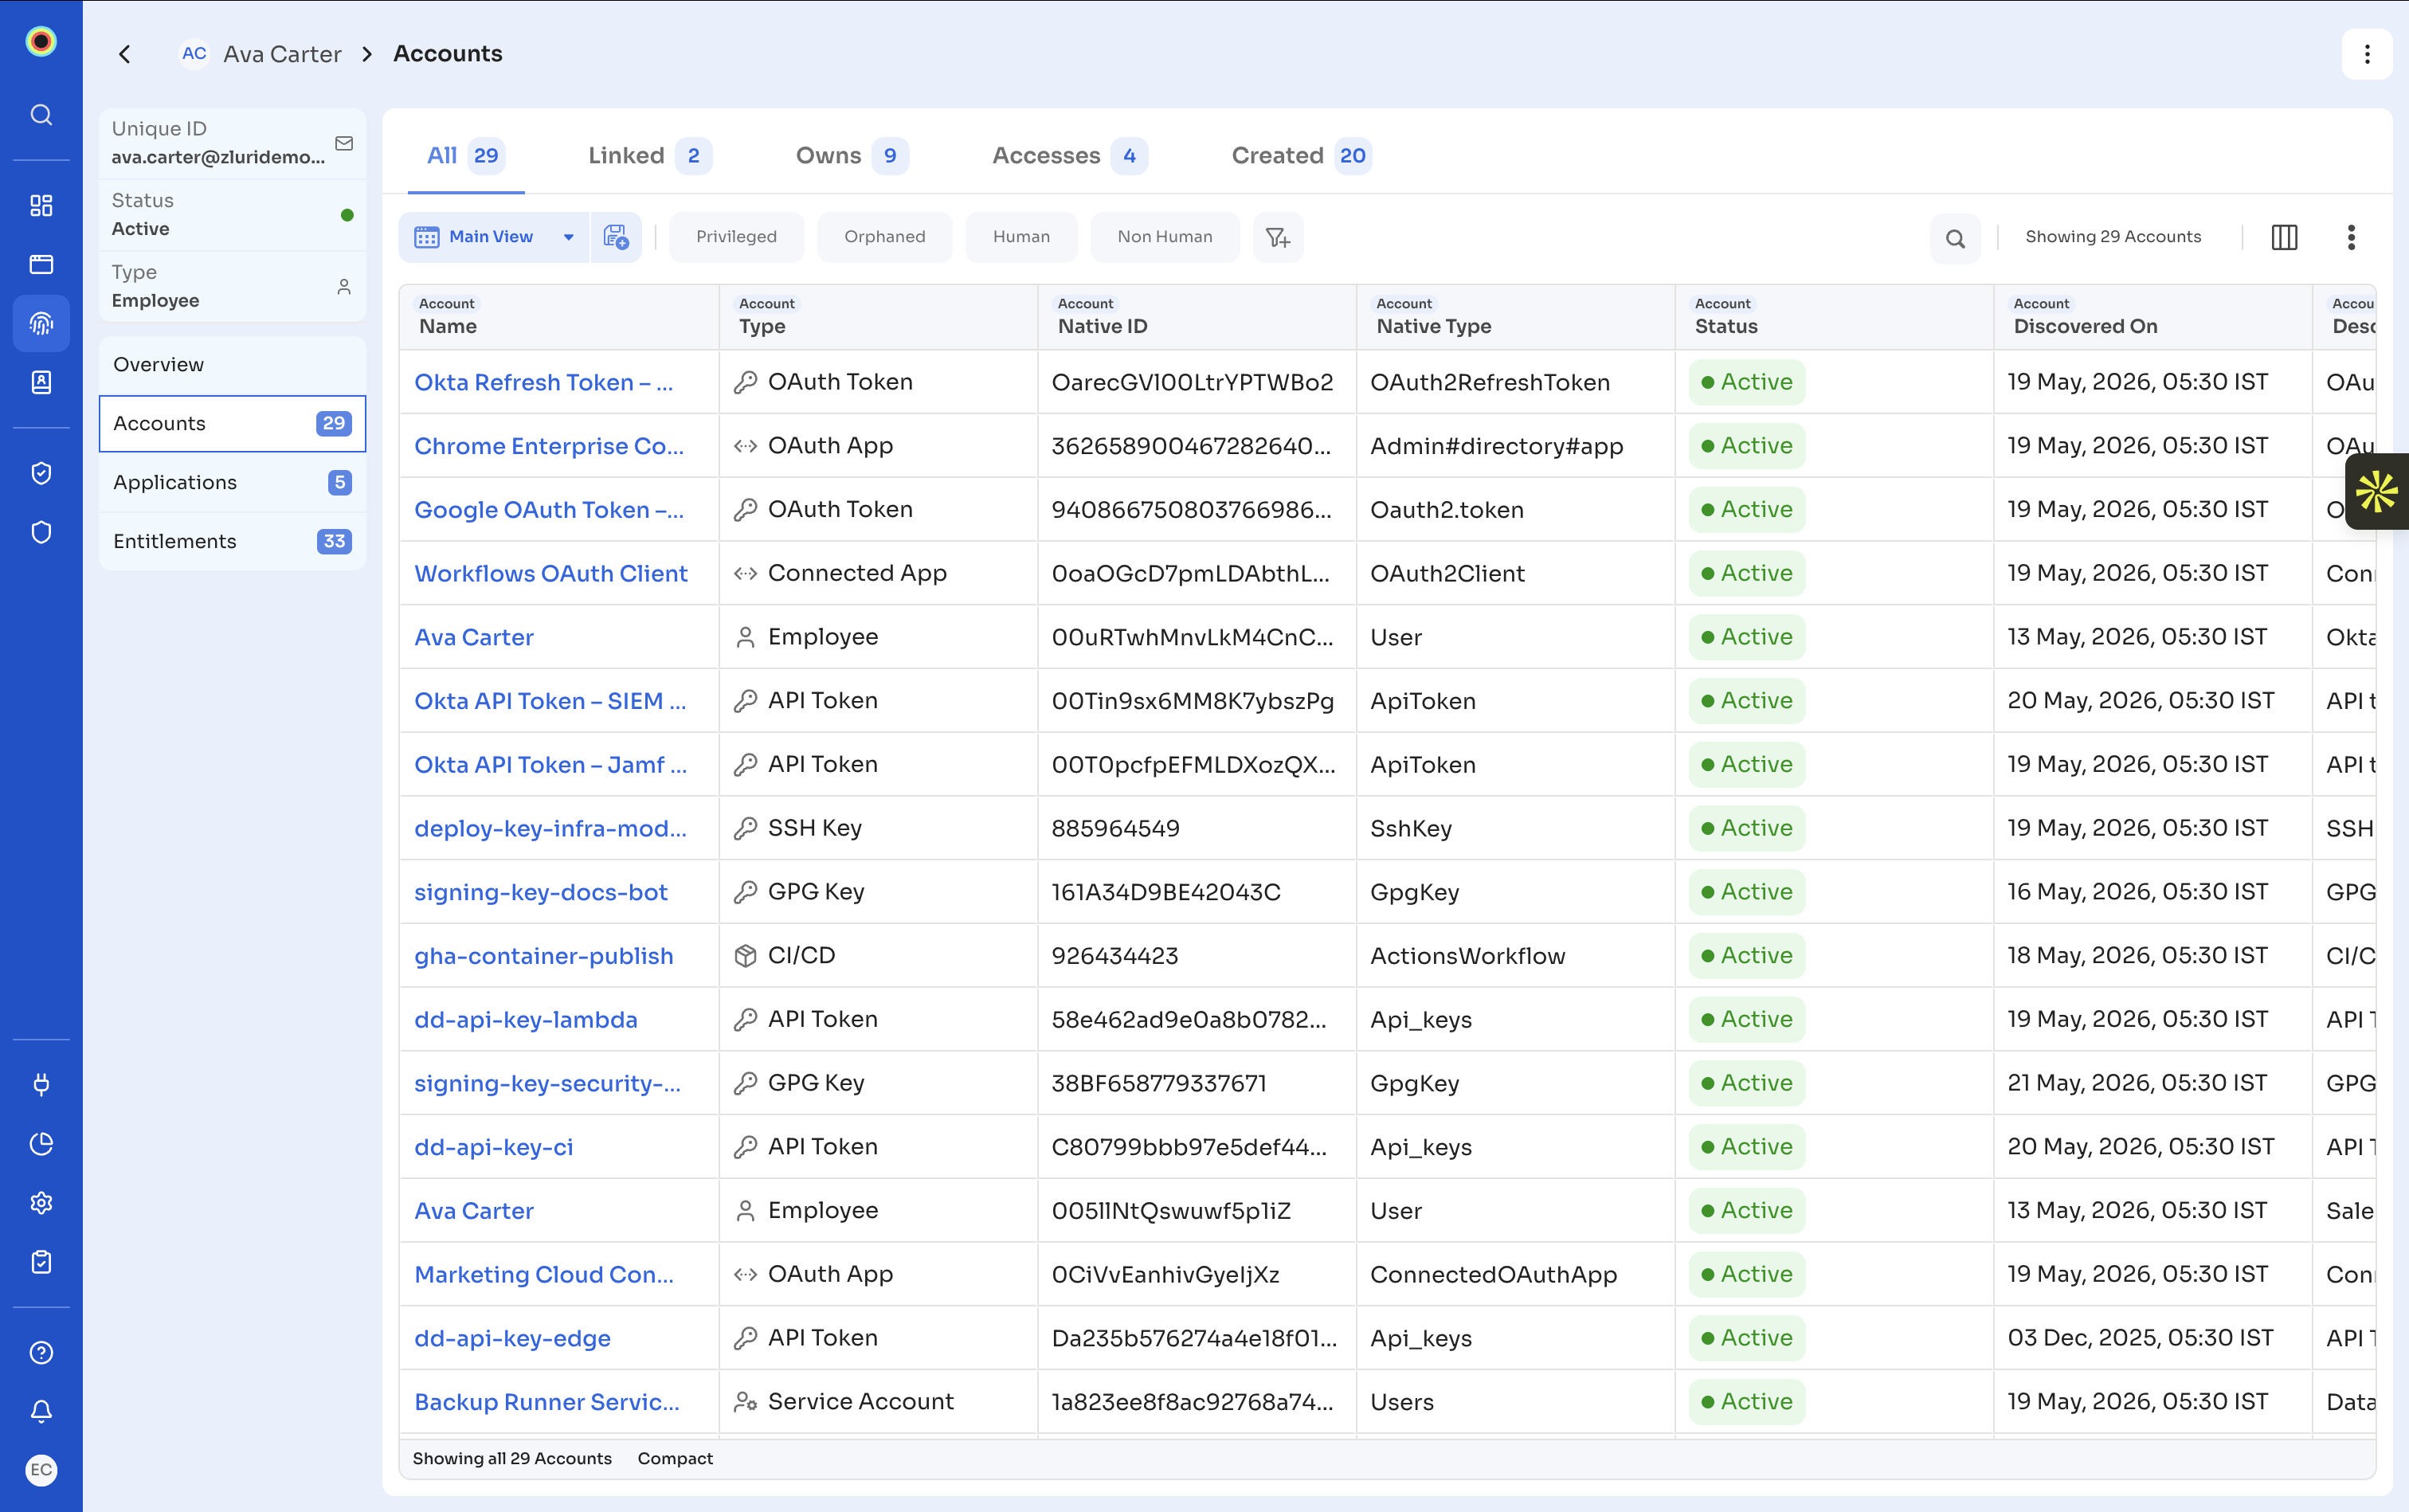
Select the Accounts tab in an identity's detail view to see every account tied to that identity. Sub-tabs split the accounts by the relationship the identity has with them, and four filter chips narrow the table further: Privileged, Orphaned, Human, and Non Human.
The table below explains each sub-tab.
| Sub-tab | What it holds |
|---|---|
| All | Every account related to this identity, across all relationships |
| Linked | Accounts that represent this identity in a specific application instance |
| Owns | Accounts this identity is the owner of. Available on human identities only |
| Accesses | Accounts this identity uses, recorded through Assign Accessor in account rows |
| Created | Accounts this identity created in the source |
A non-human identity cannot own another identity, so the Owns sub-tab does not appear on non-human identities.
Steps
- Select the Accounts tab in an identity's detail view.
- Select the sub-tab for the relationship you want to review.
- Select Privileged, Orphaned, Human, or Non Human to narrow the table.
- Select the column manager icon to open Modify Columns, then select the columns you want and select Update.
Review an identity's applications
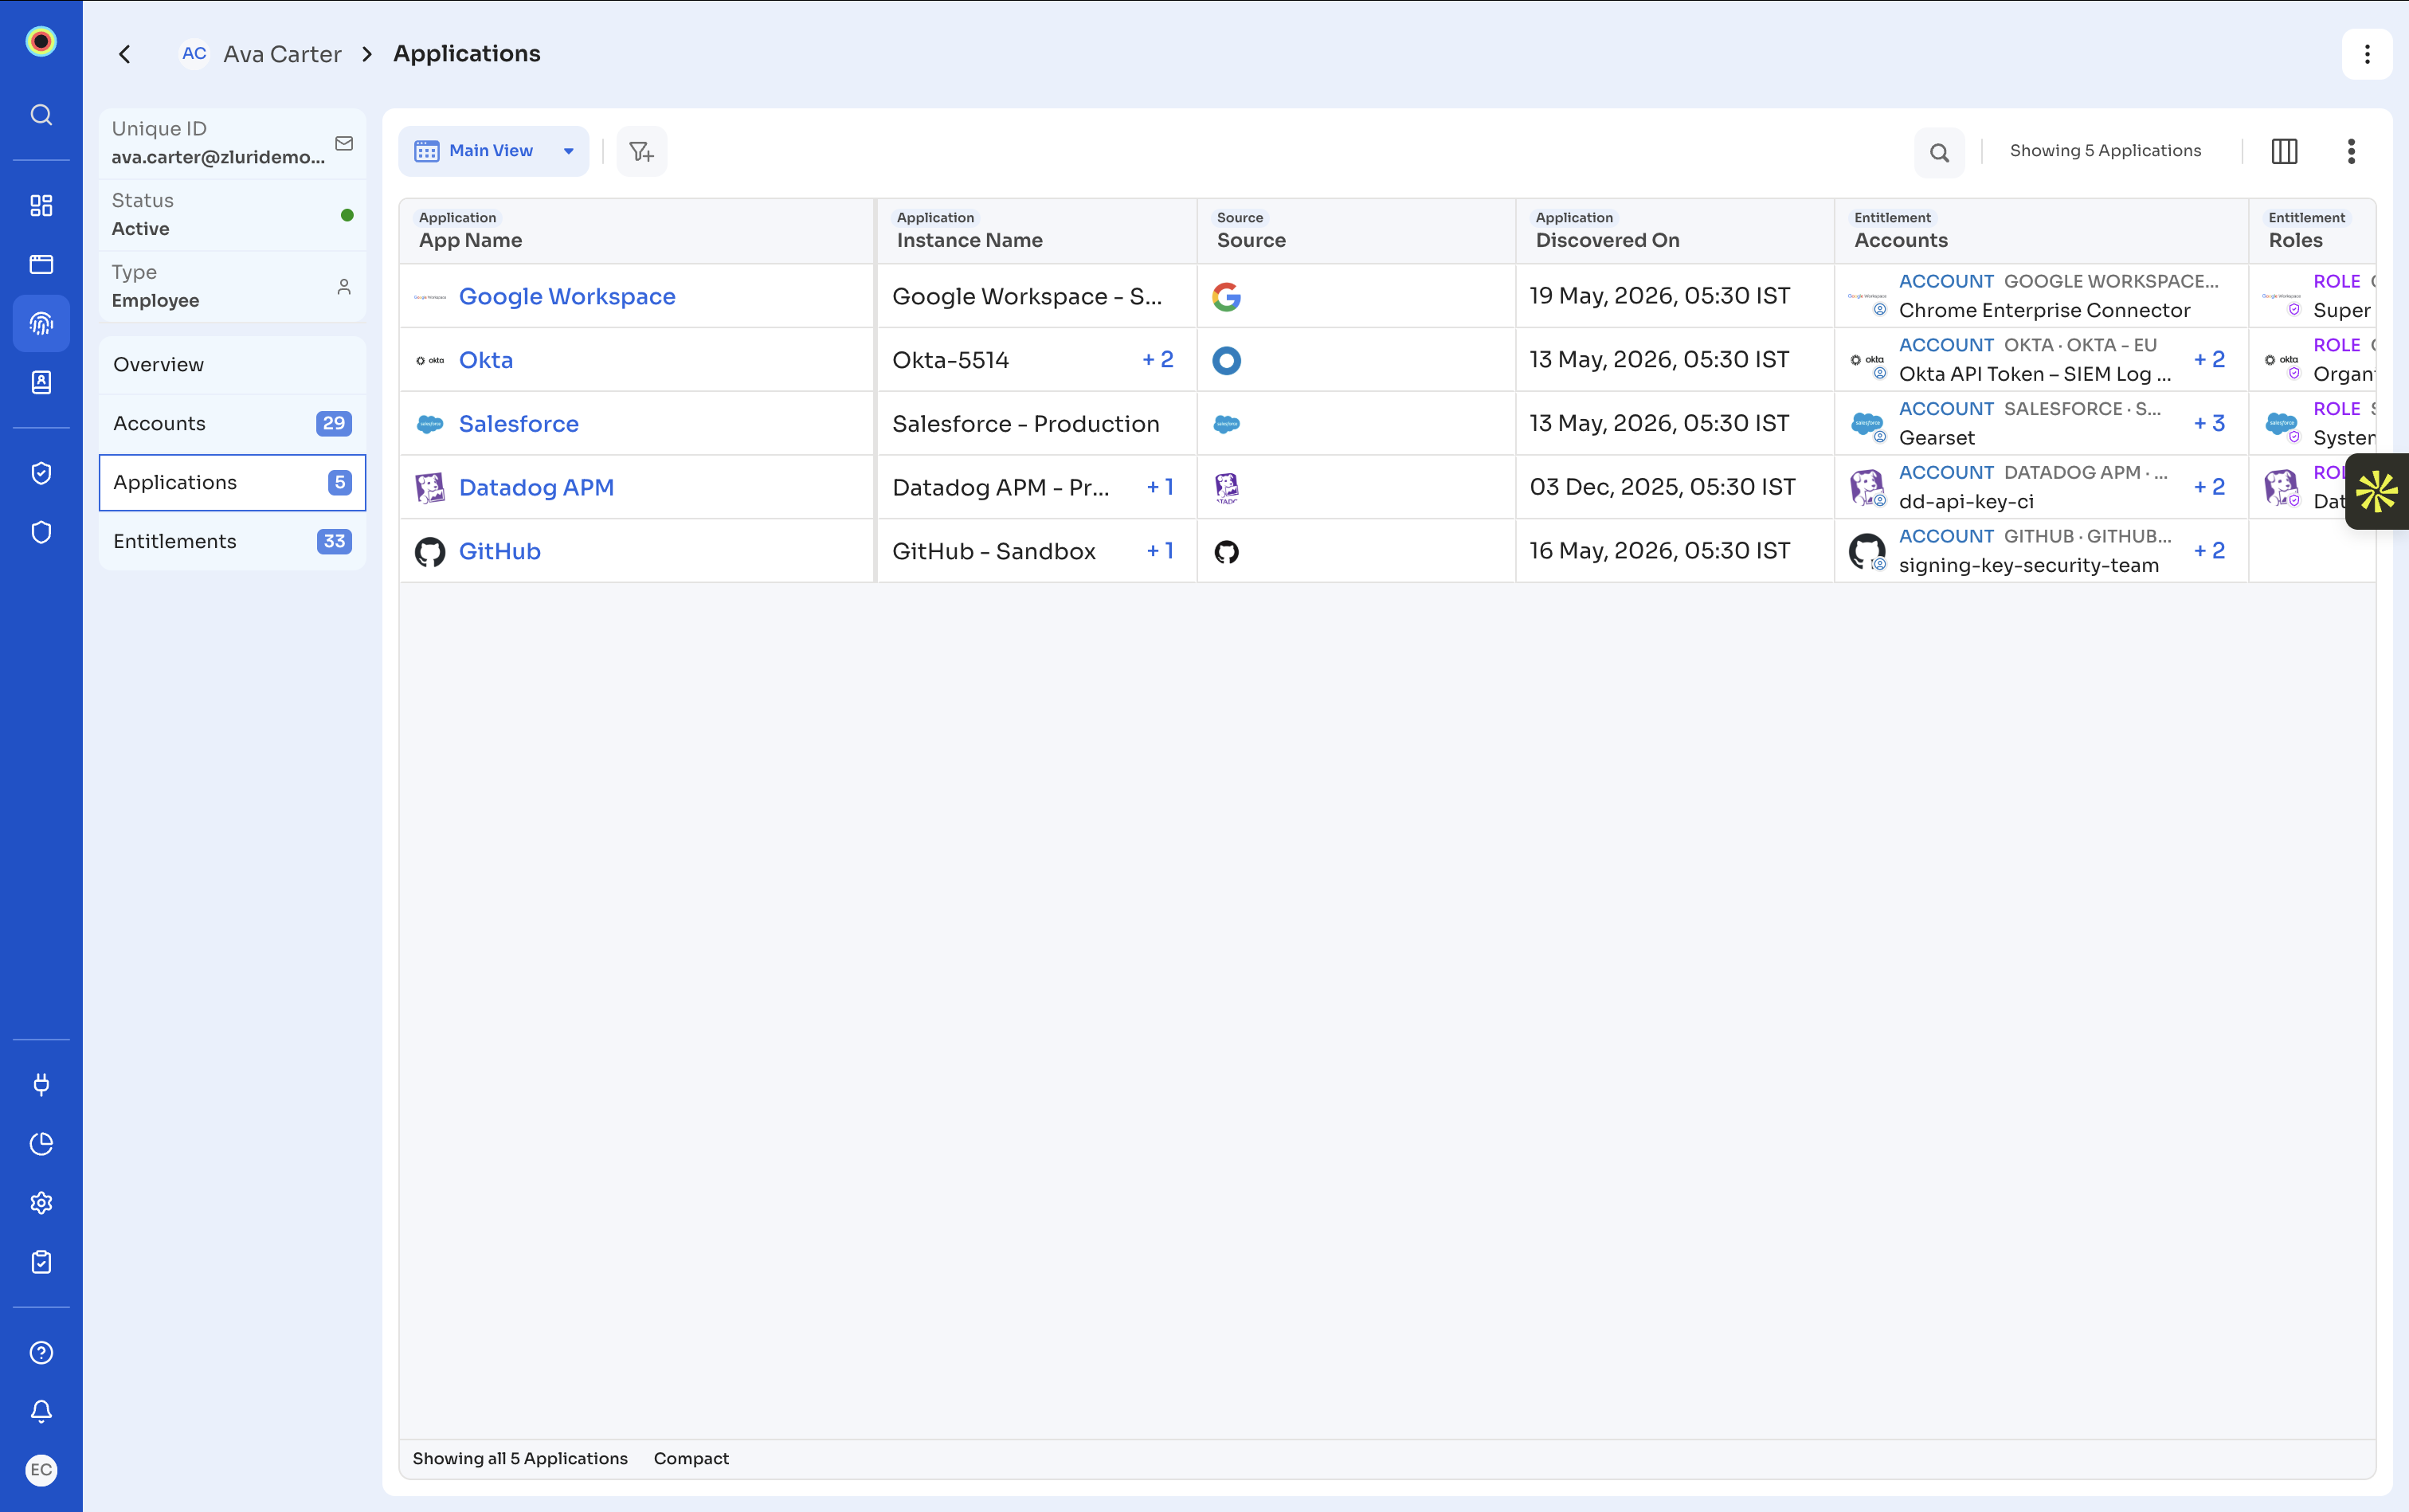
Select the Applications tab in an identity's detail view to see every application this identity reaches, whether through a linked account, an account it accesses, or an account it owns. The table shows the accounts that grant the access alongside the roles, permissions, groups, and licenses the identity holds in each application.
Steps
- Select the Applications tab in an identity's detail view.
- Read the Accounts column to see which account grants access to each application.
- Select the column manager icon to open Modify Columns, then select the columns you want and select Update.
Review an identity's entitlements
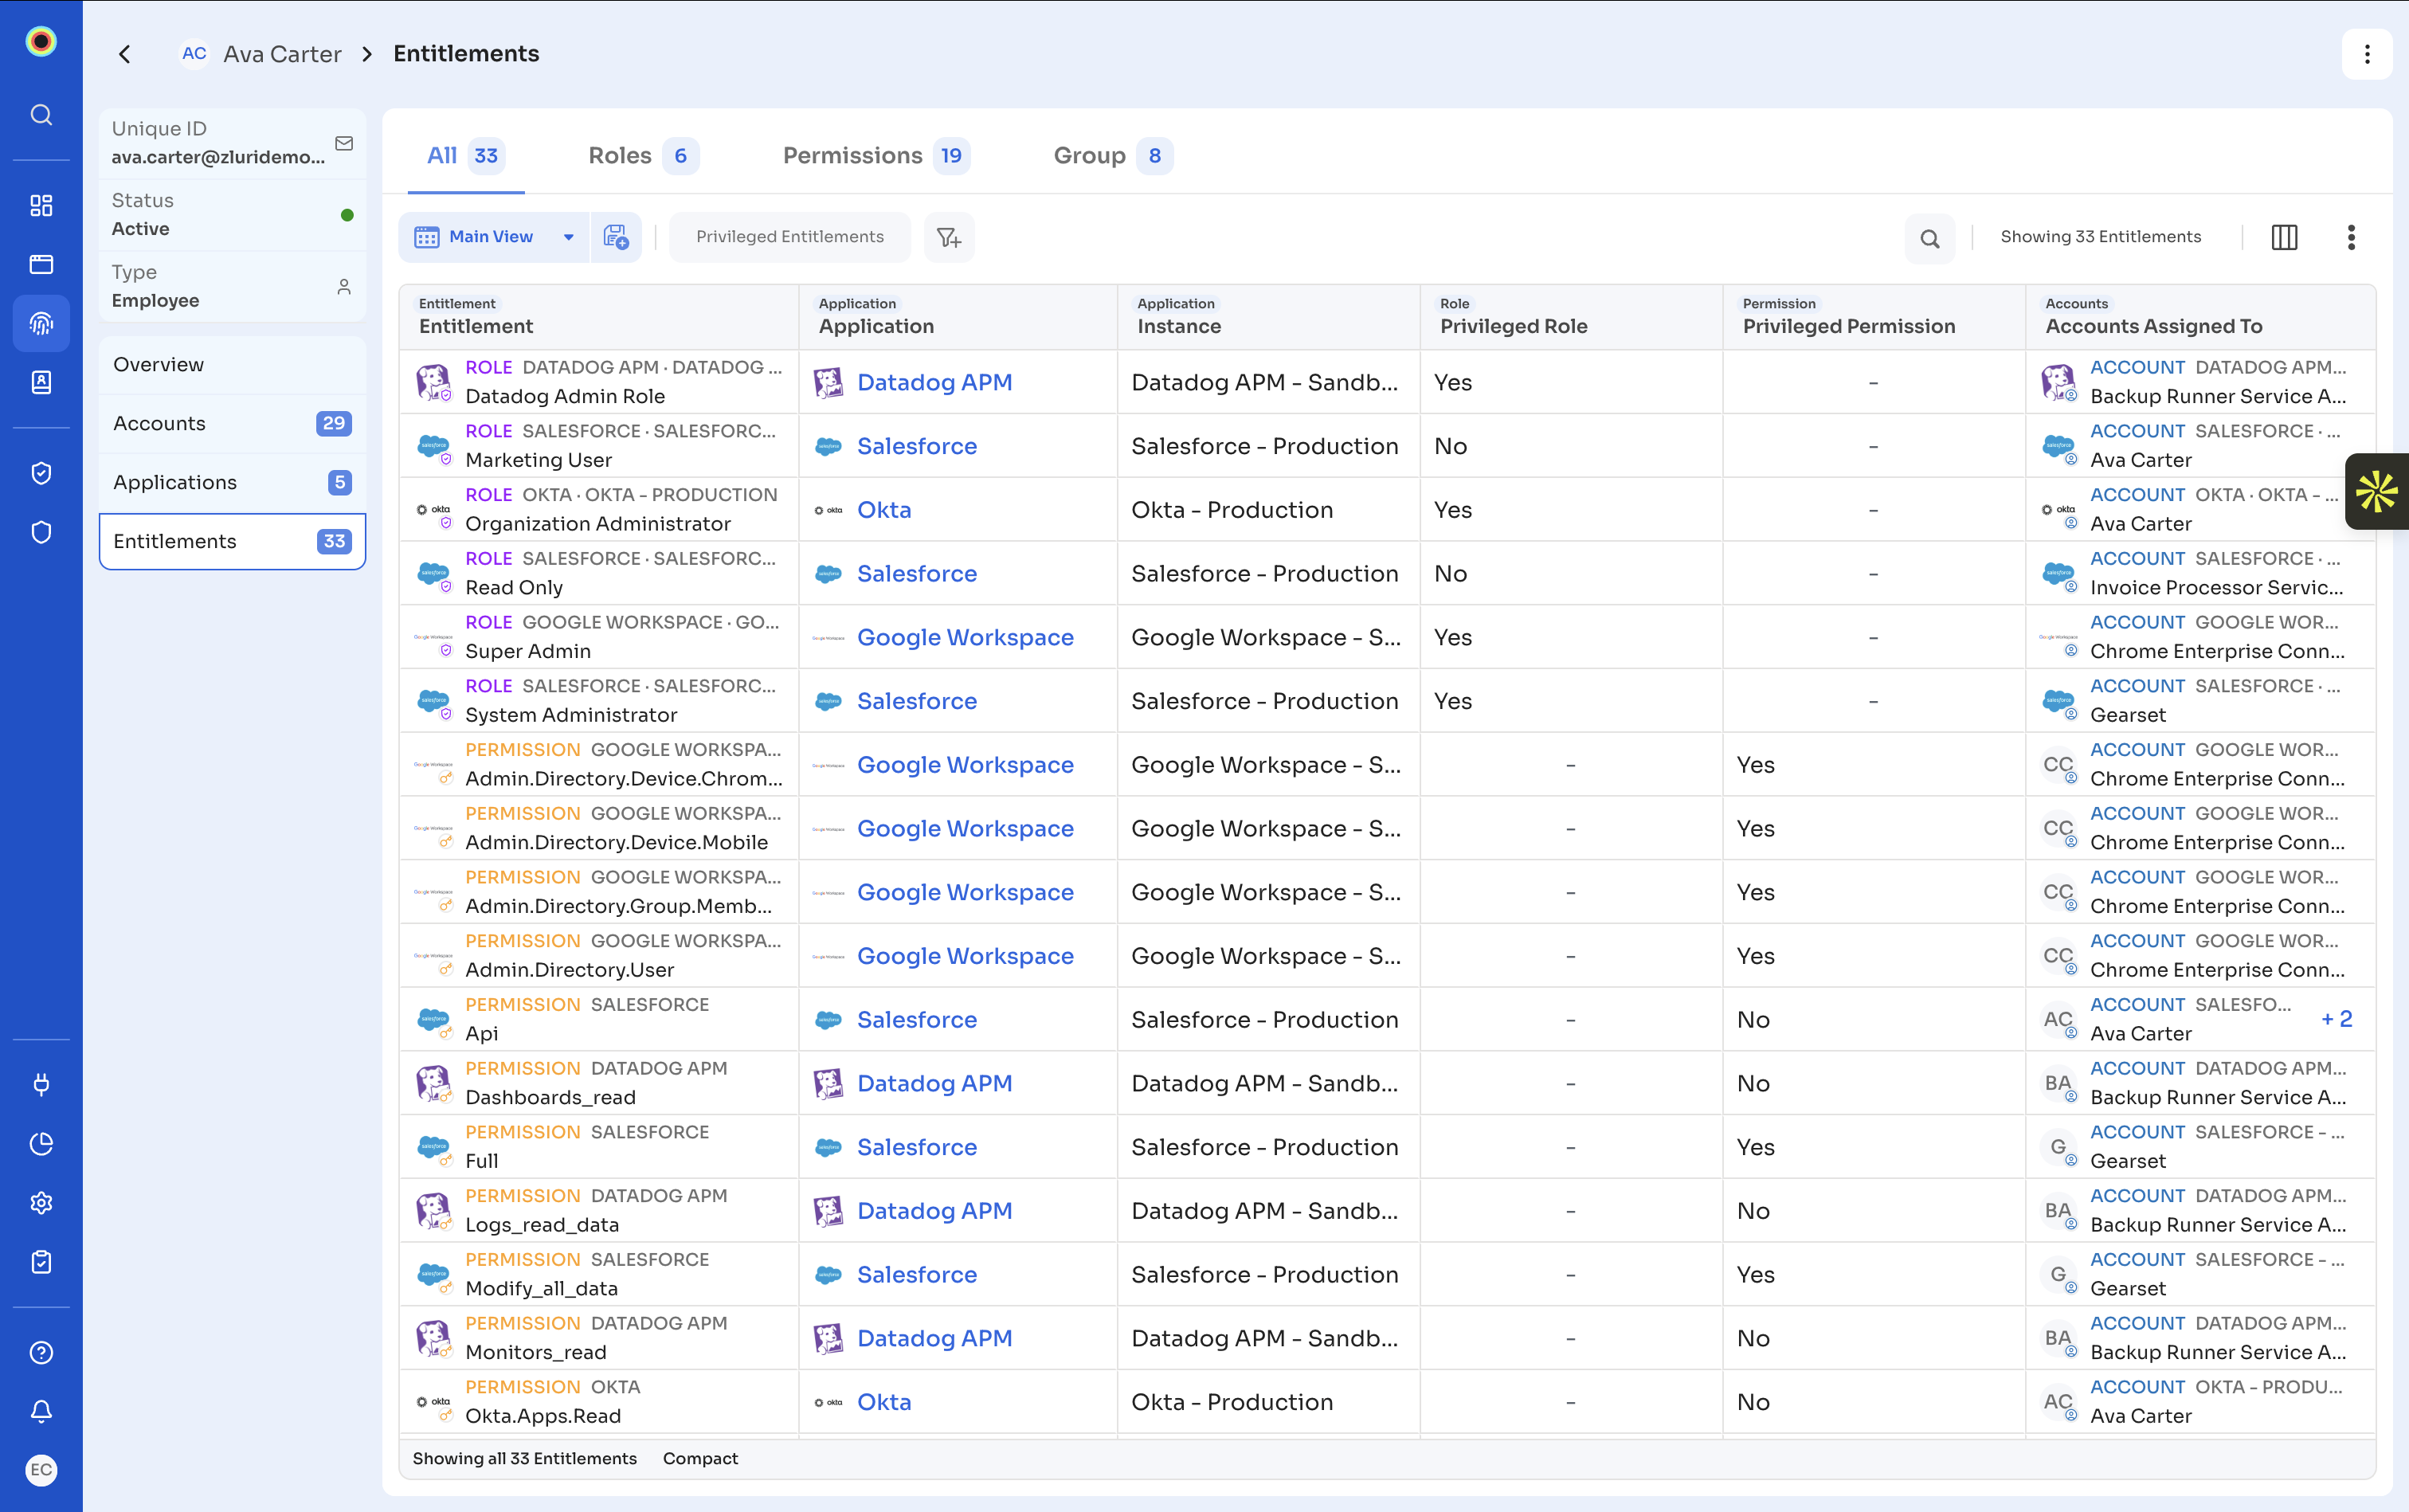
Select the Entitlements tab in an identity's detail view to see everything the identity can do across your applications. Four sub-tabs split the list by entitlement type: All, Roles, Permissions, and Group. The Privileged Entitlements filter chip narrows the table to entitlements Zluri marks as privileged.
Steps
- Select the Entitlements tab in an identity's detail view.
- Select the All, Roles, Permissions, or Group sub-tab.
- Select Privileged Entitlements to narrow the table.
- Read the Accounts Assigned To column to see which of the identity's accounts carries each entitlement.
How Zluri determines owners
Zluri populates the Owners field on a account from the connected source wherever it can, so most identities arrive with an owner already set. The table below lists the methods in the order Zluri applies them, and which record each one sets the owner on.
| Method | How Zluri uses it | Applies to |
|---|---|---|
| Owner from the integration | When the source reports an owner for the account, Zluri records that person as the owner | Account |
| Created-by attribution | When the source reports who created the account, Zluri records that identity as the owner | Account |
| Traversal to a human owner | When the owner Zluri finds is itself a non-human, Zluri follows the ownership chain upward until it reaches a human, then records that person as the owner | Account |
| Owner of a linked account | Zluri takes the owners of the accounts that represents this identity in a specific application instance | Identity |
The first two methods set the owner on the account. An identity does not take an owner directly from the source: it inherits from its linked accounts, which are what the identity itself represents in a specific application instance.
Zluri always resolves ownership to a human, which is why traversal continues past any non-human owner it encounters.
Assign an owner from an identity table
The Owners column is editable in place, so setting an owner on one identity. Use this option when you are working down a filtered list and fixing identities one at a time.
Steps
- Select the Owners cell on the identity you want to change.
- Select the delete icon next to any owner you want to remove.
- Select the owner type selector, then select User to assign a user or Group to assign a group.
- Enter a name in Add Owner, then select the owner from the results. Select Next.
- Choose the scope of the change, then select Update owner.
Assign an owner to a single identity
Open the identity's detail view and edit the Owners section in the right panel. Use this option when you are fixing one identity and want to see its current owners before you change them.
Steps
- Open the identity's detail view.
- Select the edit icon next to Owners in the right panel.
- Select the delete icon next to any owner you want to remove.
- Select the owner type selector, then select User or Group.
- Enter a name in Add Owner, then select the owner from the results.
Select Next. - Choose the scope of the change, then select Update owner.
You can also reach this from the More actions menu in the top right of the detail view: select Modify Owner.
Assign owners in bulk
Select rows in any identity table to reveal the Bulk Edit menu, then assign one owner across the whole selection. Use this option when you have filtered a table down to the identities that need an owner, for example by selecting Orphaned Identities.
Steps
- Select Orphaned Identities to narrow the table to identities that need an owner.
- Select the checkbox next to each identity you want to update, or select the header checkbox to select every row.
- Select Bulk Edit, then select Assign Owner.
- Select the owner type selector, then select User or Group.
- Enter a name in Add Owner, then select the owner from the results.
Select Next. - Choose the scope of the change, then select Assign owner.
Choose how far the ownership change cascades
Ownership in Zluri is rarely a single record. Most accounts and identities hold the owner Zluri worked out for them, following the chain from the owner the source reported, through the accounts an identity is linked to, up to a human. See How Zluri determines owners.
That is why changing an owner is not a one-field edit. Zluri needs to know whether you are correcting one record or moving accountability for everything that record feeds. It asks in a confirmation dialog, and it asks on every route: from an identity table, from an identity's detail view, from a bulk edit, and from a single account.
Two Options and the table below explains what each option changes.
| Option | What it changes |
|---|---|
| Everything the record affects | The record you are editing plus everything downstream of it. For an identity, that is its linked accounts, the accounts downstream of those, and the identities that inherit their owner from them. For an account, it is the identity the account is linked to and the accounts downstream of it. Selected by default. |
| The record only | The identity or account you are editing, and nothing else. Every derived owner below it stays where it is. |
Take action on an account
Account tables let you assign ownership, record who uses an account apart from the already exisitng actions at account level. Both the controls appear as inline prompts in their respective columns, on both an identity's Accounts tab and an application's Accounts page.
The table below lists the actions available on an account row.
| Action | Column | What it does |
|---|---|---|
| Assign Owner | Owners | Sets the person or group accountable for the account |
| Assign Accessor | Accessed By | Records an identity that uses this account without owning it |
| Edit Name | Name | Changes the account display name in Zluri |
| Change Status | Status | Sets the account's status to Active, Inactive, Suspended, or Expired |
| Change Type | Type | Reassigns the account to a different type |
| Edit Description | Description | Records what the account was created for |
| Archive | Archival Status | Archives the account and sets its archive status |
Steps
- Scroll the table sideways to the Owners, Accessed By
- Select Assign Owner, Assign Accessor in the row you want to change.
- Complete the picker that opens, then confirm.
Open an account's details
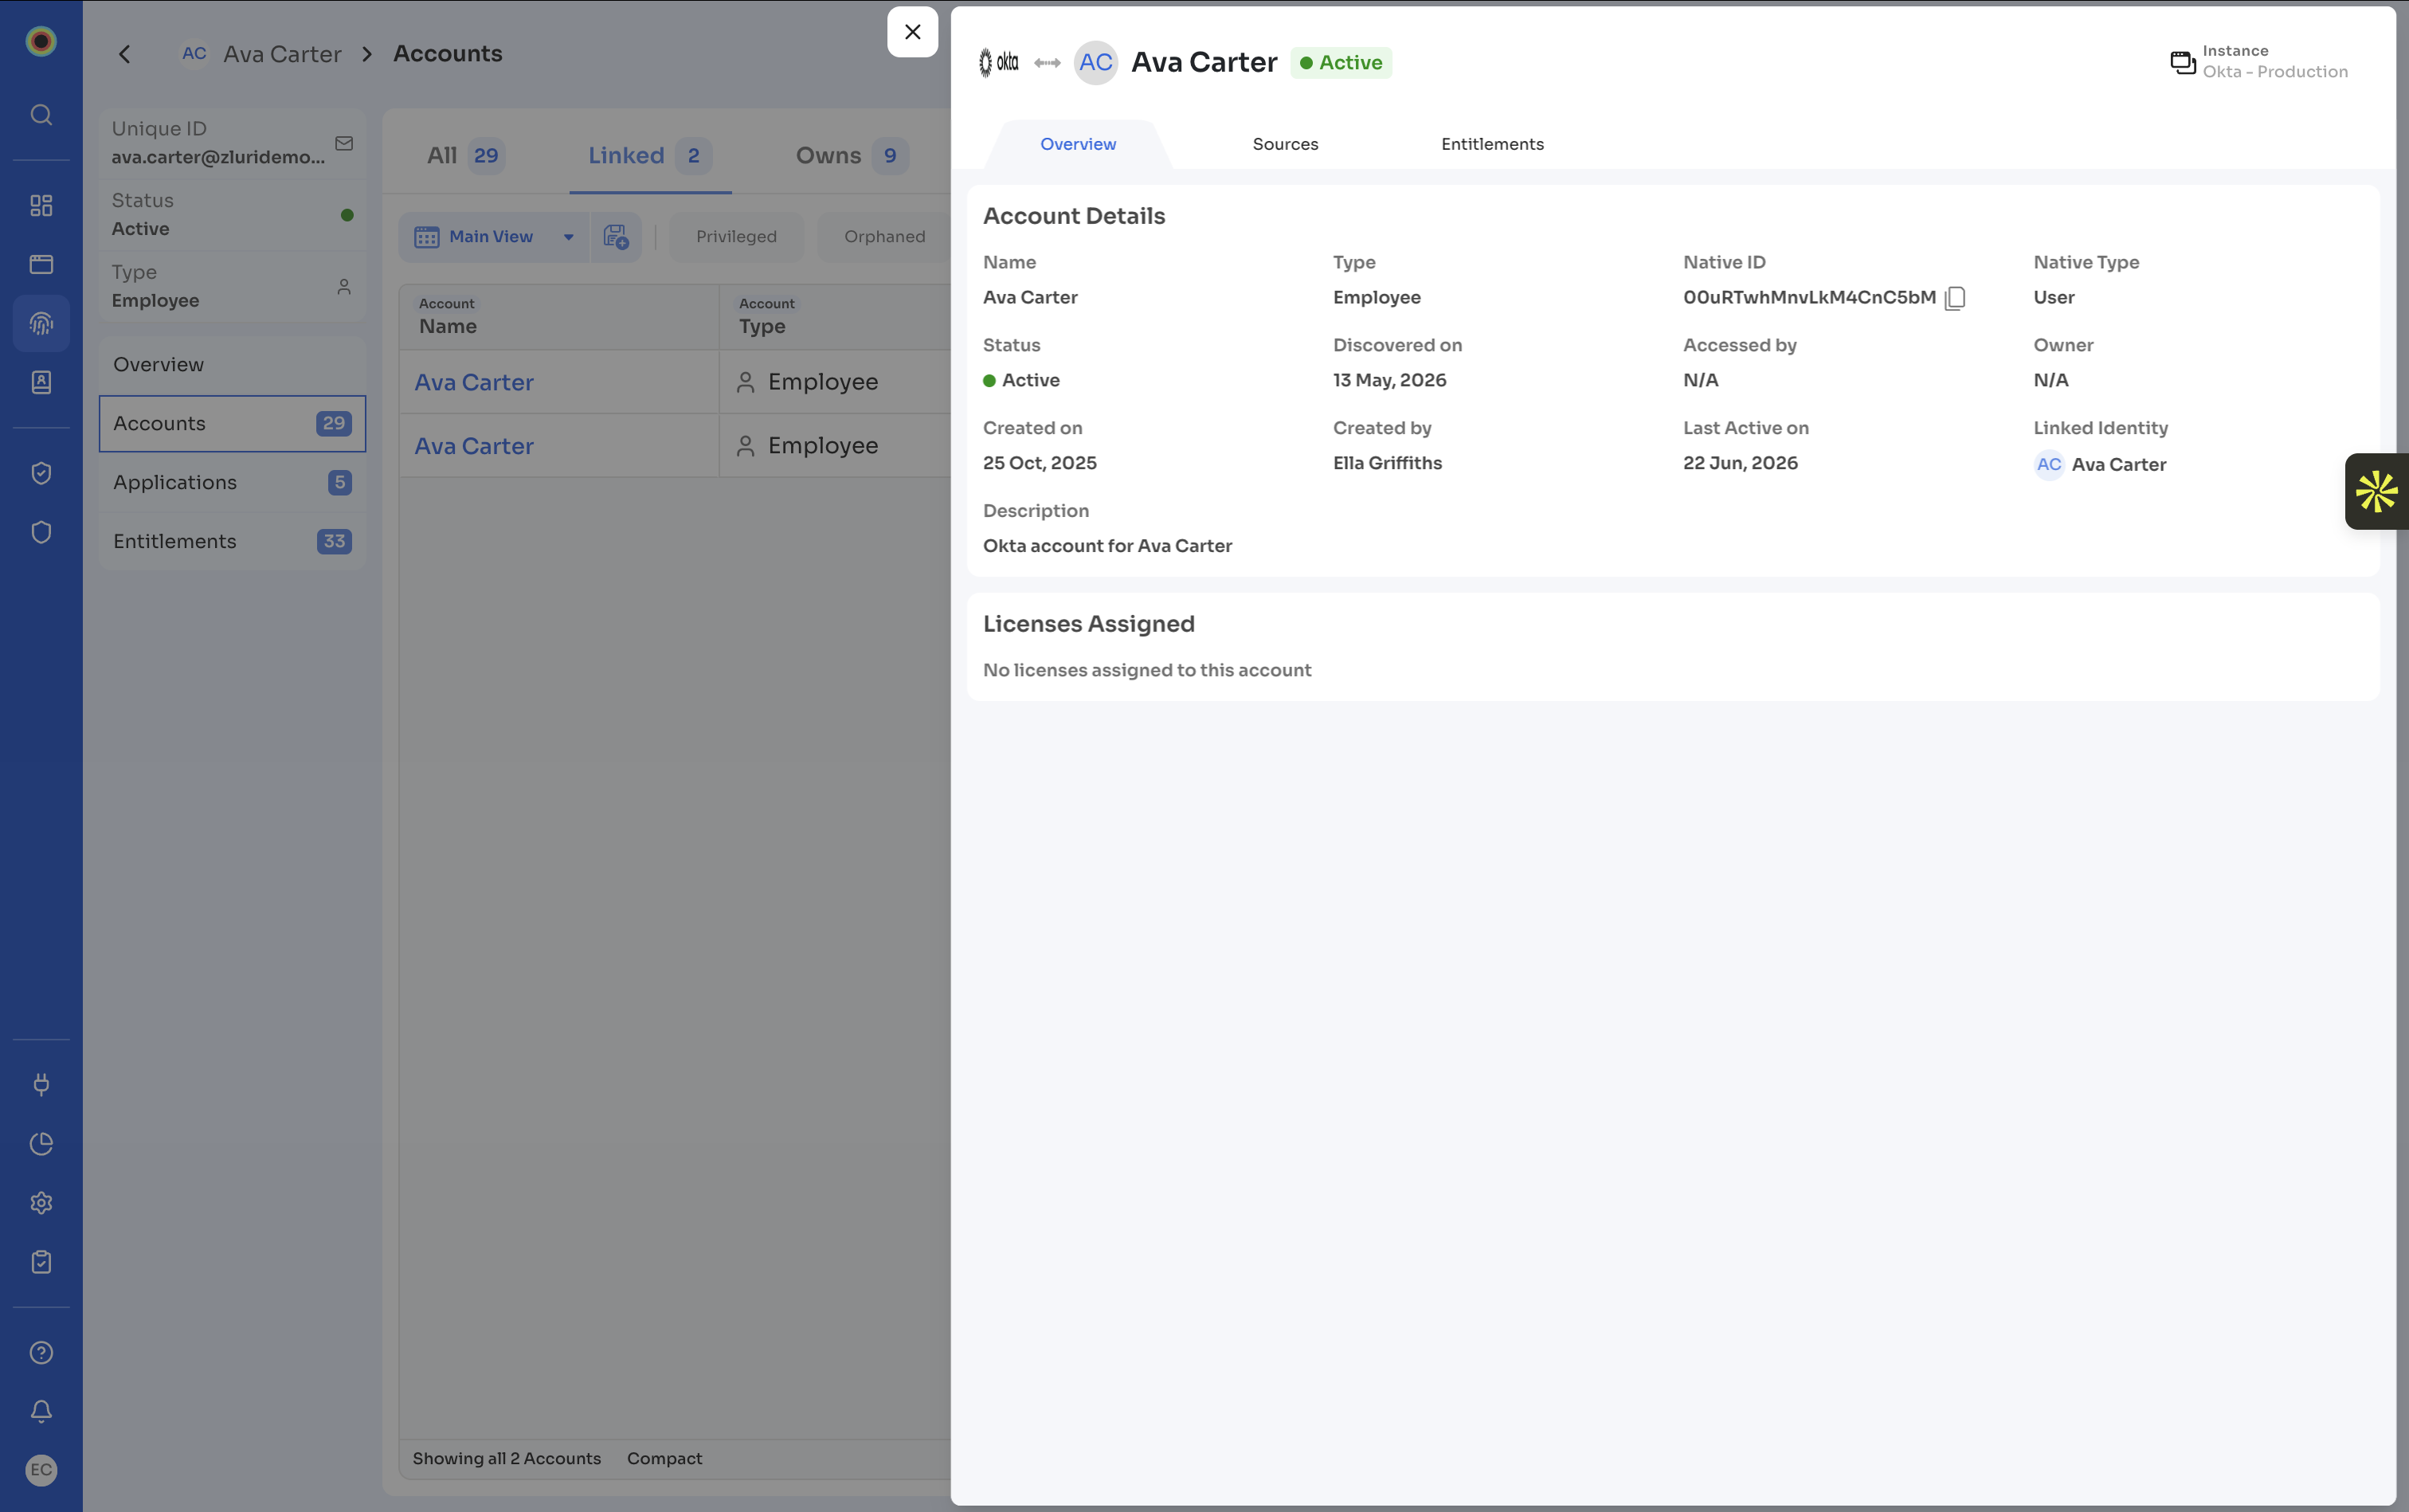
Select any cell in an account row to open the account detail side sheet. The header shows the application icon, the account name, and the account's status badge, with the application instance named on the right. Three tabs split the detail: Overview, Sources, and Entitlements. Selecting a cell deep-links to the matching tab, so selecting the Roles cell opens the sheet on Entitlements > Roles.
Steps
- Select any cell in the account row.
- Read the Overview tab for the account's attributes and licenses.
- Select Sources to see every source the account came from.
- Select Entitlements to see the roles, permissions, and groups the account holds.
What each tab shows
The table below explains the three tabs.
| Tab | What it shows |
|---|---|
| Overview | An Account Details grid holding Name, Type, Native ID with a copy icon, Native Type, Status, Discovered on, Accessed by, Owner, Created on, Created by, Last Active on, Linked Identity, and Description, followed by a Licenses Assigned section |
| Sources | One row per source the account was found in, naming the source, its category and sub-source, and the Account Status that source reports |
| Entitlements | Sub-tabs for All, Roles, Permissions, and Groups, plus a Privileged Entitlements filter chip |
When an account holds no licenses, the Overview tab reads "No licenses assigned to this account".
Review accounts for an application
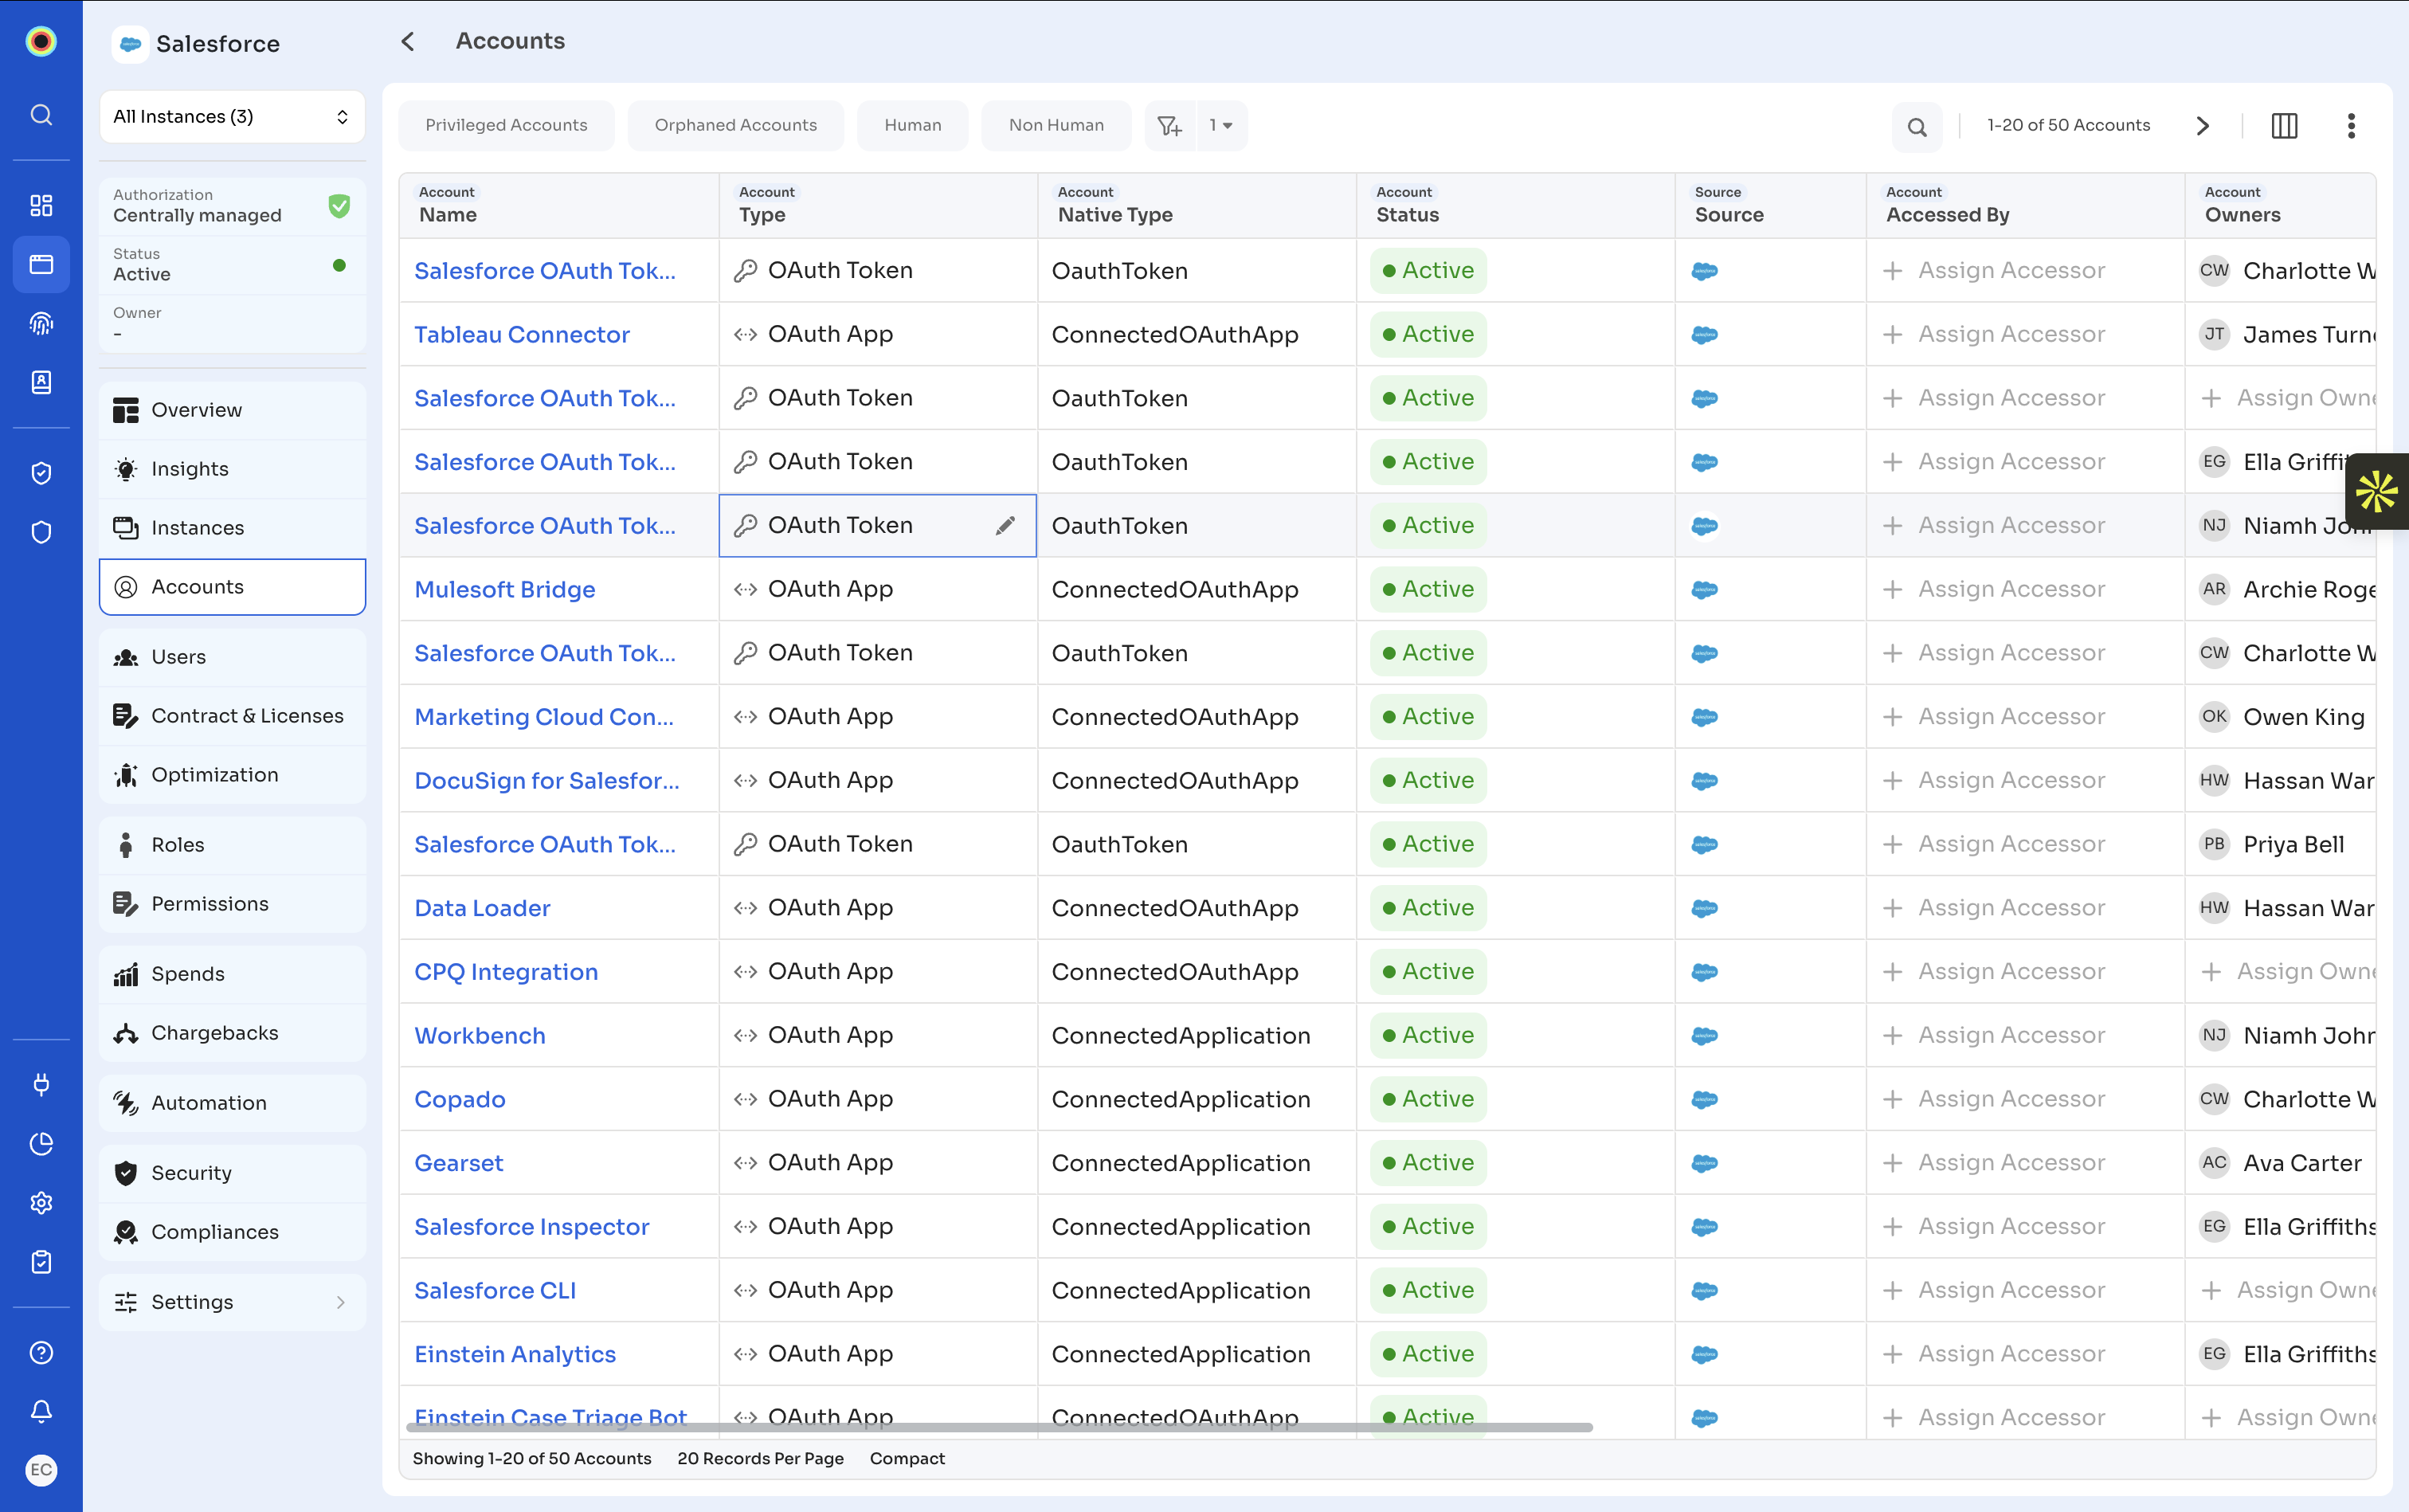
Navigate to Applications, select the application, then select Accounts in the left rail to see every account Zluri discovered in that application. This is the view to work from when you are focussing on one application rather than one identity, and it is where you record accessors and grant roles.
The instance selector at the top of the left rail reads All Instances with a count. Use it to narrow the table to a single instance of the application.
Steps
- Navigate to Applications, then select the application.
- Select Accounts in the left rail.
- Select the instance selector at the top of the left rail to scope the table to one instance, or leave it on All Instances.
- Select Privileged Accounts, Orphaned Accounts, Human, or Non Human to narrow the table.
- Select the column manager icon to open Modify Columns, then select the columns you want and select Update.
- Select a page arrow to move through the table.
Edit identity details
Correct an identity record without leaving the page you are on. Every identity action is available in three places: the More actions menu on the identity's detail view, inline in the identity table, and, where the action makes sense across many records at once, the Bulk Edit menu.
| Action | What it does | Inline in the table | Bulk Edit |
|---|---|---|---|
| Edit Name | Changes the identity display name in Zluri | Yes, select the Name cell then the edit icon | Not applicable |
| Modify Owner | Opens the owner picker and the scope dialog | Yes, select the Owners cell | Yes, as Assign Owner |
| Change Status | Sets the identity's status to Active, Inactive, Suspended, or Expired | Yes, select the Status cell then the edit icon | Yes, as Status |
| Change Type | Reassigns the identity to a different type, which can move it between inventories | Yes, select the Type cell then the edit icon | Yes, as Identity Type |
| Edit Description | Records what the identity was created for | Yes, select the Description cell | Not applicable |
| Archive | Archives the identity and sets its archive status | Yes, from the row menu in the Actions column | Yes, as Archive |
Edit an identity from its detail view
Use this option when you have the identity open and want its full context on screen before you change anything. The More actions menu in the top right holds every edit action.
Steps
- Open the identity's detail view.
- Select the More actions menu in the top right.
- Select the action you want, then complete the fields shown.
Alternatively, select the edit icon beside Name, Type, Status, Owners, or Description in the right panel to change that field in place. You can also rename an identity directly in a table: select the name cell, then select the pencil icon.
Edit an identity inline in the table
Use this option when you are working down a list and correcting records as you go, without opening each one.
Steps
- Select the cell you want to change.
- Select the edit icon that appears in the cell.
- Complete the control that opens, then save.
Each field opens a different control:
- Status opens a dropdown listing Active, Inactive, Suspended, and Expired with a check against the current value.
- Type opens a Modify Identity Type dialog reading "Select a new type for [identity name]." with a required Select type field and Cancel and Save buttons.
- Owners opens the owner picker described in Assign an owner from an identity table.
- Archive sits in the row menu in the Actions column rather than in a cell.
Edit identities in bulk
Use this option when the same change applies to many identities, for example setting a batch of tokens to Inactive.
Steps
- Select the checkbox next to each identity you want to change, or select the header checkbox to select every row.
- Select Bulk Edit.
- Select Status, Archive, Identity Type, or Assign Owner.
- Complete the control that opens, then confirm.
Updated about 1 month ago