
Scheduled Rules for Application Automation
Scheduled Rules for Application Automation
Create and manage automated rules that perform actions on applications based on scheduled triggers and specific conditions.
What are Scheduled Rules for Application Automation?
Scheduled rules automate repetitive application management tasks by combining three components:
-
Trigger:
- Automatic: runs daily at 12:00 AM UTC (not currently user configurable), or
- Manual: run rules individually or in bulk at any time.
-
Condition(s): criteria that filter which applications the rule affects. Mix AND and OR conditions, for example:
Active Usersis< 5ORLast Usedis before05/13/2025. -
Action: what happens to applications that match the conditions, for example: Assign
StatusasInactive.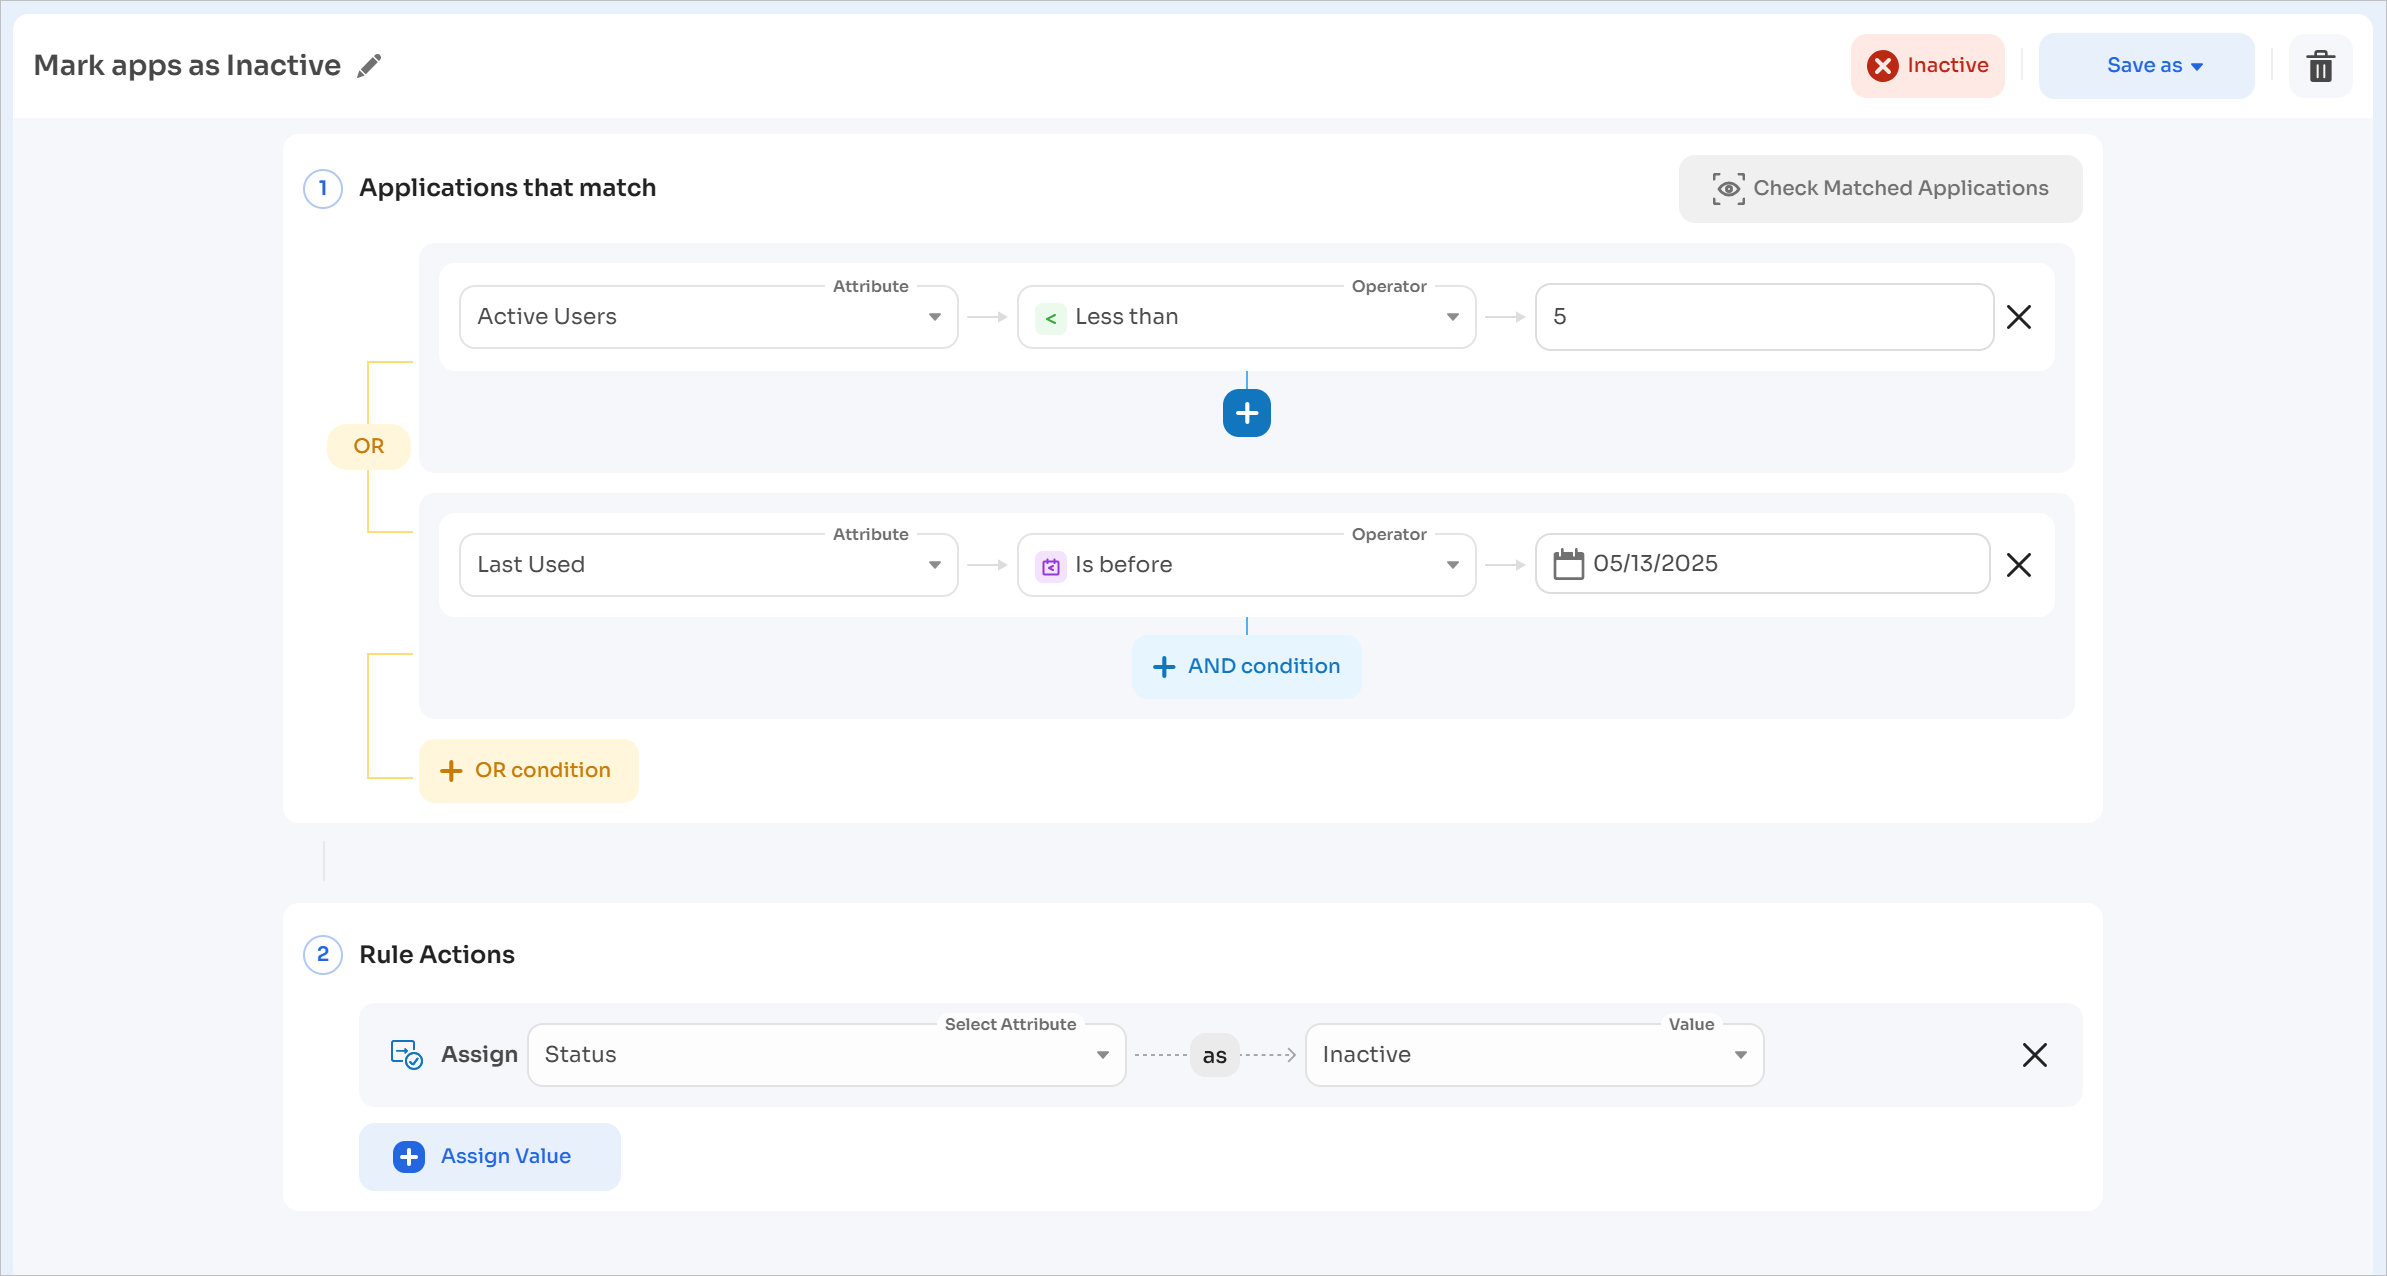
Use cases
Practical use cases for app automation include:
- Restrict all AI chatbot applications
- Automatically archive applications with no active users, and unarchive them again when active users appear
- Automatically classify applications as centrally managed or restricted
- Update custom fields or tags on an application based on preset conditions
Access scheduled rules
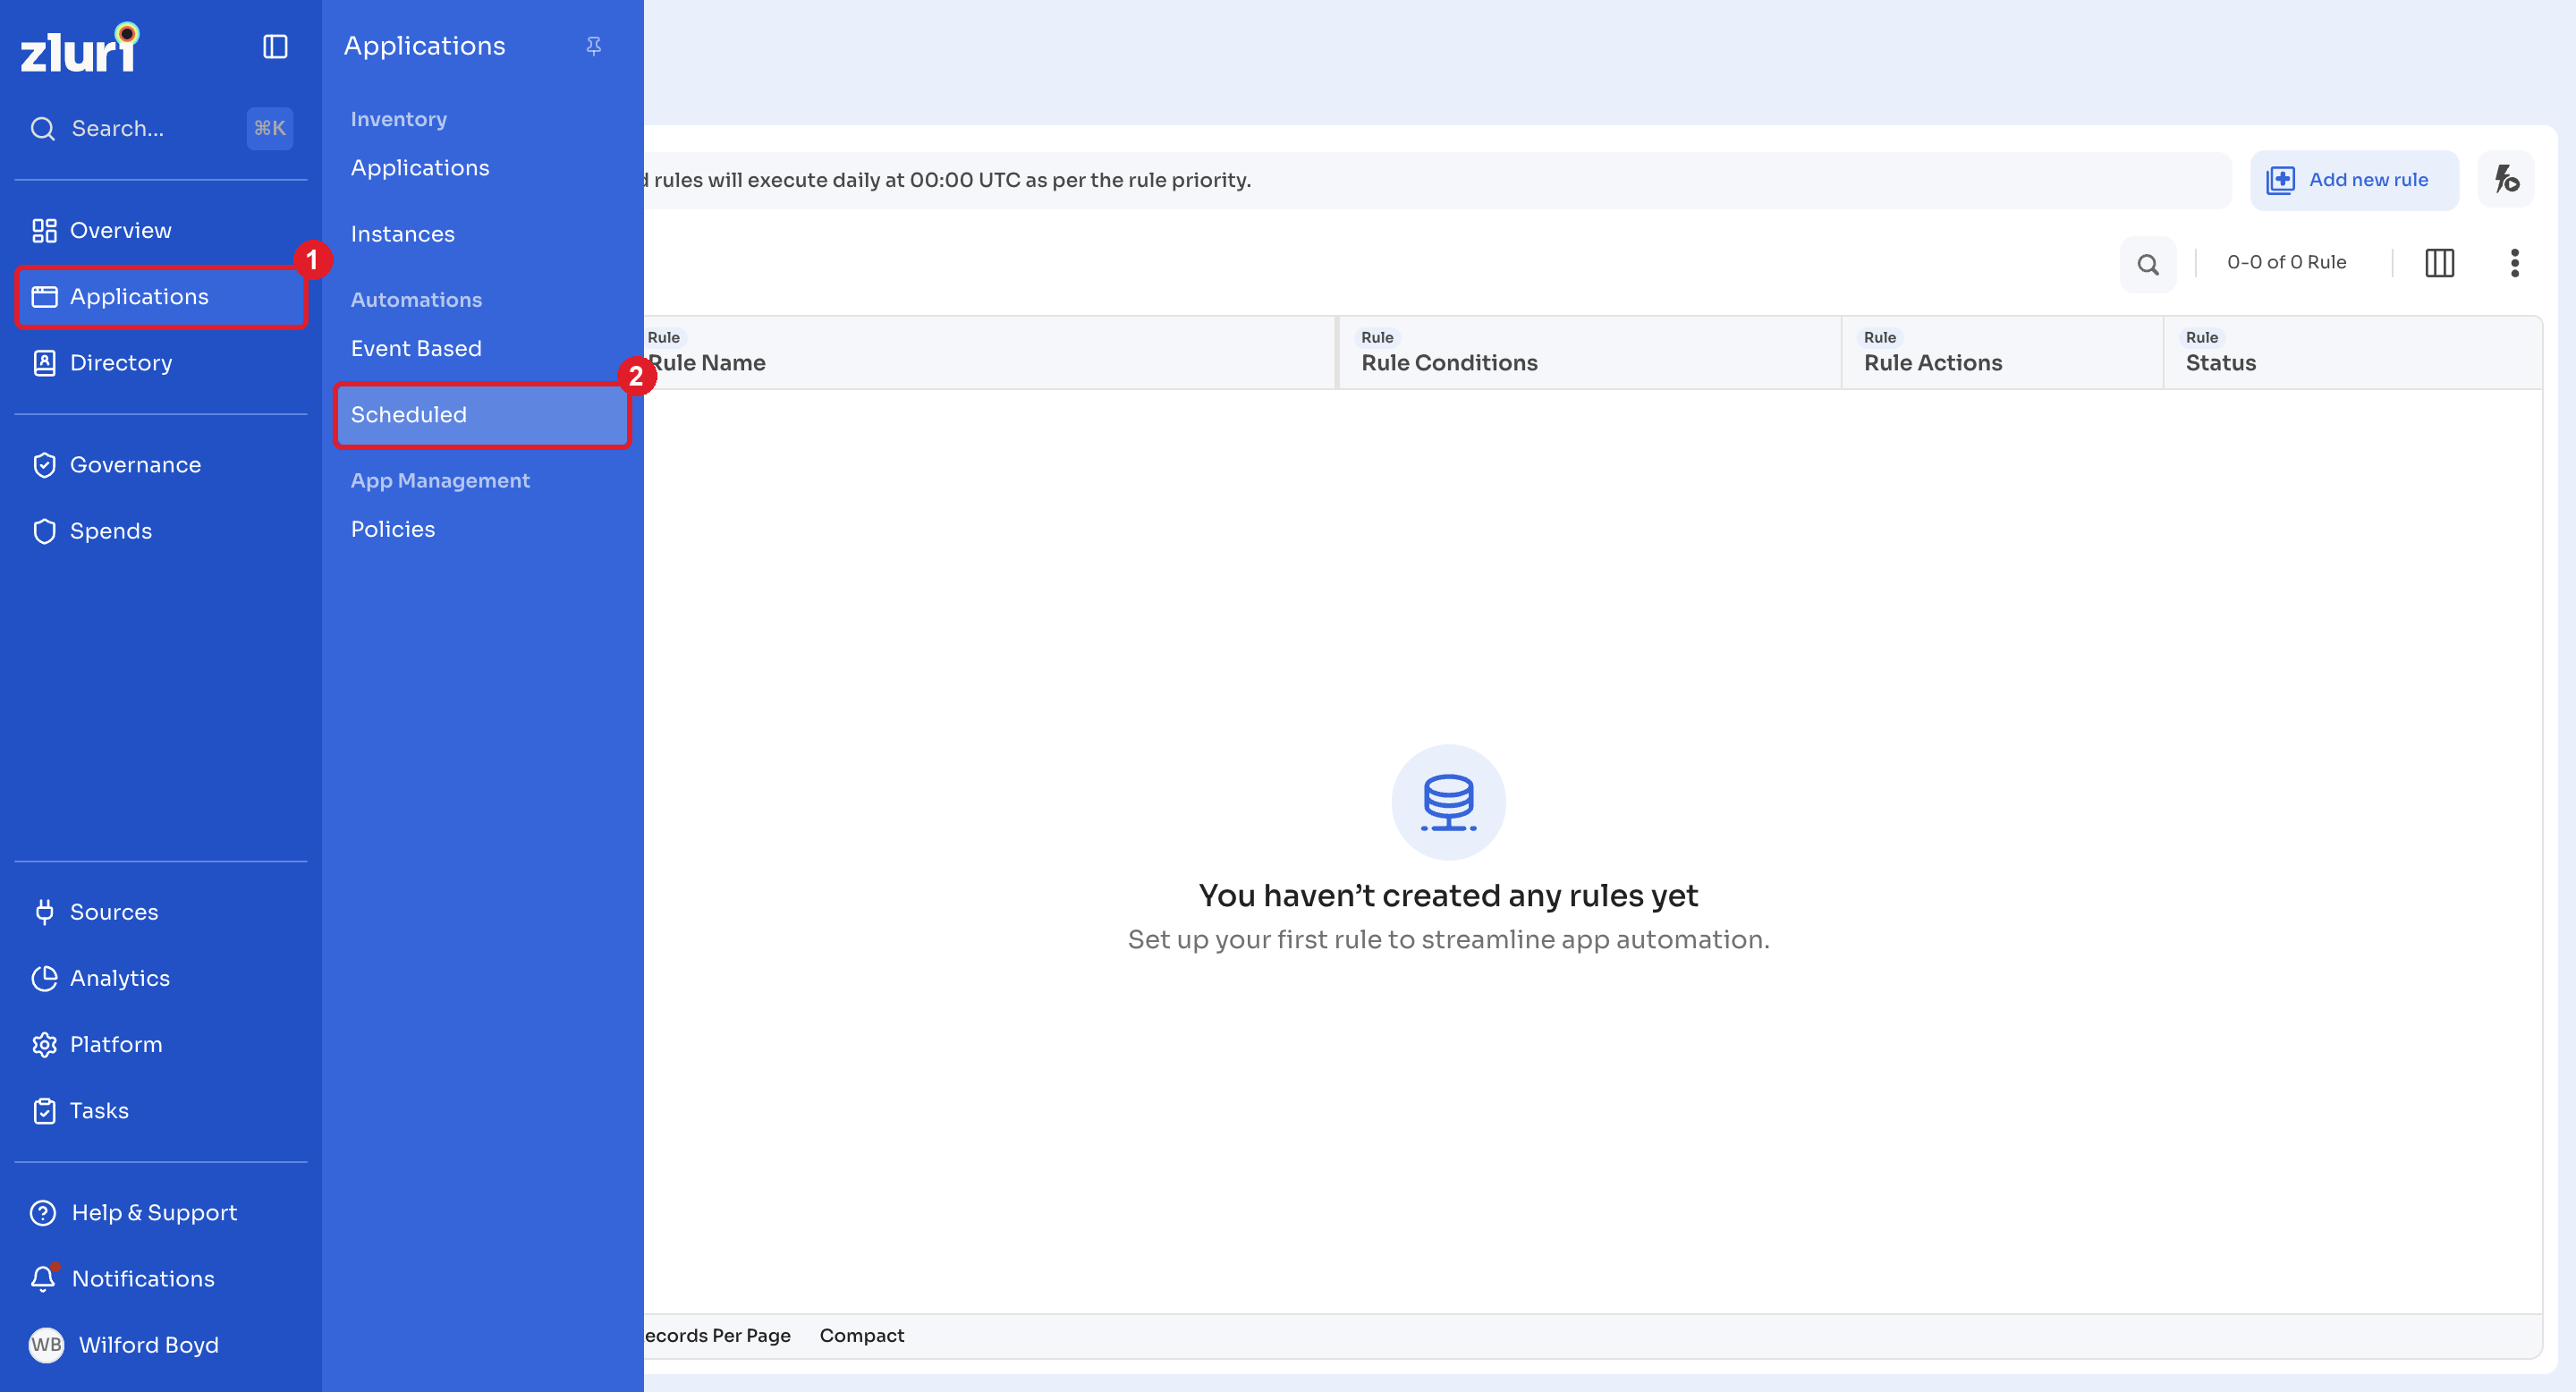
Select Applications from the left navigation, then select Scheduled under Automations.
Understand the Scheduled Rules interface
The Scheduled Rules interface displays differently depending on screen width.
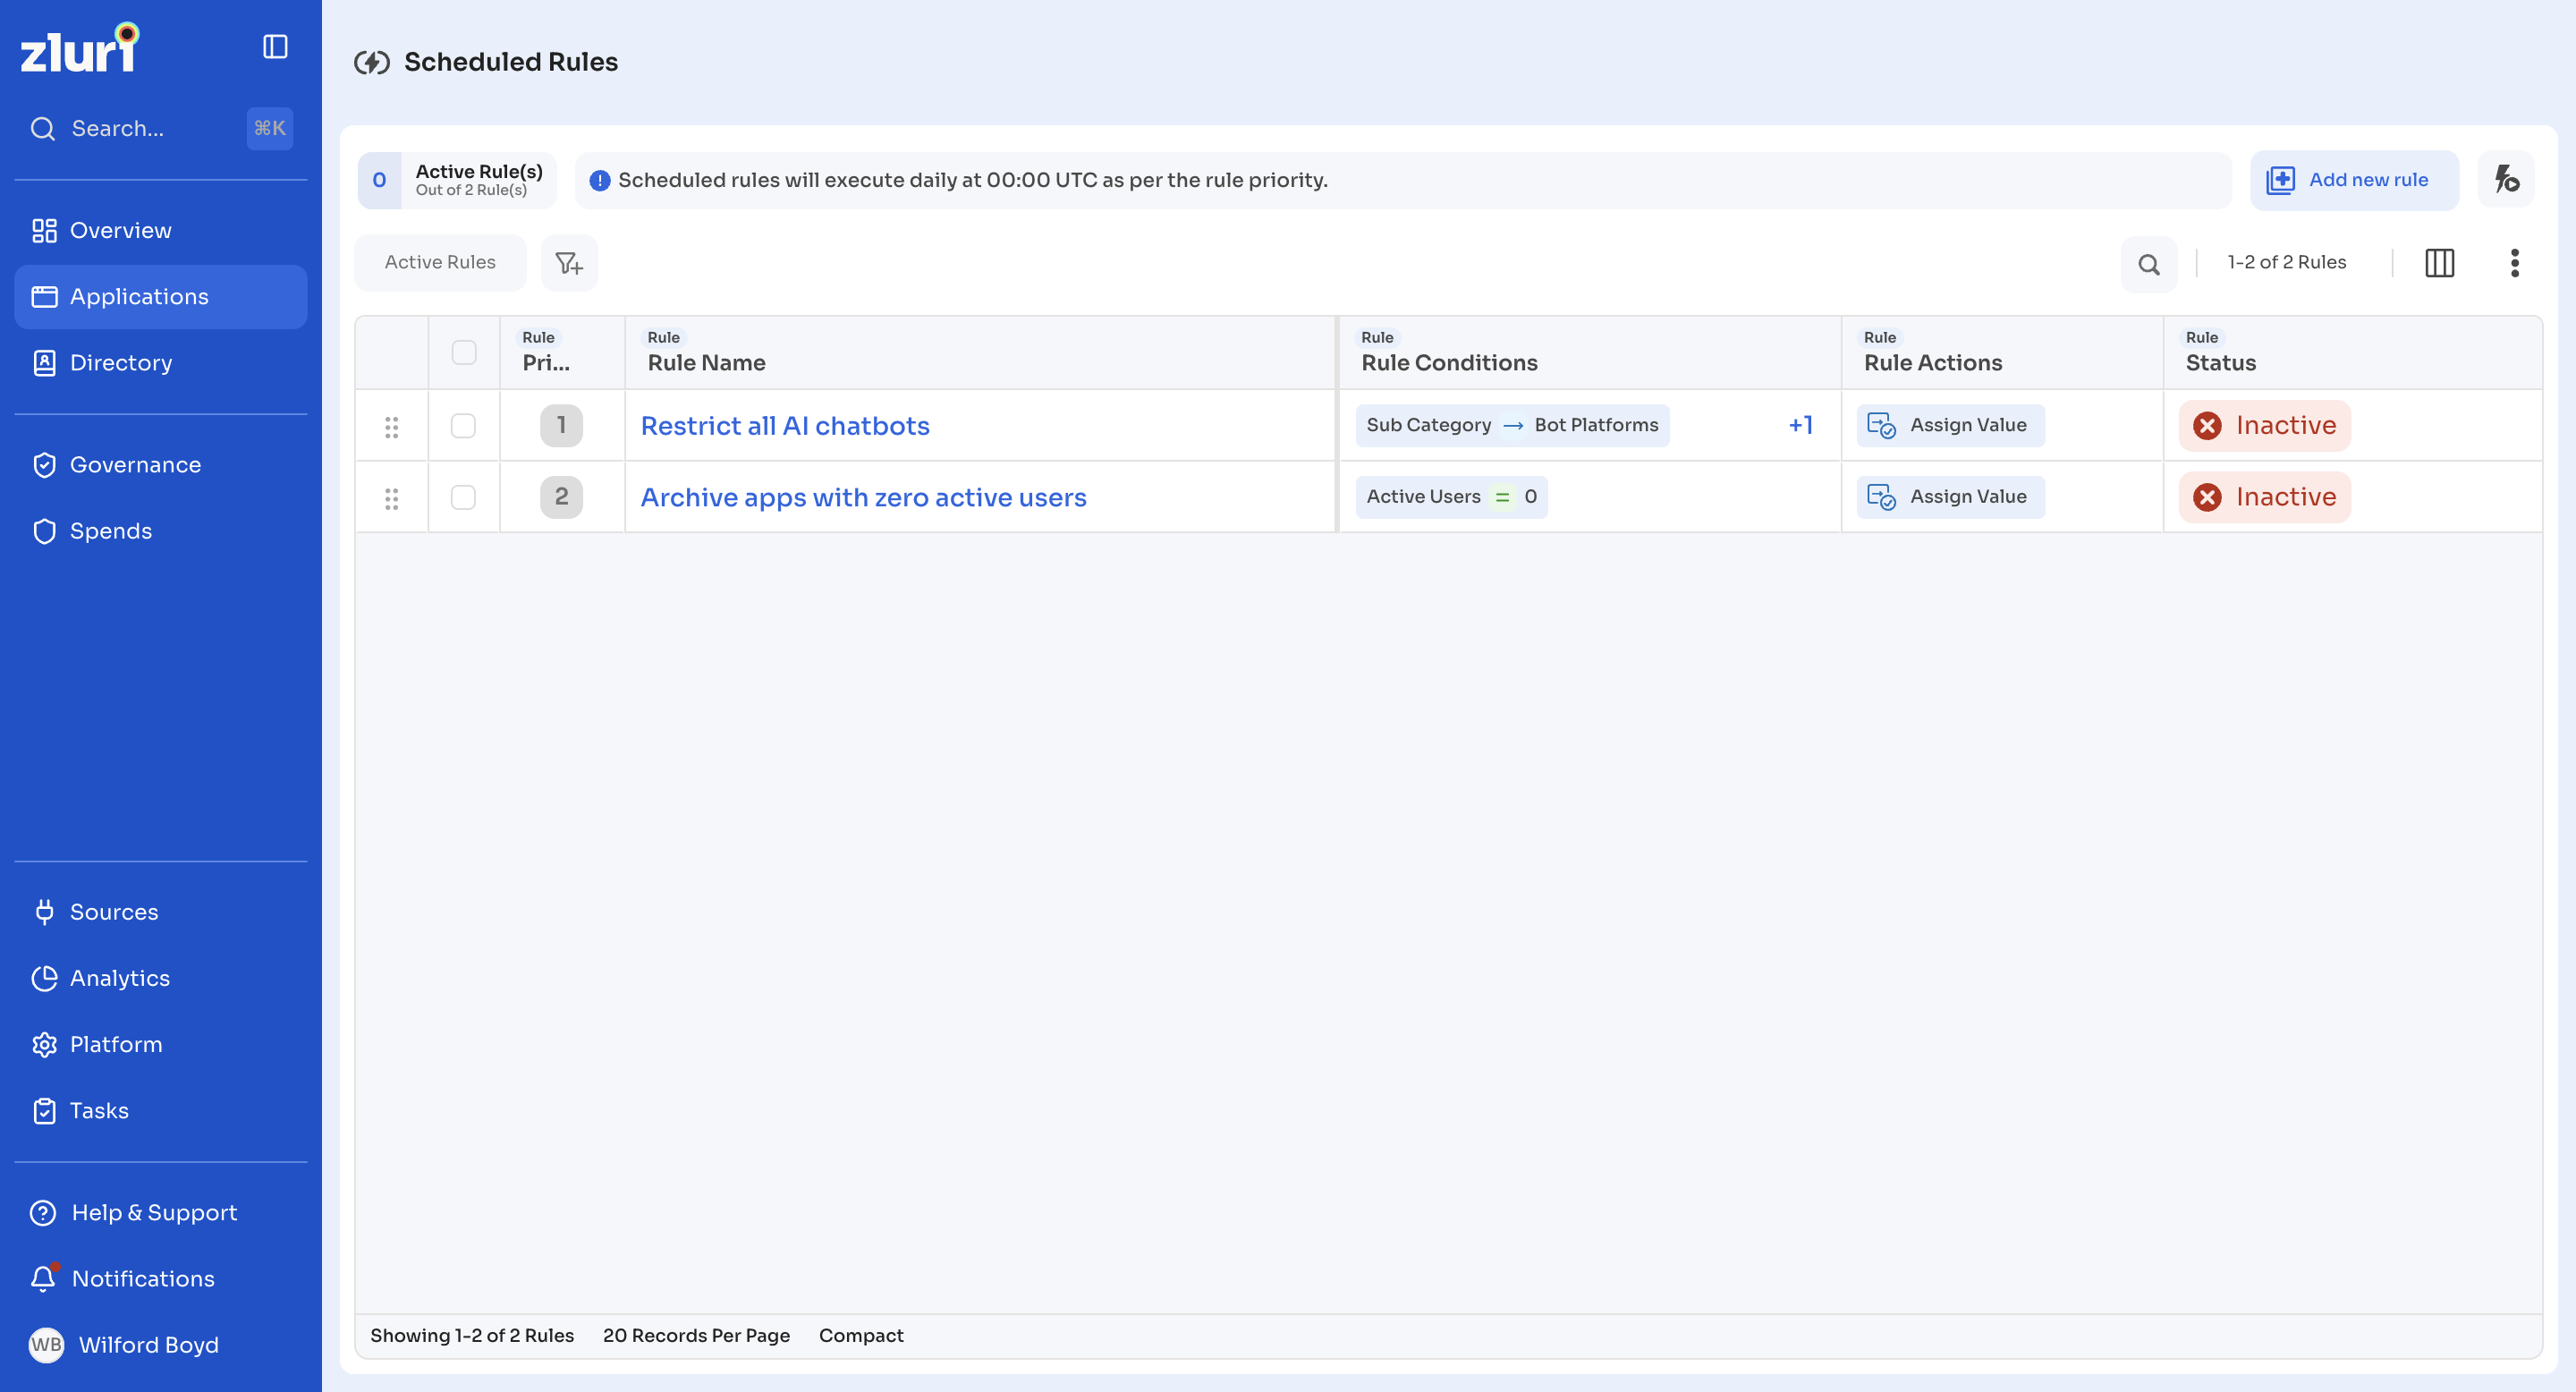
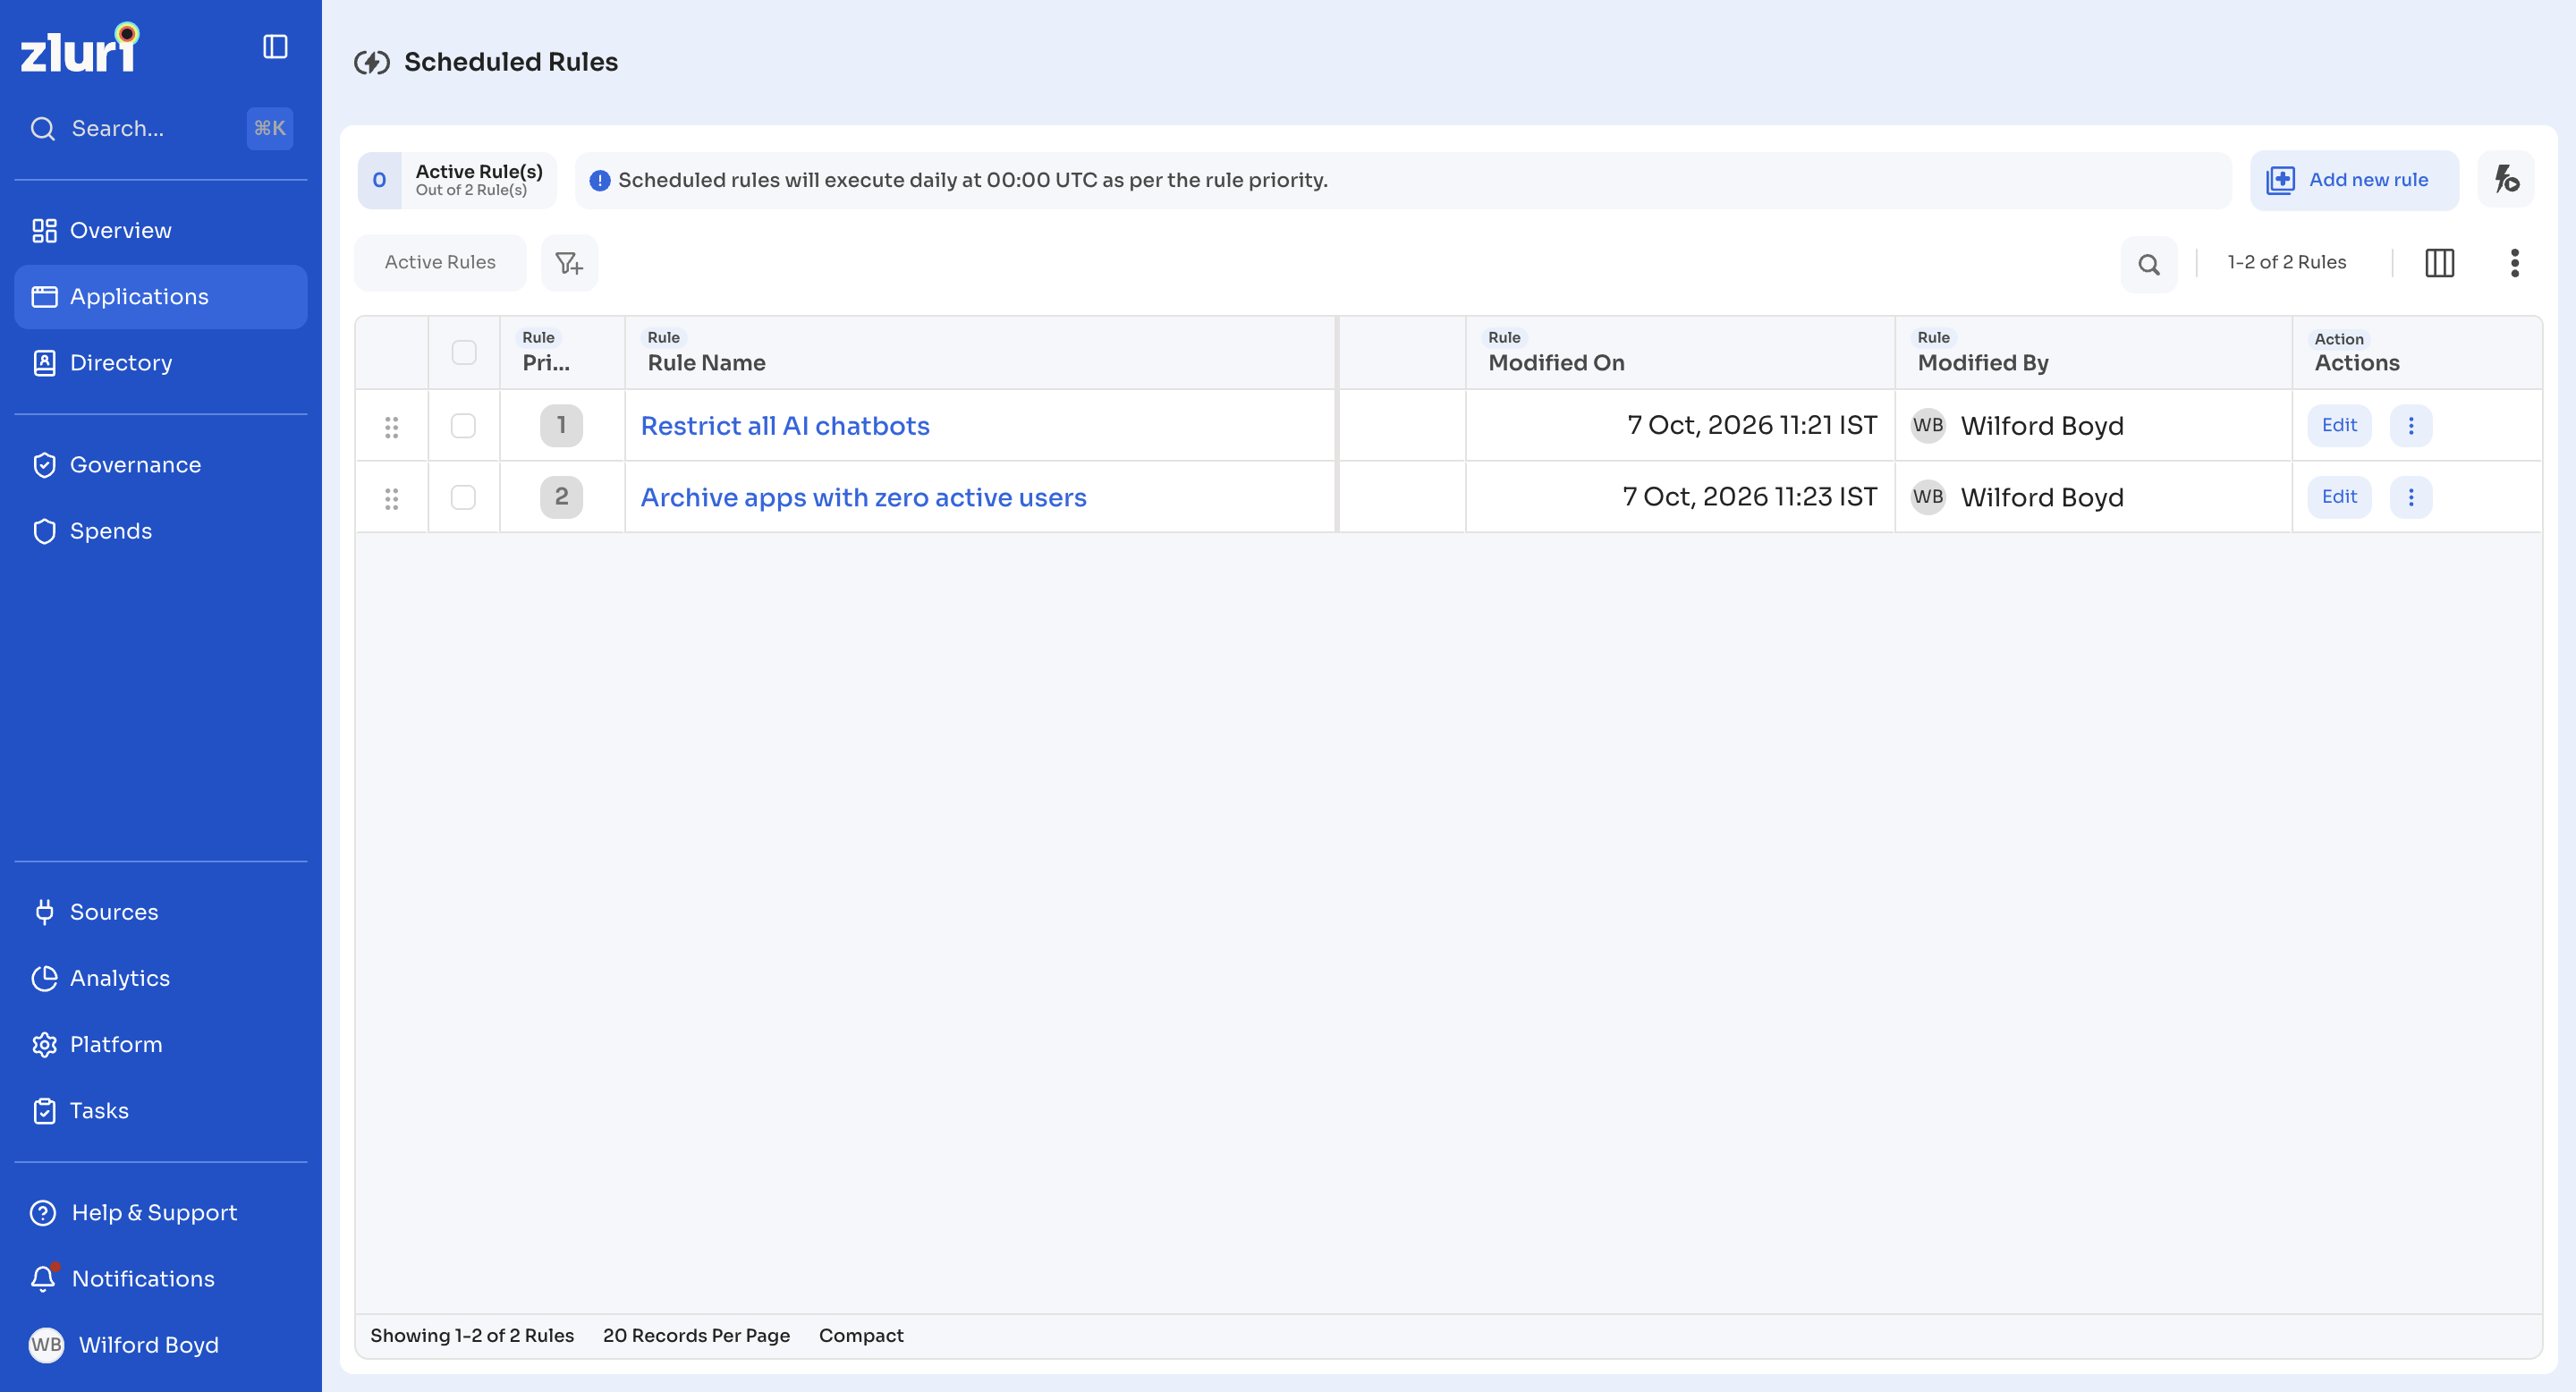
Scroll horizontally to reveal more columns.
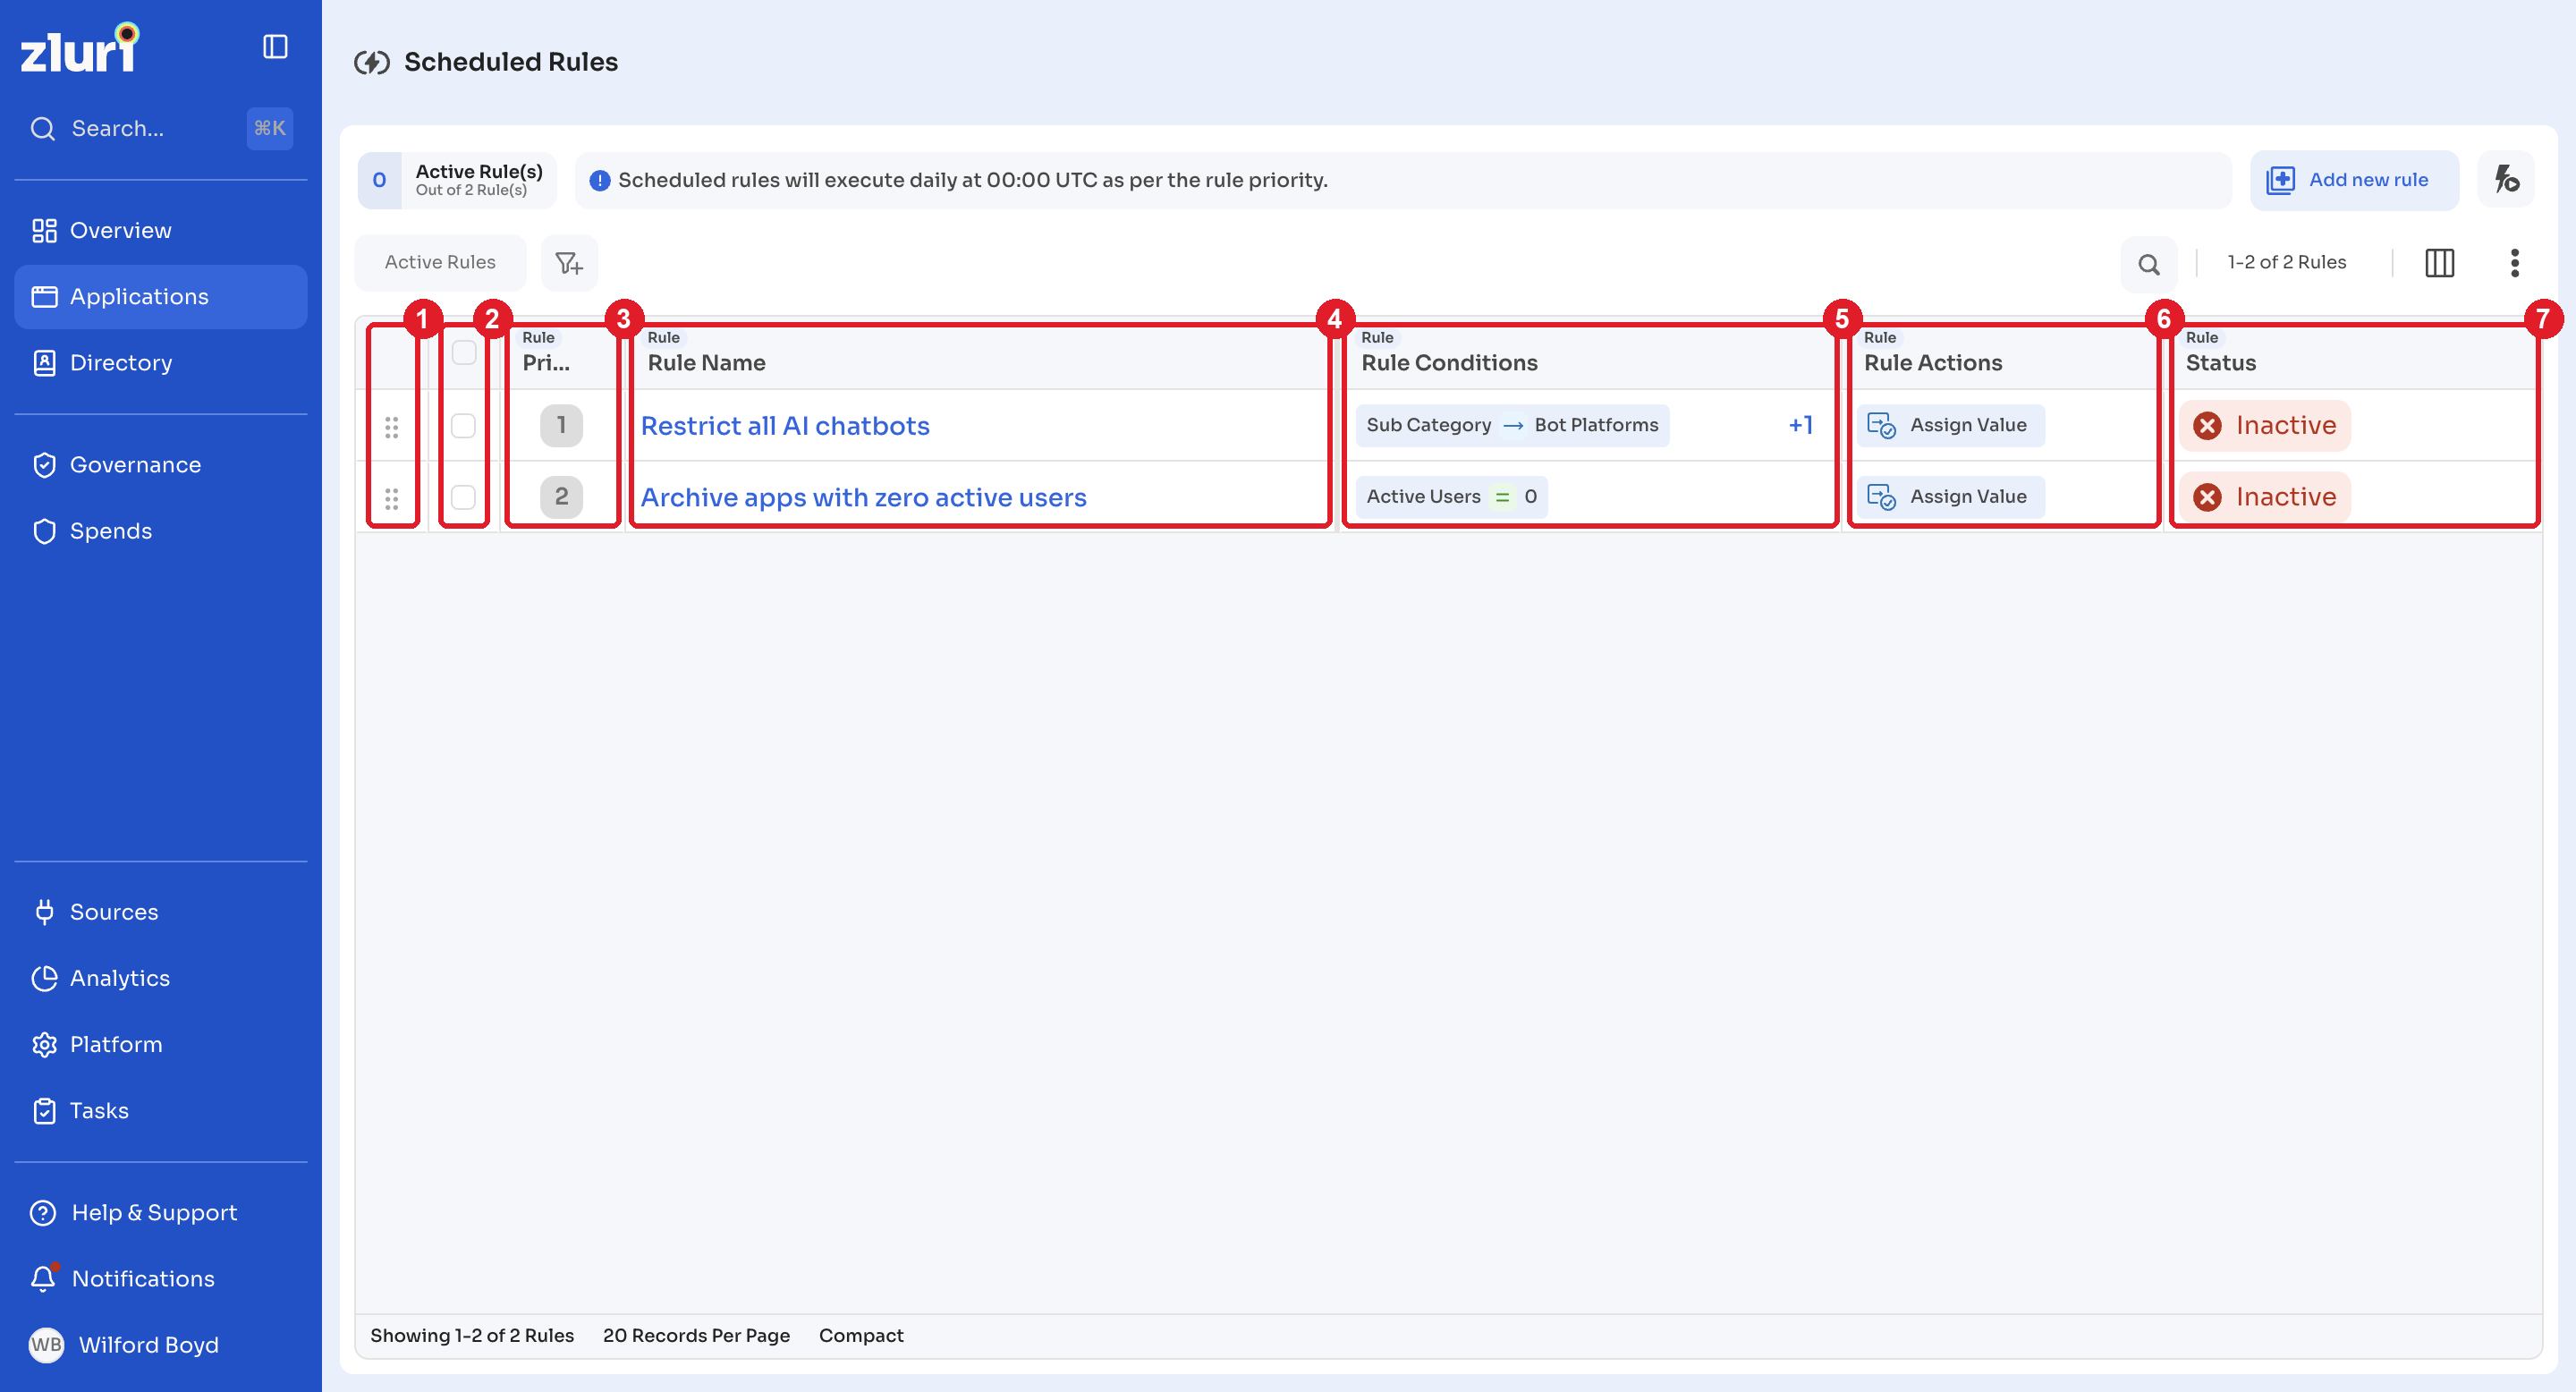
Rule list columns
The rule list includes the following columns:
- Drag handle: select and drag to reorder rule priorities
- Checkboxes: select multiple rules to execute in bulk
- Priority: specifies the order in which rules execute
- Rule name: the name of the rule
- Rule conditions: the criteria applied to applications
- Rule actions: the actions taken when conditions are met
- Status: the current status of the rule
- Active: runs automatically during scheduled execution, at 12:00 AM UTC (not currently user configurable)
- Inactive: a complete rule that does not run automatically or manually
- Draft: an incomplete rule that cannot be activated or executed
- Last run: when the rule last executed
- Created on: the creation date
- Created by: the name of the user who created the rule
- Modified on: the last modification date
- Modified by: the name of the user who last edited the rule
- Actions: select Edit to edit the rule. Select the three-dot menu on a rule for further options:
-
Move rule to last: assigns the lowest priority to the rule, so it executes last
-
Delete Rule: removes the rule from the list. This action cannot be undone
-
Execute Rule: runs the rule manually
-
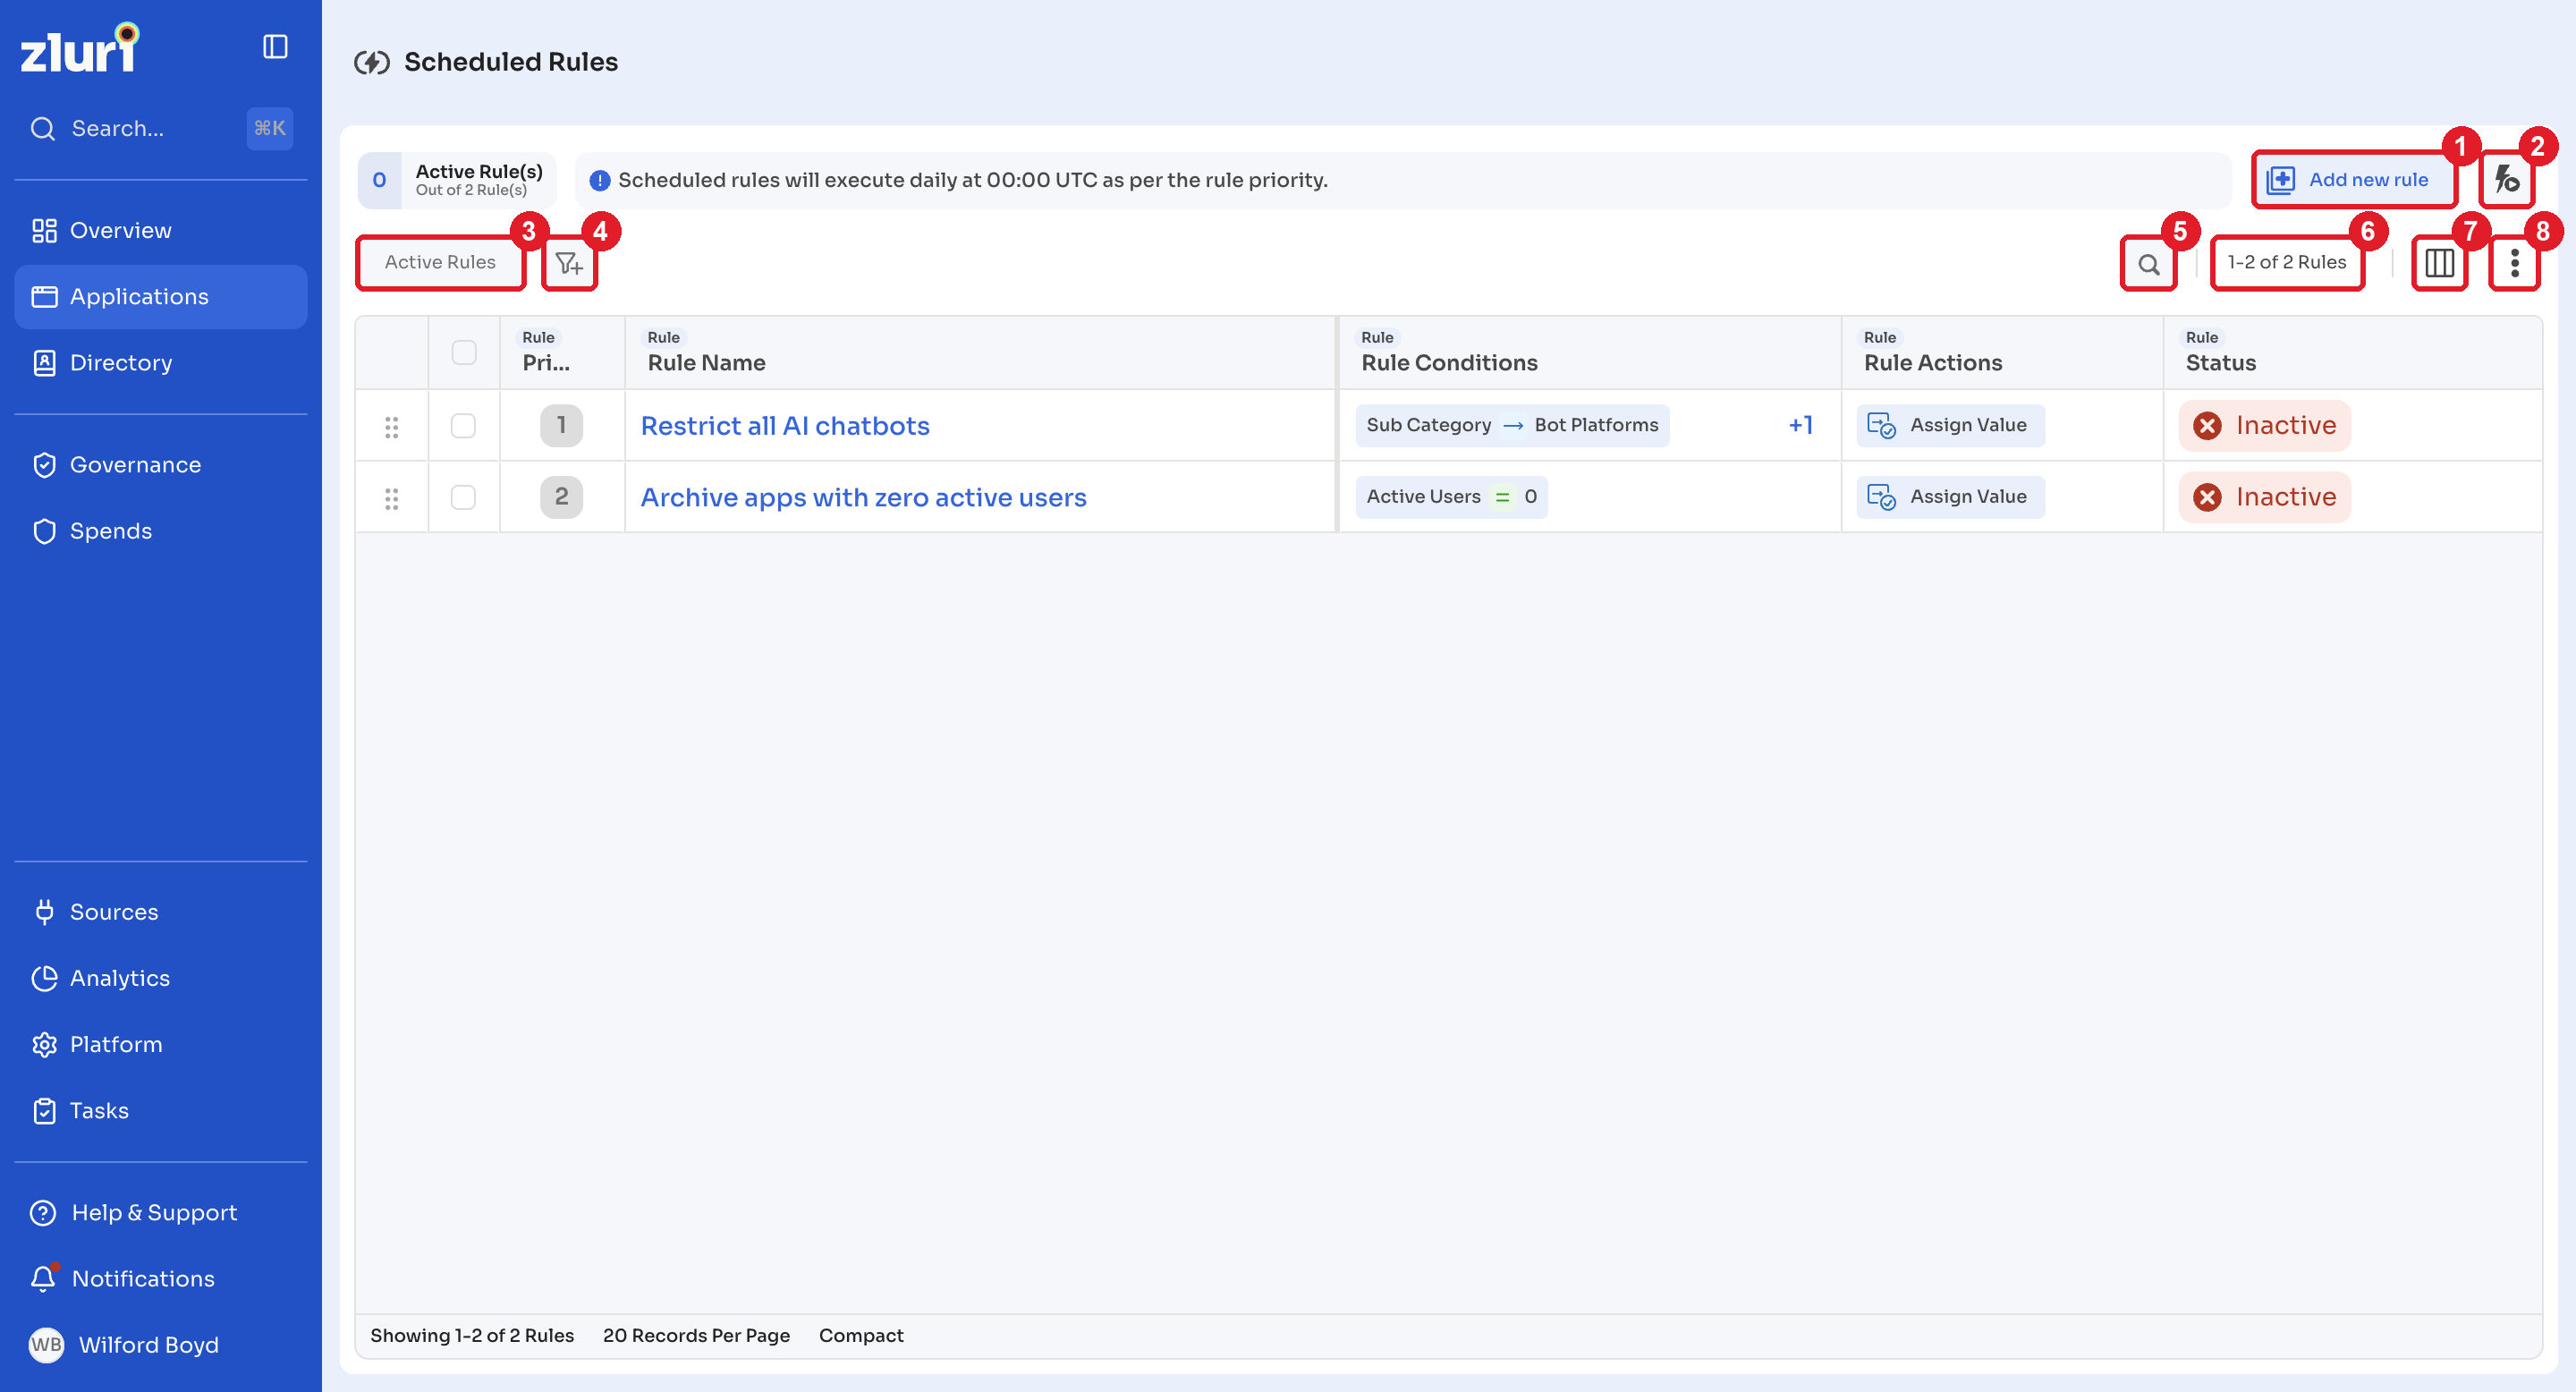
Other UI elements
The interface also includes:
-
Add new rule: create a rule from scratch
-
Execute All: run all active rules in sequence
-
Active Rules: a quick filter to hide inactive rules
-
Configure Filters: advanced filtering options
-
Search: find rules by name
-
Pagination Configuration: set how many rules display per page, or enable infinite scrolling
-
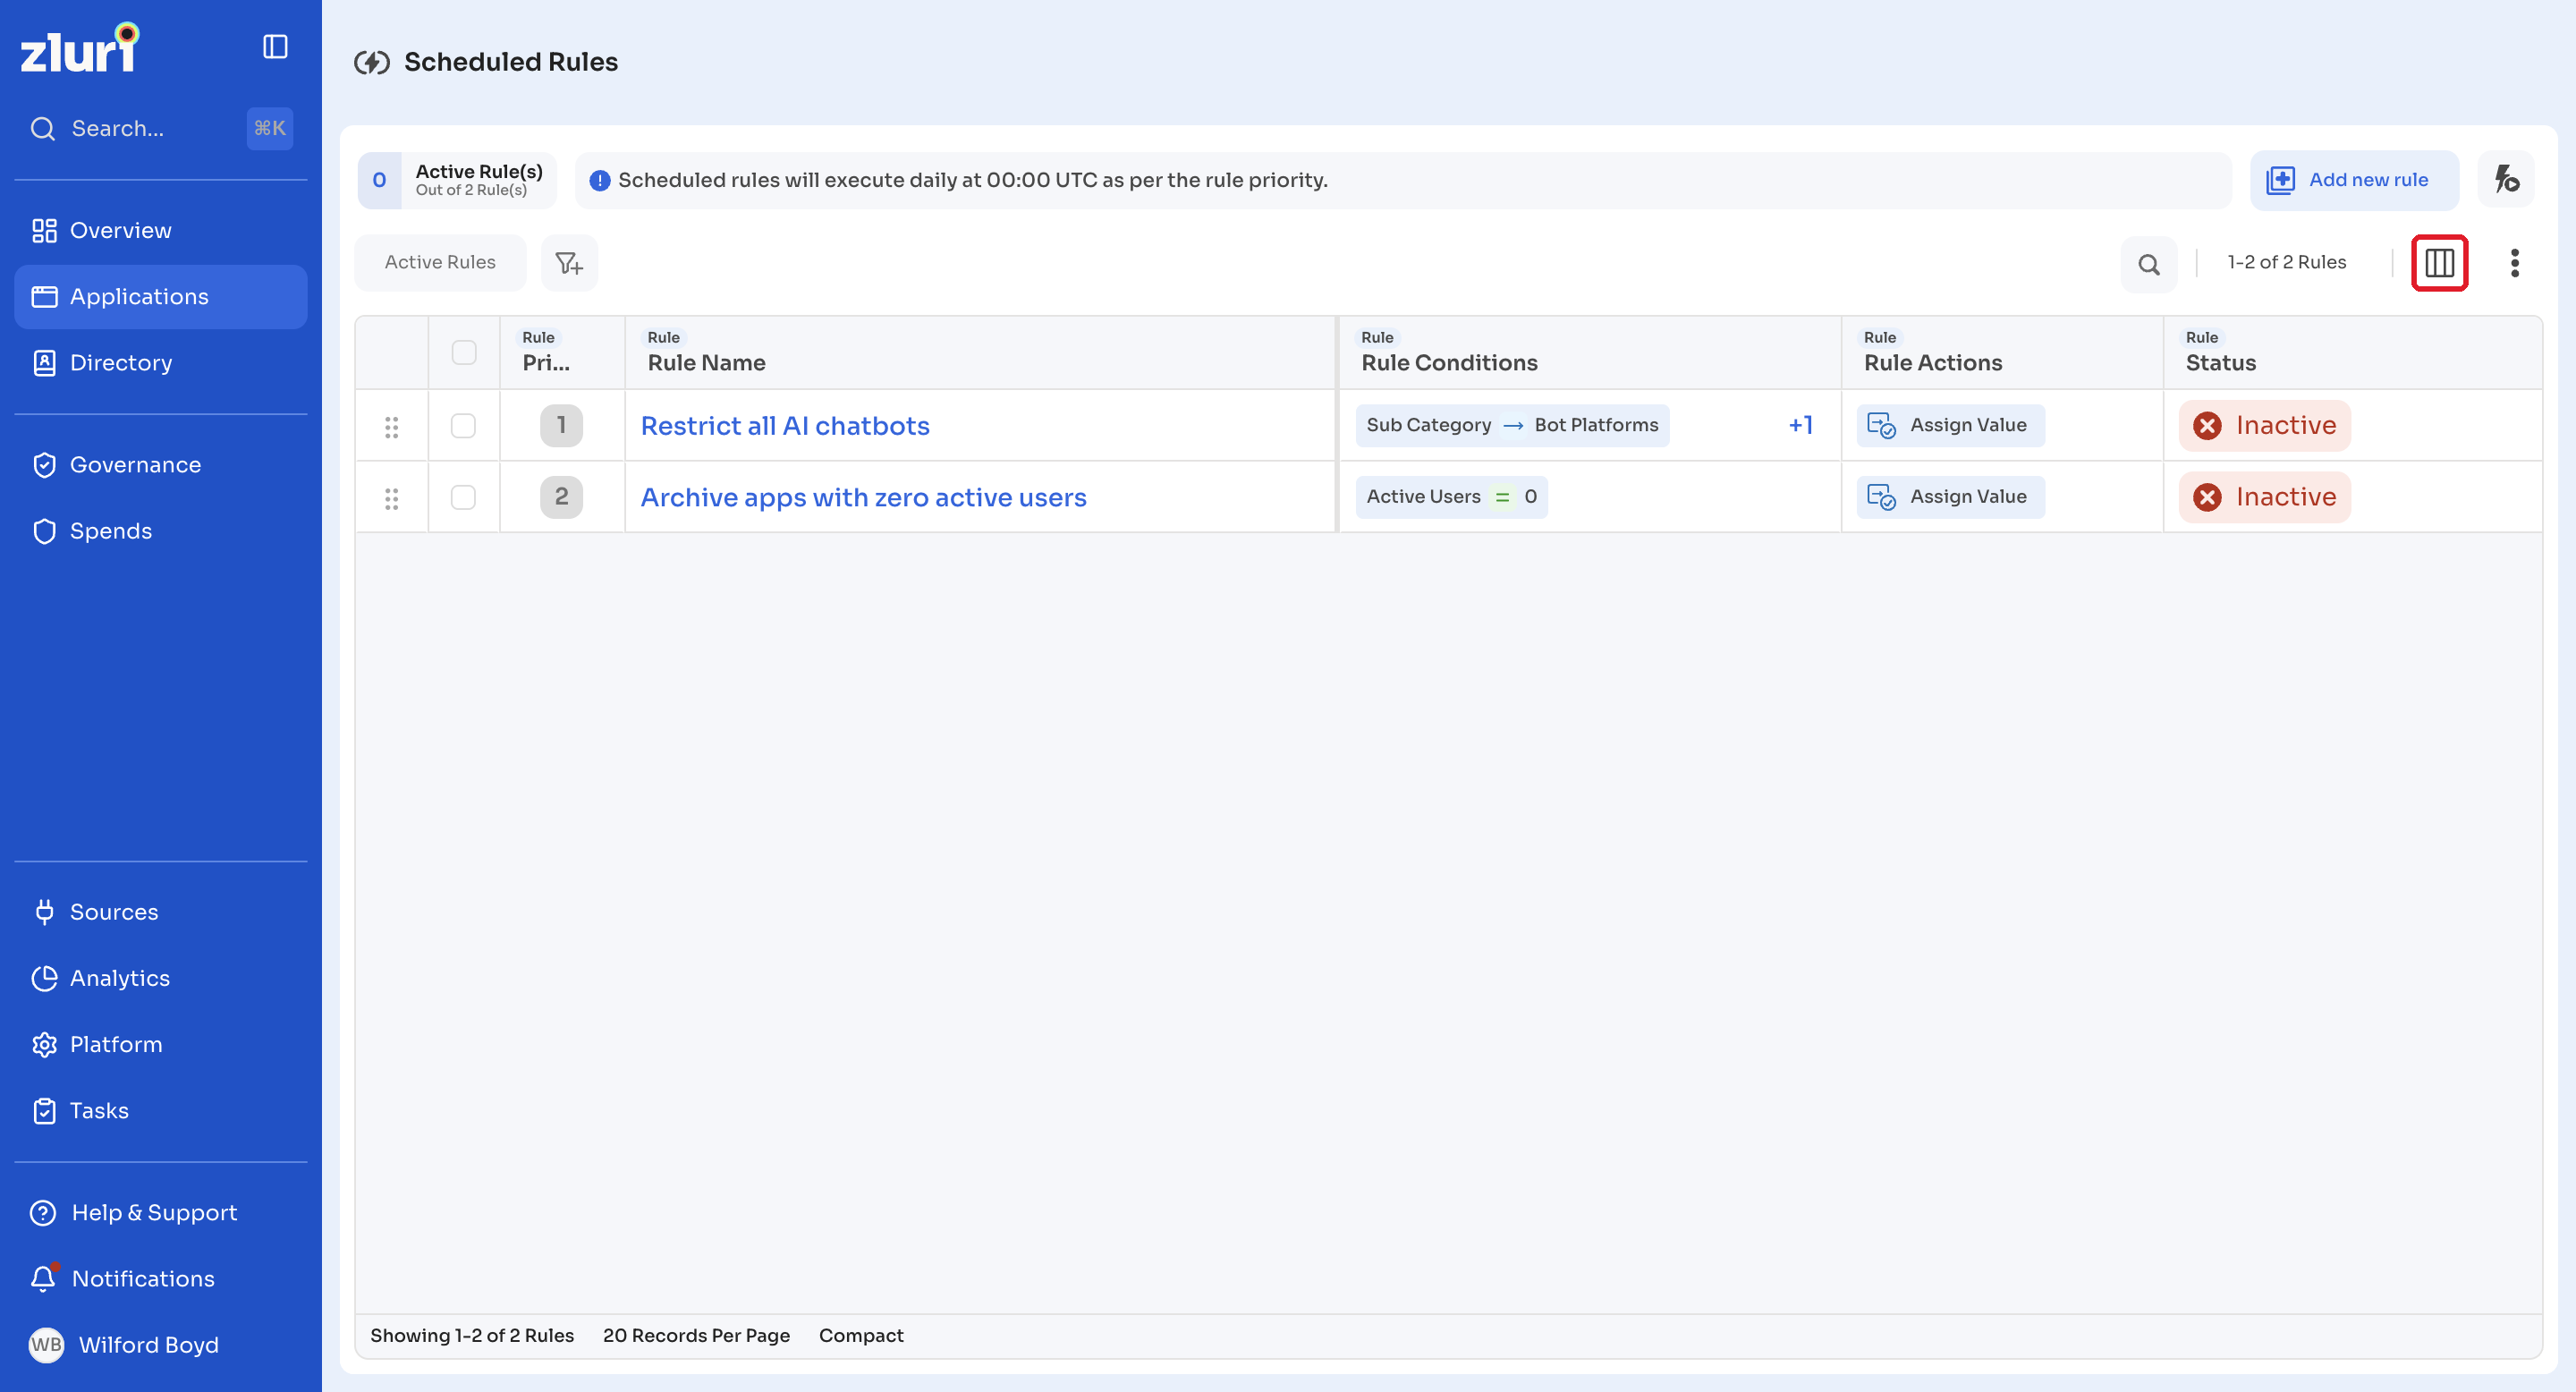
Modify Columns: configure which columns display and their order
-
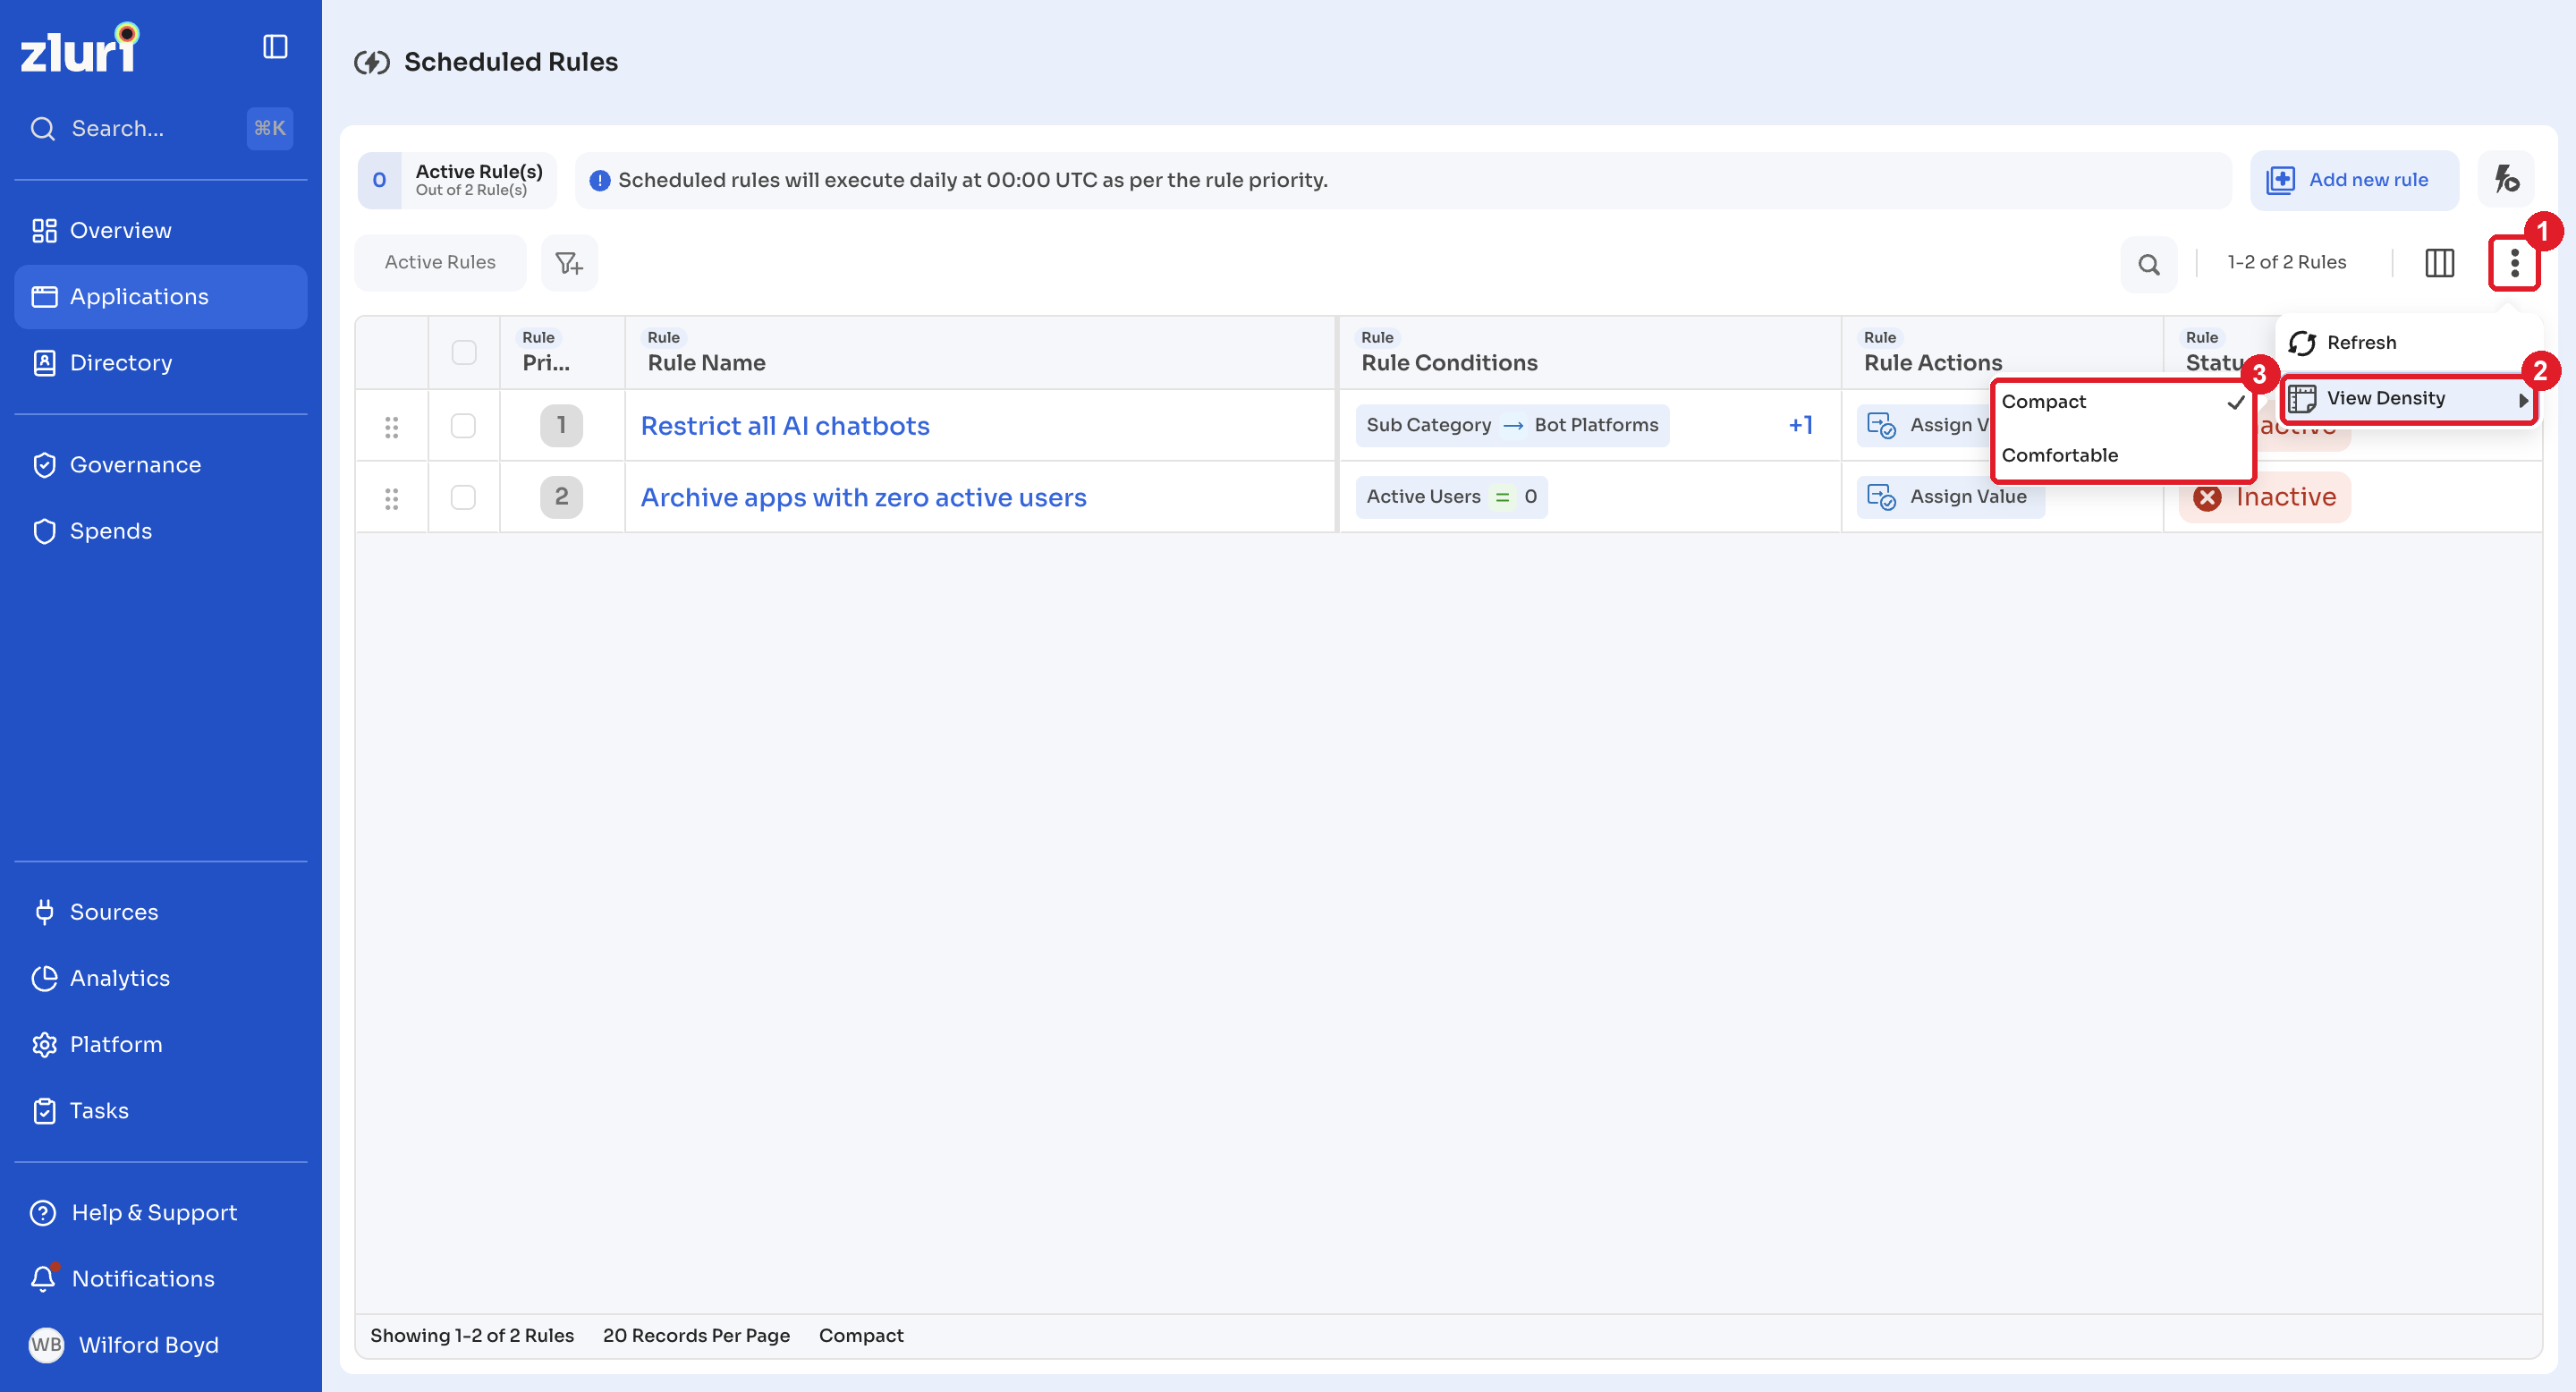
More Actions menu: refresh the view or change display density (Compact or Comfortable)
Manually execute rules
Active rules run automatically at 12:00 AM UTC (not currently user configurable). Administrators can also execute rules manually.
Only active rules can be manually executed. To run an inactive or draft rule, activate it first.
Execute a single rule
-
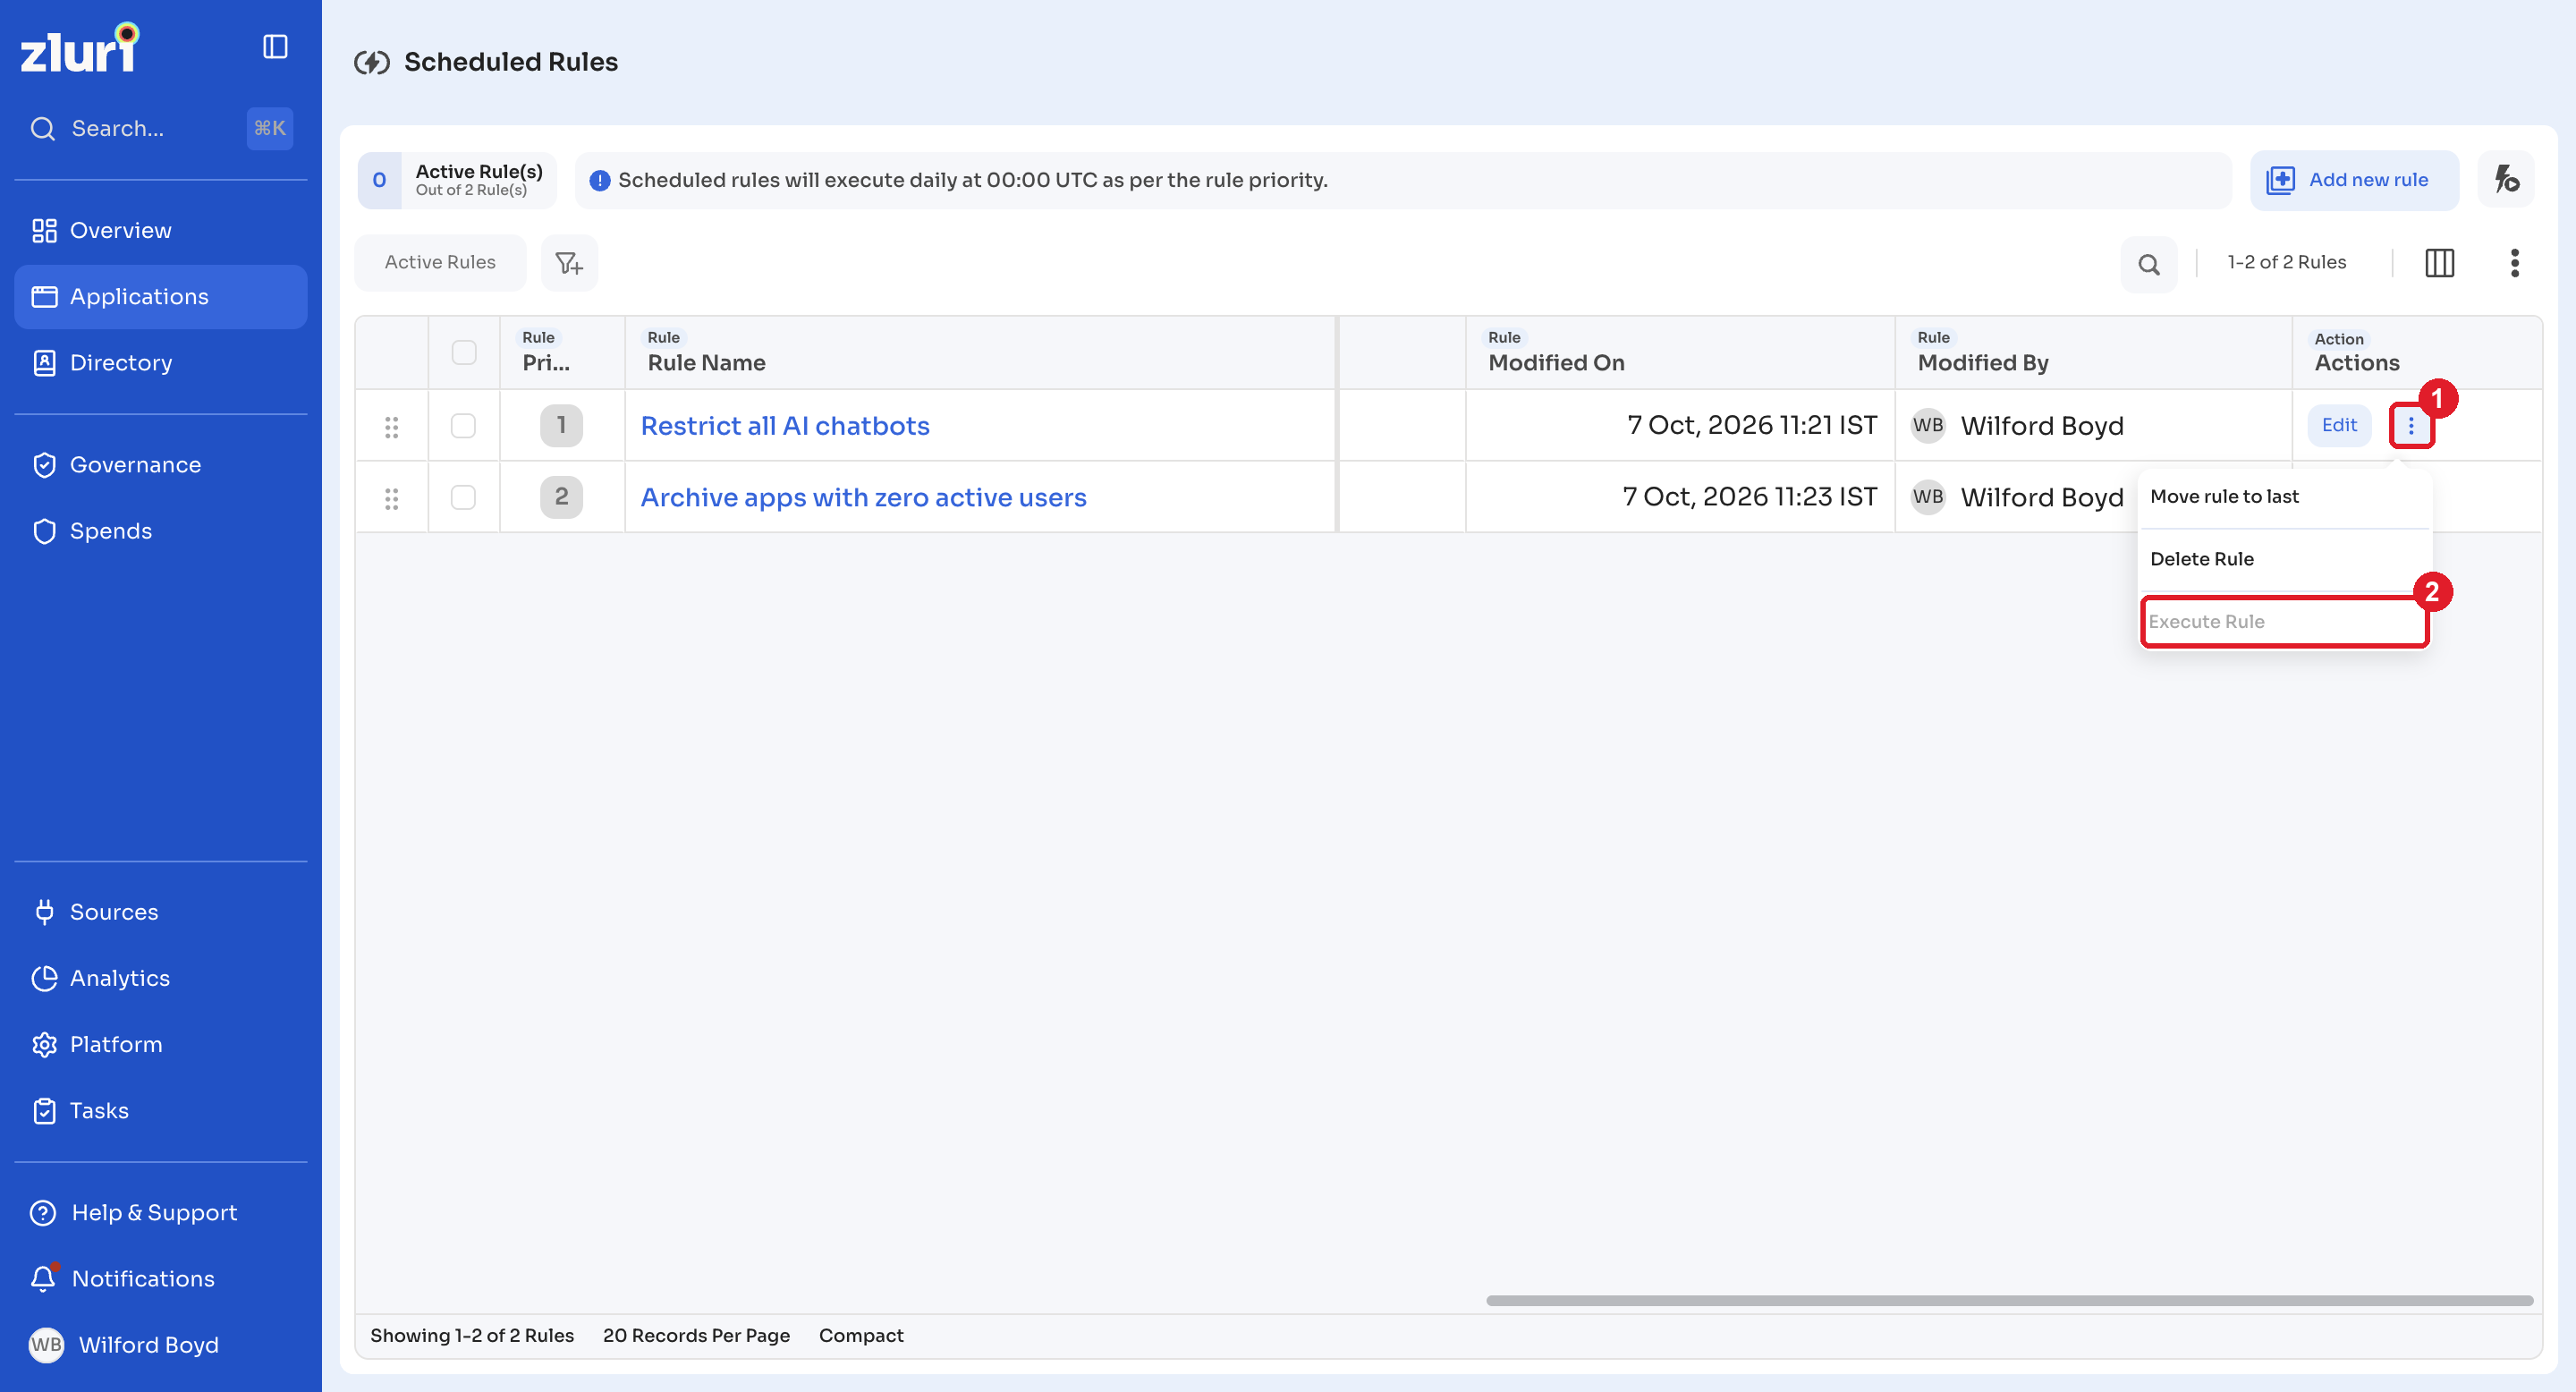
Scroll to the far right and select the three-dot menu for the rule to execute.
-
Select Execute Rule.
-
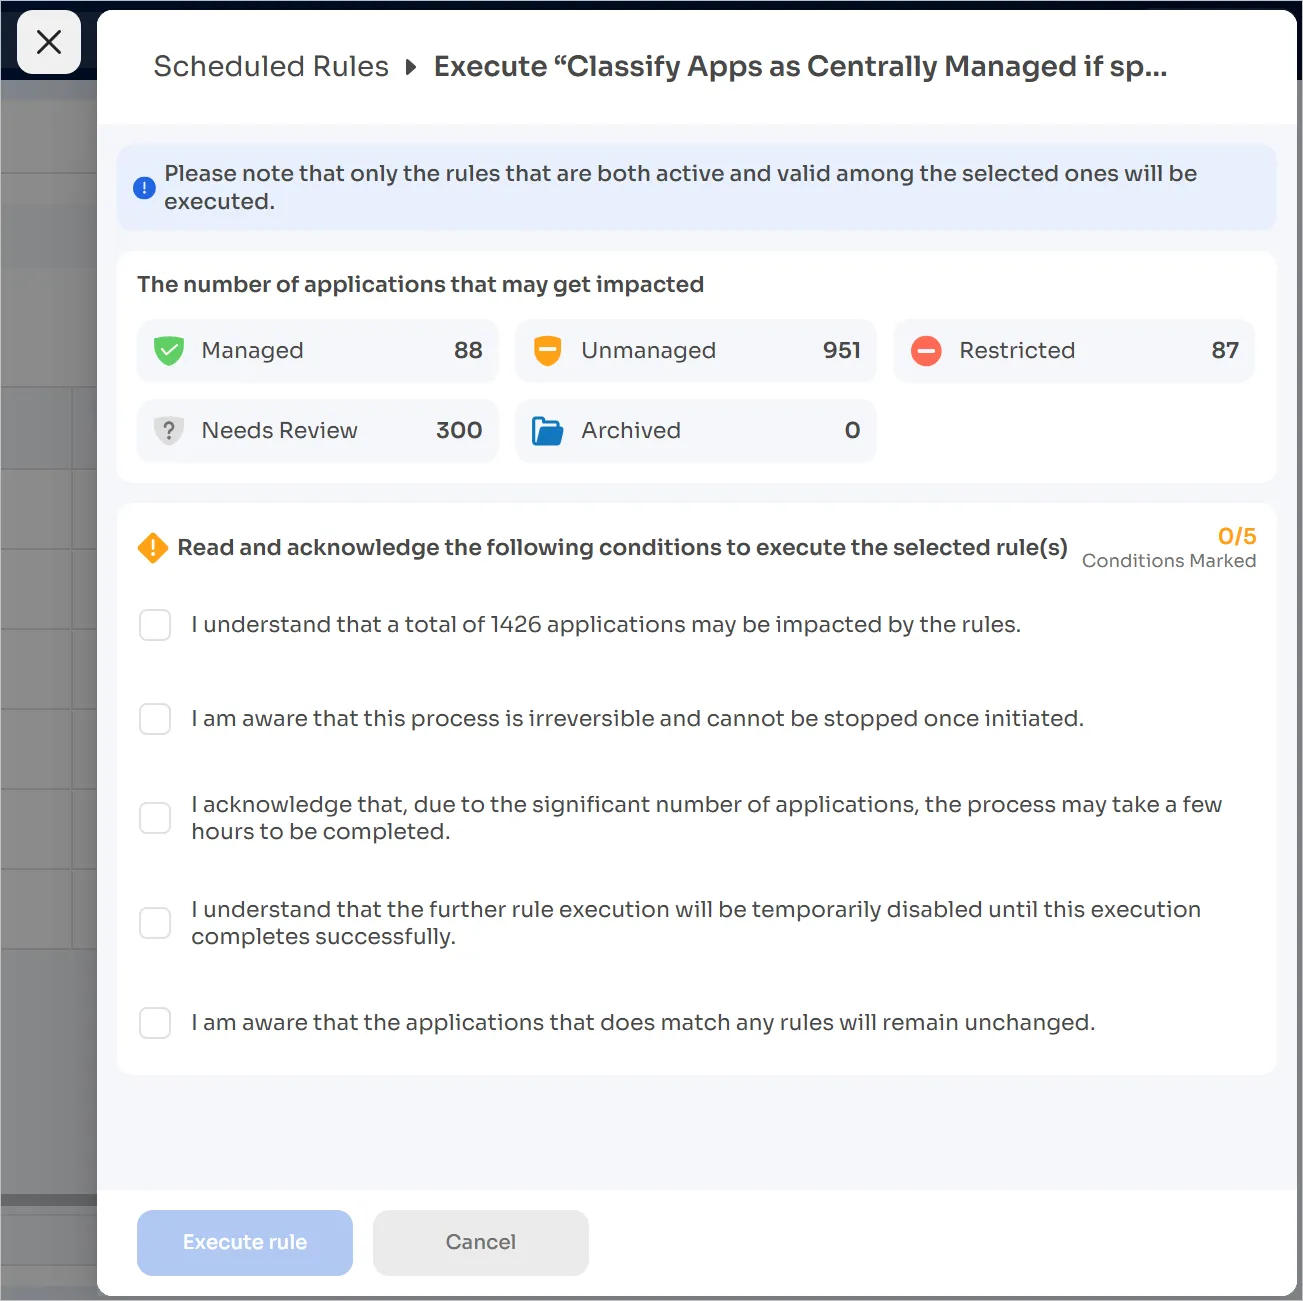
Verify the actions, select the checkboxes, and select Execute rule.
Execute multiple rules
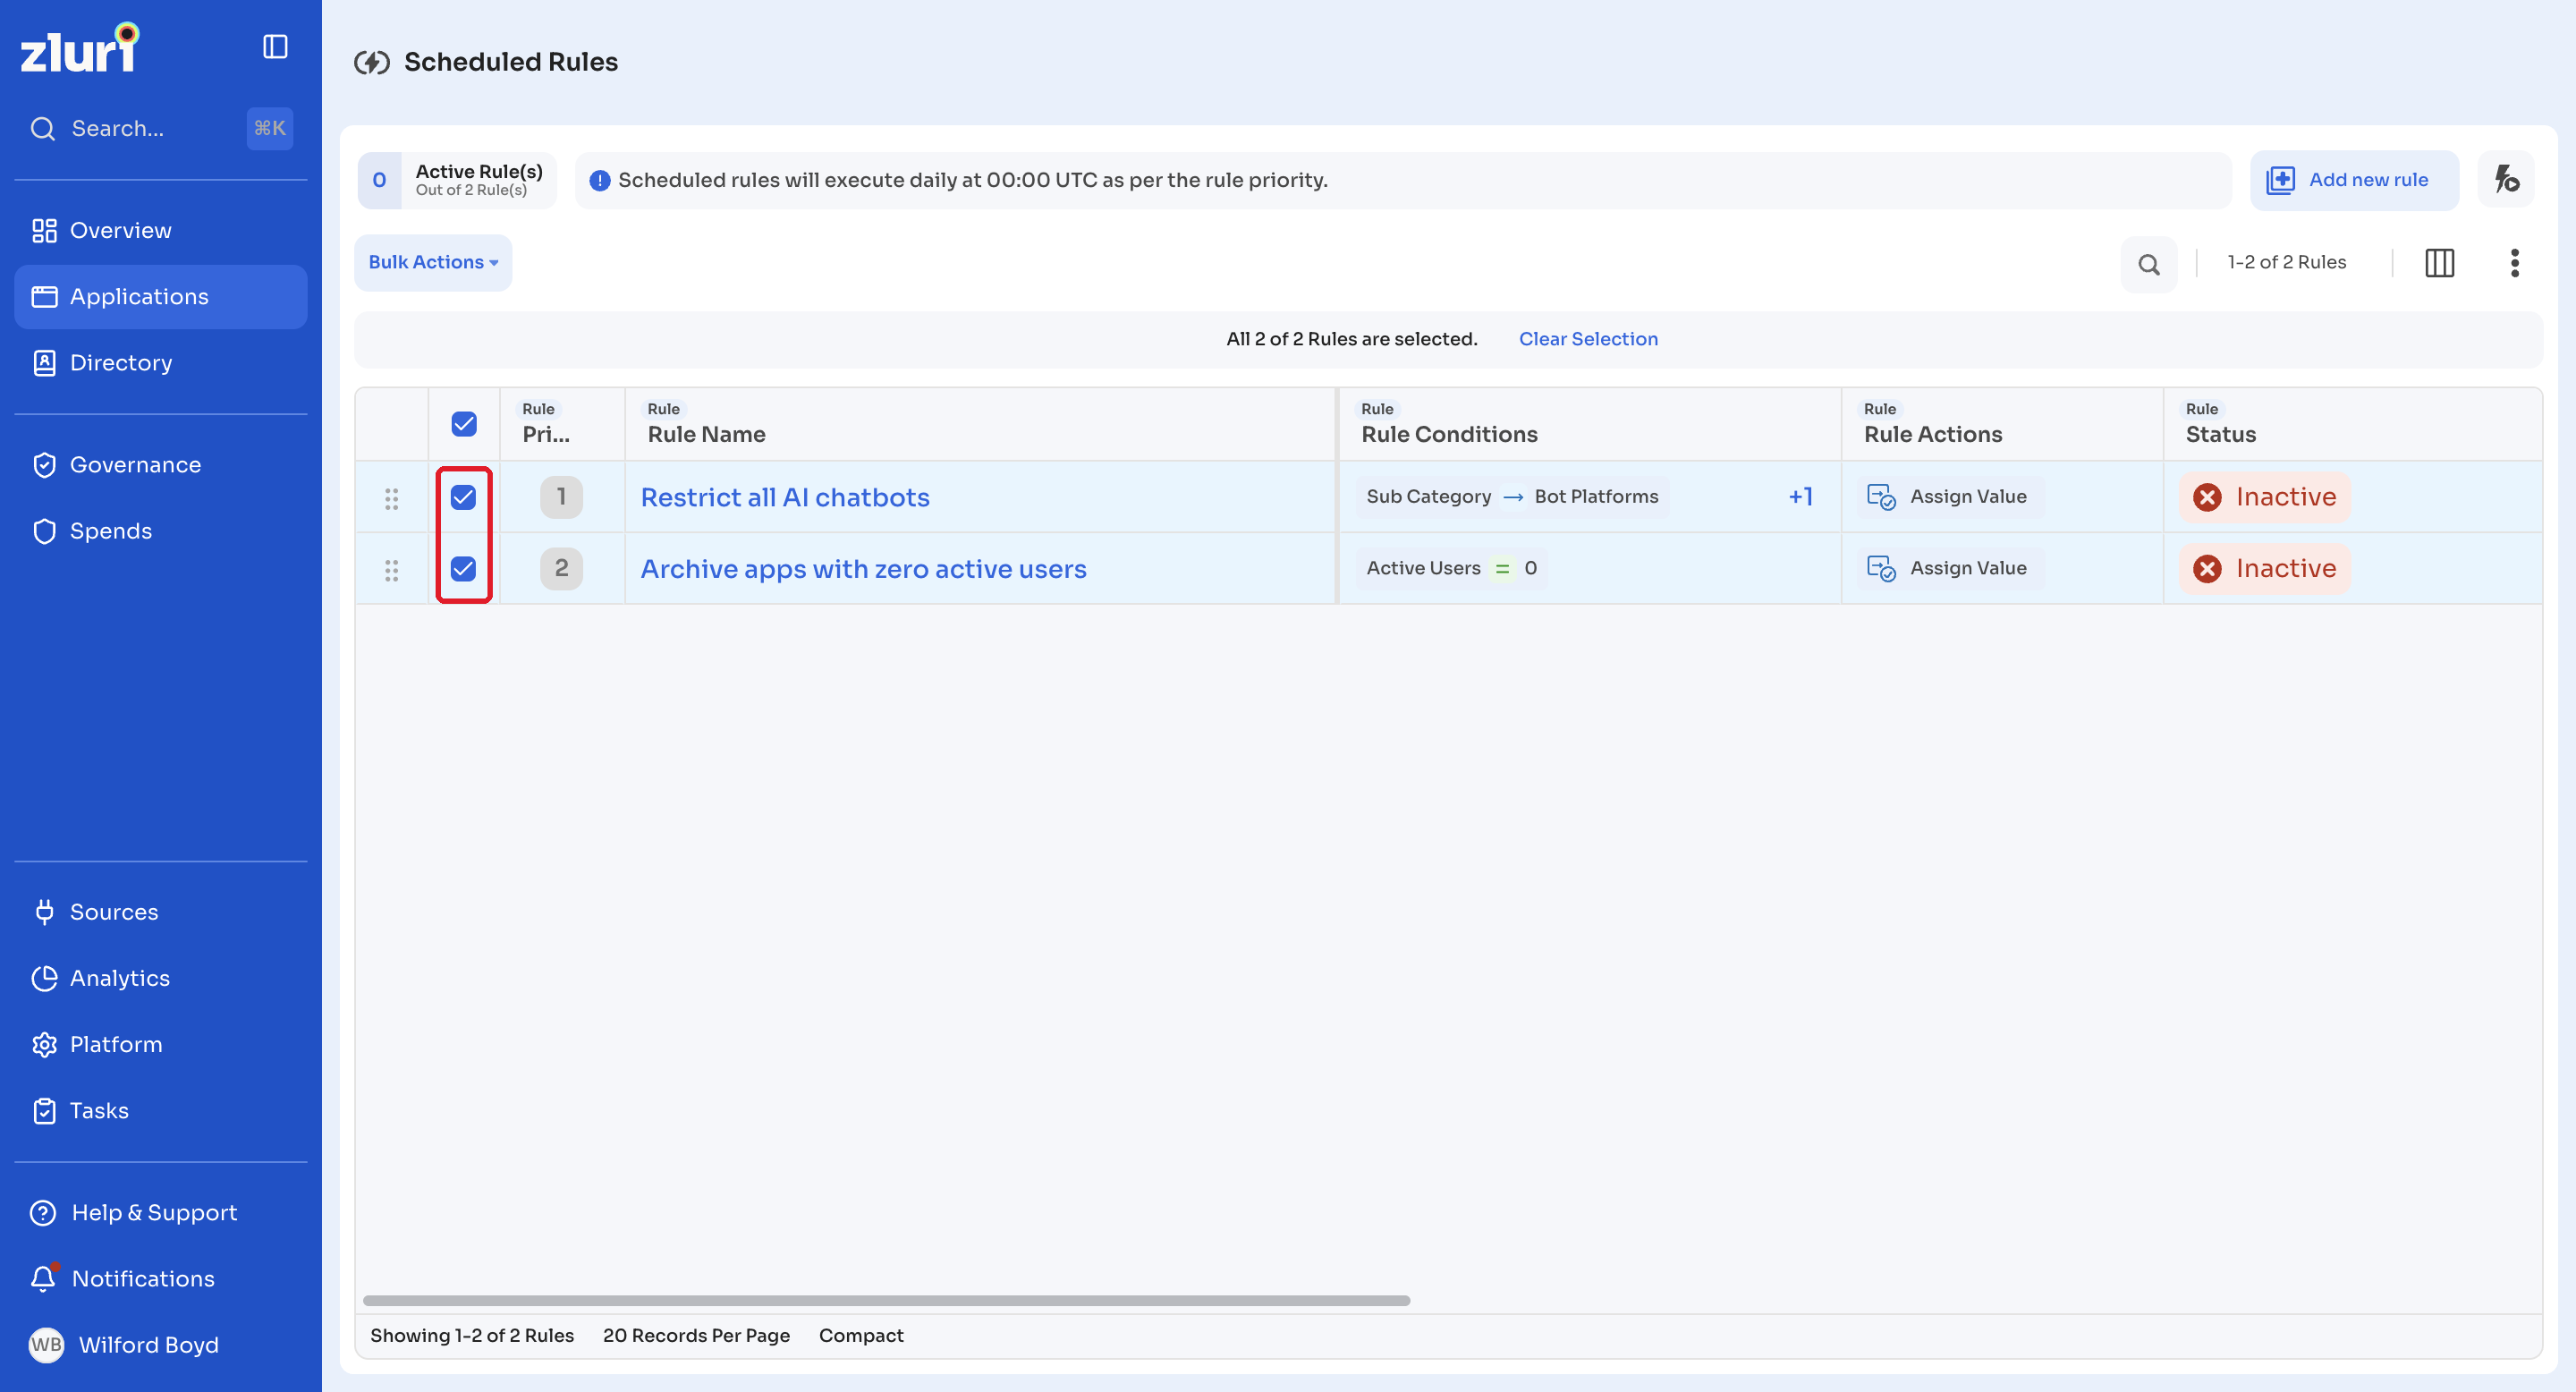
- Select the checkbox for each rule to run in bulk.
Only rules marked Active run, even if inactive rules are selected. Inactive rules fail silently.
-
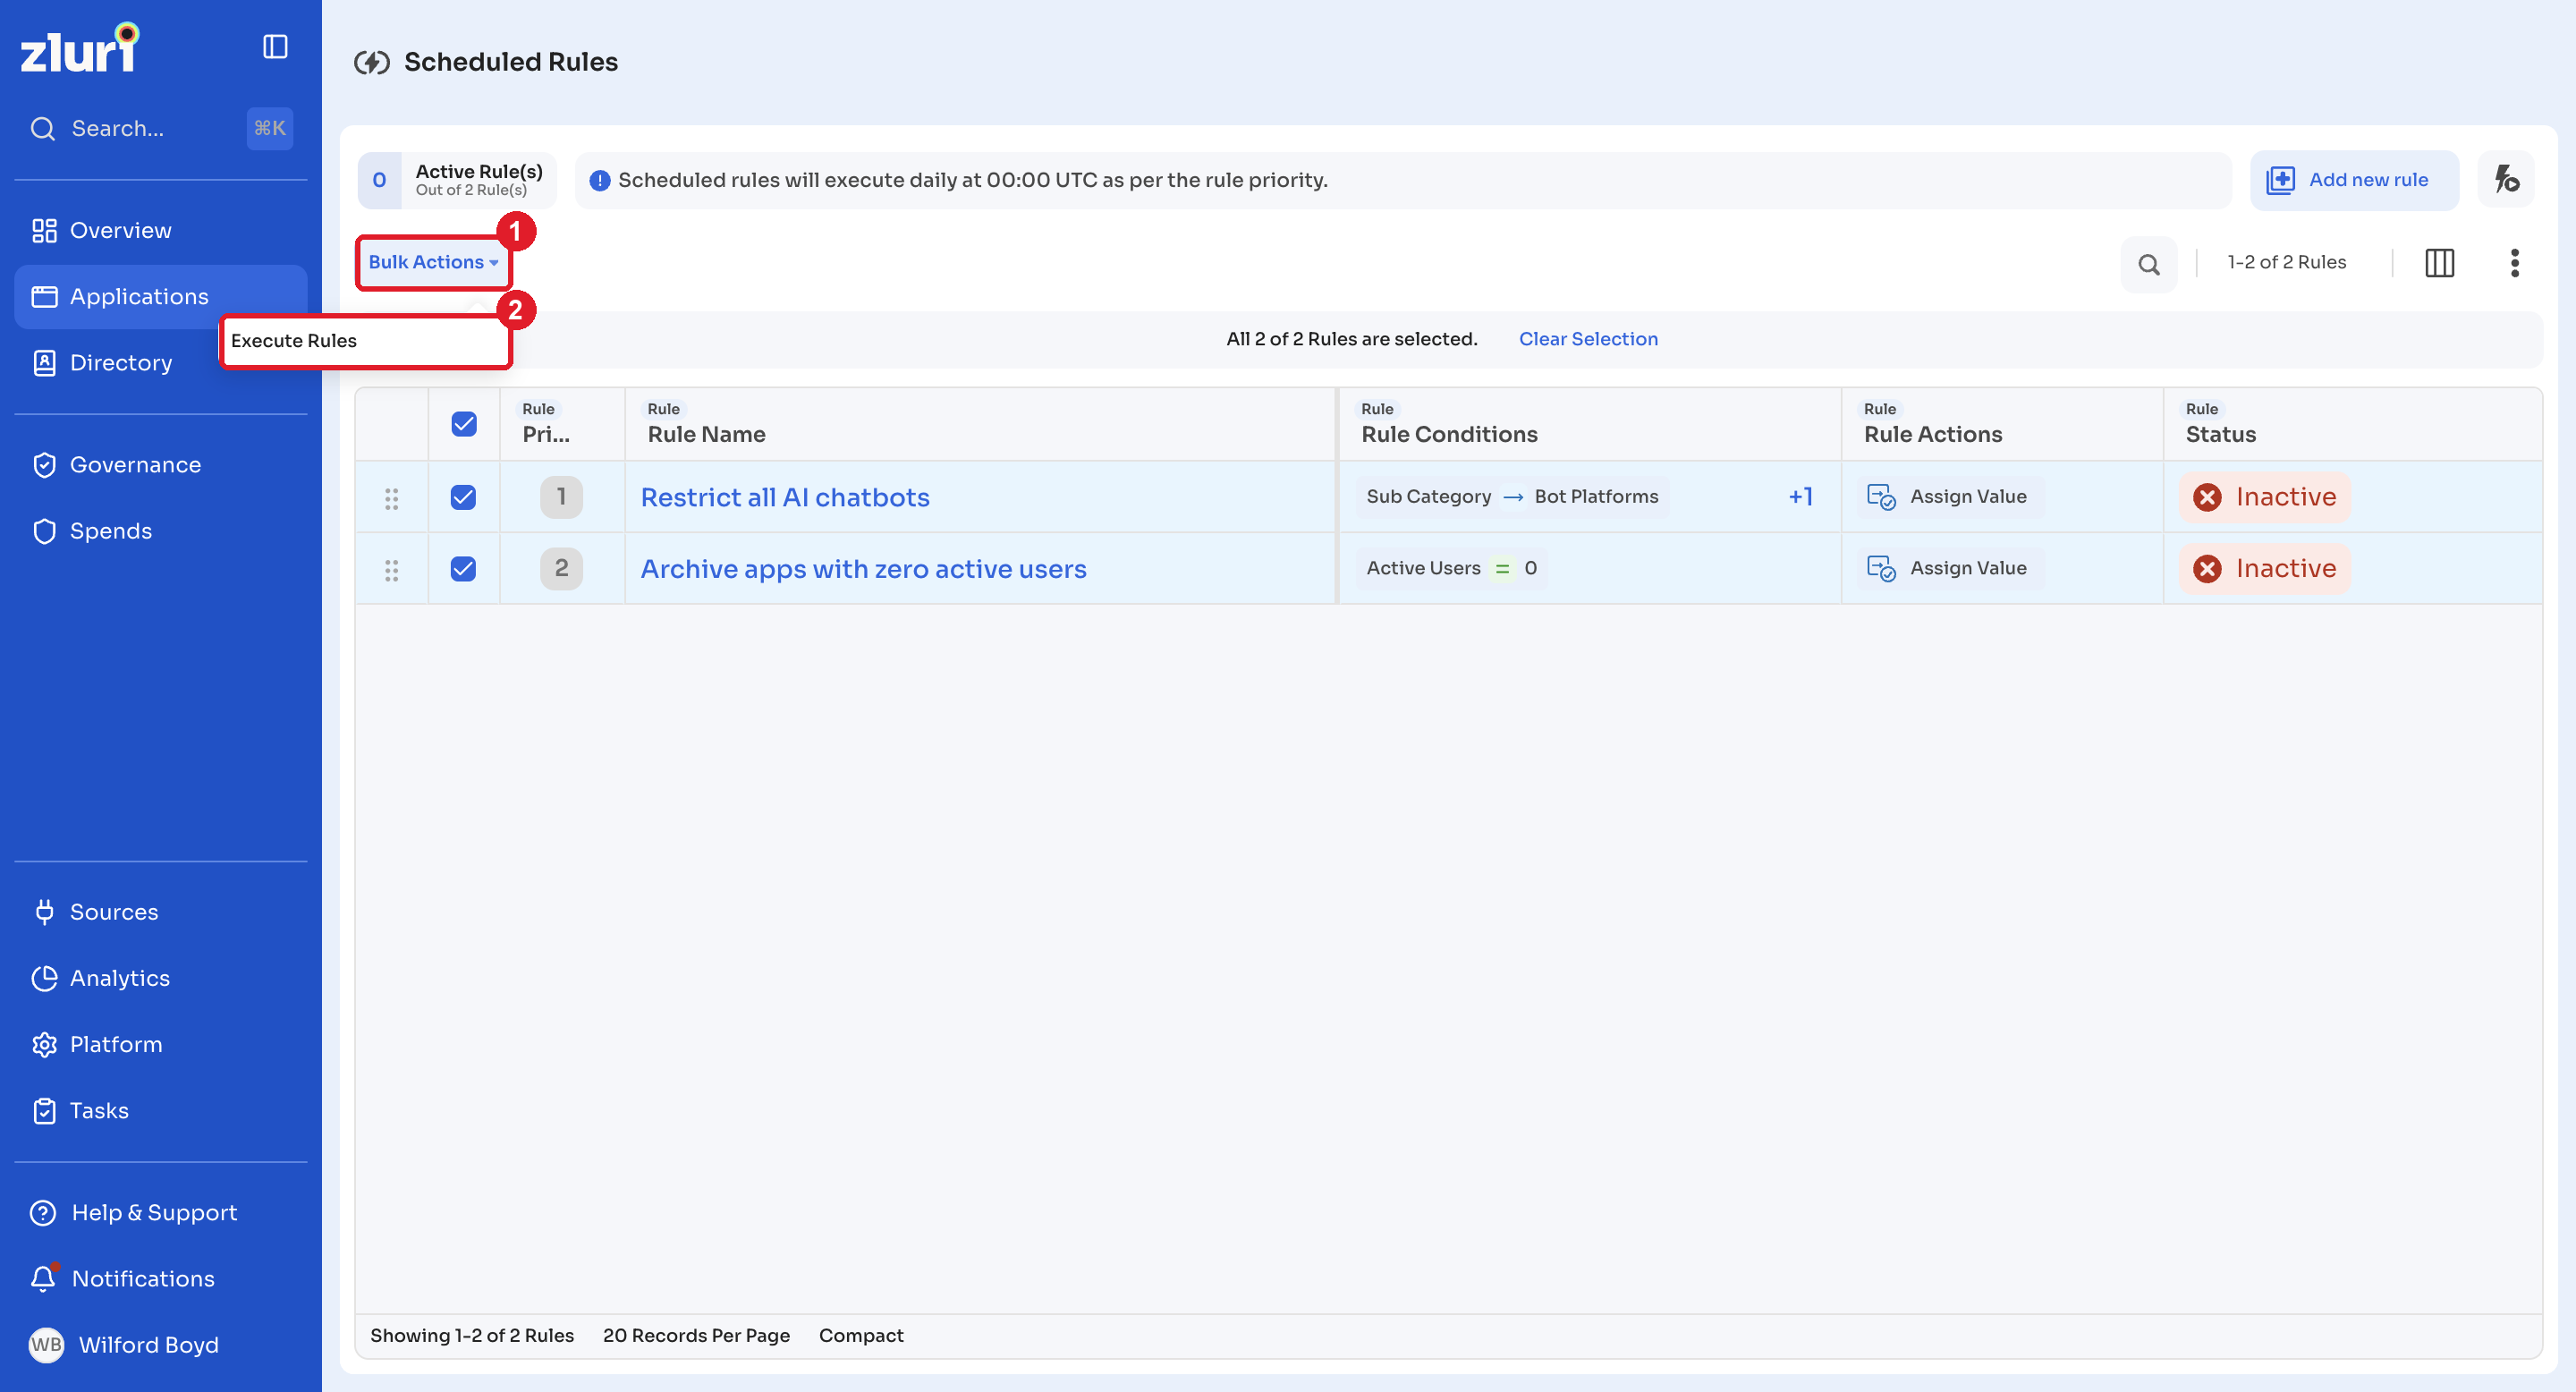
Select Bulk Actions, then select Execute Rules.
-
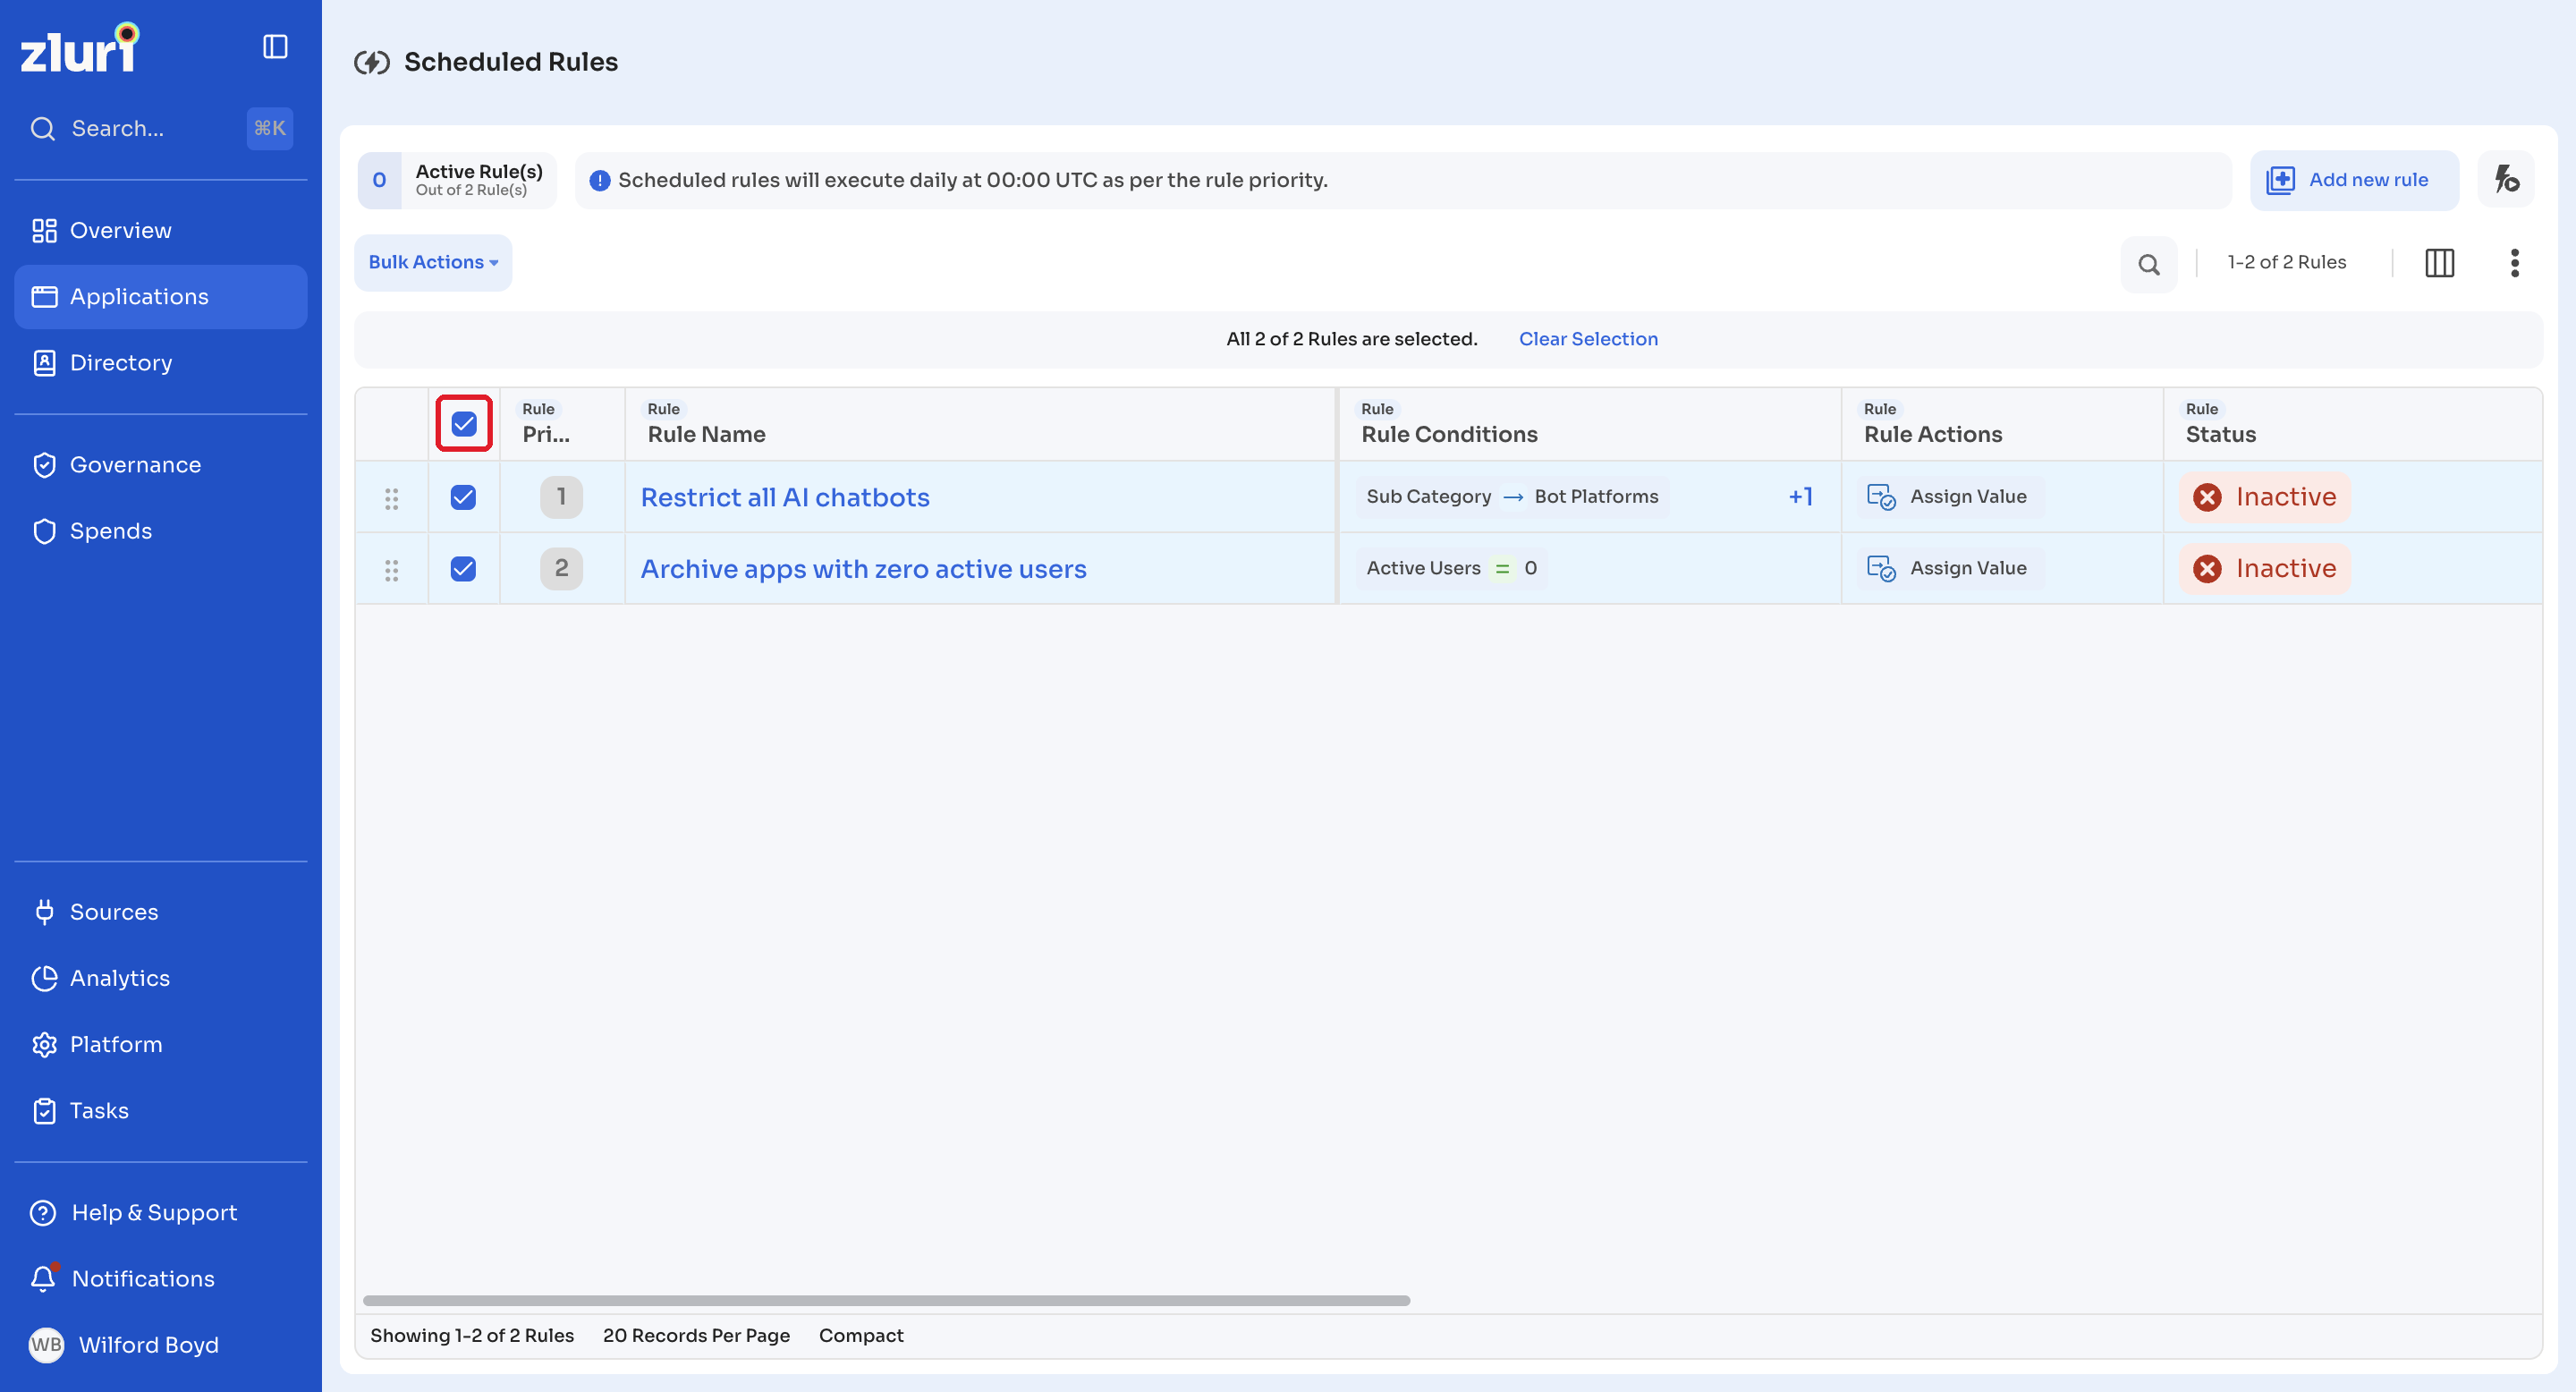
Select the checkbox in the header row to select or deselect all rules.
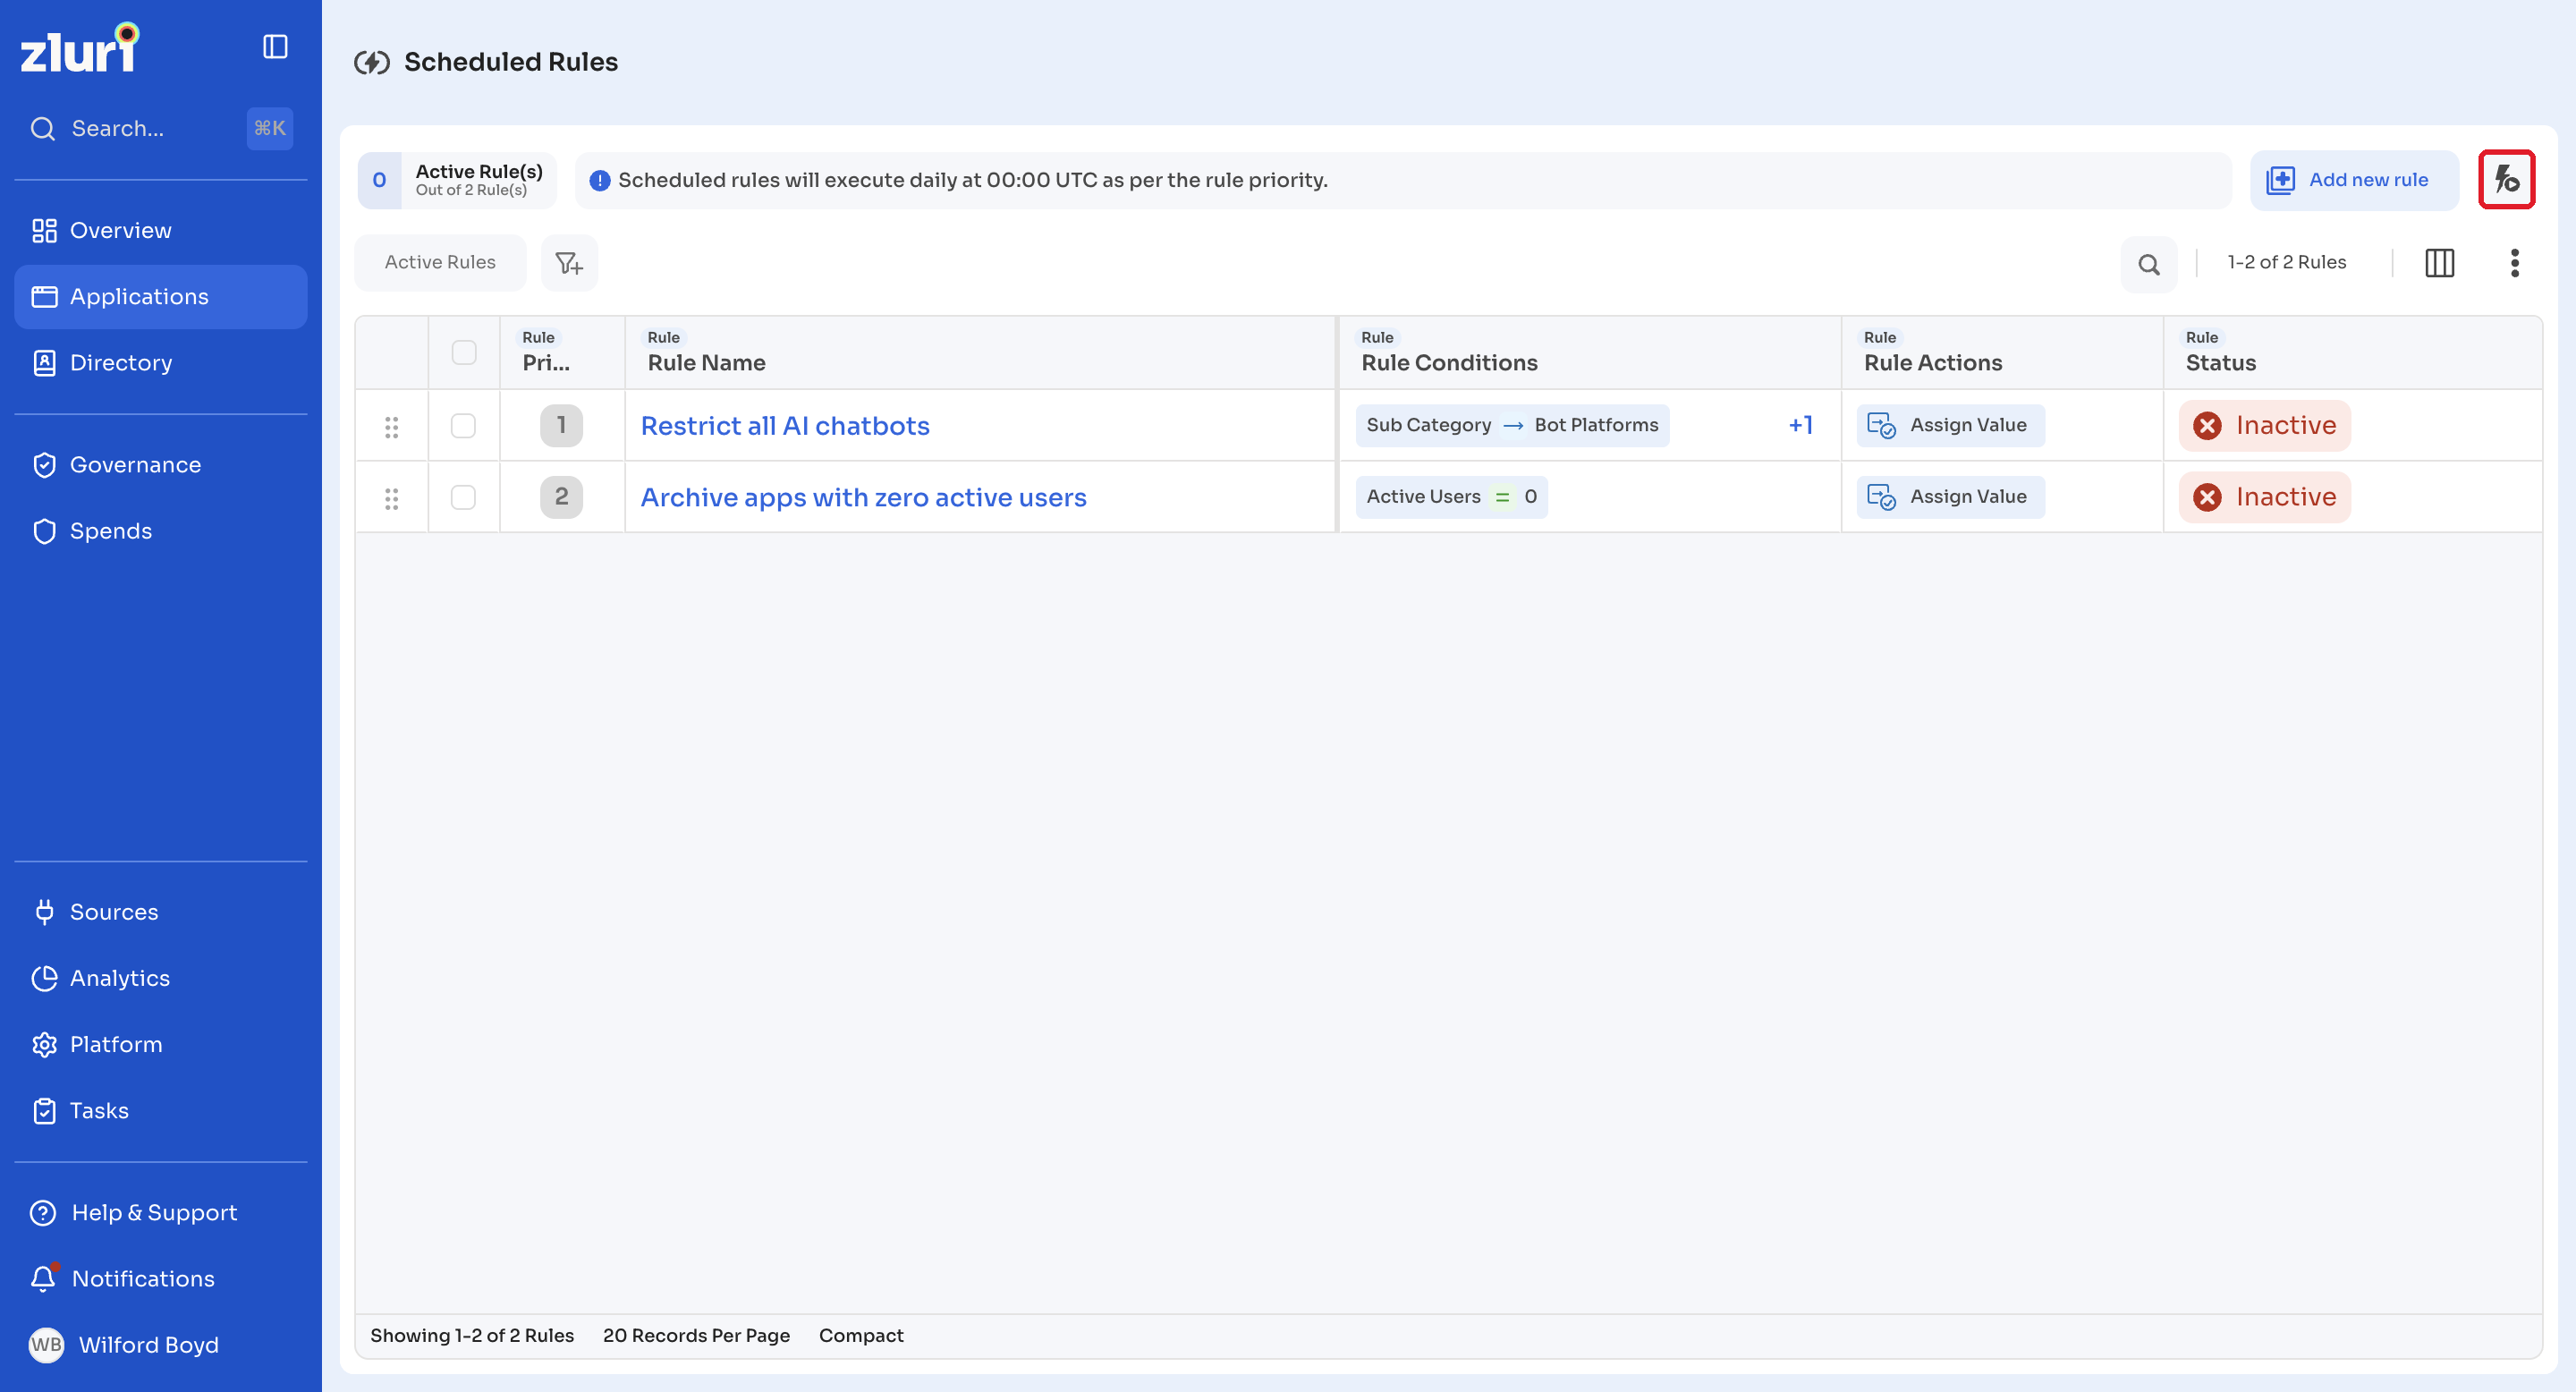
Execute all active rules
Select Execute All in the top right to execute every active rule.
Filtering options
Active rules filter
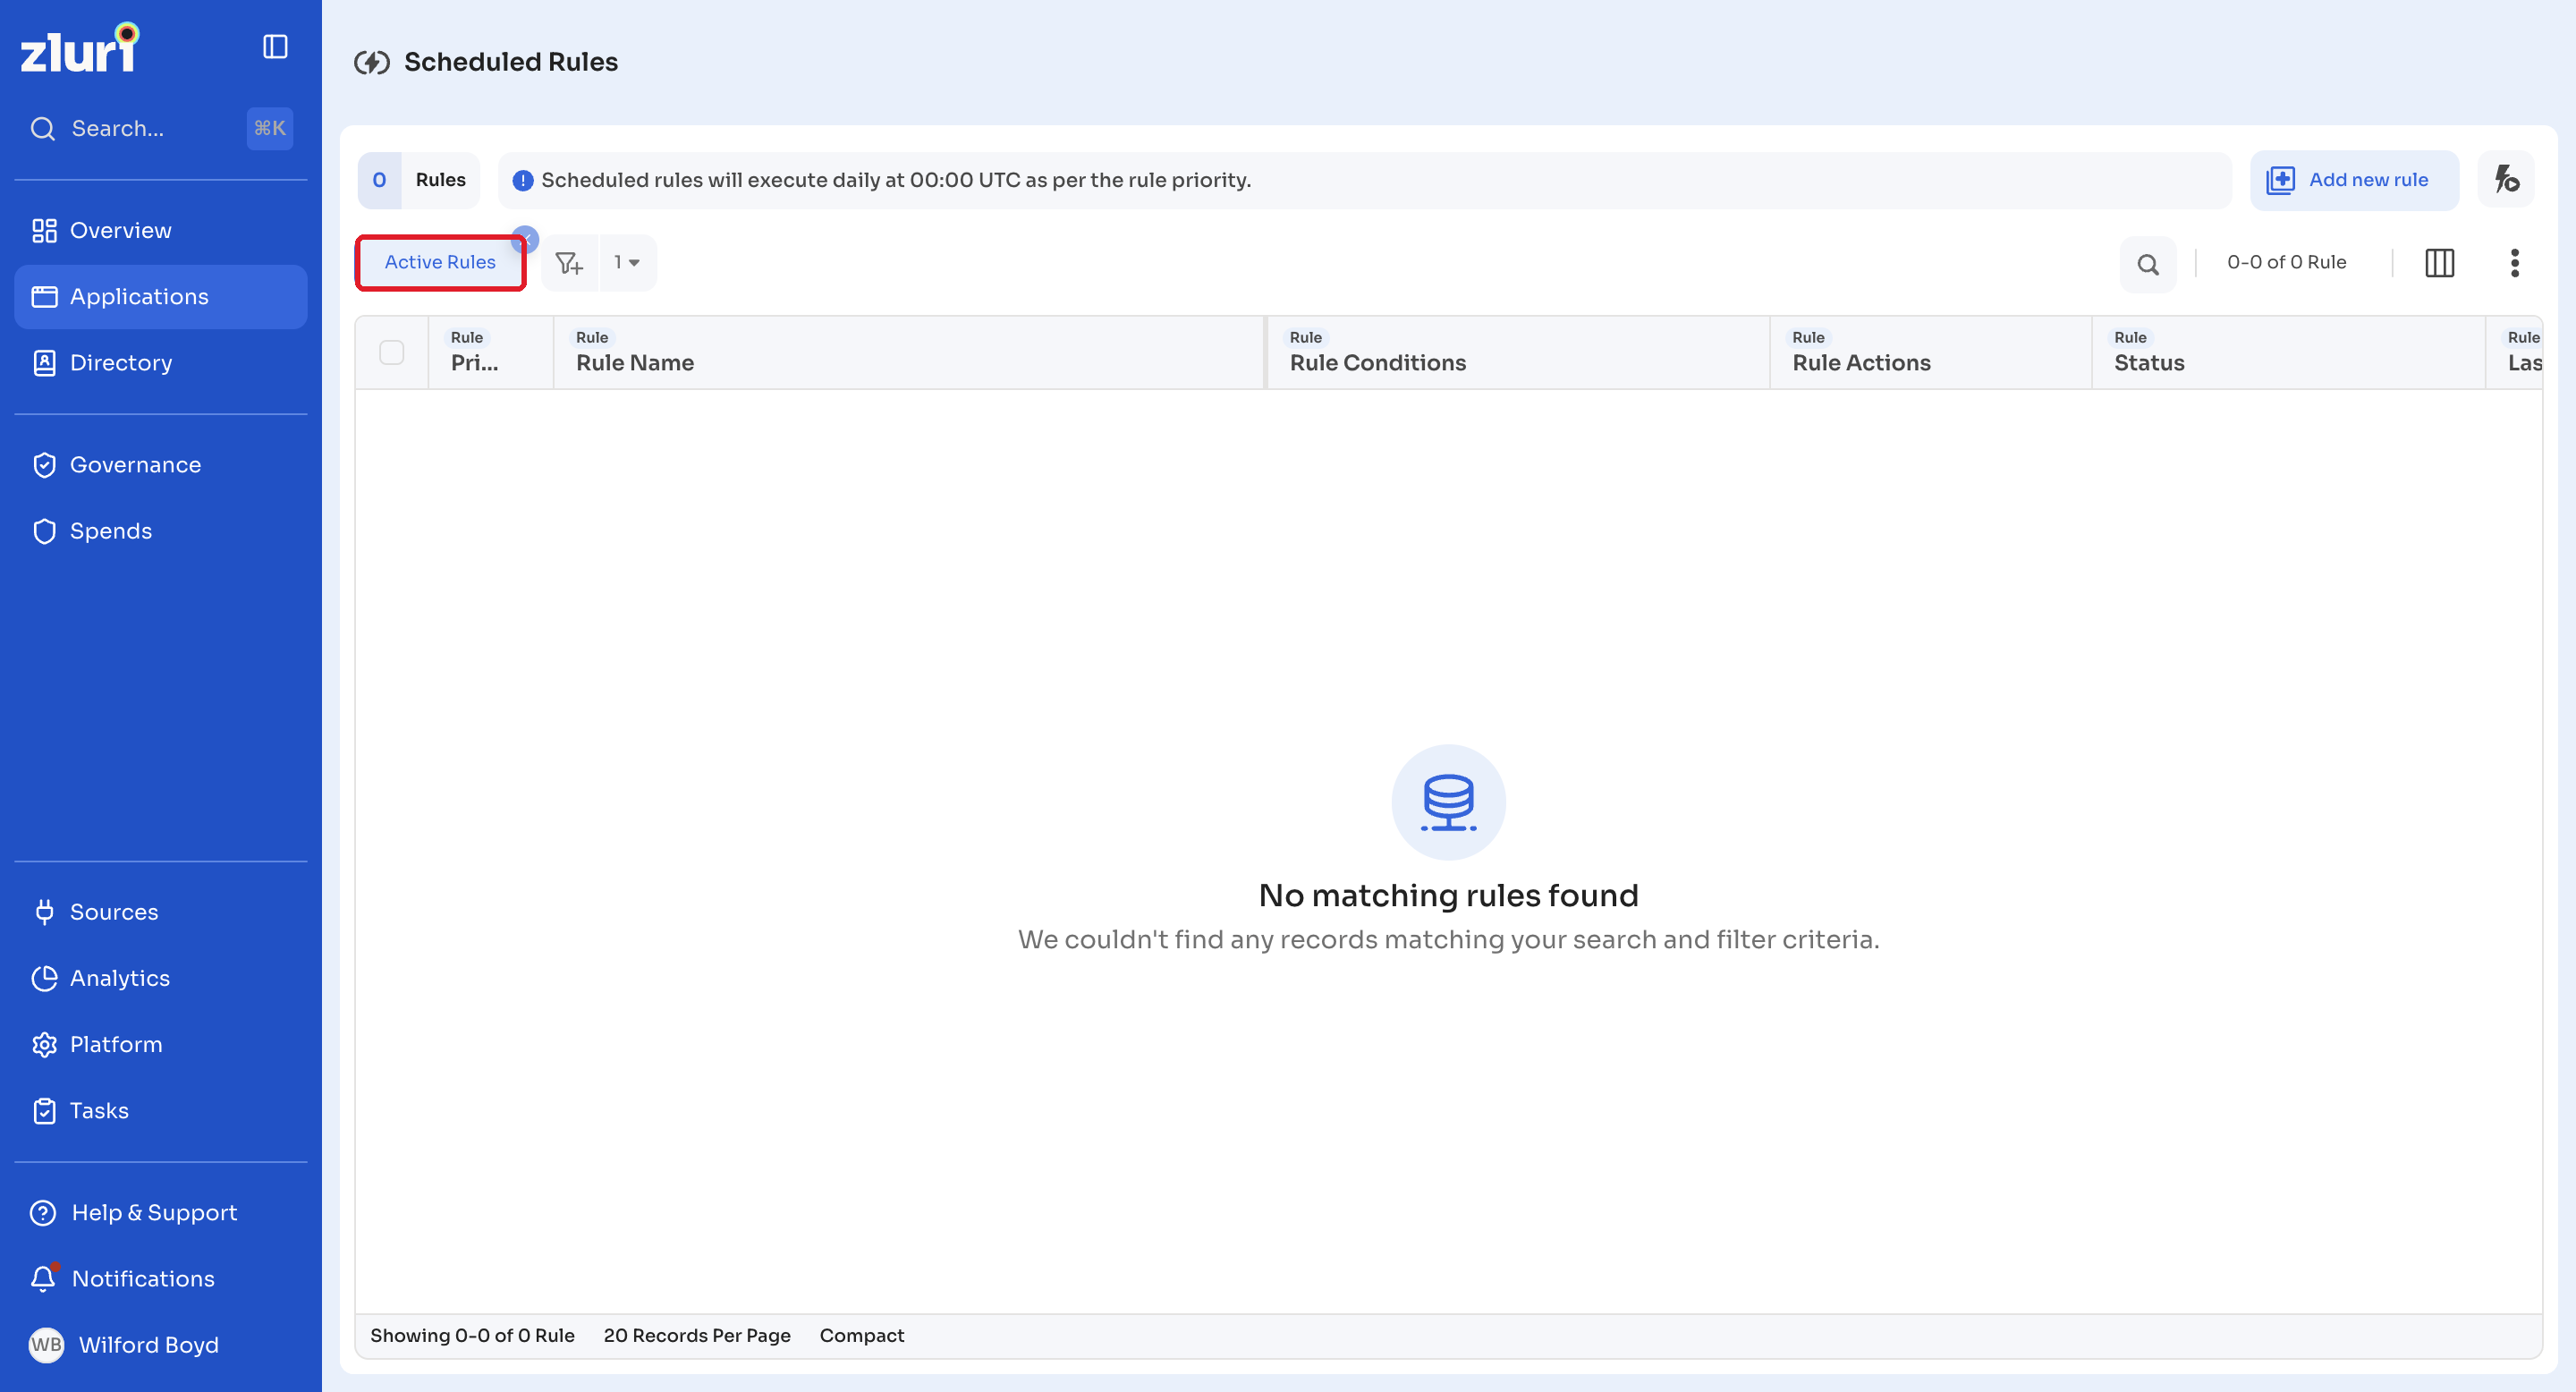
Select Active Rules to show or hide inactive rules.
Advanced filtering options
Select Configure Filters to open advanced filtering options.
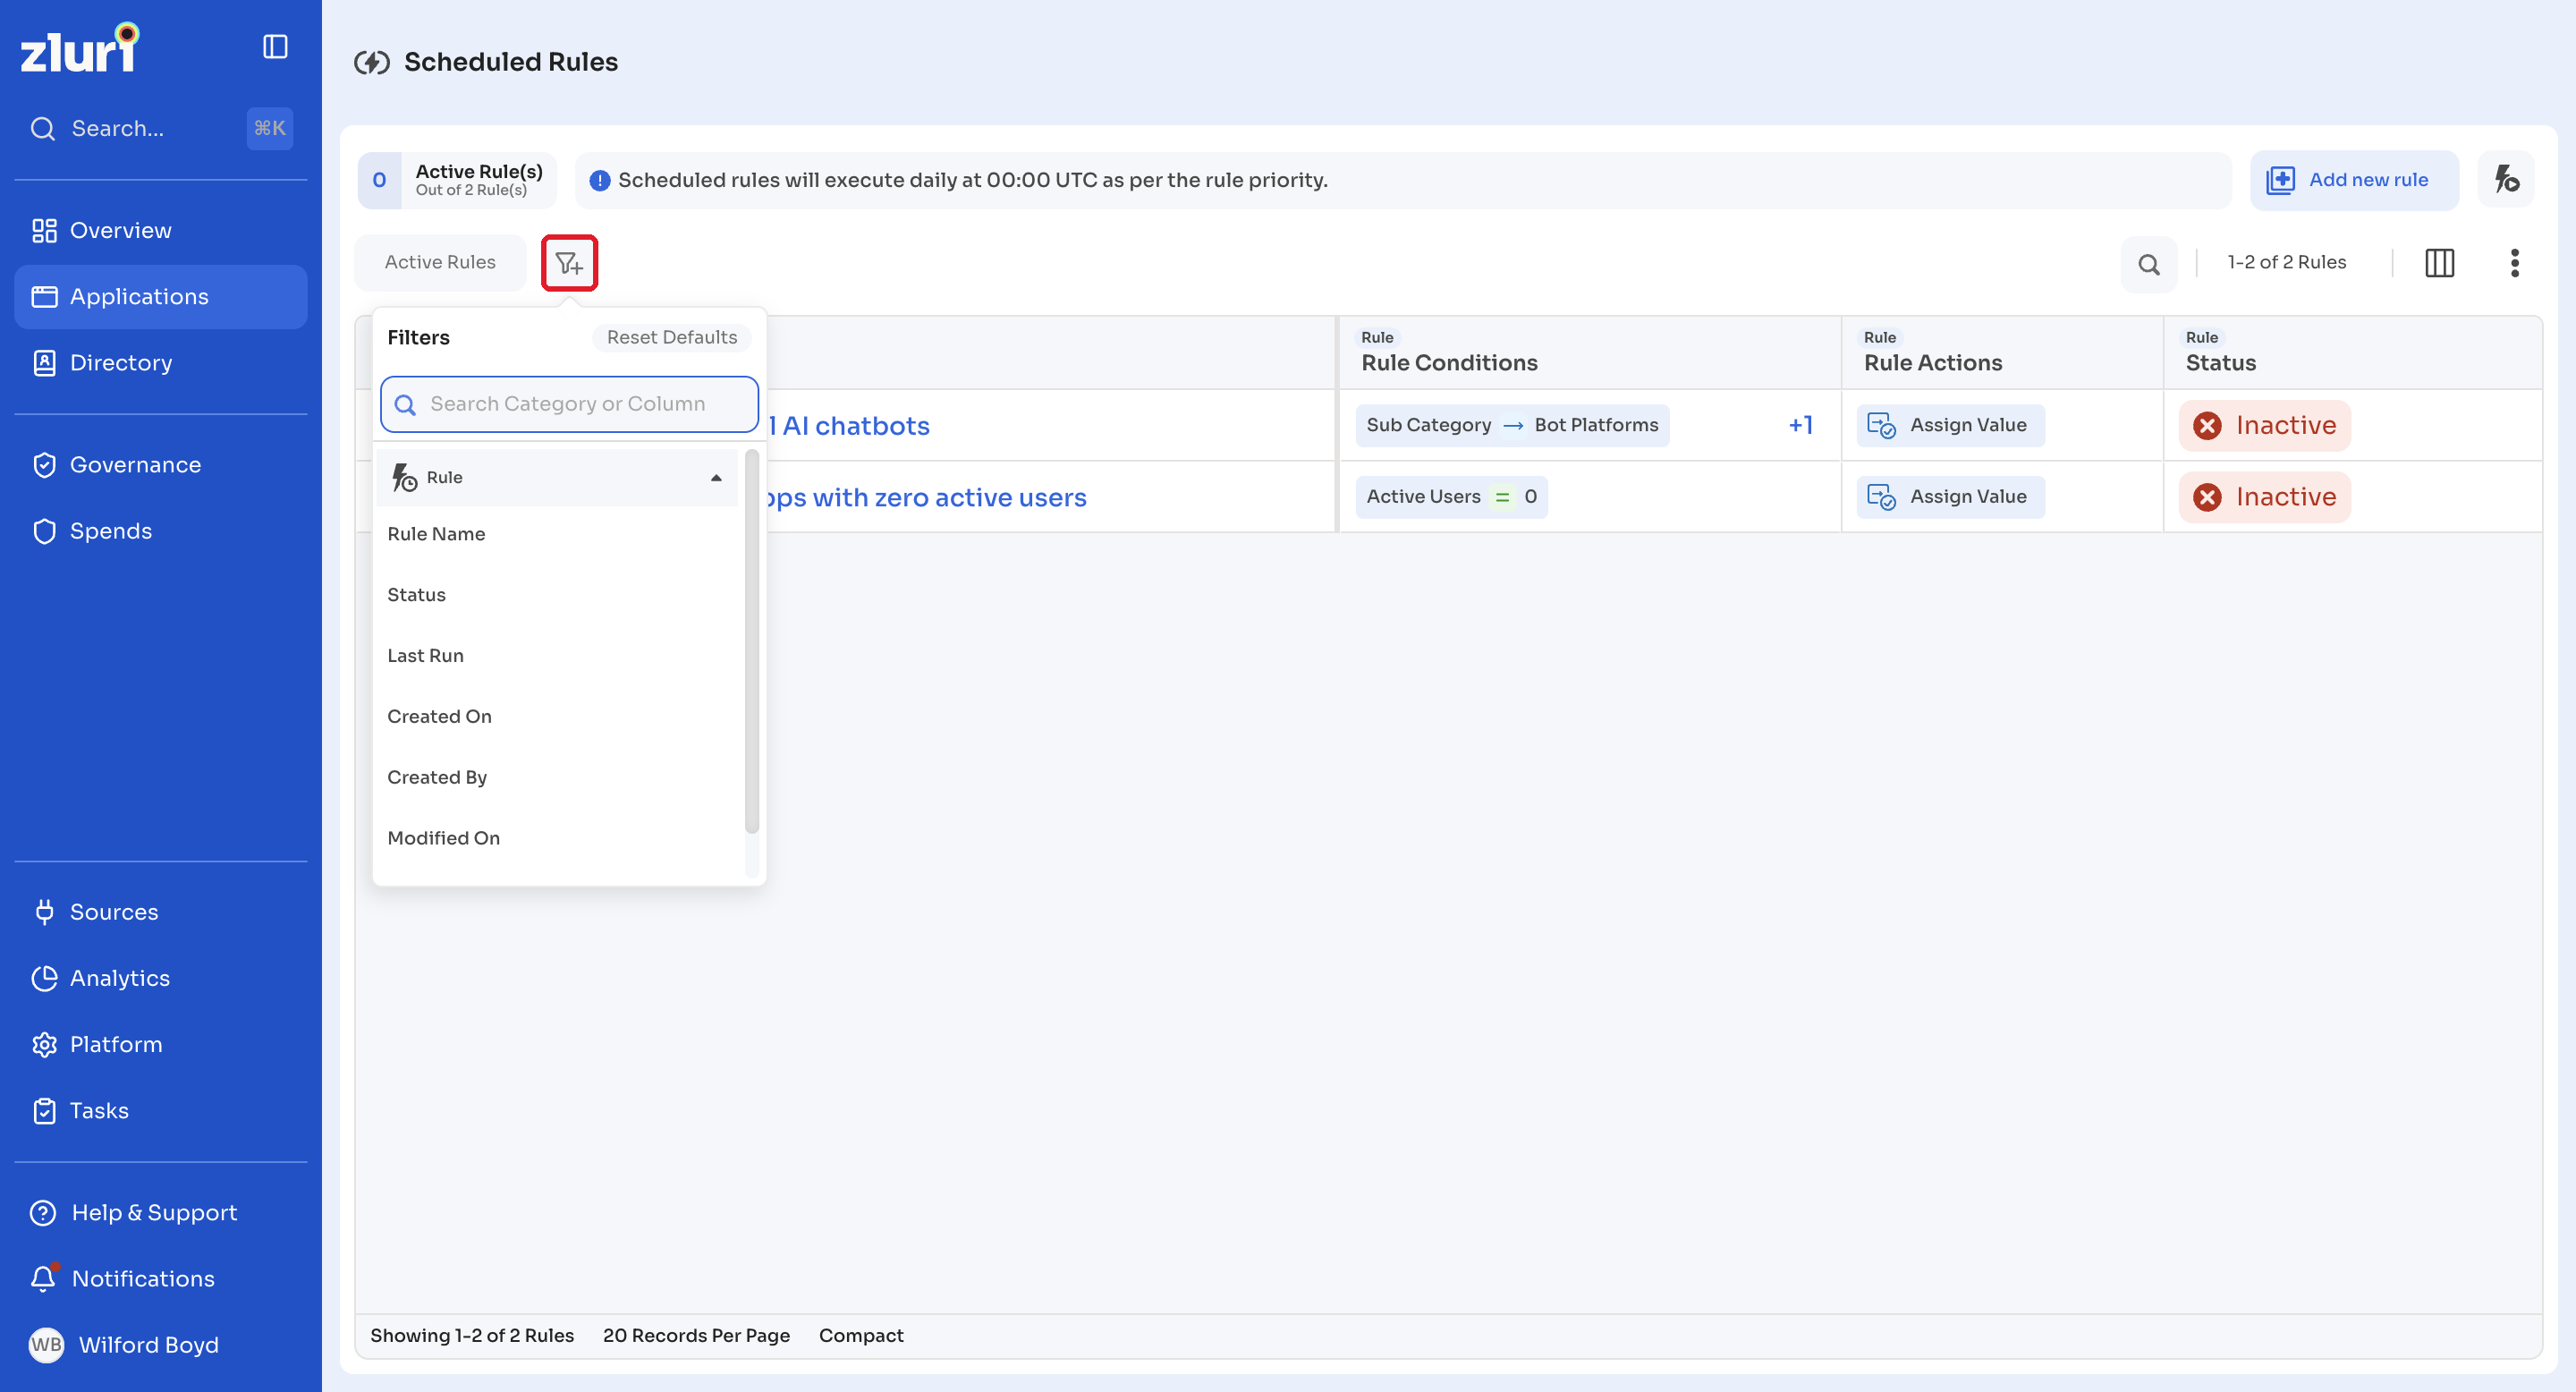
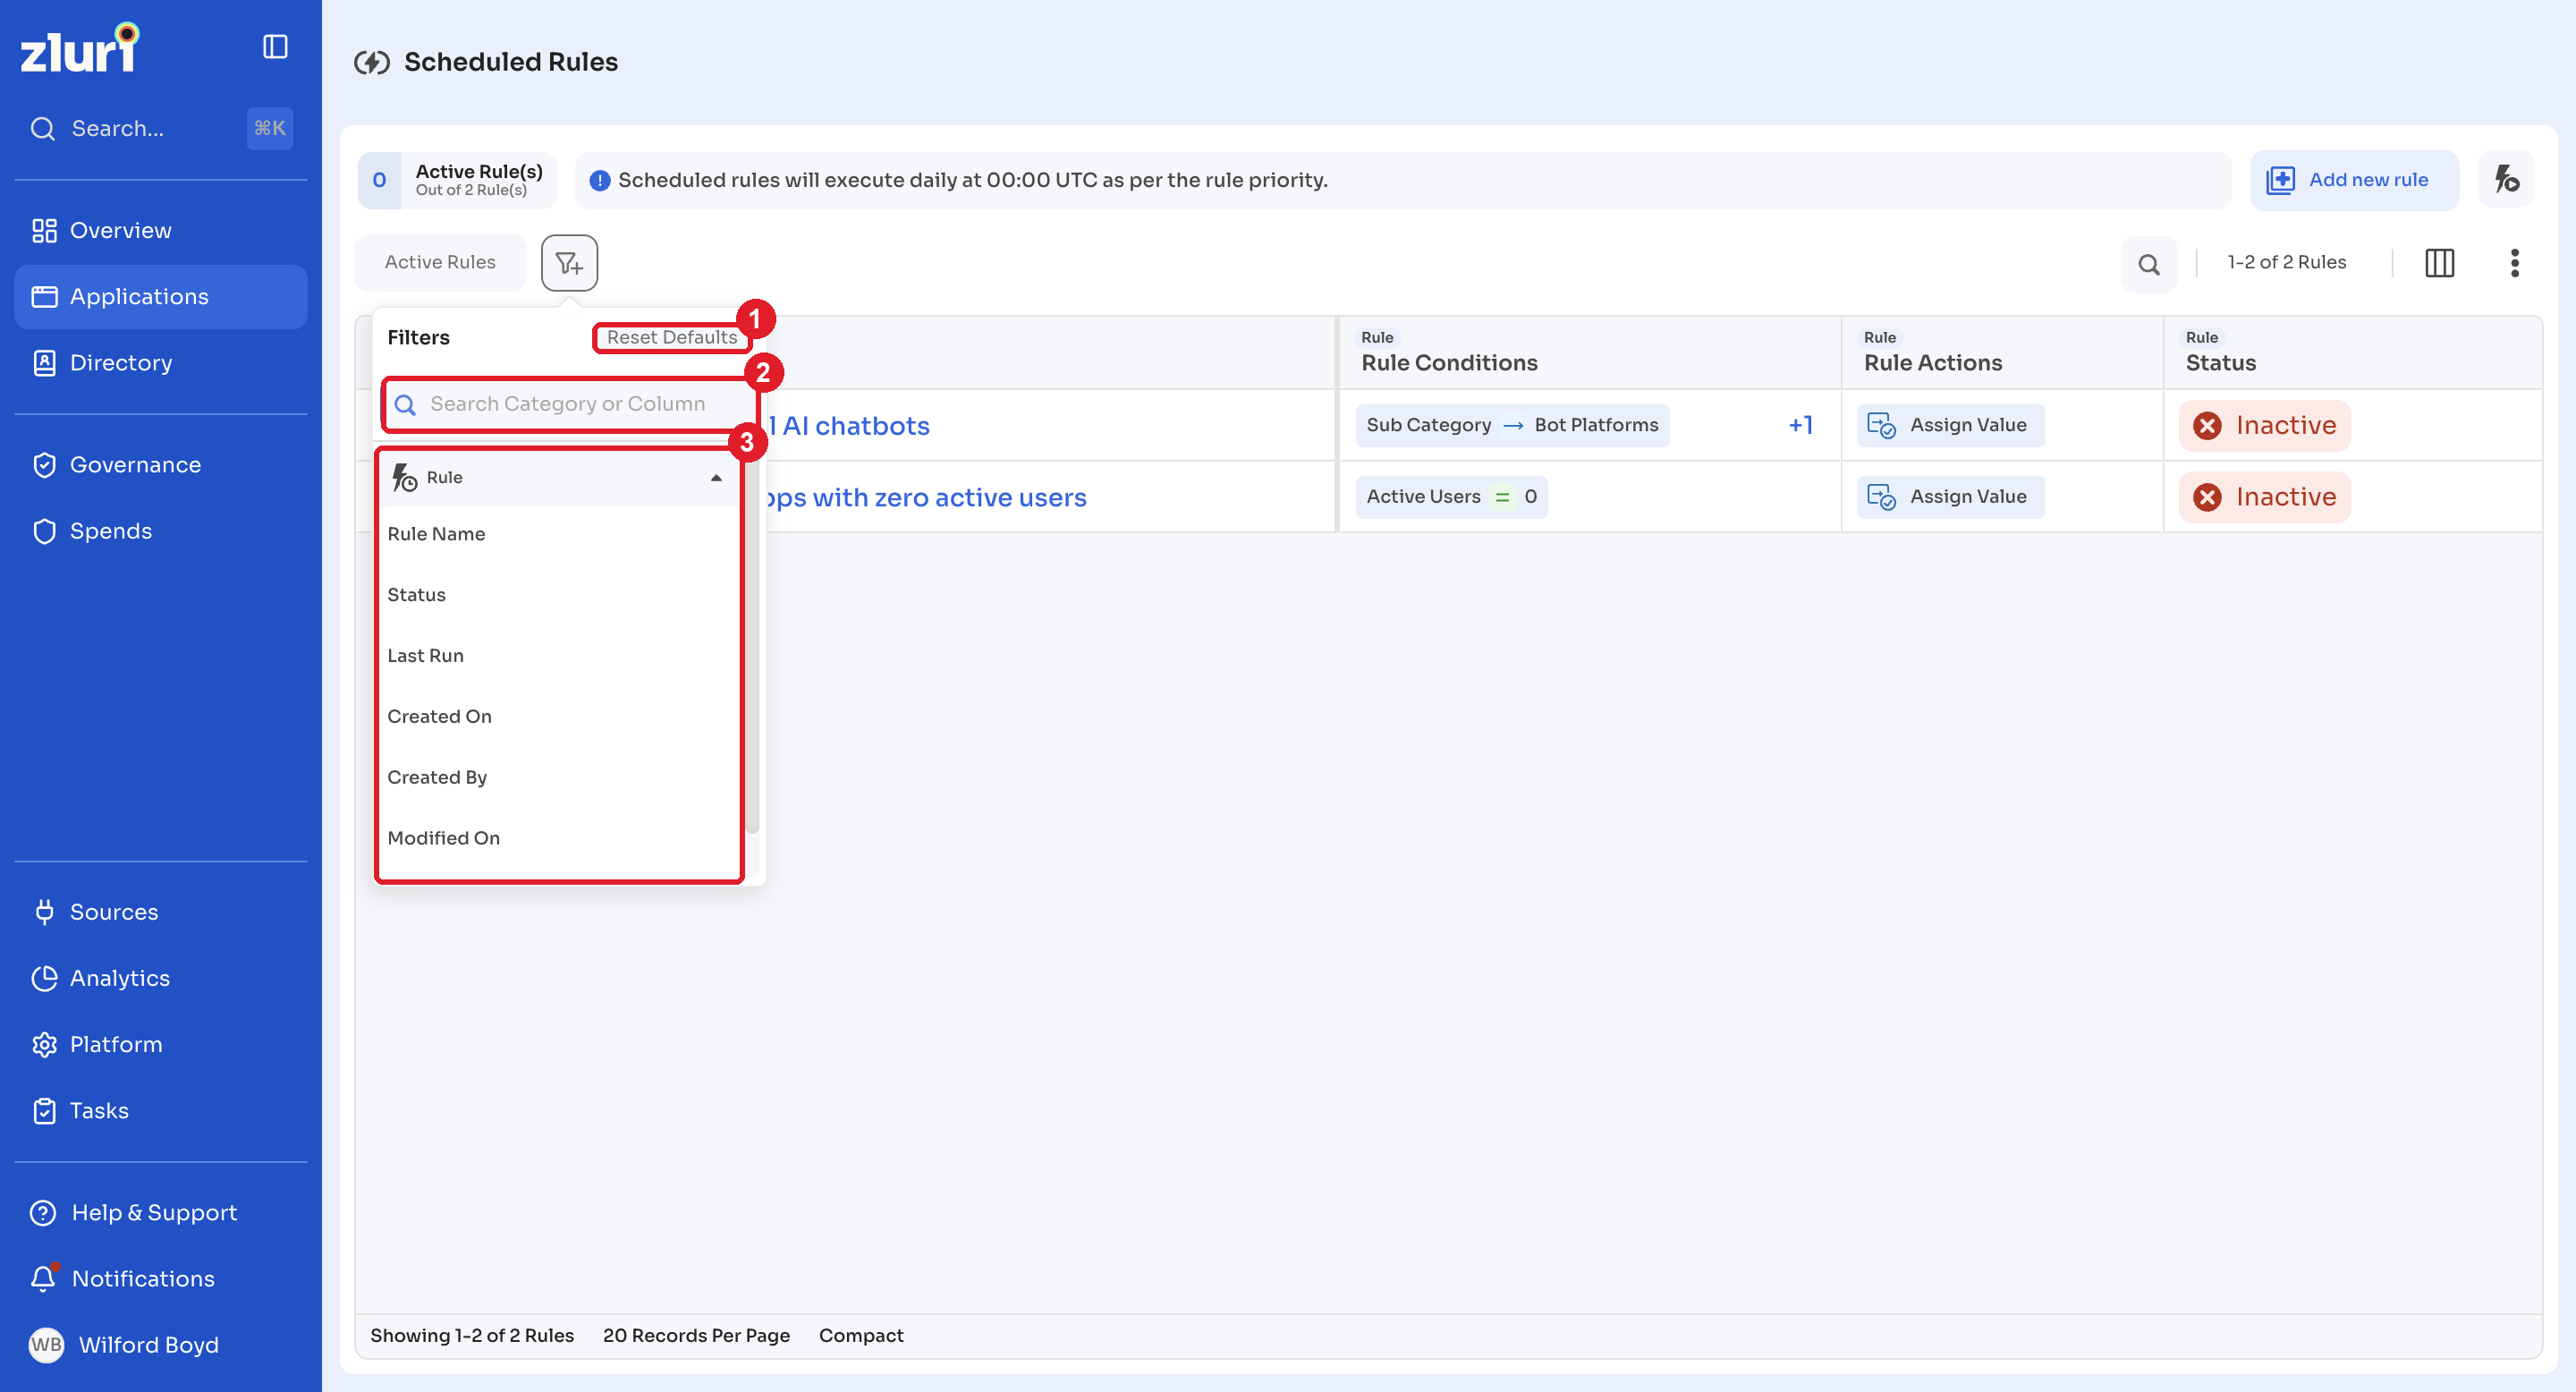
This panel offers:
- Reset currently active filters.
- Search by category or column.
- Filter rules by the following categories:
-
Rule Name
-
Rule
-
Status
-
Last Run
-
Created On
-
Created By
-
Modified On
-
Modified By
-
Customizing the interface
Pagination and infinite scrolling
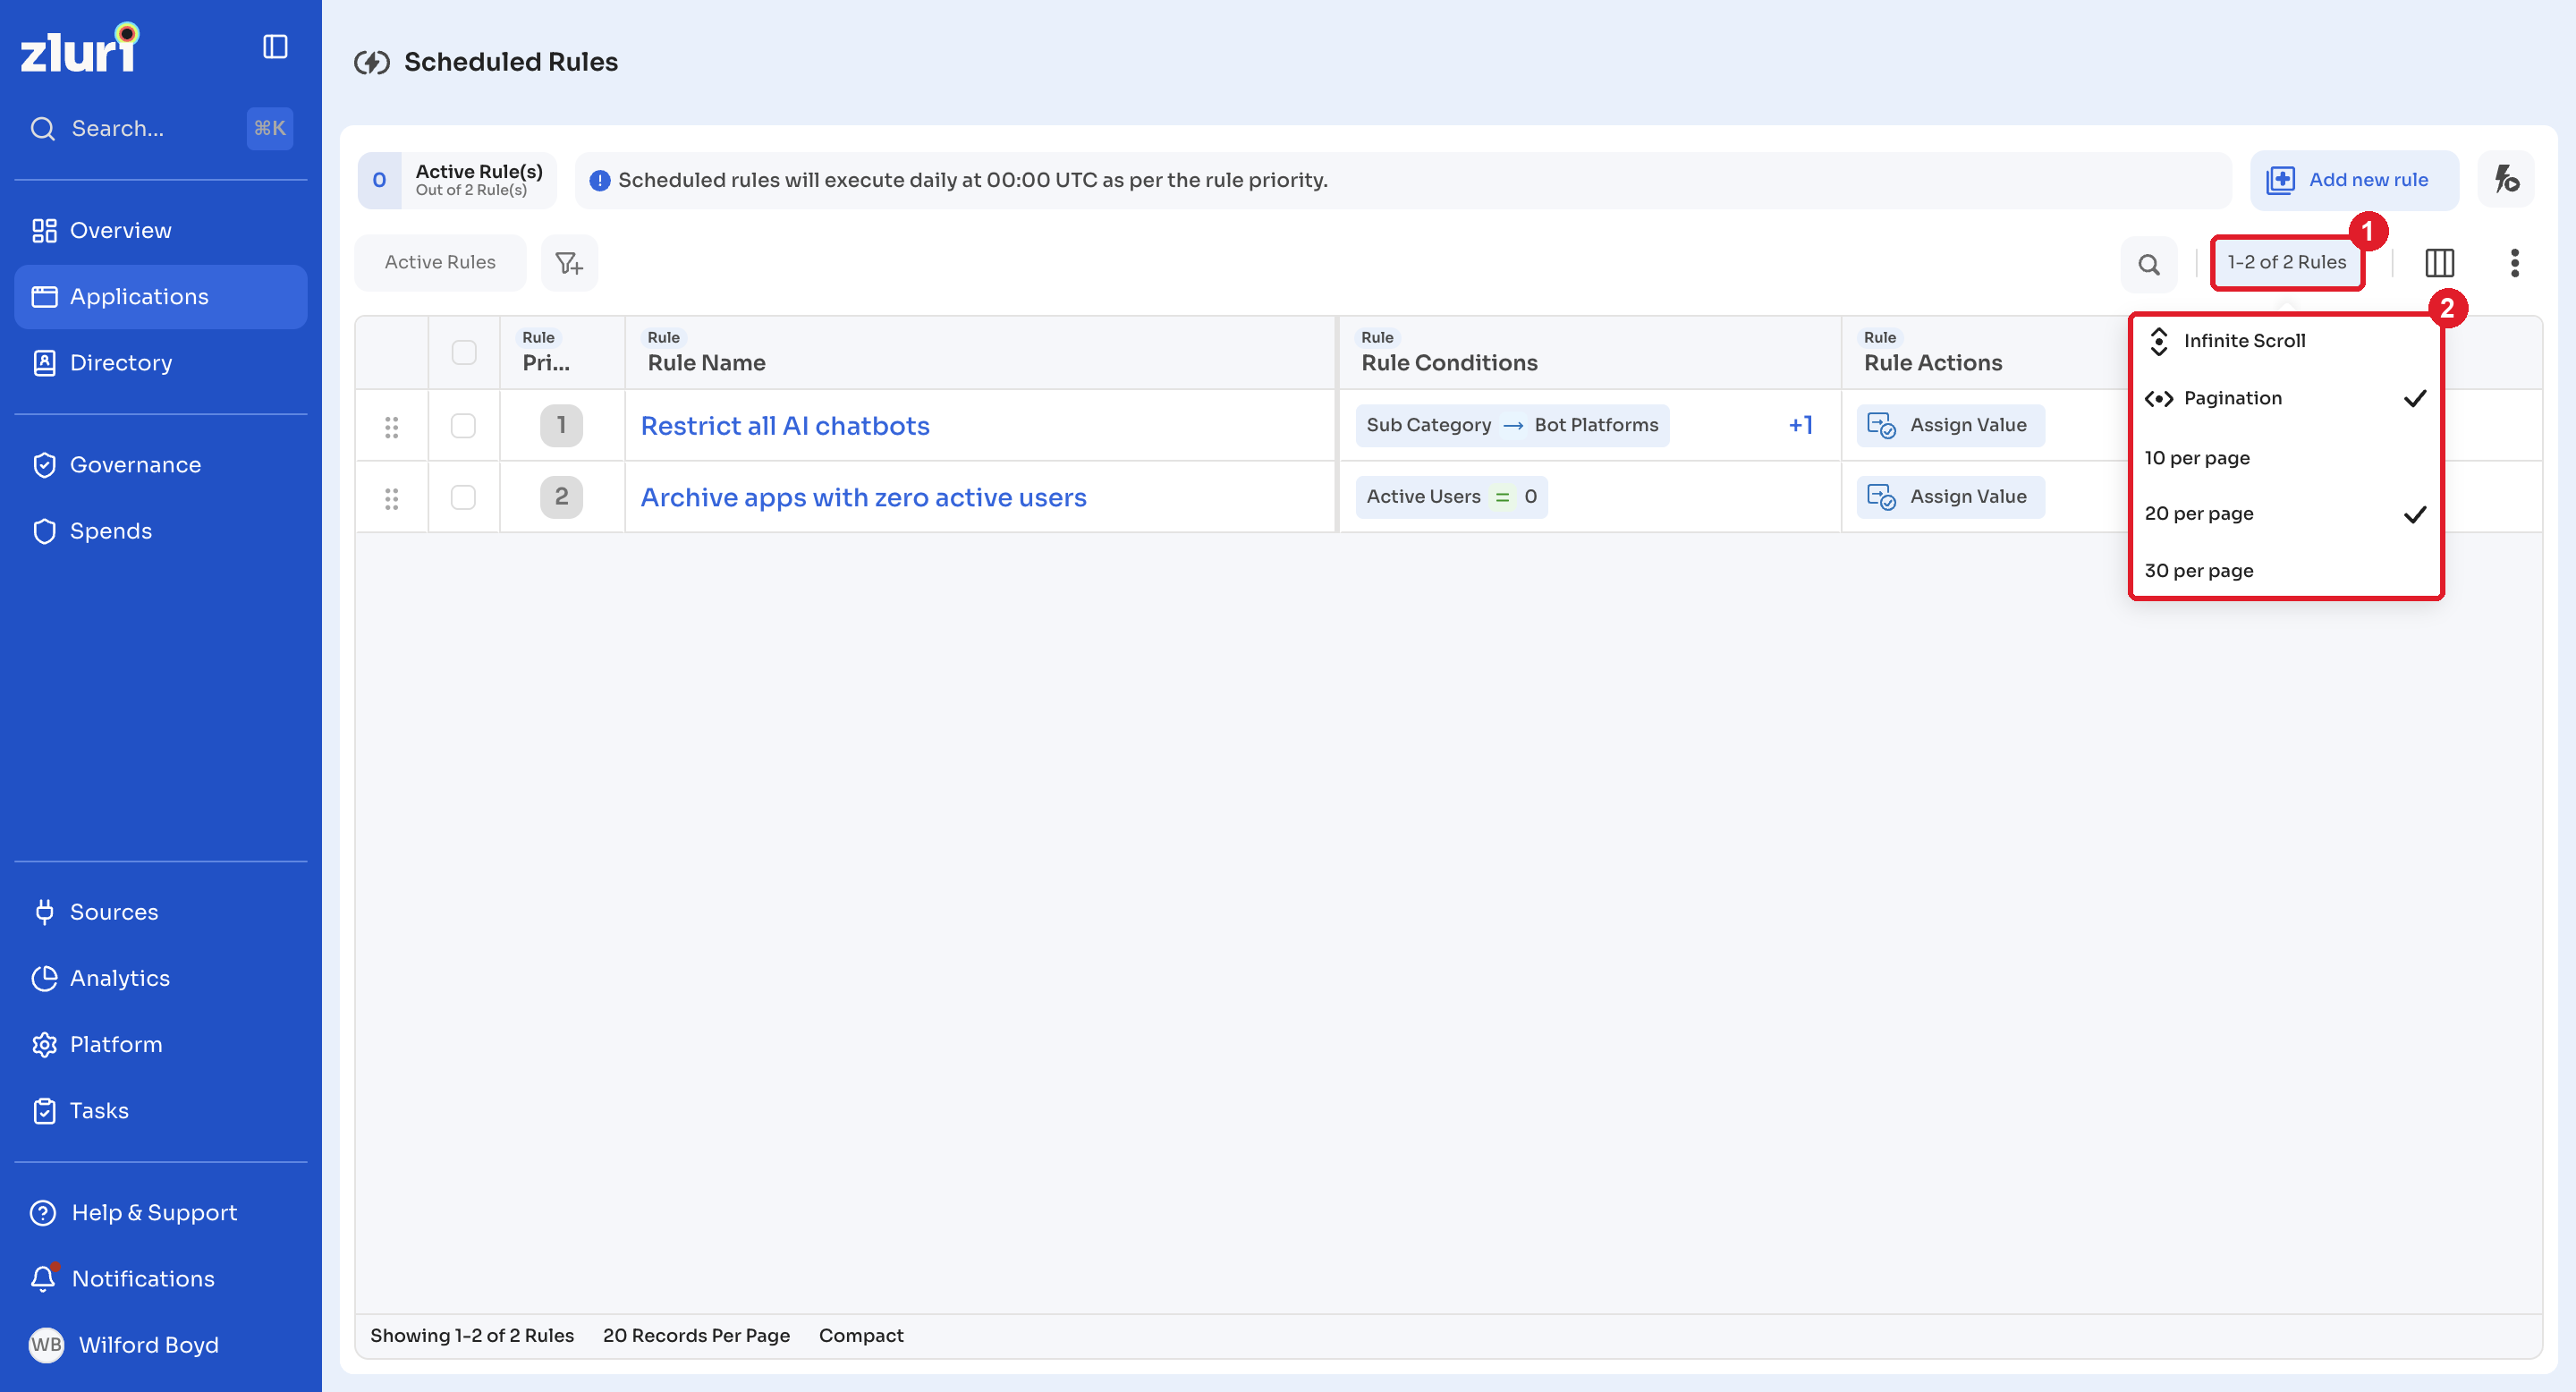
Select Pagination Configuration in the top right to choose between Infinite Scroll and Pagination. Within pagination, select 10, 20, or 30 rules per page.
Modify columns
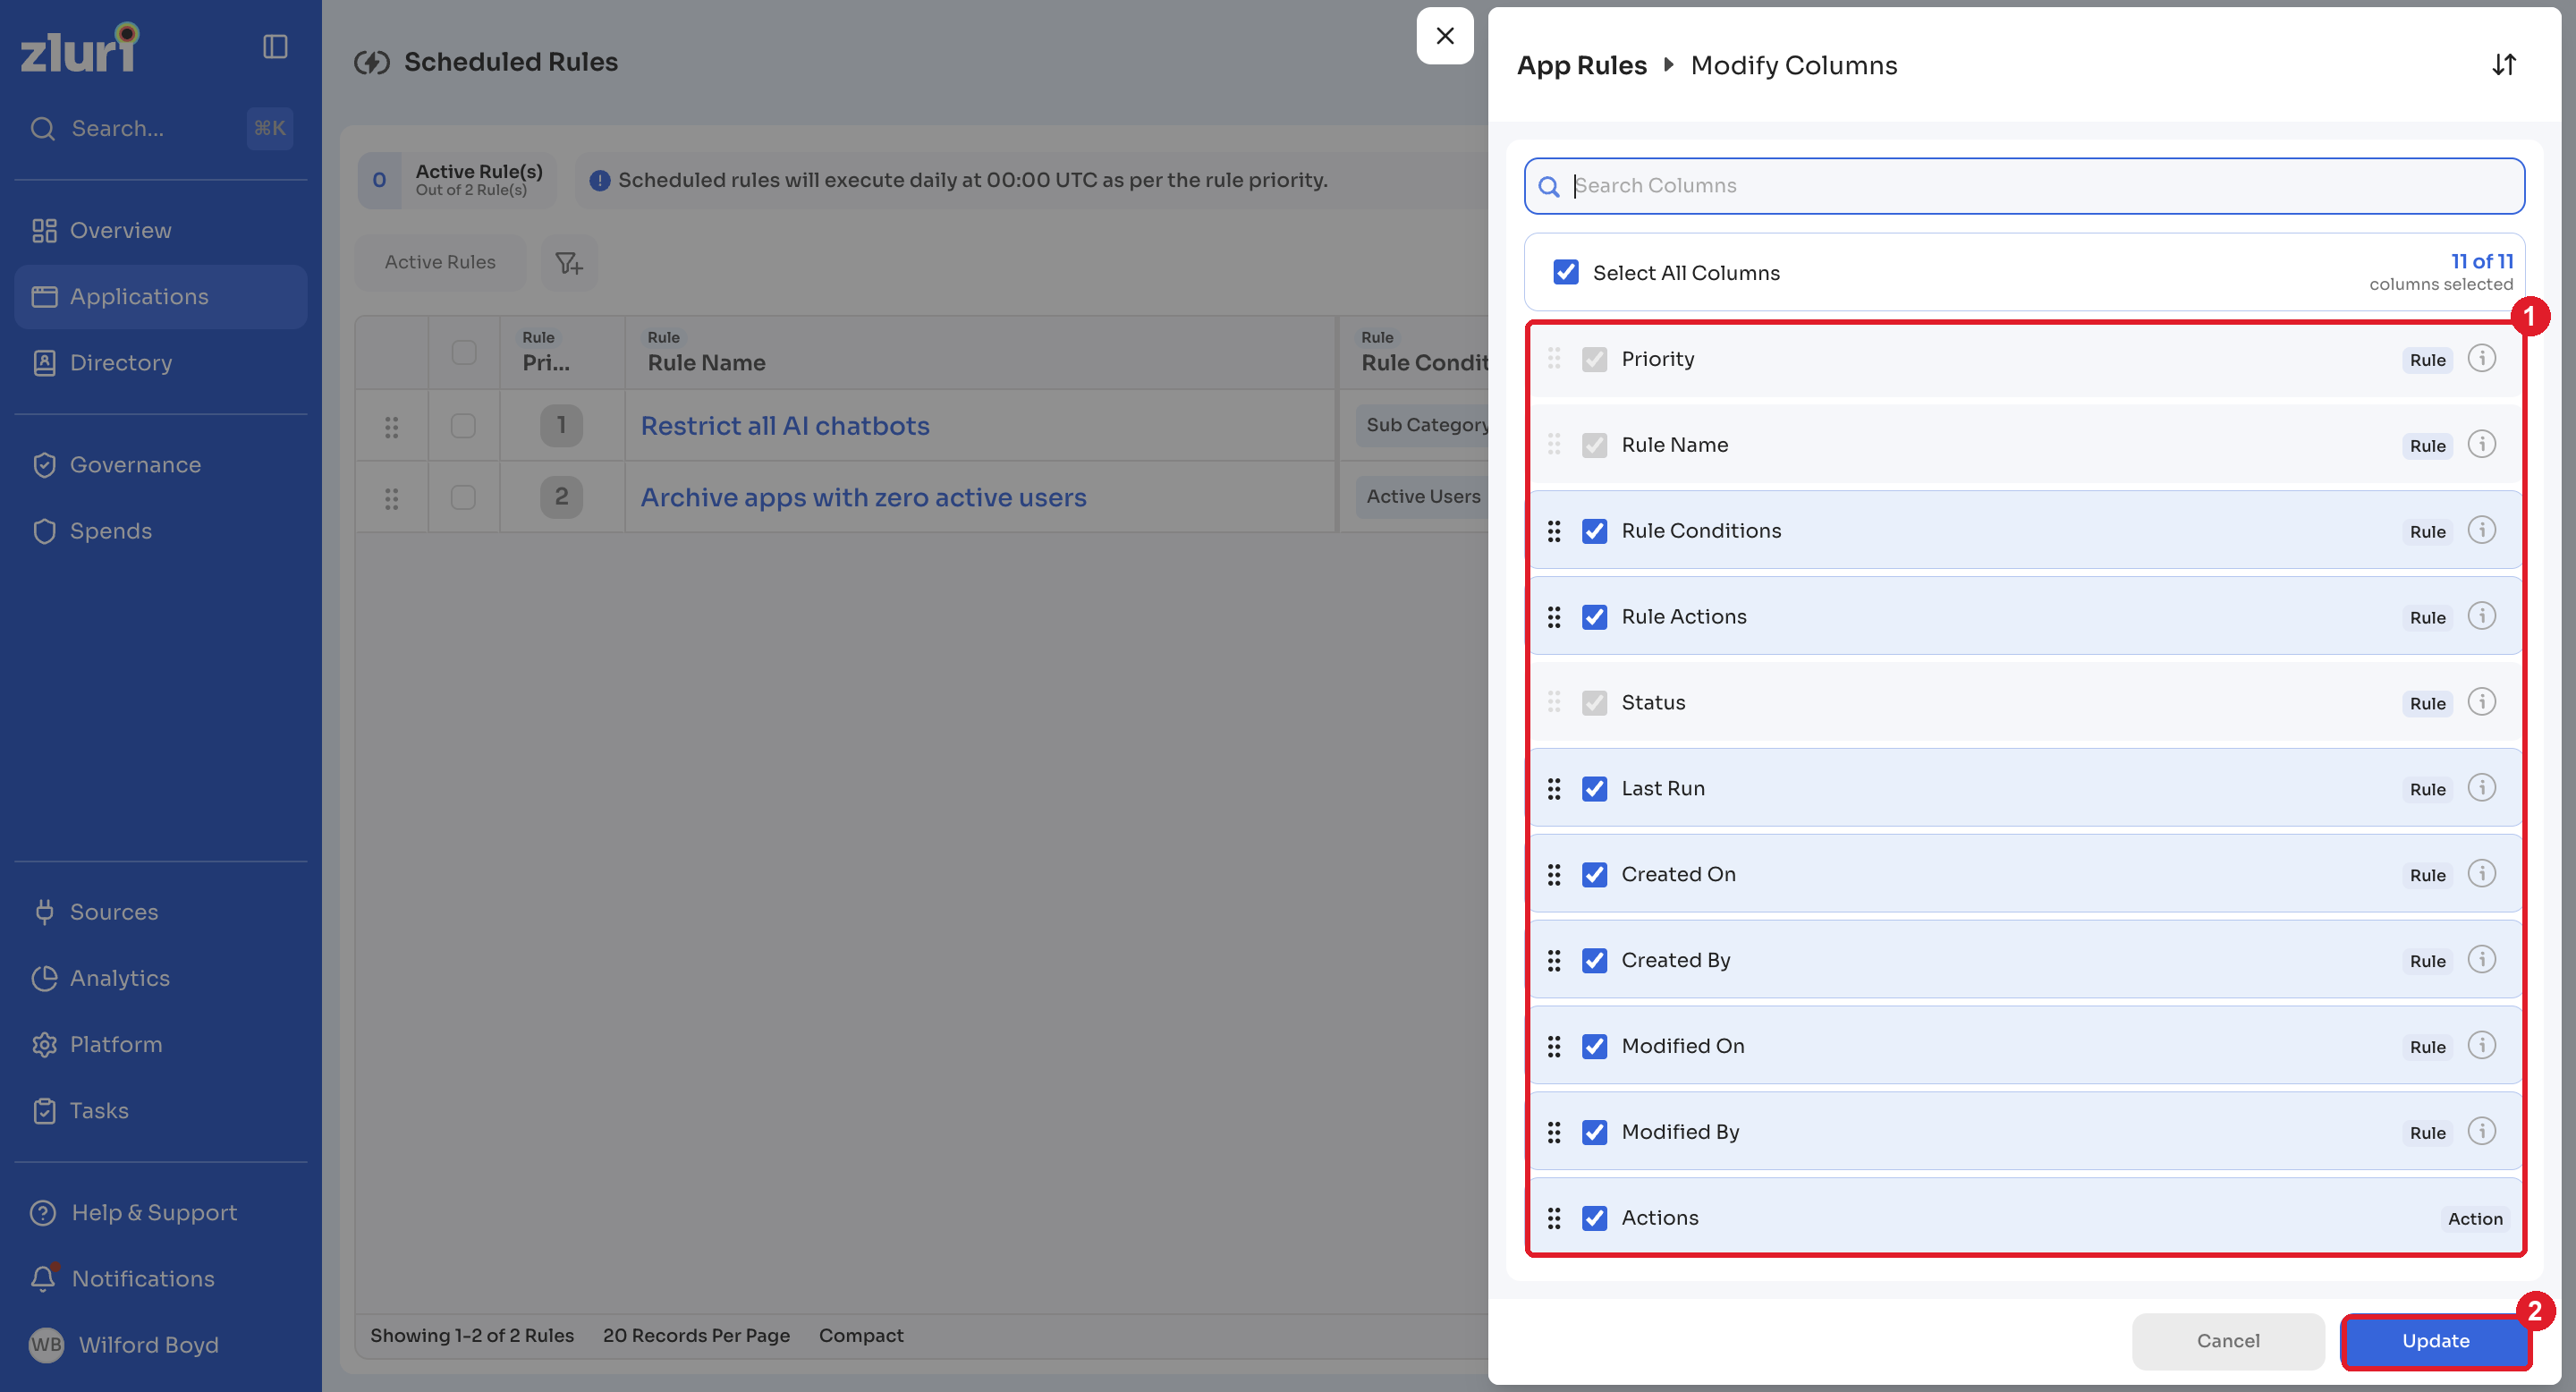
Select Modify Columns in the top right to choose which columns display and in what order.
Select the columns to display, or drag the handle to the left of each entry to reorder them. Select Update to save.
Change display density
Select the three-dot menu in the top right. Point to View Density and choose between Compact and Comfortable.
Create a scheduled rule
Follow this example to create a rule that restricts all AI chatbot applications, for data privacy reasons.
- Select Applications from the left navigation, then select Scheduled under Automations.
- Select Add new rule.
- Select the pencil icon next to the default rule name, enter a descriptive name, for example Restrict all AI chatbots, and select the check mark.
- In Applications that match, select Add Conditions.
- Set the following conditions, and select OR condition to add the second one:
- Sub Category → Is → Bot Platforms
- Sub Category → Is → Chatbots
- Under Rule Actions, select Assign Value.
- Set Authorization Status as Restricted.
- Select Check Matched Applications to verify which applications match the rule.
- Review the applications the rule will affect, then close the preview.
- Select Save as, choose Active, Inactive, or Draft, and select Confirm.
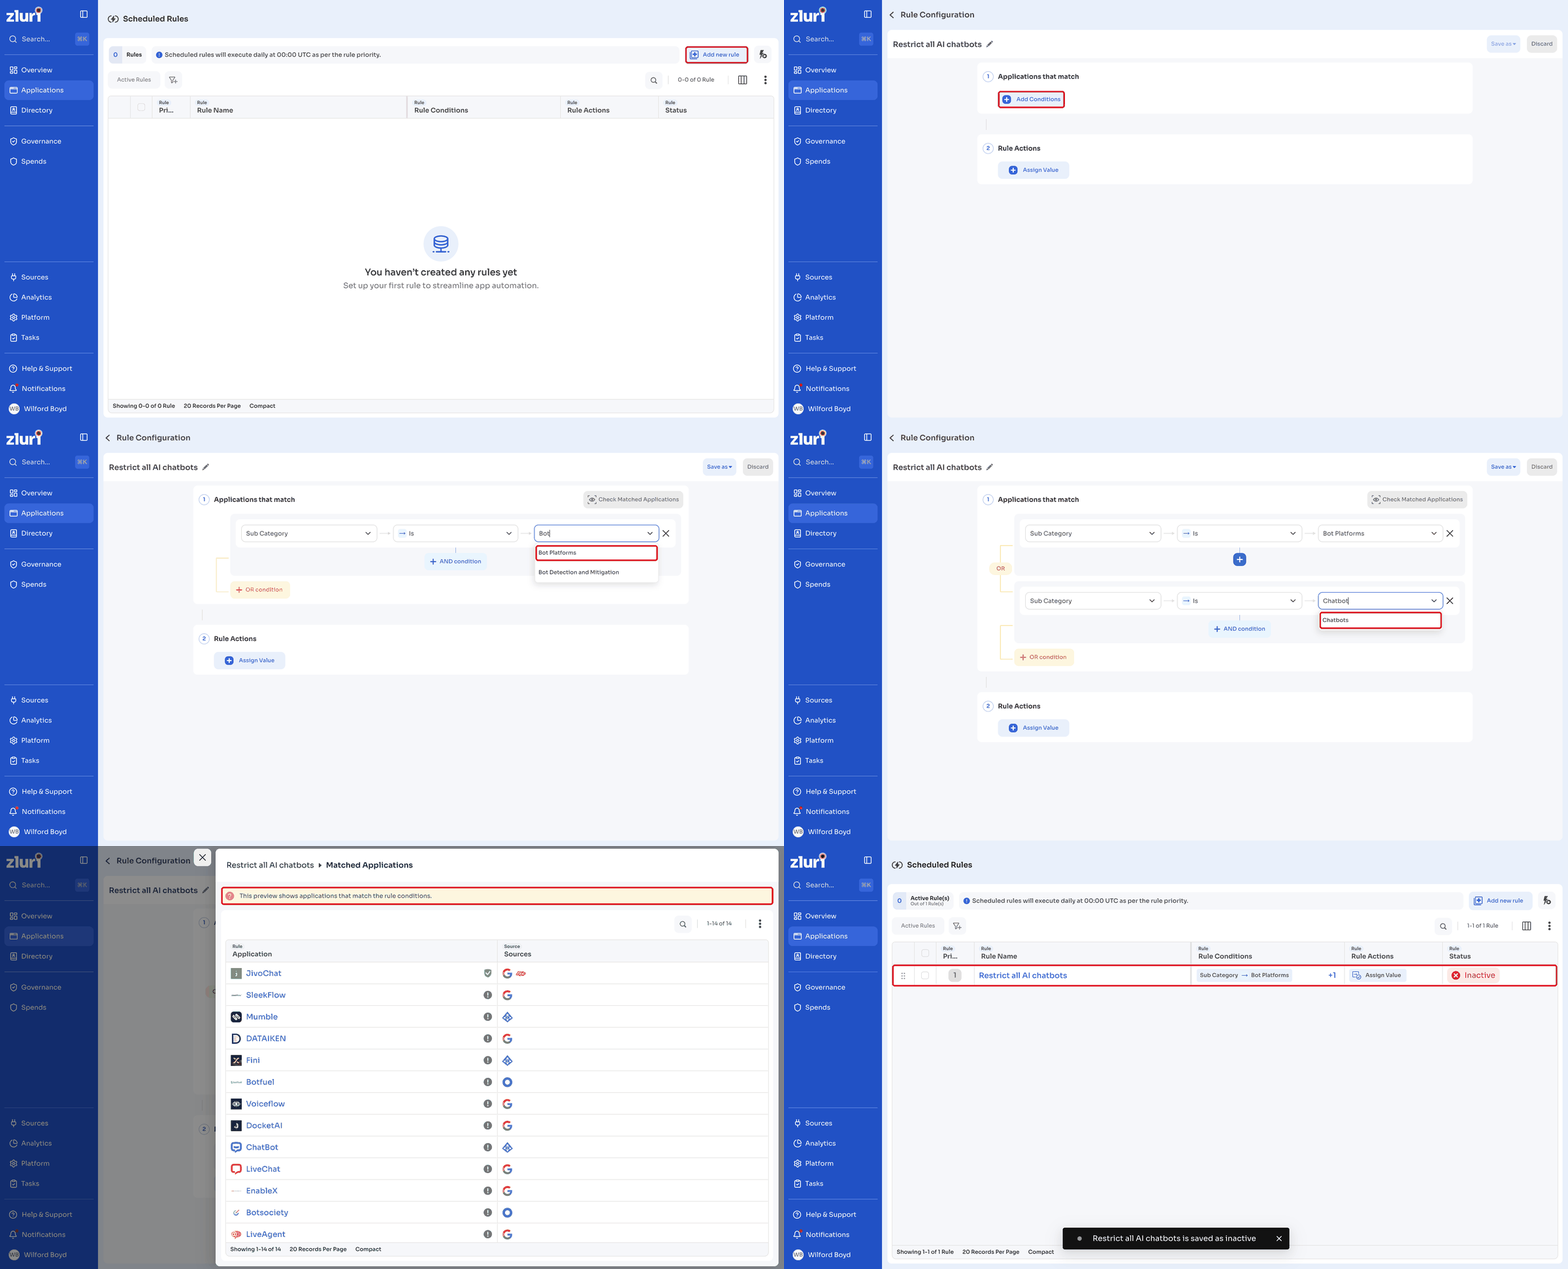
Only rules marked Active can be executed, whether automatically or manually.
The new rule appears on the main page. New rules receive the lowest priority by default; adjust the order as needed.
Condition and action attributes
Create conditions based on these application attributes:
- Active contract count
- Active users (direct and from configuration)
- Annualized cost
- Archive status
- Authorization status
- Category and subcategory
- Direct integration status
- Discovery date
- Finance owner
- IT owner
- Last used date
- Application name
- Spend YTD
- Tags
- Total users
- Type
- Custom fields
Rule actions use Assign Value to set the following attributes on matching applications:
- Archive status
- Type
- Owner (IT/Finance)
- Authorization status
- Tags
Modify existing rules
Zluri provides five recommended rules for new users. By default, rules 1 through 3 are active and rules 4 through 5 are inactive. Modify these rules as needed.
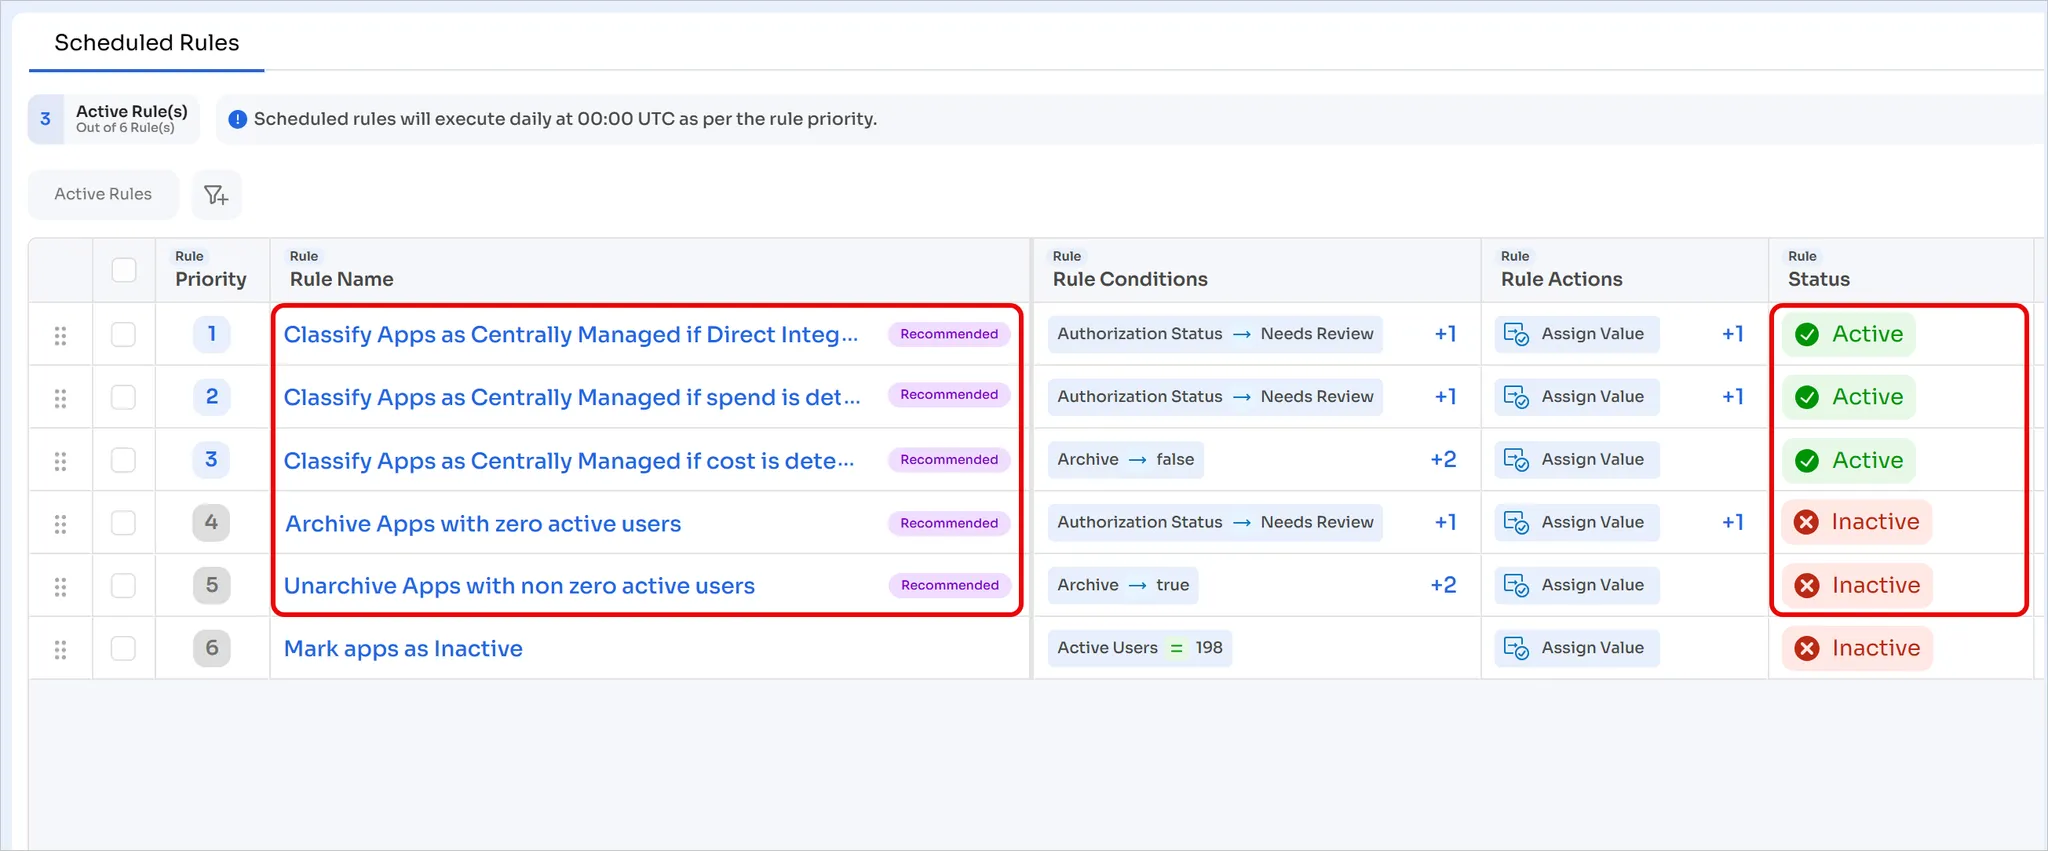
Active by default (3 rules)
- Classify Apps as Centrally Managed if spend is detected: if authorization status is Needs Review and spend is greater than 0, set authorization to Centrally Managed and archive to false.
- Authorization and cost rule: if authorization status is Needs Review and annualized cost is greater than 0, set authorization to Centrally Managed and archive to false.
- Direct integration rule: if a direct integration exists and authorization status is Needs Review, set authorization to Centrally Managed and archive to false.
Inactive by default (2 rules)
- Archive unused applications: if archive is false, authorization status is Needs Review, and active users is 0, set archive to true.
- Unarchive active applications: if archive is true, authorization status is Needs Review, and active users is greater than 0, set archive to false.
Activate, deactivate, or modify these rules as needed. Modifying a recommended rule removes its Recommended tag.
Modify rule conditions, actions, name, and status
-
Select the rule name in the list.
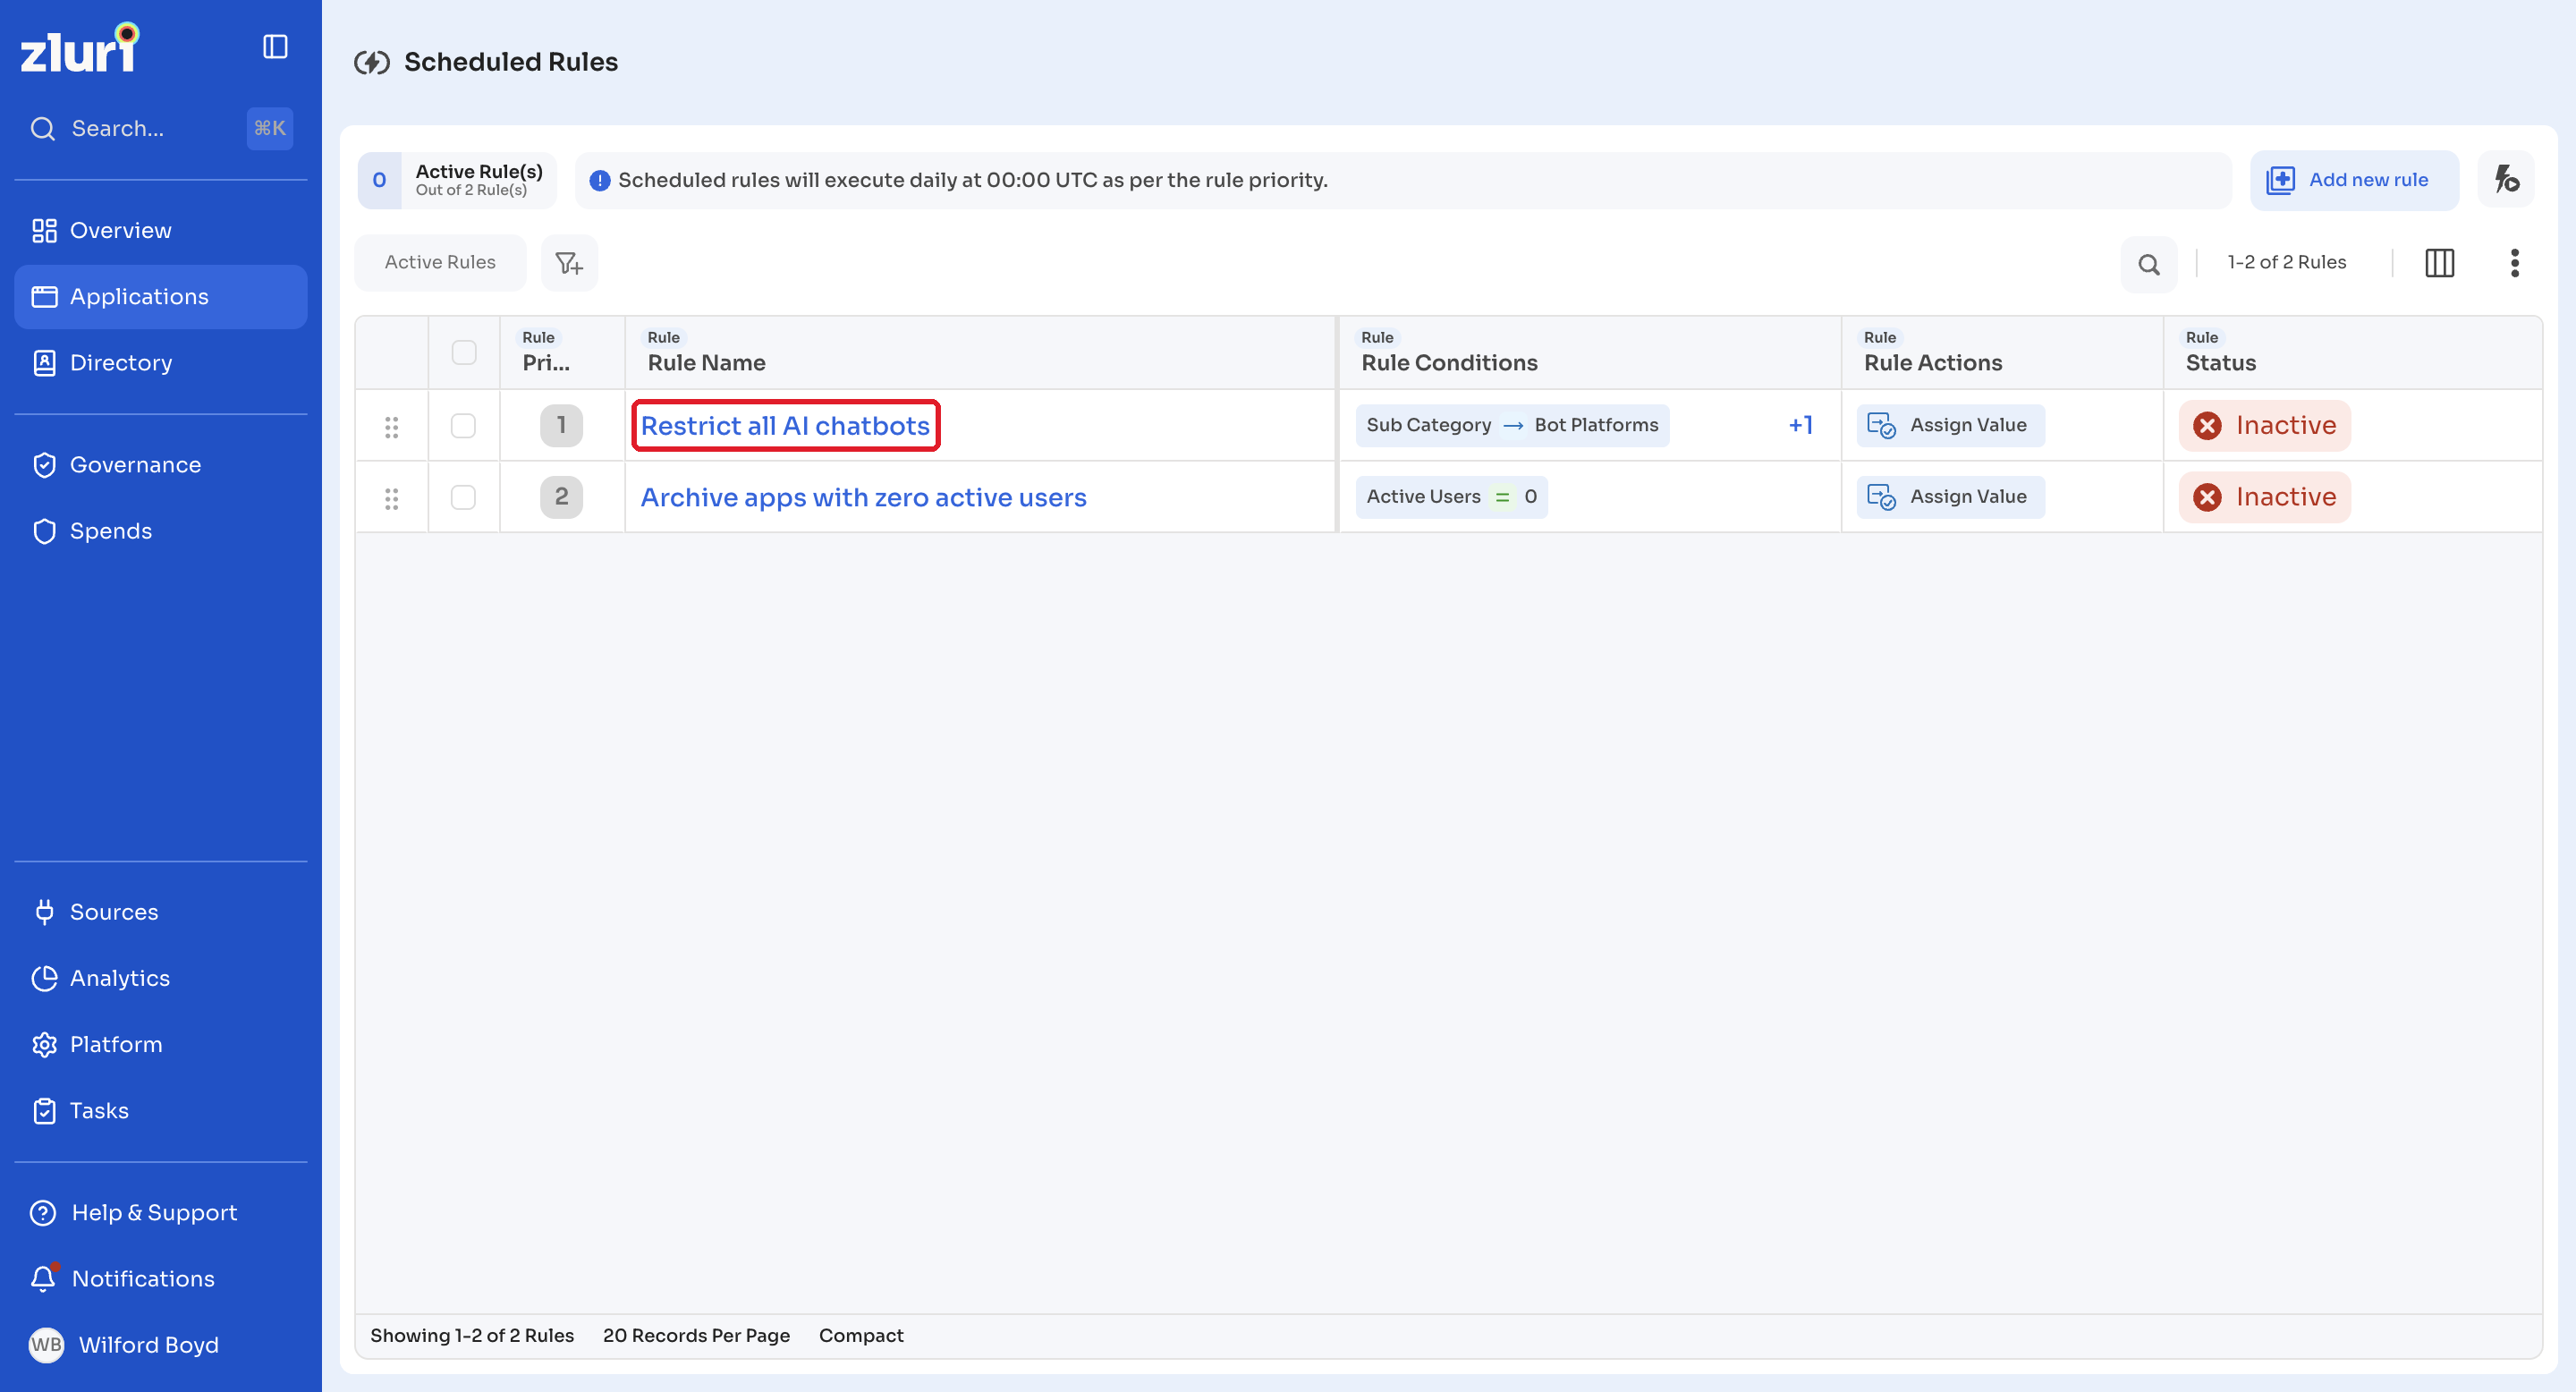
-
Modify the conditions and actions as needed. Optionally, select the pencil icon at the top to change the rule name.
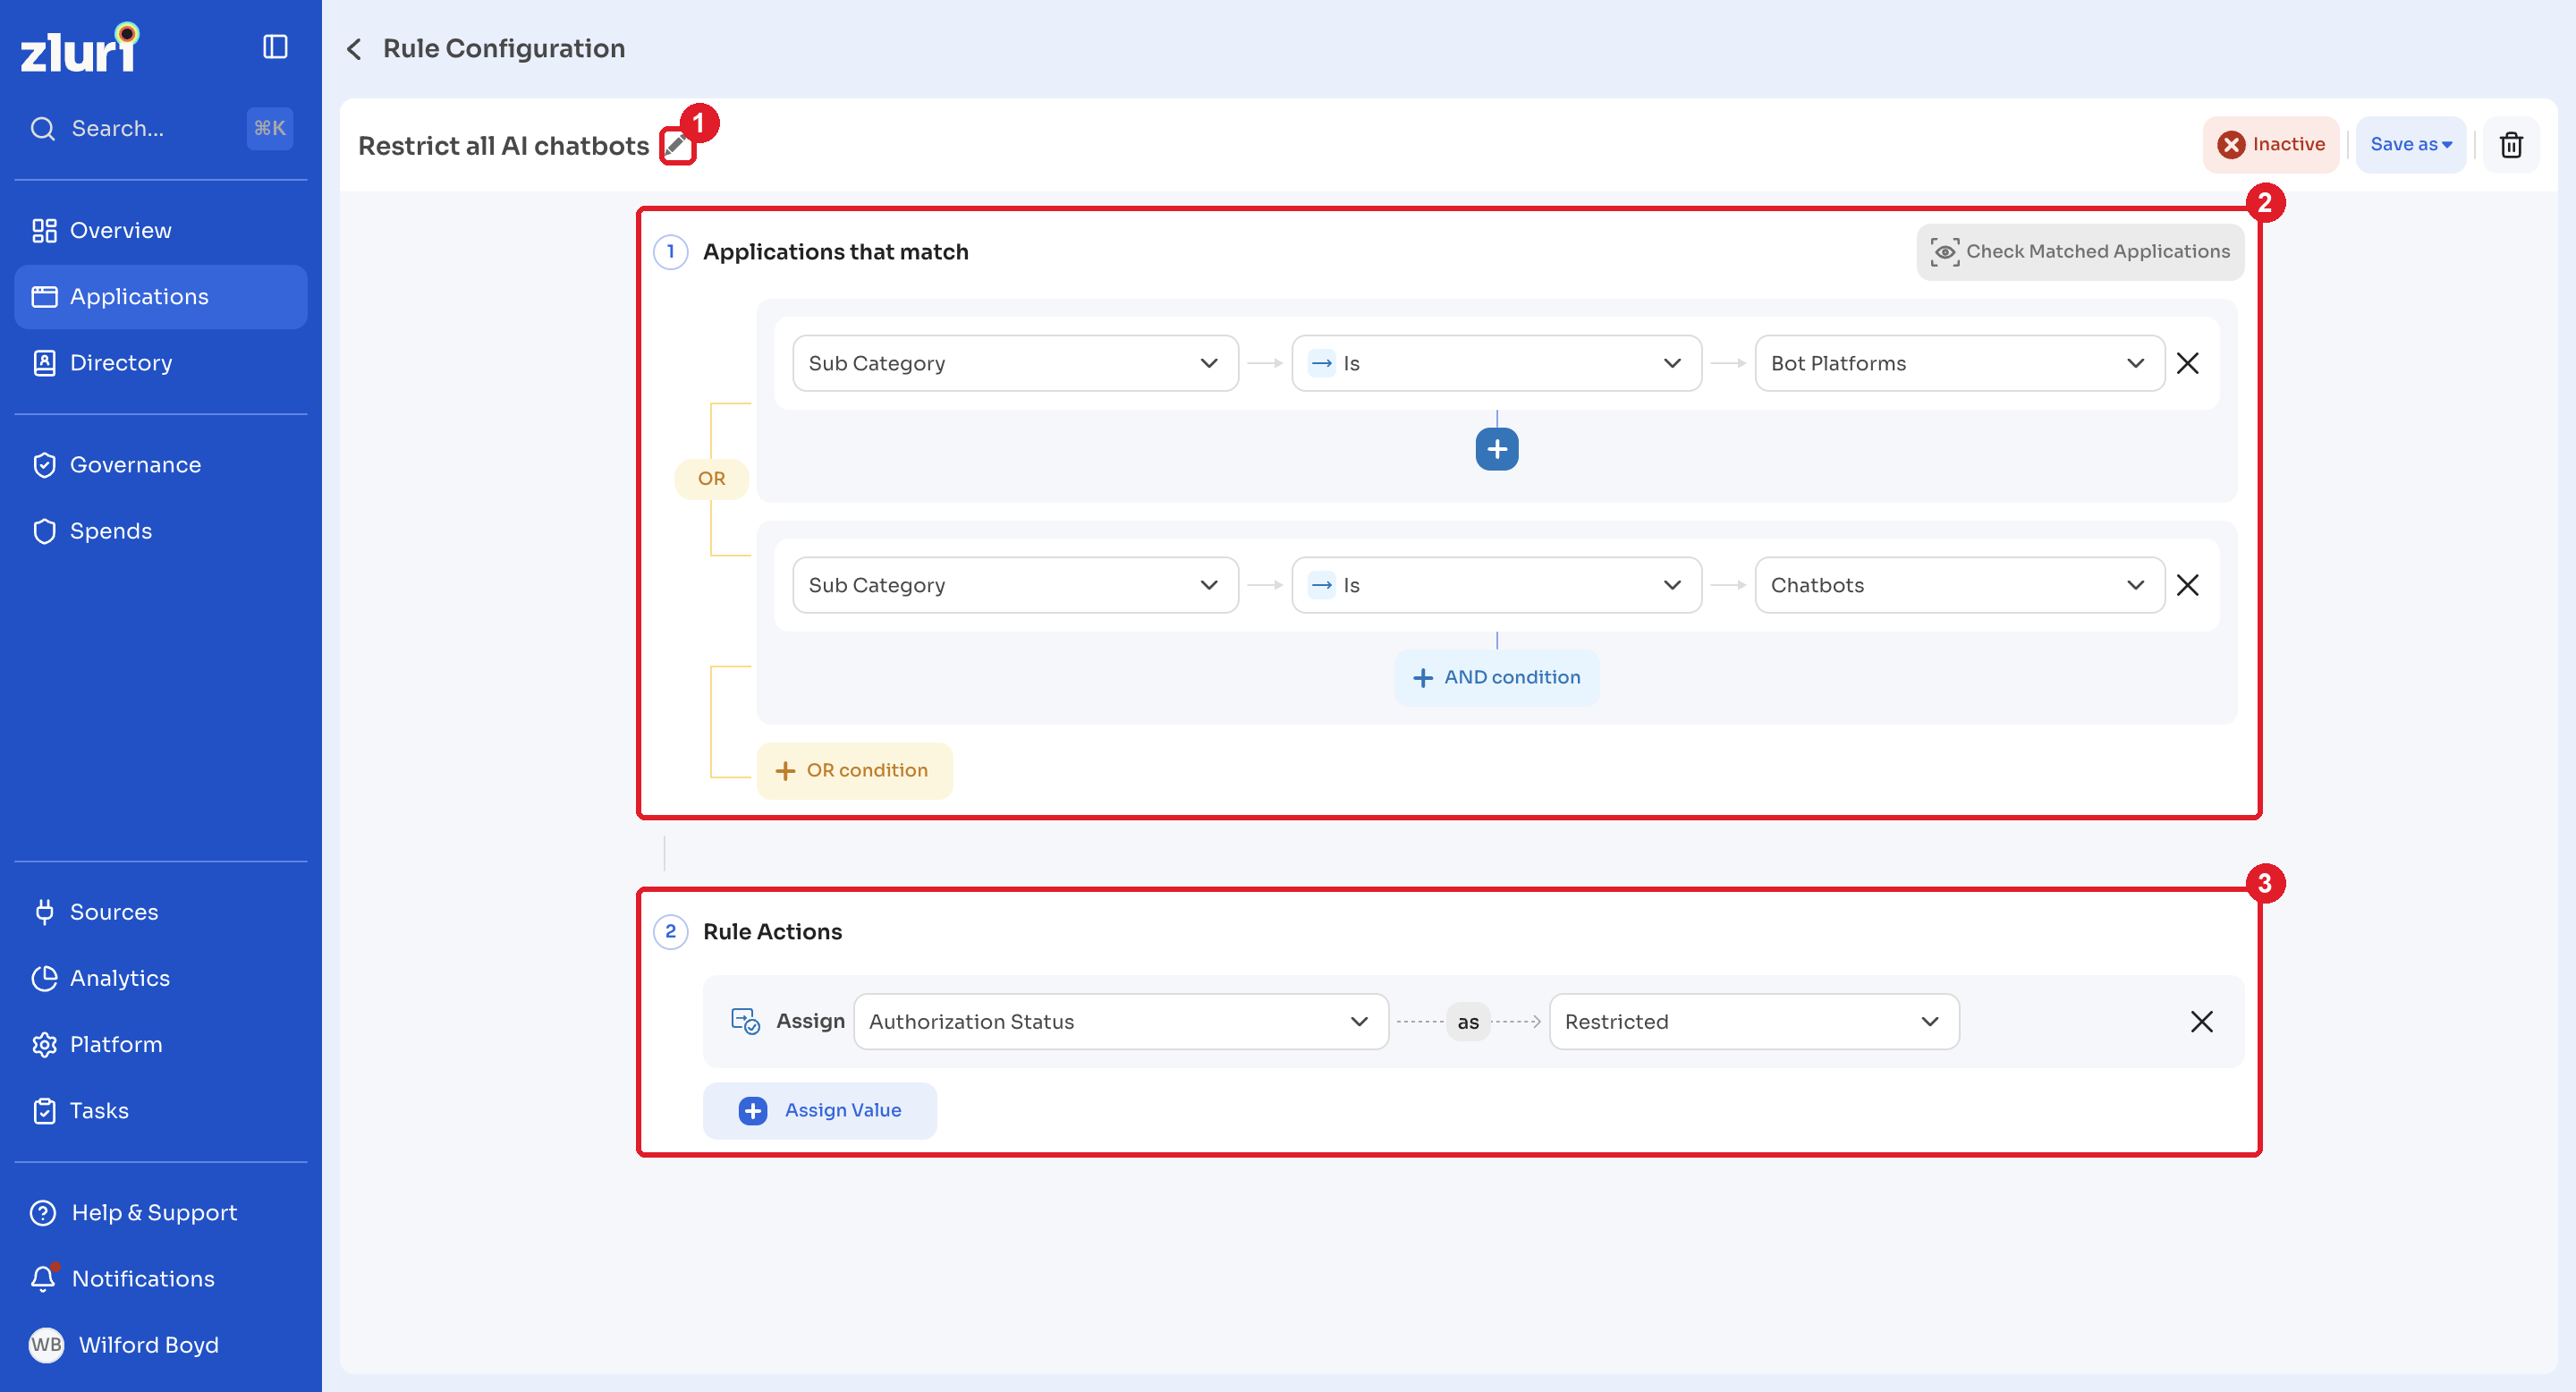
-
Select Save as, then choose Active, Inactive, or Draft.
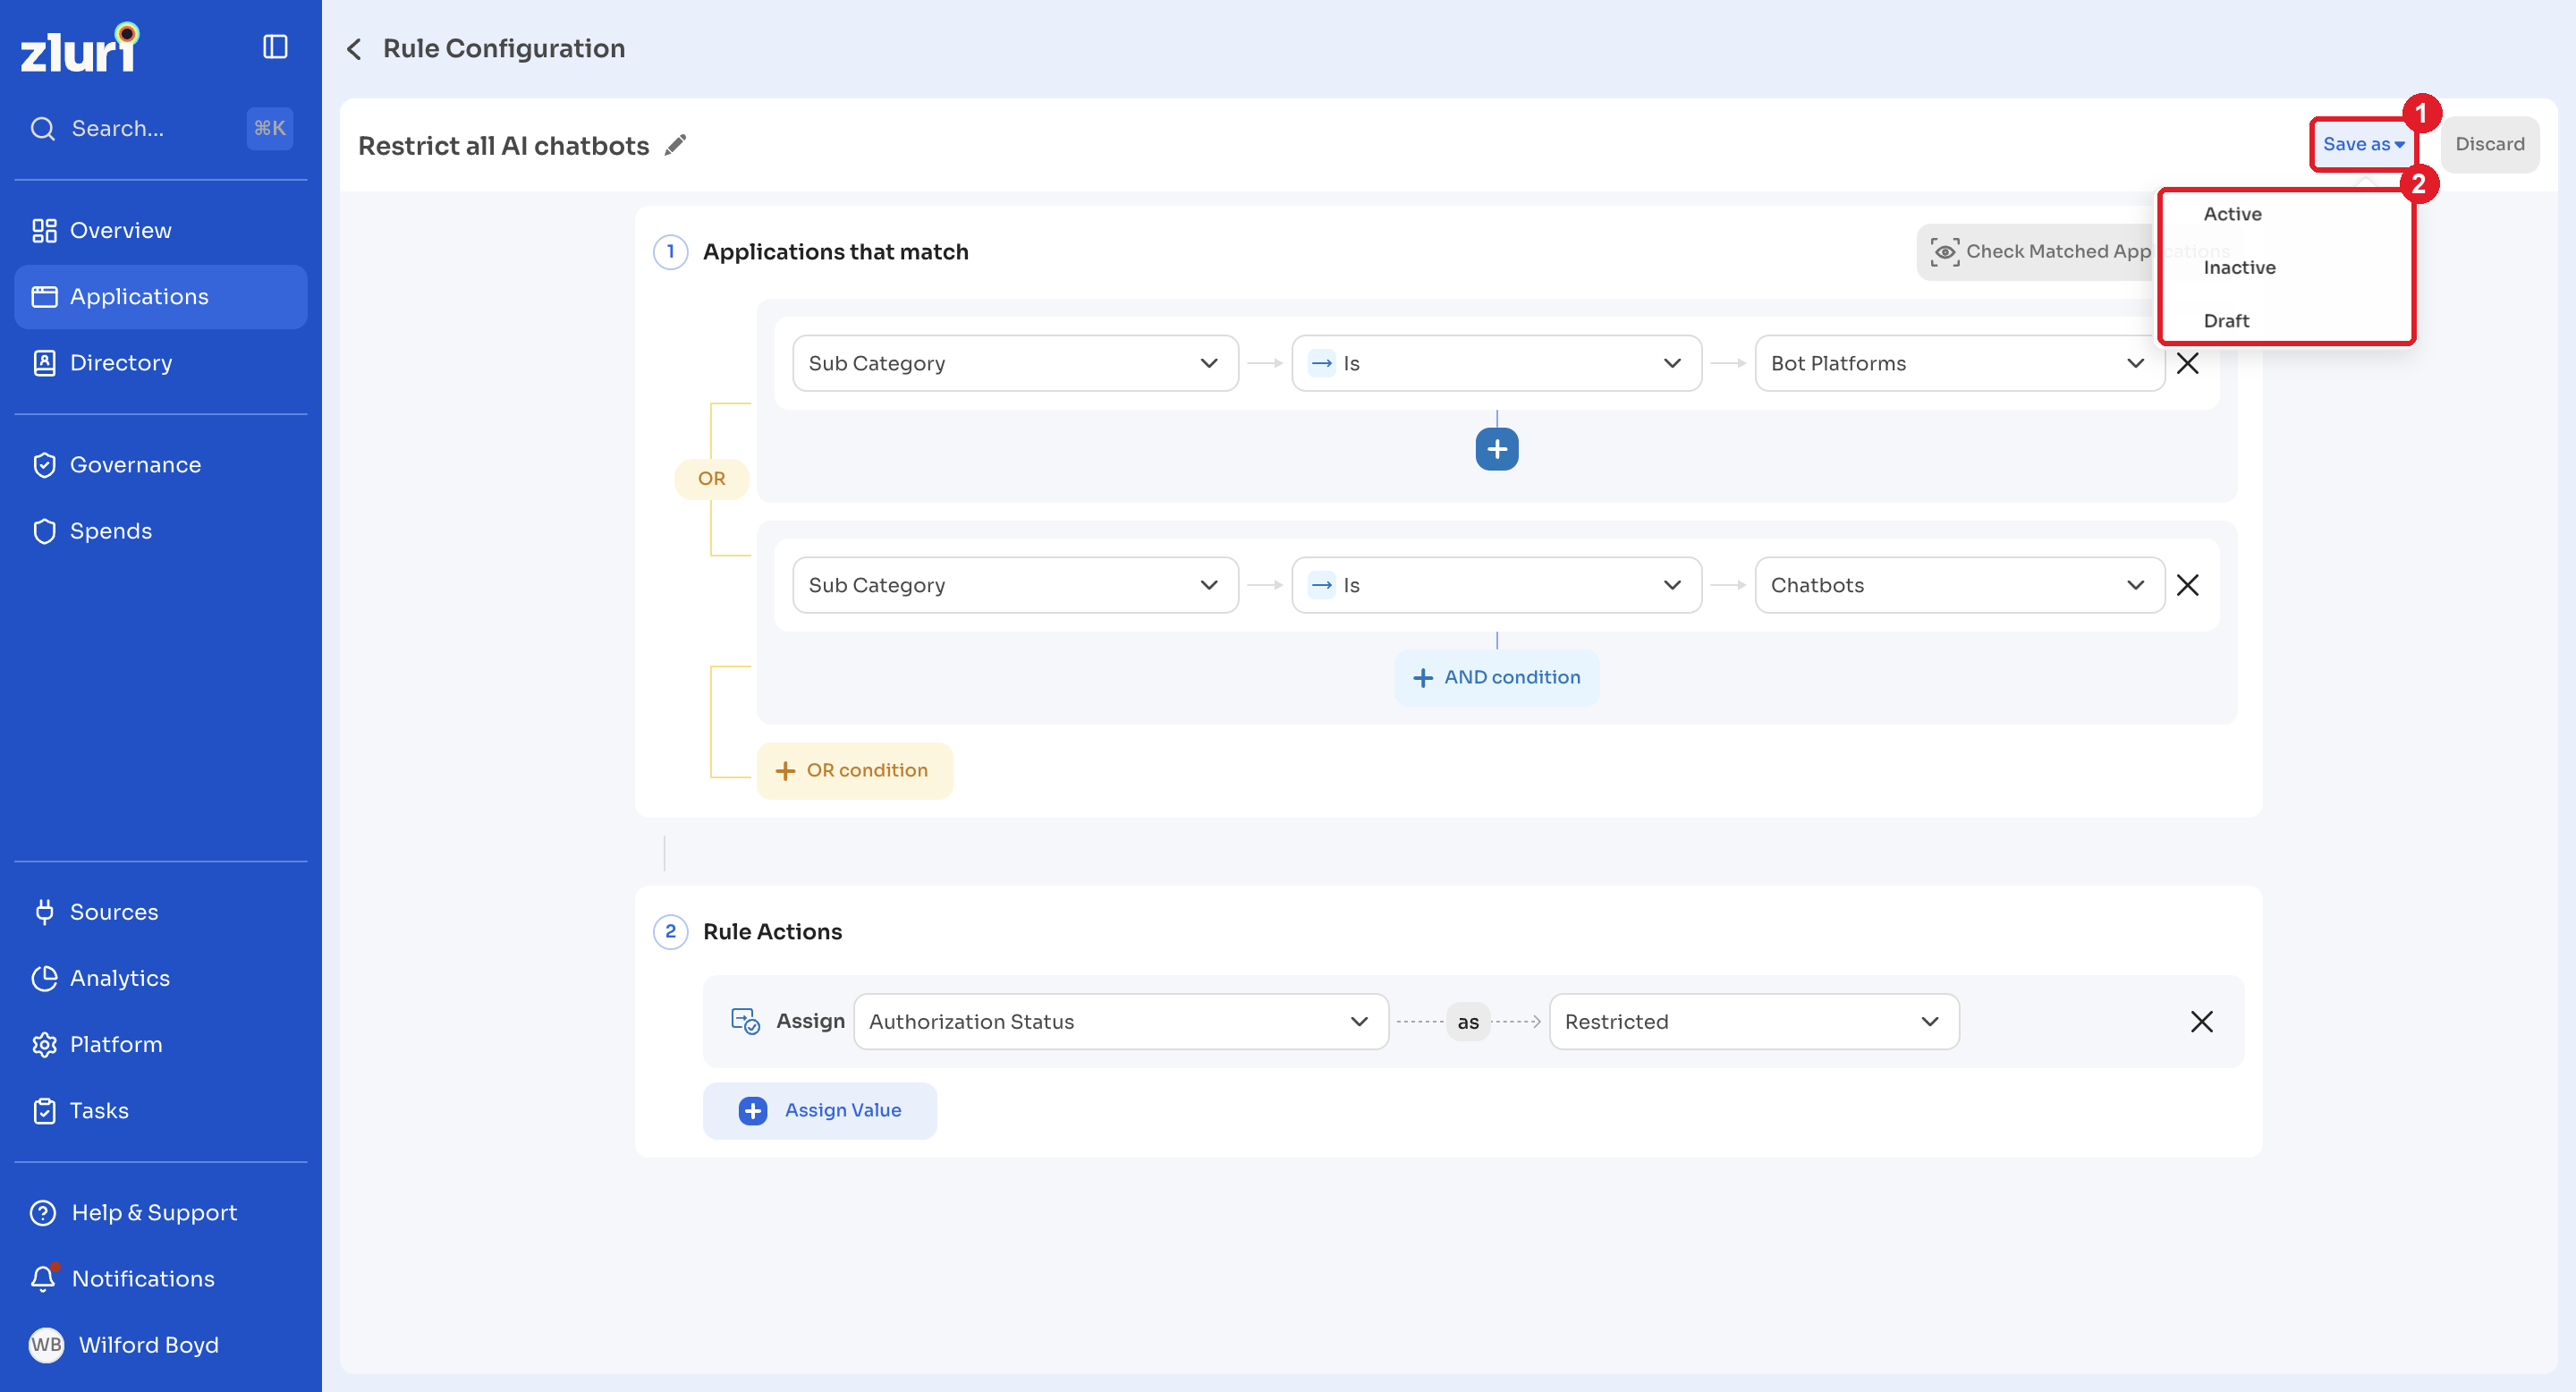
Managing rule priorities
Rule priority follows two key behaviors:
- New rules receive the lowest priority by default.
- If a rule fails, subsequent rules do not execute. For example, with six rules, if rules 1 through 3 complete successfully but rule 4 fails, the system does not process rules 5 and 6.
Change priority using the following methods:
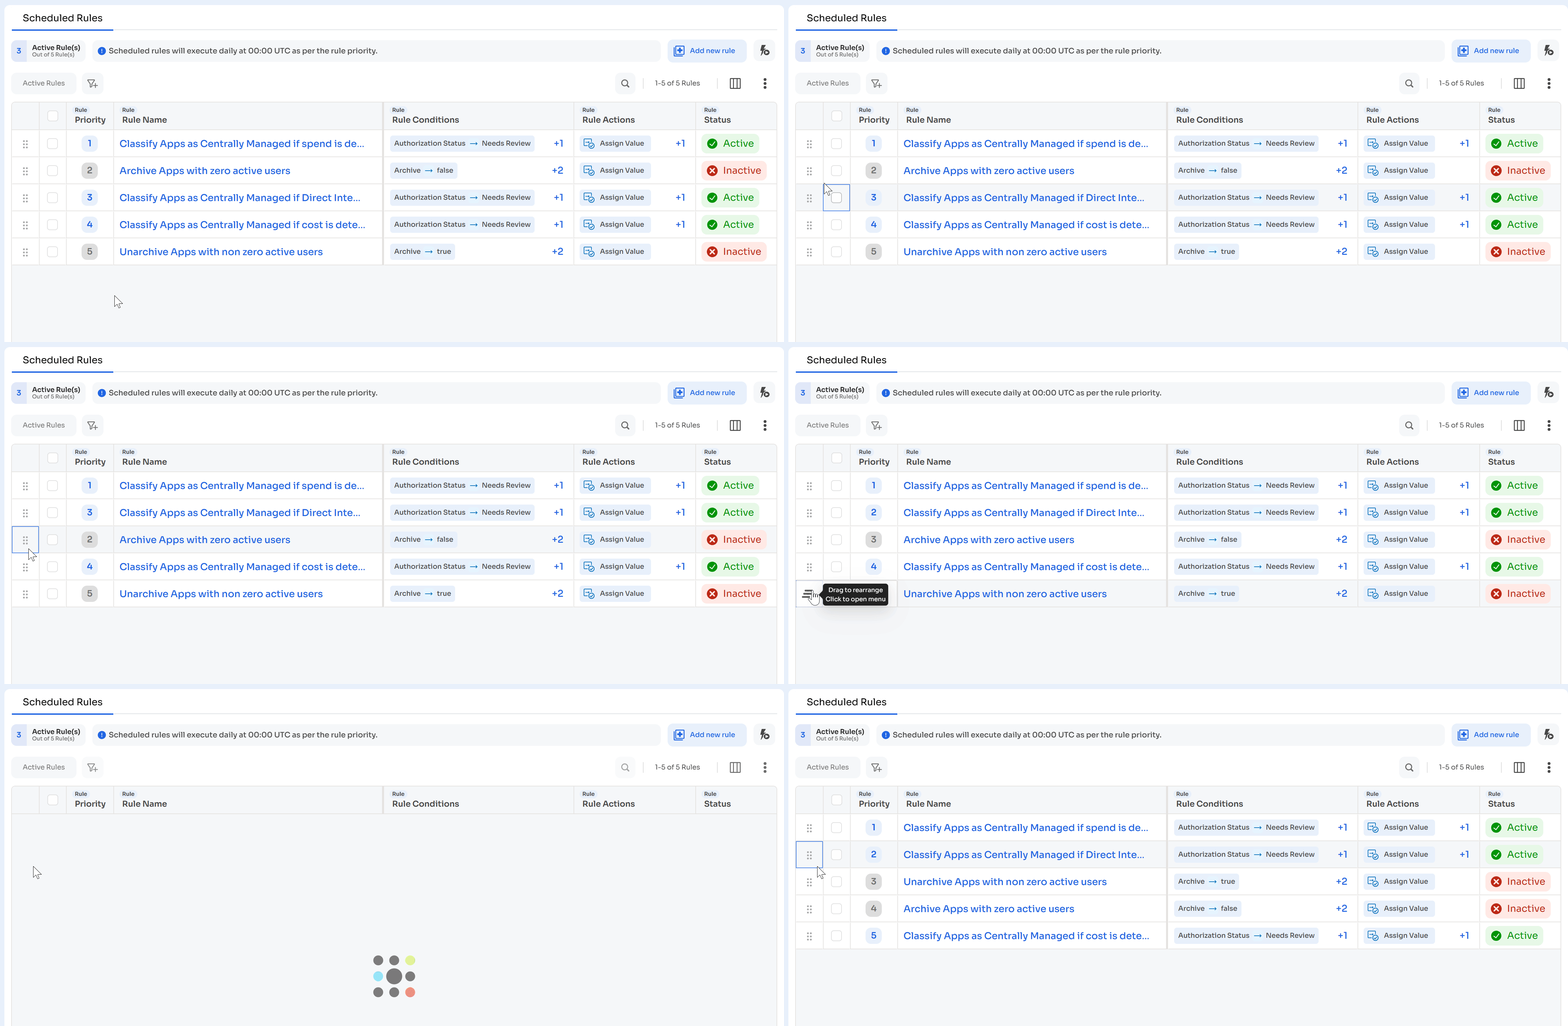
Drag and drop
- Select and hold the drag handle.
- Drag to the desired position.
- Release to set the new priority.
The screen refreshes after the priority changes.
Enter priority manually
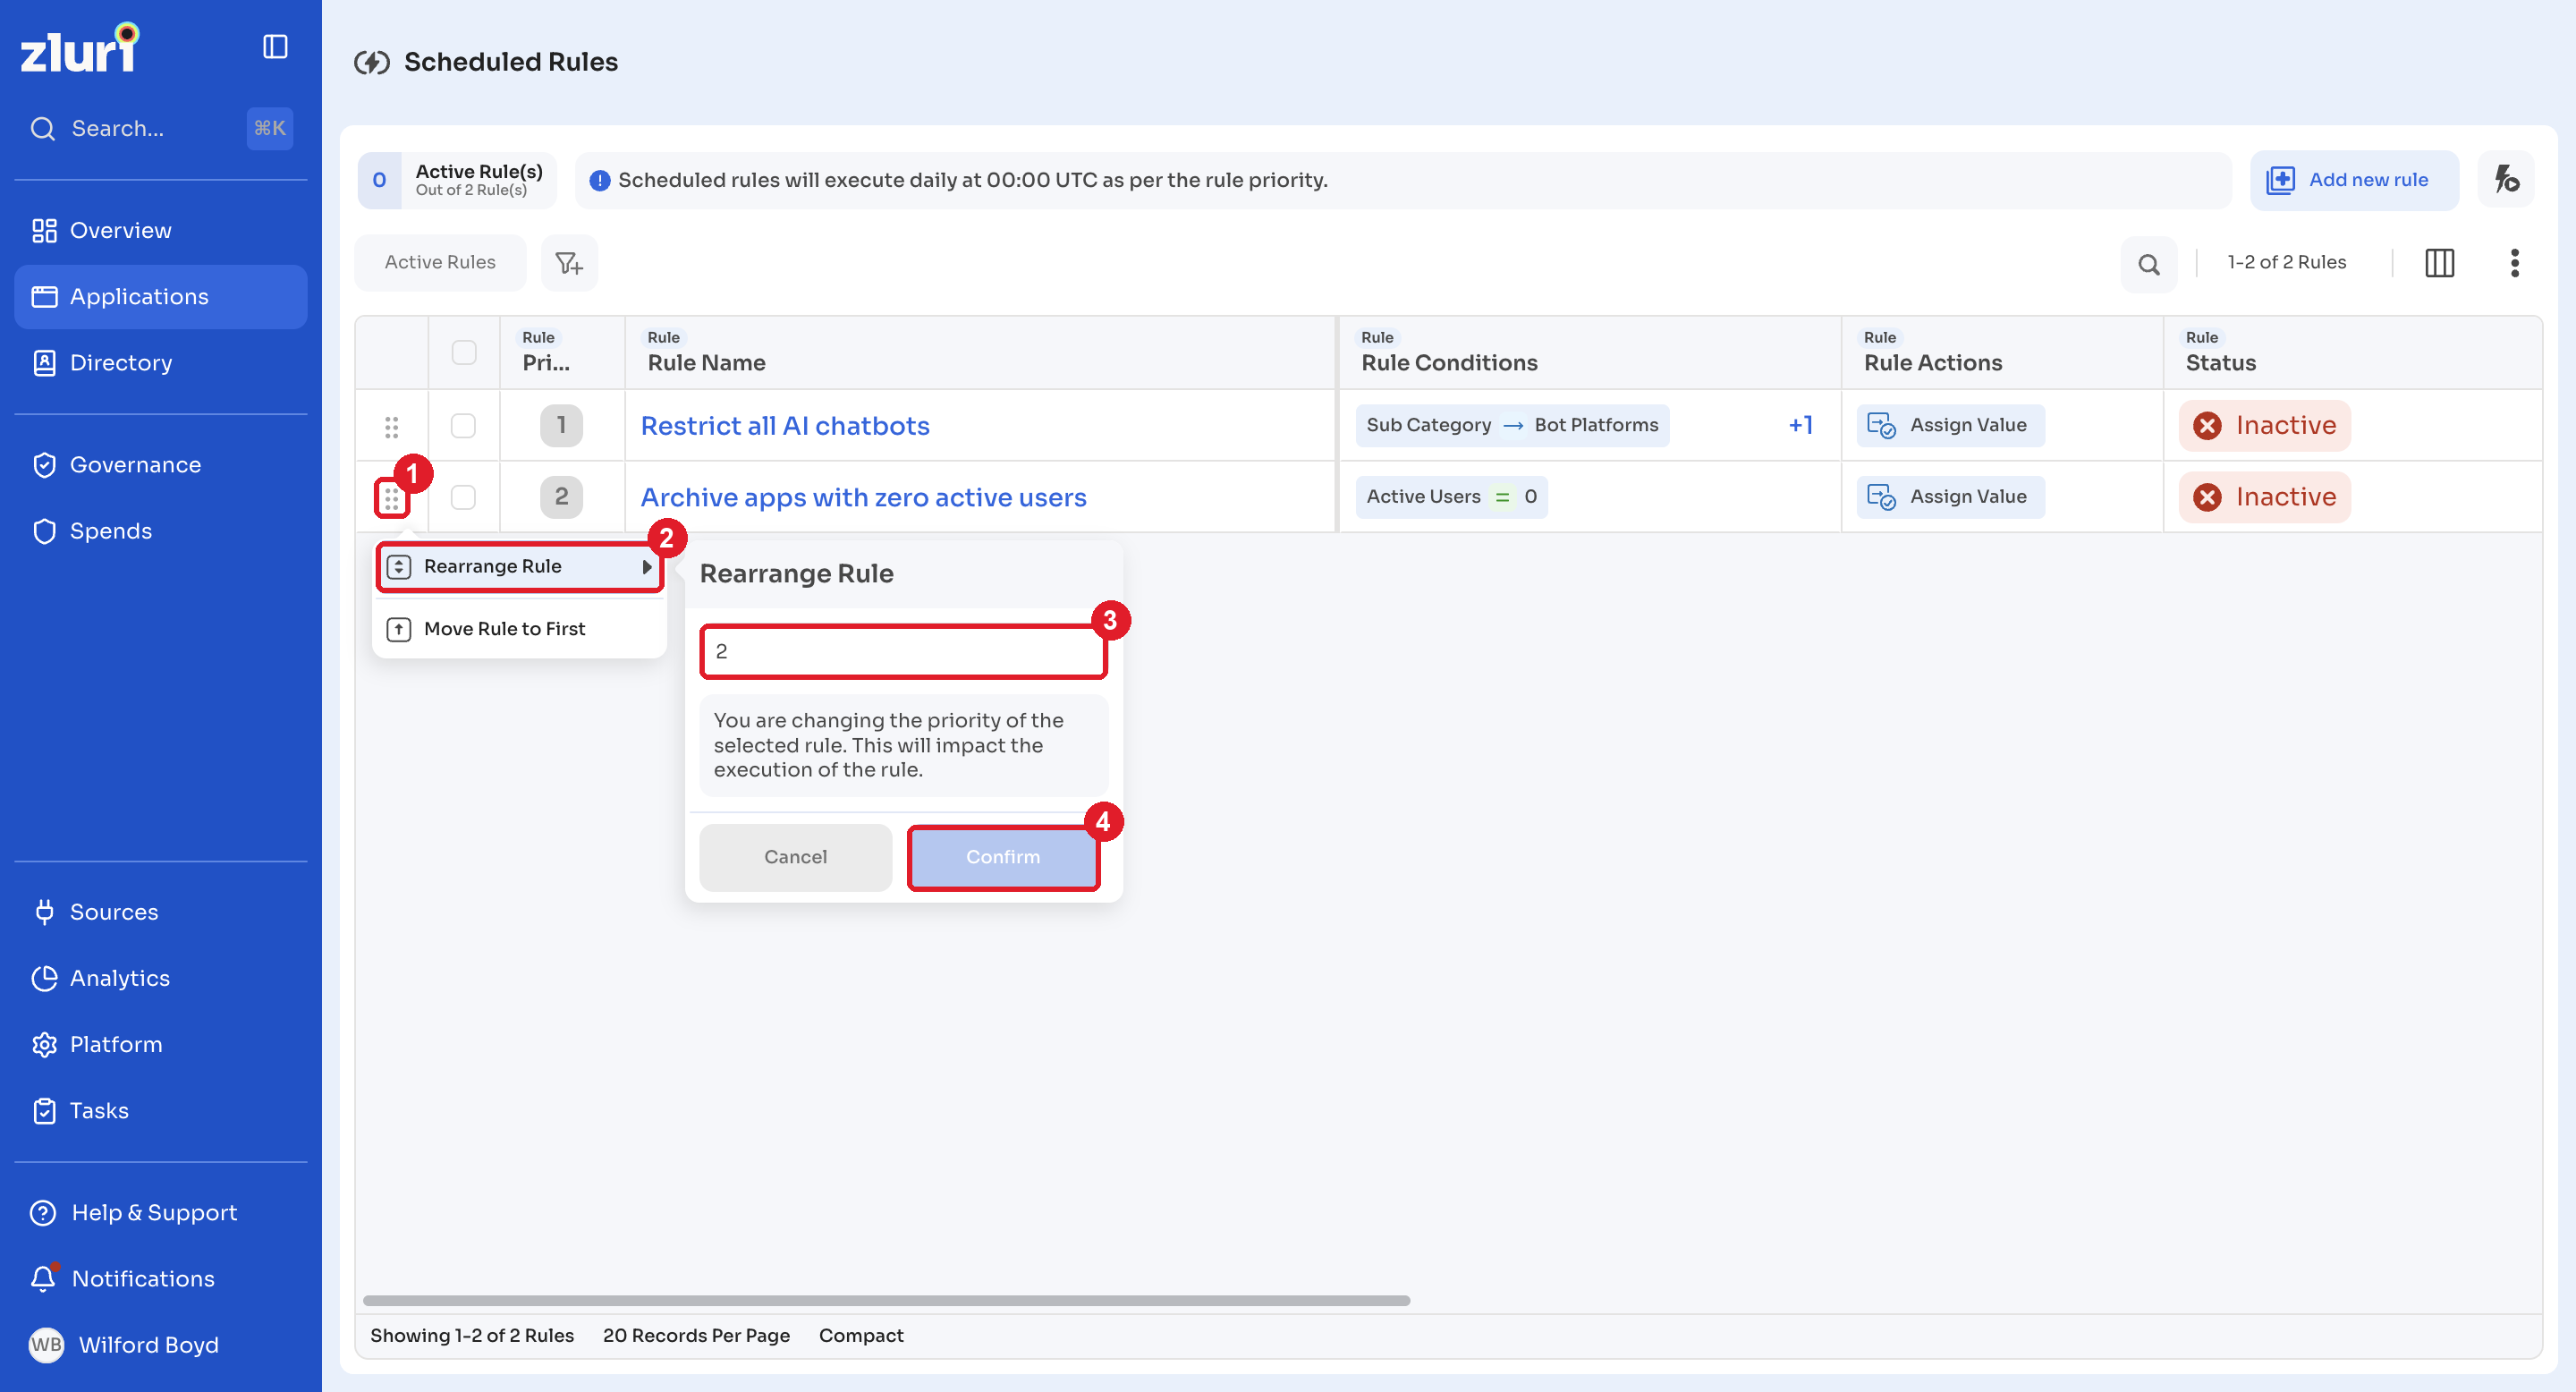
-
Select the drag handle.
-
Select Rearrange Rule.
-
Choose the desired priority.
-
Select Confirm.
Quick priority changes
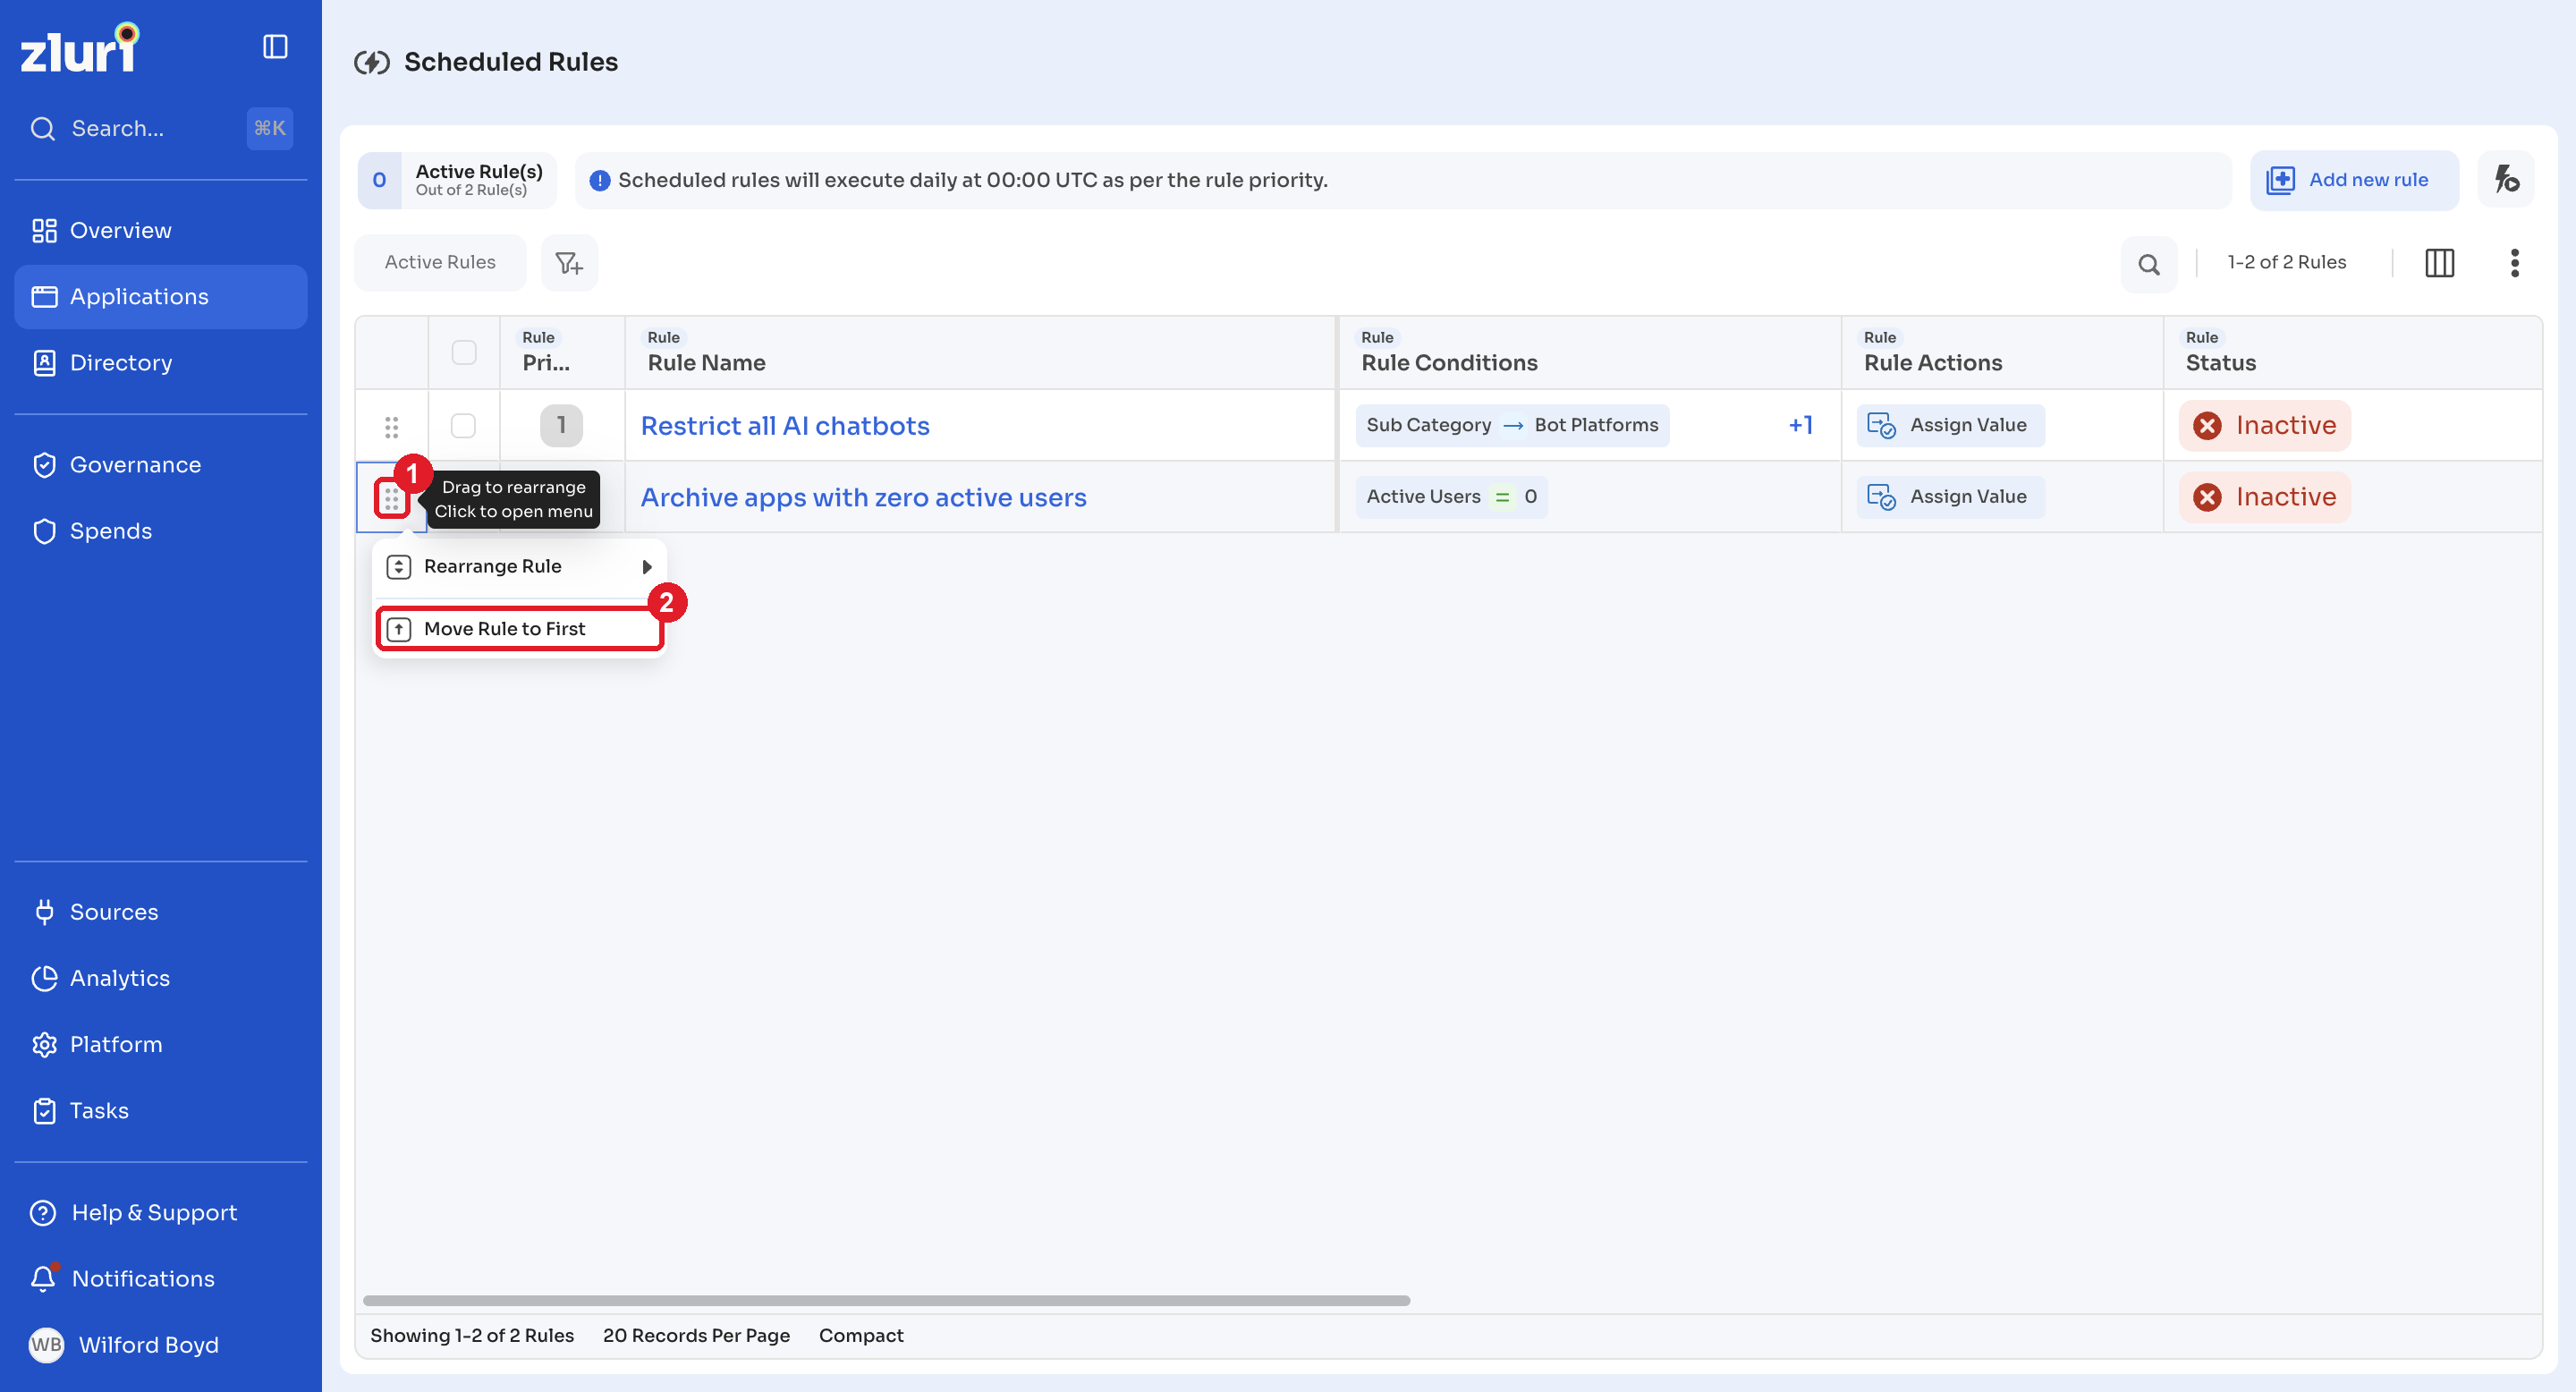
-
Select the drag handle.
-
Choose Move Rule to First (highest priority) or Move Rule to Last (lowest priority).
Delete a rule
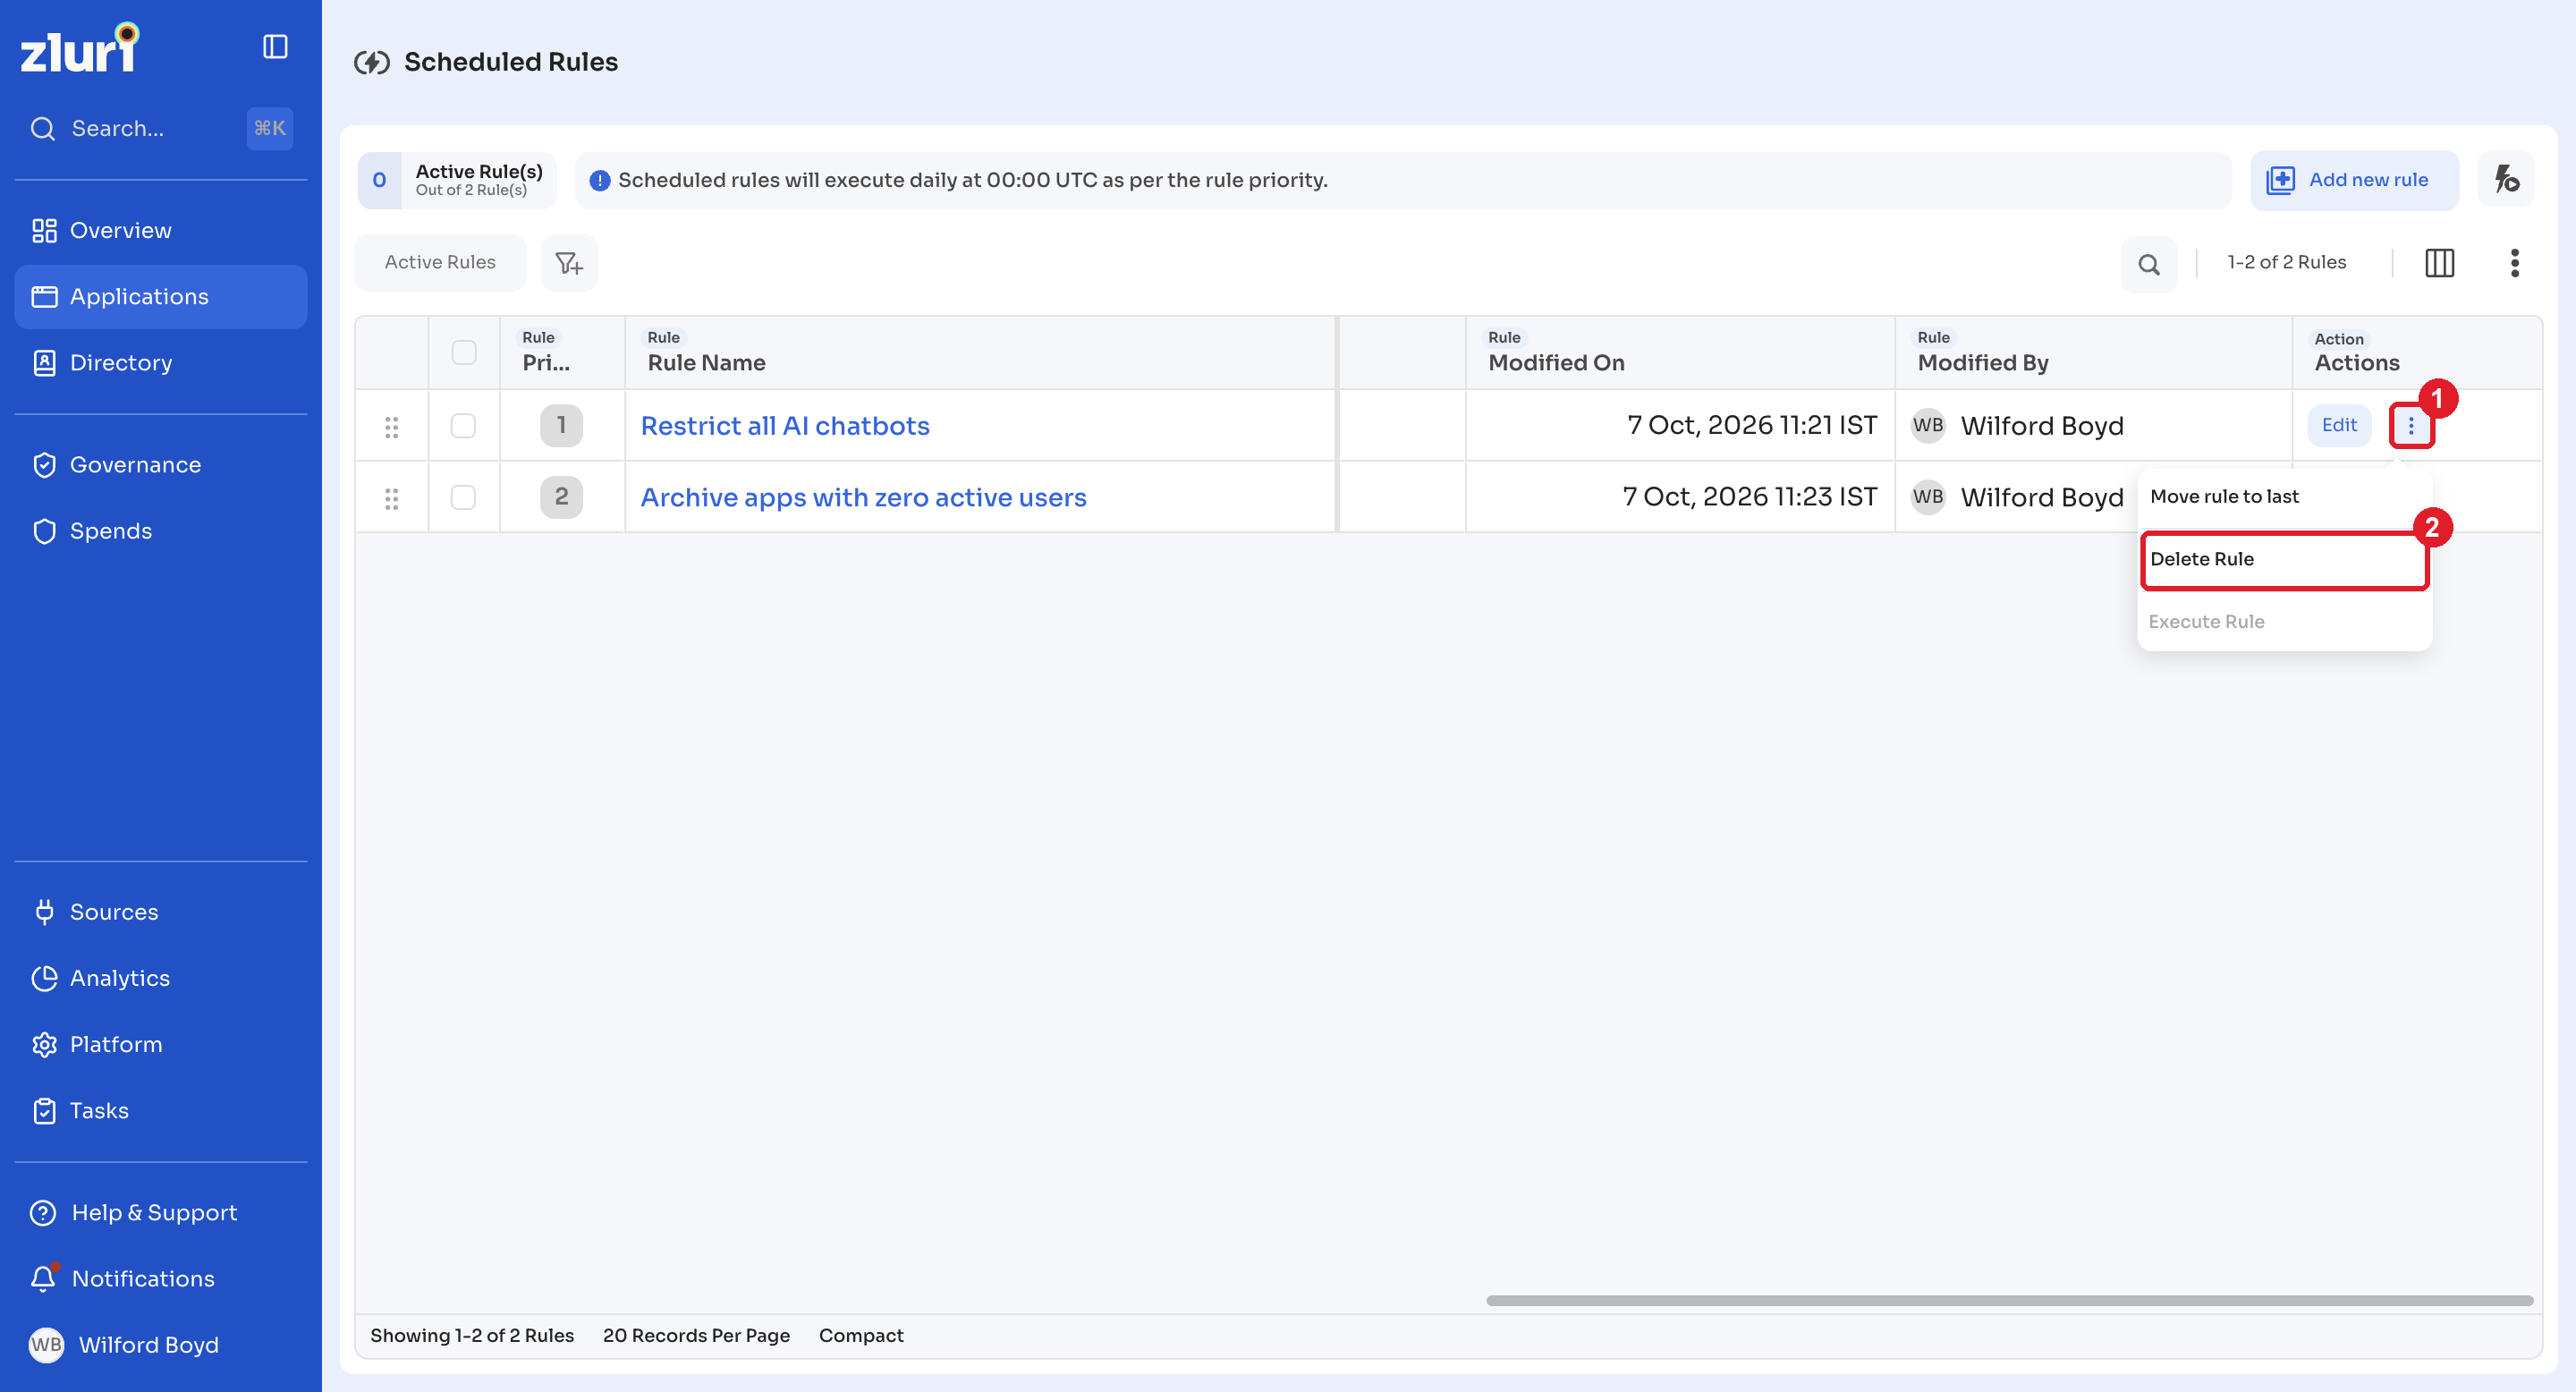
Scroll to the far right and select the three-dot menu for the rule to delete. Select Delete Rule. You can also open the rule and select the delete icon next to Save as.
Track rule activity
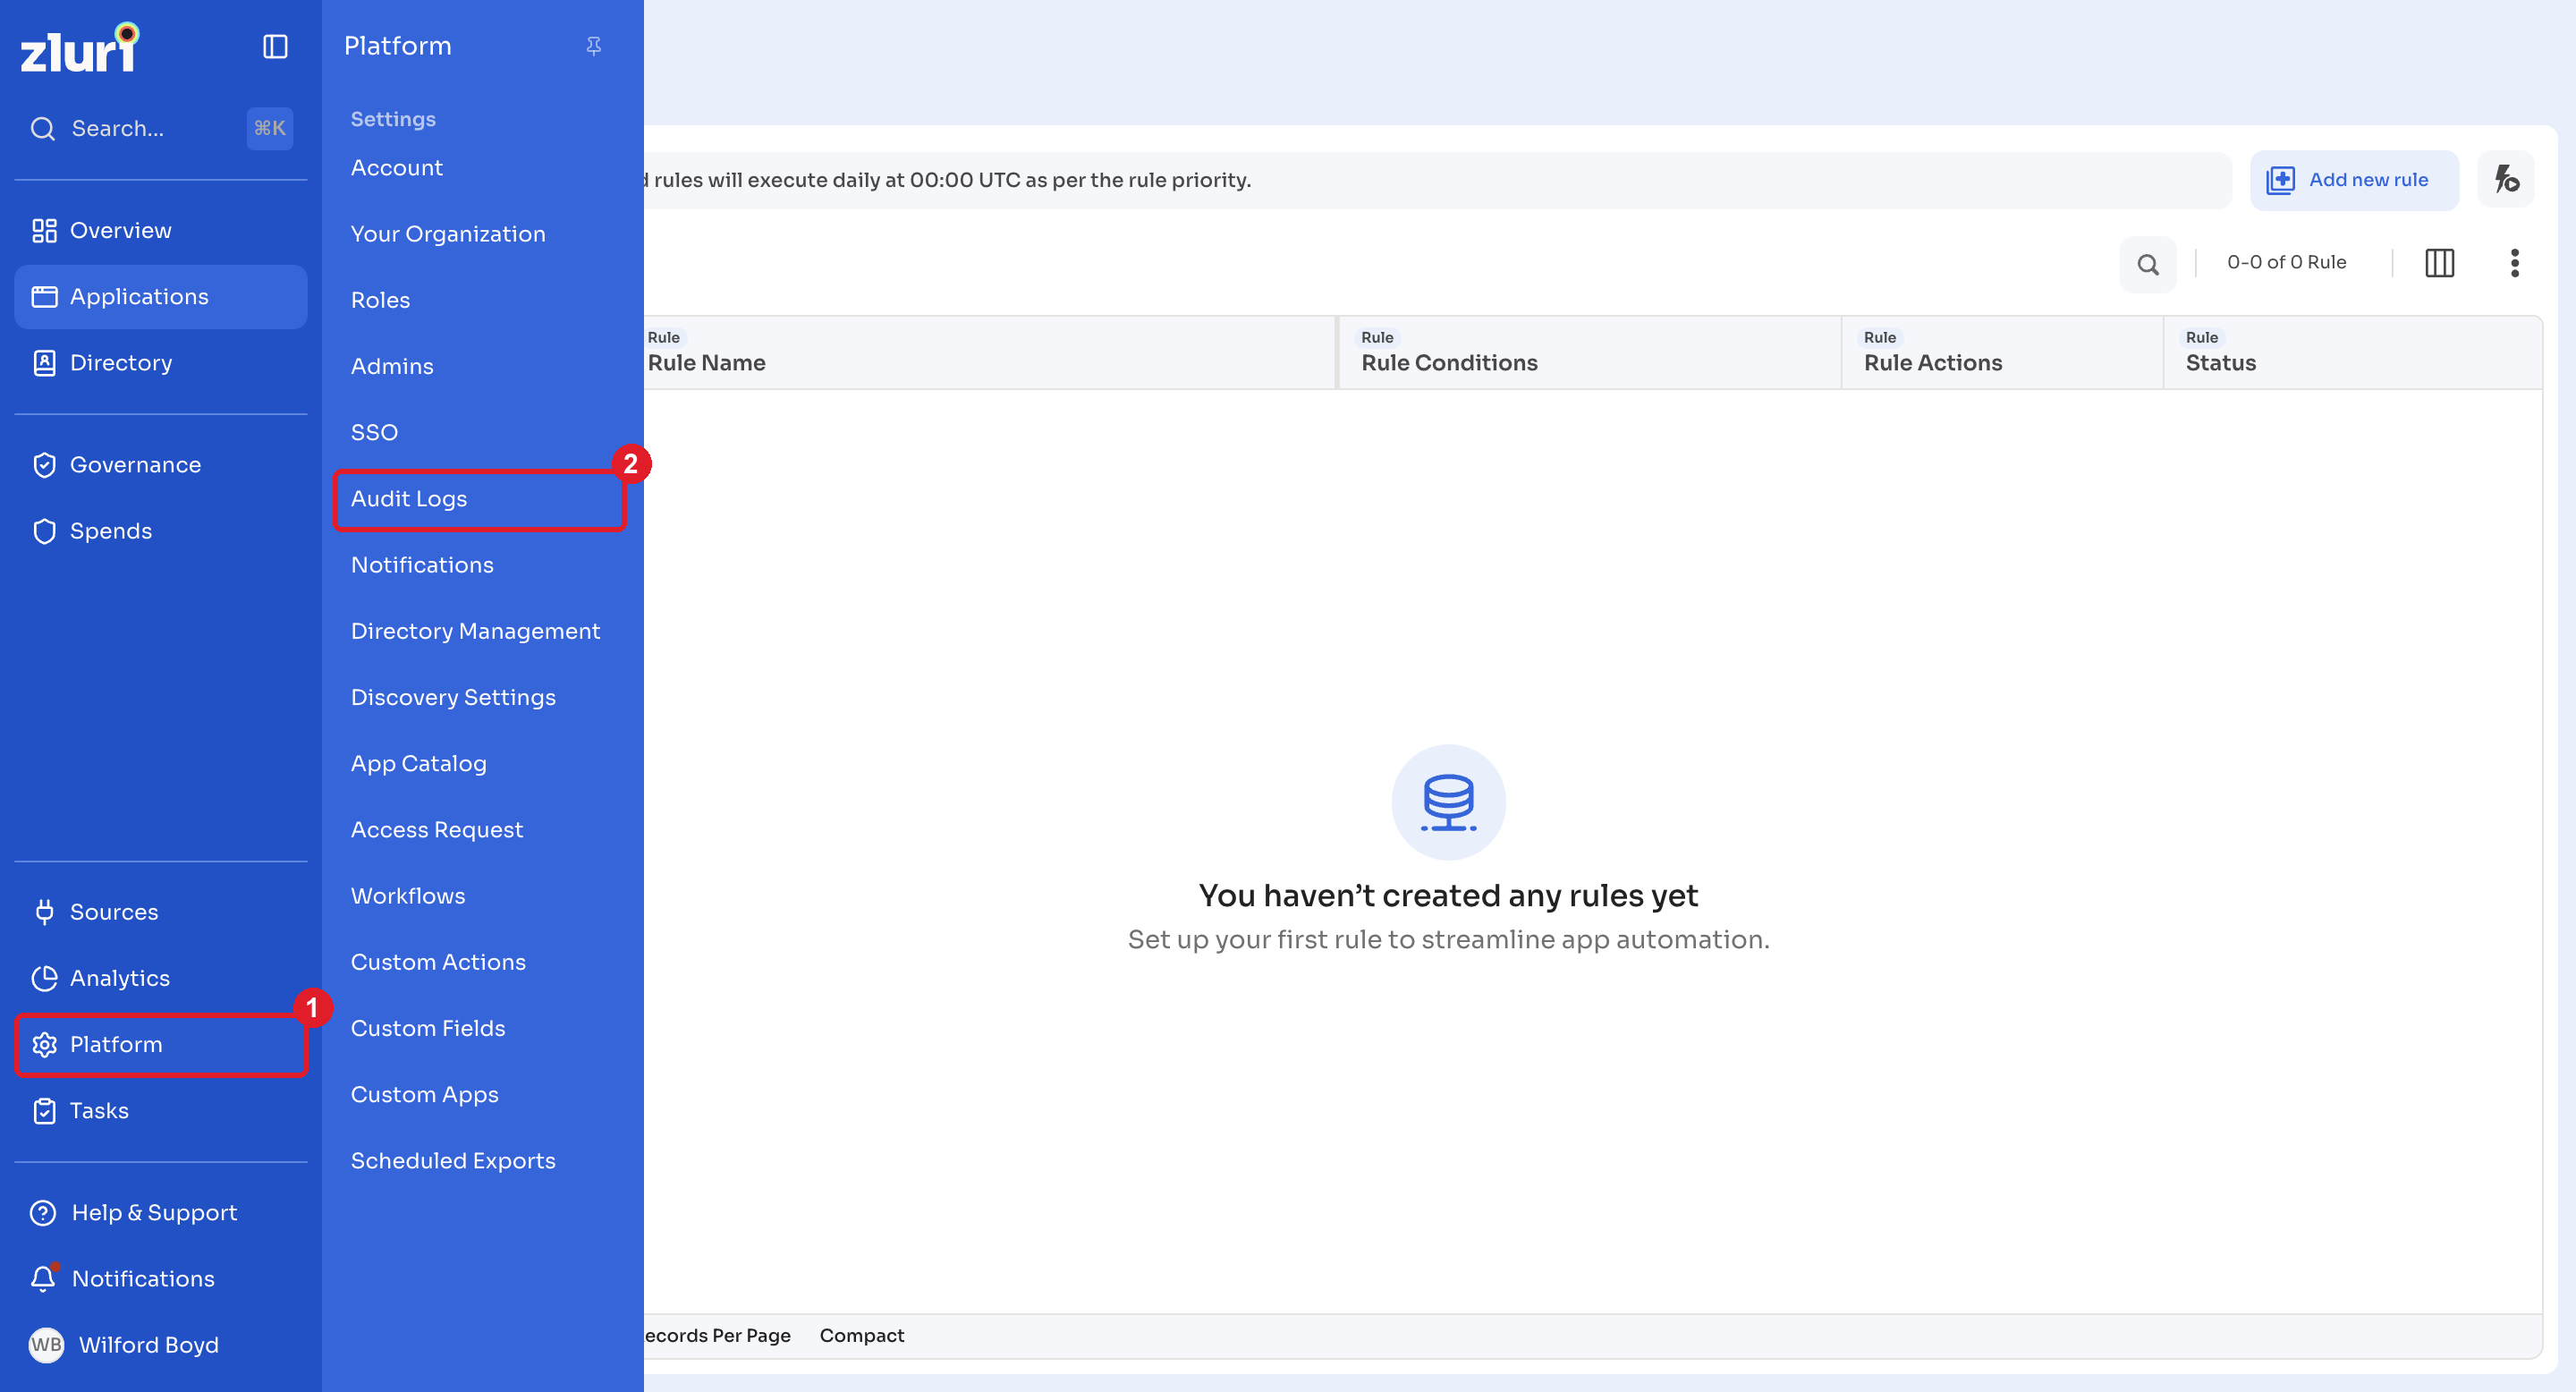
Zluri logs all rule activity, including creation, editing, deletion, execution, and failures, in audit logs. Select Platform from the left navigation, then select Audit Logs under Settings to view rule activity.
Filter by entity
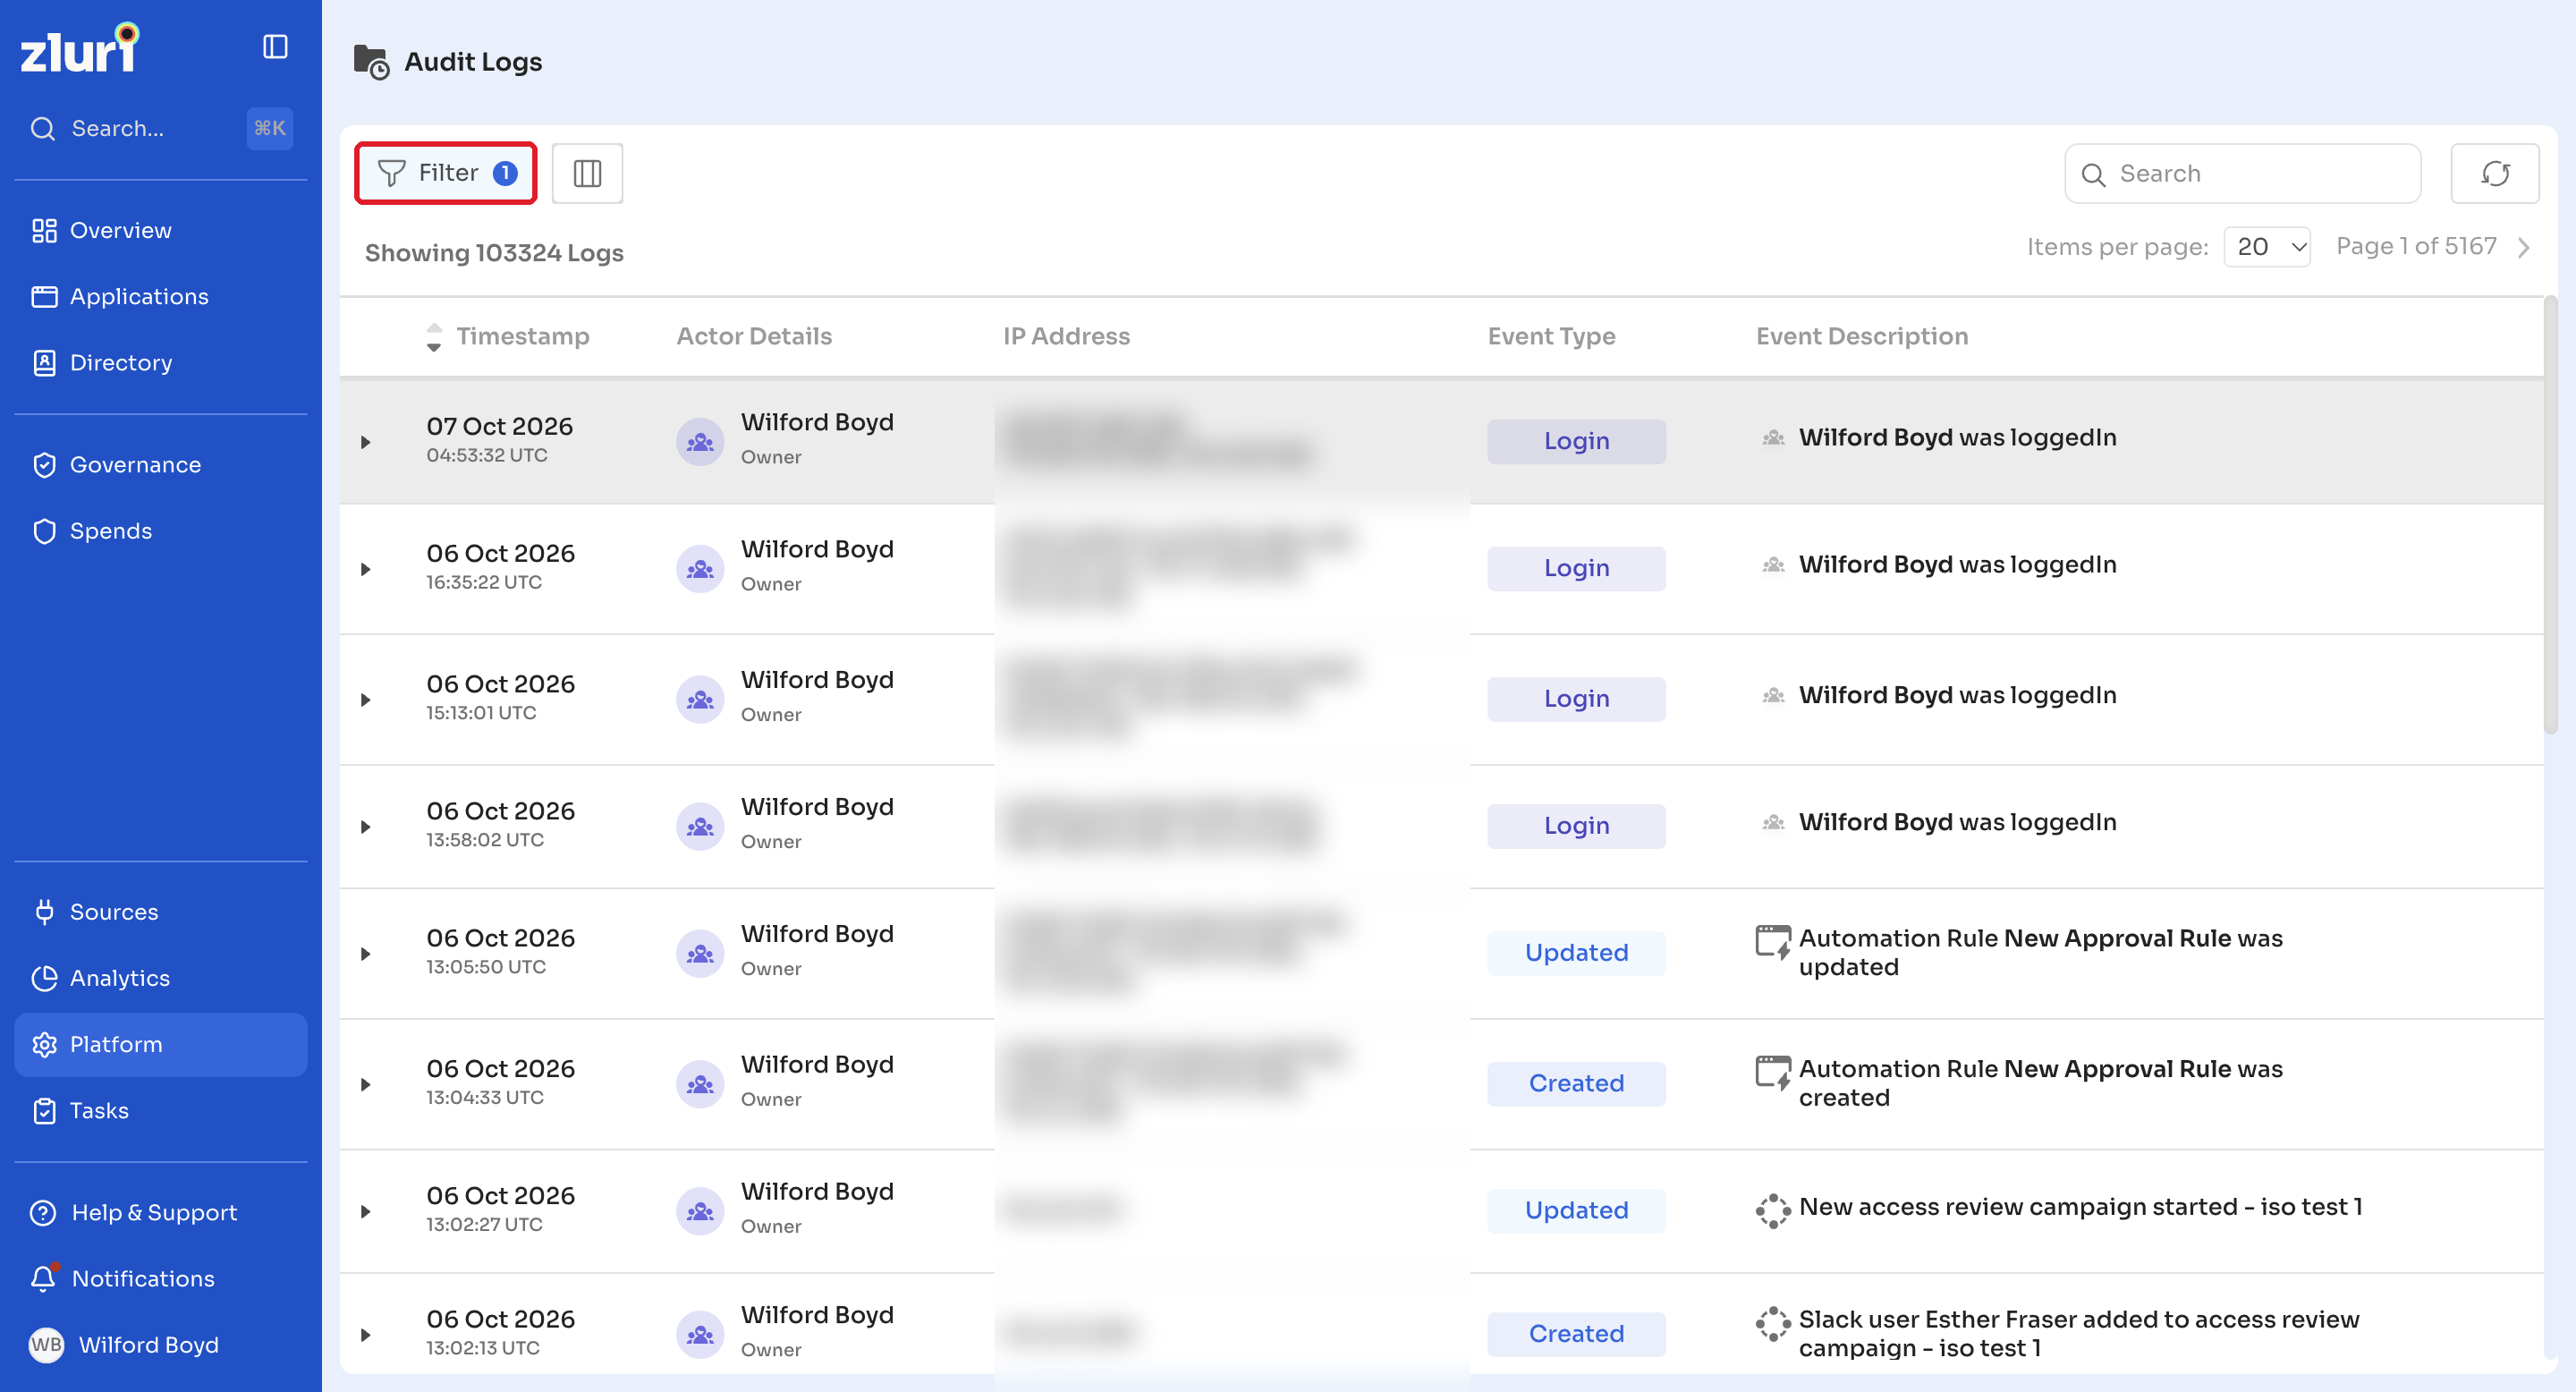
To see only scheduled rule activity in the audit log:
-
Select Filter in the top left, then select + Add Filters.
-
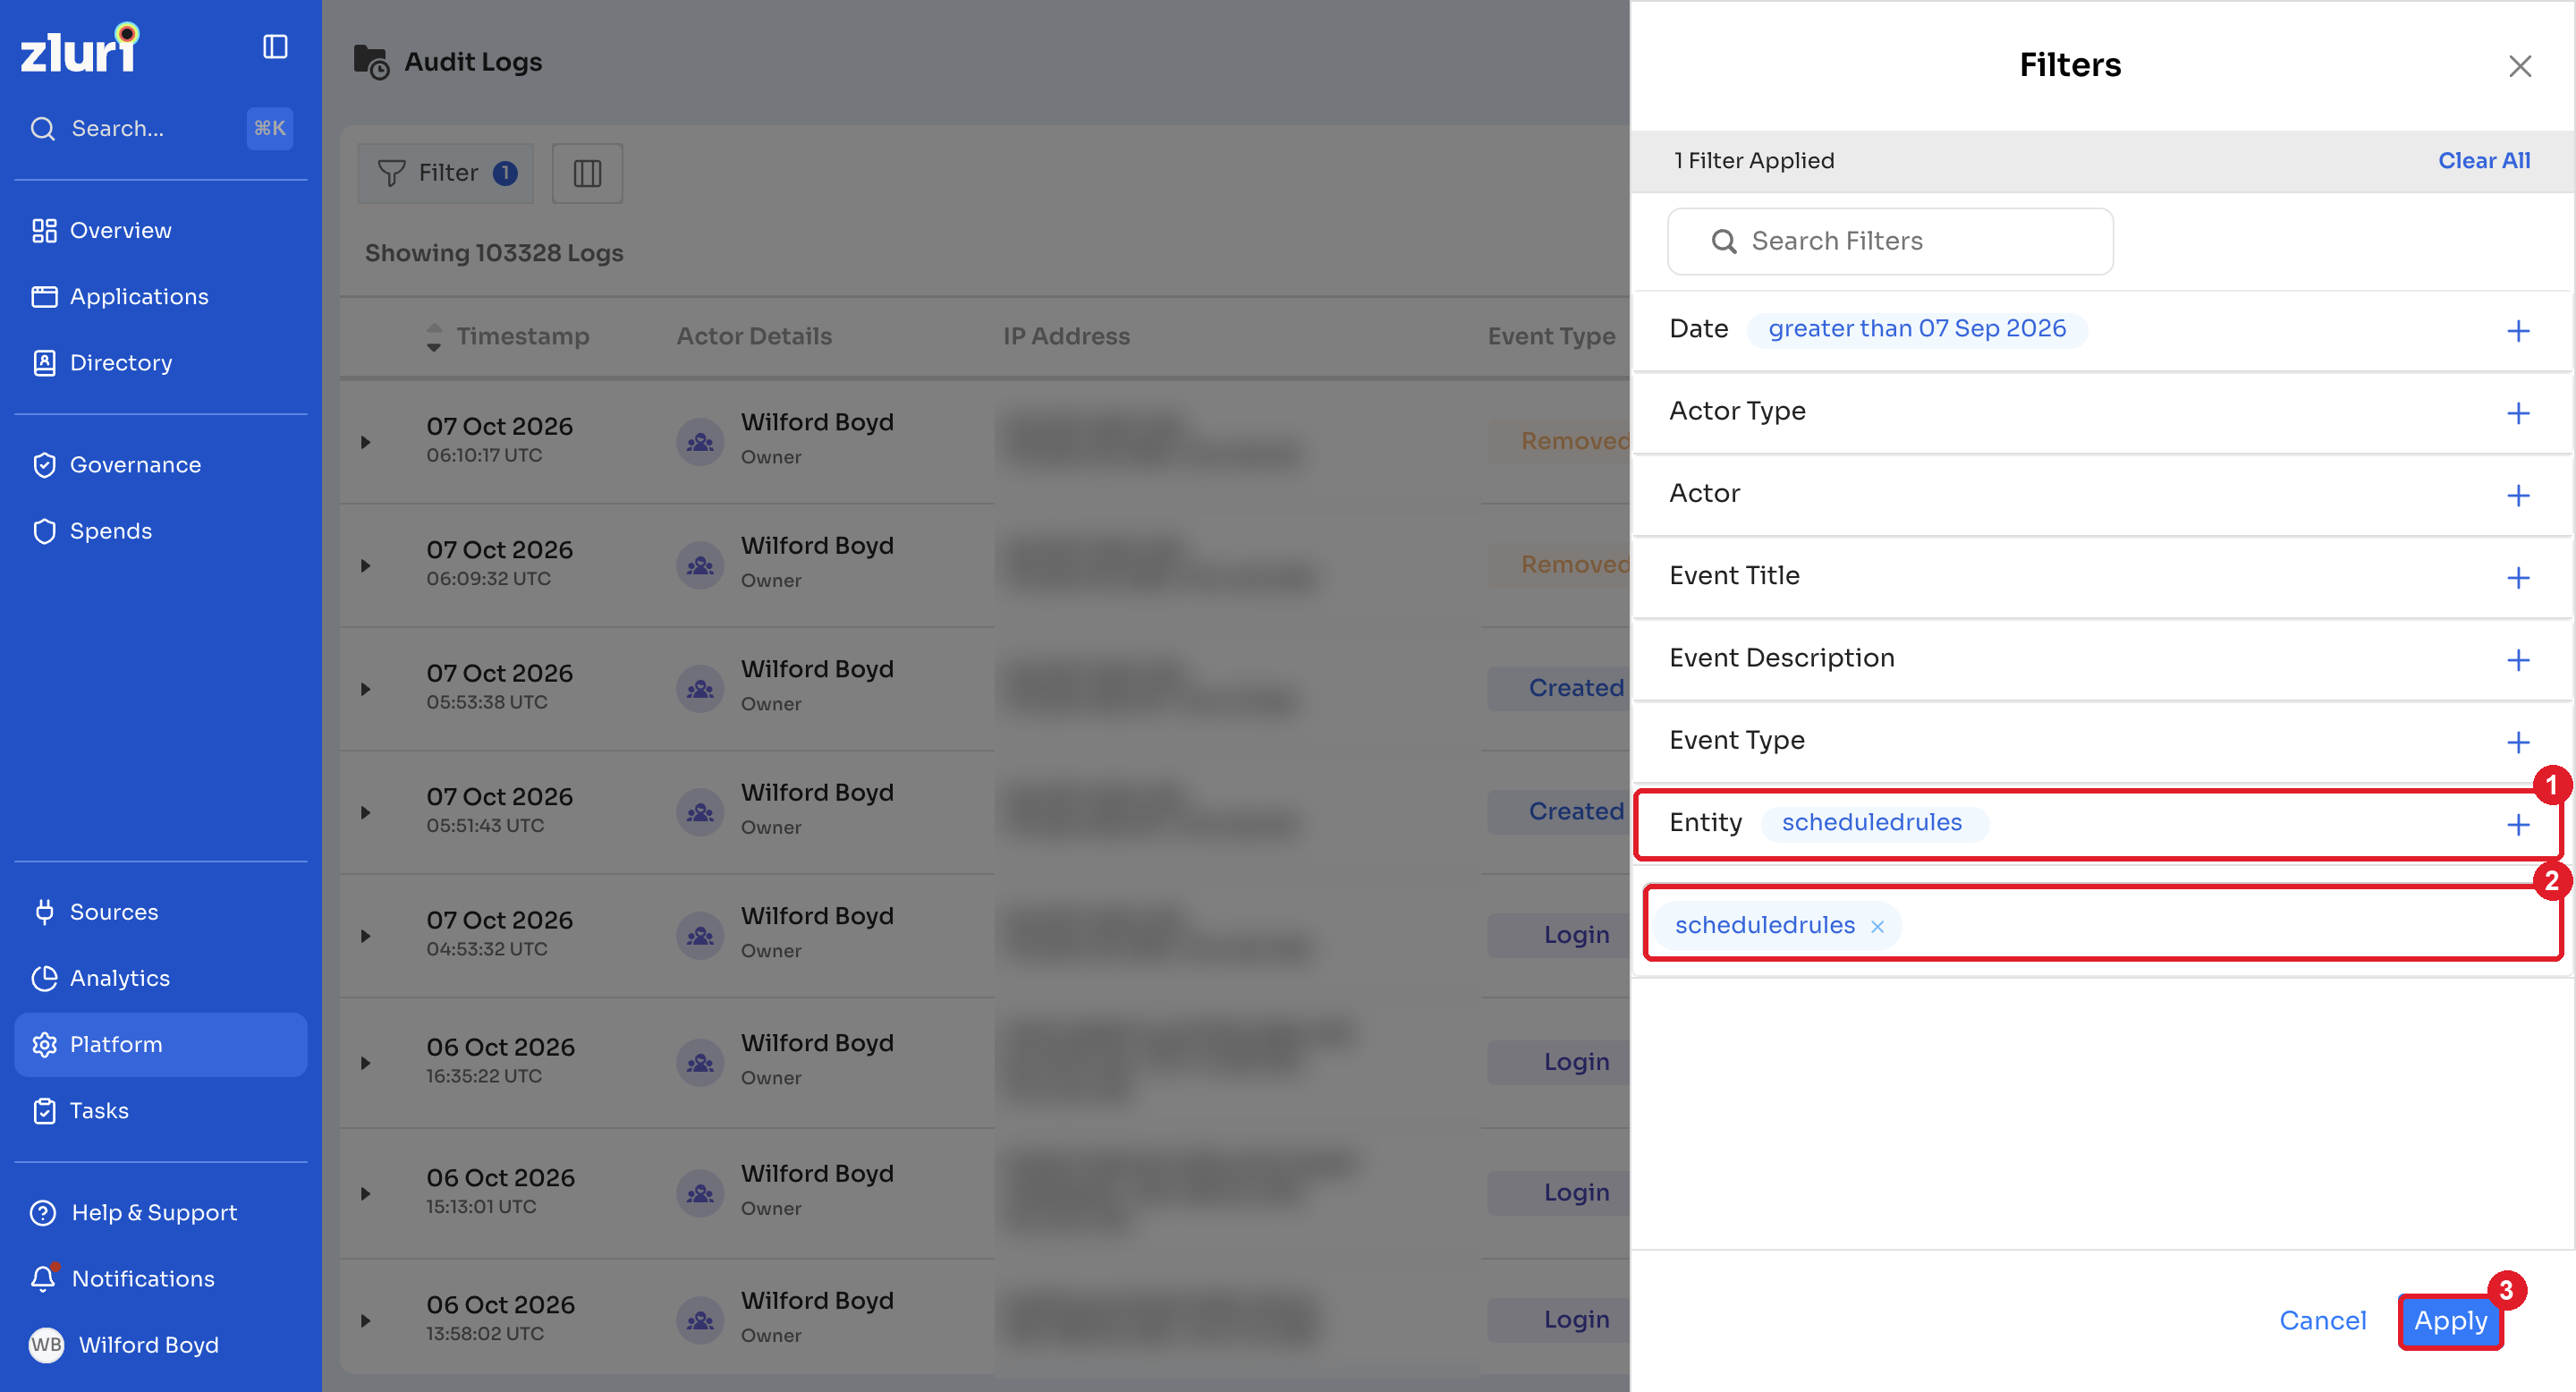
In the Filters panel, select Entity.
-
Search for and select scheduledrules, then select Apply.
Filter by keyword
To find activity involving a specific rule after it has run, search the audit log by keyword:
-
Select Filter in the top left, then select + Add Filters.
-
In the Filters panel, select Actor. Despite the label, this field matches against the event's actor and description text, so a keyword from the rule's name still returns matching entries.
-
Under Text contains, enter a keyword from the rule's name, for example "restrict," and select Apply.
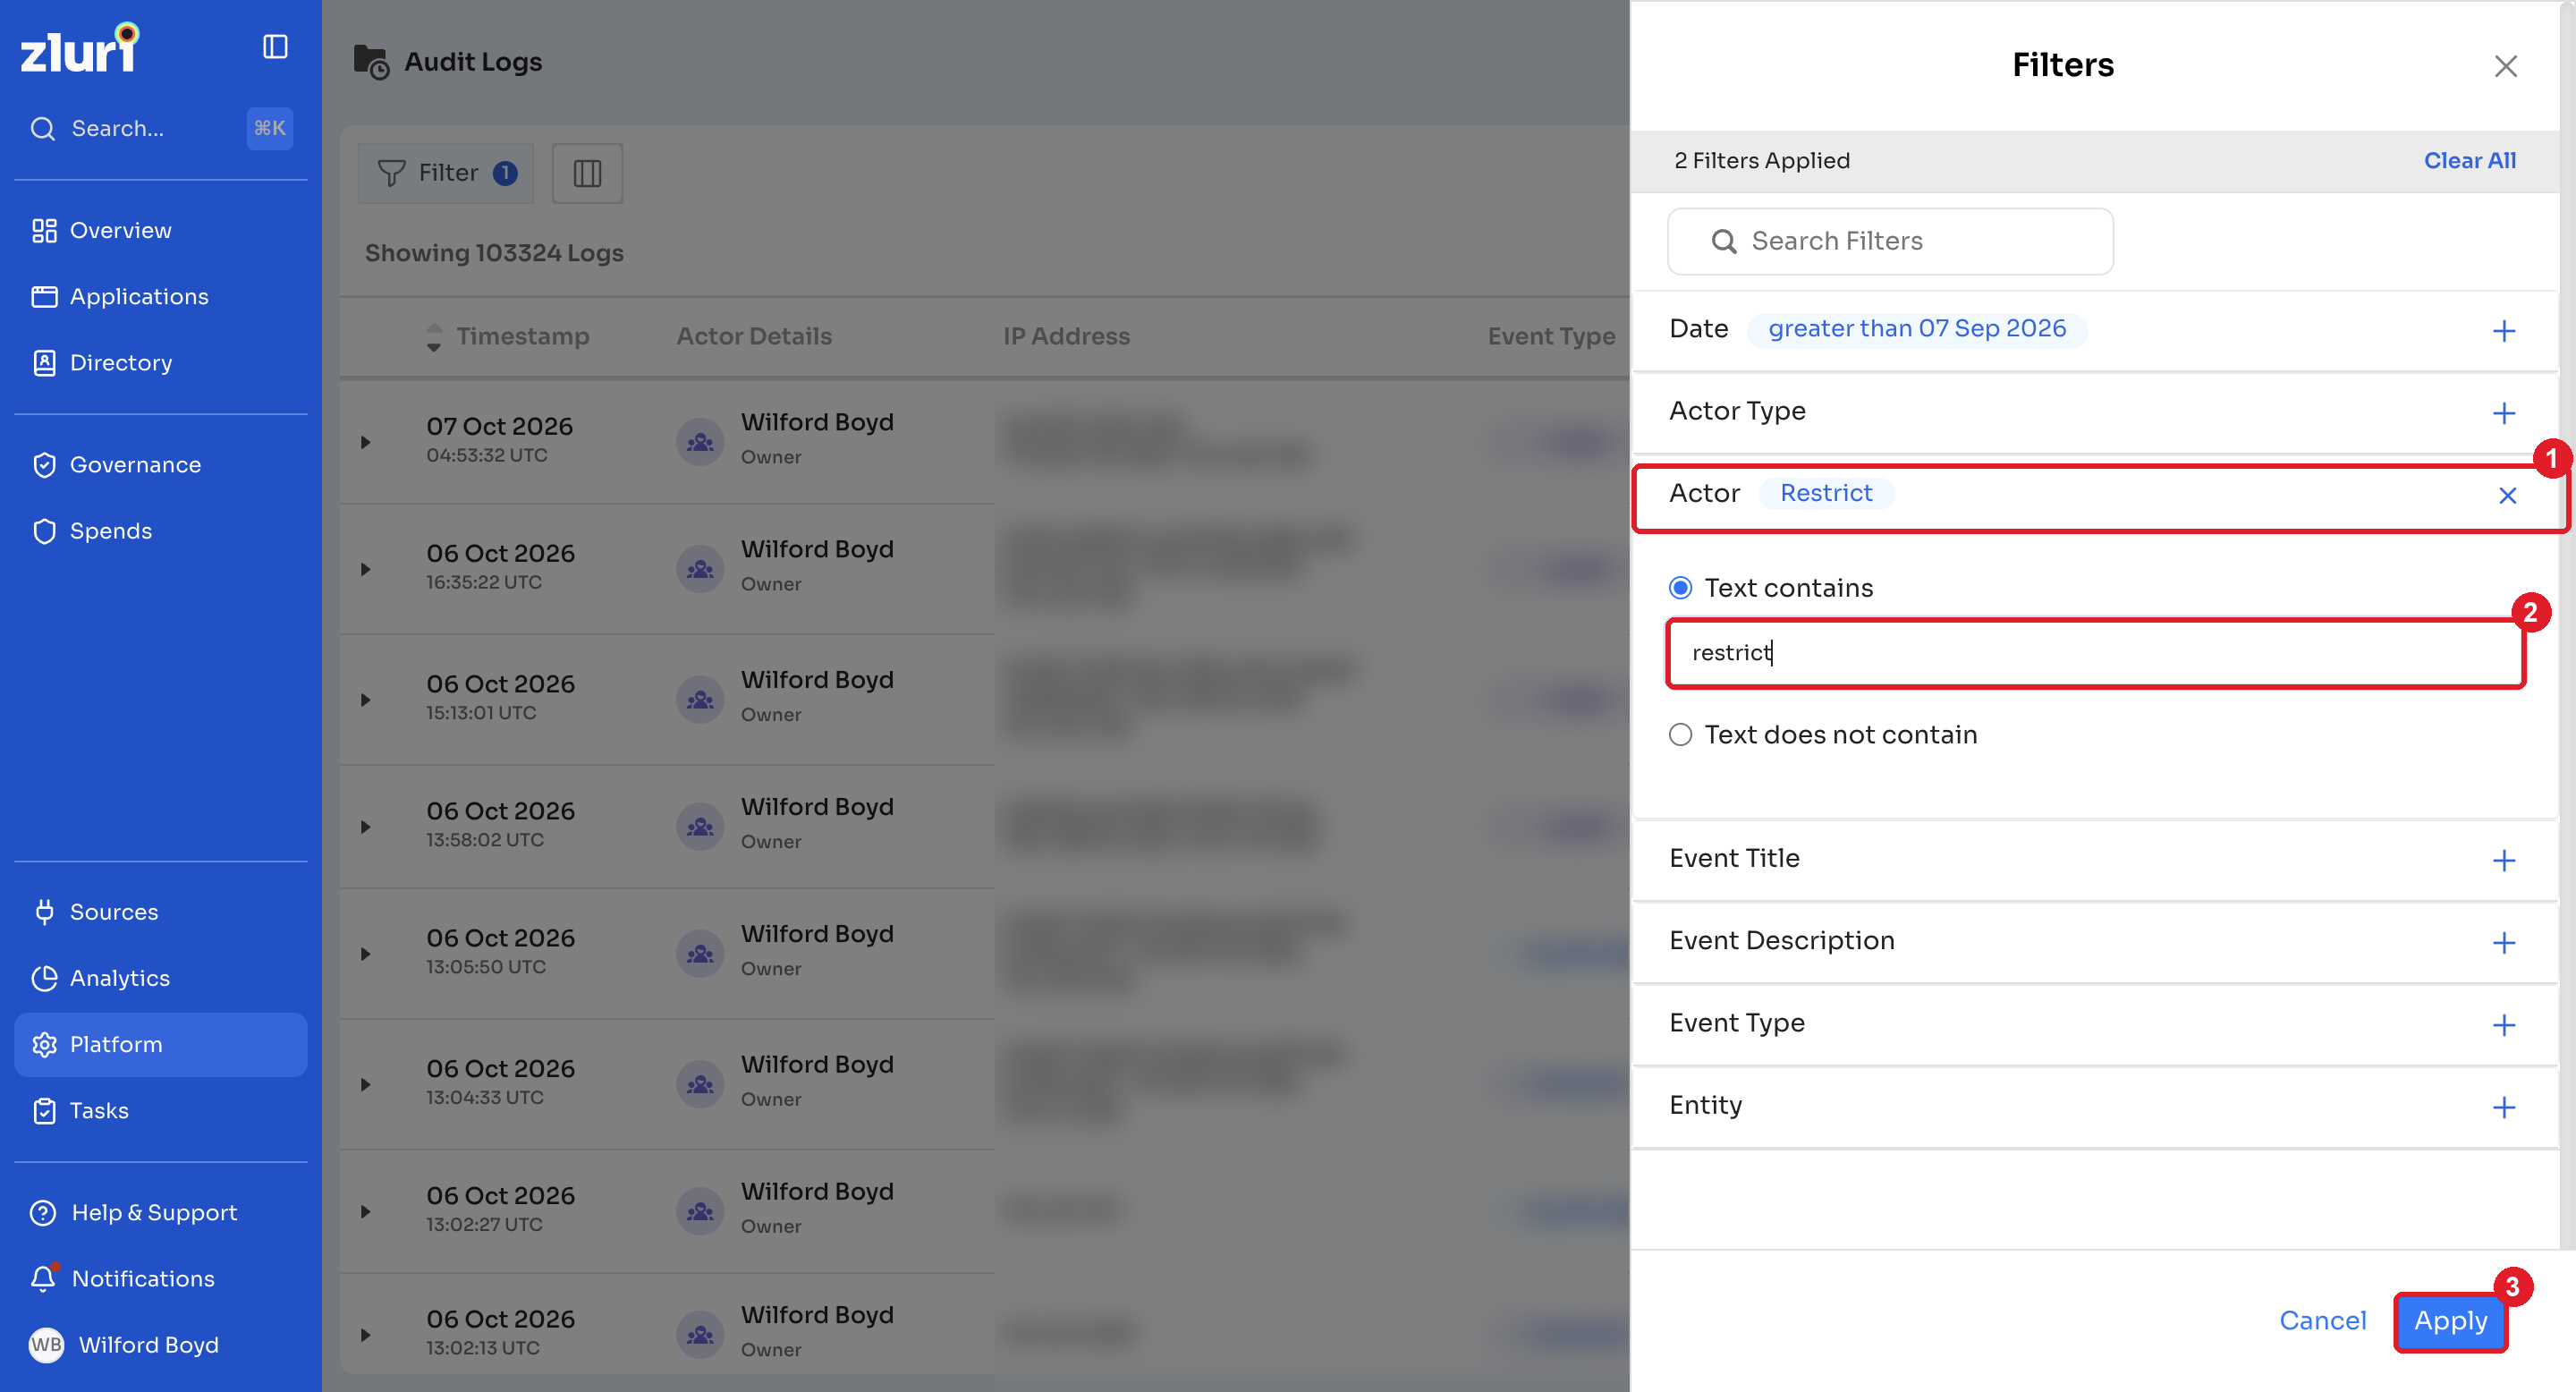
This returns the audit log entries whose actor or description contains the keyword.
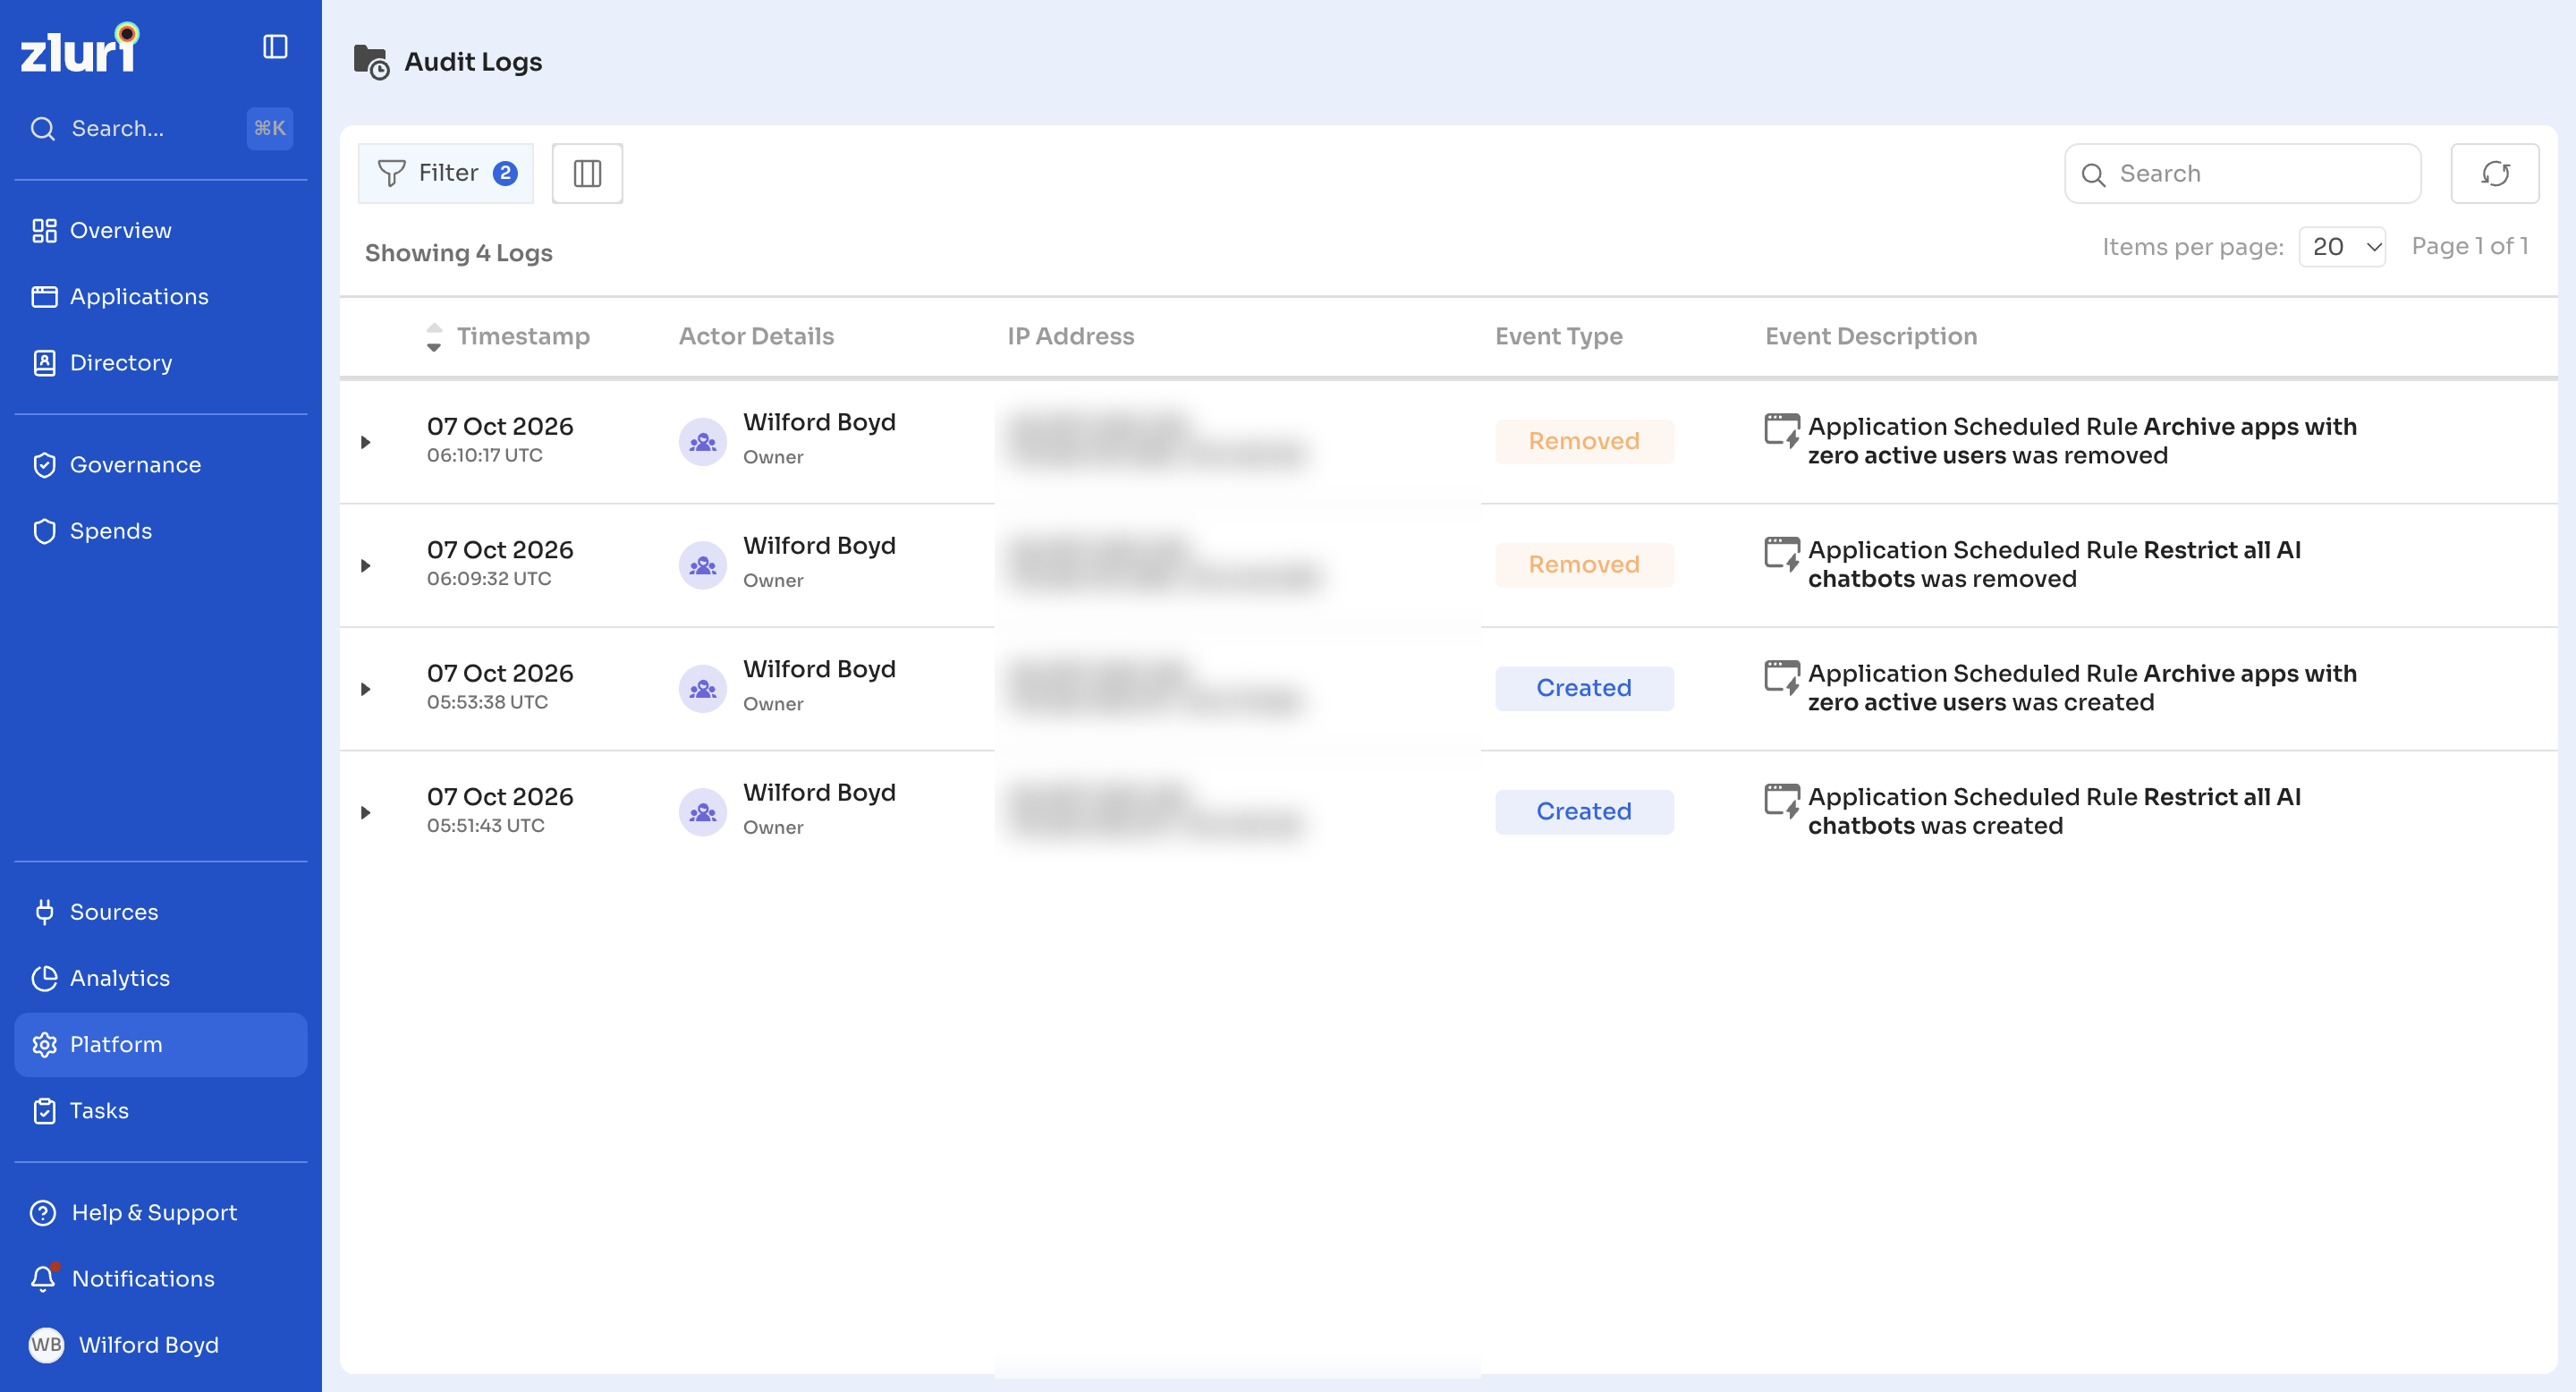
Activity log columns
After filtering for automated rules, the activity log displays the following columns:
- Timestamp: the date and time of the event, in UTC
- Actor Details: the name of the user who modified or ran the rule. For automated runs, this shows System
- IP Address: the public IP address of the user who took the action. For automated runs, this shows Not Available
- Event Type:
- Created: a user created a new rule
- Updated: a user modified an existing rule
- Removed: a user deleted an existing rule
- Initiated: automated or manual execution of a rule. For automatic execution, Actor Details shows System. For manual execution, Actor Details shows the user who ran the rule
- Failed: a rule failed to run
- Event Description: details of the event
Limitations
- Entity support: currently supports application entities only.
- Scheduling: fixed at 12:00 AM UTC daily, with no customization options currently available.
- Rule dependencies: if a rule fails, all subsequent, lower-priority rules also fail.
Updated 10 days ago